Part 104: The Last Battle - recap
Mission Recap
Game film: LP The Last Battle (TFL 1.5)
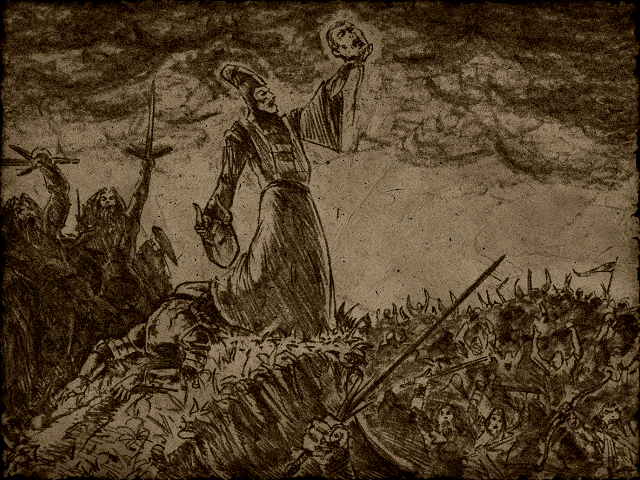
Apparently Alric's plan was of the "so crazy it just might work" variety. We had to burn the majority of the Legion to do it, but we've taken Balor's head and survived the Last Battle.*
* Note: Last Battle may not actually contain final conflict. See your avatara for details.
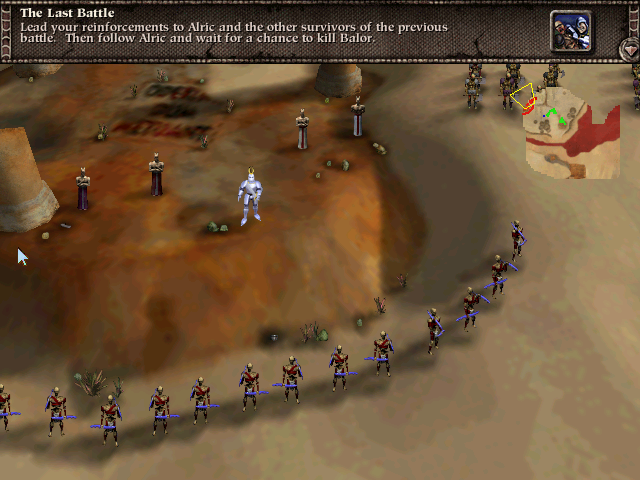
In the first big fight after you get your reinforcements, the main issue is clearing out the enemy melee fast enough so that you can deal with the fetch when they arrive. The myrmidons are the wrench in the gears for that plan, and you need your dwarves to really thin them out. If too many myrms reach your archers, you have to send up a lot of zerks to fight them, and they get in the way of your archers. And/or you lose some archers.
One thing you might have noticed when I was moving formations "sideways" -- like the dwarves after laying the first satchel field & crossing over to do the other -- is that Myth pathfinding will fill in the unit destinations using closest-unit-first. This means that the last unit to get into formation will have the absolute longest possible path, which is a pain in situations like this when you are pressed for time. If you just scoot your units over without reselecting a formation, they will move more sensibly, but in that case you won't get to re-orient your units. (You can only choose an orientation if you have selected a formation.) Myth 2 improves on this.
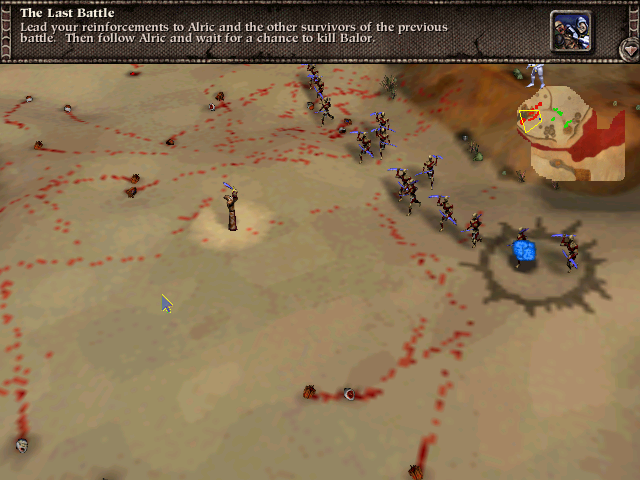
The second fight is not as strenuous, just some possibly anxious moments getting archers on the fetch. The key here is to not engage the enemy melee until the fetch are out of the way, exactly the reverse of the previous fight.
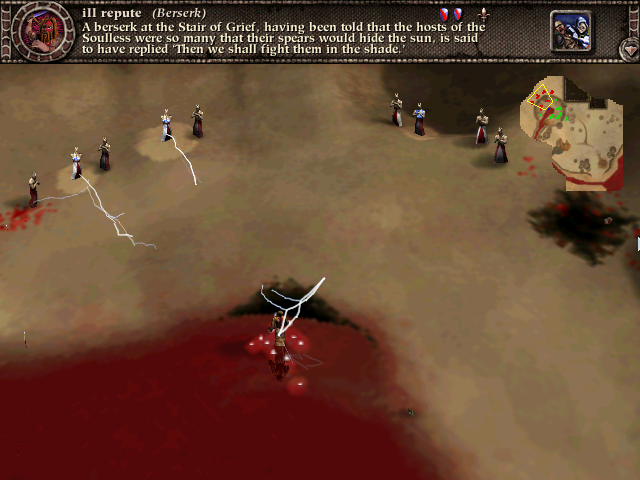
The final fight is pretty dramatic, and it seems to take some overly precise management for minimum casualties, unless I'm missing something. If you just try to mow down the fetch with the archers, then the final few fetch will break out of their arc and start walking closer to Alric. That is bad news because Alric will go out to meet them, and then it's hard to protect him from the myrmidons. So you have to use a couple of advance zerks to mop up the last few fetch, but if you start on that too early then again some fetch will break formation. The last tricky part of this fight is of course the myrm/zerk mosh, which I screwed up by getting my left-side zerks in place too early and letting them run toward the right-side myrms. If you can get an even myrm/zerk distribution here then things go more smoothly.
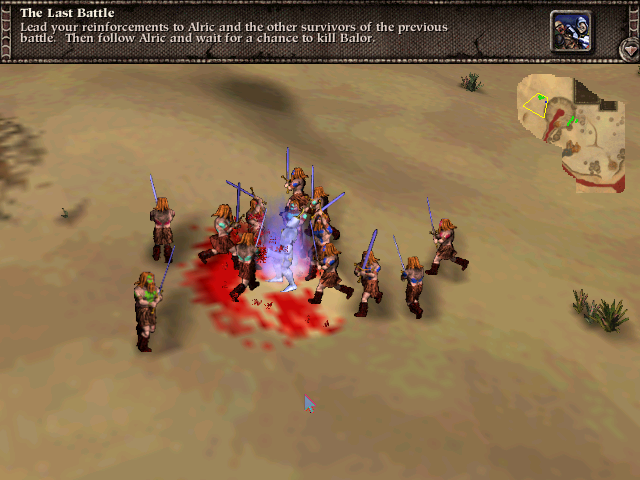
All you really need though are a few zerks to survive; you have about 30 seconds to make Balor a head shorter, before Alric's juice runs out. We had more than enough claymores to do the job.
So, what could possibly be left for us to do?
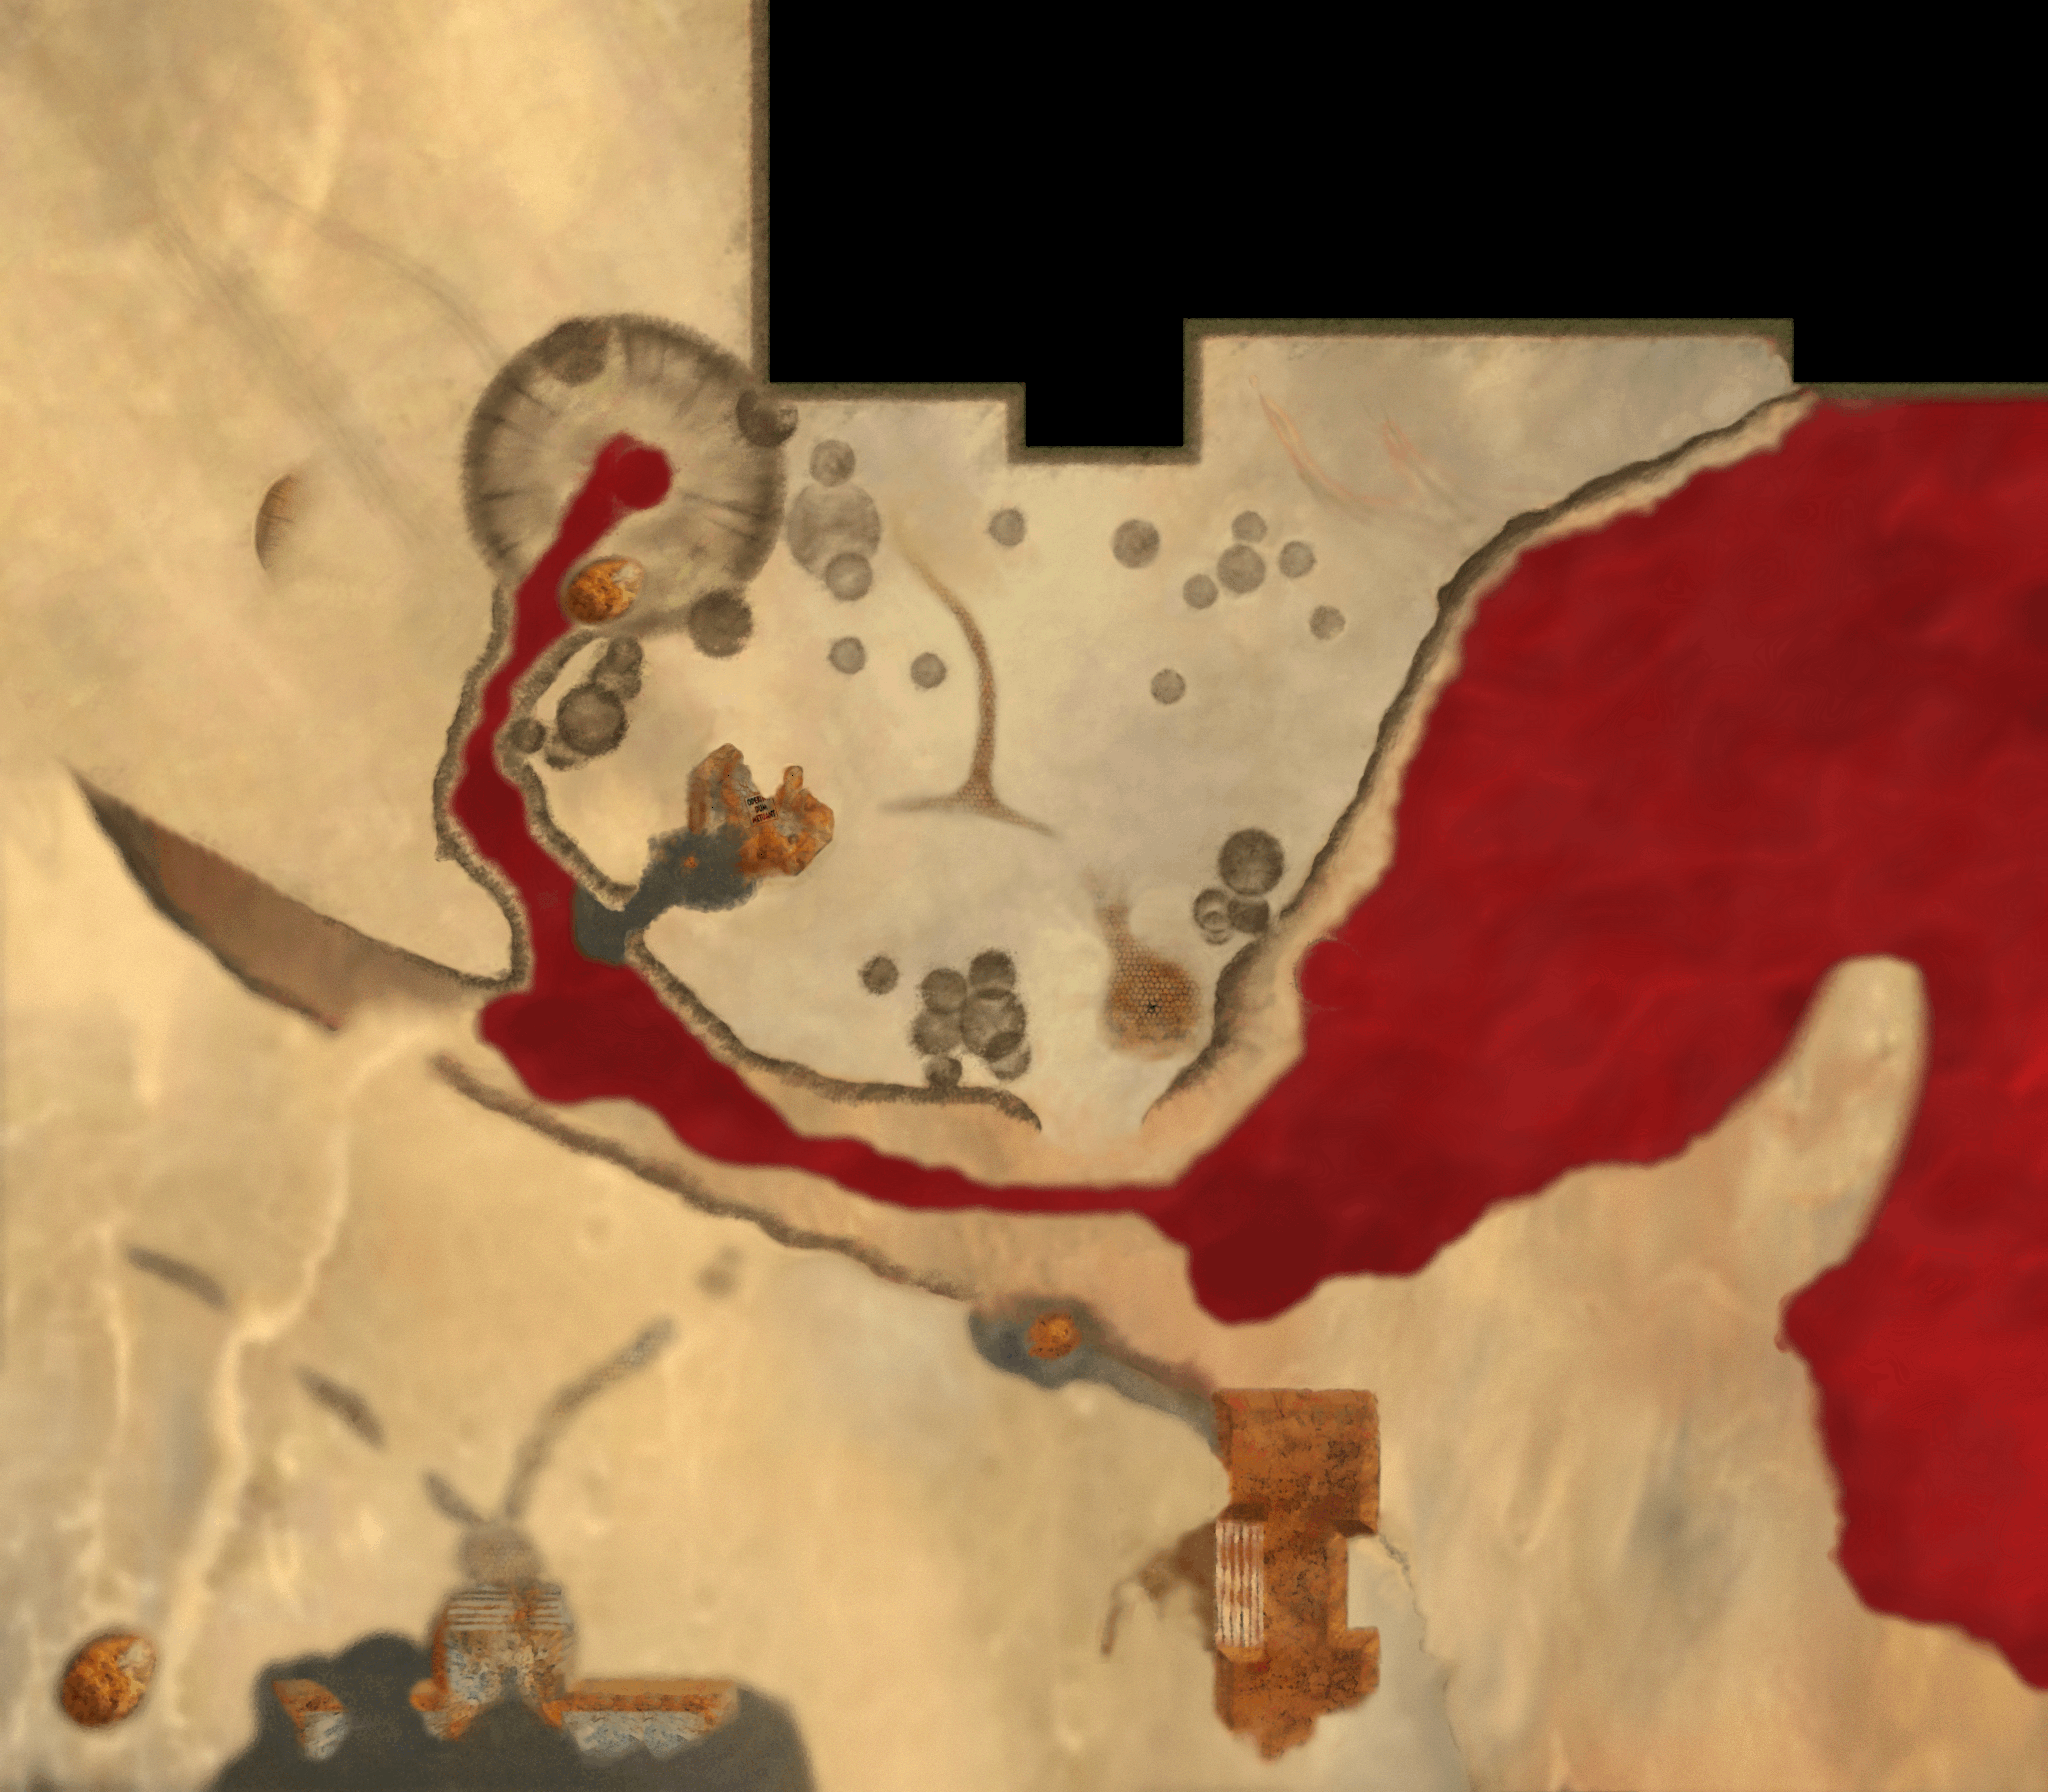
Click on the overhead map below if you'd like to see the full-resolution landscape texture.
Screenshots:
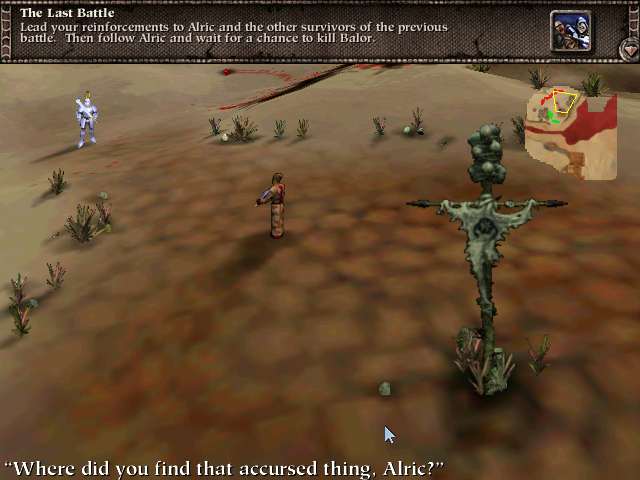
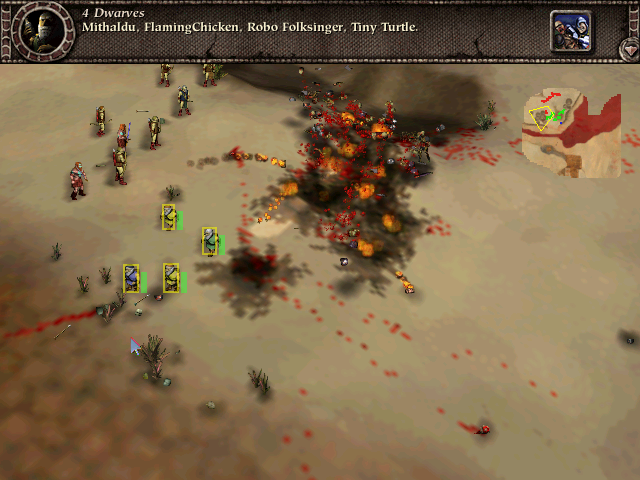
Victory!
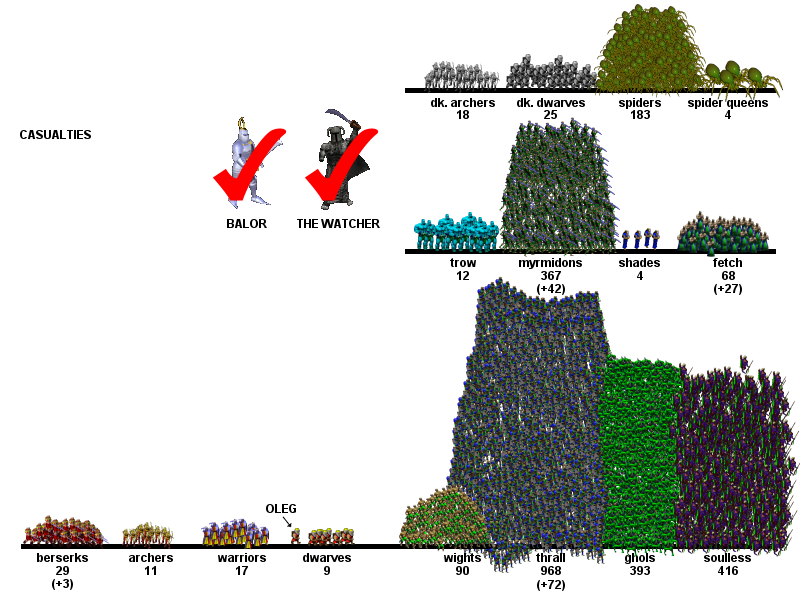
And the cumulative bodycount: