Part 22: I'll See Orbs in my Dreams

Visible on the horizon is the Mana Fortress, which can actually be surprisingly difficult to get to. It randomly zooms around the map at irregular intervals, and if you try to move in on it too quickly you'll overshoot. The key is to move toward it slowly and tap toward it, at which point Flammie will automatically fly you in.

The best part is getting an uninterrupted view of Flammie from the side. He looks.. fierce. And not in a
 way either.
The landing pad keeps up the futuristic theme, while also handily using some of the same art they did for the intro. Getting in and out of this place is a bit of a pain in the neck, as you can't summon Flammie indoors and you can't use the escape rope to get out. Keep that in mind each time you see me leave and come back.

Our first enemy is the Fiend Head, that being the orange guy in the upper left hand corner. They spawn Dark Stalkers and can be extremely annoying, as they go into an invincibility frame when they're damaged based on the amount of damage they take. A good critical will leave them unhittable for ten seconds or more. I killed a LOT of these guys for a very good reason:


They drop Axe Orbs, which we need two of to get the axe to maximum level. As a bonus they also drop some fairly strong armor. Although it's not the best in the game, it's still better than what Kid and Boss have. The drop rates on the Axe Orbs are terrible, as are all the Orb drops. Keep an eye on my HP totals as this update continues.


In quick succession we've got a few more enemy types showing up. Right inside the door are metal crabs, who are a valuable source of the single Bow Orb that we need. They also drop Vestguards, but by now you've got those. I sold about 15.


Immediately afterward I lucked out by getting a Spear Orb from a Tsunami within seconds of finding them. They're also a handy source of Amulet Rings, which are about the second best in the game. They prevent petrification, at least, so that's something.

We've got our first upgraded werewolves in Wolf Lords, which are actually a good source for a couple of valuable items. This is a terrible place to farm them, however, as they only appear one at a time.
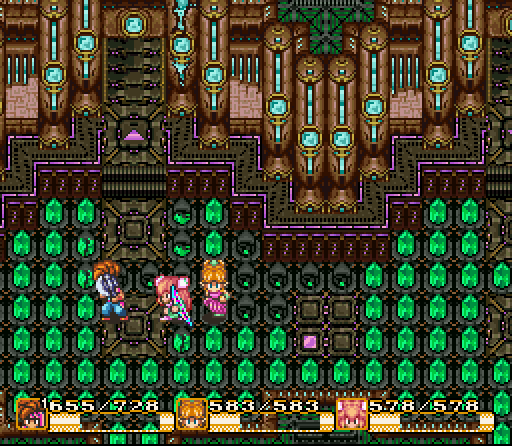
The fortress itself is fairly interesting to navigate, as it makes extensive use of whip transfers and these green crystals as obstacles. For quite some time I erroneously believed that you could only damage these with an axe, then felt like an idiot when I realized that the sword would work as well.
 (Whimperer)
Finally we end up at this green transport crystal with a flying enemy called the Whimperer. They've also got a rare drop, but this isn't exactly a good time to farm it. Stepping onto that tile results in being tossed into a boss fight, and you don't want to do that on accident. Instead, we'll run out and see Watts and then come back.


The fruit of our labors thus far are a very Doom-ish axe and the Garuda Buster. All of the highest level weapons are pretty much the same in not being strong against any particular enemy and having only slightly higher attack power than the second to last forms. In some ways they're barely worth it. To get the Doom Axe we had to upgrade the Gigas Axe which gives +5 to strength in exchange for 2 points of attack power. Not pictured: The Daedalus Lance, for some reason.
Boss Fight: Buffy
Buffy Conventional Battle Video
Buffy Sword of Mana Video

Our first boss is the strangely named Buffy, who you can see is obviously a vampire. I'm not sure what the name is in the original writing, but if it's the same I can only think that someone misunderstanding Buffy the Vampire Slayer as Buffy the Vampire who Slays rather than Buffy who Slays Vampires.


As you'd expect, thematic vampire powers like Energy Absorb are fully present as well as some of the other bits from Undine's Tree. It also has a Leaden Glare attack and poisonous normal attack.


As a vampire, Buffy also comes equipped with the powers of darkness although.. they're less than impressive all things considered. Dispel Magic can be a real pain in the ass if you're using buffs to increase your damage, however.

Logically enough Buffy's extremely weak to light and is a lot easier to hunt down with melee attacks this time around. While the cape is closed you can't get a good hit in, but let it open and it's fully vulnerable. Ranged weapons might be just a bit better because they can hit while Buffy's in flight. The reward for this battle is... to move forward toward the end of the game.

After finishing off the boss fight we reach our next grinding area. You can travel freely back and forth from here, there's just a big empty room where the boss fight took place.

They bring in some Shape Shifters for this area, but they're really more of an annoyance than anything else. At least they don't reproduce.


I mentioned Whimperers earlier as having some good loot, and this is one of the examples. The Power Suit is Boy's best armor, equivalent in defense to the Vampire Cape with the added bonus of giving +5 strength.


This area is noteworthy for having two Wolf Lords who spawn fairly close to the entrance. We need 5 items from them, so this is a very good thing indeed. 2 Glove Orbs will max us out, but the Faerie's Ring is the best in the game so we need 3. In addition to giving a +5 bonus to agility it also prevents poison, pygmy, frosty, dizziness, and balloon. It really is a must have.

The second item we can get from Whimperers is a Javelin's Orb, and it's a good thing too. I spent a good while here.


I like the naming conventions for most of these ultimate weapons, as they give them a fairly epic feel. We skipped right over the Dragon Claws to get to the Aura Glove, and that's probably a good thing when you get right down to it.


The interior of the Fortress is an absolute nightmare for the AI's pathfinding, but at least it's colorful and fairly interesting to get around. Captain Ducks also make everything better.

Our final set of drops can't even be found here, so it's time to move on. Before we can get to the last group of enemies we're going to have to step through the portal to fight another boss fight and.. well...
Boss Fight: Dread Slime
Dread Slime Conventional Battle Video
Dread Slime Sword of Mana Battle Video

Welcome to the worst boss fight in the game. And when I say worst, I don't mean hardest. Why would I say such a thing on the third to last boss fight of the game?

This is its ONLY attack. He basically oozes around the screen occasionally firing off an Acid Storm and that's it. No other spells, no changing color and causing an effect, nothing.

He's pretty much the exact opposite of the Lime Slime in that instead of getting smaller as he's damaged, he gets bigger. Eventually this is going to end up with you trapped on an obstacle unable to move and incapable of hitting it with weapons. That wouldn't help much, though, as it's got a really high defense, but the thought counts. It is weak against Dark Force, so this is Boss's moment to shine.

Moving on from that atrocity of a boss fight, our next target is the Master Ninja. Despite looking like a slightly more colorful Dark Stalker, they're actually extremely dangerous. It's not impossible for them to get a few lucky hits and strip you down to practically no HP in an instant, and they like to cast Stone Sabre. I saw at least one game over from these guys.


Despite the danger they're a valuable enemy as they drop the best armor for Boss and Kid as well as our final Boomerang Orb. The Faerie Cloak has a defense of 250 (the highest in the game) and provides a +5 to constitution.

Our final target is the Terminator, an animated suit of armor with sky high defense and a fondness for casting Lucid Barrier on itself. They can be difficult to kill, but magic cuts right through them.


There's only one here, but later on in the dungeon you can find three of them hanging out by a teleporter. We only need the one Boomerang's Orb from them, but the Faerie Crown is another must have for Kid and Boss. In addition to great defense and magic defense they also raise intelligence by five points.


One last trip out gets us our final set of Level 8 equipment. Contrary to what you'd expect, the Gigas Flail doesn't provide any strength. I'll also give in and say that by the end I was abusing save states to get the treasure I wanted. If I hadn't, you'd be seeing max HP at this point.

The journey to the end of the Fortress is fairly colorful, to say the least, and there's actually a good selection of enemies along the way.

 Pathfinding! Whoever designed this is a monster, especially considering how difficult it is to pry your AI party members away when they're trying to attack something out of their reach.
They did think of a nice trap in this room, however, considering that Whimperers like to cast Wall. You'd think you can just blast him with magic and might very well get a nasty surprise. You can also run into Wolf Lords here, but it's not 100%.

At the very end we come to a teleporter, shortly beyond which the end game begins. The room on the other side is empty, but once you're past that there's no going back. For space reasons, we'll pick up the last two boss fights and ending next time.