Part 7: ARSes, the Botnet Golem and the Dyson Sphere
Because AI war is a rolling game where you tend to be getting attacked on multiple fronts at once it's a bit hard to give a coherent overview without just dumping out the entire galaxy map every in-game minute. So far I'm probably only showing about half to a third of the AI attacks that are going on, in the interest of picking out the more important or interesting ones. Essentially I'm trying to give an overview rather than a minute-by-minute tactical account (because otherwise I'll burn out on writing stuff up looong before this is finished). That said, I'll start mentioning specifically when I context switch between planets rather than relying on the planet name in the top of the screenshot.Expect lots more galaxy maps, in other words.
Anyway after our little misadventure neutering Boomquonxu (where most of the last posts action took place), let's just take a moment to chill out. Our first zenith power generator is online and has dealt with our electricity situation, so let's see what the scouts have to say.
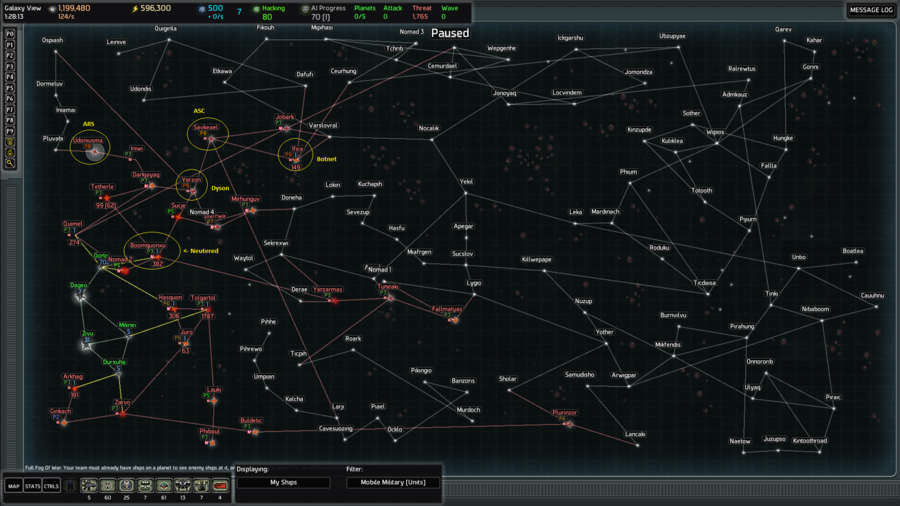
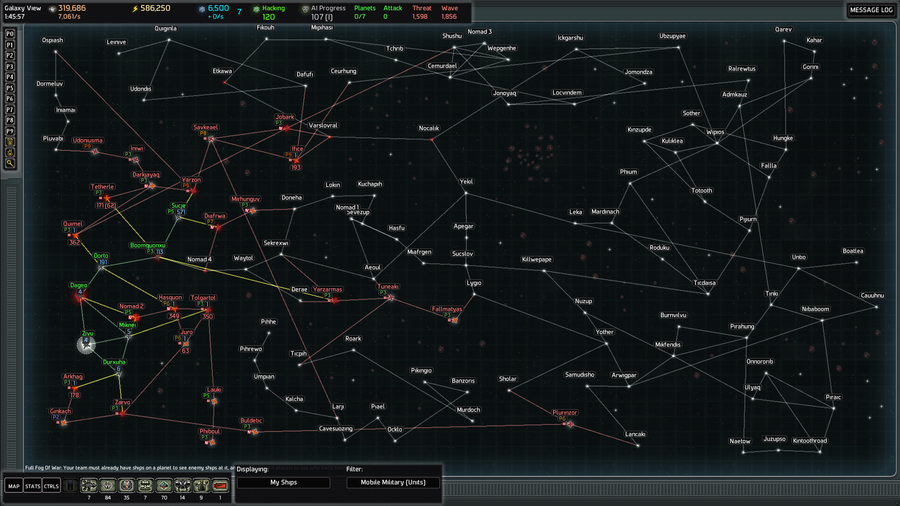
The observant among you may notice that a P8 and three P9 tags have shown up to the north. After blowing up the tachyon sentinels on Boomquonxu our scouts were able to access that part of the galaxy, and they've found a very tasty little cluster of planets for us.
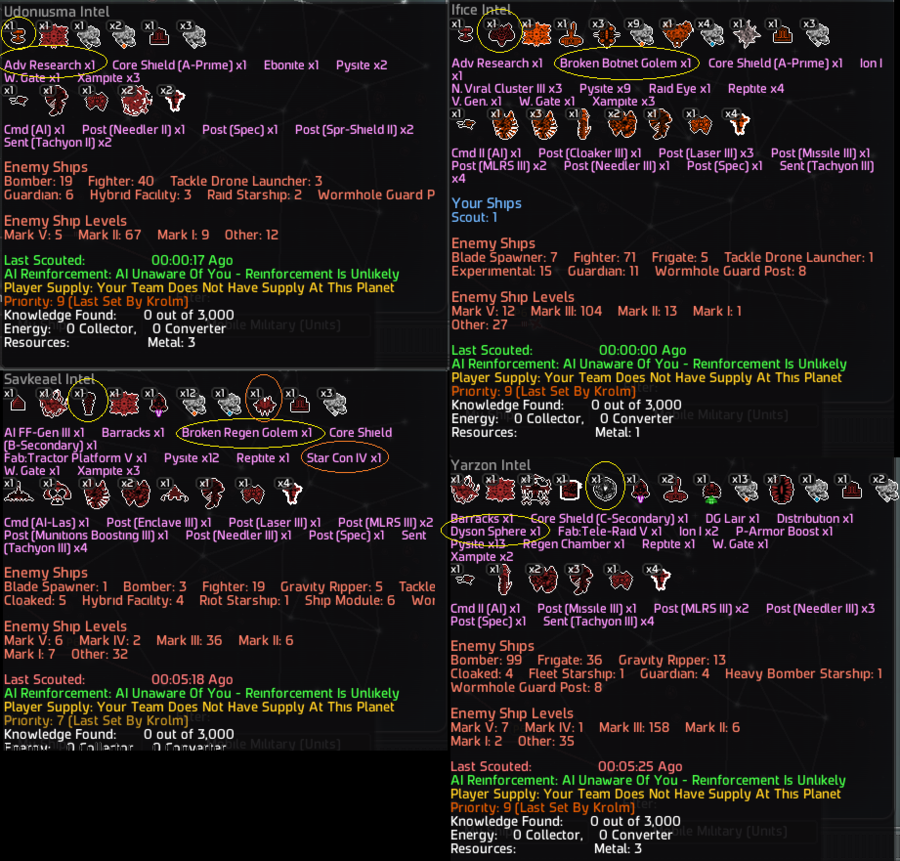
Udoniusma is the loner to the left-hand side, P9 because of the ARS sitting on it. ARSes are a 'vault of advanced AI technology', and upon capturing them we get 500 free knowledge and an entirely new ship type to build. ARS planets also always have A-network core shield generators seeded on them, and we need to destroy all but one of those before the network self destructs.
Ifice also has an ARS, but even better it has the botnet golem on it. This little beauty can eat entire waves on its own, and is pretty much the most potent weapon you could hope to capture. Because not only does it annihilate waves, it also turns them into zombie ships which then turn right back around and attack the AI. I normally play with golems medium turned on, where repairing the botnet costs an extortionate +100 AIP. Five entire planets worth of AIP gain, that's how much of a beast this guy is and how much it scares the AI. However for the sake of completing this LP, rather than getting to hour twelve and losing, I've knocked the difficulty down to easy which means I can take this baby entirely for free.
P.S, the shortcut / desktop icon for AI War? That's the botnet golem. It's that good.
Savkeael is a slight step down, but still a tasty target because it has both a broken regenerator golem and an advanced starship factory. The regen golem will automatically rebuild any friendly ship which dies on the same planet, at the expense of its own health. This makes it fantastic for supporting a fleet when pushing into enemy territory, as with its 4 million health it can essentially rebuild 2,400 fighters at zero metal cost or travel time. As for the advanced starship constructor, in AI War you can only research ships as far as Mk III. Beyond that you need to steal one of the AI production facilities to get access to MK IV ships, so if we can appropriate this one that'll give us a leg up once we get around to researching MK III starships.
Last in the little cluster of three planets we have Yarzon. Not only does the planet have a Mk V teleport raider fabricator on it, it's also home to the dyson sphere. The dyson sphere is an optional minor faction, essentially the invulnerable remnants of a long vanished alien civilisation. When first encountering it the dyson sphere will generate dyson gatlings which are hostile to both us and the AI. However if you free the planet from the AI by wiping out the command station it starts generating gatlings which are allied with you, and make a very handy roaming defence fleet which automatically patrol your worlds for you.
Honestly, finding these last three clustered together like this was a fairly decent stroke of luck. Normally you'll find the dyson sphere and botnet golem miles away from each other, and I don't think I've ever seen the botnet spawn on a planet that also has an ARS. Anyway, we'll be focussing the majority of our expansion efforts over in that direction for a while.
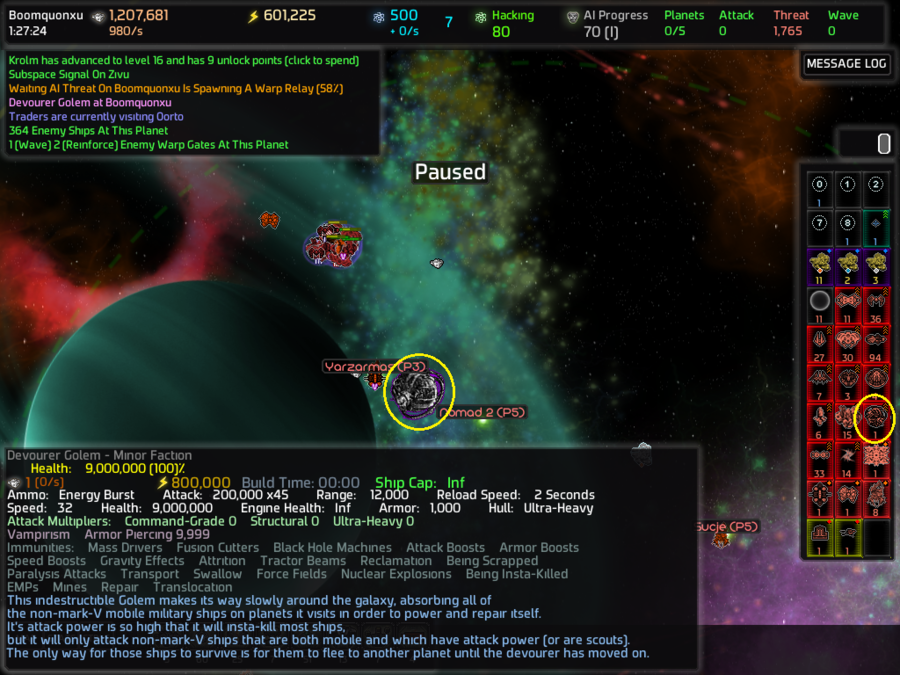
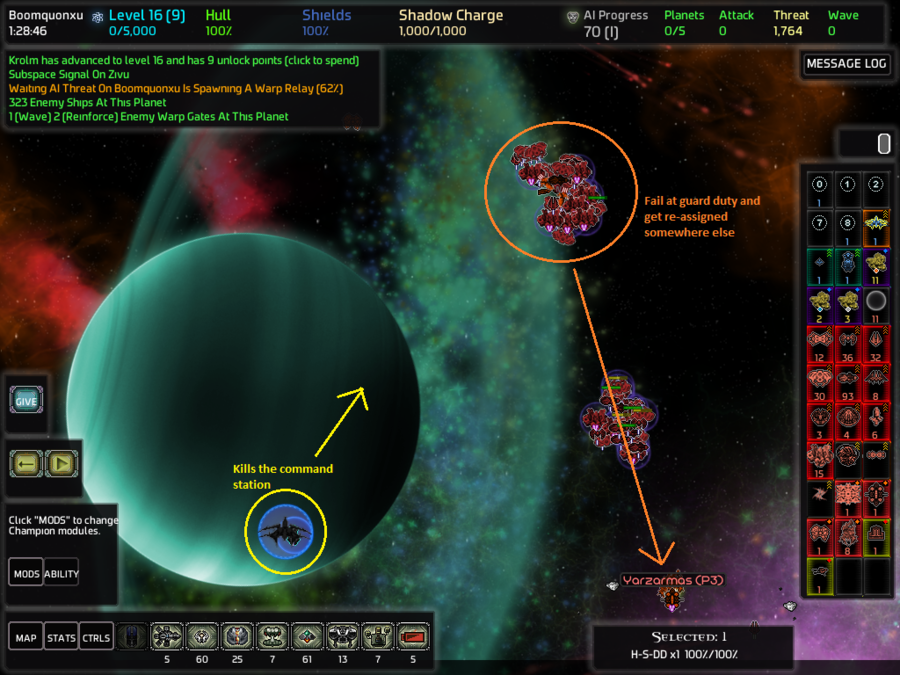
Hmm, so what else is going on in the galaxy. Well, the cookie monster seems to be prowling through Boomquonxu. We'll probably discuss him later. There also appears to be a warp relay spawning on Boomquonxu. This is a new addition from the latest major release, essentially if you leave threat unmolested for too long it starts building a warp gate that will let it leap-frog over your heavily guarded choke-point and strike into your soft, under-defended underbelly. We should probably go and discourage that.
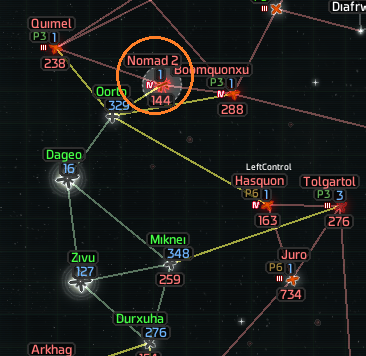
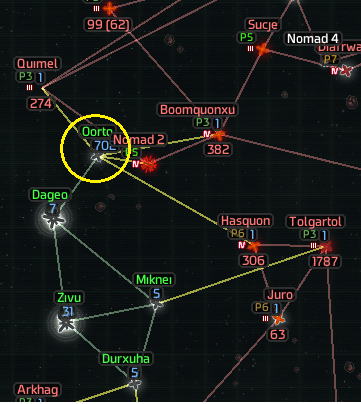
Other than that, it looks like a nomad planet has shown up and formed a wormhole link with Oorto. Nomad planets are new in the latest expansion, and I've actually never played with them before. But from what I can gather they bimble around the galaxy slowly forming and breaking wormhole links between previous unlinked planets. In other words, they have a nasty ability to let the AI bypass your carefully laid out choke-point defences. They also come with a new mini-campaign, which I might chase down later.
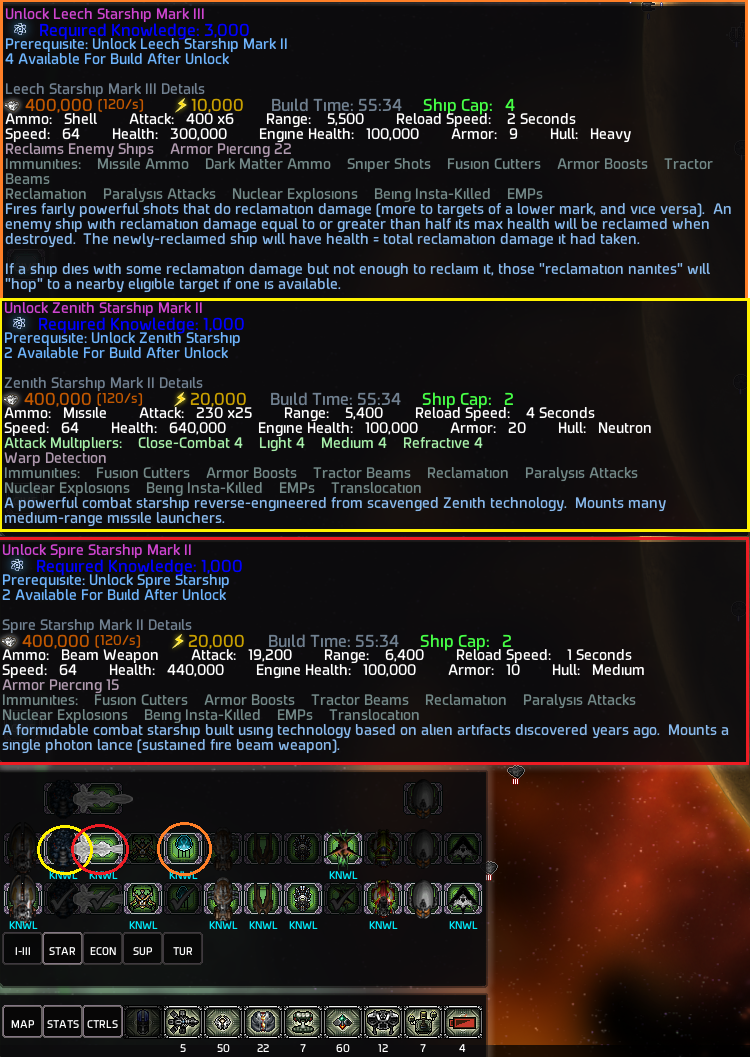
While we're thinking of tactics, it's probably time to spend some of the knowledge we've accumulated. Let's go for tier three metal harvesters, to give my economy that little extra fizz, along with MK II leech and MK I spire and Zenith starships.
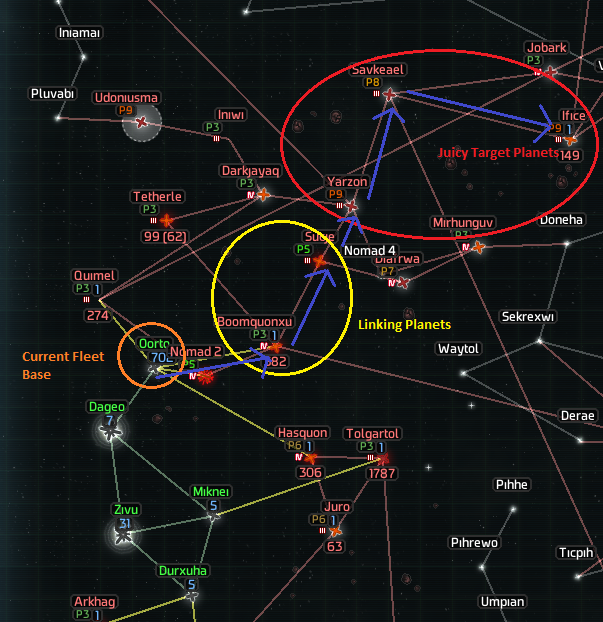
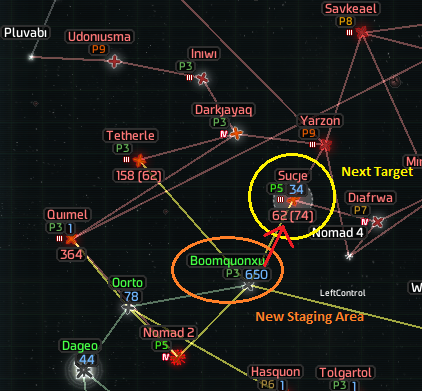
I've now got a bit of a decision to make. We can either link the three high priority planets in with the rest of my empire or leave them out there on their own. Linking them means taking two additional planets, with the respective +40 AIP hit. Having said that they're fairly decent planets, with Boomquonxu having five metal harvesters and Sucje seven. What tips it for me though is that Sucje has both a MK V missile frigate fabricator and a spire civilian leader on it, and the fact that if I do this the friendly dyson gatlings will be able to patrol my homeworlds as well. So, in a decision I may well come to regret later, I commit to taking an additional five planets with the commensurate +100AIP impact. One of the great joys of AI war is you can't really know if this is a strategic blunder until you get to hour eight or nine, when that 40 AIP means the difference between comfortably handling a CPA or getting wiped from the face of the galaxy.
Location: Boomquonxu

First task is to send the champion over from Oorto to Boomquonxu, under cloaker cover, to pop the command station. This should hopefully make the hybrids bugger off, once they realise that their 'defend this planet' mission has been a complete failure.
Next up, send the rest of the fleet in to cleanse the place of that sickly AI stench and remove the under construction warp relay.
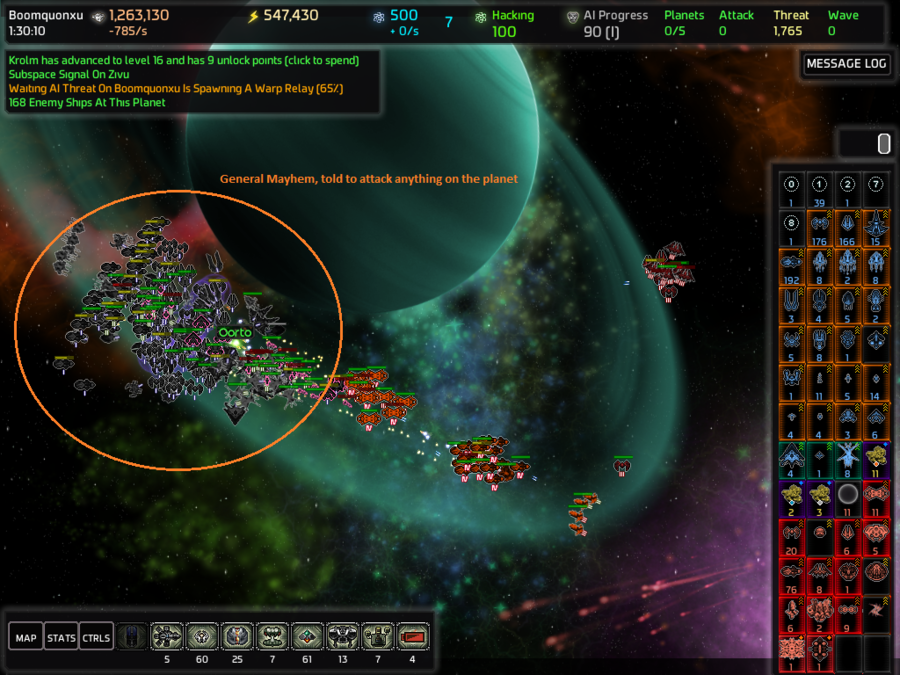
After that, it's pretty much a matter of choosing where to slap the command station. This is going to be a lightly defended outpost, so the middle of the grav well is as good as anywhere. A few dozen of each turret type and a single forcefield ought to be enough here, there's nothing I particularly want to protect. This will likely end up as more of an easily rebuilt crumple zone to slow the AI's assaults. It also means Oorto only has two entry points now, so I can re-orientate some of my defences there. Oh, there's also an E network core shield generator here. These things are invulnerable while the AI command station is up, but seeing as we're now in control of the planet we'll have the fleet wipe it out. As the E network is a weak one, this will destroy all the other shield generators as well.
Location: Oorto
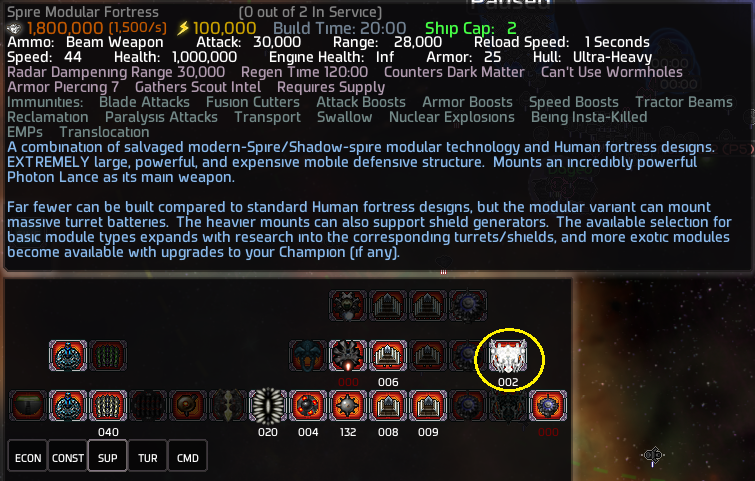
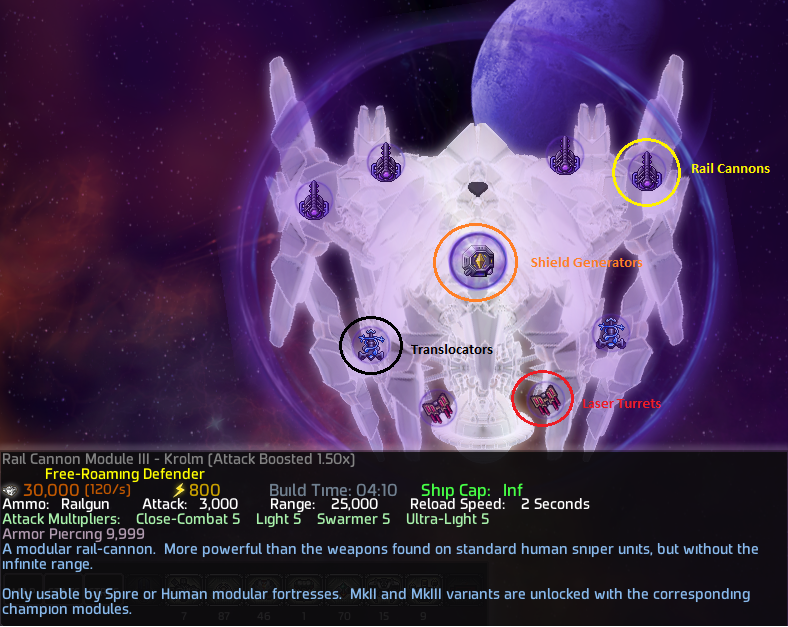
Oh, hello, what's this? Looks like our champion alternate progress has just unlocked some spire modular fortresses for us. These are extremely expensive defensive structures which can mount the same kind of modules as our champions, but based on our a mix between our normal turret technology tree and champion unlocks. They cost 1.8 million metal and 100,000 energy each, but we can pretty much afford that with the zenith generator up. For now I think we'll build one at Oorto and save the second to build at Savkeael when we take that. To give them a few more interesting modules to mount I unlock translocator Mk II and and rail cannon III modules in the champion unlocks, and retrofit the champion itself with some rail cannons.
Location: Durxhua

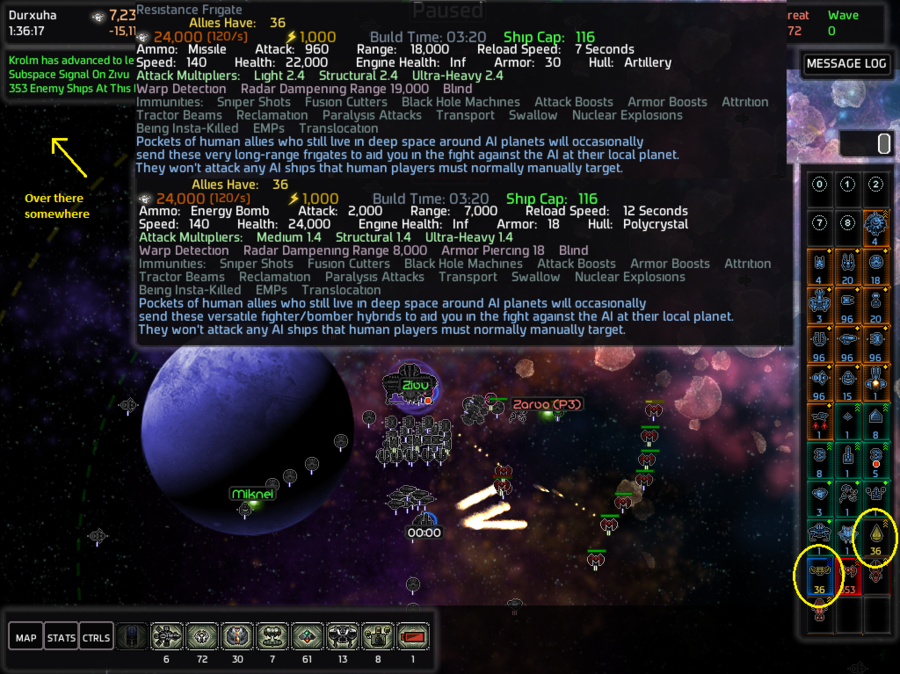
Looks like the human resistance have shown up to help us with one of the waves. You can't see them, because they've spawned miles away at the edge of the gravity well and all the AI ships will be dead by the time they get anywhere. Still a little additional firepower never goes to waste, even if based on past experience they will end up filing through a wormhole single-file and straight into the AI firing squad.
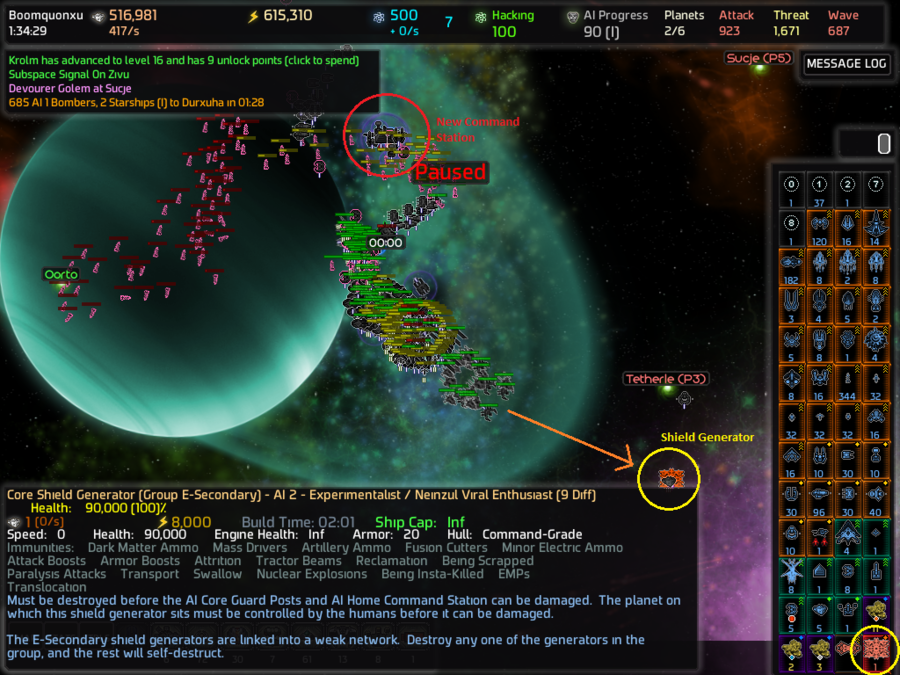
Location: Sucje
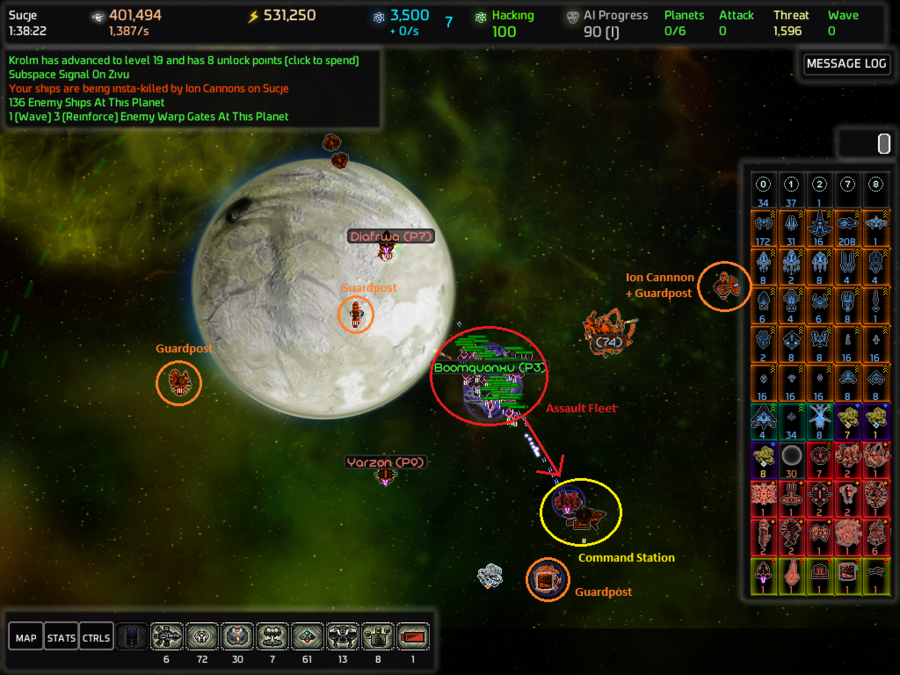
Right, let's deal with Sucje. Looks like a fairly standard planet to me, so it should be just a case of warping the normal fleet blob in.
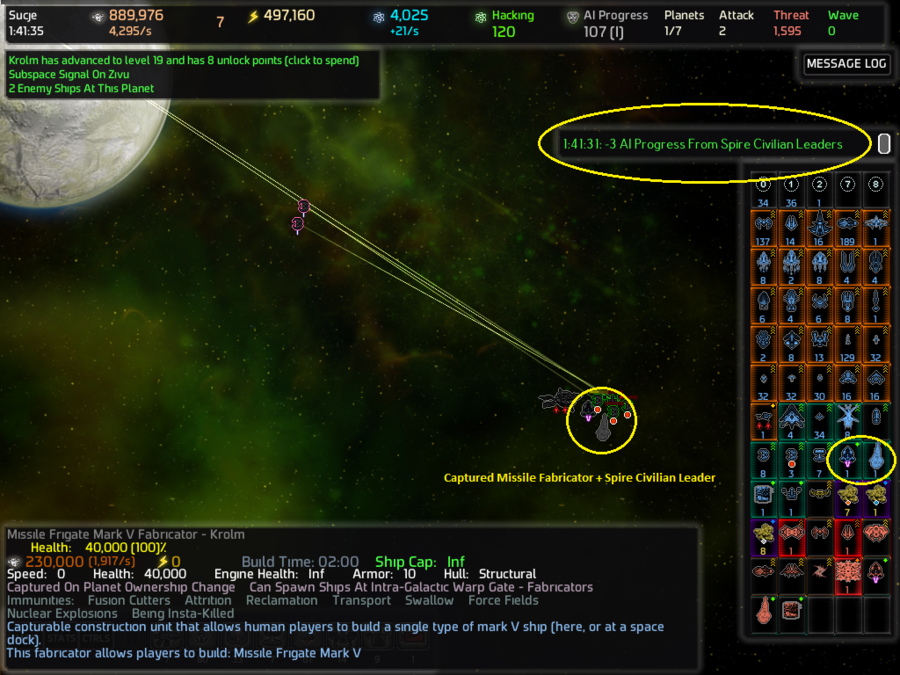
A couple of minutes later and the planet has been taken. I'm kind of surprised that the enemy threat didn't take the opportunity to strike at one of my choke-point planets while the fleet was engaged, but maybe the mass of turrets was sufficient to discourage them. Anyway, command station goes up at the edge of the grav well, covering the Mk V missile fab, and the grateful liberated spire civilians instantly decrease my AIP by three and will continue to do so on the hour for however long the game lasts. Oh, and there's a C-network shield generator here that we can pop, nice. 2/5 networks down.
State of the Empire
Next time, on AI War: Question and Answer: Part Un