Part 59: Bonus Ex-Play and the Hard Dungeon
Alright, moving right along from finishing the game you might be forgiven for thinking that it's completely done. Unlike other games from this era (ie, Chrono Trigger) that had a new game plus mode, Bahamut Lagoon doesn't actually tell you anything is going on. If you do turn the game on again after beating it, however, you'll have a fourth menu option.

After choosing that option, you have to go in and choose a cleared save file to load up. It's not exactly confusing at this point, but I'd say that a star or something to indicate a cleared file would have been a nice touch.
Ex-Play works a bit differently in this game, solely because of the fact that the ending isn't really going to change. It has two main purposes: to allow you to explore alternate dialogue options and scenes, and to allow you to power through challenging areas like the Hard Dungeon with extra experience. You keep your levels, equipment, and your dragons just as you had them when you beat the game, although you still have to acquire characters and dragons through the storyline. As you can see, things like the dragon sprites are carried over in most cases.
The game also remembers your dragon's names as the new defaults, but it would be possible to rename them if you wanted.
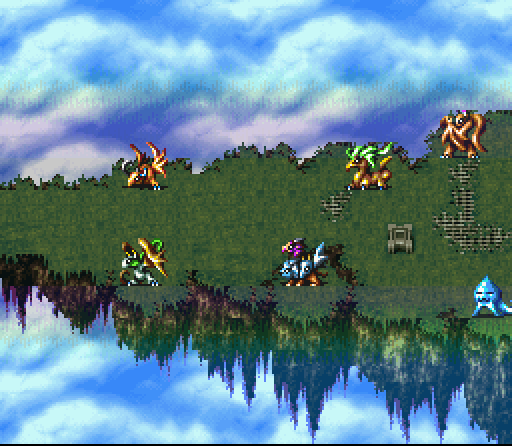
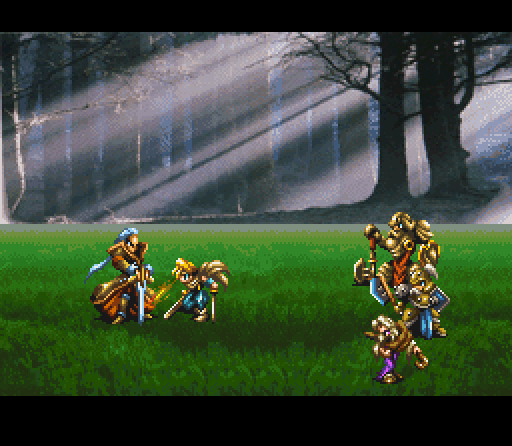
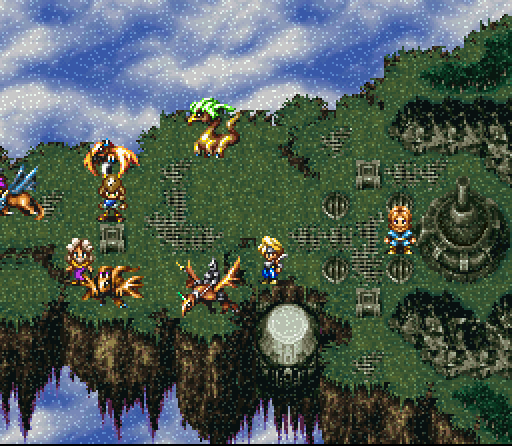
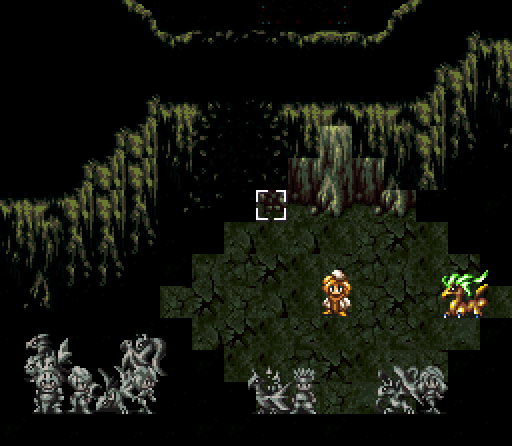
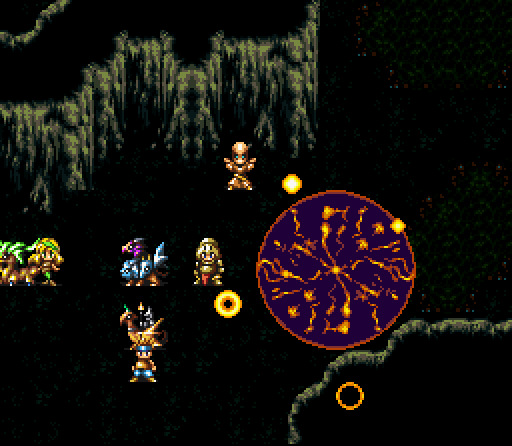
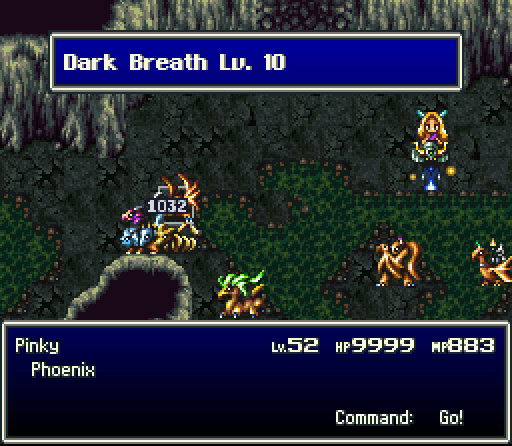
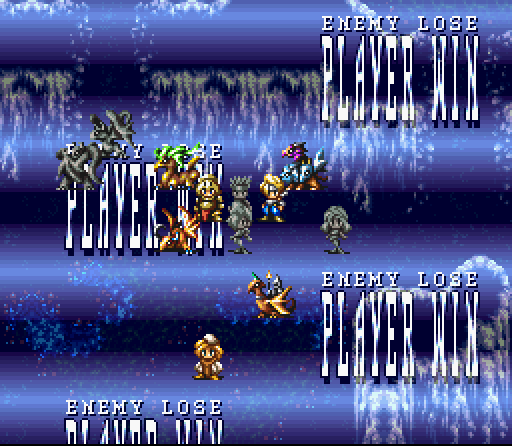
Here you can see the first really major difference: in Ex-Play, Sendak starts off with a summon from the get-go and it's a monster. Alexander basically hits a fat cross pattern that's 11 squares across at its widest point. A number of early battles can be finished in a single round with this summon, especially since with Sendak alone casting the damage is around 2,000. Alexander is a bit of an odd bird: the damage is technically neutral, but enemies killed by it drop items as though they were killed by a Dark element attack and its strength is based off the dragon's fire element. I suppose that's to make it so that it's not useless on anything other than a Dark Dragon or Master Dragon.
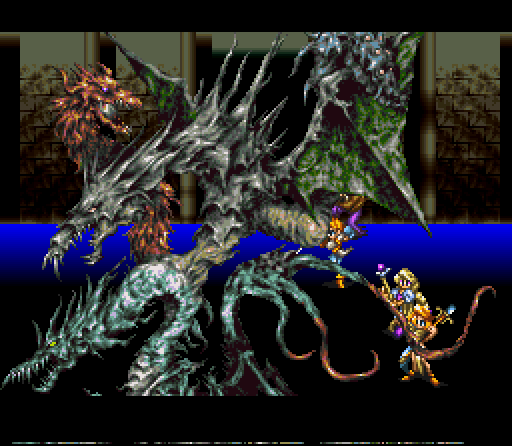
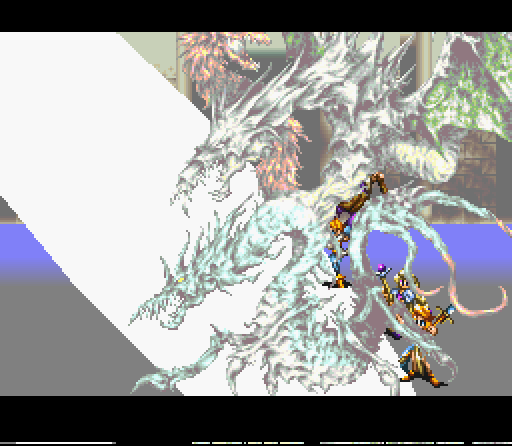
It's an awesome summon to look at. Alexander shows up and all four heads fire off some kind of ancient dragon laser beam.
You can pretty much see what I'm talking about. In this image 5 of enemy units are caught in Alexander's attack pattern. I believe that there was 1 survivor since I had both Yoyo and Sendak at this point... and by that i mean one out of the 15 individuals who were affected.
Moving on, the first point where I noticed a real difference was in Chapter 4. Previously there was no realistic way of reaching Palpaleos, since he's scripted to leave after 3 rounds. With Light Armors who have level 10 sprint, however, you can definitely get in a few rounds. He's got about 12,000 HP at this point, and you're going to need at least two rounds to get within range, so it's a bit difficult to beat him. As far as I can see, there's no indication that anything special would happen if you were to defeat him.
You might remember in the next chapter that there's a scripted fight with Sauzer. Initially it was impossible to survive more than about 2 rounds since all of your characters except Byuu had 10 HP and he did about 600 damage to everyone per attack. A few Royal Drugs, elixirs, and magic gins can certainly turn things around... but this is a set battle that you can't win no matter how long you try. I must have spent about 15 rounds hammering on him doing upwards of 4,000 damage per round with no effect. It's a bit disappointing, as battling him would be satisfying.
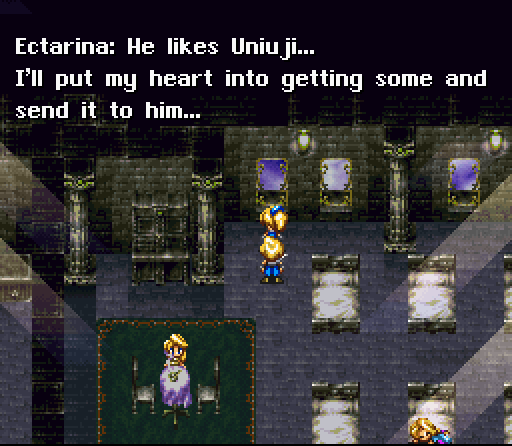
Just for fun, this time I told Ectarina that Hornet like Uniuji.. that wasn't the only thing I attempted, just one of the first ones to pay dividends.
Another interesting note is that when you recruit Blinky in Chapter 7 his initial sprite is the default dragon sprite for that class. This is about the only instance where the game uses a fixed sprite rather than checking your dragon's data and using the appropriate sprite.
The next time you see him, however, he'll have whatever sprite he did when you beat the game.
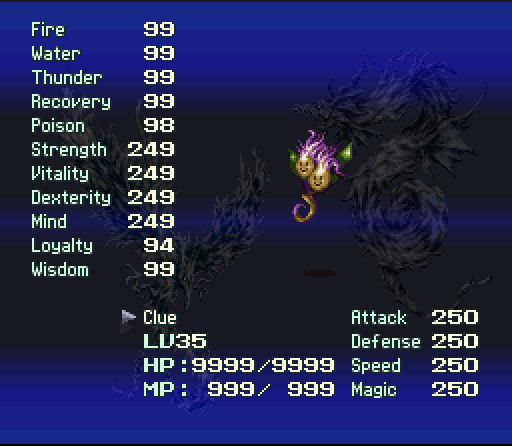
Since the novelty of having a Black Dragon had worn off by this point, I turned him in to a Dark Dragoon. This gives me 3 light and 3 dark dragons, and the Dark Dragoon's attack is slightly less useful than Odin's. Neither of them works on boss type enemies, but as an instant death attack Odin's special doesn't work terribly well on normal enemies either.
The second major change I went with was changing the Assassin's target to Yoyo. The payoff occurs in Chapter 18 after Yoyo's conversation with Matelite. As you can see, one of the assassins makes a jumping attack to try and finish her. He fails, but evidently if you send them after a crewman (the third option) they'll succeed. This game is a bit harsh to the poor crewman.
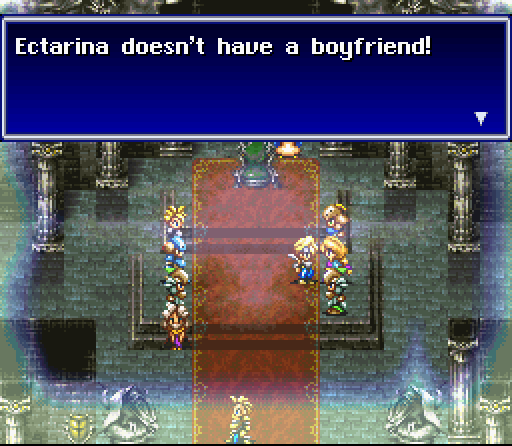

This dialogue after recapturing Kahna appears to be a major difference if you tell Ectarina the wrong food for Hornet. It's a bit of a guilt trip on the game's part.
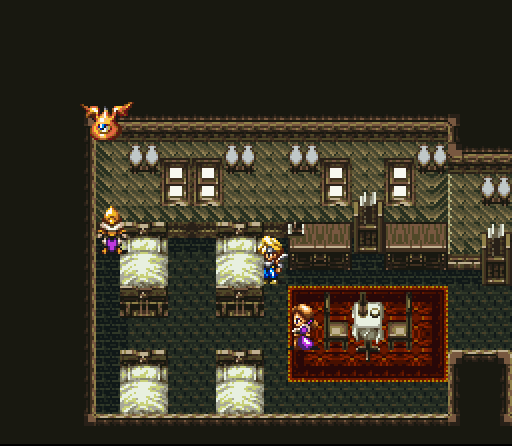
Another thing I missed on my first play through was talking to the Battlefield Salesman's wife after selecting our dragons for breeding. She gives you some excellent equipment, including an Iron Duke and a Pax Kahna. The Iron Duke is pretty much the best axe in the game, while the Pax Kahna is a suit of armor for Matelite only.
Some of her other materials are.. more questionable. People who have been paying attention might wonder how I got an Unknown Dragon if I missed this the first time. Let's just say that there was some hex editing involved.
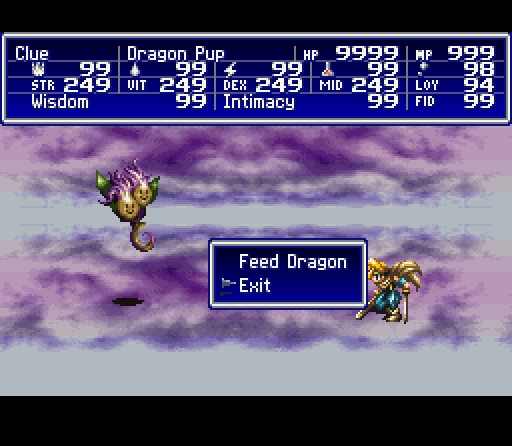
With the Dragon Pup you're given another chance to change his initial shape if you'd like. This time I went with Flammie and Sue. The pup's stats are reset to 1 less than his parent's average, giving you an opportunity to go for a different form if you'd like. He does keep his levels and the additional HP and MP from the mushrooms and magic gins, however, which is a nice bonus.
Going from Chapter 1 to Chapter 20, my characters gain about 7 levels on average. In a way you kind of lose out because characters who join later don't get any experience during the build up. Palpaleos is now far behind the rest of his group.
The Hard Dungeon
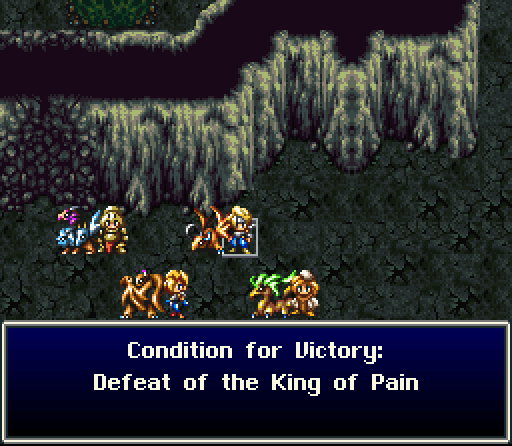
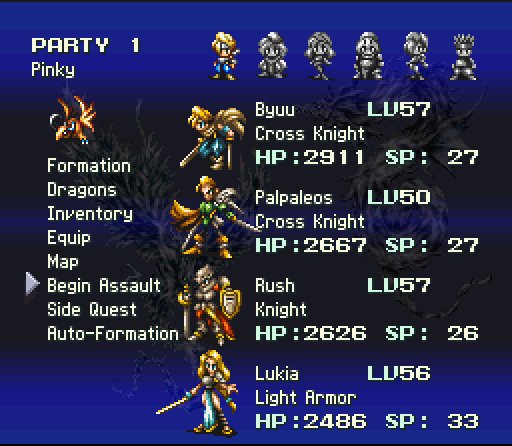
Going in to the Hard Dungeon I contemplated grinding up my characters to all be around level 55, but the process was cumbersome and slow. The level of enemies in other side quests is fixed based on the chapter, and trying to go from level 40 in some cases to 55 fighting enemies who are level 30 was not fun. Just for reference my highest level character was Byuu at 57 and my lowest was a tie between Barclay and Zora's Son at 45. The average level of the participants was 52.
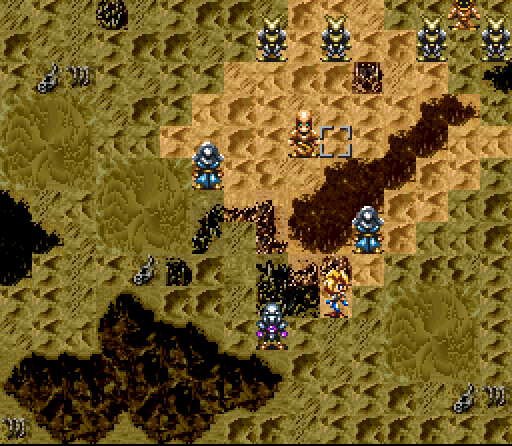
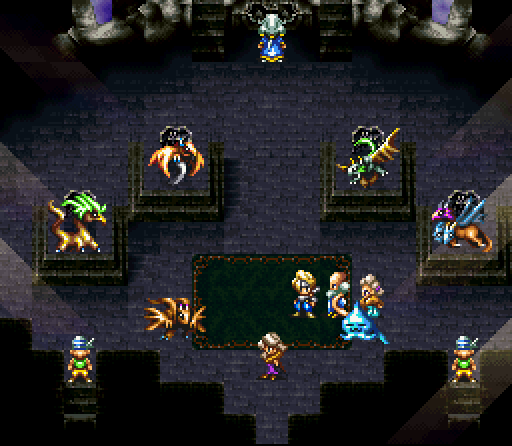
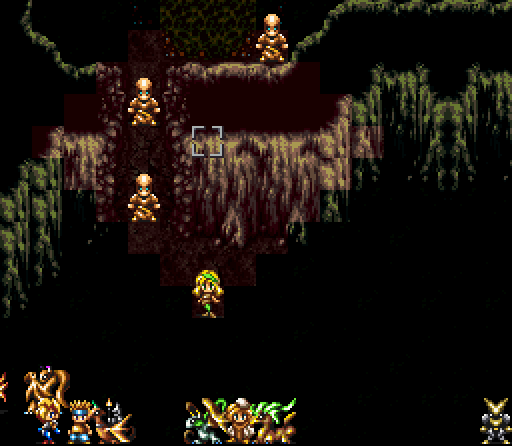
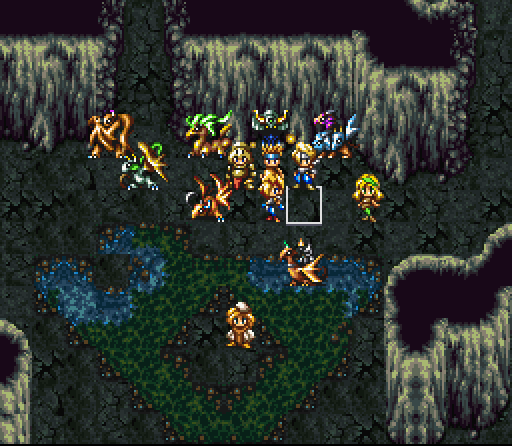
The main difficulty in finishing this side quest is the very beginning, and this section right here is the worst culprit. While they don't always use it, the enemy has the range to reach pretty much across the screen to hit you with Bagdem. A character who's near the top of this corridor is actually in danger of being hit by the group of Overlords coming south from the center of the map.
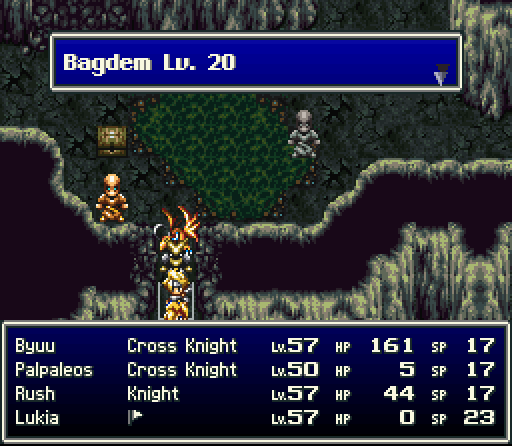
This is a very bad thing, since a single hit from a level 20 Bagdem can do this to Byuu's unit. That spell does more than 2,000 damage to your entire group and is quite capable of wiping out our mages with bad luck. Even Matelite's group can't handle two in a row. So, we build our tactics around that.
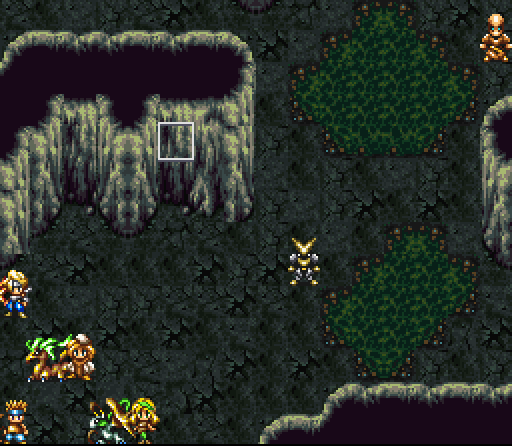
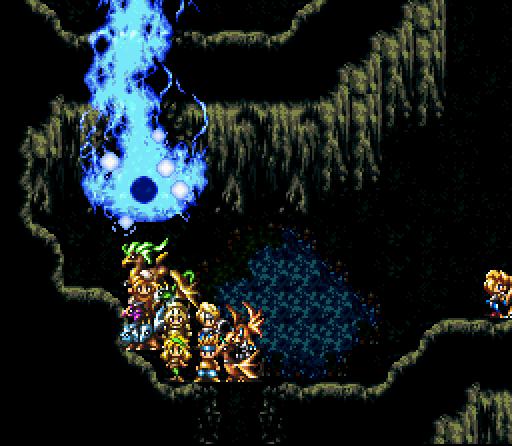
First off, since that one corridor is such a problem the first thing we do is avoid it. You can use lightning to blast a hole in the top wall and give the enemy mages a path to come after you. From there, you're going to want to pull back as far as possible.
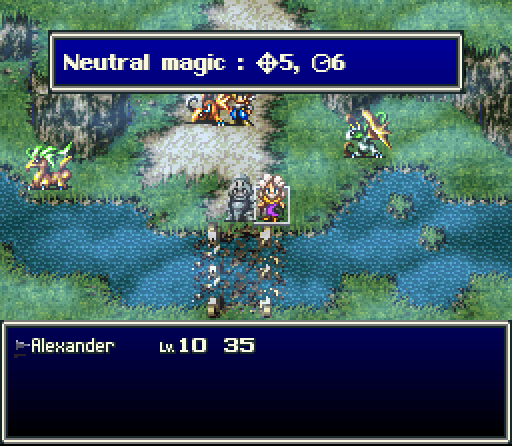
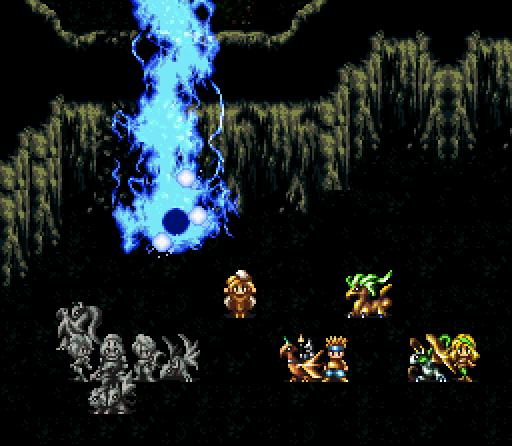
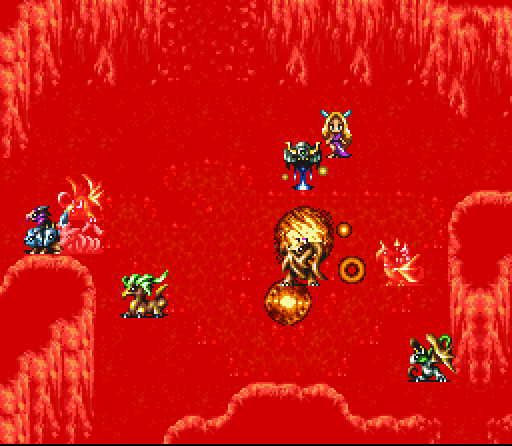
The ultimate goal is to get the enemy caught up in that narrow passage to make your life easier and then hit them with everything you've got. Alexander helps a lot in this battle; right now Yoyo and Sendak are about to hit all three of those groups for around 3,000 damage.
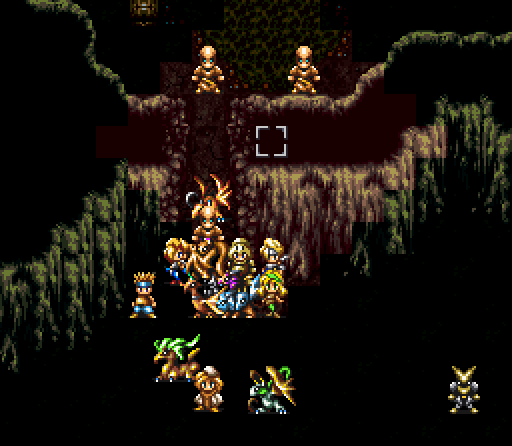
Afterward everybody can rush in to finish them off, preferably letting the dragons lead the way. The enemy tends to concentrate on them given a chance.
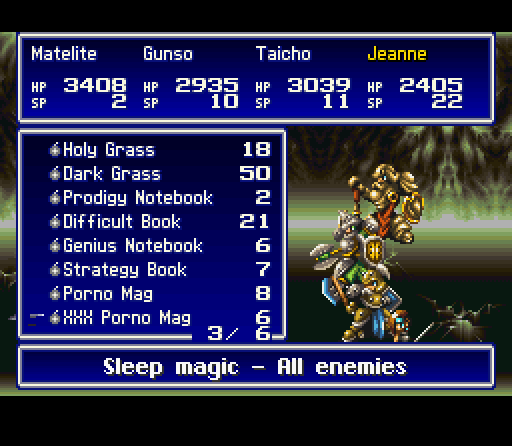
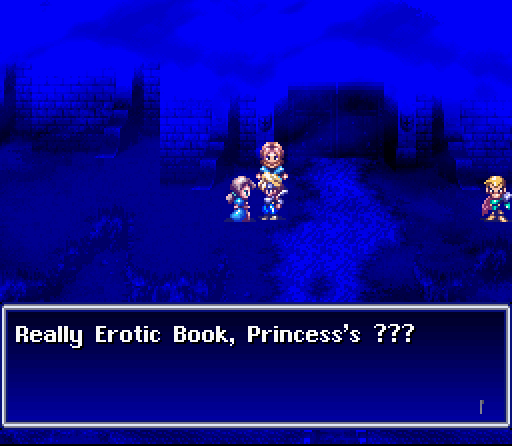
All this time the melee only units (Striders) will be coming along behind you, which can be a bit of a problem. They're not going to do the same kind of wide area damage that Bagdem can, but it's possible that they can weaken a unit right before an Overlord group comes in and finishes them. Luckily they're very vulnerable to the sleep affect of the XXX Porno Mag.
It's a very happy day when the Overlords decide to use their gravity spell instead of Bagdem. There's a certain element of luck to this battle if you're caught with two Overlords in range of a single unit. This is the last survivor of the initial wave shortly before his demise.
After you defeat the Overlords and Stride groups it's time for some good old fashioned pulling. You don't want to deal with all of the high level enemies at once, but luckily Alexander is great for reaching out and touching somebody without triggering a response from everybody else.
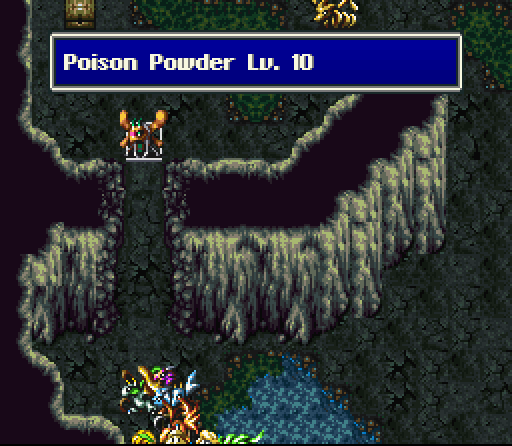
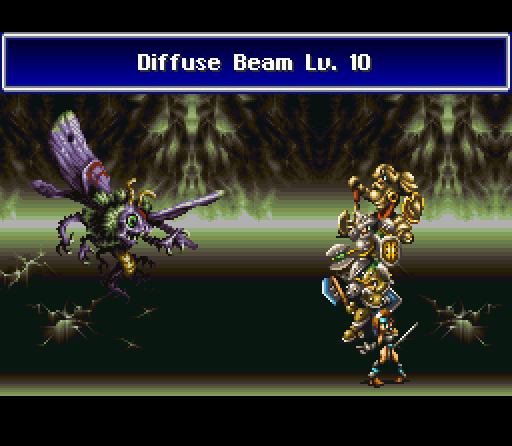
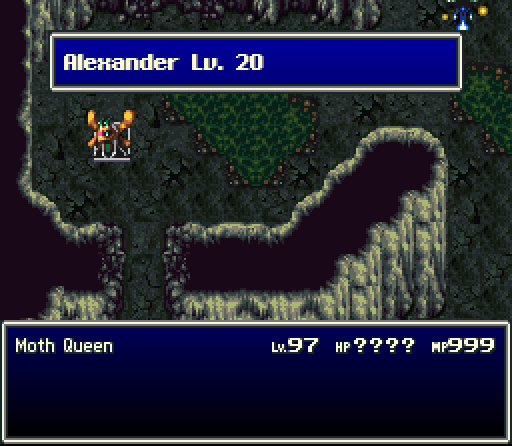
Our first target is the Moth Queen, who's actually the most annoying of the bunch. She likes to hang out at a good distance from your group and spam Poison Powder. The attack itself only does about 700-1000 damage to a group, but the issue is finishing her off without drawing any additional monsters in.

I had to pull back pretty far, but eventually got her far enough in that I could send Byuu's unit in to block her escape. The Moth Queen has 55,000 HP and in addition to Poison Powder and Diffuse Beam also has a Breath Wing attack. None of them are very dangerous on their own.

Our next stop is over here on the right side of the map, where we're going to pull one of the Judits over and systematically murder her.
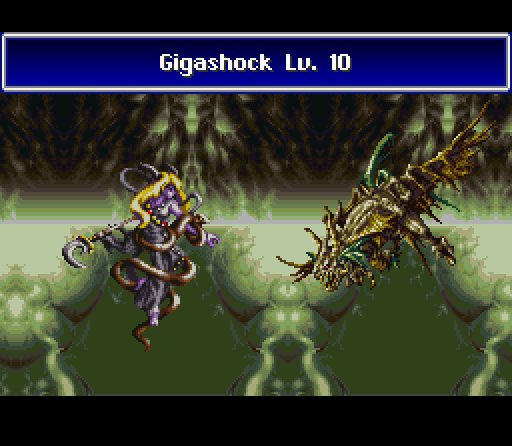
The Judit is a bit of an oddity in this battle as she has no field attacks. This makes her an easy pull, since once you tag her with Alexander from a distance she'll rush right at you in order to start using Gigashocks. As an attack it's actually fairly powerful, but that's not really the worry here...
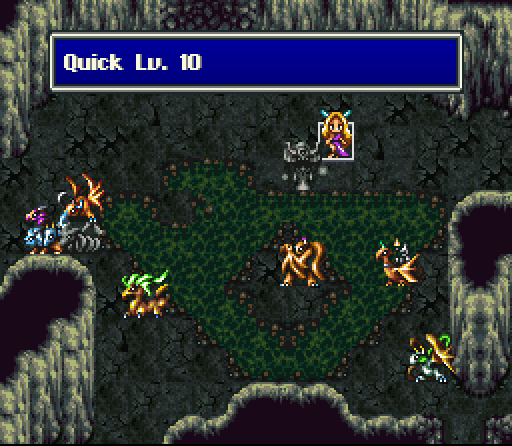
The real purpose of the Judit is to heal and support the King of Pain with healing and Quick spells. And yes, the Quick spell works exactly like it does in other Square Enix games: extra turns for the King of Pain. There's a reason that the Judits have to go out fast. Luckily they only have about 40,000 HP and aren't particularly tough.
Next up on the hit list is this guy, who's positioned to the right of the first Judit. Unfortunately he's a bit more difficult to get, since in order to get within easy range of him you have to enter the King of Pain's lair. At this point I managed to get everyone's attention, but with only one Judit left this was manageable.
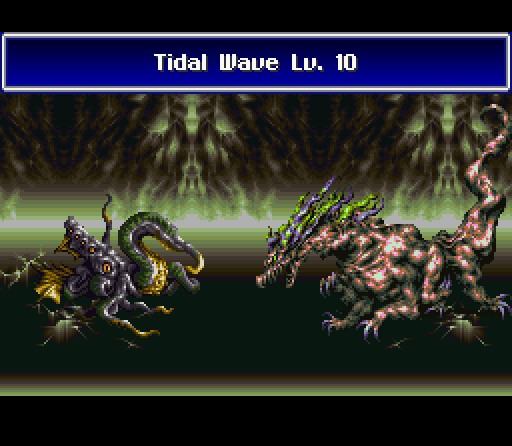
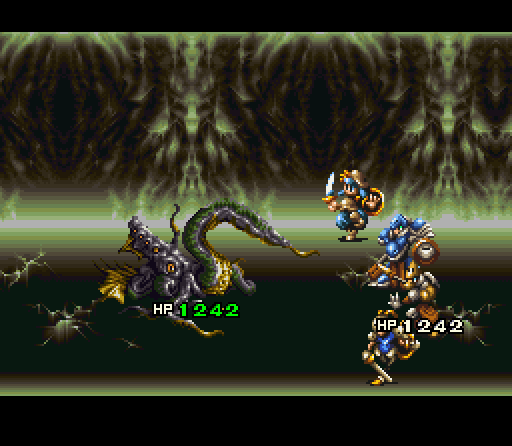
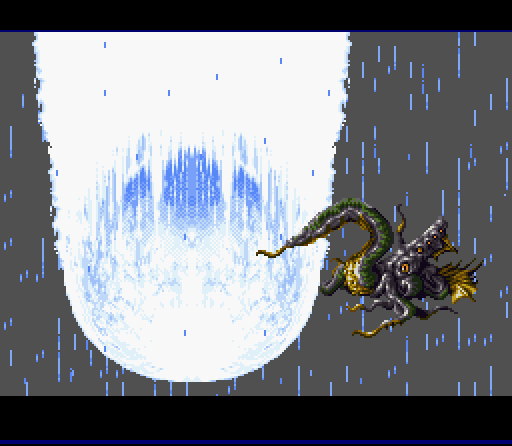
Naga, as this particular cephalopod is known, isn't actually that much of a problem either. He's got some fairly wide area attacks with Toxic Ink, Halley Gazer, and Tidal Wave, but he's a pugnacious fellow who likes to get in and mix it up in melee. When he gets low on HP he starts to use a life stealing Tentacle attack, but like most enemy healing effects it doesn't really save him for long. He's got about 58,000 HP.
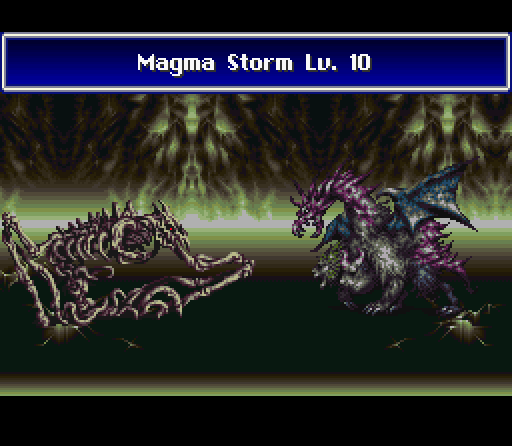
The final assistant to the King of Pain is Schwarzen, who's a palette swap of an earlier enemy you might remember from the night battle in Chapter 13. He's basically an undead dragon, and his only attacks are Dark Breath and Magma Storm. These are both field and melee attacks, and he prefers to use them in the field is possible. Like most of the other enemies at the end of the Hard Dungeon, he does about 1000+ damage to the entire group. He's got 55,000 HP, but the fact that he's undead helps a bit since you can heal units surrounding him and damage him at the same time.
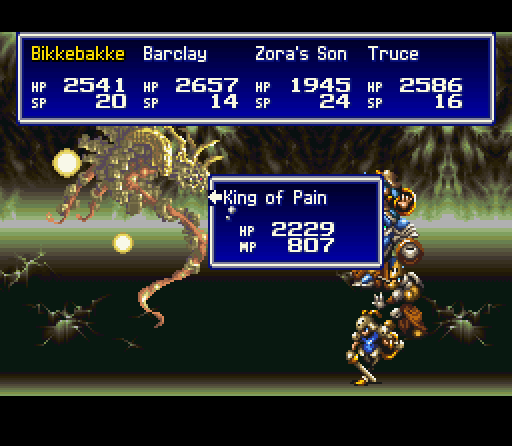
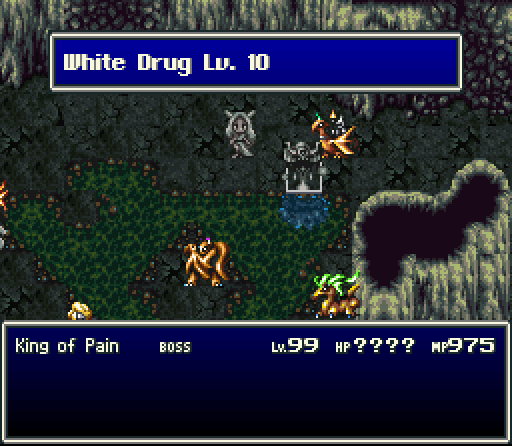
The King of Pain is a bit of a let down compared to what you'd be expecting at this point. His two attacks are Inferno, which does about 1000 damage to everyone, and a Randomizer that's pretty useless since most of your characters are going to have armor that will protect against the worst effects. The real threat is that if you go in to fight him with both Judits alive he's going to go three times to every one of yours.
Once his supporters are dead, there's nothing to really keep you from just pinning him against the wall and going to town. It's easy to keep up with his damage output through healing at this point. He's got 60,000 HP, which is about 10,000 more than Alexander's final head.

The King of Pain is unique among Side Quest bosses in that he actually gets a message upon death... although it's not terribly special. So, what do we get for all this?
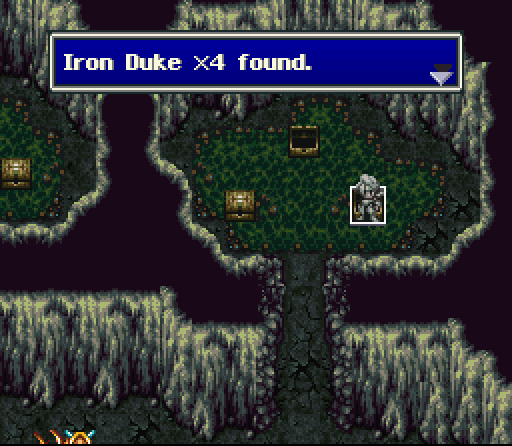
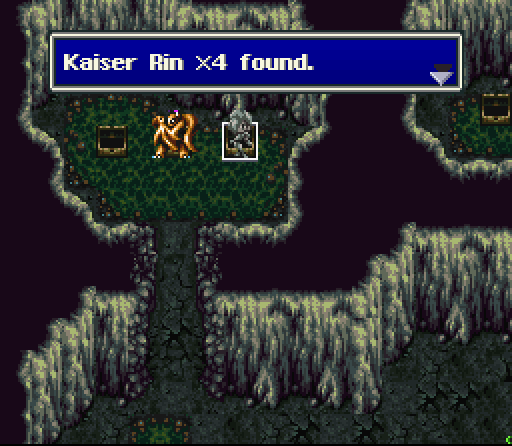
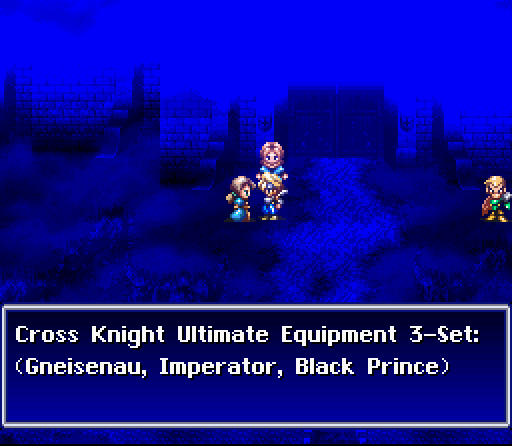
The main thing that you get out of this is loot, often in groups of 2 to 4. Among the items you can get are Reconquistas, Dreadnaughts, the Kaiser Rins (an excellent robe), Royal Gowns, Energy Suits, an Empress Kahna, Chobham Armors, and Power Suits.
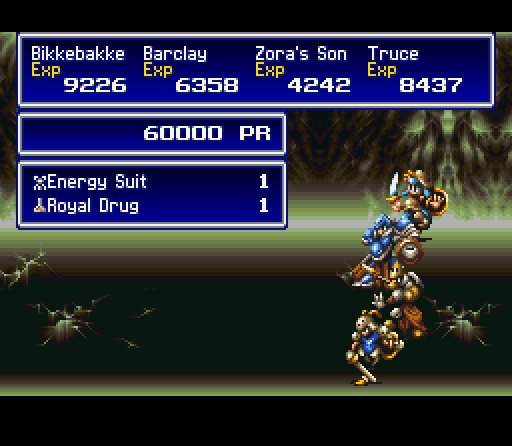
This is what my inventory looked like after that battle. The funny thing, as always, is that by the time you can do this you don't actually need most of this stuff anyway. It's more of a bragging rights reward than anything else.
The one thing that this doesn't give much of is experience. The King of Pain and all of his flunkies give 10 experience in addition to whatever you get from using your techniques on them, and Overlords and Striders give 5. I hadn't really looked at this, but this makes it even more clear that this is a terrible place to try and grind for experience. Still, it's does feel like a bit of an accomplishment to finish.
And with that, we're done. Thanks for reading along everyone!