Part 19: Sorry, this is the final battle. I realize that wasn't made clear.

Playing at level 1 naturally brings about handicaps regarding how we fight and who we can afford to bring along. As we approach the finale, then, it's worthwhile to consider how things might have changed without these limitations at play. Free to do anything except of course travel in shifts, who would we choose as the agents for Lavos' demise?
Alex (Magus) is an obvious choice. Lavos' influence ruined his home, corrupted his mother, and doomed his sister to becoming a parallel universe clone baby and still not being the most bizarre part of that game. A third chance at Lavos and Zeal is fitting for one who's spent so much time seeking revenge, and owning a weapon called "DoomScythe" while still living under your mom is just sad.
Piers (Frog) is another obvious choice. An indirect casualty of Alex's failed revenge, his life and appearance are constant reminders of Lavos' hold and its reach. For Frogman and Alex to now fight as one vindicates sparing each other's lives, and while Cyrus is robbed of his post-death catharsis he wasn't that important so there.
Who else? Mia (Nadia (Marle)) has few ties to Lavos past raw enthusiasm, having already driven her to flee home and buy candy that once. Jenna (Lucca) has already been vital, crafting the machines that let our adventures begin, but she too holds little connection to a world of robots 300ish years after her spoilers death.
Garet (Robo) was abandoned through Lavos' destruction but would surely be thrown out regardless, rusting as the new model boasts a 0.4 in3 smaller chassis and two fewer arms. Sheba (Ayla) may hate it for bringing about a 64,988,001 year disaster, depriving her people of water and crops needed for survival and grain spirits. Despite that, her immediate life was largely unaffected, and she always had Kino to cuddle with as detailed in my upcoming fanfic written largely in dactylic hexameter and Comic Sans.
Thus, the only logical choice is the person who's been here for everything. The one who checked Alex, opposed royal order, rallied resistance, and perpetually served as a soft-spoken but bold representer of hope. Seeking revenge on a Lavos who left them for dead, seeing the madness and disaster begin, and longing to repay the efforts of a tireless search: Schala.

Unfortunately, that would involve playing Chrono Cross. I suppose we'll just have to make do.
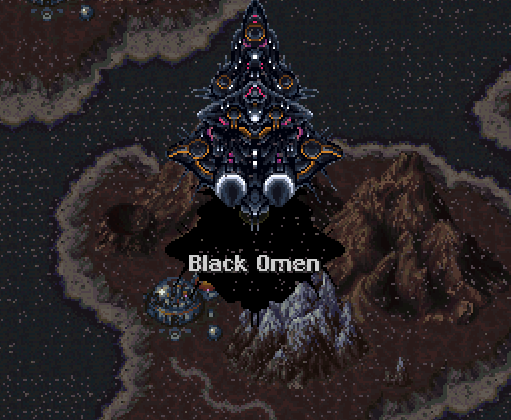
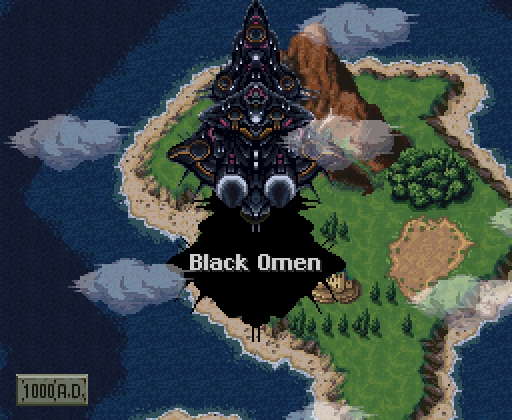
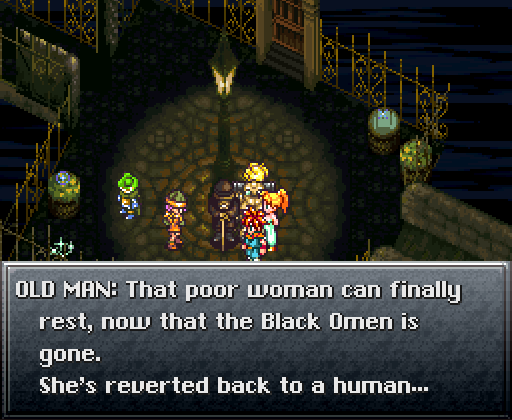
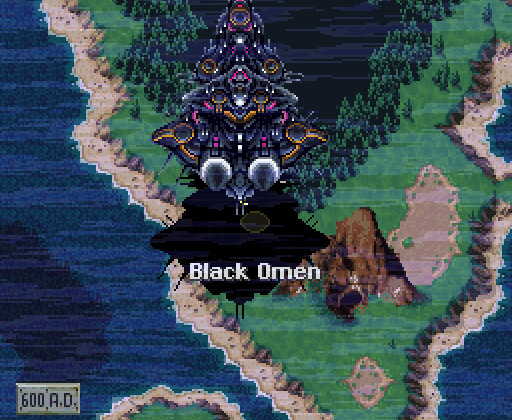
The Black Omen exists from 12000 BC on, but despite this it can only be entered from three separate dates (there's no difference between them, though starting in 1000 allows you to repeat it two more times). Its 1999 appearance is taken away from by the apocalypse somewhat nearby, and in the future there's nothing to do save interrupt her schedule of surveying a wasteland while reminding herself, yes, she's a queen. Sim City 2300 was not an appreciable hit.
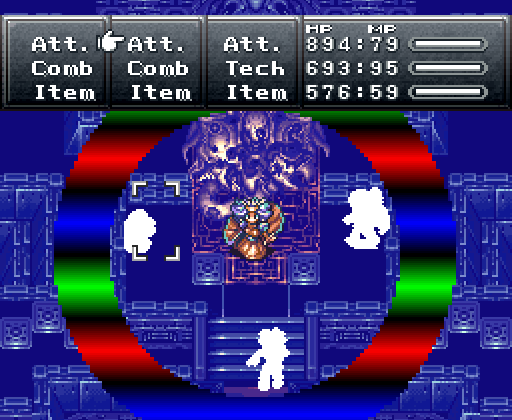
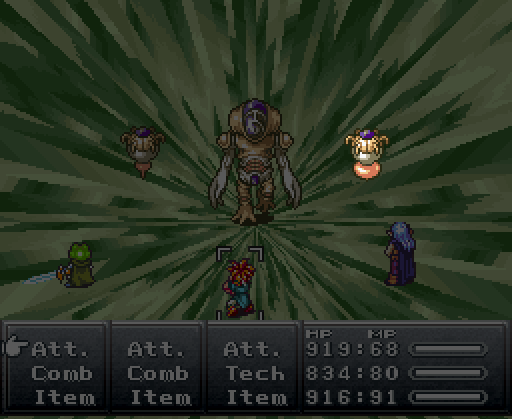
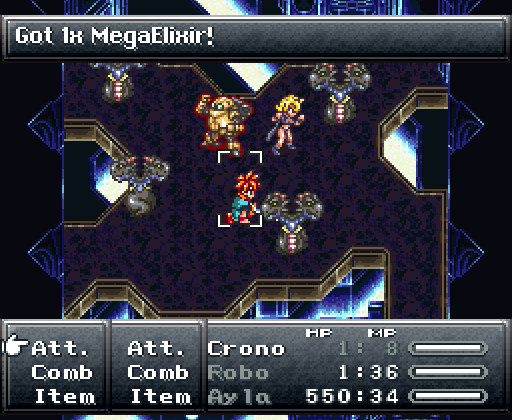
1000 AD, then. At level 1, the introductory boss' attacks were impossible to survive, necessitating some Crisis Arm trickery so as to kill the bottom before facing Chaotic Zone. With the ability to use Magus' techs and survive an attack, the fight is only irritating because of his status effects, and the gauntlet that is the Black Omen is more a test of general preparedness than particular tactics. Around this time, Felix should learn Luminaire, and the combination of this and his 70% critical hit rate makes him by far the best character in the game due to balance being a minimal (if even existent) priority.
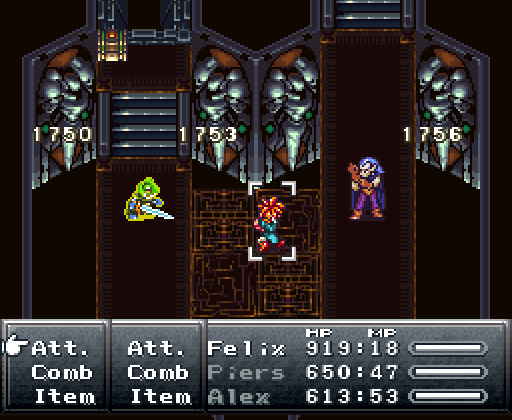
Besides bosses and a palate swapped Heckran yielding infinite power tabs, the most important things to keep watch of are Panels. Each of the 18 panels found in the omen will yield a speed tab, and Speed is the one stat that maxes out at 16 rather than 100. This alone is the second best reason to the Black Omen to Lavos, though using the Epoch and Bucket are alternate approaches to be shown off in overdue time. The true reason we're doing this, of course, is to see the best thing in the game.
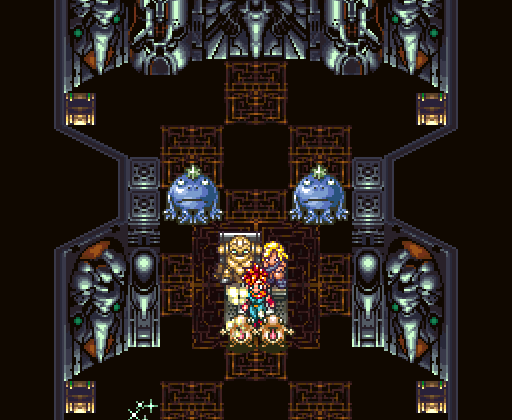
Mutant Mk. II is immune to attacks and counters all magic with MP Absorb. At Level 1 we were forced to use barriers and shields while praying he didn't use Life Shaver (HP to 1) or Poison, but a Felix/Alex team can sufficiently overpower him provided we've made just a moderate attempt to learn techs. Speaking of...
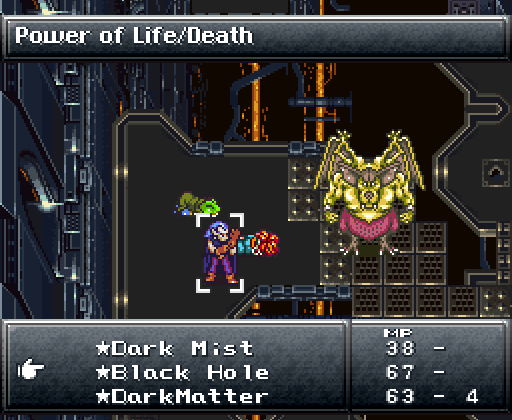
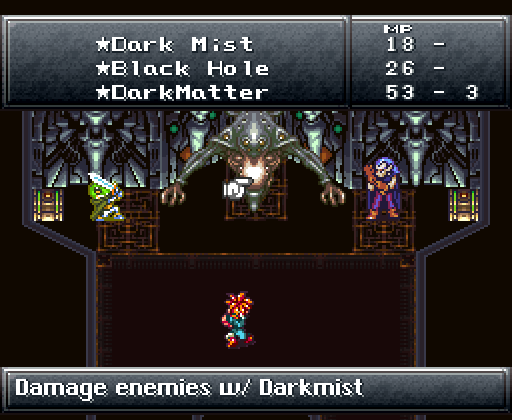
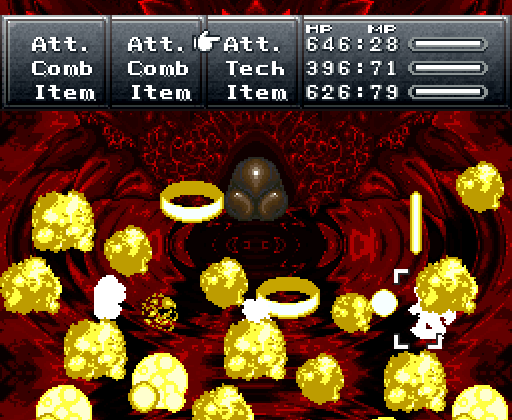
Beyond the level 2 element spells, Alex learns Dark Mist, Black Hole, and Dark Matter, the first and last of which are general Shadow attacks with Black Hole being X-Zone (from FF6) without being good. Also included in this shot are yellow things, Goons, which are probably the toughest enemies in the Omen and, as such, the game. Most assuredly, there's an absolute cornucopia of humor to be found in that statement. I'll let you get to work on that. Insert joke.

(In general, and in odd juxtaposition with the barely-even-palette-swapped bosses, a number of unique designs populate the dungeon along with the barely-even-palette-swaps. Also among these are slightly more alkaline Gatos known by the awful name "Cybot", who sadly do not open their battles by singing about the nature of the Omen and Jenna having plagiarized 13,000-year-old designs. A shame.)
The only other high point is this room, and I wasn't being facetious in calling it purely non-sequitur. As always, the Compendium claims it was a form of psychological warfare meant to dishearten us with a show of our futures or somesuch; I prefer the idea that, increasingly desperate for hobbies, "Queen" Zeal made novelty life-size CT plushies to sell to the fans who would make and defend such a theory. I'd buy eight.
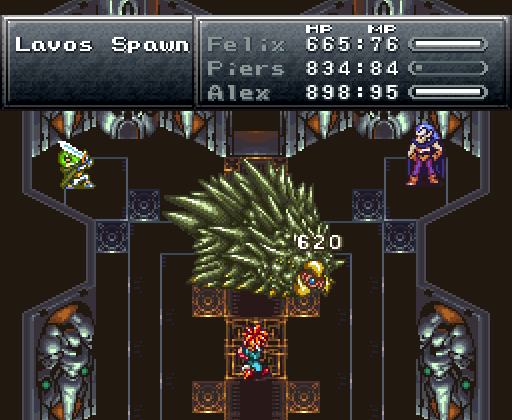
Now for an onslaught of bosses. The Terra Mutant's top absorbs health from the bottom, so giving Robo strong armor, Full Tonics, and an HP-up Gold Erng allowed him to watch as it ate itself. The Lavos Spawn, besides holding a charmable Haste Helm and stronger attacks, is mostly the same as the ones on Death Peak, and a similarly defended Robo (with a Blue Mail for his new water attack) had few problems. Acceptable alternate strategies include Luminaire.

Then we come to Zeal. Battle #1 is nothing to write home or several couplets about; the only gimmick is that she regularly Halations all HP to 1 (an empty threat, no other moves can hit multiple members and it's by far her most used attack). The Mammon Machine is a similar story; in one form, the Machine uses your attacks to modify (increase) its stats, while in the other it stands around waiting for you to mash A. At level 1 the timing could be a bit dicey due to its regular Point Flares and the reviving that needs to be done, but even then a well-prepared team turns out fine.
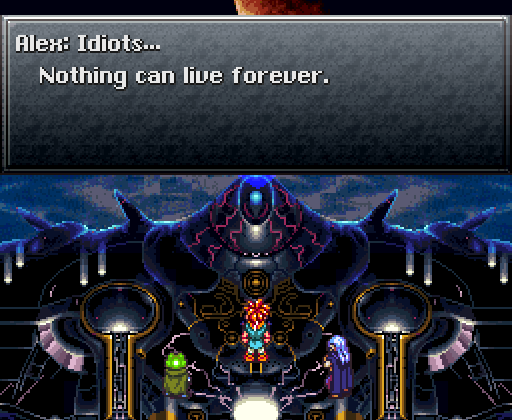
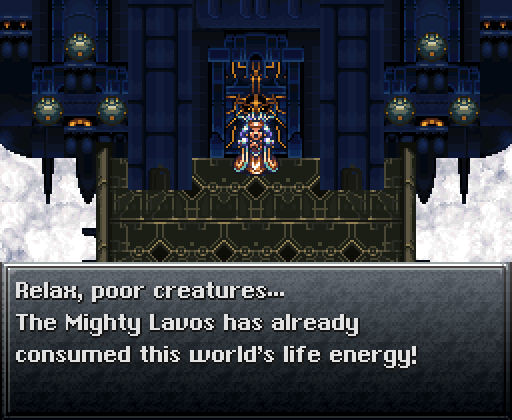
 Zeal... A pitiful woman, duped by Lavos! I, myself, will bring an end to all of this!
 Prophet! You are doomed. I haven't forgotten what you did at the Ocean Palace. You will now forfeit your life. How dare you insects come after ME! Oh almighty Lavos, lend me your power!
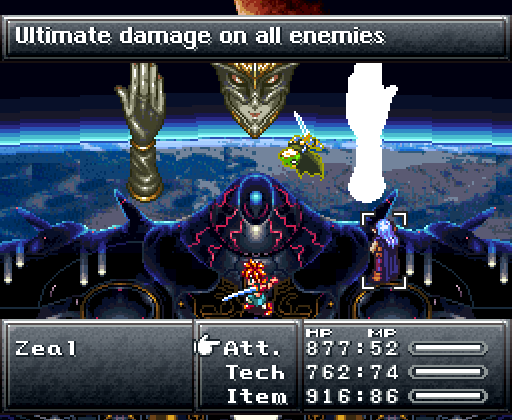

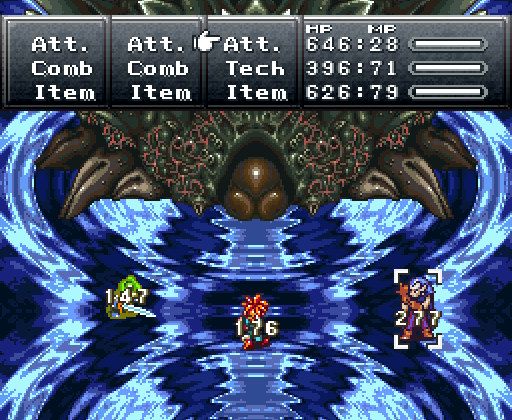
Part 3, on the other hand, is far more intense. Zeal's hands have almost as much health as her maskhead and counter all attacks by either draining MP or reducing your HP to 1 which, combined with extremely rapid-fire attacks, can easily ruin your party. Zeal cycles between elemental attacks and her favorite Halation, and some moves, like Hexagon Mist, can easily wipe out the party all on their own.
At Level 1, the key was (surprise!) preparation. Crono and Ayla wore Black Mails to survive the lasers shot by the hands, while Robo was given a Blue Mail for Hexagon Mist. Robo and Crono used Haste Helms to sneak in Revives while Ayla, with a Prism Helm and Gold Erng, served as a tank. Robo and Crono, with MP cutting Gold Studs, spammed Uzzi Punch and Confuse on the head, Ayla threw Megalixers, and they all interrupted this every three seconds to revive. Halation was completely ignorable since non-absorbed attacks are pure instant kills, but the rest of the battle depended in large part on quick reaction and luck. Tense!
Even at regular levels, this is likely the most difficult boss in the game. A similar strategy, relying on powerful one-target attacks with liberal healing, is the only reliable way to survive, and the only real advantage to higher levels is a bit of a safety net with regards to health and time.
It's not the most interesting battle, but, for a game with absolutely gorgeous spritework in general, it's likely the most visually impressive sequence so far. If you've ever wanted to see amphibians fight Rayman-esque despots in space, you'd be remiss in not watching this video numerous times:
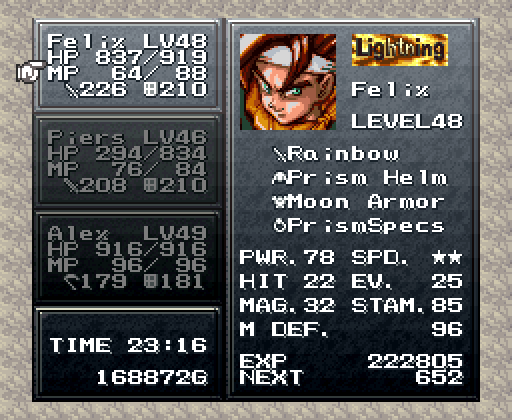


For final comparison, this is the strength of a late-game party after thorough but not excessive play. From here, the fights are the same as had we just used the bucket; the optional leadup unlocks New Game Plus and presumably resolves something despite her still being alive.
The first stage of the Lavos shell is refights, as Lavos and guest star roach dancers mimic Dragon Tank, Guardian (the boss guarding the food storage in the second dome), Heckran, Zombor, Masamune, Nizbel, Black Tyrano, Giga Gaia, and shells. Even at level 1, these fights exist solely to dissuade you from coming too early; your menu is freely available between refights and all of your earlier tactics work equally well.
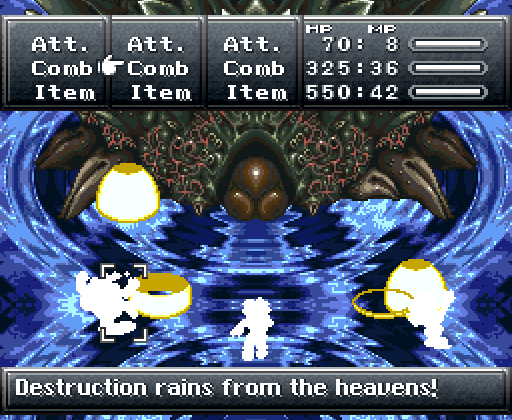
The shell itself is also no concern. Gold Erngs and armors allowed Ayla and Robo to survive the now-weaker Death Rains From The Heavens, and a standard slew of strong techs and Megalixers quickly depletes its HP. Once we destroy its exterior, we're able to see the game's ultimate area...
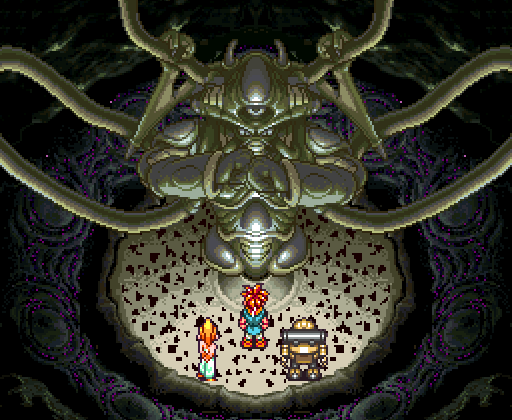
A featureless cave. You're the best, Chrono Trigger. The best.
 Cyrus, this be our finest battle...
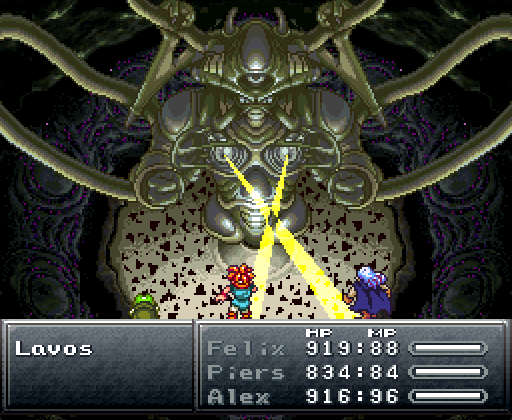
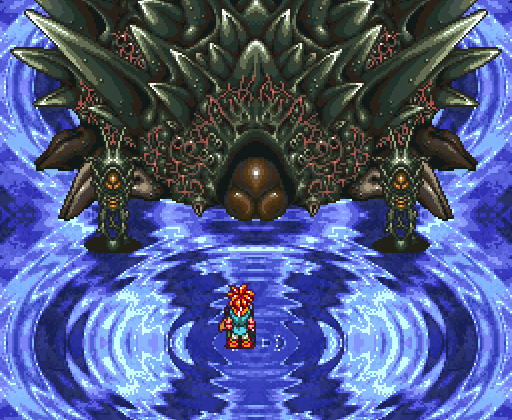
Lavos' opening nipple lasers will quickly annihilate parties with no business being here; we could bypass the refights had we crashed through its shell with the

Destroying shell #2 and seeing the real Matryoshka doll, we suddenly realize that Lavos can guide evolution such that it can have purpose besides "Evil things from space are probably bad". This revelation, anywhere from somewhat ungrounded to plain out of nowhere depending on who's in your party, is presented in full:
 This's the REAL thing?! Now I understand... It lives on a planet for as long as possible, stealing away the most vital resources... It combined the DNA it found here with its own, and gave birth to those creatures up on Death Peak. Eventually the young must migrate to other planets...to repeat the cycle... Grown like farm animals, waiting to be slaughtered... All of our history... our art and science... All to meet the needs of that... beast... Impossible... You CAN'T expect to toy with an entire world and get away with it!
 This...is...Lavos! It's...humanoid... It seems like it has collected all of the vitality from the creatures who have lived on this planet. This is Felix's and ours... Leene's and Doan's...everyone's ...and I mean, EVERYONE's world!! This be evil! Indeed! This thing possesseth the vitality of all living creatures... It hath harvested DNA from animals, only to further its own evolution! And whilst sleeping, to boot! It...is too much to bear... We have been reared like animals...! Our lives hath been for naught... My life retain'eth its meaning...! We haveth our own will!!
 Amazing... It houses all the DNA of every creature that ever lived...! This was Lavos's goal...! Using the DNA of every organism... And achieving the ultimate in evolution! Attack value is ...off the scale! It's shorting out my sensors! Human hands created me... Which means I am a product of that thing...I am no different than Jenna and the others... I am a part of all living things!!
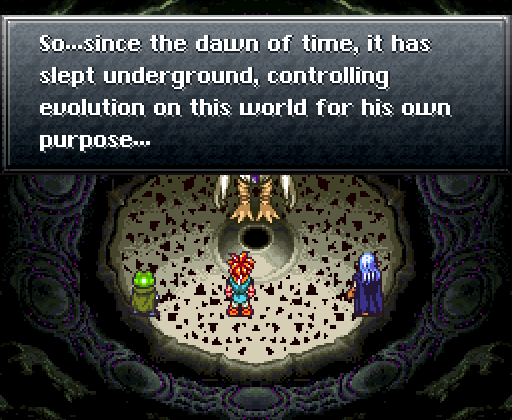
 Lavos smell...STRONGER!! This smell like Sheba's land! Reptites, Ptero, Nizbel. Sheba, and Felix! Smell like all people I know!!... Smell of all living things!! Me no run! Sheba no run away! Worse than losing!! Sheba strong! Sheba and world good! You outsider. Not part of planet's life!! So...since the dawn of time, it has slept underground, controlling evolution on this world for his own purpose... We were created only to be harvested. All peoples ...and all living things... It's over for you... Your life ends here!
 ...
...In short, the monster which isn't part of the planet's life because it was a part of its life controlled things that weren't it to evolve and give birth to new creatures the same as it was before all that maybe took place. On seeing this, Piers goes from existential despair to Frankl-esque seizing of days in one sentence, while no-one considers the flaws in this thing they made up. CT, I did this to prove you were better than, say, Golden Sun. I don't appreciate making this hard for me at the last gate.

But ignore that, because this battle and overall ending is one of my favorite in JRPGs, a perfect example of how to form challenge around more than just making numbers sufficiently high. If you know what you're doing, this boss, the game's final challenge, is perfectly beatable without any tricks or high stats. The problem, however? You don't.
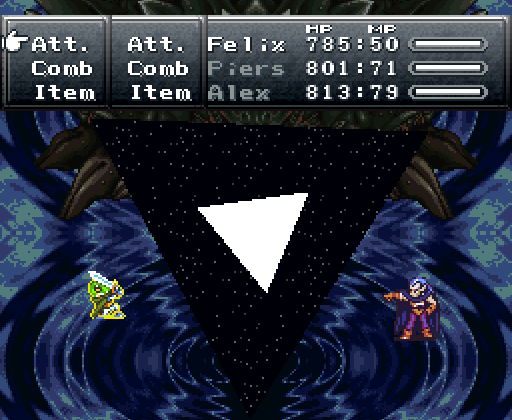
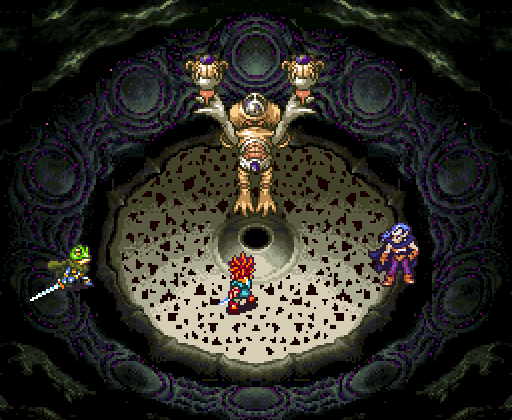
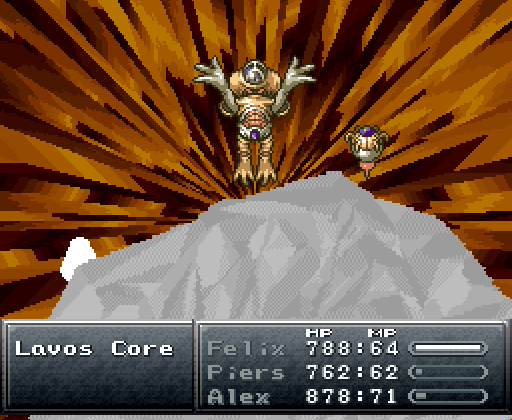
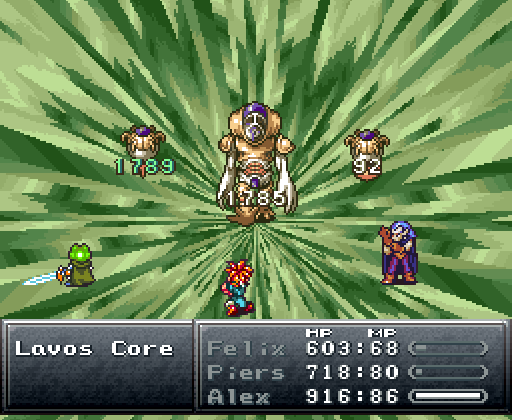
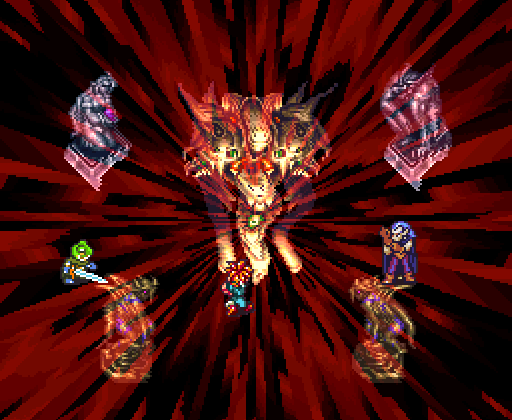
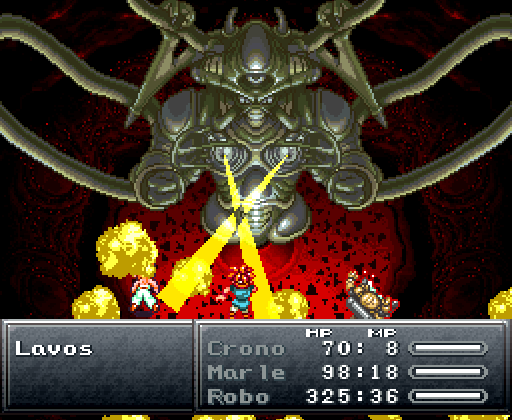
By design, the game fully breaks all the rules and patterns you've come to expect from its battles, and this boss is placed after a series of recaps and one which follows them all to a T (you know, in case you've forgotten or are reading an LP that never updates or something). As with half of the fights in this game, Lavos consists of two fairly less-powerful bits and a stronger main core. The difference?
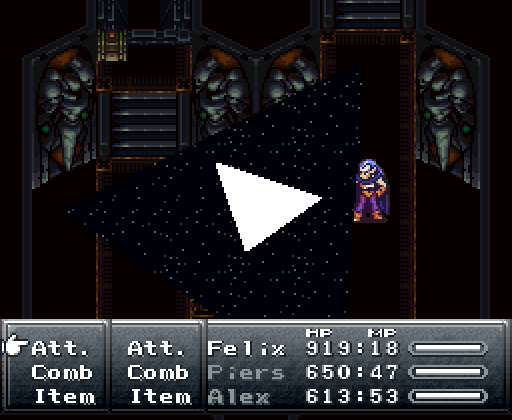
This is the left bit.
This is the right (er… center) bit.
This is the core.
Chrono Trigger knows you'll make the assumption that the central humanoid figure is the core. Once you do, there are three main approaches to battles like this, and all of them will get you into trouble if you fail to catch on.
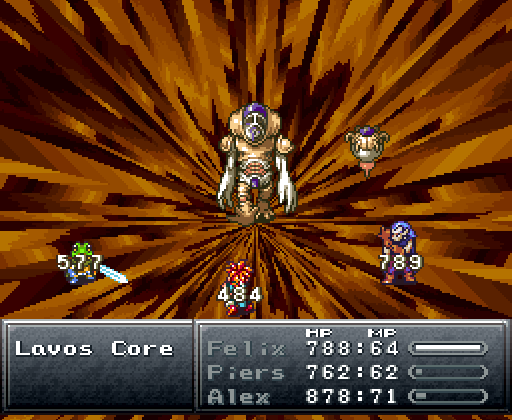
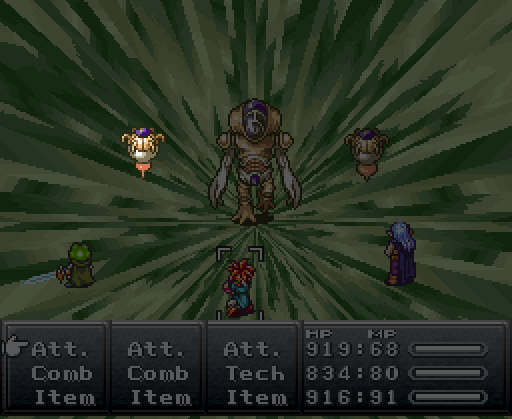
Option A is to take out the side elements before tackling the center. The left will die quickly as long as you hold off on magic, but the center will soon overwhelm you with the strongest attacks of the three. The core, with 30,000 HP and a defense boost from bits still alive, will take far more than you would anticipate to go down; unfortunately, the center bit also has enough health (10,000) that simply attacking for a turn or two probably won't clue you in.
Option B is to focus on all parts at once with your powerful techs. Because the left bit absorbs any magic and the core on the right is well-guarded, the center bit will die before anything else. Unlike when a core is defeated, the others will not follow suit, and the left bit and core will counter-attack on their own. The reuse of X-strike will more than make up for the loss of the center's attacks, and neither element left will have taken a dent.

Option C, in a regular battle, is ignore the side elements and focus your strength on the "core", in this case having the same repercussions as B. While it's certainly possible to recover from this by killing the bit on the left, it's not obvious which will die sooner and easy to die if misallocating attacks.
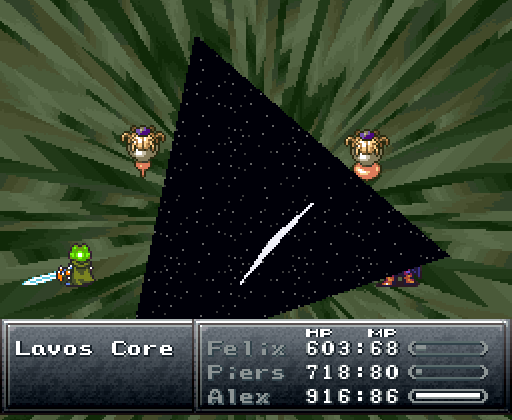
The upside, however, is this boss is more about strategy than anything else. If you pay close attention and hold back assumptions for how an end battle should work, you'll see an occasional message which gives you a clue:
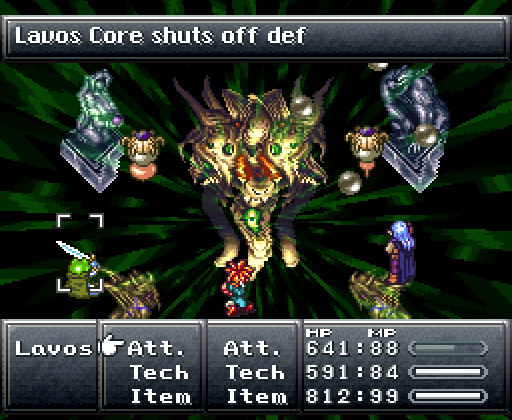
Several turns into the fight, well after one of your plans will go wrong, the core will start shifting defense. Entirely pointless from a gameplay perspective (it rarely lasts more than a turn), this is your clue that the core is the sprite on the side. Once you take note (if you watch someone play the first time, it's often far longer than you'd expect), you can now start adapting an earlier strategy knowing full well which is which.
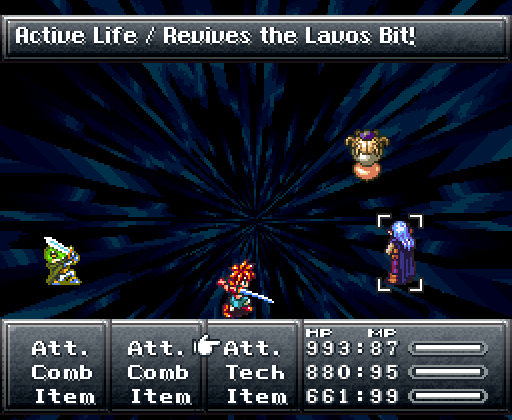
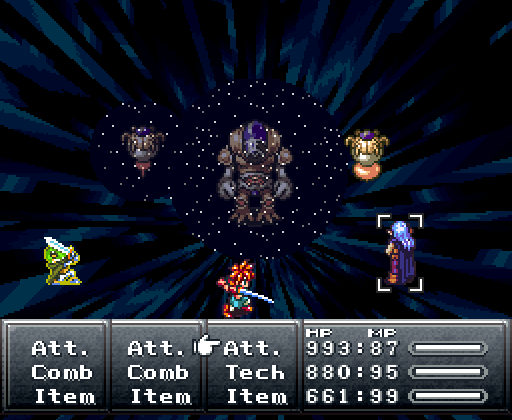
First, take out the left bit; it's by far the weakest, guards the others by simply existing, and can heal the damage you cause if allowed to stay put. Next, tackle the Center Bit, possibly now using magic so the core takes collateral damage. Once those two are gone, the core on its own can do nothing. Attack it like mad with your strongest attacks, cure when it turns on defense, and start the process anew when it brings back the bits. From there it's just a matter of watching the show in the background and basking in the end of the game.
I love this boss fight. Square has a habit of trying so hard to make endings big that they often throw sense out the window, crafting strange laser light shows outside the game's logic and nursing reliance on cheap tricks or grinding to make it through long fights alive. Here, the end boss is suitably flashy, but it never approaches self-parody and works as a capstone, not a non-sequitur. The refights and second form act as a safety to make you prepared, but its structure makes even a 10 level difference have next to no impact at all. You feel outmatched when you start it and invincible after its done, and the trick is so simple it doesn't seem crazy or cheap. All things considered, it's absolute top notch design.
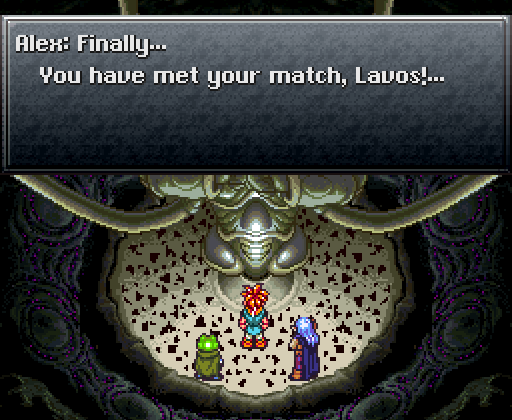
But we don't really care about that anymore. Let's do it again at level 1.


Once inside the Lavos cave, a teleporter lets us travel to the End of Time. You may notice that this fits very poorly with the framing device of Zeal having summoned the hedgehog in 1000 AD so as to destroy us and probably everything else. Rest assured, this discrepancy will be throughly explained.
Oh.
I know I just praised this game for not becoming absurd, but that might have been laziness more than anything else. This may well be the most half-assed resolution to something in any game I've LPed except all the other ones.
The Black Omen has indeed vanished somehow, but that doesn't prevent us from going back and redoing it without bosses (also for an entirely sensible and fully existent reason that let's just move on). While this is a great place for grinding if for some reason you want to do that in this game, we're going to restock on Megalixers.
I know it's hard, but temper your excitement if you can.
With that out of the way, we can "wake up" by having frogs throw our ejector seat at the Epoch, from which we choose Apocalypse Mk. III. Normally, doing this once it has wings will see it crash through to Lavos' interior, skipping the refights and shell battle but also destroying the ship. Because we've beaten the shell, the only upside to doing this over the bucket is watching the following scene:
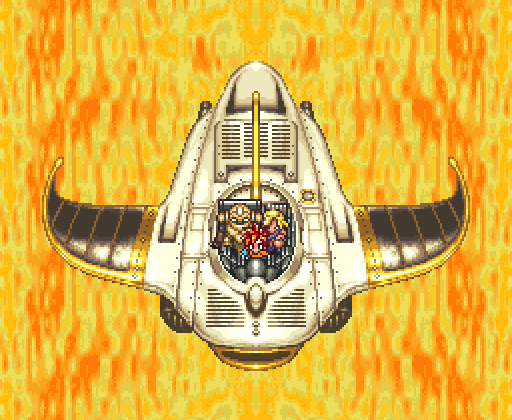

So that's fun (bonus video version here).
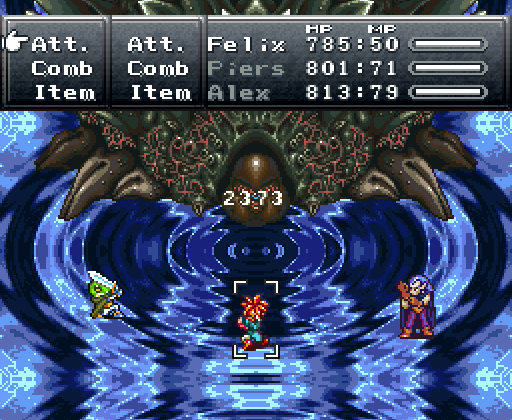
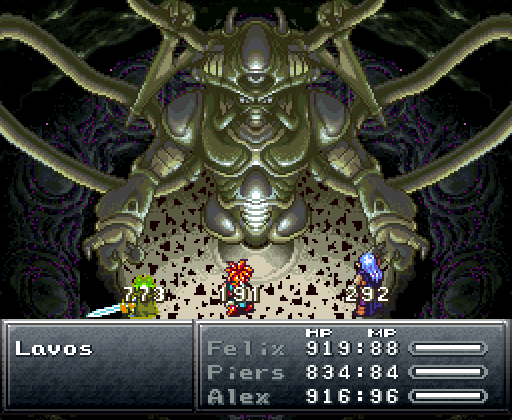
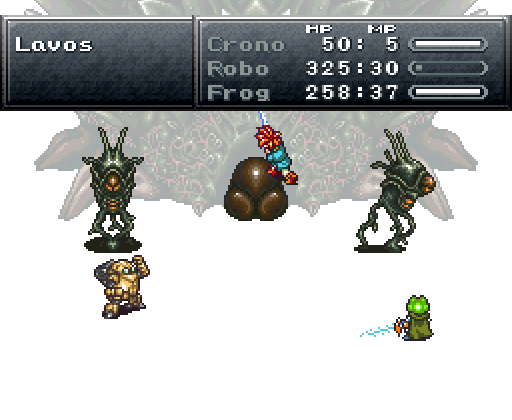
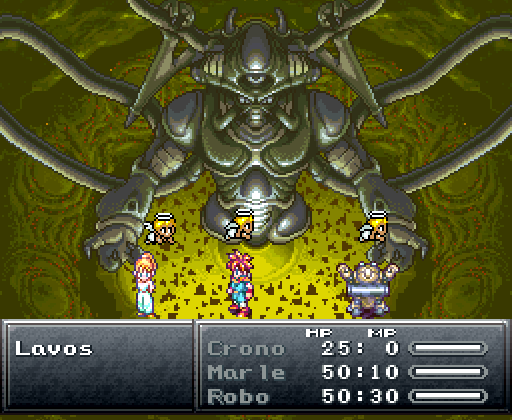
The battle itself will be shown at the end, but here's yet another quick preview: Crono is given the Rainbow, a Haste Helm, White Mail, and a Gold Stud. Marle gets the Valkyrie, Prism Helm, White Mail, and another Gold Stud. Robo gets the Terra Arm, a Haste Helm, Nova Armor, and the Greendream. No other team will stand even a chance at a low level, for reasons which become clear in about now:
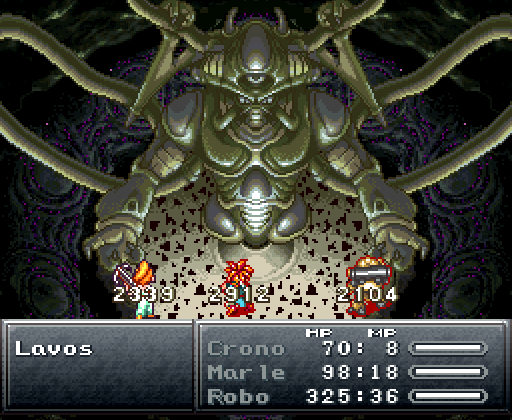
Lavos' nipple beams instantly kill our whole party, including Ayla and Robo with barriers/shields. Crono and Marle need MP-cutting Gold Studs to use an invaluable Triple Tech, so Robo is given the Greendream from the lemonade/trees quest. The Greendream is a one-time-per-battle item which instantly revives upon death, and Robo with ** speed and a Haste Helm has just enough time to bring back the others before some attacks from the arms.
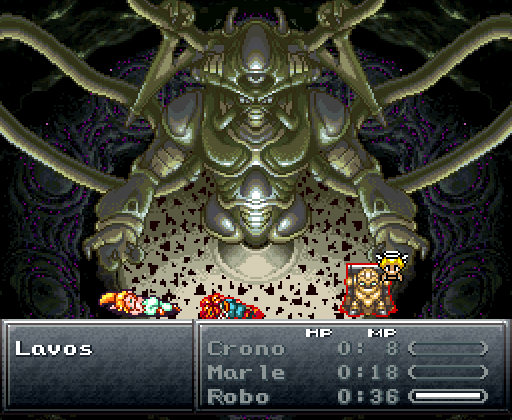
Even with haste and full speed there's an element of randomness to turn order, and Robo needs to start the battle such that he's whacked with a full ATB gauge but just before options appear (the gauge will reset if any less than full or if you've had a chance to attack). Getting this right will take a few tries of fighting small battles and Epoching back until it works, and even then it's easy to screw up if your battle speed isn't its slowest or you aren't on the ball. To see what I mean, here's an instance of being too slow:
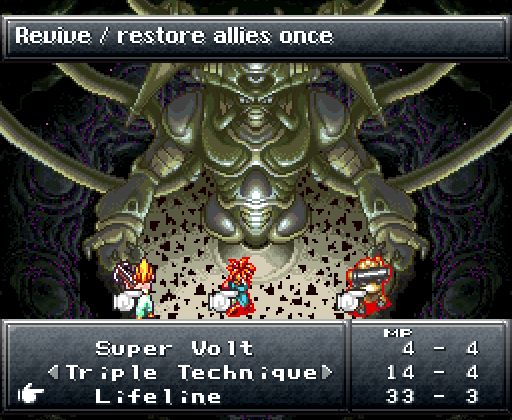
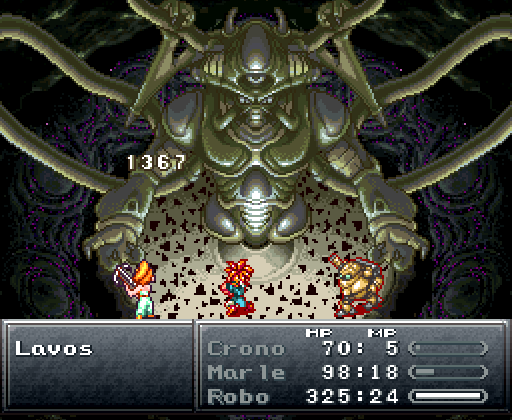
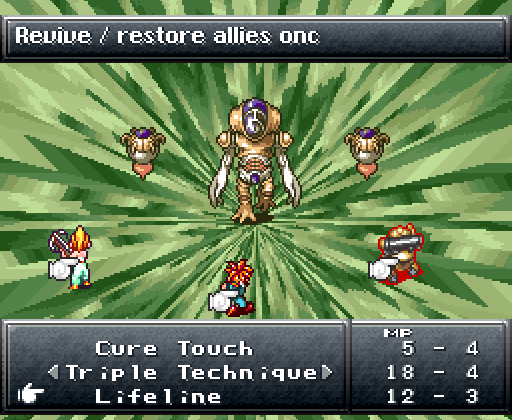
If all goes well, Robo revives the two others (starting with Marle, such that she'll have a full ATB gauge at the same time as Crono, with haste), two of the characters die from the arms, the member remaining brings back the others, and all three can quickly use Lifeline. Lifeline, the best triple tech in the game, acts as a Greendream for all members. Using it every twelve seconds is vital to staying alive.
Immediately after one Lifeline, Lavos will kill two again. Re-Lifeline and quickly heal up. Lavos will again use his nipple beams, and now there will be a chance to go mad.
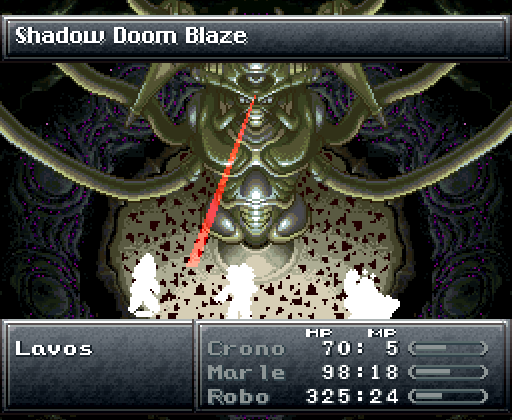
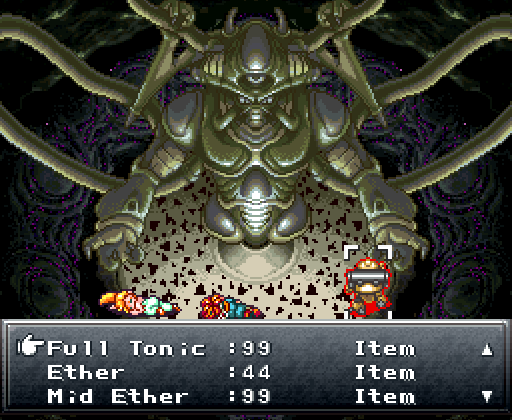
From here, the battle's straightforward. Focusing first on the arms and then on the head, Crono Confuses, Robo falls back on Uzzi Punch, and Marle throws Megalixers each turn, recasting Lifeline whenever you die. At level 1, his many attacks are near-interchangeable; as long as your items are used with abandon you'll be able to fully keep up.
Because the second/third form counts as a separate battle, recast Lifeline or get to a point where you can. A fully connecting Confuse coupled with Uzzi Punch takes down the Left Bit, and from there killing the center is a must. All but one attack, an HP-To-Half which is safely ignored, can instantly kill the whole team. From here it comes down to remembering Lifeline, gobbling Megalixers, and hoping for a decent bit of luck.
This LP is by no means over; there are multiple endings, bonus DS scenes, and one more surprise to show off, but the primary low-level playthrough is finally done. Set aside the average length of time you normally would this LP, grab some caffeine pills, and revel in the conclusion of a wonderful game. Lavos is about to be whacked when we're weak: