Part 112: Fortress Siege(Blaze)
Fortress SiegeWe've officially made it to the Alpha Sector! Hold on to your hats, we're going to be here a while.
Video
We've already seen the greeting text from the developer - first minute or so of the video if you want to read it again, or back a page or two in the thread.
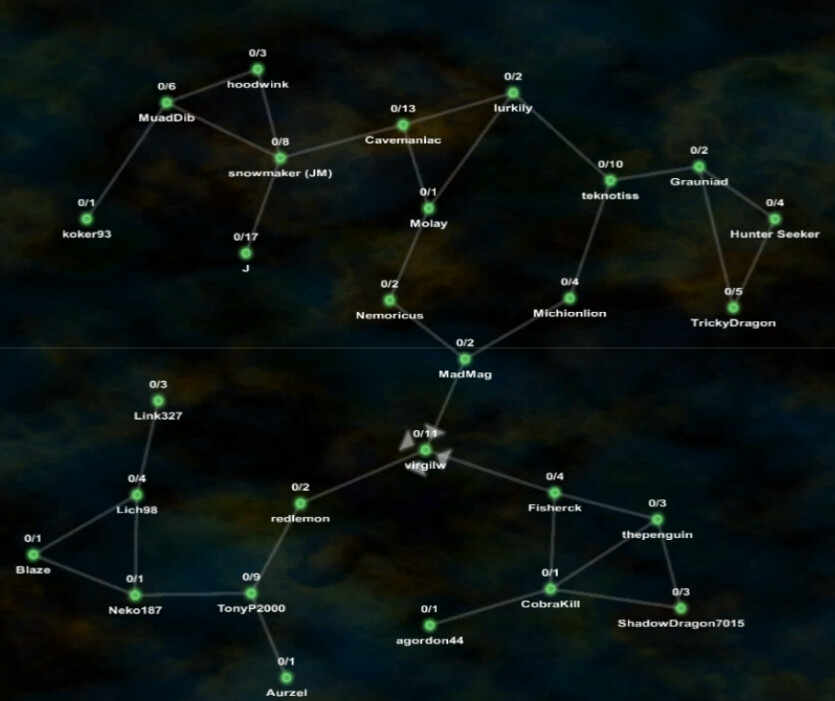
It's kind of hard to read the names here, but this is the sector map. In thinking about how to go about attacking this area, I decided to do the following:
** Play for at least an hour each session, getting through as many maps as possible in that time. Early evidence is not favorable on that front: only one of the first three sessions ended up with me getting to more than one map, and that'll be a long update since the second one proved to be deceptively lengthy.
** Save the systems that have achievements for last. That's virgilw(developer), MadMag, and Grauniad.
** Go through the other systems in order from least amount of planets to the most, ties resolved by RNG.
All of that led me first to Blaze, in the bottom-left.

That's a real special map preview; it's a blank brownish/tan square! How exciting!!
** Yes, I know it is a rectangle, not a square.
All I could say when I saw this was "Uhh ... ". I didn't even know it was a possibility to start a map midway through. Since the usual CW thing is that the startup and reaching equilibrium is where the primary challenge lies, you might think this will be an easy one. If you are tempted in that direction, all I can say is this:
[ackbar]IT'S A TRAP![/ackbar]
I estimate that I spent about five hours on this map over a 3-day period. It was close to that if not quite that long. I do believe that is an LP record. One I'm not anxious to break.
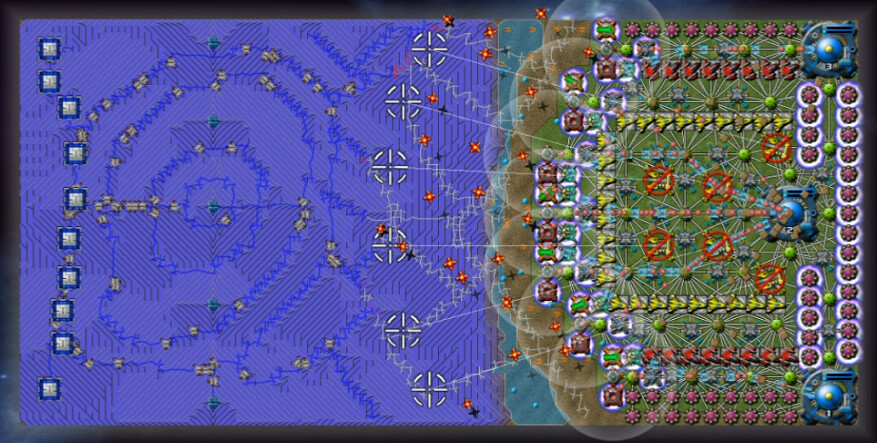
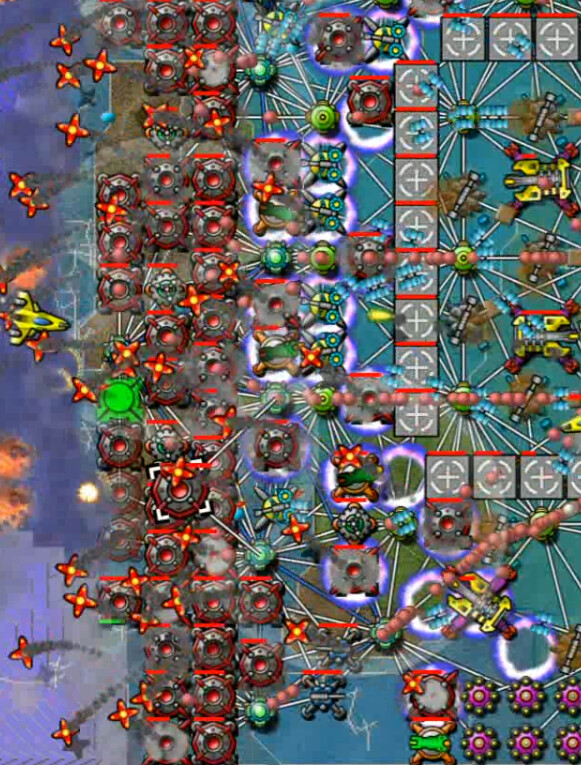
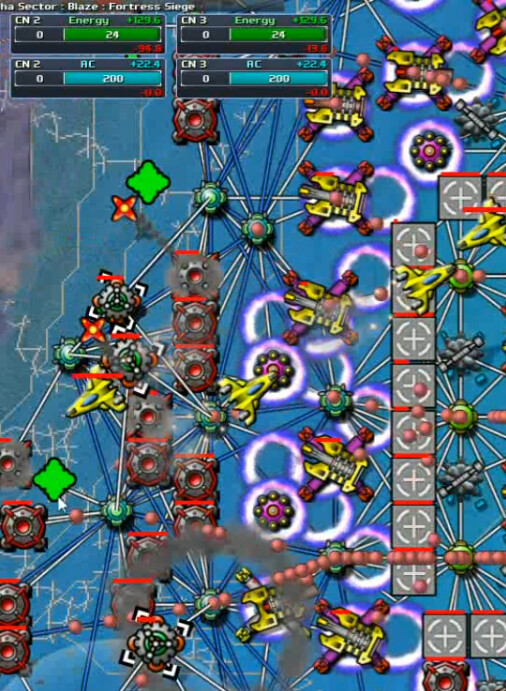
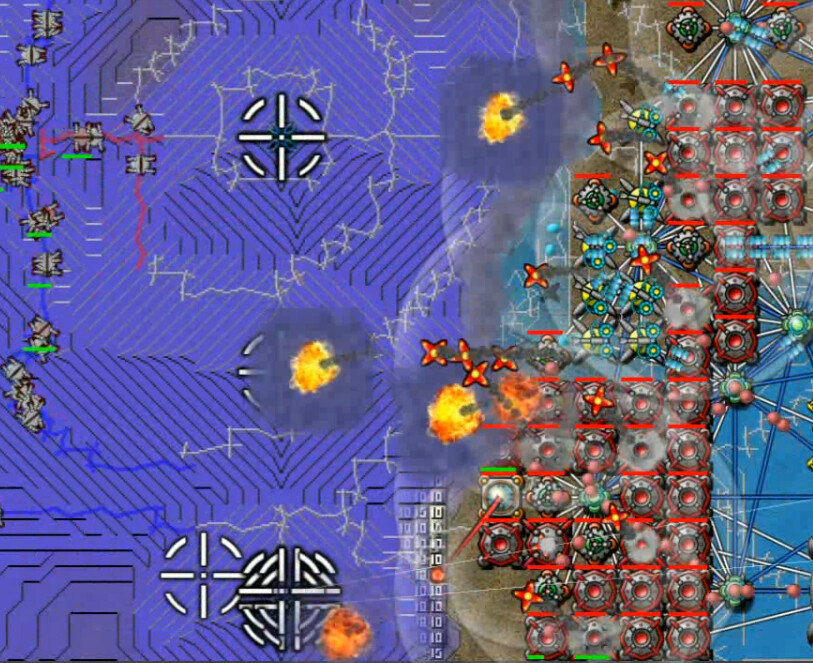
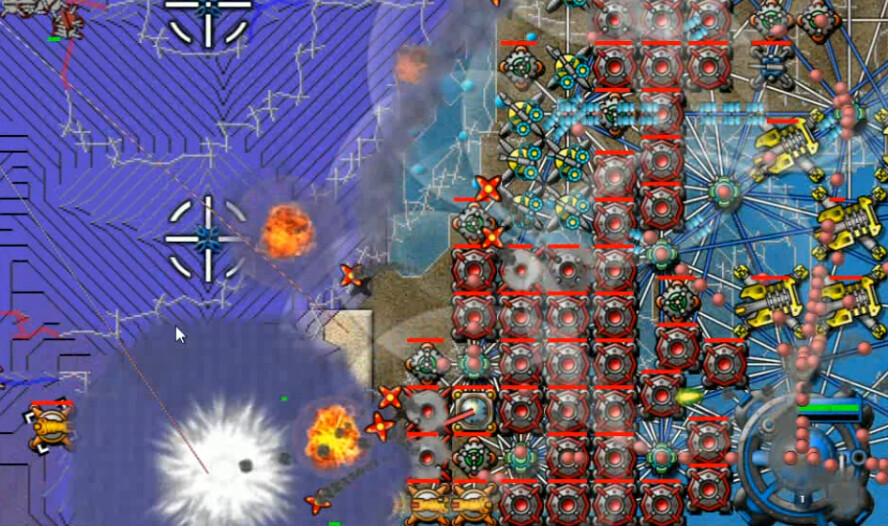
Here's a closer look. There's everything here. Shields? check. Power Zones? Everywhere. Snipers? Yep. Reactors? Tons of them to power all this. Berthas, Mortars, Runner-focused green Pulse cannons, Snipers, Strafers, Bombers, Sprayers. And most of it is even useful.
I look around and start activating the Berthas on auto-target. Despite that, and the rest of the firepower displayed here, the wave of Creeper is too much and I start losing things.
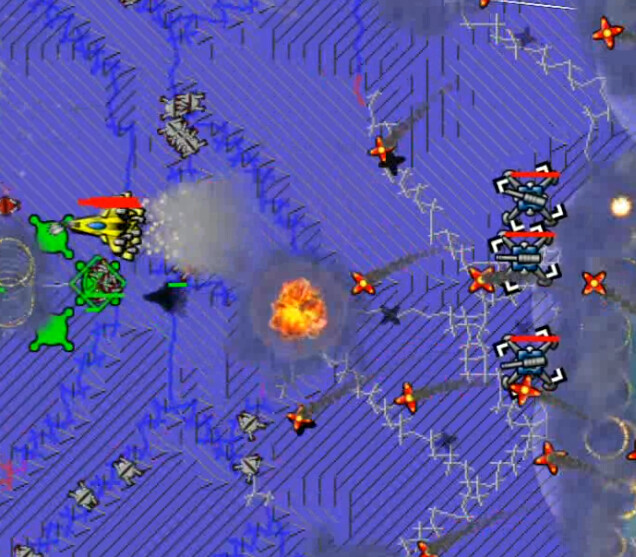
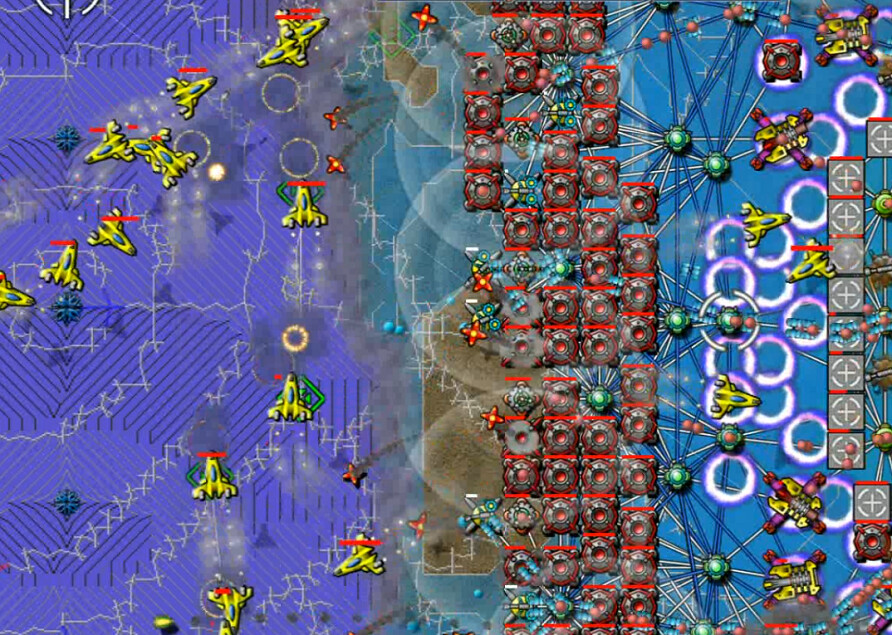
The next thing I do is get the Strafers in the air to try and relieve the pressure. I have an issue band-selecting them, and managed to not notice in between everything else going on that I sent my snipers with them here. They, uh, aren't meant for that.
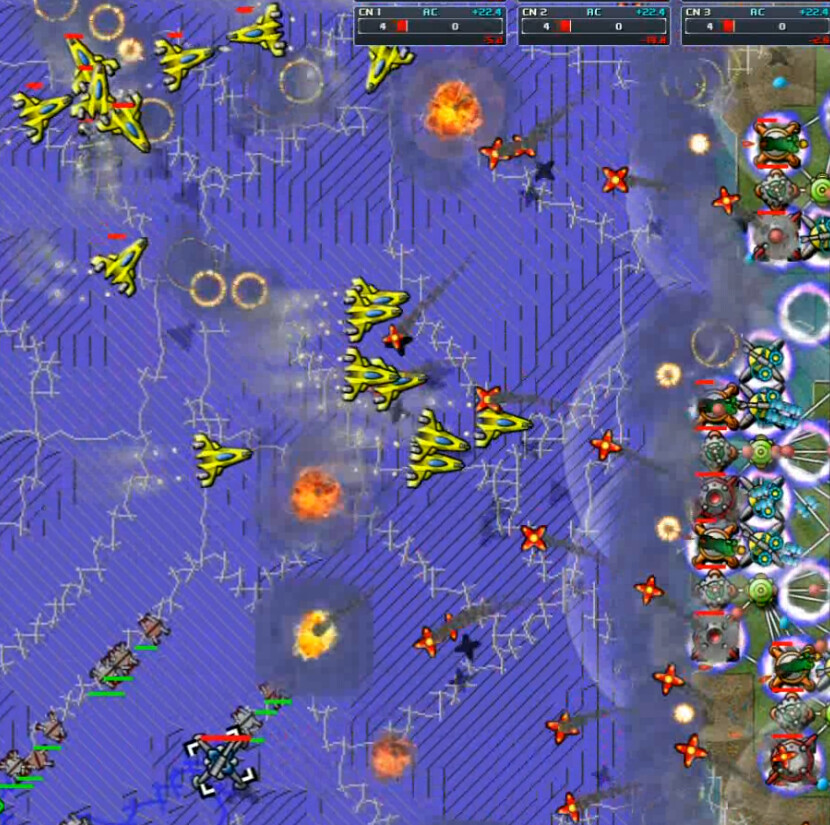
Soon I got them all out there. Looking at all this chaos, something like two dozen strafers and all the constant mortar fire, I would submit for your consideration that by the standards of this level, this is what's known as a skirmish or light engagement.
I put mortars up on some PZs, but then make the same mistake with the strafers again. I find it quite difficult in these close quarters to select everything I want and only them. So here goes a Sprayer and a Mortar Trio to suicide-bomb massive depths of creeper ... with the expected consequences.
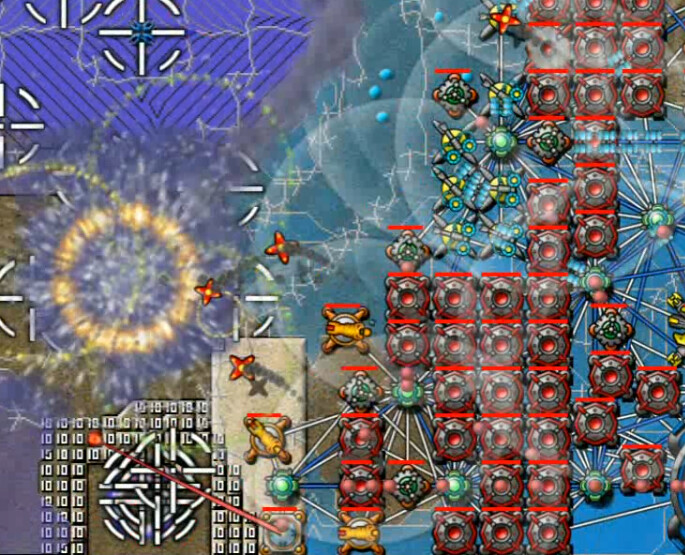
The defensive line soon collapses, and strafer launching pads start to go. Time to restart. Just for reference, those five emitters in a row in the west of the map? They pump out 2000 creeper each. With a 0.03s interval. That puts the total per-second output at 333K+. That's just a bit there. Also, the 10 runner nests behind them? 8 of them put out a runner every 3 seconds. That a lot of runners, but it's manageable. The other 2? A runner each 0.03 seconds, for the top and bottom Nests. So basically the map will always be highly saturated with the critters, because they can pump out almost 70 of them a second combined. This is not a subtle map.
Restart is about at 7:48 video. It's the only restart I had to do - the beginning here is the easy part. I get the strafers out first and a little more efficiently, though I still dragged a trio of snipers with them, then activate the Berthas, then start packing in Mortars - and this time I keep them there. This is basically the right way to go about it, just escalating firepower as quickly as possible without doing stupid suicidal creeper-diving.
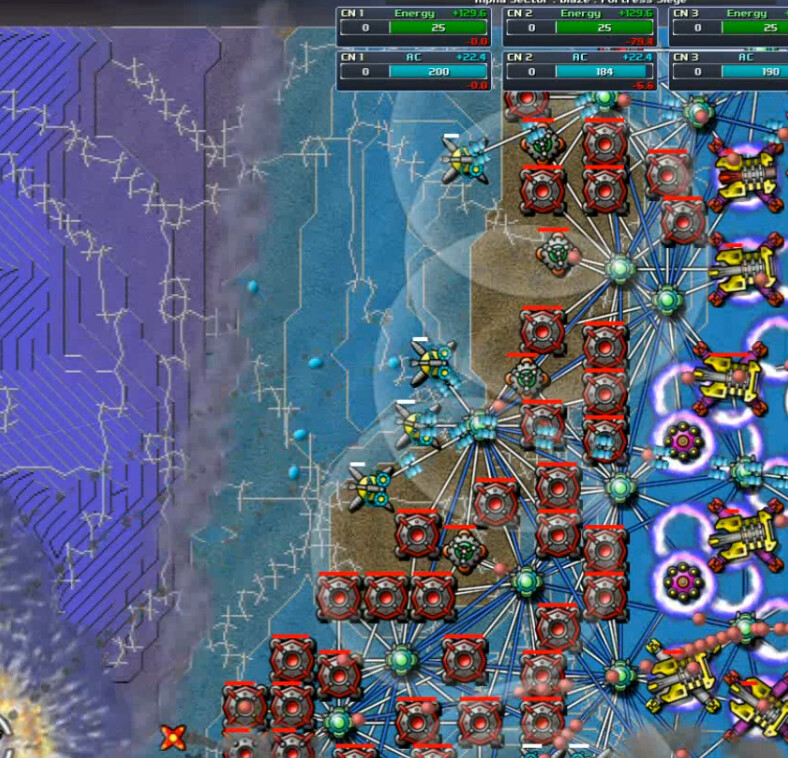
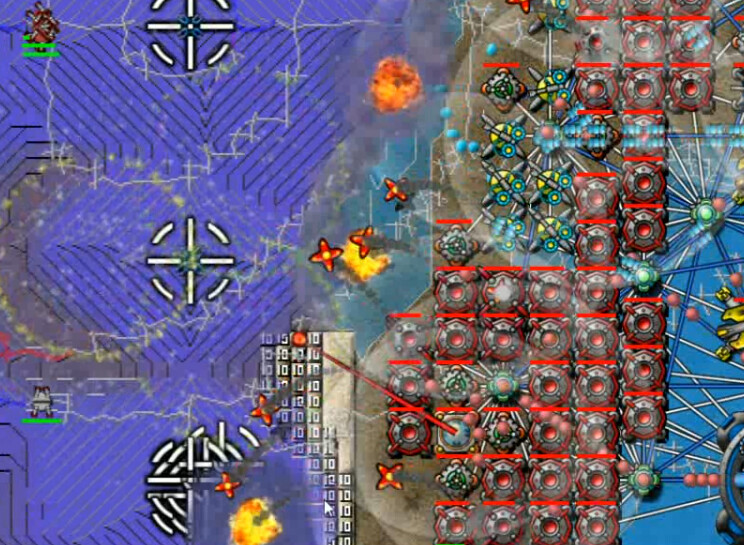
This is about seven minutes into the mission, and I've taken some damage to the line still but now we're starting to push the creeper back. Slowly. The starting depth of the creeper around the emitters is, I believe, about 2000. That's right, approximately 20x the maximum terrain height. Several minutes after this, I begin to think I'm making progress, because I've got it down to about 1700 or so. As much spam as you see here, this is merely the point at which I can start to effectively escalate, which literally requires creating more room to put more weapons down. Energy is not an issue at this point.
A couple things to note; there are no Totems on this map, so that means no upgrades. However, we are given some upgrades I think; range seems to be somewhat higher than usual at least, and stuff builds really quickly so I think the build speed is maxed out or close to it. It wouldn't surprise me if I learned you start at basically max upgrades on everything.

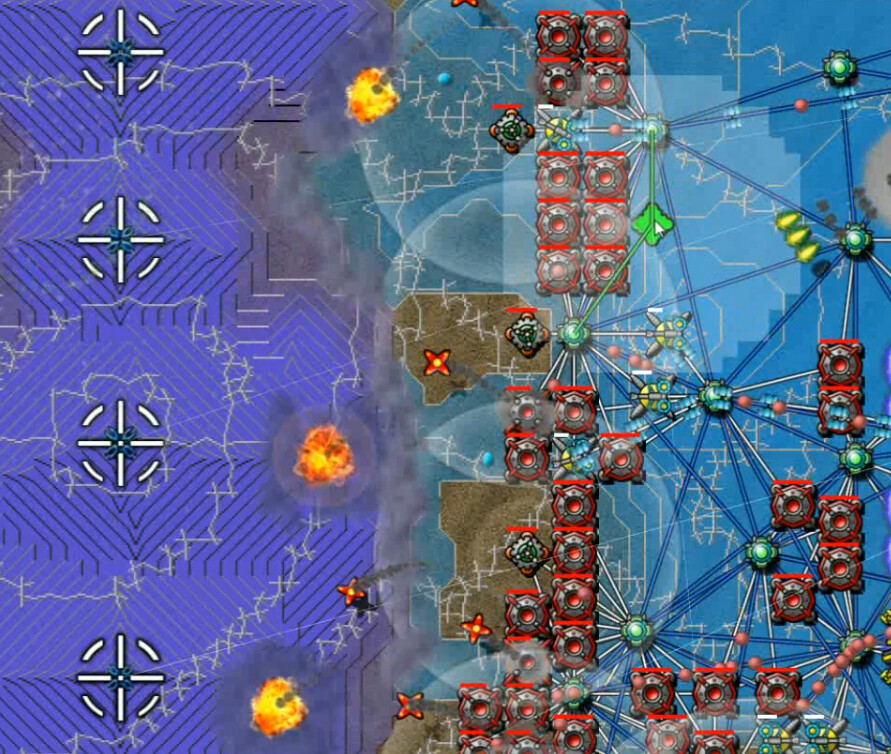
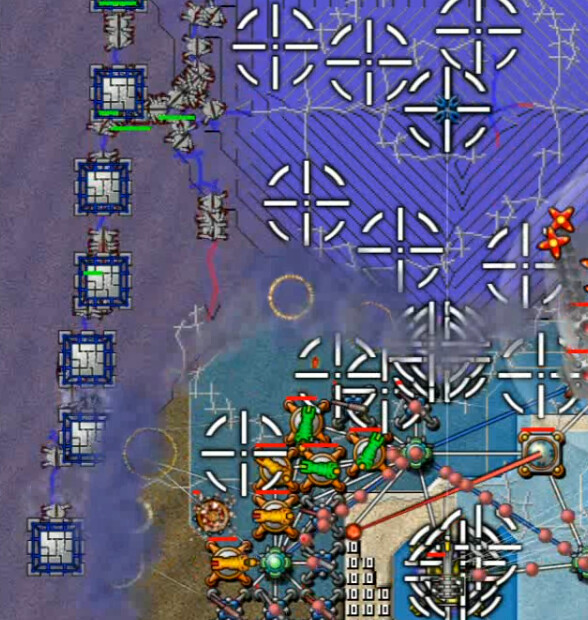
Here's another five minutes in, and I'm starting to have some trouble at the top of the map. I didn't quite have as many mortars as I could have initially, but I also had moved past the assistance of the shields up there. I would eventually realize that the basic way to advance is to keep shields and sprayers near the front, helping secure room to place the next row of mortars, and then push forward gradually by leapfrogging.
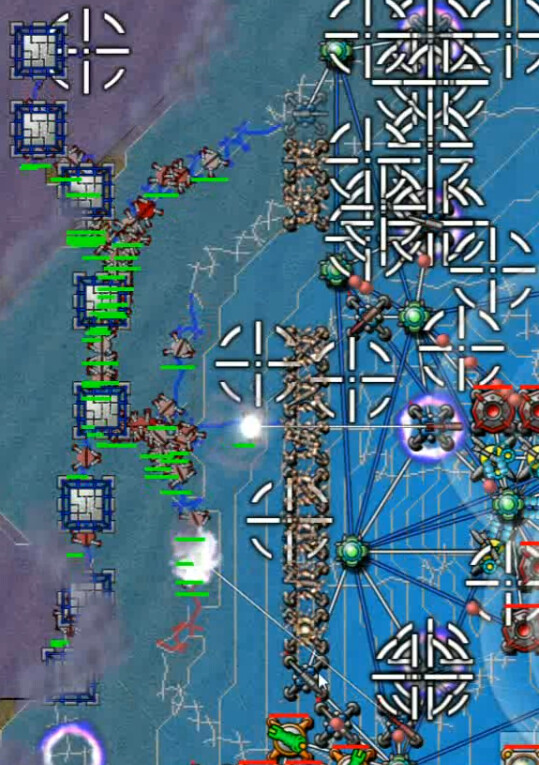
32 mins video, 23 mins mission time here. We've gradually pushed forward enough that some of the further-back SuperMortars can't do much, so they are pushed up into the line and a couple of SuperBerthas deployed such as the one at the bottom here. This is generally the way that things start to snowball a bit, and the creeper tsunami begins to get worn down a little faster. Emphasis on little - there's still a crapton of it.
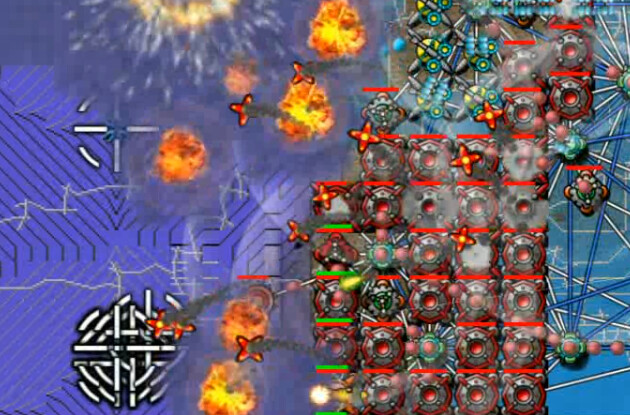
By this point - 43 mins video, 34.5 mission - we're advancing about as fast as I can move things forward, and I start doing group weapons leapfrogging to speed things up. So we're home-free, right?
Nah, this is just the eye of the storm. As you can see, we're now roughly halfway from where we started to the emitter row. A little further forward than this it gets harder to progress because of how close you get to the apex of the flood. Oh and by the way - earlier in the thread people were talking about whether shields can be overwhelmed by a sufficient amount of creeper, or if you can hold back an infinite amount given enough energy to power them.
They can get overwhelmed. Really, they can. I proved it repeatedly on this level. All for SCIENCE, naturally. And also my own insanity.
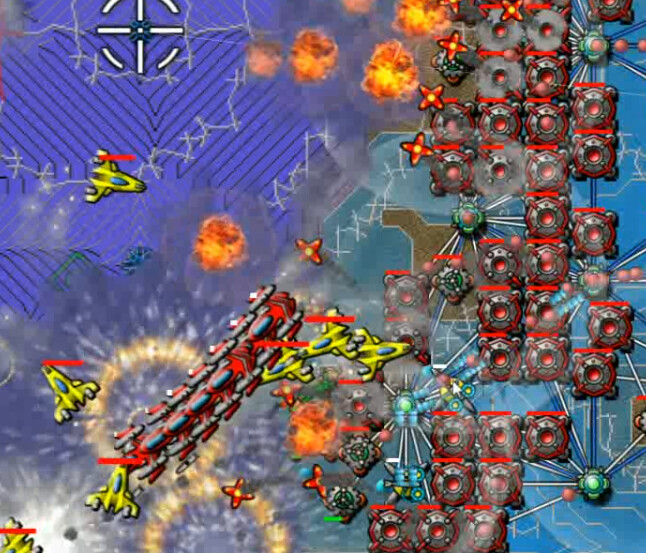
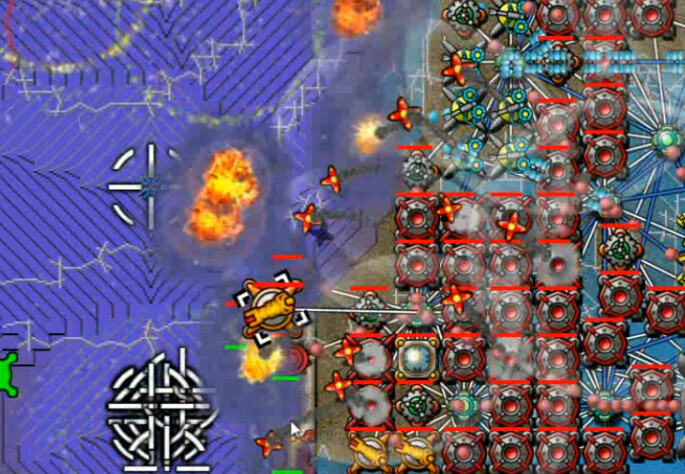
54 mins video, 56 mins mission - a little before this I started aggressively cutting out repetitive stuff. Anyway, it's hard to even see what's going on, but I've built a bunch of bombers to add to the flood at that bottom emitter, all the strafers are shooting over there, I've directed more Bertha fire at it ... and I still can't get close enough to place a Nullifier. In retrospect, the way the creeper piles up at the edges of the map probably makes this not the best place to go after it. But regardless of the where, how to get close enough to get this done is a serious problem.
I targeted more and more berthas over there to help out, which caused this problem in the north. No longer being thinned out as much by our artillery fire, the creeper began to overrun our defenses. And at this point I just saved the mission and decided to try again another day. I'd had enough and didn't know what to do.

The reload happened at 55:48 video, just over an hour mission time. In between, I'd looked up the mission in the CW forums. I didn't really learn anything new there beyond what was already in my head, except that some people have been able to beat this mission much faster by taking guppies and shields to the rear where the nests are at the beginning. I don't see how that would work out with this much creeper, but whatever.
The two main ideas, which I was already thinking about, are to stagger Bertha impacts and build a platform for the nullifier with a Terp. That doesn't do a great deal to slow things down, but as we will eventually see, it does enough. First I needed to deal with the recovery here. This is the first part of that: spamming more Mortars further back in the north, and relying on those and the modest amount of AC that's built up to slow down the advance of the Creeper Wave.
Then I set all of the berthas back on auto-target and got rid of the bombers. In trying this out a few times, I discovered that they aren't really of much use; I want to use as many sprayers as possible on the northern and central parts of the map instead. Not on the south, because I want to do something else there. Then I got some more shields up and moved them into position here to help slow things down more.
The final recovery phase was mortars and sprayers, along with some spares of those and the shields. Combined with the redirected bertha fire, this created a secure defensive situation again within less than four minutes total, despite how terrible it looked initially.
I now had a very specific idea of how I wanted to proceed. This is roughly as far forward as I can have things without the pressure from the creeper significantly increasing, so I've got an ordered line with shields all at the same point from an east-west perspective, more of a military order to things here. I'm still going to dress it up a bit and throw in more mortars after this point, but this is pretty much how I want to hold things for the northern half.
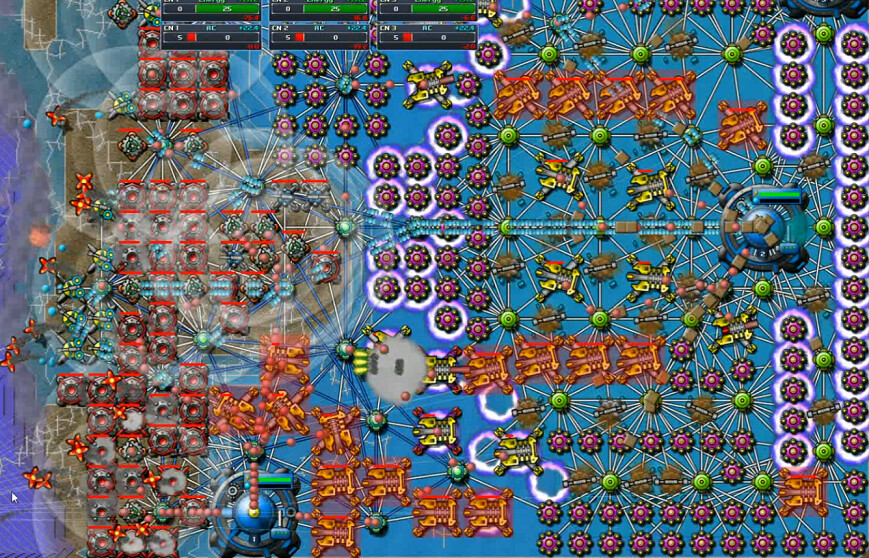
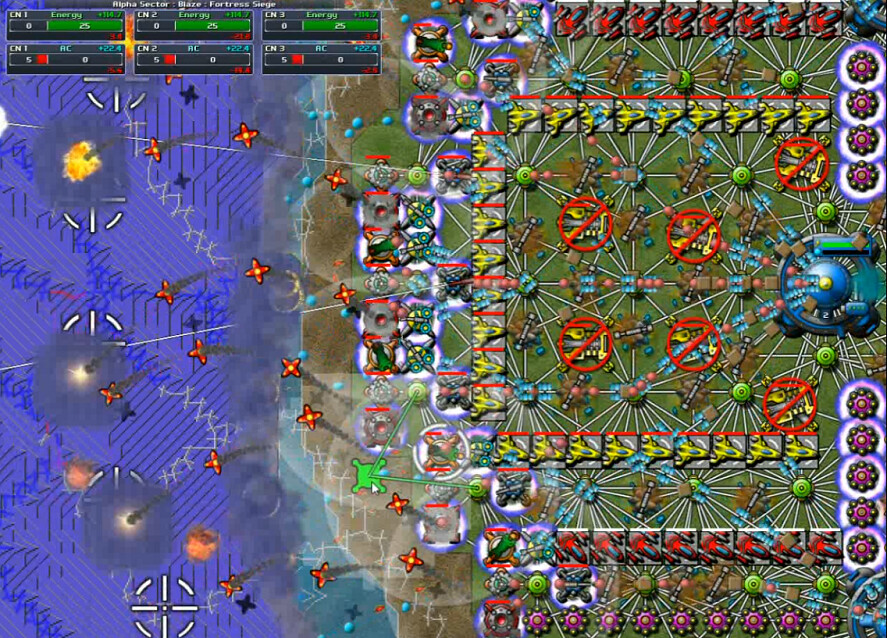
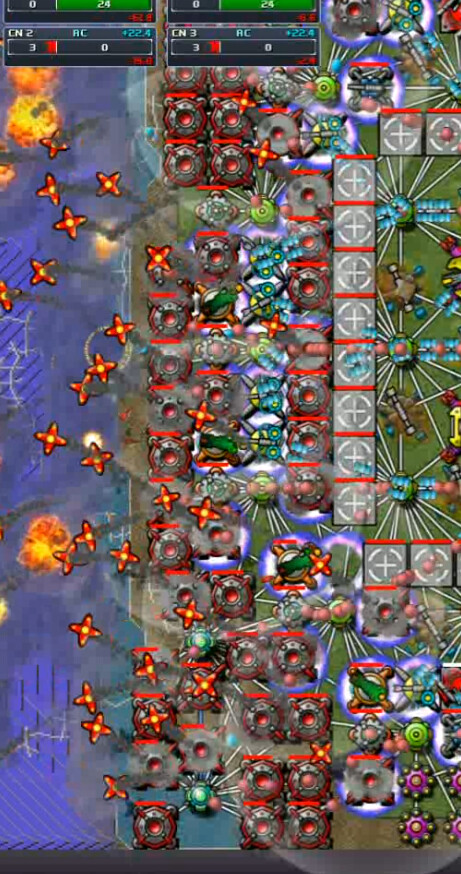
This is later when I get most of the final setup in place. 1:14:xx video, 1:25:xx mission timer. I had to shrink this quite a bit to fit it all in one shot. Points of interest:
** The sprayers are concentrated in the center-south region, to help relieve a little bit of the flowing pressure on the southern wing where I'm going to push forward and try to nullify one of the emitters. I want as many mortars as I can put down there for now to maximize killing power - I experimented with sprayers but there's just better in a defensive role I think.
** In the middle of the map, there's a bunch of SuperReactors. I'd rather have berthas there, but given the number of them I need - as many as I can possibly cram in - I have to have the energy. I lost at about this point a few times because of some annoying things happening. One is that if energy starts running low, you're dead. By the time you get more going, half of your defenses are destroyed, and then you lose more, and the firepower isn't going to keep up with the flow. This happened to me about three times. So I need the energy and the space for it.
** A lot of the berthas are disarmed. That's because I want to spread out their impacts for maximum effectiveness. This way I can time out when I hit the arm button so they can fire during a window when I don't have a bunch of others firing. I wrestled with this for a long time, and most of that is cut out of the video just for the sake of viewer sanity.
** I moved one of the command nodes up to give maximum packet support to the southern push.
** I've got spare shields hanging around for when I need them. That's vital to holding off in any breaks in the line start to happen. It can buy time. Not a lot of it against this much creeper, but some.
** No strafers or bombers - they are just a relative waste of space.
** The Berthas that aren't focused in the south are specifically set to targeting emitters -- I generally ended up doing most of this with one standard and two SuperBerthas hitting each of the other four emitters, which seemed to be about the right balance. Auto-Target proved to be a disaster, because at a certain point they would ALL switch to targeting the southern one. I think that's because as I increased the pressure on it and got closer, the creeper was more densely packed together and 'piled up' more, whereas the safer distance on the rest of the map allowed it to be more spread out. Of course, once this targeting switch occurred, the northern part of the line would flood again, unable to stop the tide without Bertha support. I also failed that way multiple times.
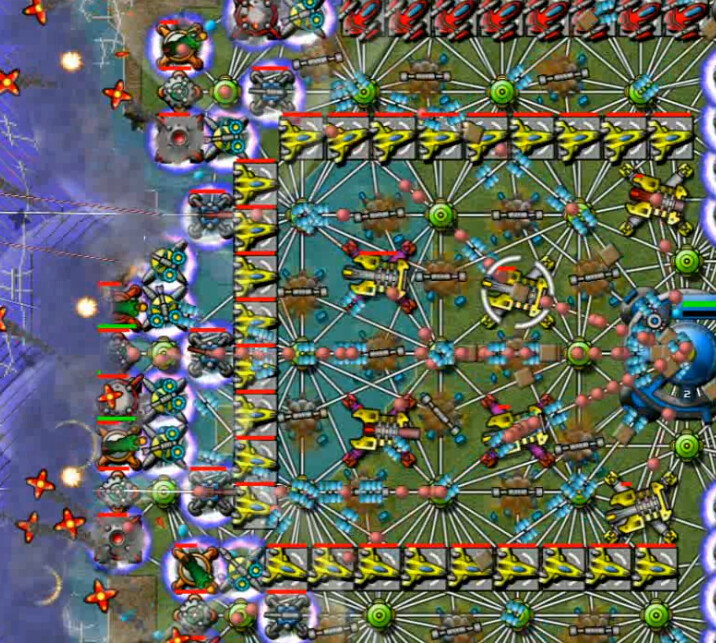
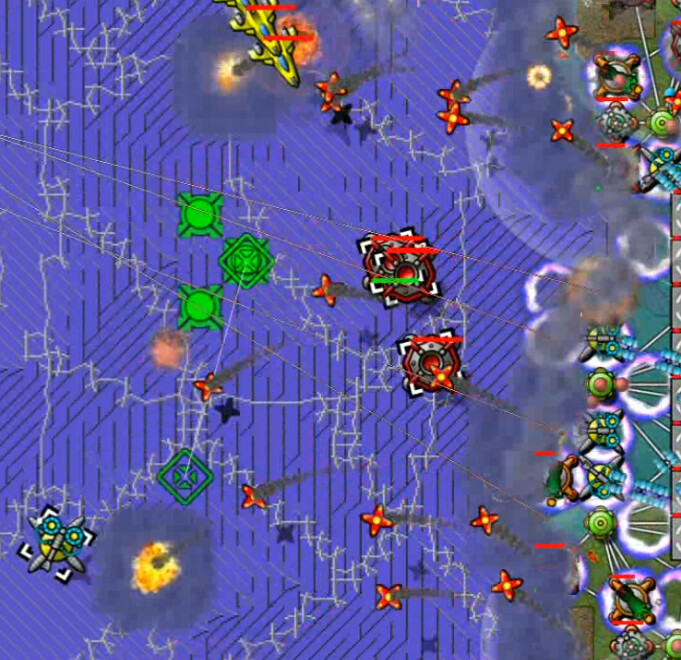
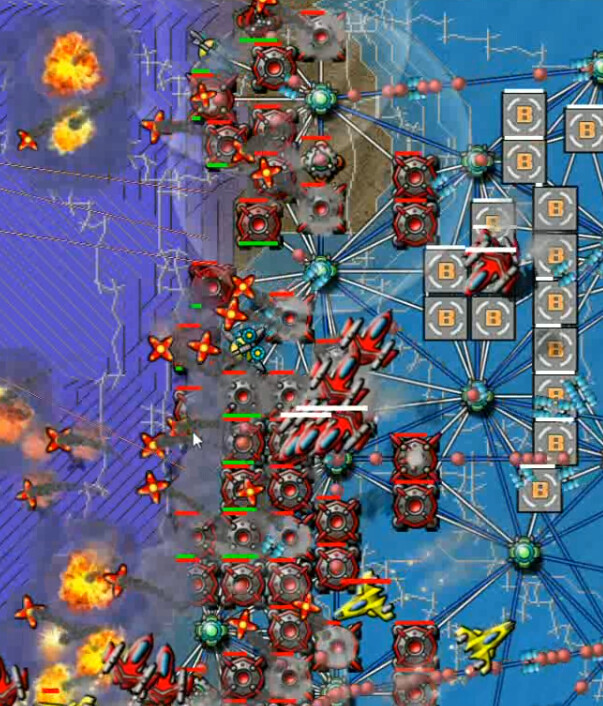
1:20:xx video, 1:36:xx mission. The Platform-Terping begins. You can see a bunch of runners here - the bertha artillery impacts ensure that they stay at the back, as they are regularly pounding the Digitalis sections anywhere at emitter-level or further east.
As for the Platform, it is at the precise point that I need to get to in order for a Nullifier to be in range. Even with 15+ Berthas doing staggered-fire on this emitter, I can't keep more than one of them close enough to work. I might have been able to cram in two somewhere if I'd gotten inventive with it, but this is the start of a fairly long process of building up a home for the nullifier. As it progressed, I had to rebuild a lot of Mortars and Terps over here, and at times it didn't look like I was making any headway, but eventually this construction did start to slow down the creeper flow a bit.
1:24:xx video, 1:45:xx mission. Now the Platform is basically resembling steps. I've got some of it maxed out on the east side, but not enough to place a nullifier yet. The flow is largely under control, but there are periods of time that I was never able to space out artillery impacts evenly enough. About five minutes later I had space to place it ... but still couldn't protect the weapon.
Also, around this point if you watch the video you can sense the frustration and sarcasm building in the depths of my soul. And hear it in my voice. If you're sadomasochistic, have a listen for about ten mins.
1:33:xx video, 1:57:xx mission. Close but no cigar. This Nullifier gets most of the way to firing strength, but not quite there before it is destroyed. I tried using more shields than this, vacillating between 2-4 of them along with the mortars and that one cannon at the bottom where the creeper likes to pool. I never came to a firm conclusion on one formation being better than others.
Eventually I just said 'screw it', targeted a couple extra Berthas that I really needed elsewhere, and went all suicide-bomber with these cannons, hoping they'd help a bit, or soak up some of the creeper, or distract it, or whatever. I'd also built the platform a hair wider by this point.
1:38:xx video, 2:04:xx misson. The moment of triumph - it worked. Barely. That white light is the emitter starting to go boom. Me:
"I GOT IT! Hahaha I don't care what else gets blown up, I got the STUPID emitter down!!"
Next, I tried to expand this breach I'd created. Terped up part of a new wall here, and retargeted some Berthas. Not all of them, as that would have required going through like 30 of them one at a time and I was only doing that if absolutely required - with this much chaos on the map it was really hard to see which targeting line went with which weapon. The point from here was to use the power zones to build SuperNullifiers to take out the next one from distance.
1:45:xx video, 2:15:xx mission. My efforts would yet meet one more avalanche of fail. After knocking out as second emitter, I wanted to take out the runner nests. So I went after them - unsuccessfully. Seven snipers in range here, and it's not nearly enough. So many Runners are coming out that they constantly stun the nullifier -- it was literally gaining like 2 ammo packets per minute. On the other hand, I got the Runner Assassin achievement or something like that, to go along with the Bertha Lover one I grabbed earlier in the level, and the Turtle one I'd get when I finished. There might have been more. I wasn't going achievement-hunting on this level, I just got them in the process of ... whatever this was.
1:48:xx video, 2:21:xx mission. So I rolled up the other emitters, and then went after the runners in more force. Look at almost all the Snipers being stunned immediately. That's pretty awesome. Eventually though we killed all the digitalis, which had no more power, and then the runners couldn't go anywhere and became easy pickings.
My final thoughts:
"Know what my biggest achievement is? I DON'T HAVE TO PLAY THIS MAP ANYMORE!! ... as I said, I REALLY hope Alpha Sector maps are not all like this, cause .. I ... might go insane. But we have finally completed ONE. 123 to go, WOO-HOO!!"