Part 124: Tide
TideVideo
It's time to wrap up the hoodwink system and move on.

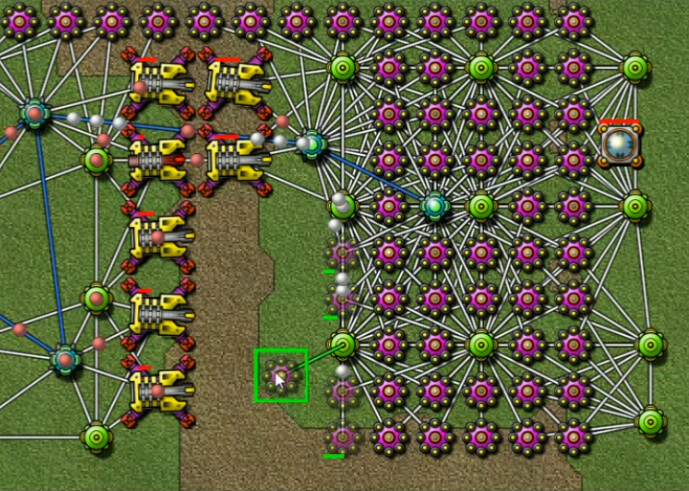
This one reminded me a bit of the floodgate mission at first, but it has no elevation, prebuilt walls, or digitalis. Really it's more Fortress Siege's little brother. The layout is simplicity itself; Totems on the left, a row of Emitters on the right, flat and pretty narrow land connecting them.
Each of the emitters pumps out 500 creeper per second. That's a lot, but not the worst we've seen.

The Forge went up as soon as I had some Collectors going. Then a Terp for the wall to buy us time, and Reactors. Pretty clear this is going to be a Bertha-heavy map - the only real question was where to build the wall. I could have gone a fair bit further before putting it up, as it turned out. I wanted Aether/upgrades ASAP, and then your basic economy-boosting with gradual increase in firepower.
I'll be less bird's-eye with a lot of the shots, but I think the overview is useful to give a scale of how much space my initial build occupied.

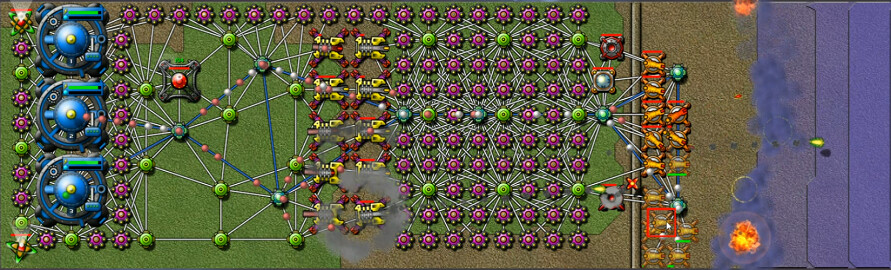
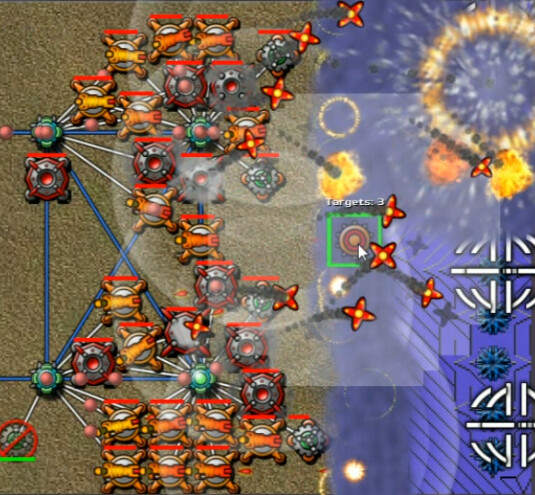
One example of this at about nine minutes into the video, which is a much better way to see it then these kind of images, but an effect that is really obvious and pronounced here is the arc that the bertha shots take. It isn't a straight line. That yellow bit at the top is actually 'above' it's target, and well above any of the Berthas; if it was going in a straight line it would finish well off the top edge of the map. In actuality it'll hit the top emitter in the row. Creeper depth is in the hundreds already.
Meanwhile the wall is built, and soon I engaged on some serious OCD ...
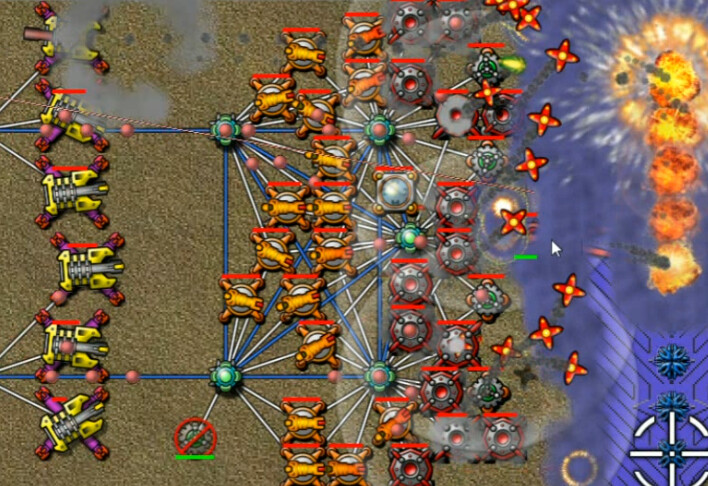
This was not strictly necessary; I was really giving the enemy too much credit here. I could have just moved out further, although by now that would have meant weapons as the Creeper was almost at the wall. I moved around collectors as needed to have optimal spacing with a connecting Relay thrown in every once in a while. It turns out that something around a half-dozen standard berthas is needed for equilibrium on this map. With seven here, I'm perhaps just barely destroying more than is being created. I would of course add more, ending the initial build-up with ten, in two complete rows of five.
Having used most, but not at all of the starting territory, I eventually threw up a couple Mortars and a few Cannons to push the creeper back from the wall. Here I began to escalate.
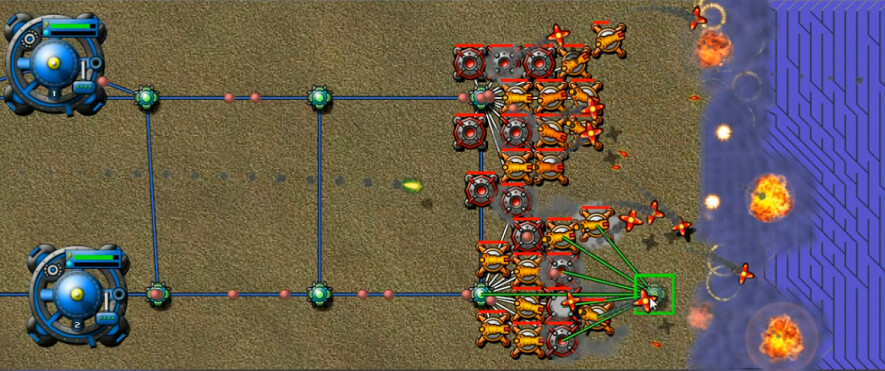
Progress was rapid, but gradually slowed a bit due to the creeper stacking up in a smaller and smaller area. Energy supply was no problem with a couple of Command Nodes coming along for the ride. A pair of Relay Rows ensured plenty of connection range everywhere.
Within 10 minutes of departing the safety of our wall, we had compressed the enemy to a fraction of the map, and approached the 'Ridge'. That's the deep part of the creeper, about midway through the area it currently controls, not the stuff immediately around the emitters. The artillery impacts at the business end of the map create a 'valley' just left of those emitters, and so the creeper at the Ridge basically flows in both directions.
At this point, even the dozens of weapons we had were forced to slow. Instead of moving them almost as fast as I could group and re-position, they had to wait several seconds to clear more room, then advance. It was still a steady, unstoppable offensive though.
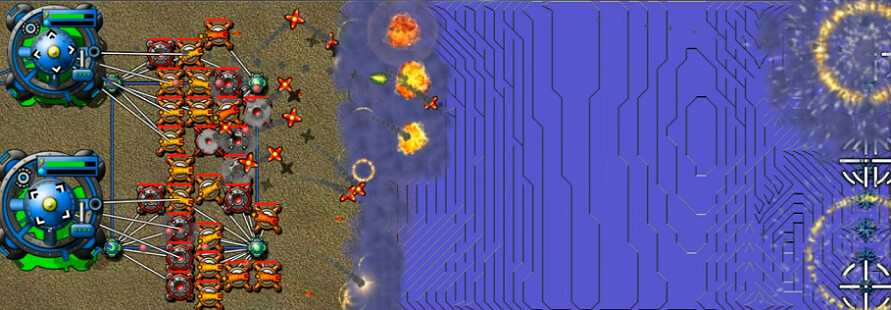
I'm not sure why, but I tried a few alternate approaches here at the finish. I couldn't build my way close enough, not even after adding a few more staggered berthas, so I threw a Shield Row up. They weren't enough.
Went with a rather ... explosive ... shot here, but in the middle of all that is Nullifier on a max-height platform, the Terp once again being the hero here, taking out three emitters. A couple more such constructions later, and this fun was over.
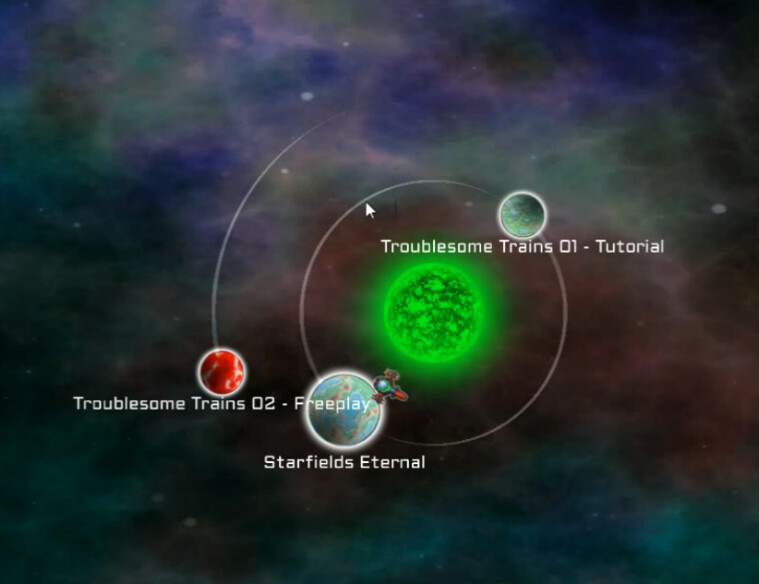
thepenguin system is our next destination. And this deserves a bit of explanation. Starfields Eternal is the next one we'll get into, and that can sort of come as it comes.
I tried Troublesome Trains first ... and well, those are weird. The 02 Freeplay level is actually bugged to the point where it is impossible to complete. I found a discussion claiming that it is one of two Alpha Sector levels that can't be finished - I don't yet know what the other one is. The basic deal, without giving away too much about the special nature of those levels, is that they utilize a unique scoring system. One of the pre-release updates apparently broke that system, and only the Tutorial level was ever fixed - and even there, not completely. But in the Freeplay one, your score never changes, so you can't lose it, or win it. It just goes on forever with no chance of a resolution.
The other thing is, for the first time in 150 levels or so, the Tutorial level gets an asterisk. Literally, I'm going to add one to it when I put up that update in the table of contents for the OP. I could only beat it, after several hours of trying my best to avoid this, by utilizing that horrid, forbidden Pause key. I would normally hang my head in shame, but given the highly non-standard nature of the level, I frankly think that asterisk deserves an asterisk of its own. Very few 'normal' Creeper World concepts even apply to it. You really need to quick-twitch trigger finger of a shooter or high-level Starcraft-type RTS player to have a chance at it I think. That's not me; I got pretty close, but stopped improving beneath the required performance. I'll be impressed if anyone manages to achieve it sans stopping time.
Anyway, Starfields Eternal is next, then the odd duck that is Troublesome Trains, and on to a new system it will be afterwards.