Part 140: spacecadet & Terror
spacecadet & Terror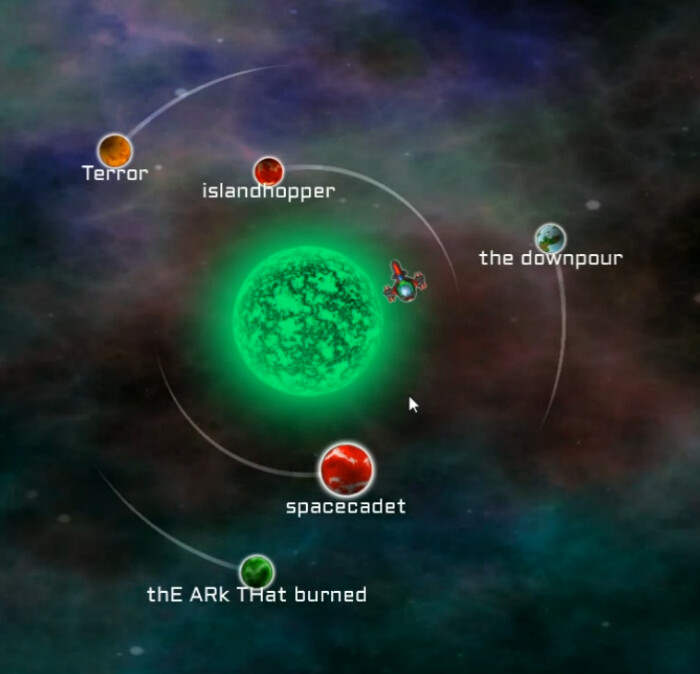
We're about exactly at the one-third mark of the Alpha Sector now, and entering the long middle of the process. Each system will have more planets than the one before it, until we eventually hit the upper teens in that count. TrickyDragon's five planets are next, beginning with spacecadet
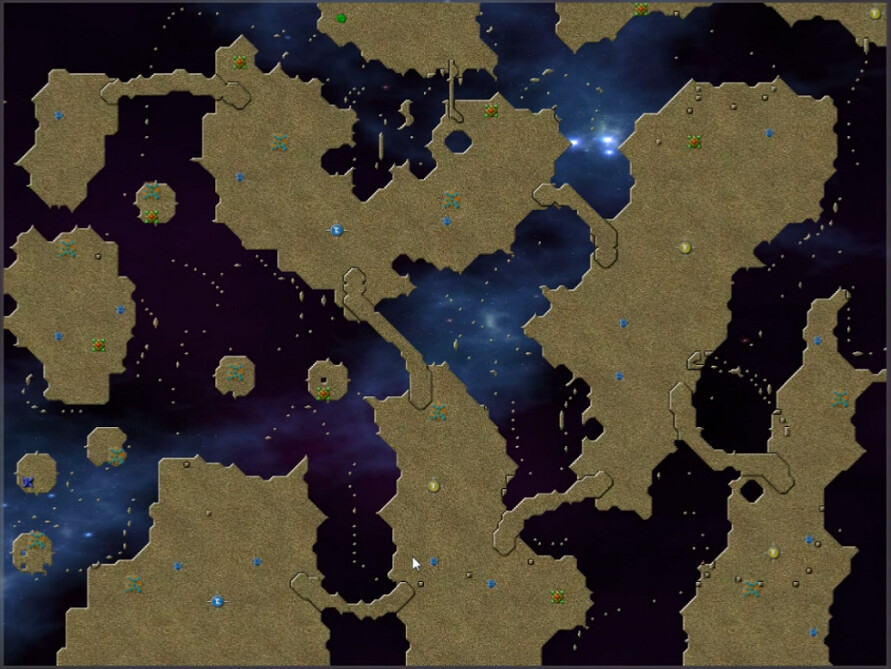
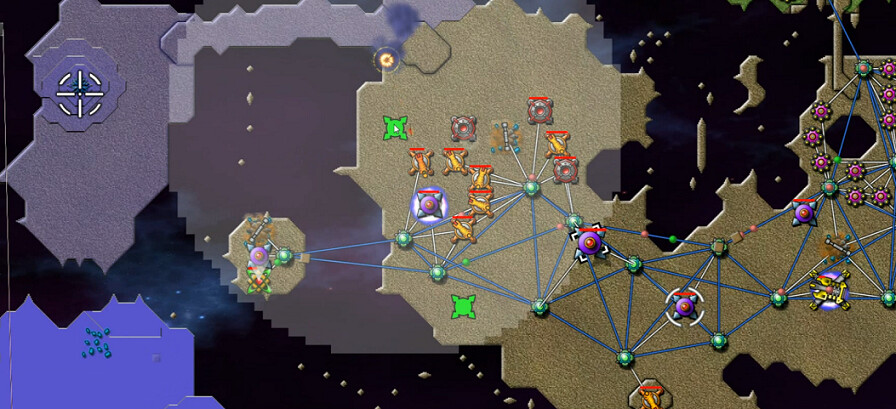
All the emitters are standard, and we have scattered Totems & Ore, minimal Spores, no digitalis or runners. It doesn't look particularly punishing. The most notable feature of this map is the elevated bridges, which are a good bit of level design in an otherwhise blase landscape. They simultaneously allow land connections while largely keeping each landmass's 'Creeper pool' separate and distinct. That deserves respect.
Beginning with the energy resource in the north, I separate off the one Command Node to the east here to get access to an immediate Totem. Quick Beams are important on this level but I've pretty much already guaranteed not losing at this point. The only way the creeper could harm here is if somehow run horribly low on energy, or by coming across that very narrow bridge. Both would require terrible play to allow.
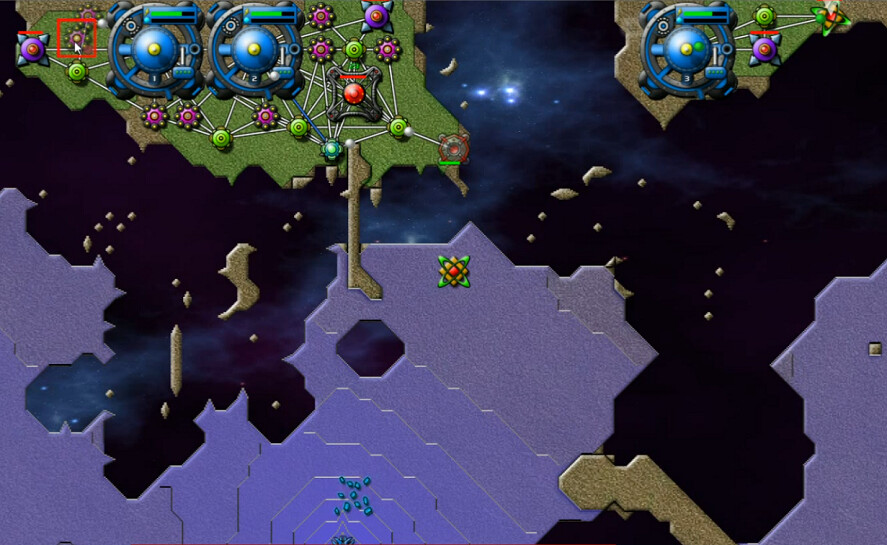
My crossing technique was a bit too minimalist and doesn't deserve any awards. This was the second one - first time I didn't leave sufficient room for the Relay. With the support of a Mortar, a mere Pulse Cannon pair was just enough though, and while it took me a bit to find my stride I did gradually expand this beachhead.

Since I don't often show it, here's a look at the upgrades not that long afterwards. I would soon add a range boost as well and move on that next emitter, getting with it the Ore Deposit. I also decided to post a Sprayer on that eastern bridge to protect against any incursions. From this point it was simple gradual progress and ramp-up. I also paused a bit here because it was about at this time that I had the room to significantly expand the reactor operation.
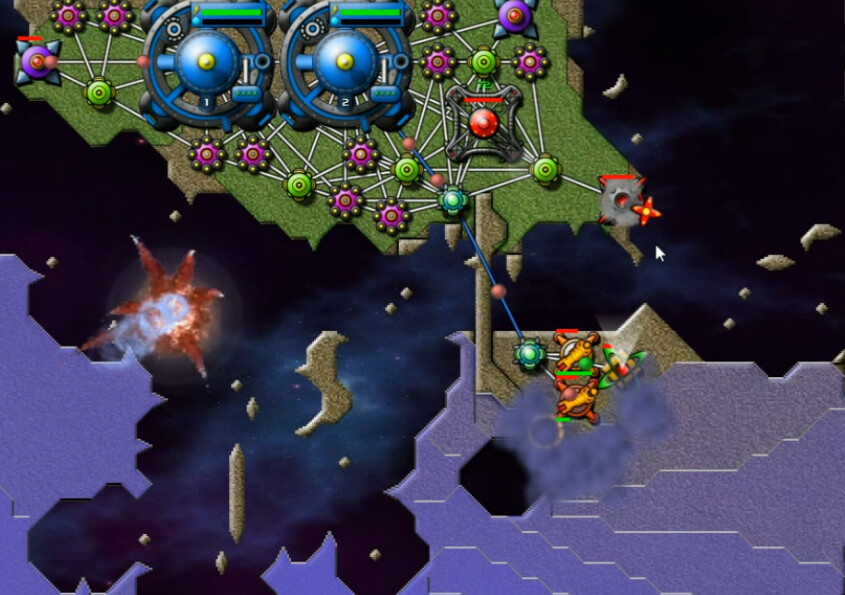
With limited access points and a SuperBertha in place to clear out any resistance at defended points of attack such as this western island, success was even more assured.
That shot is at 20:27 of the video. I would use more and more AC as time went on, eventually multi-tasking (starting a second attack before the first one had finished) and so on but there isn't anything else particularly interesting IMO. Several Artifacts of Odin, but those were ignored as I usually do. If interested, there's almost another twenty minutes more of it to watch me do the same thing.
"Not my favorite level, but it was an interesting little romp" was my synopsis, and my opinion hasn't changed.
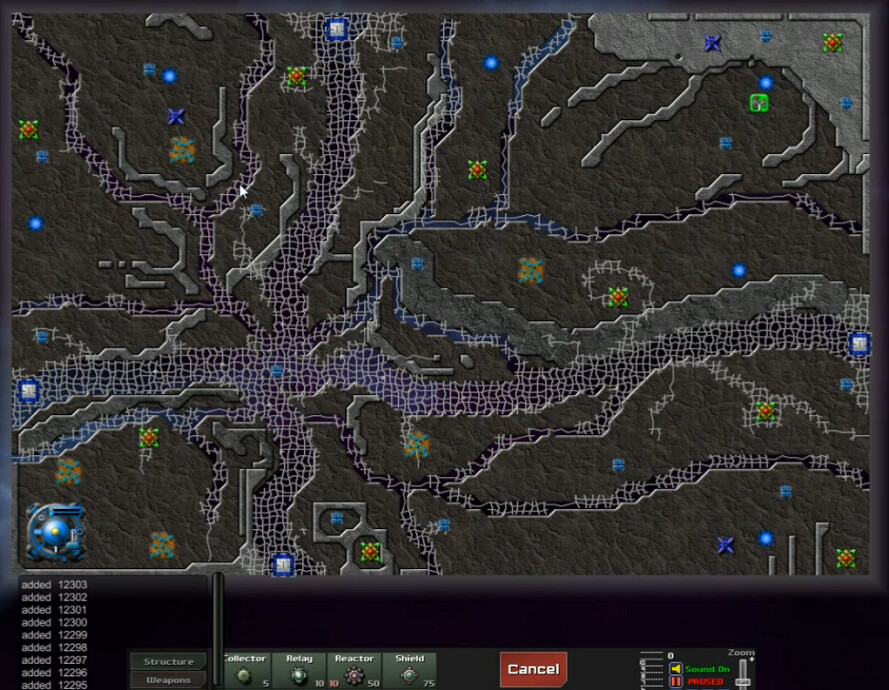
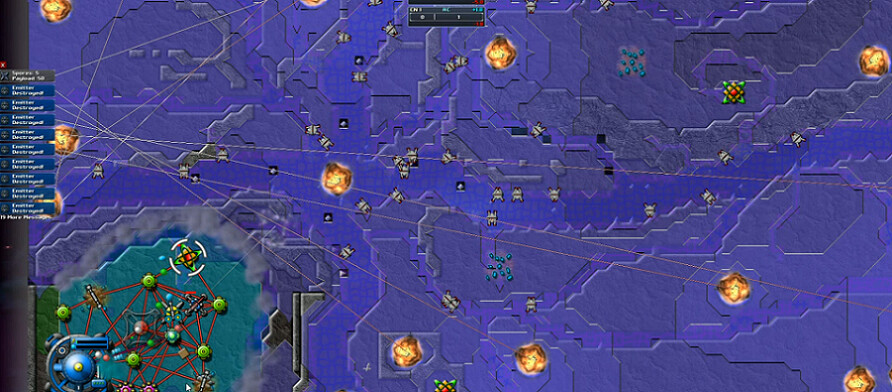
Terror, the next level. Here we'll combat some of everything - and that's a completely unnecessary and superfluous Thor Artifact in the northeast that I didn't notice initially. The many ribbons of void space filled with digitalis, effectively making this into a jigsaw puzzle, definitely stands out. And look at those numbers in the lower-left. I'll get back to those in a bit.

Pretty cool idea. There's just one problem, if I may spoil the ending -- IT DOESN'T WORK. Paging DmitriX, if you are bored and need something to do - feel free to dive in (or not) to WHY it doesn't work. Suffice to say that this is the second of the two unwinnable Alpha Sector levels, to go with the Troublesome Trains Freeplay. Probably another 'script broken by development changes' deal, or maybe it never worked.
But of course I didn't know that at the time. So in I went ...
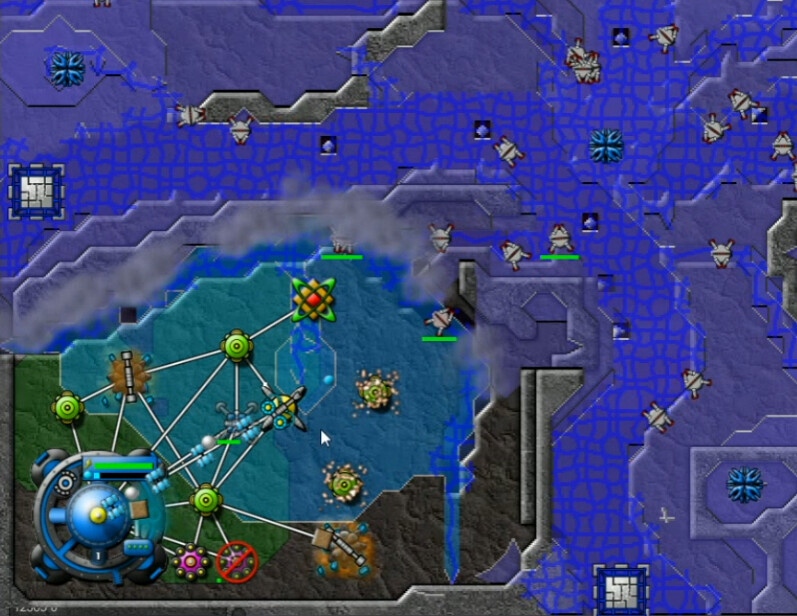
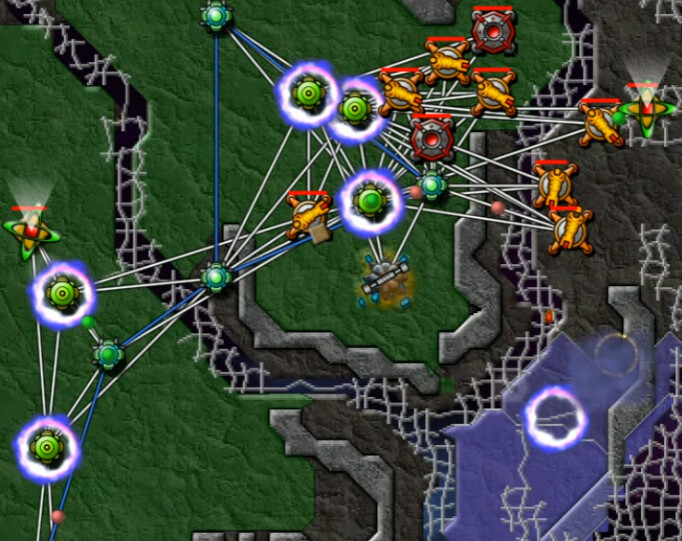
Using the supplied ore right away - it's clear where we are supposed to start given that the lone Command Node is pre-supplied. Digitalis forms quickly and Runners are a stunning mess as you can see by the Collectors here. We're pretty well confined, under significant pressure but at the same time not in any real danger due to the Sprayer.
A Sniper naturally to help relieve the pressure, and then I wanted a Forge asap. I had other plans, but then all of a sudden ...
This really annoyed the crap out of me at the time. In retrospect, this would be a VERY painful - but achievable IMO - map to deal with with no way to take out the emitters. The whole unpredictability and unexplained part of it though still irks me. No message pops up when you do this, or at any other time, providing the slightest hint that this could happen or why it does. The trigger? I started charging a Totem. The second you do that, every emitter and nest on the map goes BOOM. Which really stunts the challenge, to put it mildly. Now it's just a tedious matter without any real difficulty to it, just connect all the Totems.
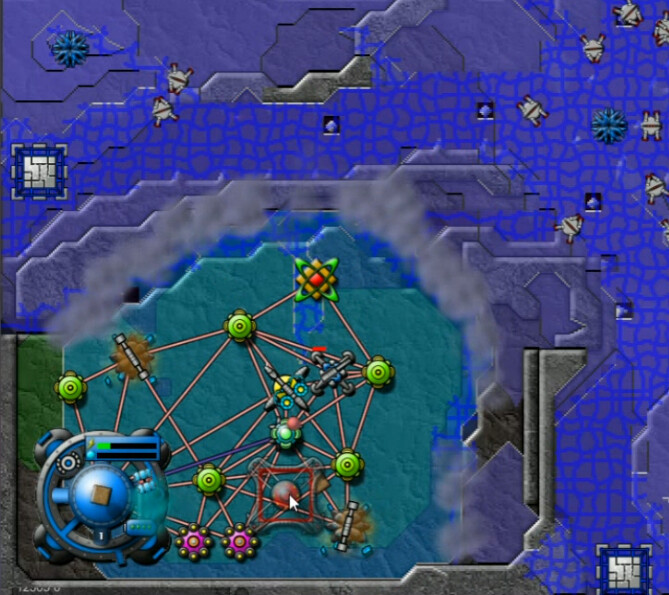
From a gameplay perspective, the whole build up and expand with limited space deal is now on offer, except that it's not hard to get more space with just a couple weapons deployed.
Reactors are limited to 10 only, so SuperCollectors became a thing wherever I could. Why build Berthas anyway, when creeper only has a few units of depth at most?
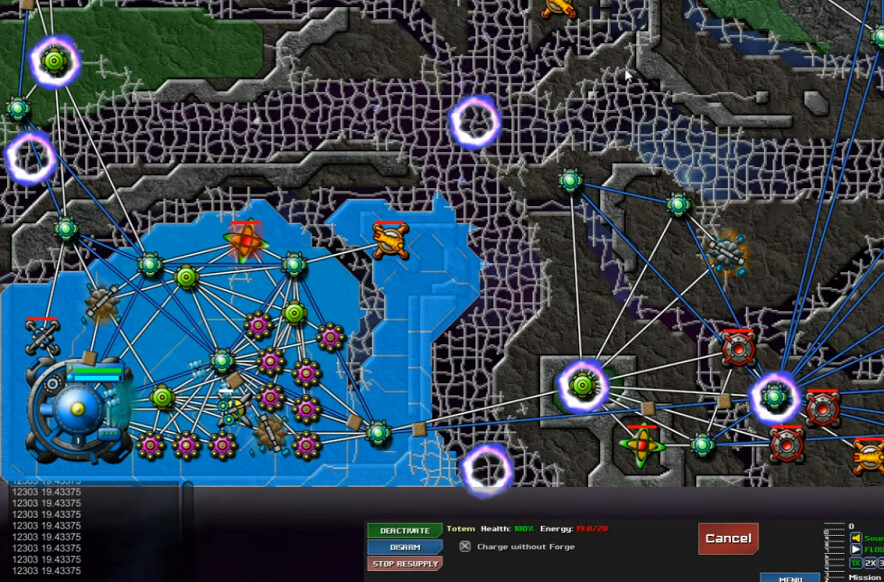
Here's a shot at the end, when I've done everything that can be done. I eventually realized that those numbers in the lower-left appear to correspond to the Totems and how much energy they have ... a little under 20 which is the max. Deleting and rebuilding connections doesn't help. Powering them down doesn't help. Destroying-rebuilding the Forge doesn't help.
And in fact, nobody has ever recorded a time for this apparently - because it can't be done. The Totems will never fire. All opposition can be destroyed, but you can't technically 'win'. *Sigh*