Part 167: Leapfrog*
Leapfrog*Welcome to the second CW level - both in the Alpha Sector, the first one was Troublesome Trains - to get an asterisk (*) due to me not being able to beat it without pausing. And this is definitely the better of the two for my money. This level hates me so much, I lost my whole writeup when it was over halfway done. I was not amused.
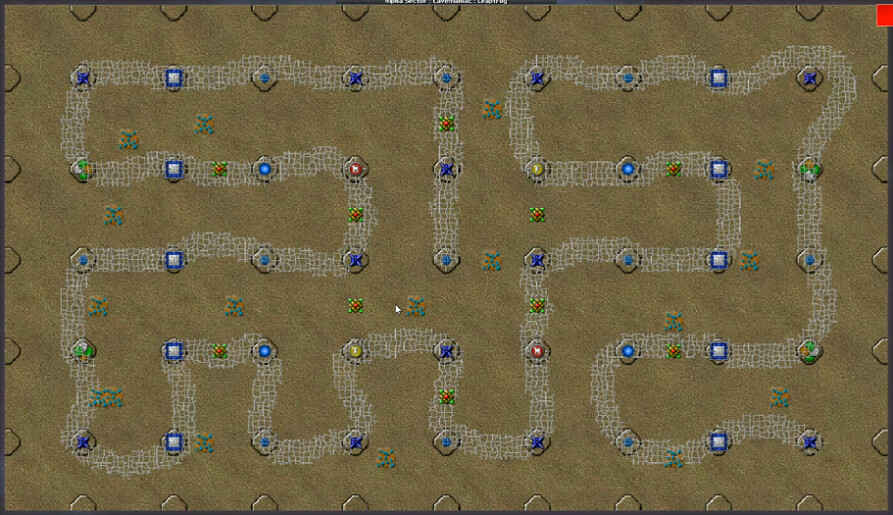
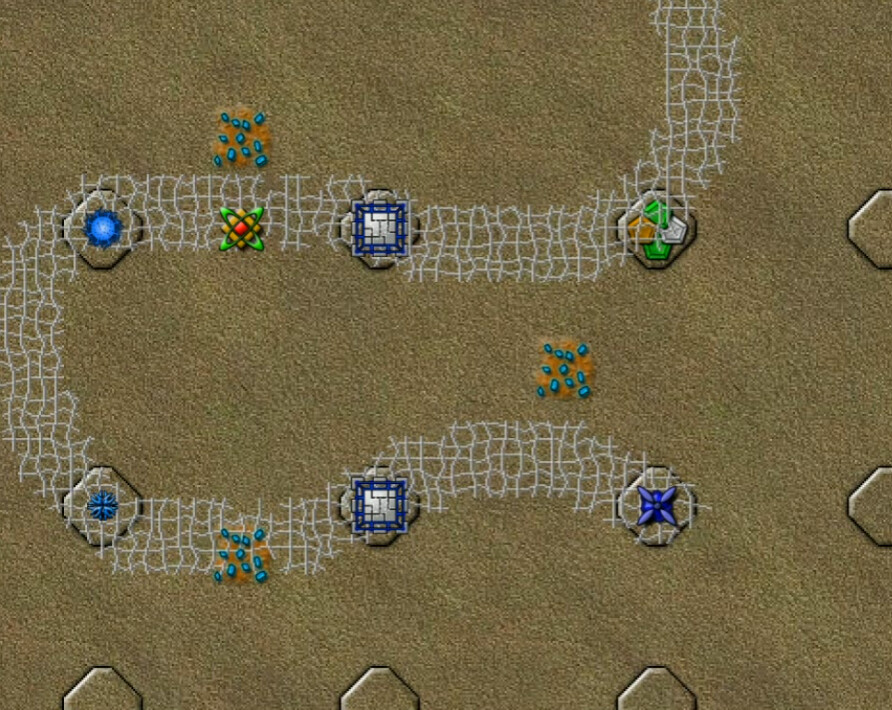
A flat plain with the occasional raised area around the perimeter, and also plateaus within the digitalis ribbon for various things. At first I just thought ok, there's some of everything obviously here, this doesn't look too ha ... oh. Where do I start? It's clear there's nowhere that will be safe for long, but the corners of the map are the furthest from emitters.
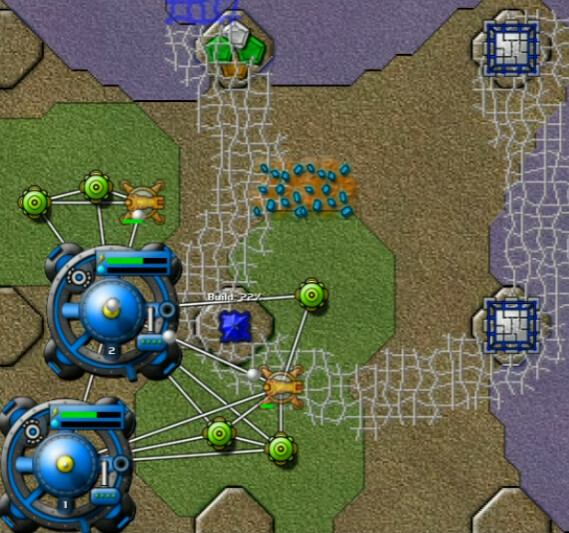
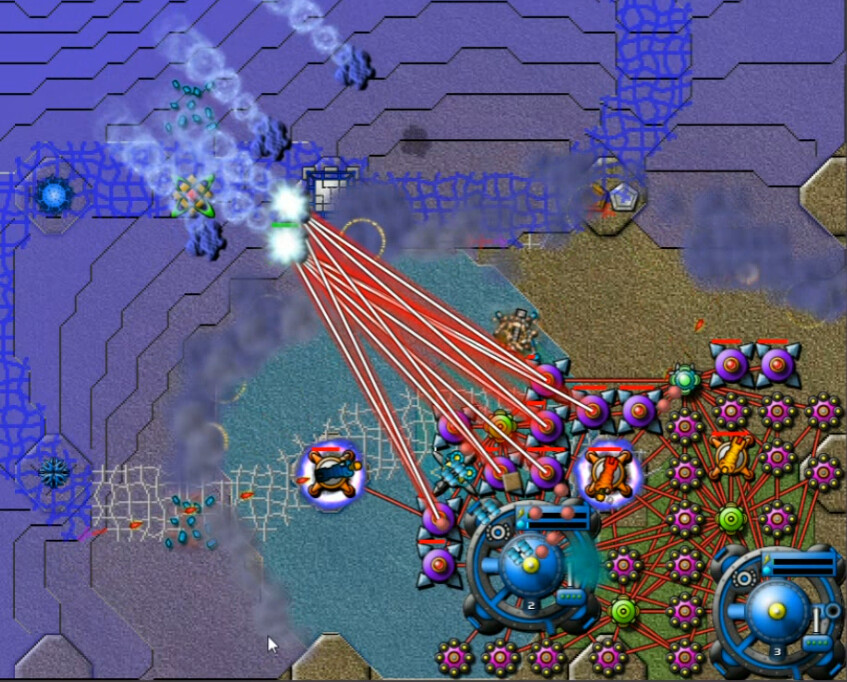
I tried the southwest first, I think because there's a little more ore around. By the time my first Pulse Cannon pair was halfway built the creeper was already approaching. This is a whole 27 seconds into the mission.
I just barely got this Nullifier to fire and take down the nearby Spore Tower, but even I was clearly doomed. This attempt was going nowhere and getting there fast.
Take 2 - 4:12 video
This was the next plan, and it was no better. I don't have the energy to support this many cannons, fewer of them won't hold back the digitalis is both directions, and it does nothing to address the flood of Creeper itself.
Take 3 - 5:17
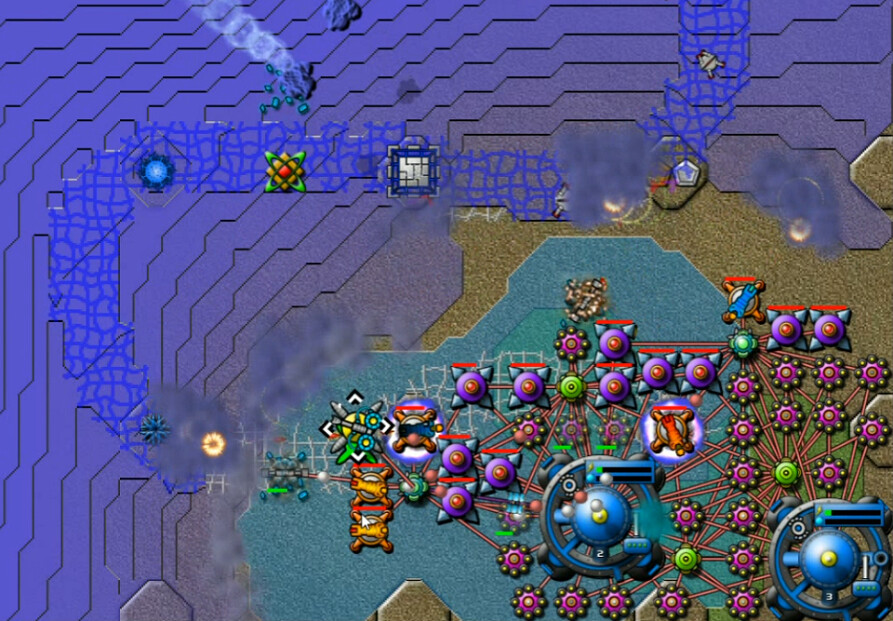
I decided to switch locations. The spacing of structures is pretty much the same everywhere, but in the southeast here the digitalis only approaches from one direction - this is the end of the ribbon. Perhaps I could use that to my advantage. This try was similar to the first two - a little better, but very little.
Take 4 - 6:40
I gave this a shot as a test thing, to try to take out a couple more spore towers in other locations. The thing about this Three Corners approach is that it does nothing to address the immediate problem - getting a defensible area up before being overrun. I did discover that a single Digitalis SuperCannon, set up on the resulting PZ, can keep the digitalis away ... but I need more than that for a viable strat.
Take 6 - 10:02ish
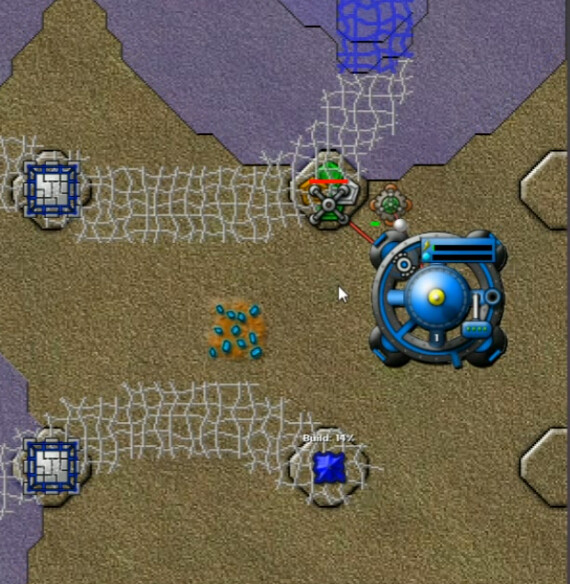
The only way to get more energy, and thus build more stuff, faster is to harvest one of these siphon clusters. First try, doomed to hilarious failure, was to get a shield up to protect it for a bit. Takes way too long to build.
Take 7 - 10:30
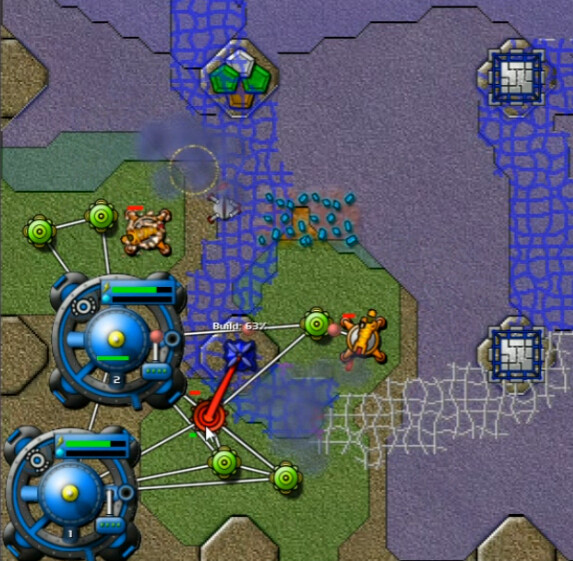
If I can't protect the siphons, I have to try and get what I can from them before they are destroyed. That's the idea here, just build enough stuff to suck it dry, then have a few reactors up and a PZ ready once the nullifier fires. This was the first point at which I actually started making progress.
Take 10 - 13:50
By this point I'd realized I didn't need an early sniper; the digitalis supercannon could keep the digitalis far enough way to form a small but useful cordon where the runners couldn't get close enough to stun me. I'd managed to fairly consistently keep a second node around and get three reactors up right away with the drain operation while still building everything else that was required. So I worked with this concept for a while.
Once the spores started showing up a little after three minutes in, it was clear the startup wasn't fast enough. This needed more work. Three sets of two were dispatched easily enough, but a four-pack of Beams wasn't going to be able to handle this kind of volume. To make a long story not any longer than necessary, I eventually got it up to six of them. Which still isn't enough - around 17:45 on the video if you want to see how that went. Turns out you need 8-10 of them, and enough reactors to supply them. Try as I might, I just couldn't get there - I couldn't build enough efficiently enough to make it happen.
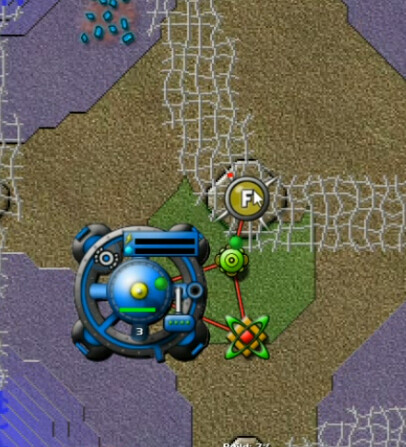
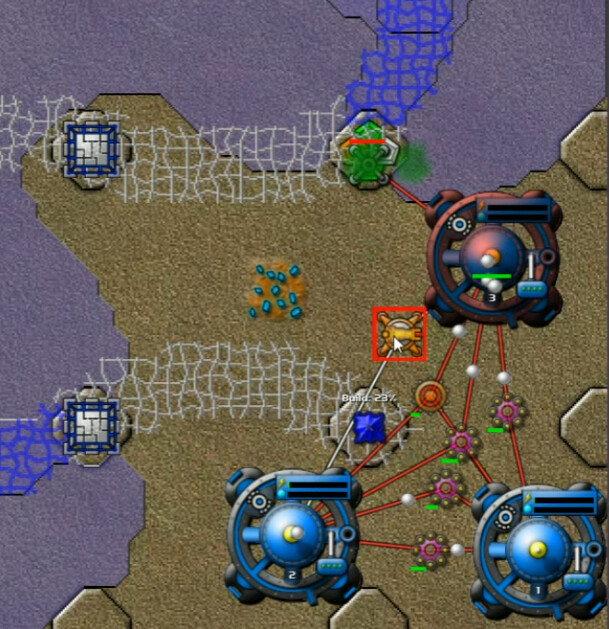
This was my last outside-the-box idea; get an Artifact of Odin and freeze nearby creeper for a while to get myself more time. Unfortunately I was never able to get more than 20 out of 25 activation packets before command is destroyed and leaves for orbit. I tried putting a second Node nearby but that is of no use because only one of them will feed into it at a time.
This is the point at which I surrendered to the fact that I wasn't going to be able to do this without pausing. After more off-screen practice though, I believed I was prepared to get it done with that advantage.
Take Way Too Freaking Many - 21:57
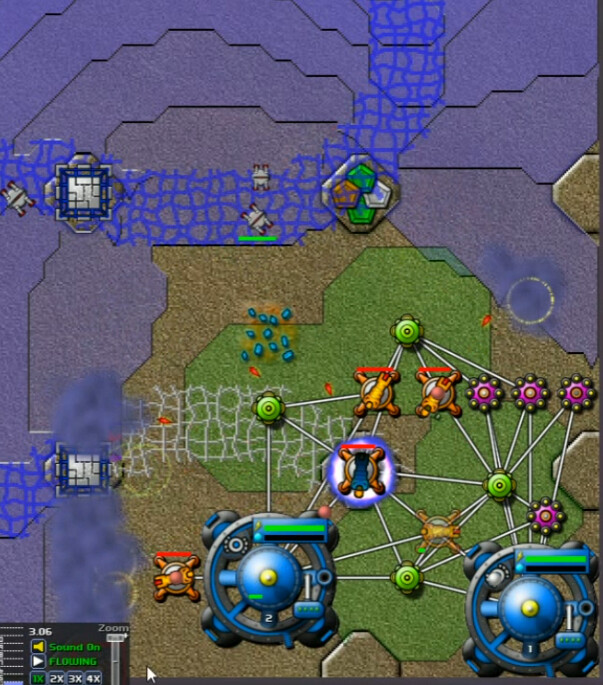
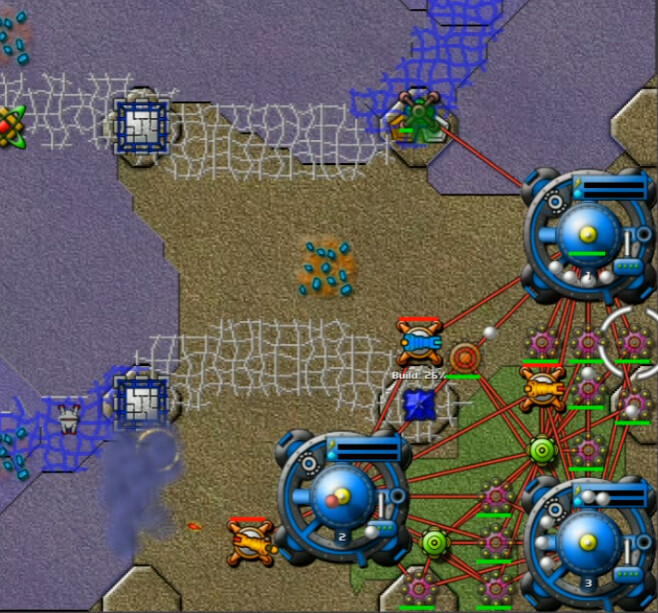
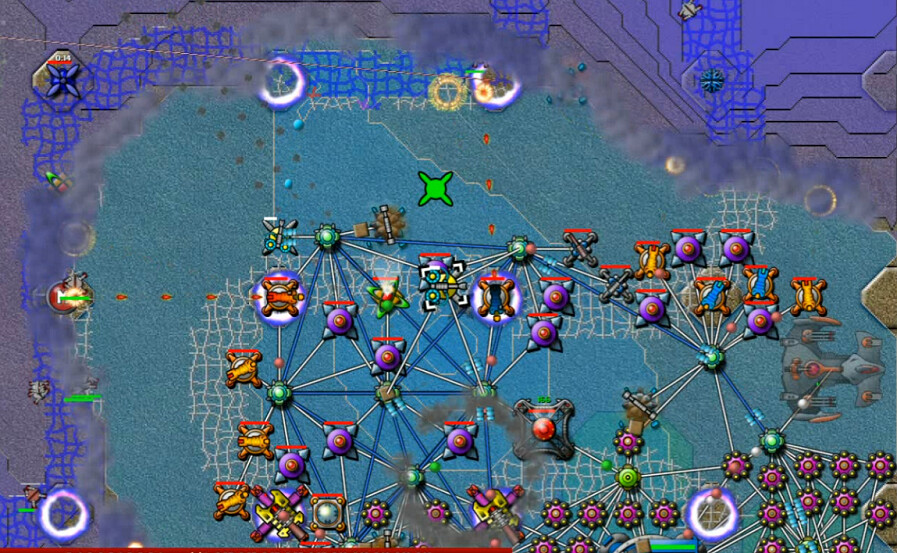
Here's the setup before unpausing. I made a few conclusions:
** Three Cannons is the optimal number for defense. One digitalis for the PZ, one to defend the reactors against approach from the north, and one in the west to keep a second node around. Nothing I did, mostly due to runners, was particularly effective at trying to guard the third. That one's just going away eventually.
** 10 Reactors + Nullifier seemed the optimal rest to fill in. The goal is to drain BOTH energy siphons, 250 apiece - the aether and ore are useless to me at the start as the AC will all be stored in the node that's going to be lost - before they are destroyed. Nine reactors wouldn't quite get it all.
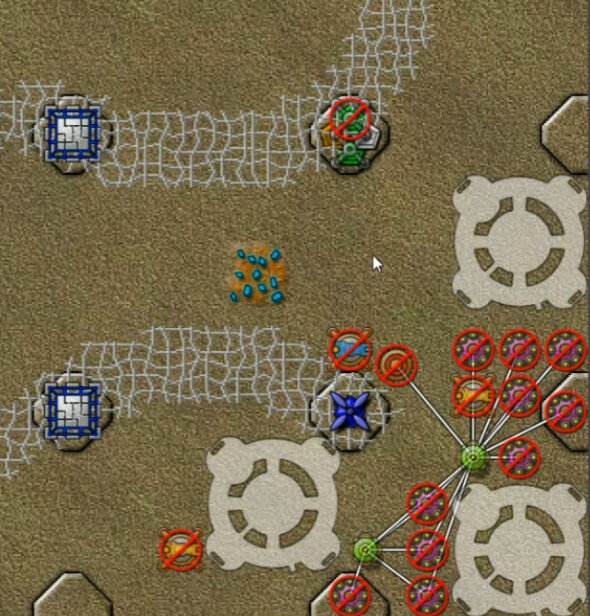
So with most stuff deactivated as you can see, I ran the clock for a whole 7.8 seconds. That's because that's how long it takes for the nodes to land and the first siphon to build. No matter what order I build them in, it drains from the bottom one first unfortunately. Then at that point, everything gets activated.
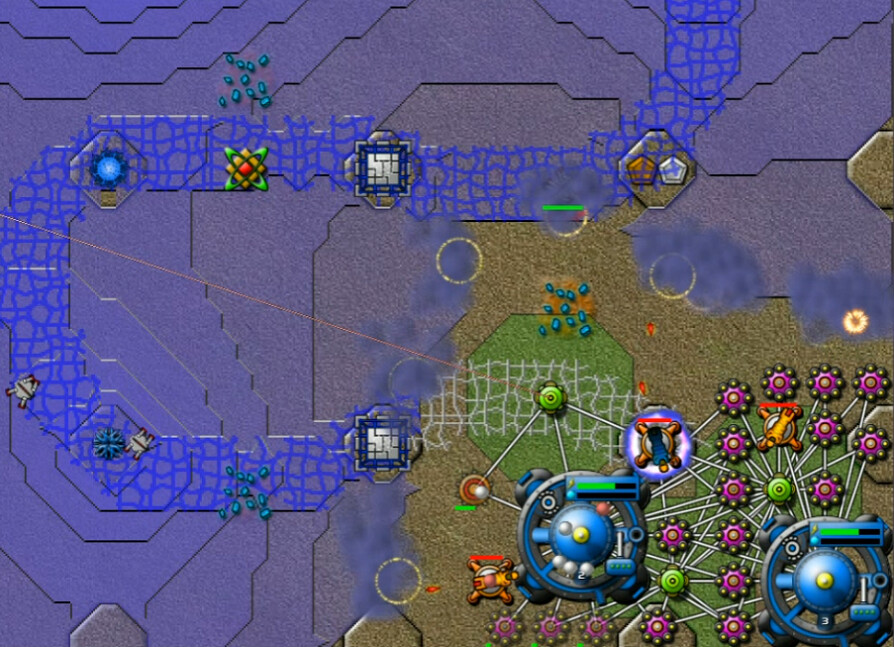
32 seconds in. I've drained both siphons - this one is almost dead but is about to disappear - weapons are up and full and the reactors are at 90% built across the board. I'd like 100% but beggars can't be choosers. Nullifier is almost there as well.
Next, I deactivated almost all of the reactors and turned them on just one or two at a time to finish getting them online. That yielded an income of 9 energy/second, with the top command node about to go.
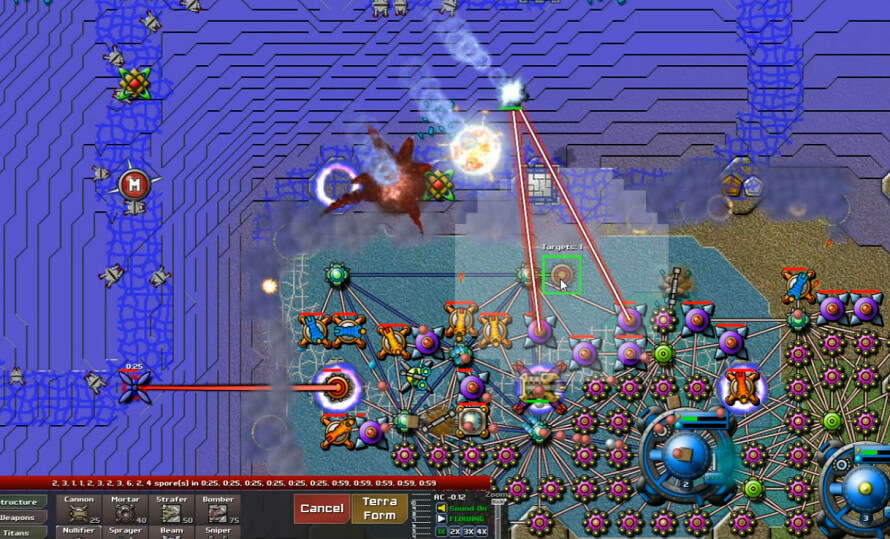
Then I wanted to get the Runner Nest as well. This is actually the second nullifier, as the first attempt got destroyed. I'm also ramping up reactors as fast as possible, still pausing liberally. 1:33 on the clock, and the spore towers are at 77% built. Now I want to work towards the final two things to get going; grabbing the ore mine for a defensive always-on sprayer, and getting beams up.
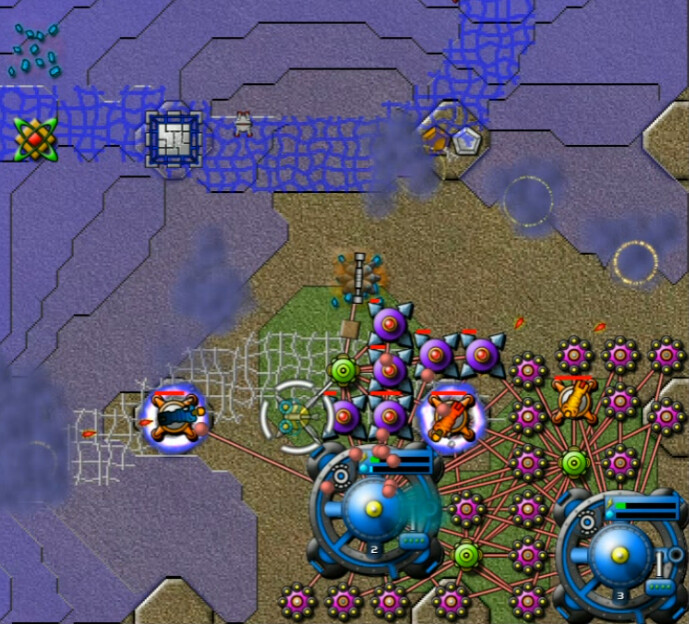
2:24 mission time, 42 seconds countdown on the first set of spore towers. This looks hazardous - there a couple things about it that just barely work. The digitalis cannon relocated to the western PZ is just close enough to the node to be connected as paret of the network. The now-standard one to the east has just enough range to keep that creeper from crashing in from the west and knocking out some of my reactors. It was pretty nerve-wracking but it is actually a stable situation - just - so long as I don't screw up and overbuild, tanking the energy situation. The first handful of beams are up and filling, but I haven't the energy to build the sprayer just yet.
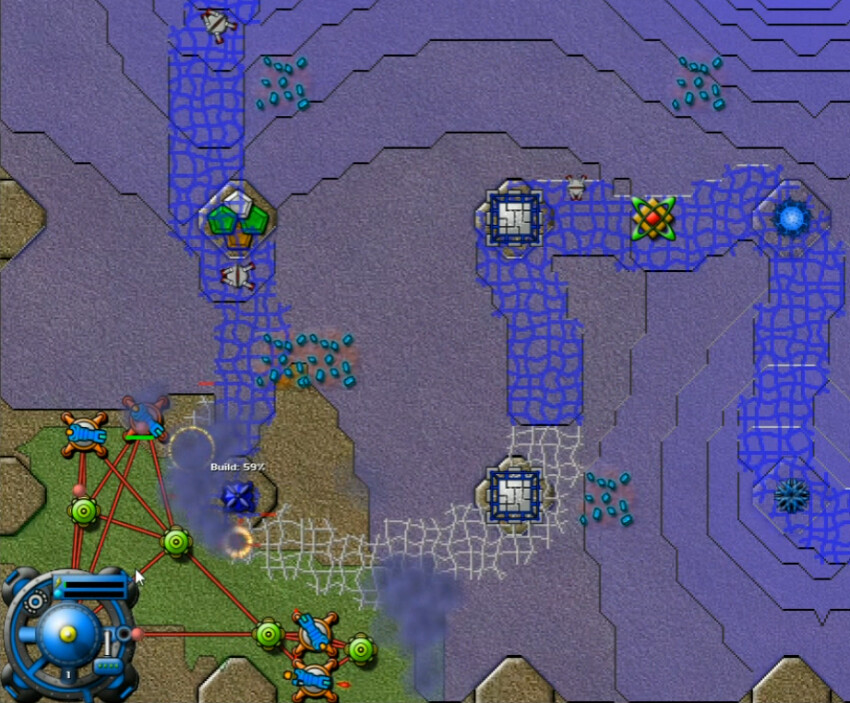
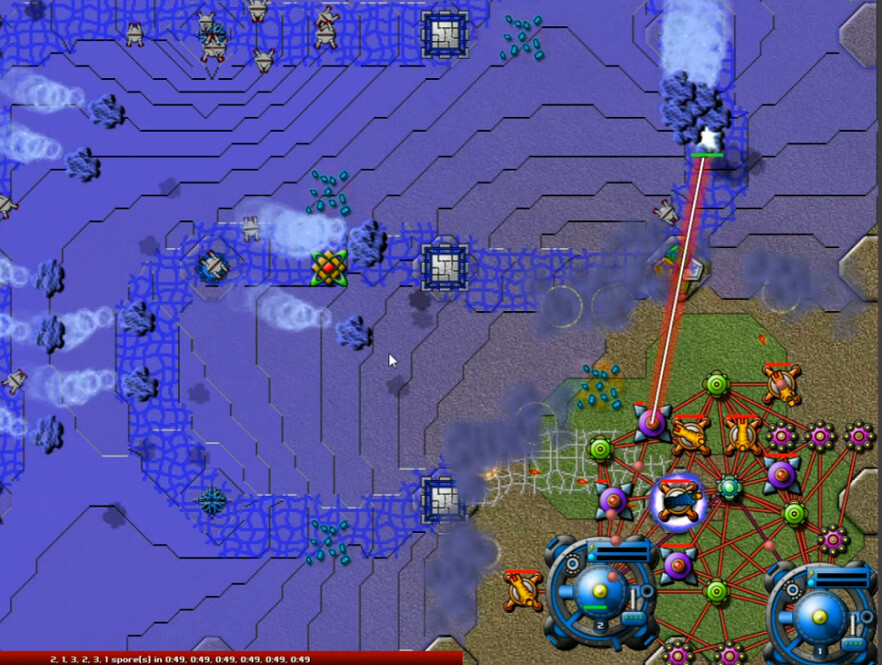
3:07. It's Spore Time. Energy income is at 10.6, ten beams up with an eleventh and the Sprayer on the way, and it's time to see the results of my work.
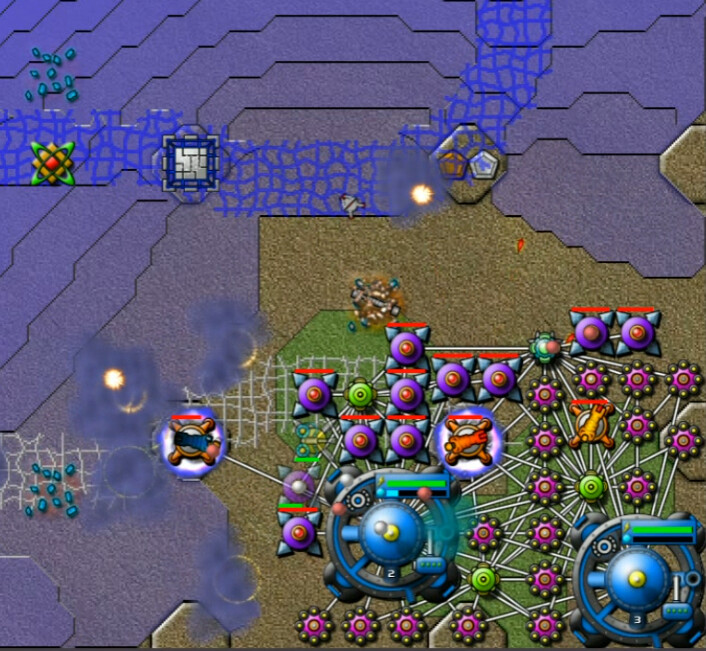
We had enough - this was the end of the first major wave, at which point they just sort of keep coming - think they are all set at an interval of just over a minute. Deficit of 7 is significant, but we've got some AC coming in between the mine getting stunned periodically, and that's giving us a little bit more of a berth. As I said at 3:40 mission/34:18 video:
"Now we are stable and we don't have to keep pausing. We can just play."
Which is what I did. At this point it turns into a 'normal' Thotimx Creeper World 3 level.
Now it's worth noting that we aren't safe yet. Anti-air equilibrium has been achieved, the digitalis is being kept at bay, but the pressure from the creeper is continuing to mount. Being careful to build mostly between beam re-filling periods, I push westward to snag more space for reactors and a second ore mine. I've also added a couple more cannons here.
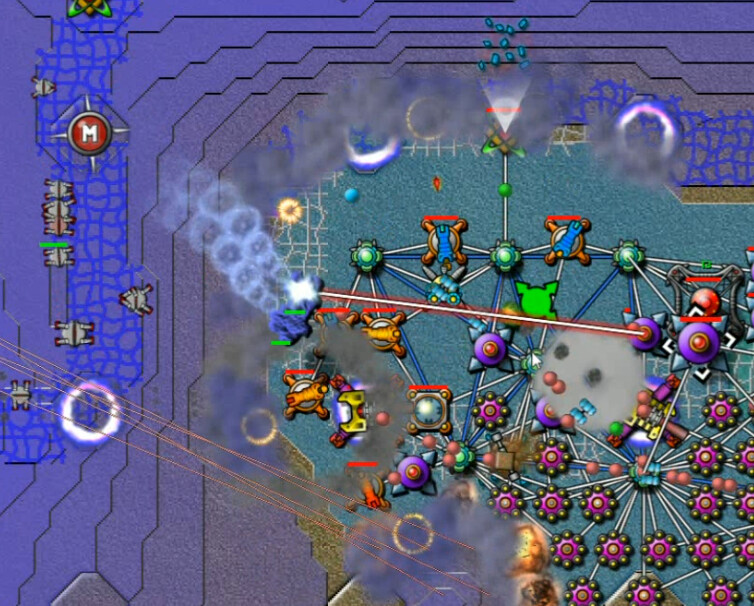
This is quite some time later. The intervening period has been marked by slow, unexciting, and largely tedious progress. Importantly though, it has still been progress. Beam positioning is particularly essential, and there are times when I barely had enough of them in the west to stop the incoming. I'm proceeding with clearing out the nearby area of all structures, the SuperNullifier is able to reach across to another area of the ribbon and eliminate a spore tower, and after some terraforming to level the plateau, a SuperBertha is almost up and running with supporting reactors for energy. We are ramping up the pressure ... but so is the creeper.
I added a second artillery piece where that nullifier is firing from, and energy was tight but it was enough to essentially get me total equilibrium. Then I was finally able to get to a Totem, and get a Forge up and running. Starting upgrades this late isn't optimal, but it really wasn't an option much earlier.
This was the one really bad moment. A single spore got through, taking about half a dozen reactors with it. It was recoverable, but that whole beam positioning thing was quite firmly impressed on my brain as I recovered.
As upgrades helped a gradual expansion - aided by the remaining two siphon locations once we secured those - I was eventually able to spare the energy to power the Thor.
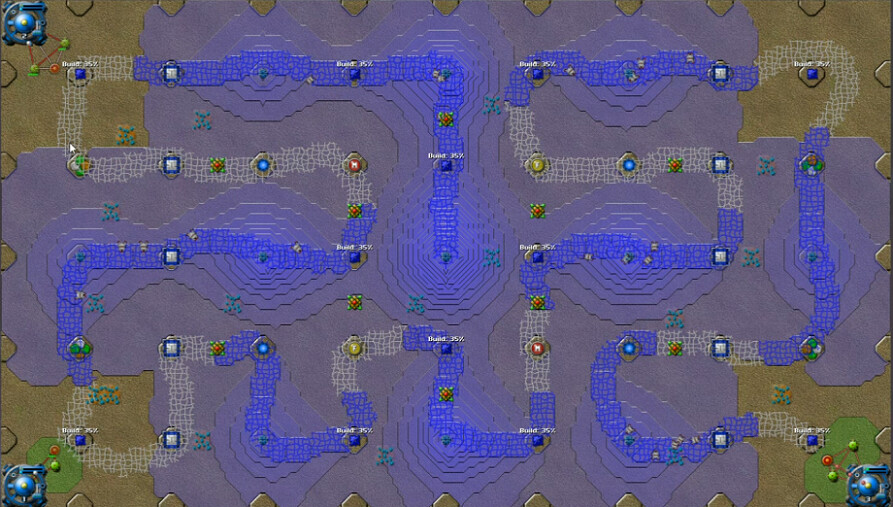
You know the drill from here. It took some time, but it was trivial to clear the map at this point. I found this to be a little different than your typical challenging planet. Usually you have a small but secure area which comes under massive attack. In this case, you really have to fight to get that area. The no obvious place to start thing plus the siphons being just close enough to be useful, etc. gives this a seal of approval.
I will also spoil a bit to mention that progress through this system will now be speeding up. For better or worse, the upcoming sessions feature less difficult planets.