Part 185: Metroid
MetroidTime for our first achievement map. I have mixed feelings about this planet - it does a number of definitely cool things, but is also too large for its own good and tedious for large sections because of it. Even cutting considerable amounts of it out, the video pushes an hour and a half.
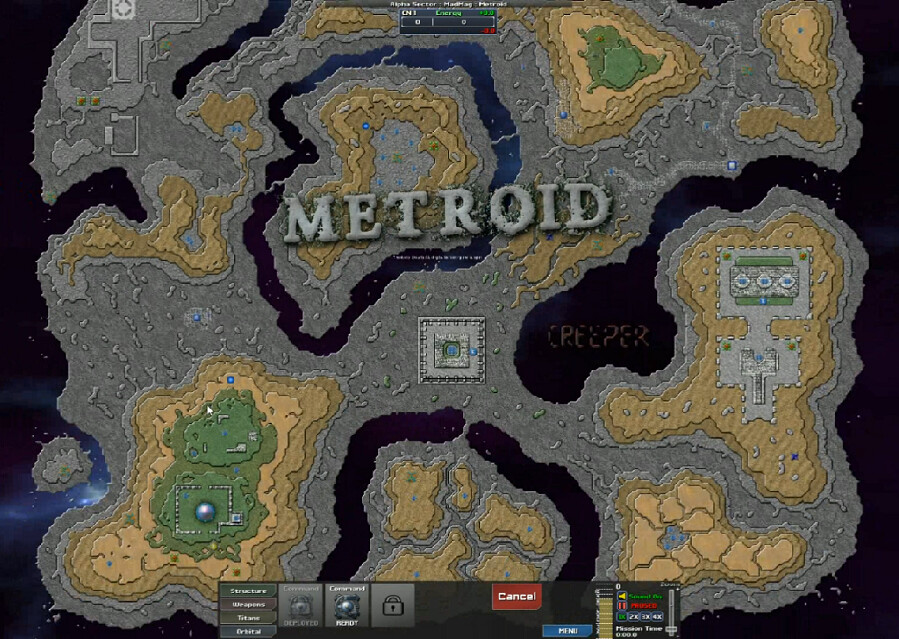
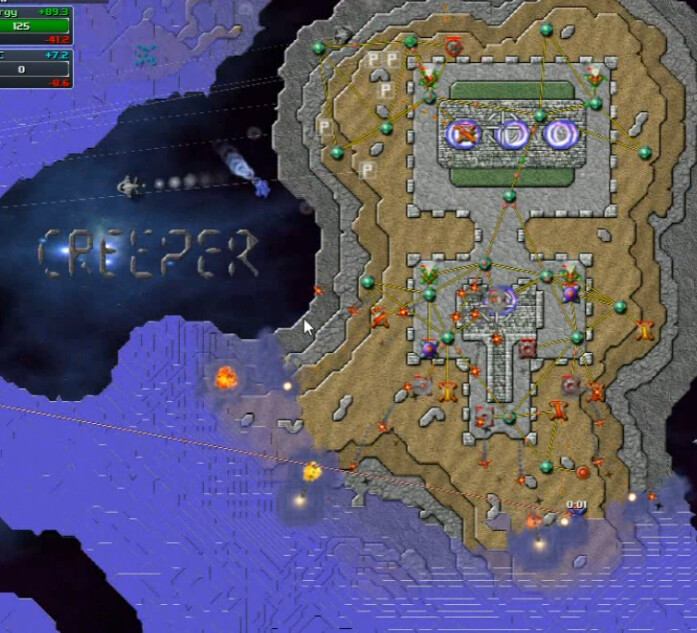
There's more above this, but it's not as interesting. I think this is a max-size planet. Stuff to note:
** I never played the Metroid games. As such, some of the visuals are I'm sure lost on me.
** The Creeper word in the void-space there flashes a reddish color.
** You can't see it as this distance of course, but underneath 'Metroid' is written the message 'Thanks to Grauniad and virgilw for testing and support'.
** Notice the 'dome' structure in the southwest. There are a couple other too-small-to-clearly-see special units on the map.
** This takes noticeably longer than other maps I've played to load, and appears to run somewhat slowly at first. It normalized later on ... I'm sure Regallion will have words about the scripts which I expect are the culprit.
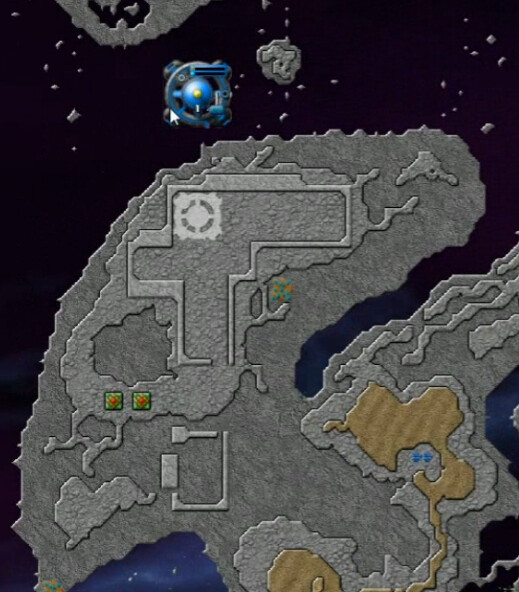
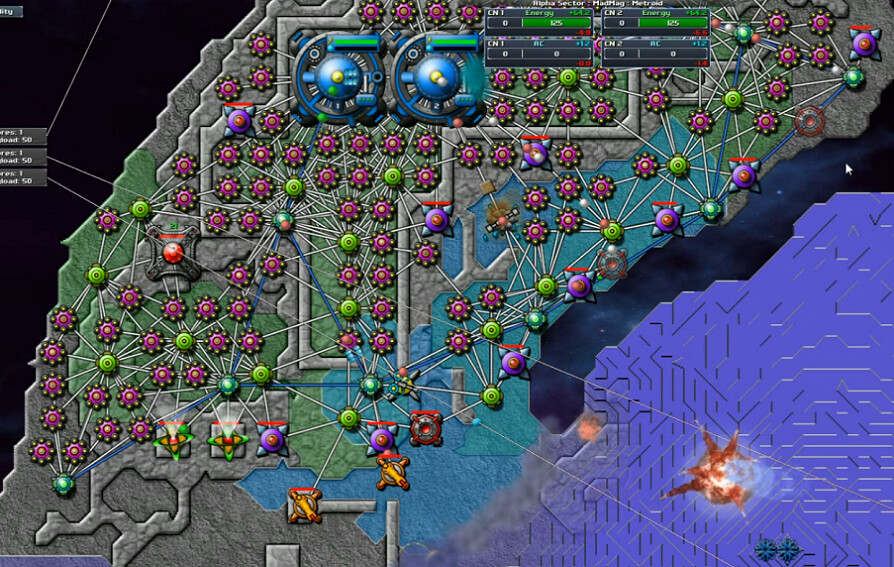
At first, I thought this was a Command Node landed in mid-air. It's actually partway through descent at the start of the mission. This ruin, in the northwest of the main landmass, is clearly where we must begin.
First spore impact. We have two nodes, and I built a few collectors and was working on an always-on Sprayer here ... but this hit 49 seconds in. That might be a record for fastest spore impact I've ever seen. So we've definitely got one of those where you need to start the battle properly.
Take 2 - 3:21 video
This actually should have been the winning attempt. It wasn't, but it should have been. This spore nearly gets away from me, but the Beam is just close enough. Getting one anti-air in the north and one in the south as soon as a few collectors are slapped down is vital.
You can see it in the video about at 5 to 5 and a half minutes if you like, unfortunately it's too zoomed out for screenshots there, but the schtick with the Spores on this map is that there's only a few towers and they only send out one projectile at a time. On the other hand, they send out that one every 9-10 seconds. So it starts right away, and keeps constantly peppering you. This is the main challenge of the early stages.
This was the fatal error I made in this try. I'm getting a couple of weapons up to supplement the sprayer's efforts in fighting off the creeper approach, but I too far on that too soon and the beams run out of energy. Getting reactors up while not sucking the beams dry is a big deal here, and I lost the focus on energy. And paid for it.
Take 5 - 8:44
The third time I tried to get too many beams up right away and ran out of energy, and the fourth one I waited too long to get them up.
On this try, I expanded the area of collectors at the start. This is another bad idea because it takes more beams to cover everything and you just don't have time to get more of them up. So I'm about to get hit with an almost-but-not-quite-dead spore here.
Take 6 - 9:38
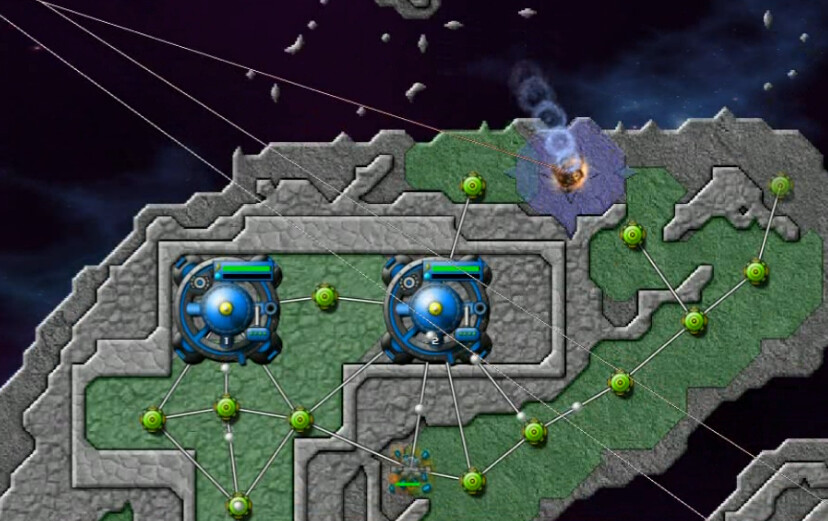
So I finally got things right enough this time.
I skipped the Ore Mine at first, going with three beams along with that first Reactor. It was too many and the first spore almost got by - I'd have to recommend just two and building more later. But I got away with it.
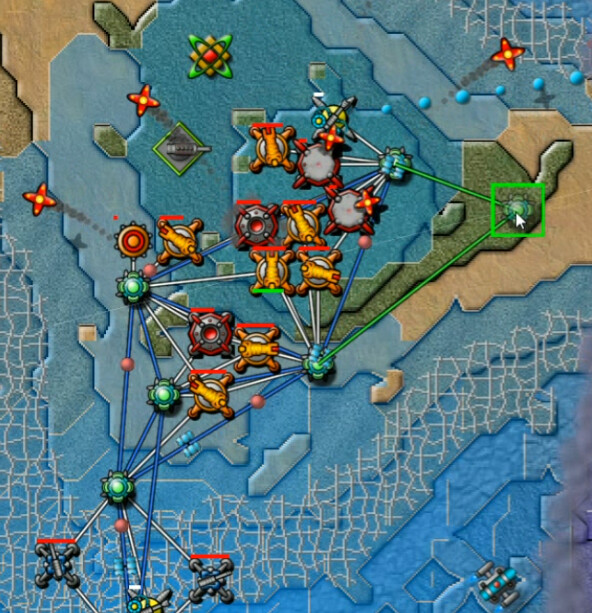
From there I gradually built one reactor and one something else at a time. Mine, sprayer, fourth beam, fifth beam, Pulse Cannon here is the latest that I have up. In this way I'm able to gradually secure the position both on the ground and in the air. Next up came a Mortar, another beam, the Forge, and then I started going with a pair of reactors at a time and ramping up energy to support future operations.
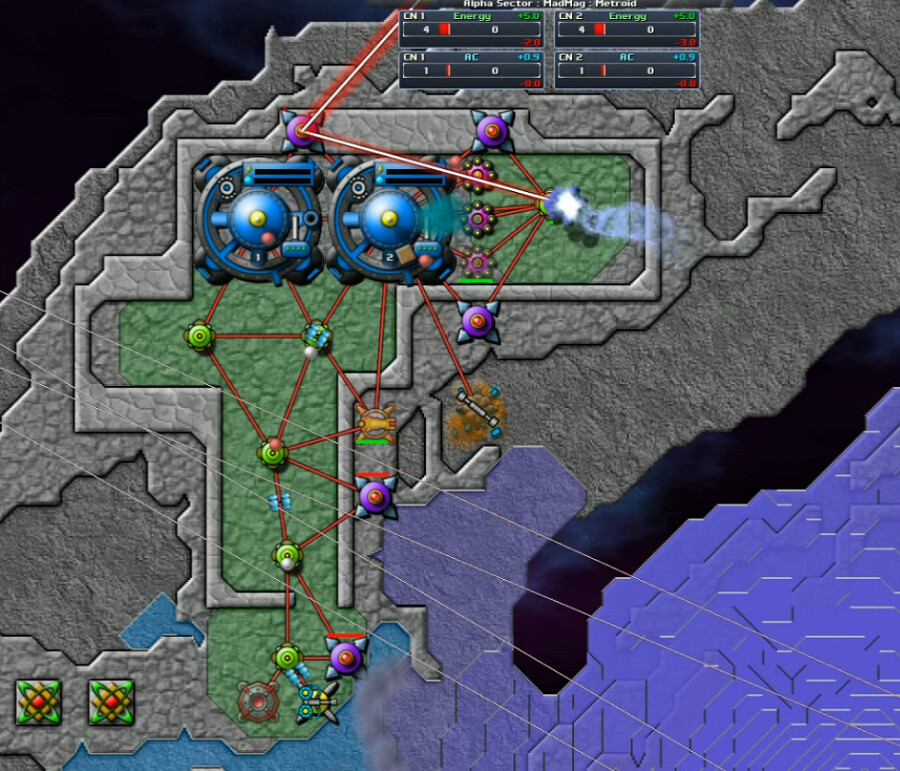
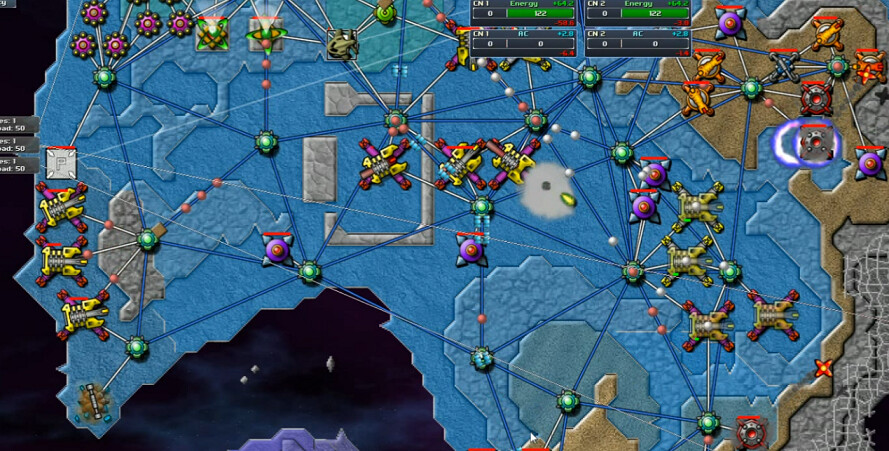
Here I'm flooding the area with reactors, and have a few upgrades in. I have 64 energy income and I'm just starting to think about attacking. That's higher than I normally go but it was quite obvious that this map would require a big economy. That emitter pair has one standard and one that I think is about 4x strength. It was my first target.
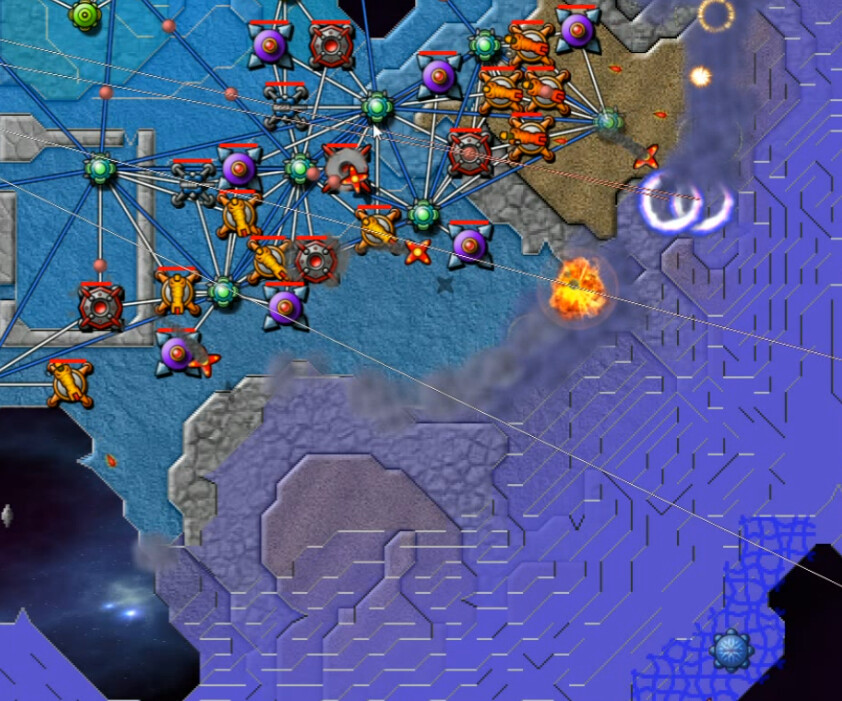
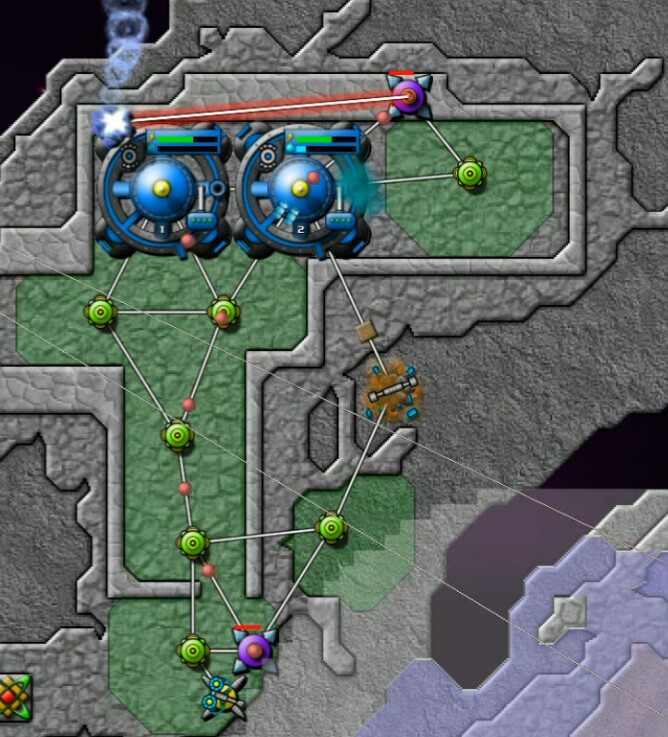
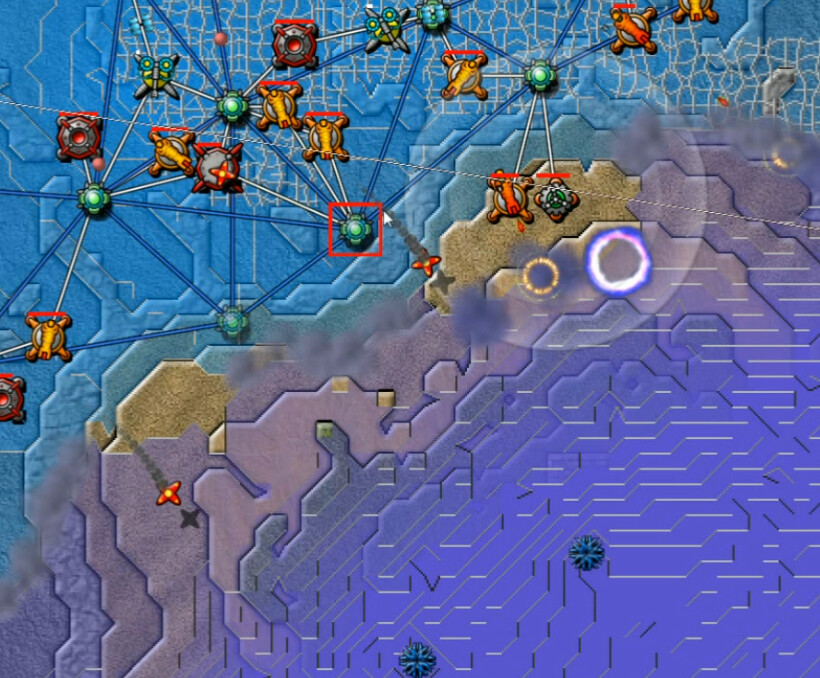
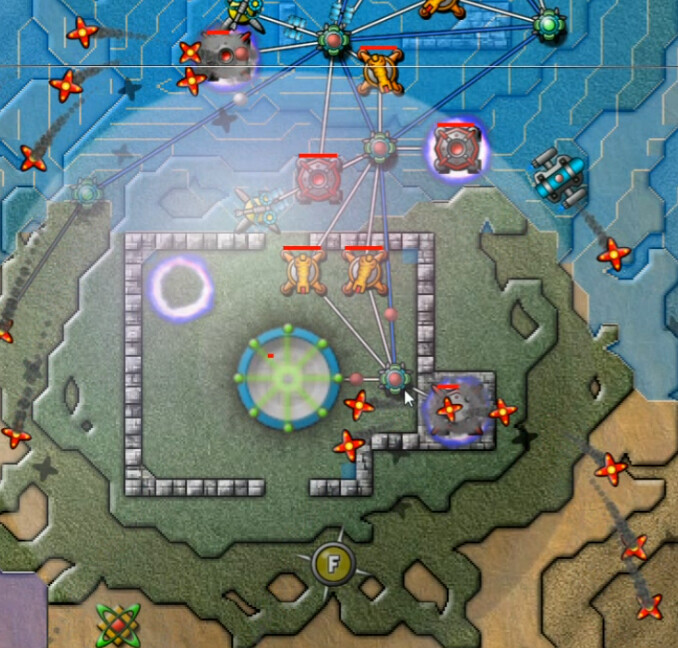
Once they went, I had a bit of an issue with an approaching ... thing. That circular object in the digitalis, which has gradually spread to many times its original size, is slowly and methodically spreading the influence of the webbing further and further. And jettisoning the occasional Runner as well.
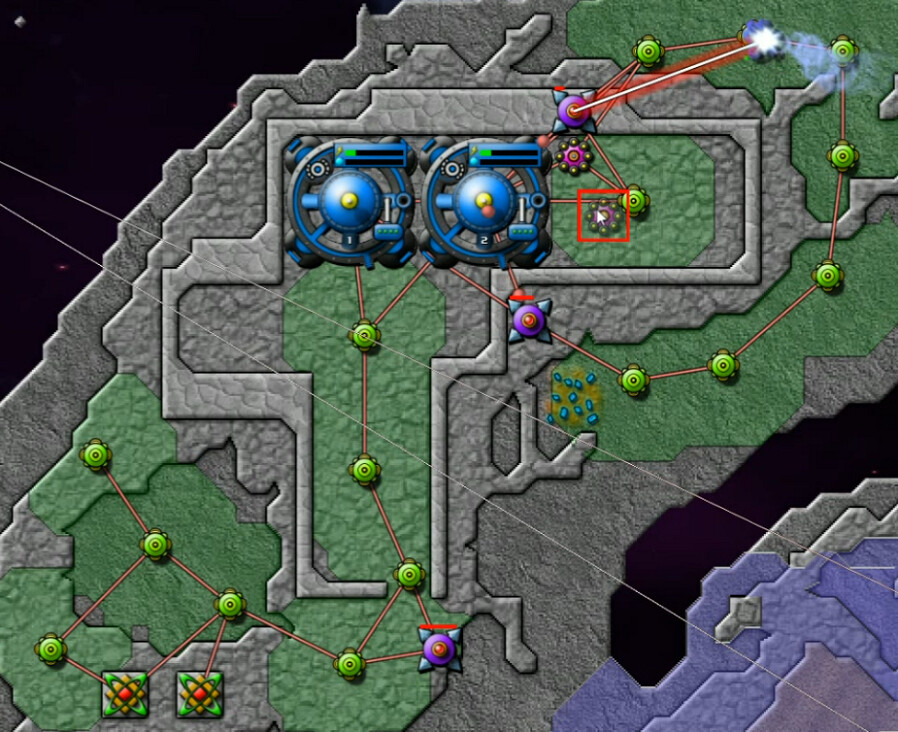
I tried setting up Snipers, but they couldn't shoot at it. It required a Nullifier. Putting one on our newly-acquired Power Zones easily got the job done. At the time, I didn't realize that this was basically a training annoyance - there's another one out there and it's not nearly as hospitable. These don't leave a PZ when destroyed, they are just gone.
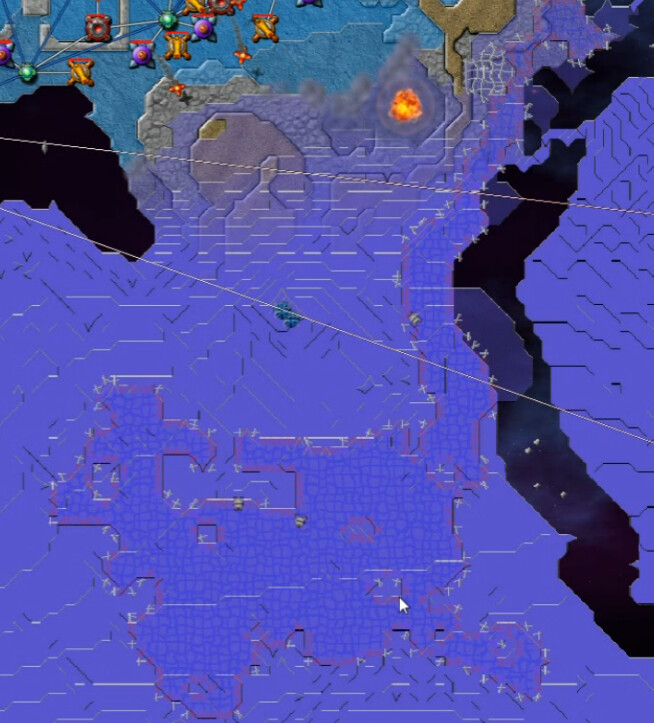
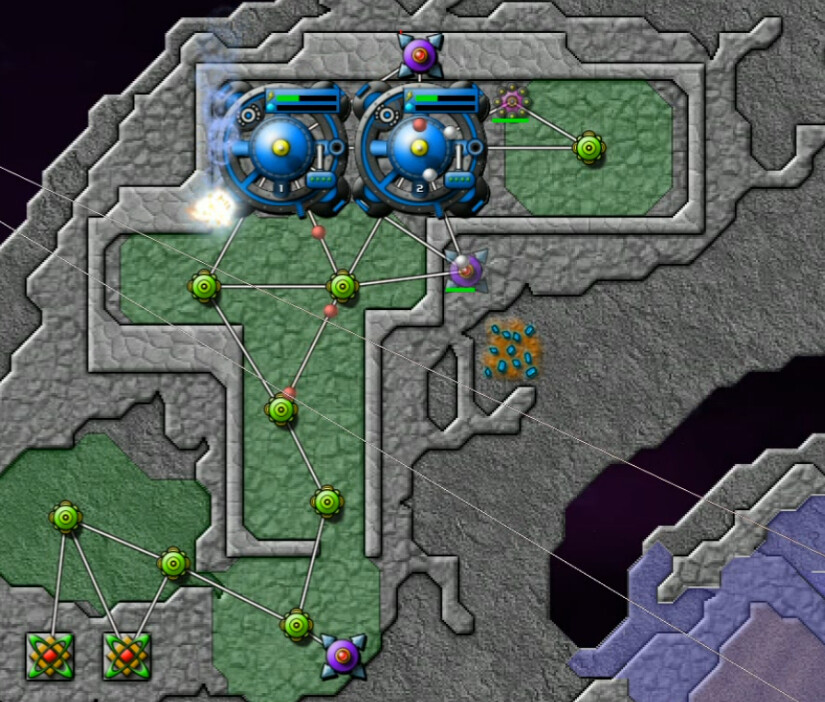
The digitalis they spawned shrivels and dies as well without them around as a source. This was a very small patch when we started out, but that was almost 25 minutes ago.
At this point I was well into the we're going to win, but how mindset. I thought about what kind of triggers there might be in terms of a device similar to an Inhibitor that would shortcut the process. I decided to head south to that dome thingy. It took quite a while to get there ...
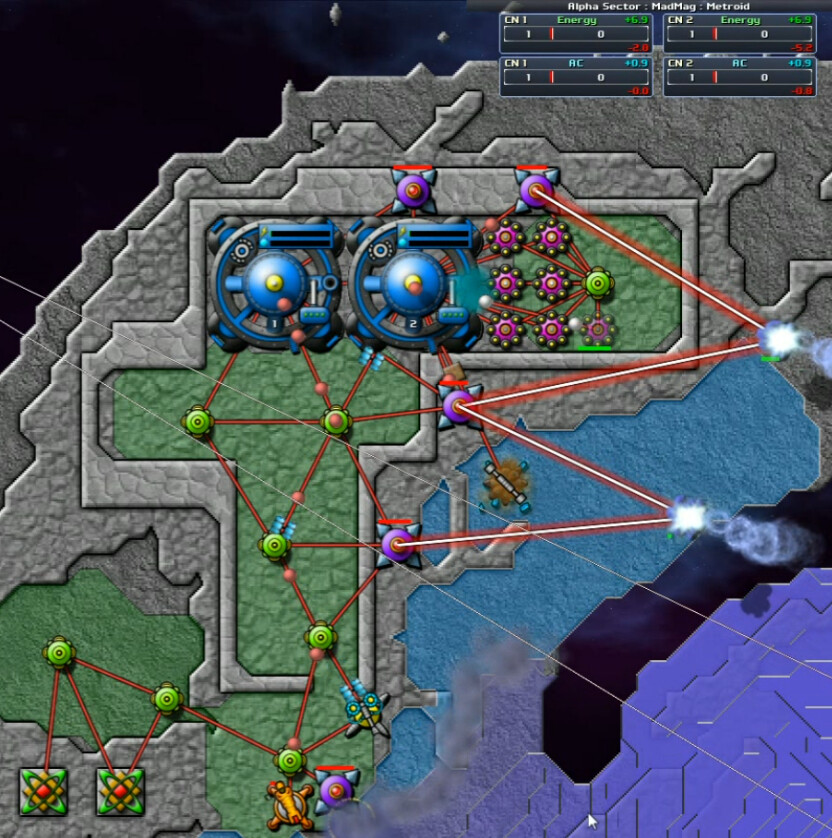
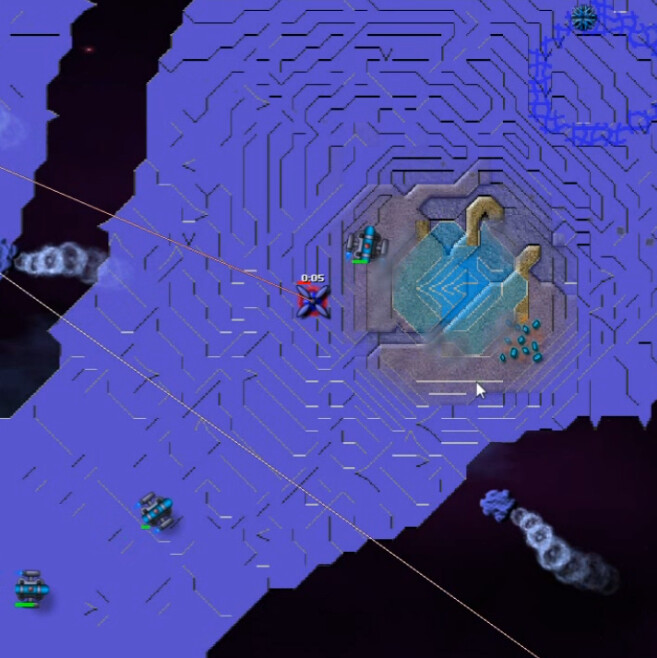
But before that, I noticed something I'd overlooked bore; Anti-Creeper Island. This pumps out 50 AC every 0.4 seconds, so it's a fairly strong one. What the heck, might as well exploit it.
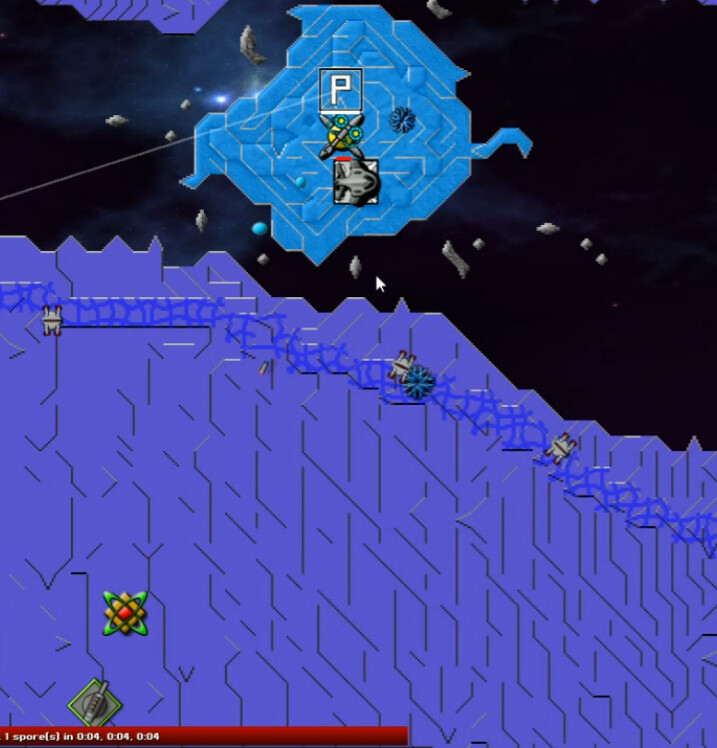
That operation was soon greeted by the nearby Creeper Cannon. If you look closely you can see one of its 'bullets' by the digitalis. These things have a pretty good range, but fortunately it didn't do enough damage that I couldn't handle it while nestled in a bed of lovely anti-creeper.
I also set up a number of Berthas just to start lowering overall levels.
Partway there, this hill seemed to call out for use of the Shield method of advancing.
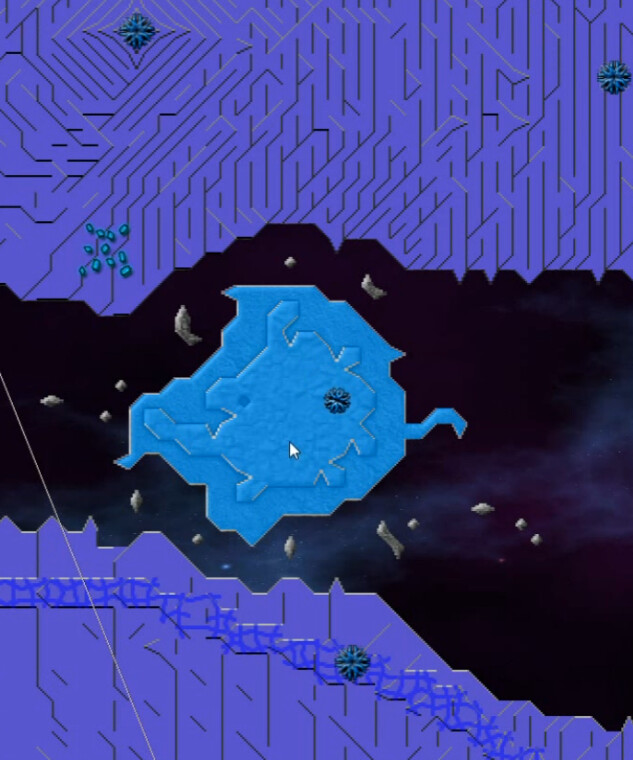
A couple of the emitters near the Dome are in the 300 or so creeper per second range, fairly strong ones. And once I got there, I was somewhat confused to discover I couldn't nullify it. Or attack it. Or do anything really, so I went to other things. Until I noticed something, that is.
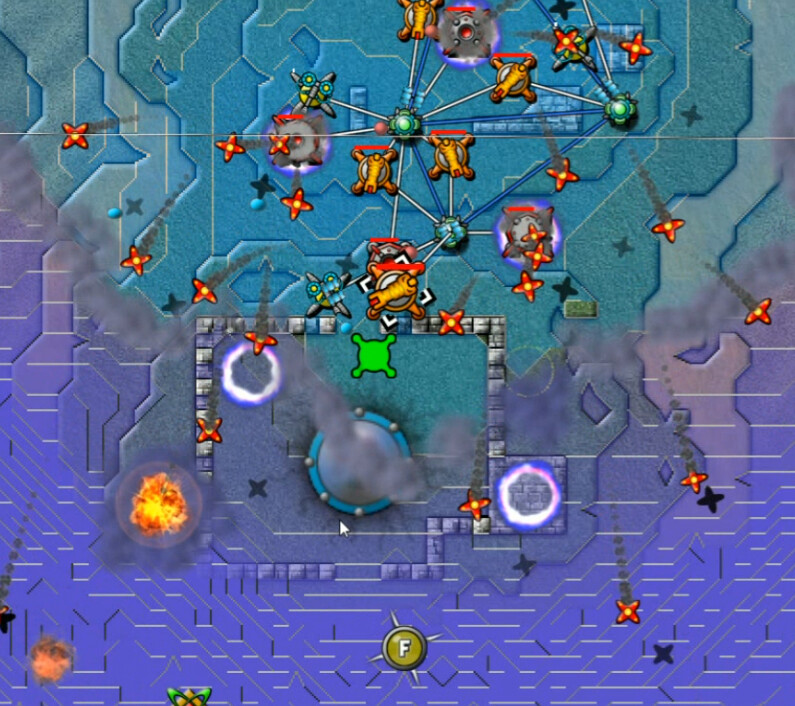
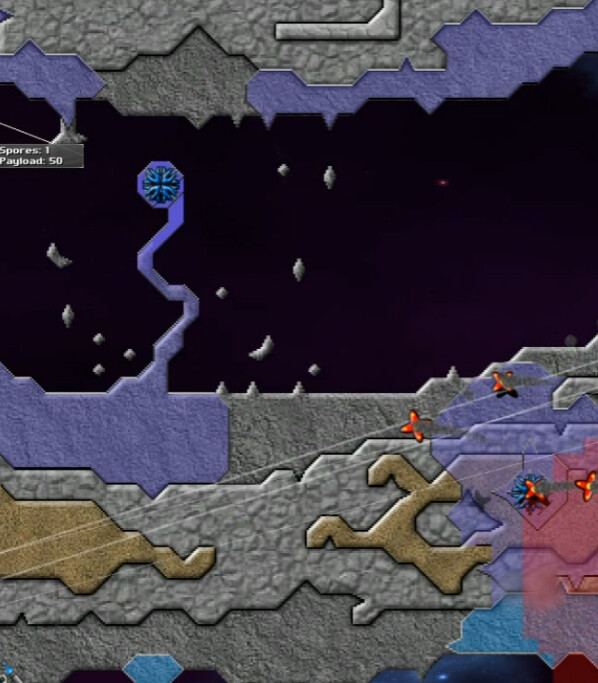
Quite by accident, although it was also inevitable, I connected to the Dome. Turns out it is a disguised pyramid structure, with a shield and the ability to produce ... uh ... something? These 'Blue Bombers' began flying off all over the place.
Despite appearing to float above the surface, the Blue Bombers take damage whenever they are above creeper. And watching closely, they appear to do damage similar to a bertha impact when they explode, and then an AC payload appears just afterwards. While not the 'quick fix' I was looking for, they definitely help.
The other idea I had was to raid the east end and take a look at that strange structure out there. It was just that though, a structure - there's no device or anything that does special things, as I eventually discovered after a Guppy-led attack with artillery clearing the way per usual. So at this point it was clear that I'd need to kill everything on the entire map.
I set to work on that, but there would be one further complication.
This section ended up being a lot more 'fun' than I wanted to be. First up, it was time to visit the Creeper Cannon. And it proved somewhat annoying. We have digitalis around here of course, and this thing likes to shoot the closest available target I think. Which a number of times meant taking out a relay that isolated part of my network. So I needed to keep plenty of weapons in range for it to shoot. I also discovered that those bullets pack a decent amount of punch in terms of Creeper, so that there's cleanup work needed after they impact.
I lost quite a few weapons here before just plain brute-forcing it with a big landing on top of this nearby hill.
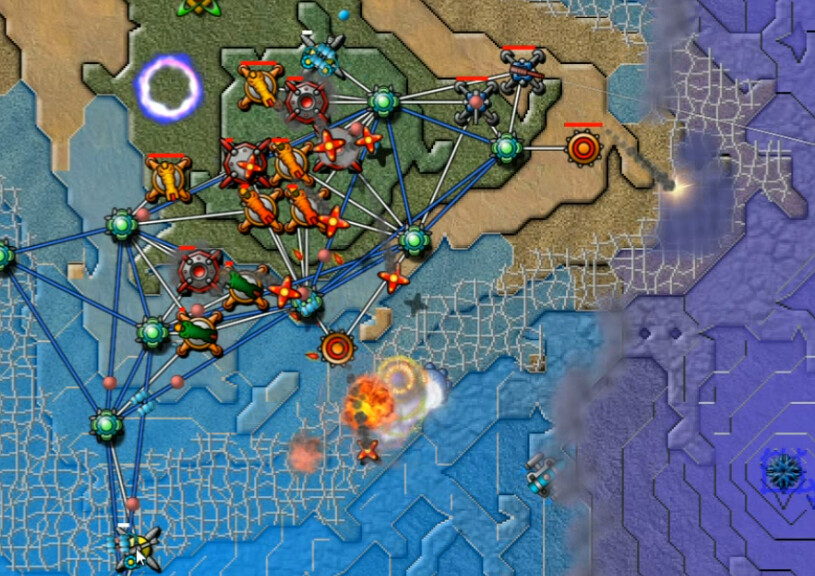
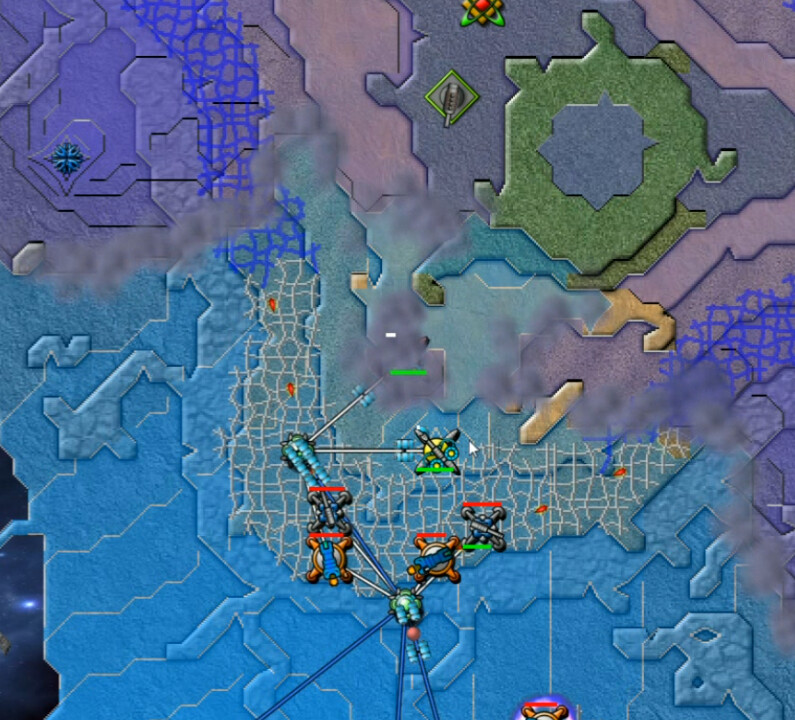
And then ... there was this thing. Wandering around this area making a general nuisance of itself was another digitalis-and-runner-spewing Stupid Sphere. Yeah I know, brilliant naming there. I try.
Anyway, it proved a LOT harder than the first one to take down. The main reason is that it puts out a lot more runners, so any standard nullifier close enough to it just gets stunned. And so do a lot of the weapons, relays, etc. I highly, highly recommend making use of SuperNullifiers since they have enough range to counteract that somewhat. You can hardly even see the thing here due to how much fire I'm putting down on it, and yet I'm pretty much getting nowhere at this point. Looks like I've got a couple of nullifiers going ... but yeah stunning made sure they never actually did anything.
There's lots of VERY narrow connections on this map. This one is interesting because you can't actually get to this emitter to nullify it without going to the land in the north to take it out, which I eventually did. After some while more of killing, and killing, and killing more emitters, I had finished Metroid.
No more StupidSphere(tm) for me.