Part 187: Waternaris*
Waternaris*Heh. So I had over four hours of footage for this one, and at least 2-3 hours more of off-screen trial and error. More the latter than the former. If you're not a fan of watching screwups or trying different things, feel free to dive in at about a half-hour into the video here.
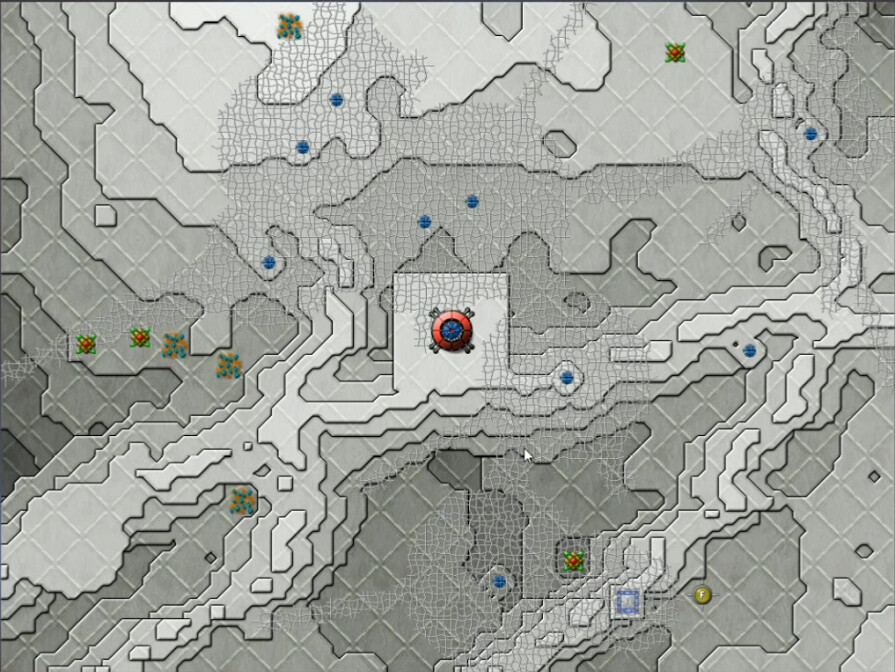
Smallish but not tiny in size, Waternaris has an inhibitor smack dab in the middle, a decent amount of Ore deposits, a single Runner nest, and no Towers at all, Spore or AE. What it does have are a number of Emitters, some of which are several times normal strength.
30 seconds into the first attempt. The southwest has the best resemblance of defensible high ground, and while I considered other locations I never found anything worth trying. Get a bit of energy and then defend with a Sprayer initially was the idea here. It's the right idea. It's not hard to see how pressed for time I'm going to be.
We've got your basic traditional CW challenge type here - getting flooded with Creeper quite early on. Aside from the Thor and secondary Command Nodes, every tool in the toolbox is available. The question is what you can afford to build and use.
Just before the two-minute mark, creeper invades my valley and the ore mine goes down. Getting the Sprayer up initially bought me time, but not all that much of it. I restart, deciding I probably really need to keep that mine alive. I didn't know the half of it.
Take 2 - 3:25 video
I build more Collectors first. And the initial AC burst isn't enough to save the mine. I failed faster.
Take 3 - 4:34
I manage to do essentially the same thing, only even worse. Mine is dead before the sprayer is online.
Take 4 - 5:45

Note to self; don't build things where they'll die before they are built. It doesn't work well.
Take 5 - 6:30

Took some time to observe the initial flow pattern of the creeper to try and find a better starting location with more time. This is 38 seconds in, and it's pretty clear I've found the right spot. Everywhere else is worse.
Take 7 - 7:22
I get the sprayer up in time to protect, add a Pulse Cannon, and then I was adding a Mortar here but it got destroyed when it was almost built, even up on the higher part of the ridge. Still, I'd defended better here. Not nearly good enough, but better.
Take 8 - 8:50

Next time I don't build as many reactors early, which lets me get that mortar up. However that essentially maxes out the energy, and I'm getting overrun in the east. I've now successfully made it through two and a half minutes, but I don't have a good plan for how to get enough energy fast enough to keep ramping up with the threat.
I would spend a very long time figuring out the answer to that question.
For a while I played around with this setup. Having a mortar on the eastern heights helped there, but it didn't fix the problem ... and as you can see the north side collapsed. This is where I surrendered to the fact that the margins were just too tight, and I would need to utilize the forbidden Pause button.

I did better pretty soon after going that route, but still was repeatedly defeated. Here I managed to get a mortar up in both east and north before getting swamped, but then was flooded at the south flank. I also pretty much was going nuts here on collectors in an attempt to get some early energy.
More experimentation ended with me concluding that I didn't want some of the collectors with really small areas, instead delaying the mine and sprayer building as long as possible to get another Reactor or two up earlier. Eventually I timed this stuff out to the second, with the mine starting at 37 and the sprayer at 52 seconds, then going up to three reactors, then the initial energy-based weapons, and so on. As seen here, this method actually allowed the mine to nearly get destroyed but just barely saved by the AC and get repaired over time after that. There was very little that was too extreme for me to do in order to find a small bit of improvement at this stage
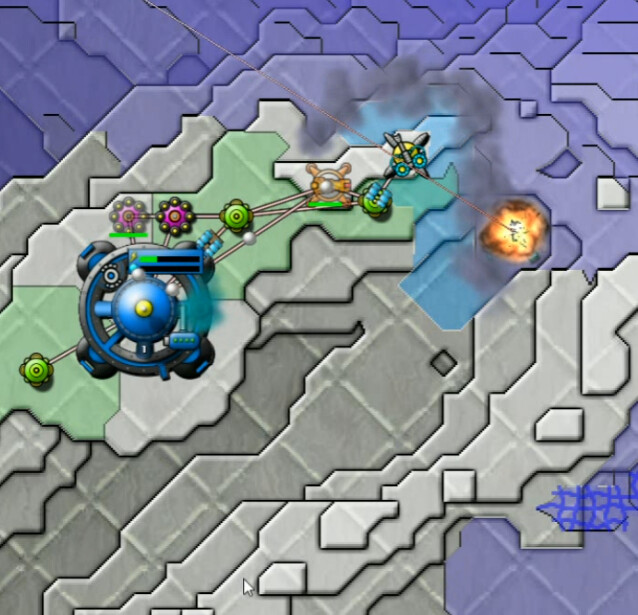
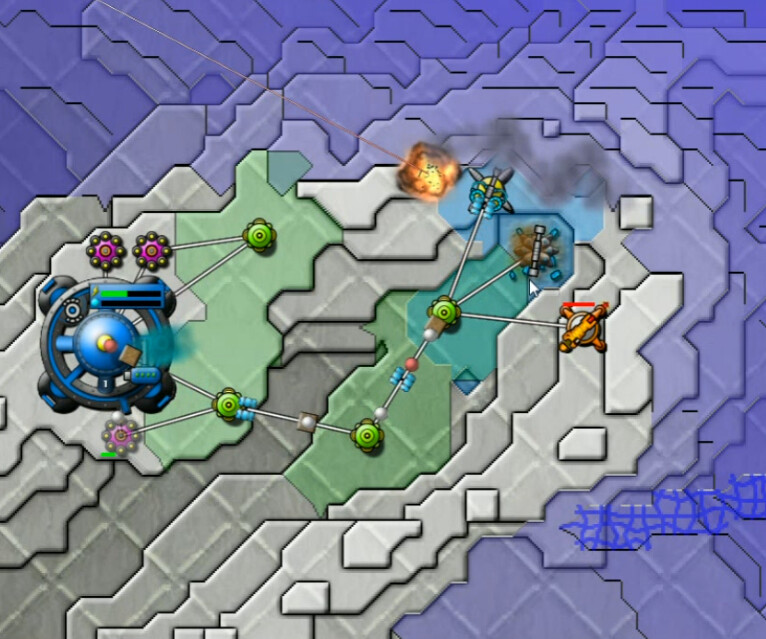
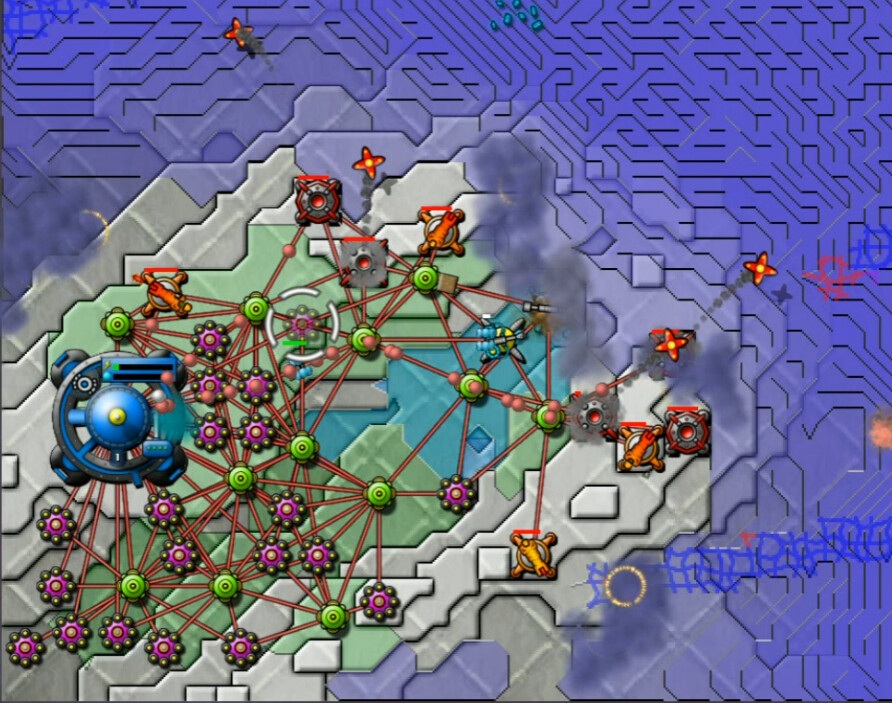
After an extended period of off-screen testing, I found a plan that, if I didn't screw it up in any significant way, would allow for me to reach something close to equilibrium. This was one of the key moments in the buildup. After getting the initial cannon/mortar combo up, I'd build a second mortar in the north and abandon the 'Northeast Passage' in between those placements, retreating the sprayer down into the valley. This was at least to me pretty counterintuitive, but it allowed the sprayer to gradually accumulate AC while firing only at creeper that trickled through that funnel. The idea is to keep creeper levels low enough that we don't get overflowed anywhere else, and then anything coming through that area gets handled by the sprayer. An unusual strategic, fighting retreat, but it proved effective.
Another important aspect here was being as precise as possible with only building as many weapons as I could afford, and then not running low on energy so as to slow down the next reactor being built. There was always one going up, and at times I'd produce two at once while adding no weapons for a bit, particularly when I wanted to add in a mortar. This whole section is what starts at about 30 minutes on the video, and there's a lot of stop-and-start to it but it's the point where I really show the winning approach I eventually found.
Each weapon built was calculated to deal with the next, biggest threat, and a couple times it was necessary to put something up, have it fire a bit, then move it somewhere else while I acquired the energy for a replacement platform. Mortars to keep the rising tide at bay soon became the biggest need.
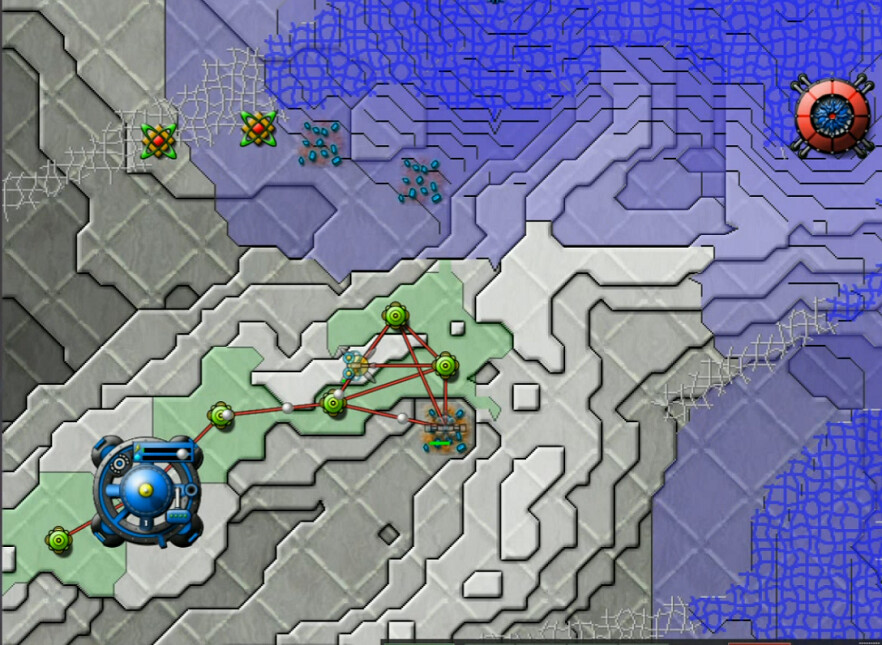
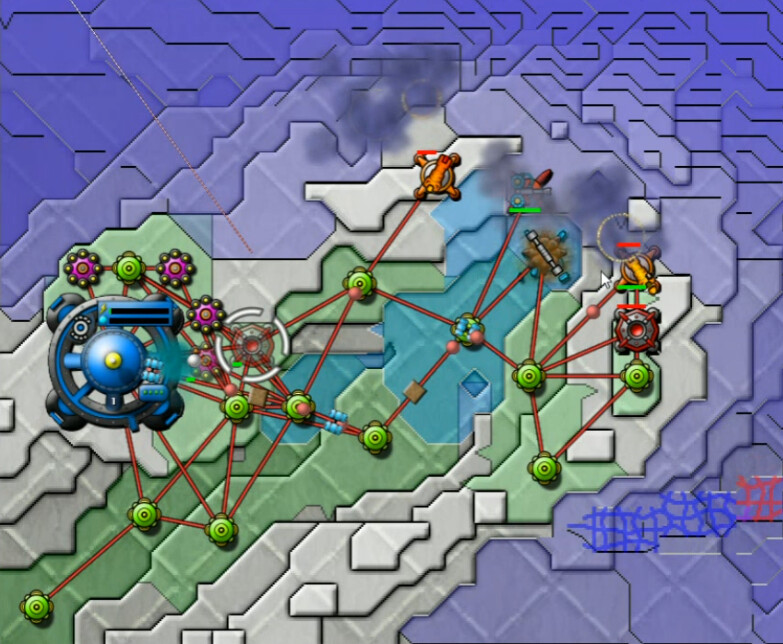
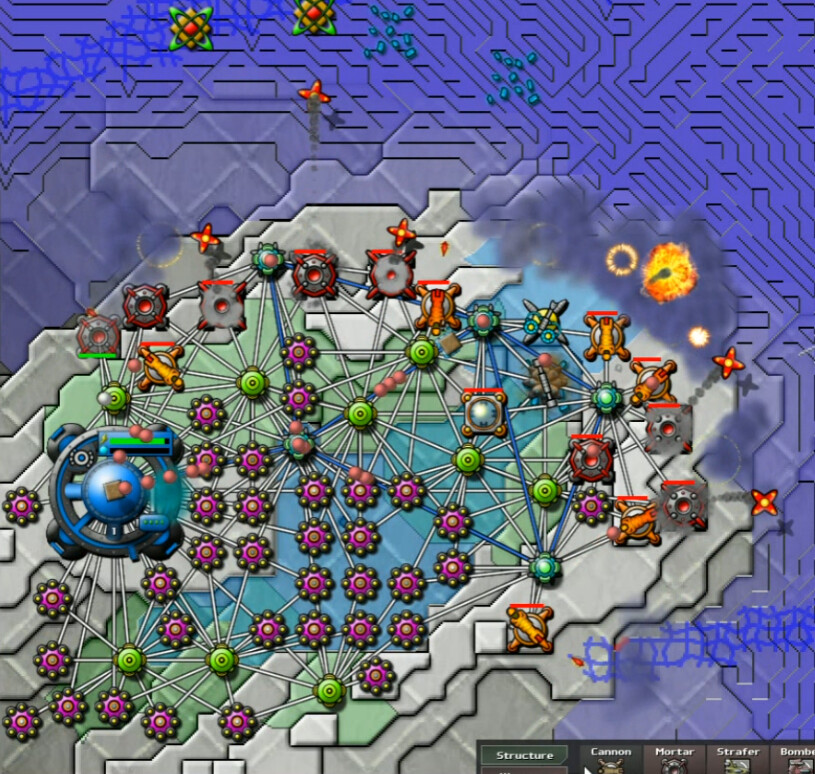
As I closed in on ten minutes of mission time, all of it filled with tense start-and-stop, this was the point of equilibrium more or less. I could hold off the incoming indefinitely or nearly so. Five mortars, four cannons, the sprayer, and as you can see I'm not far from running out of room. It's one whale of a cliff to mount at the start of this planet.
Soon after this, I added in a Terp to clear more space so I could build more reactors so I could terp more to clear more space so I could build more reactors so ... After a bit of that wonderful cycle, I slowly started to build up an attack group.
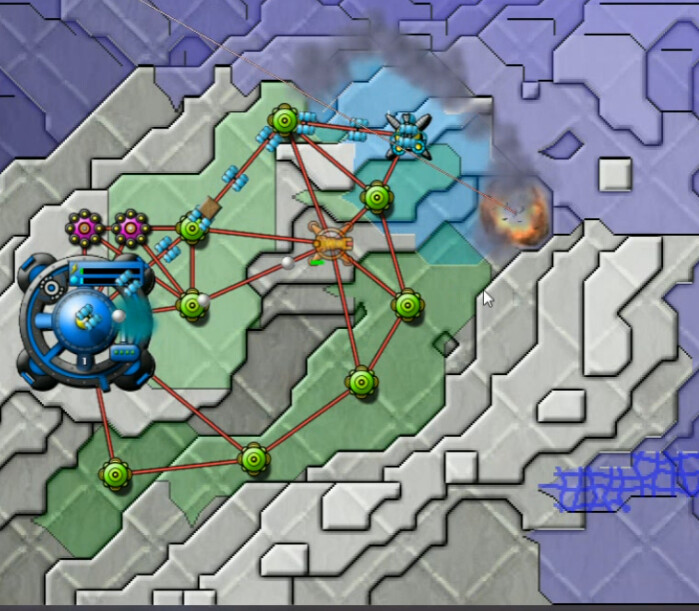
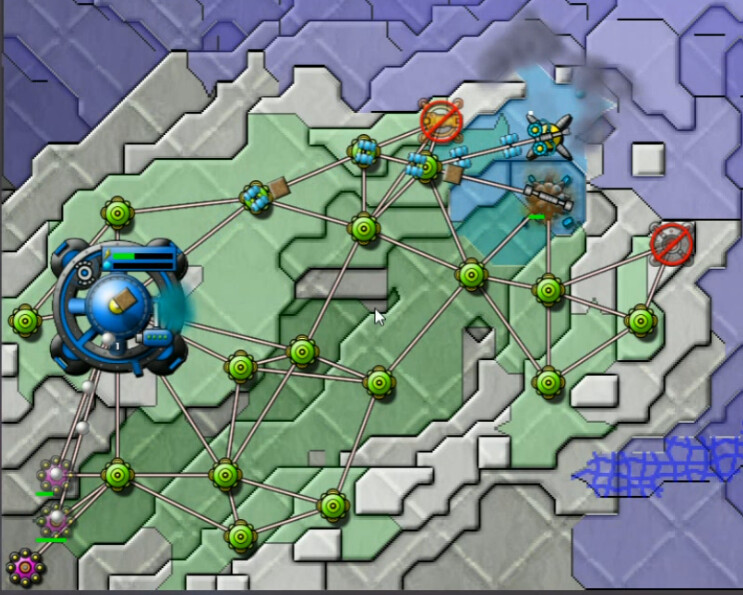
My target is the Totems to the north. You can see I've also yanked the sprayer out of the valley and put some cannons in place to assist it at the 'funnel' area - now I finally have a full defensive perimeter around the entire ridgeline.
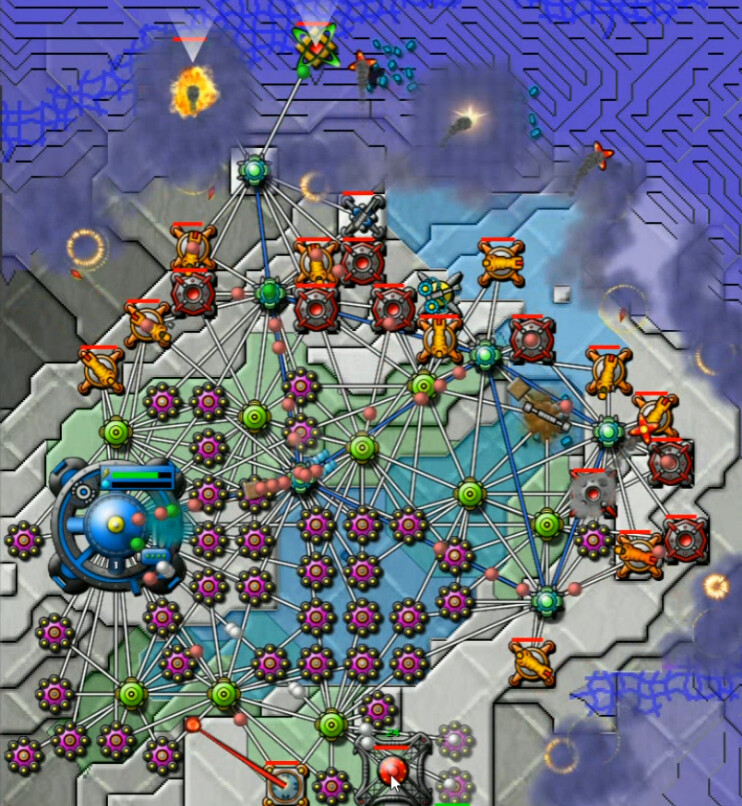
Plenty of terraforming was required. A platform in the north for a Relay to reach the totems, and one for the Sniper to protect against runner-stunning efforts, and more terrain work in the south to clear space for the Forge itself. All of it was well worth it though when starting getting sweet, sweet Aether in.

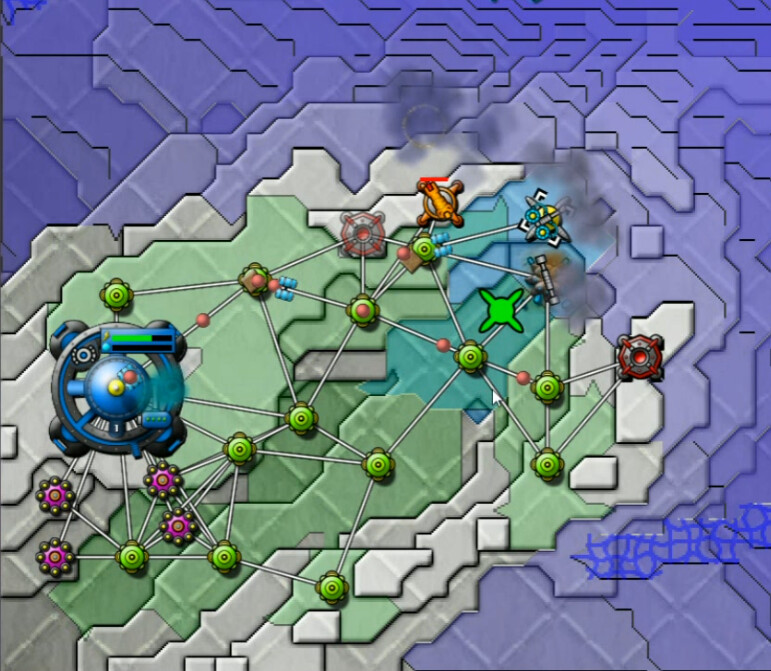
The terp's work was far from done. Next it flattened out an area to place some Bertha batteries and pound the creeper into submission. Then, it helped carve out a gradually-leveling wedge towards the Inhibitor. It was time to go in for the kill. It is worth noting that there is a significant mercy in terms of the runners. The nest spews out one every 3.4 seconds, but there is apparently a pretty low limit on them - 15 or maybe 20 at most on the map at once. Only a couple snipers or so are required.
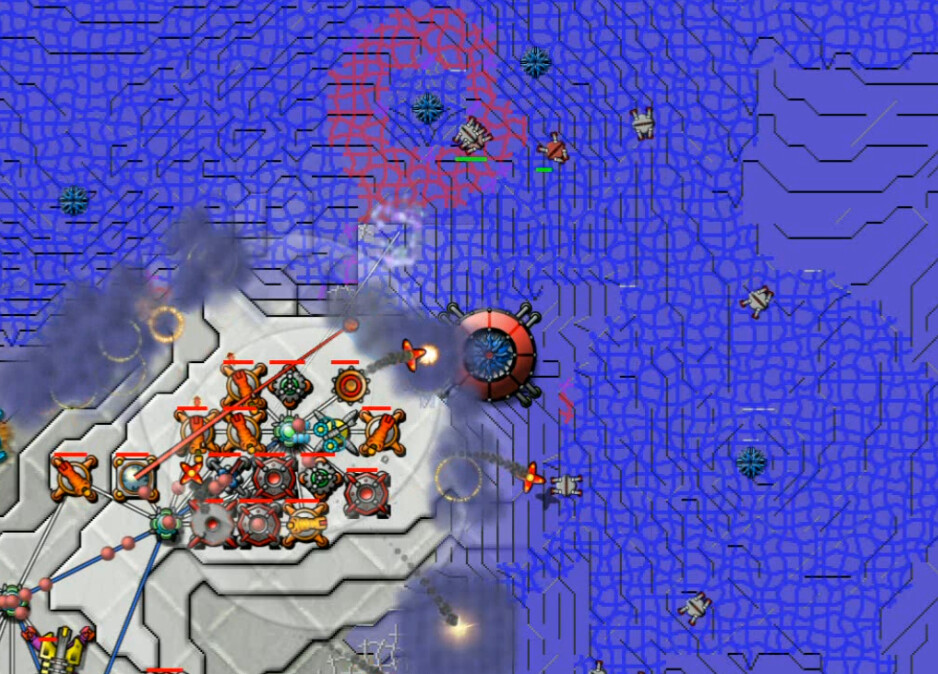
Eventually I have enough room to just throw a mass of weapons in the general direction of the inhibitor, with a Shield along to help protect the Nullifier. And at long last, the mighty Waternaris has been slain. This map was clearly balanced to make it possible ... but not by much.
Also ... it's that time. We reached the final system in the Alpha Sector, the one which bears the developer's name.