Part 197: CSM-58 SB9
CSM-58 SB9 (1:55:40)It's finally time for some CSM. This one has only the early-ish bells and whistles, so it's not as complicated in terms of learning the mechanics. The strategy on the other hand ... well there's lots of possiblities even so.
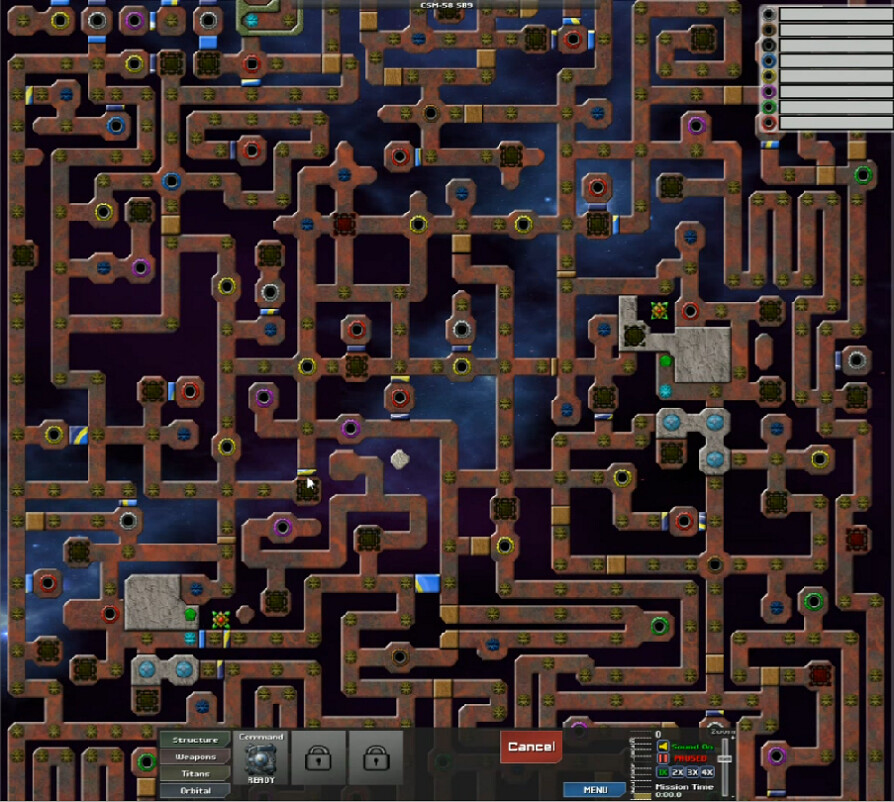
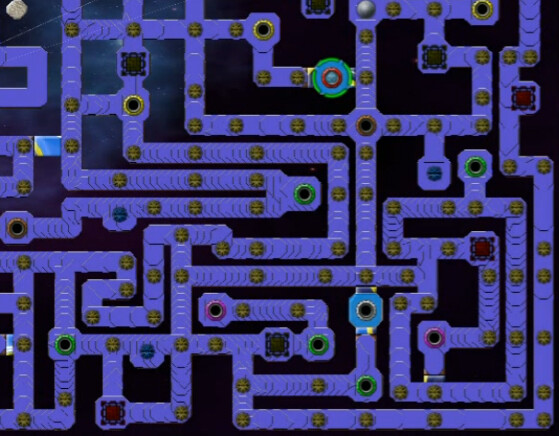
At first this just looks like a big mess. And well, that's basically what it is. A lot of CSM maps are laid out in this kind of maze-like format, for reasons that will become apparent.

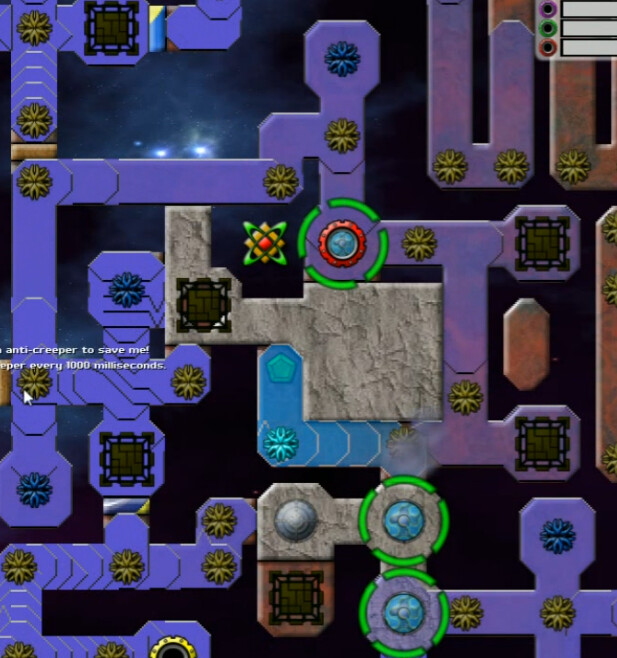
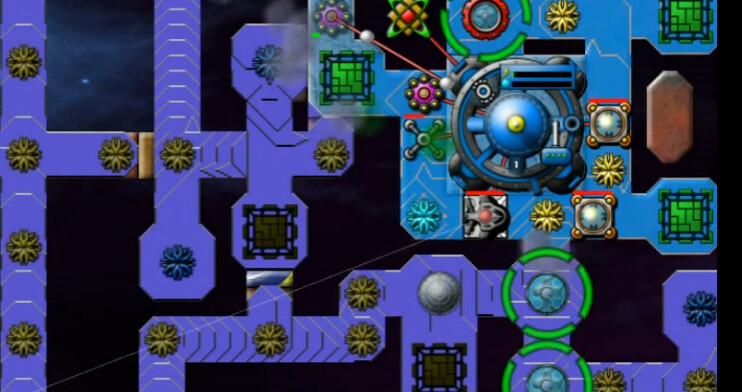
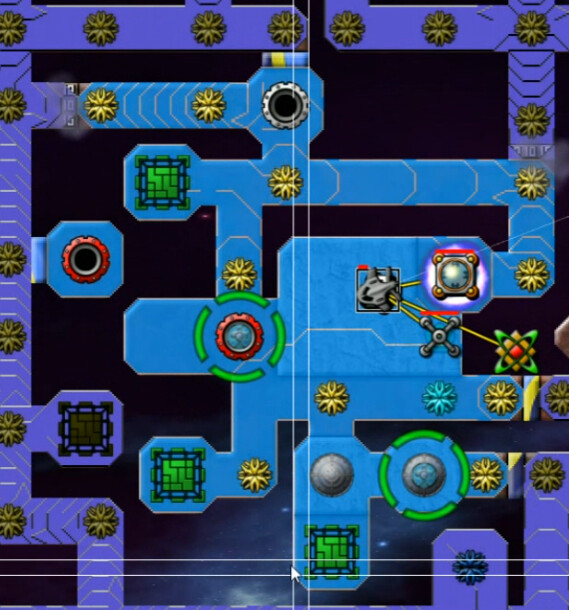
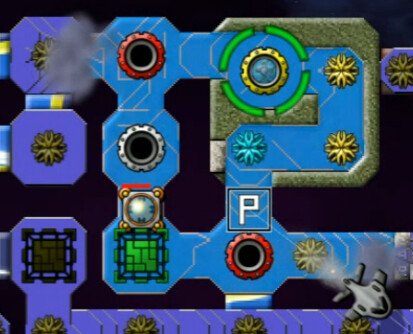
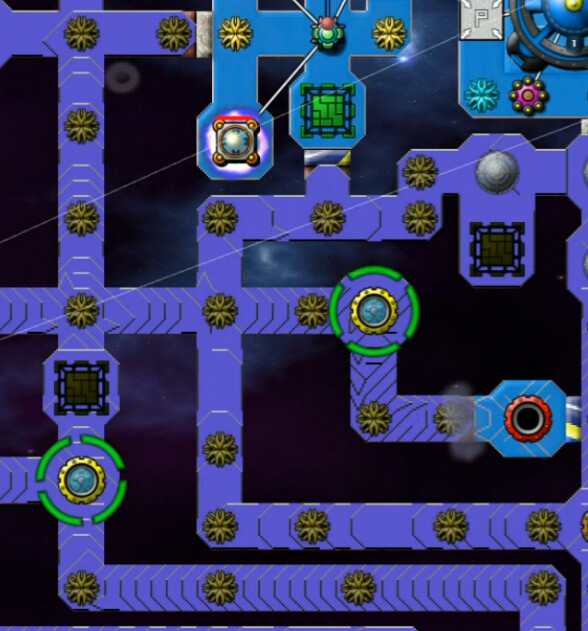
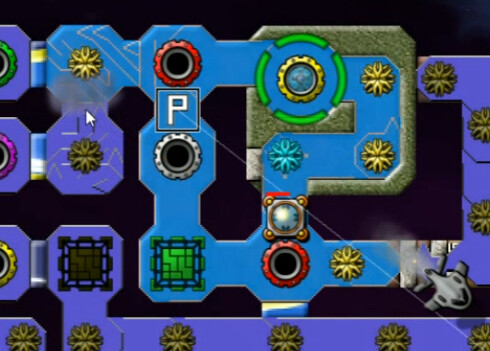
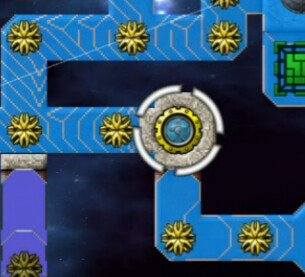
This basically mandates starting positions looking somewhat similar to this. Didn't realize it at first but there are actually two on the map, but basically a platform is left for us to land our singular Command Node. There's a lot of stuff to notice here, so I'm bolding the important things in the following list. I'm sure the CSM vets will be along to correct any errors I might inadvertently make.
** The light blue emitter produces anti-creeper and is known as a Friendly Emitter; there are tooltips for many objects and this one says it produces 10 AC every 500 milliseconds, or half-second.
** Totems and Siphons work as you would expect them to.
** The 'standard' dark blue emitters sort of do as well. They output a certain amount of Creeper and leave a Power Zone when destroyed.
** NO WEAPONS, including Nullifiers, are permitted of any kind. Destroying the creeper is done only by virtue of our only anti-creeper. How do we do that with a very small amount to start with? We must control the flow to our advantadge first of all.
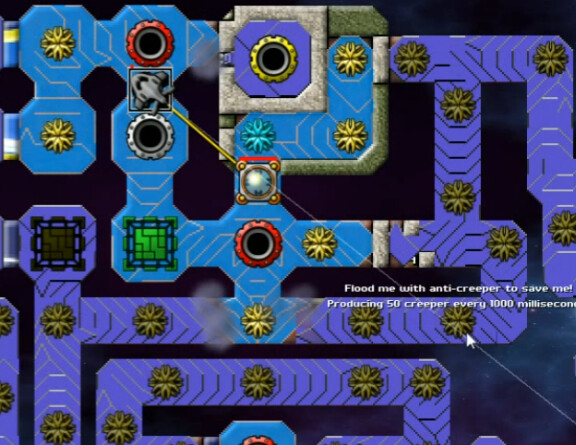
** The amber-colored emitters are known as Flip Emitters, which do pretty much what they say. They'll output creeper until you swamp them with a sufficient quantity of anti-creeper, at which point they'll turn yellow and generate AC as well. A major objective is to gradually perform a divide-and-conquer operation in which we turn the weapons of the enemy against them, instead of simply destroying them. The standard emitters are destroyed in the same way, and cannot be flipped - typically they will surge some fairly sizable amount of creeper at once upon death so it's not a painless process. The tooltip for these states 'flood me with anticreeper to save me' and then gives us the strength, which at least on this map is always on a per-second or 1000 millisecond basis.
** Towers, or as I call them a fair bit in the video Power Towers are your friends. These are the various dark square-shaped things of which we can see several here. Each one that is captured/activated - again by swamping it with AC - will 'power up' all friendly emitters, including the flipped ones. In other words, Towers are a force multiplier, increasing our output directly. There's also a reddish version of these, known as Evil Towers. They do the opposite, downgrading your total power and therefore AC output if activated. It's important to avoid doing that, obviously.
** Supercharged Walls are a thing. It seems to have been, at least at this time, standard practice for a wall to hold back 50 units of creeper, sometimes 100 but it's 50 for this map, instead of the usual 1:1 relationship. As will be seen, I'll need every last bit of this capability. This allows for the maze-map to be divided into sections. Terps are therefore essential to put up and tear down walls as appropriate, and control the flow throughout the map.
** Stargates. Note the red circular doohickey near the top middle. This is a Stargate, of which there are typically a number of color-coded networks. This will indiscriminately share creeper and/or anti-creeper with all other stargate locations of the same color on the map, in this case all red ones. I initially called them Pipes, which isn't the right name - though I maintain it's a better one since we're on a single planet, and therefore not navigating between stars, are we not? That's my story and I'm sticking to it.
** Stargate Blockers are the most recent invention as of the time of this map; I think the 'SB9' stands for Stargate Blocker 9 or somesuch. The bluish circles at the bottom are these. They can be moved to 'block' or 'plug' any stargate, rendering it non-functional. This is yet another tool in terms of controlling flow.
Exhausted yet? I haven't even started playing. This is why I'm beginning with a so-called 'basic CSM'. It gets worse. So let's illustrate some of this stuff as I inexpertly get this underway.
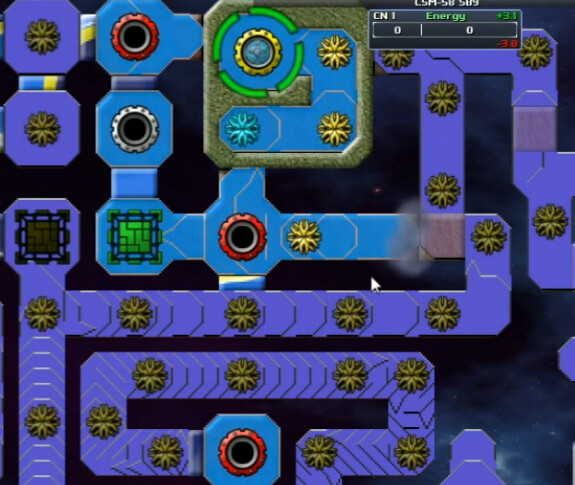
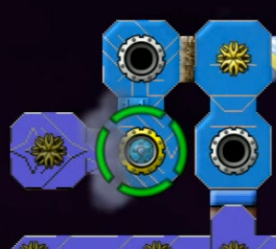
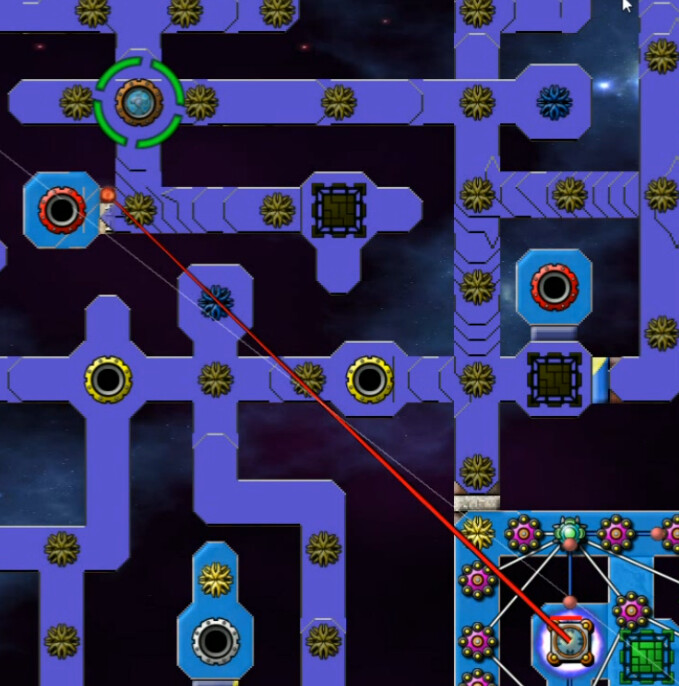
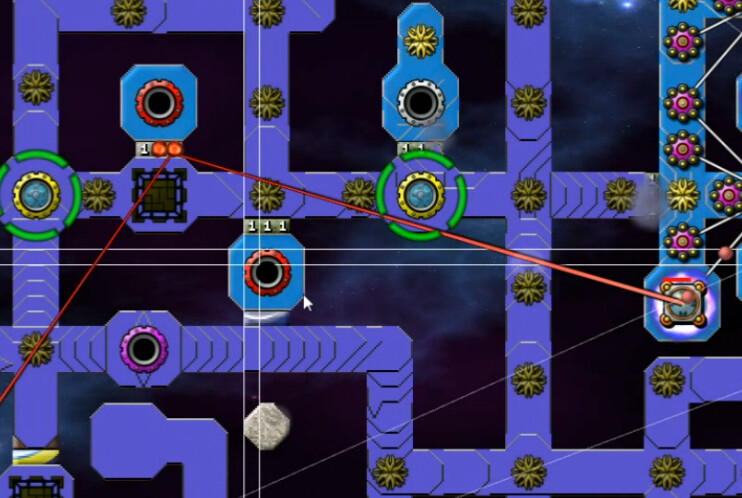
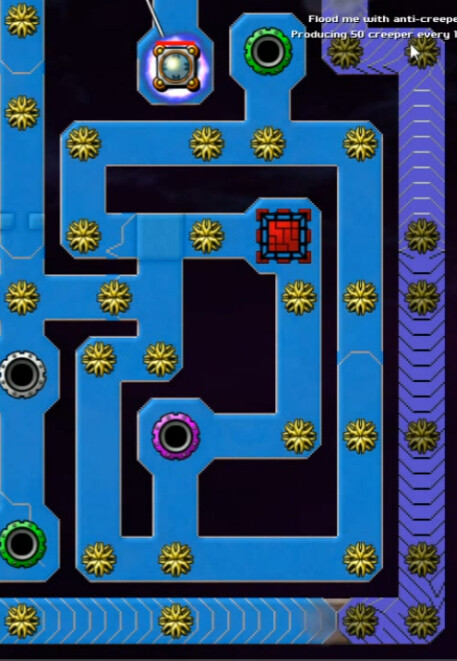
Here you can see things shortly after I've started the mission. I've moved one blocker to the red stargate, to stop it from reinforcing from the others. This is a must. It's generally good to have all the blockers in use, but my initial concern here is to conquer the starting area. After that I can try to expand. We've got a wall on the very left cutting things off, one in the upper-left, and the stargate blockers things below. All of those limit the flow, and so initially everything inside of that is my sandbox.
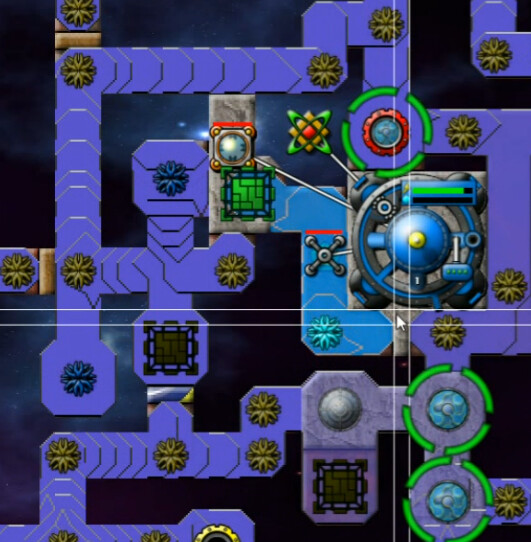
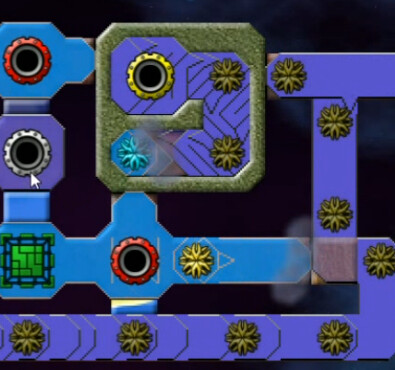
I've now deployed a Terp, built a wall to separate off my AC from the rest of the area - it can't make any progress on its own anyway - and lowered the terrain enough to cut a path to the Tower, left of the command node. Nothing else can get there, so it's an unopposed move, and now our initial friendly emitter is doubled in strength; towers can be of varying power but each of these give me +1. Now I want to cut down the retaining wall I erected and go on the attack.
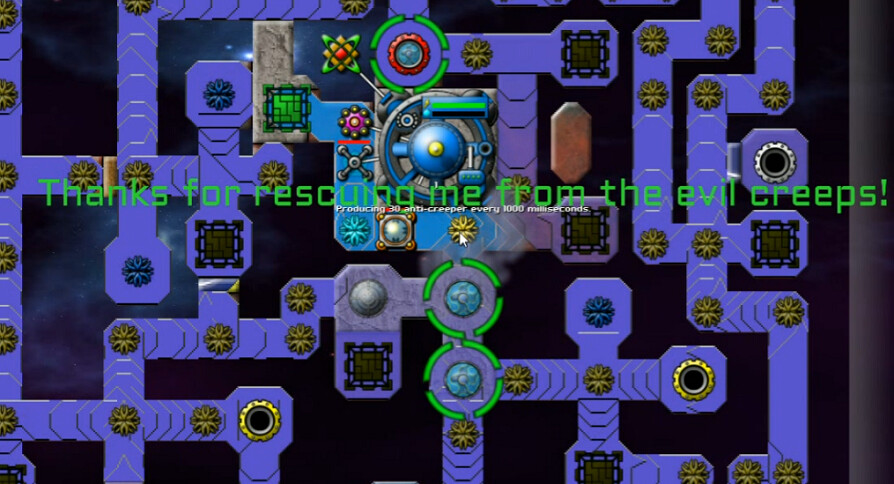
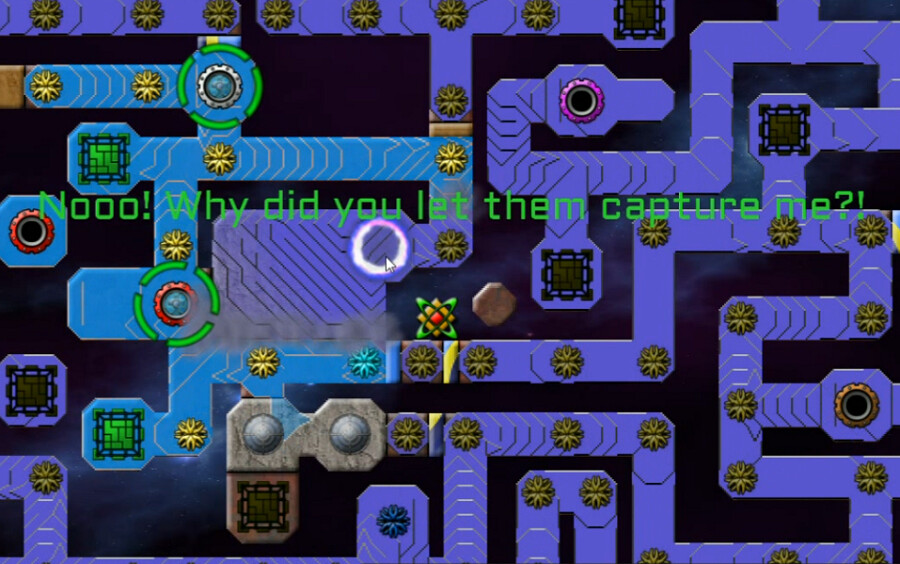
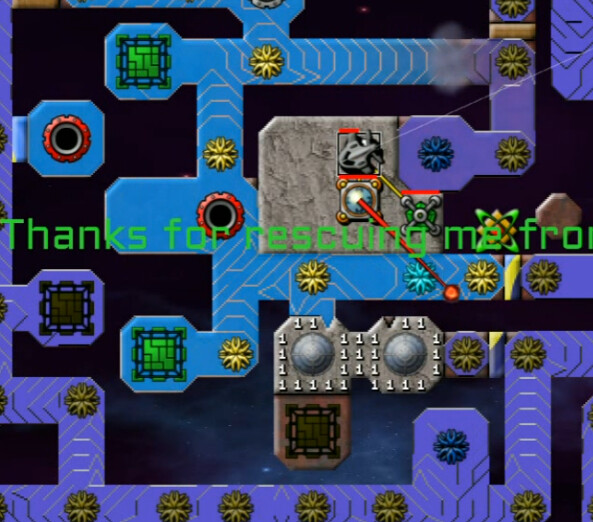
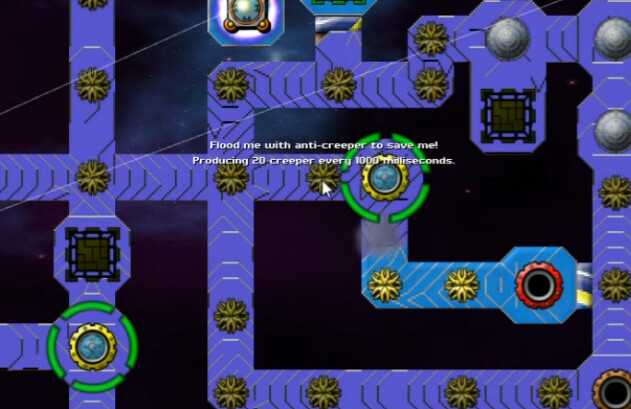
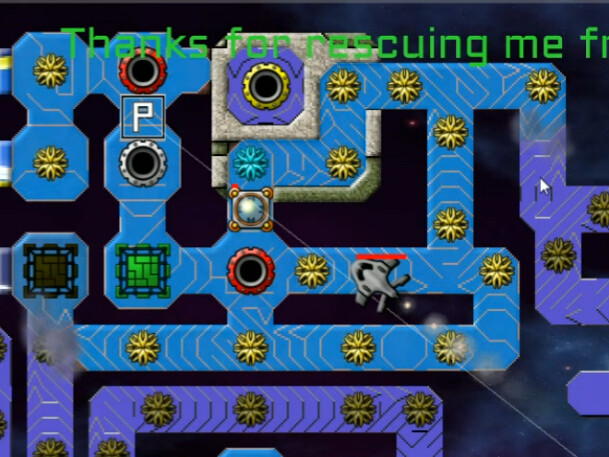
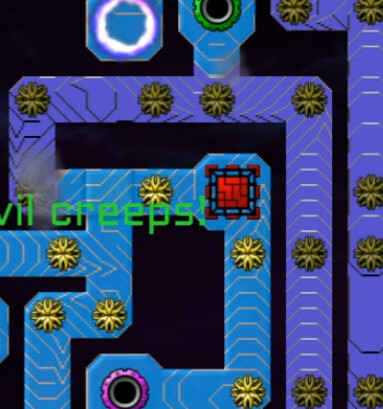
And eventually the first, weak Flip Emitter joins us. Every time something switches sides you get a nice big green message like this to inform you. And it can happen in both directions - if creeper swarms the area again then we can lose these. The way this map is designed, the flip emitters are of varying strengths when controlled by the creeper, but they will all be the same if we capture them. That doesn't have to be the case, but it's the way this one was done. So the tooltip here reads 30 per 1000 milliseconds. It would be 10, but our Towers upgraded it. What's that, you say I only have one tower? Well, that's because of ...

And then I notice we have a second starting area on the left side of the map as we progress. The location of the tower doesn't matter. Another friendly emitter here, blockers, siphon, etc., and we're starting well, but that probably doesn't continue if we leave this alone. Notice that the two red stargates have anti-creeper, but there's also a white one in this area, and that will supply bad creeper here. Don't want to fight all of the areas where there is a while stargate, so I'll need to block that.
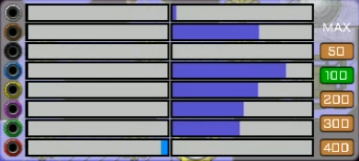
It's worth looking at the Monitor now. This is ever-present in the upper-right. Hard to make out here but the white network is the top line, and there's a very small bit of creeper there - not a lot thankfully. You can see by the dark blue bars on the right side that many other colors are filling up much more quickly. Then at the bottom, we have a small amount of light-blue anti-creeper in the red network. Essentially this is a guide to what networks of stargates are owned, or safe. And for the moment, that's red only.
As we continue to gain control over our initial area, the enemy emitter is swamped, stating 'But I still had so much to live for!' and then does this explosion. I think 3600 creeper was the amount for these, their final word at death. Which, as you can see here, has been enough to recapture one of the flip emitters temporarily, leading to this message.
While weapons will ever remain verboten, there are other things we can do. Guppies and reactors in this case. Energy will be needed to supply the terps and the infrastructure to connect things, be it local or remote. Meanwhile the fight here continues - there is more resistance on the right side but not so much that we can't overcome it. You may notice the creeper overflowing the stargate blocker area. The terrain there is only at level 2 which I did not realize, so that means anything above depth 50 will gradually try to seep in there.

Once the initial area is secured then, we want to start expanding. This is as basic and obvious as such things get - tearing down a single wall to get access to a weak flip-emitter, minimum strength at 5 creeper and we'll easily take it. But for us, it will produce many times that.
And then I notice this. A third friendly emitter! And into that yellow stargate has been flowing creeper for the seven minutes it took me to notice this. As a result, our emitter - though the friendly ones can't be captured - is not exactly winning the fight. Meanwhile our red stargate up here, completely without my knowledge, allowed enough AC in to capture a tower and a friendly emitter - though hostile creeper is flowing over the wall to the right.
This is the kind of thing that can really complicate matters. We've got stuff happening in three different locations on the map, and it's very easy to have unintended consequences. The stargate mechanic means that it's not necessarily one big wave against another, but hotspots can potentially crop up virtually anywhere.
About ten minutes later or so I decided to restart. Here's the why on that; you can see a couple of walls here if you look close where the creeper is overflowing. By the time it's doing that, it's hard to fix without retreating a bit, because you can't terraform where there's already creeper on top of the wall. A lot of walls are at the maximum of 10, able to hold back 500 creeper. But a good many of them on this map are only at 4, for 200. I did not initially realize this and assumed all were 10.
The other thing is that as is probably fairly self-evident, we've basically got a growth curve problem here fundamentally. The main idea is to fight where you have the advantadge, block the enemy off where you don't. Therefore the more leaky areas like this that are present on the map, the more difficult it's going to be to build up the requisite amount of AC to make progress. So I realized it'd be a lot faster to restart then to muddle through it.
Did most things the same but just faster on the retry. Here's one of the additions, grabbing eventually another tower and flip emitter past the stargate blockers.
Ended up being better to leave the white network open to grab things like this ...
Plugged the yellow stargate at the top to claim that area, and worked on getting some of the reachable lower walls raised up for more long-term security.
Here's another one we could flip - that room has a 50-strength emitter and is limited to 50 deep as well. The one below it, both those values are 150, which is more than we can bite off just yet. Trust me, I tried. Didn't go so well. And of course the guppy-terp combo is ever needful here.
With the aid of another blocker, I snagged a couple more emitters in the upper-left corner. Basically just looking for any way to bolster our output here.
Finally put a Forge up. Way too late, but I did it. This ought to be done ASAP. The only thing I thought I'd really need it for was firing range, but I'd forgotten about something else that we'll come back to.
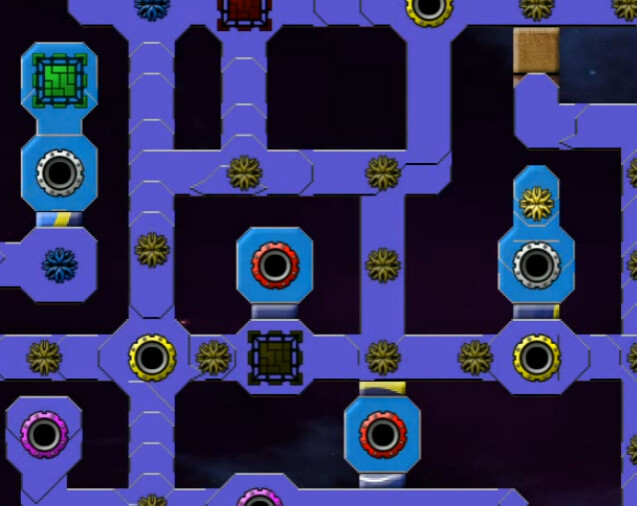
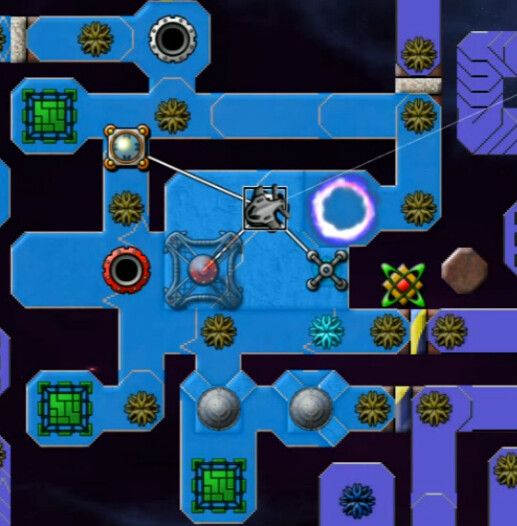
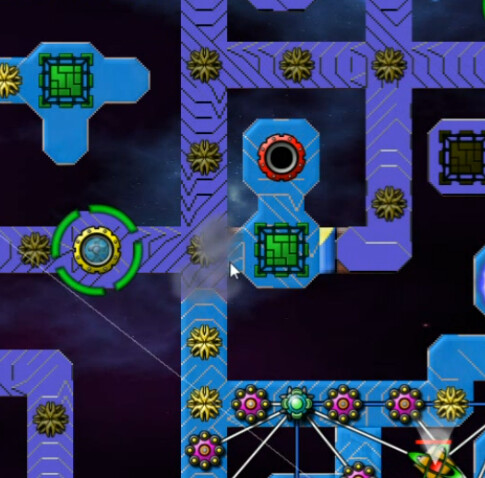
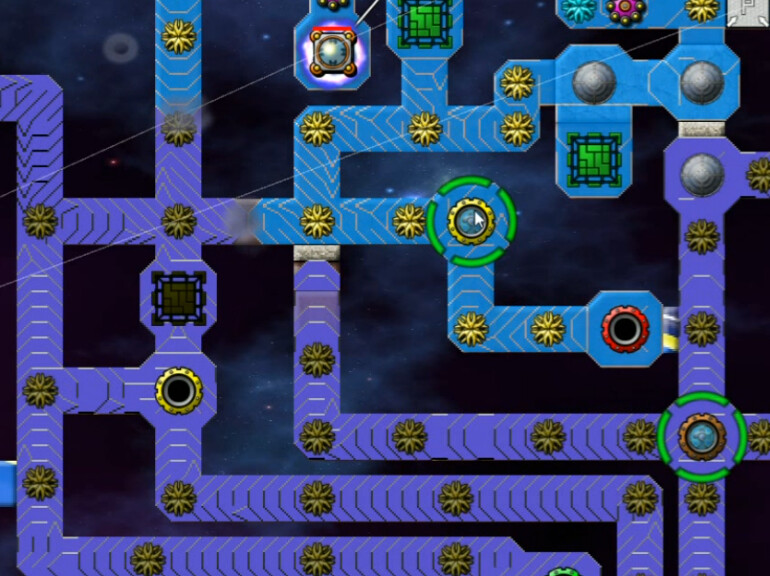
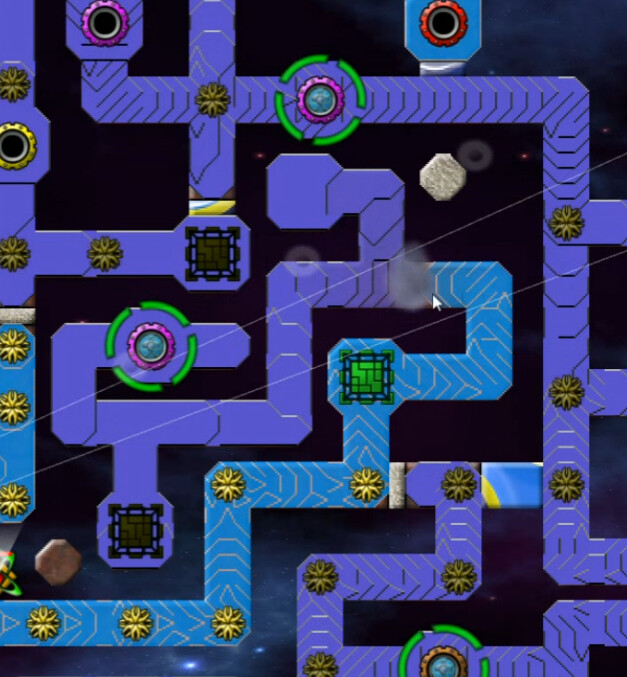
I've seen some CSM maps where it doesn't appear particularly difficult to isolate some of the stargate networks and conquer them one at a time. This isn't one of those. It's a little tough to show in a screenshot, but here's a zoomed-out one so we can see a bit how interconnected everything is. This is basically the lower-right quadrant, and we've got pink, green, yellow, brown, etc. stargates that I can't subdivide from each other. I was kind of flummoxed by this for a while, trying to figure out how to productively proceed.
The solution was found in local superiority. Overall there is still a lot more creeper than anti-creeper; the enemy is much stronger than I am. Identifying areas where there are some adjacent weak flip emitters though will require larger amounts of creeper to flow from further away to reinforce it - and it only flows so fast, meaning that I am producing more in a specific area than the enemy has I can expect to eventually gain the advantadge.
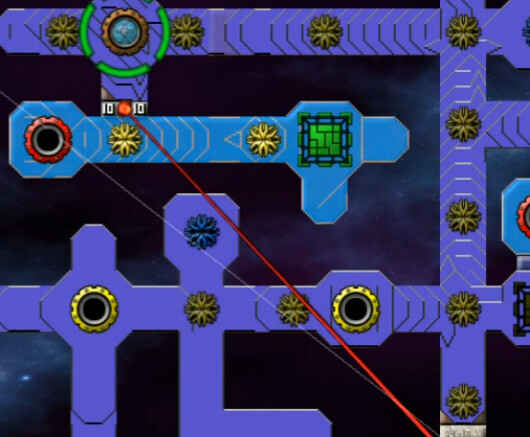
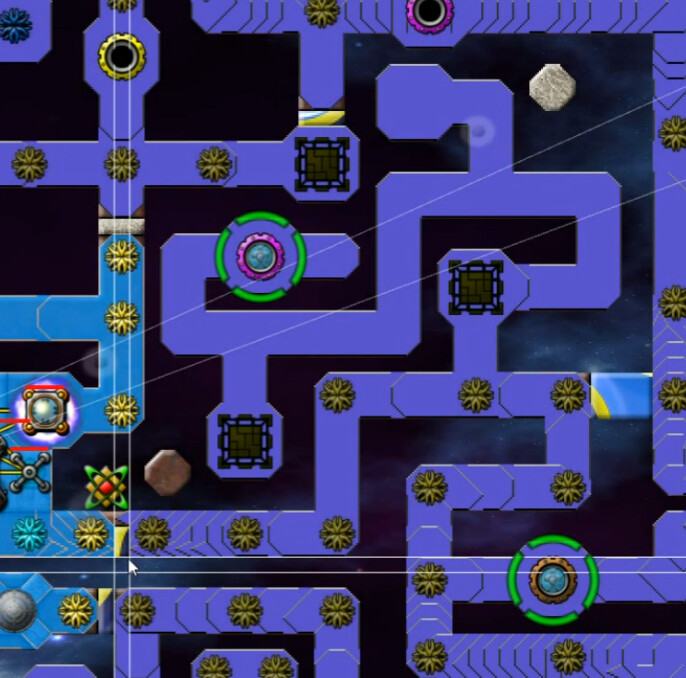
Here's the first one I did, by the red stargate I've taken down the wall to the left. There's a 110-strength emitter in that intersection above and to the left of there, but the other ones in between are pretty weak. Notice I'm also blocking a couple of nearby yellow stargates to limit reinforcement a bit.
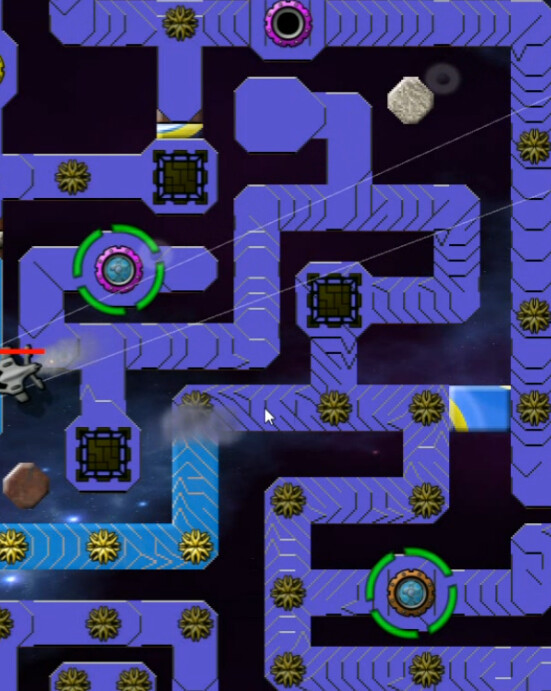
Comparing the two images now you can see I've flipped two emitters. That's as far as I'm going to get; our current strength is at 100, or 10 'power'. So any face-off between our push and that of the emitter at the intersection isn't going to get us anywhere. So I put up a new max-height wall here, take the gains, and move on.
So it continued for a while. Some places I tried worked well, others did not and I had to abandon the effort.
Knocking down this wall required two firing range upgrades, and this SuperTerp on a PZ. Even so I could barely reach it.
It was worth it though, getting a couple more emitters and even more importantly, another tower. Pushing up further above, even though the emitters there aren't that strong, was beyond me though. One of the main reasons is just stuff I was gradually learning about flow dynamics. It's not too difficult to overwhelm creeper flowing in from one direction. Approaching an intersection though where they'd get reinforcements from 2-3 directions while we only have one access point is much, much harder.
After grabbing another flip emitter and tower elsewhere, I dared to try breaching the 150-strength room. It held us off initially but was then quickly swamped. Unable to get reinforcements from elsewhere, it couldn't compete with the overall force of our combined network. At this point, our output per emitter is at 120, so we were competitive with it.
Soon afterwards, light dawned on my cranium and I decided to try a pincer-type activity, attacking from multiple directions at once. Here we are approaching an intersection, and there are decent 70-strength enemy emitters next to it, but our push and the defenders are both coming from two directions each. That's a lot of more feasible. I would use this idea of multiple fronts more and more as things went on ... and would have more opportunities to do so as well with our growing control of the map.
A couple things to notice here. Our power was up high enough that I felt ready to take on a bigger project, and I was also running out of easier, smaller ones. Notice the wall that I've only knocked down one part of. There's a long, snaking route there with nothing stronger than 50 in the emitters for a long ways. A couple of towers available in the branch up towards the pink stargate. Problem is, there is a LOT of of built-up creeper there, depths as high as 250. So draining it all ... yeah, I expected it to take a long time, and it would end up taking a lot longer than I anticipated.
Also, taking down one section of the wall at a time seems to work better. Taking them down evenly can sometimes end up with just small amounts of creeper on top of a lower wall, and then you can't progress any further. Knocking down one entire side first will force a bunch of creeper into that side because flow dynamics, and then it's easier to take down the opposite side ... I found it much more reliable and successful to use this method of removing barriers.
The first emitter along the path flipped almost immediately, second one took longer, and then things really started to bog down. We were still advancing, but at a snail's pace. Most of it I cut out of the video, esp. since there wasn't anywhere nearby to open a second front.
This is where it severely stalled out, and reached a point where almost nothing was happening other than further draining of that vital side branch. It can be seen here that is happening ... but between the two directions feeding into it further lowering of the amount became virtually microscopic.
So I took the multiple-attacks idea to a new level. Here I'm trying to invade this left-to-right stretch from four different locations. Any one of them on their own would not have succeeded, but soon the cumulative draining effect was decisive and I made further gains here.
This was my next try, while the long pathway shown before was still working and making almost no progress. What I wanted here was primarily that tower to the left. I didn't fully realize though how strong we were getting - up to 140 per emitter.
Pushing further and faster than I expected, we grabbed a number of additional emitters in the area - and would have gone further had I realized there was a block of level-4 sections of terrain slowing us down. The tower fell soon after this.
Not long after, another emitter fell on the long path, and we approached the vital branching-off intersection ... but could not quite surge past it.
We were now at the point where a lot of areas on the map - not all of them, some of the emitters are as strong as 400 - could be handled if enough different avenues of attack could be opened. This was the next section - we'd been sytmied here before but not this time.
In order to keep moving the blockers where I needed them, I found it necessary to completely encase some stargates like so to avoid them causing problems.
This whole continual attack process, combined with the relentless push we'd made locally, finally allowed us to push past the crucial branching-off intersection. That wall to the right of it is just to direct all our force up towards clearing off the tributary, and getting both towers under our control.
At this point, a gradually more and more general attack proceeded. I wasn't so much targeting specific areas anymore as opening up any wall where we had an advantadge.
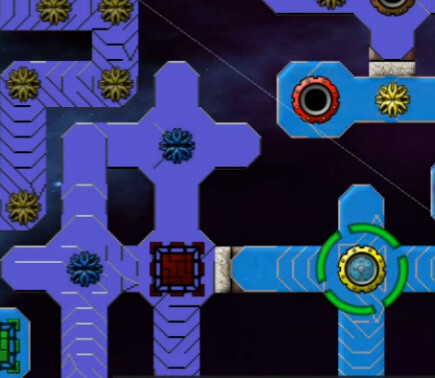
This was the first evil tower we came into; I set up walls well before we got there, so they would be built as soon as the creeper cleared. Once that area fell, I moved around the map basically taking down almost any wall I could find, save those at super-concentrated areas. Even that was only a short period - eventually I just yanked out all my blockers and tore down every wall, regardless of what was going on. Any local superiority the creeper might have would soon be overcome by the might of our combined flow.
There were a few problematic locations at first, but in most places the creeper depth was already down to about 100 and those that weren't soon got drained by our reinforcing aqua goodness. After more than two hours of struggling uphill, the creeper was finally helpless before our onslaught.
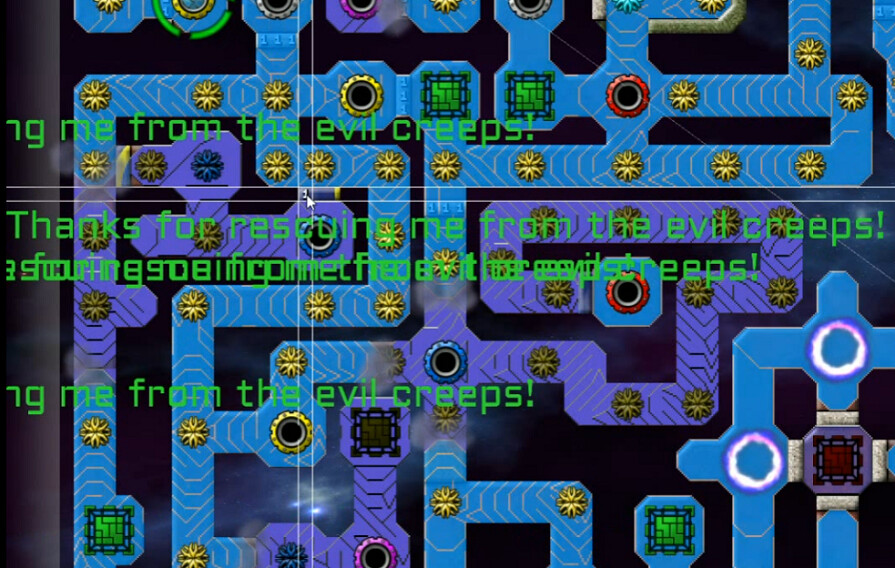
The screen filled with liberation messages at times, far too many to celebrate each one individually. Even at this point, we only controlled maybe half the map at most - but we were getting 200 roughly per emitter and that was significantly more than the enemy could average. One by one the stargate networks fell to our power, multiplying the attack vectors. I couldn't even keep up with the terps, spamming relays all over the place to extend our operational range.
I could not control what I unleashed, which was mostly a good thing, but I did end up triggering three evil towers like this one, not getting walls up in time.
Finally it all came down to this. Looks like we can just eventually push through this, but it's not that simple. It might have been possible with no evil towers activated, but even that I doubt. There are multiple 250-strength emitters in this pathway, and only two directions to push into it from. Our emitter strength was 300. That wasn't enough to just overwhelm it from a distance away. We reached a point of annoying equilibrium, having hundreds of AC depth across the entire map. I even tried backtracking by using walls, but our emitters were too strong for that to work. I was well and truly stuck.

That's when I eventually remembered something I could have used earlier. The power of the Singularity. I had so much Aether built up by this point that, if needed, this would have lasted for over 18 minutes. That was not necessary though, as the AC swept in fairly quickly and flipped the last group of emitters, triggering victory!
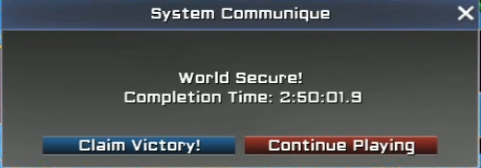
And in just a hair under three hours on what is a one-hour map. *Ahem*. Clearly using the singularity earlier to clear troublesome areas would have helped just a smidge. Either way, I've conquered my first CSM map ... now on to further advancements in the genre.