Part 38: Special Ops: Chop Raider
Special Ops: ChopRaider
https://youtu.be/uyJ38uGthTU

One emitter. A strong one, but still. Spores with a 3-minute timer. This doesn't look bad at all.
Doom Timer: 6:28
Appearances can be deceiving though. There's more to this planet than initially meets the eye. The first time I did this, I lost.
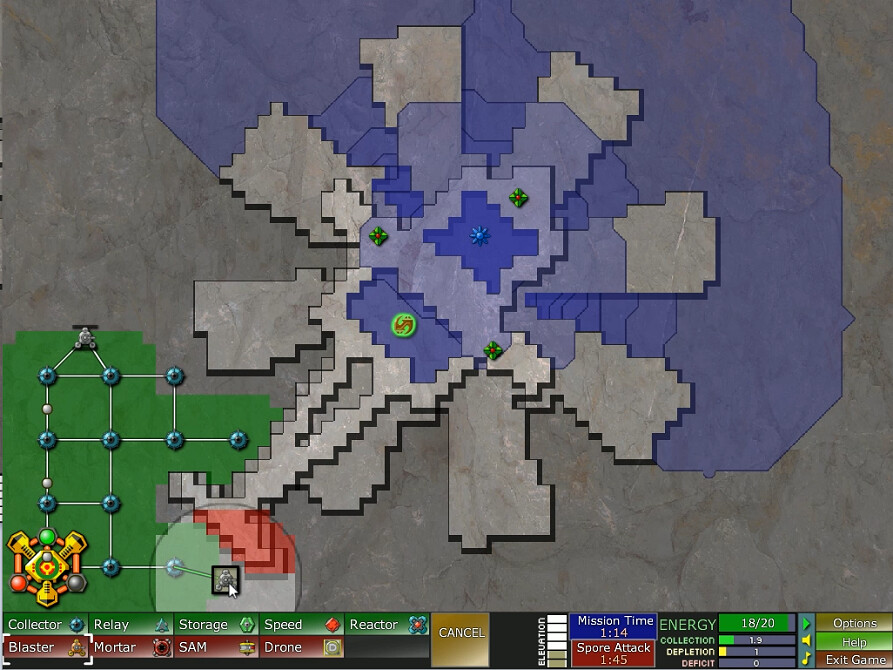
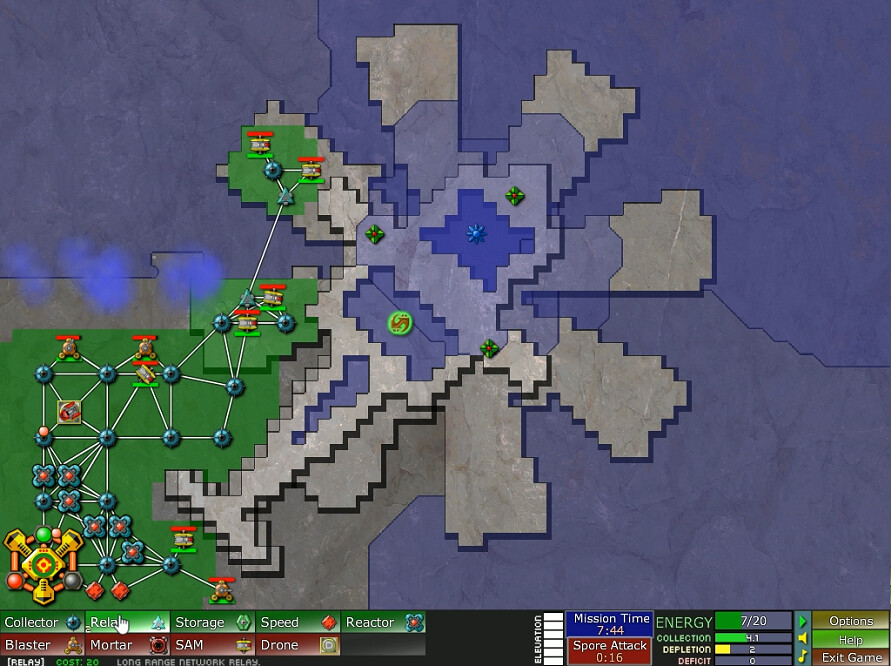
This is about as far as you can get away with building before getting ready for the creeper on the plain to start flooding everything, and the spore attack.
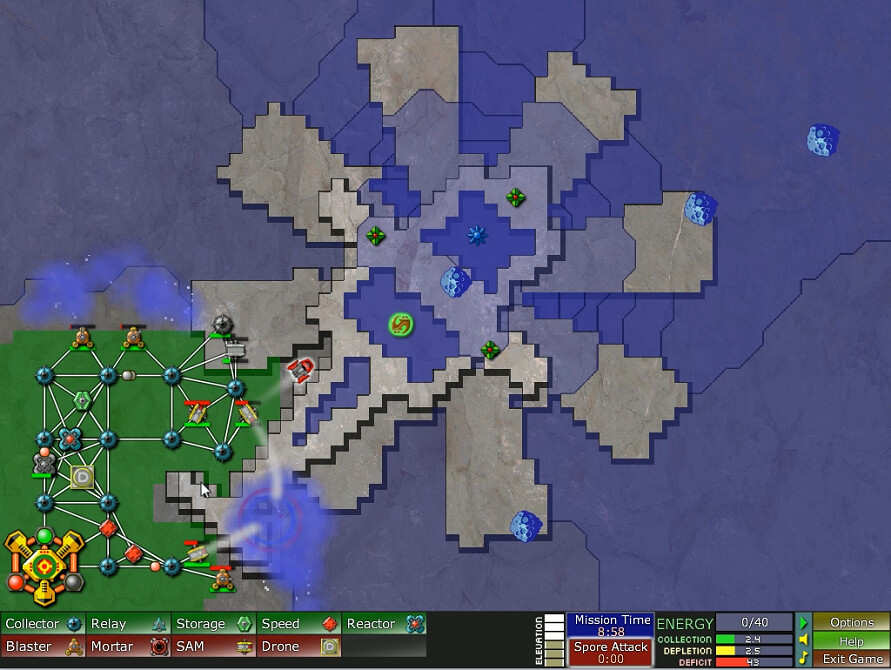
I built two SAMs the first time I tried this level. That's not even close to being enough. Usually the spore attacks are an afterthought basically, and that would be plenty. That isn't the case here. Four sites is more than needed for the four incoming here though; in retrospect I'd recommend three of them and going up to 4+ soon after. The careful observer will note that we've already got an indication of just how much fun this will be though. Look at the Spore Attack timer. They haven't even gotten shot down yet and it's already down to less than a minute. And it will get worse.
I've also got a drone going to hit the emitter and increase the pressure on the blasters. Unfortunately, even though I've been through this before, I have also made a possibly fatal mistake; the storage and speed buildings. We'll see shortly why this is wrong.
The four spores are shot down with 51 seconds to go on the next attack timer. It takes about half that time to get their ammunition back to full.
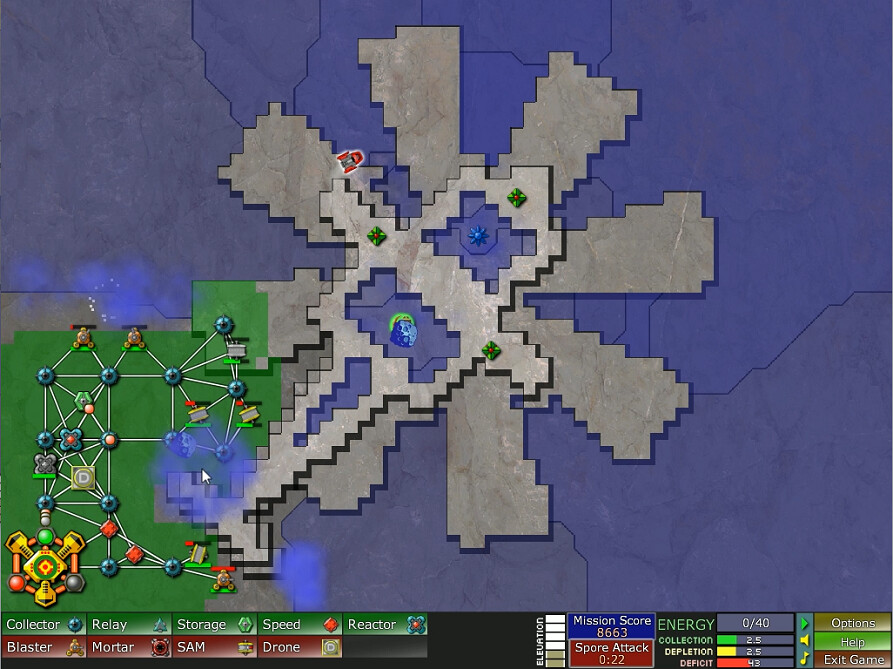
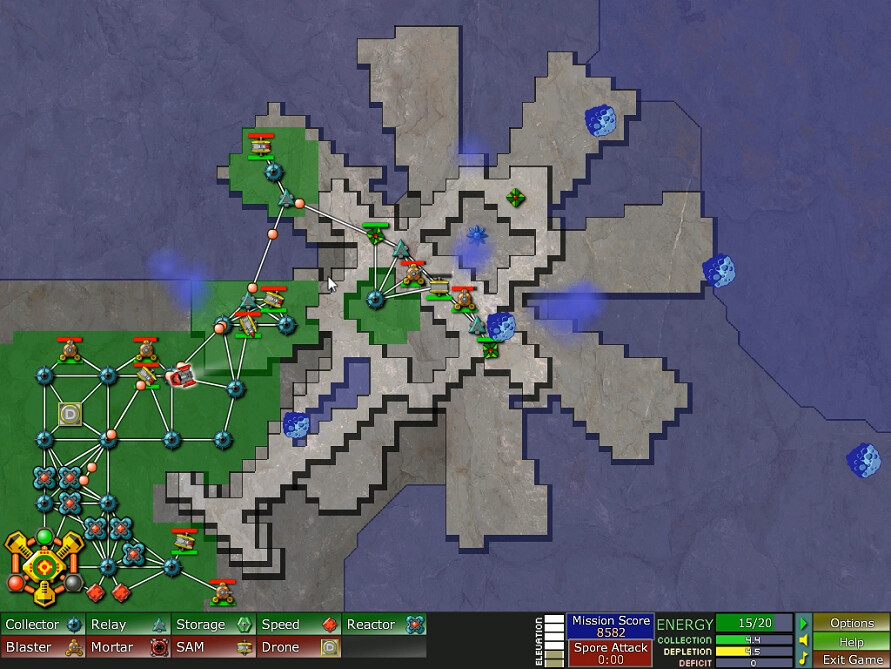
The second wave. All the buildings are done and the bomber is powering up. That's good. This time six spores come in -- and by the time they are destroyed, I have exactly 18 seconds before the next group enters. And that right there is the big challenge with ChopRaider. You simply don't have time to do much building in between spore attacks. If you don't have your basic setup right by the time the second attack hits, it ain't gonna never happen. As we will see shortly.
Ten come in the third wave, and I barely get them all.
Another ten in the fourth one, and this time they take out a SAM site -- I tried to expand my network to increase energy. You can see the northern blasters are struggling to keep up, even with bomber support. Now I've got to try to rebuild a SAM and get that reactor going and get ready for ... 21 seconds from now. There just isn't time, and that's an ugly deficit number when operating at just over 2 energy income.
This becomes a pattern for a bit, but I'm barely holding out and things get a bit better when that reactor comes online. I start a second one.
Here's something helpful that's good to keep in mind. Two missiles have fired at the same Spore; when one hits and blows up its target like it has here, the second one will switch to another spore ... even if it isn't within range of the SAM. For that reason, clustering SAMs close together, esp. if you know what direction the spores are coming from, can be quite effective. You definitely don't want to space them out too far on this map, as they'll never get resupplied in time to deal with the volume of spores coming in and 'flooding the zone'. However, this does also mean that you'll sometimes waste a missile at the end of a wave when multiple SAMs fire on the last spore.
Confession: Until I played this level, I didn't realize you could move the SAMs. I don't know why, I just assumed they were stationary. Kinda dumb in retrospect, since moving weapons is a big thing and ALL the other types move.
Like, say, this one. Notice that none of the SAMs have enough ammunition to fire. My line of defense is breached, and this one lands basically right on top of the under-construction reactor. I'm lucky it doesn't take out the operational one. I had only 3 SAMs up when this attack hit, and that's not enough.
I'm slowly losing the 'stalemate' here, and the next wave does a little more damage. The one after that ...
Yeah. It's over. I know the basic idea for how to beat this level, and I still lost. Didn't split up the videos this time, just restarted(a little after 11 minutes)
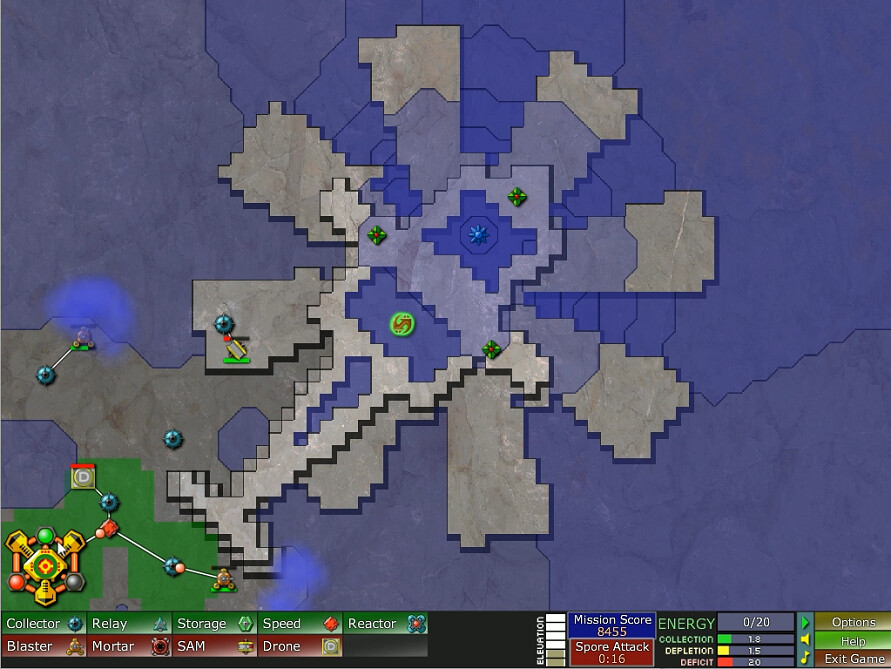
Started the same, but then built a couple of reactors on the re-start as soon as the collectors were up. More energy = faster re-arming = better recovery between attacks. That's the goal at least. I had two Reactors up by the time the first wave hit, and finished my fourth about the time the second one arrived and things started getting real. Over 3 energy collected now, significantly more than the first time. That's a lot better.
I would add two more for a total of six before starting to expand with more collectors and SAMs. Still had the rare spore get through, but I was able to repair/rebuild afterwards much faster.
Moving around the blades of the chopper's 'wings' seems a sensible way to expand here. The little bit of energy gained from the collectors isn't nearly as valuable as getting closer to the emitter.

The artifact text of course. Really pimping that cross-promotion there aren't we Virgil?? Ima sticking with just LPing your entire CW series. I hope that's enough for you; I don't plan on playing ChopRaider.
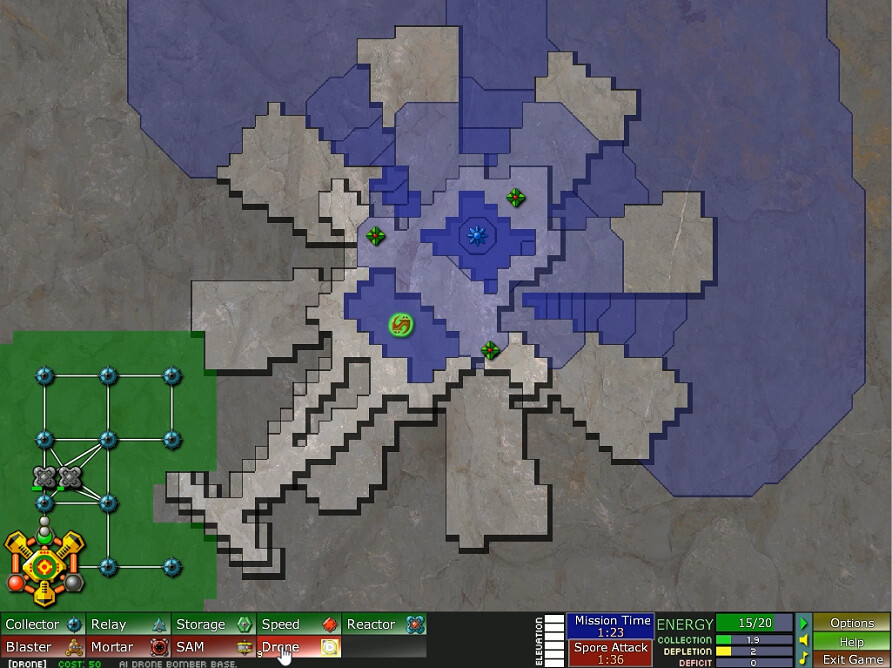
After a couple of attempts, I get this rather bizarre-looking line of structures in place to quiet that emitter. That pretty much takes care of things, but it's still not entirely a non-event to get to the final Totem.
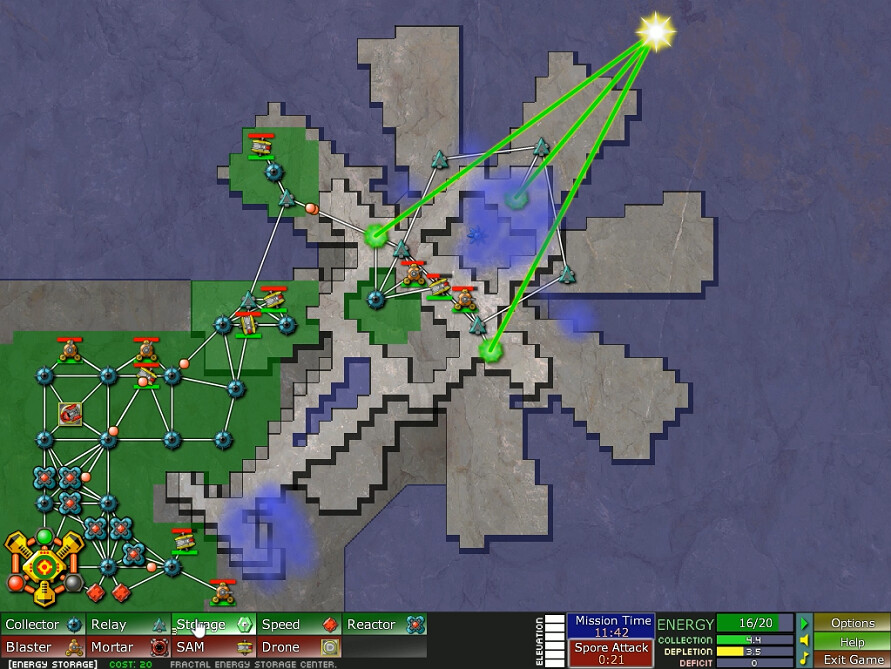
Spores take out one of my Relays, so I build them around both sides for redundancy. It's over.
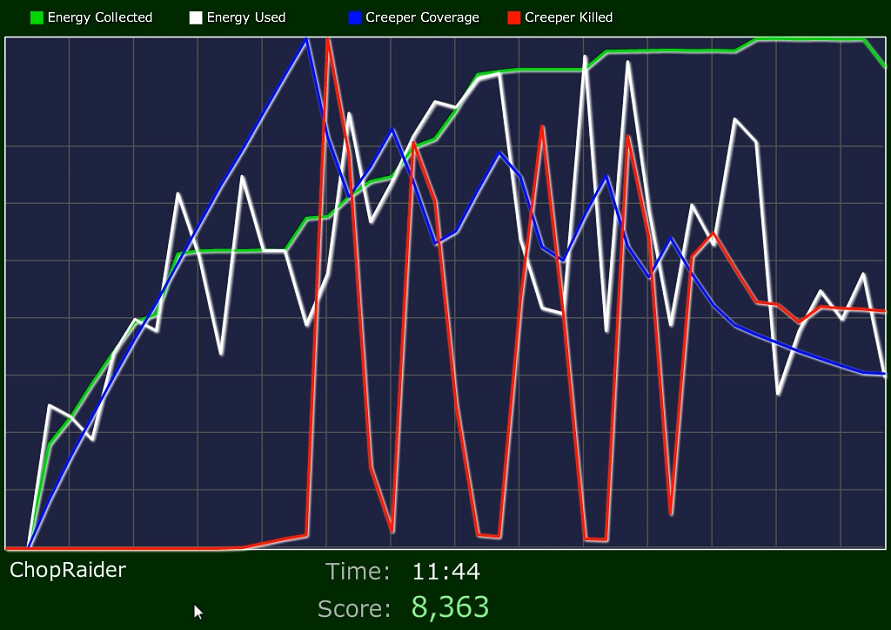
This is one of the more challenging levels, and also one of the most unique. It's the only one where Spores are a major threat beyond just the overhead of building and arming a few token SAMs. It's annoying, but I also must give it a seal of approval as a welcome change to the usual formula.