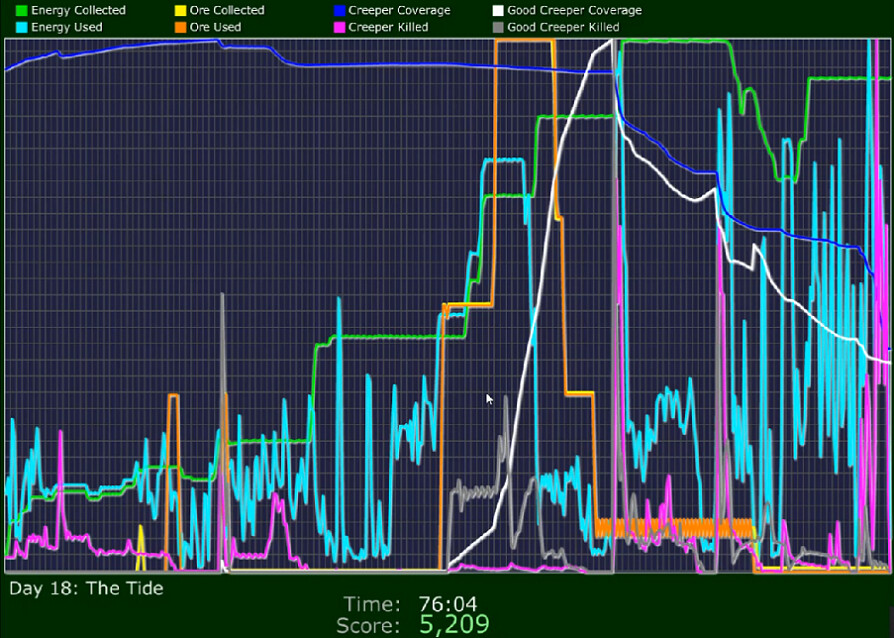
Part 61: Day 18: The Tide
Day 18: The Tidehttps://youtu.be/kiApHqmnhy8
Unedited playtime of 3 hours 23 minutes and change. Most of it I couldn't even edit out without losing some of the 'experience', though I did manage to part with over half an hour of repetitive stuff. This took me a very long time, and I failed many, many times. Recommended viewing technique for those who like the videos is to use the screenshots as a guide for jumping around in the footage.
That is of course, unless you want to spend half your day on the longest video I've ever uploaded to YouTube. If that's your thing, have at it with my blessings.
Olesh posted:
can't wait to see the upcoming levels, though. Especially since I absolutely completely misunderstood the gimmick behind one of them
I think this is probably the one you were referring to here -- let me know if it isn't. It did indeed take me a while to figure out the gimmick, as will be shown. And then a real long time to beat the level after I'd figured it out as well, but that at least gave me a chance.
Bacchante posted:
While I really appreciate you showing off these often under-appreciated games, I must still say that looking at your maker configuration was physically painful.
My apologies and sympathies to you on the last part. You really may want to grab a sedative and have your PCP on speed-dial in that case. It isn't going to get any better :P.
Tempest_56 posted:
What's going on behind the scenes is that there's an invisible block moving that has a creeper magnet in it. When it hits a shield, the shield basically knocks the creeper off the invisible block and sends it scattering in a more normal (and easily destroyable!) fashion. The shield'll be destroyed but they're basically zero cost disposables anyway. You can really use this to your advantage in some of the quirkier challenge levels and in Academy, where you can take huge moving piles of several million creeper and blow chunks off of it.
Fascinating! Thanks for this contribution; I would never have known how that worked.


Naturally.

So they've been toying with us while I've had regular Game Overs. How encouraging. Even the doctor says it's time to have the stuff really hit the fan now, as it were.


Super-drones and even more flexible 'laws of physics'. This just keeps getting better and better.

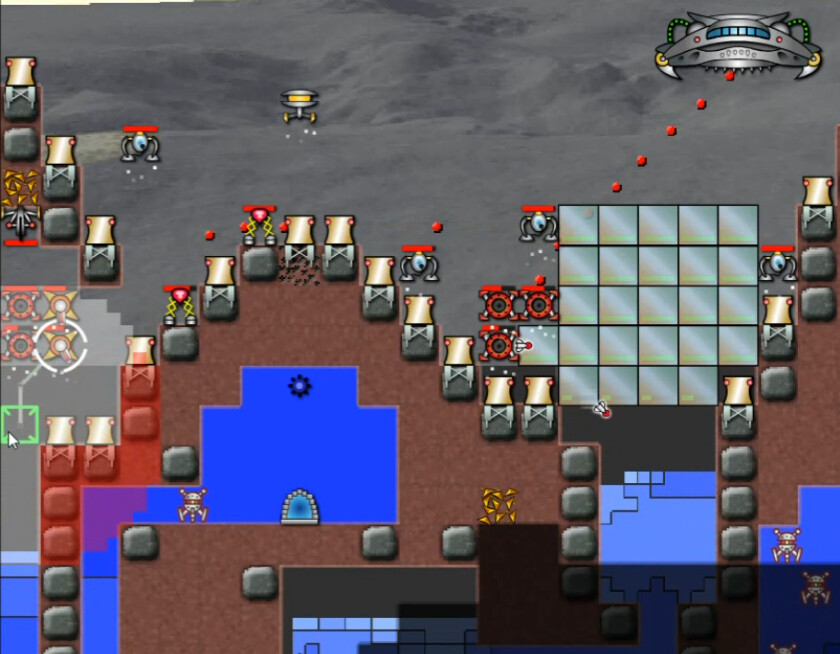
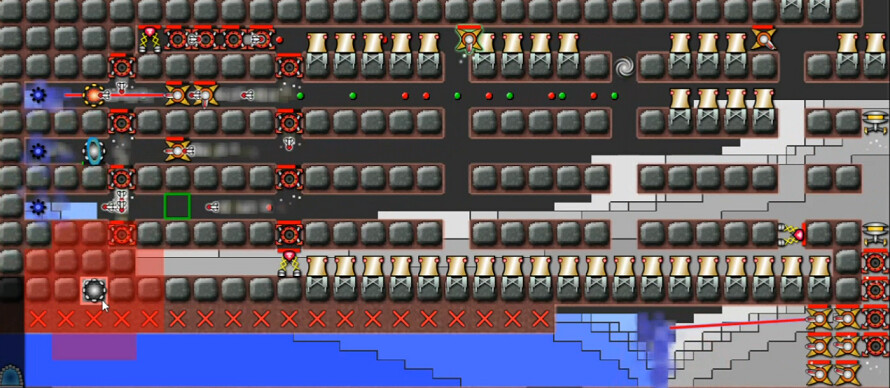
This is another 'Acquisition' level; collecting all capsules is the goal. Specifically of course that would be Thrade here.
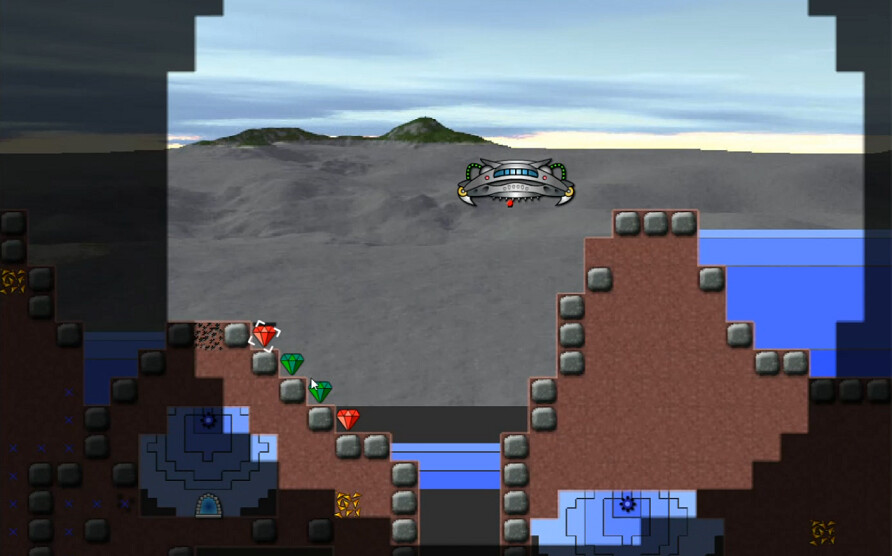
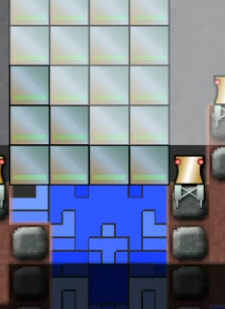
On the good side of things we have a few energy crystals to jump-start us, and ore not far away. There's a pool of creeper on the right, two emitters below the surface, and they are doing that counter-excavation thing on the very left so we'll have to deal with an eruption there. And of course there's that obvious gravitational nonsense in the middle just below the ship. As I've done here, grabbing the quick energy is a clear first step. Oh, and the 'Incoming Phantom' counter starts at 3 minutes.
** Doom Timer: 3:36
This is a bit misleading. It's fast -- but not super-fast. However there's multiple avenues to death on this world. Surviving the first three-and-a-half minutes isn't that hard ... but getting a whole lot further than that is much more challenging.
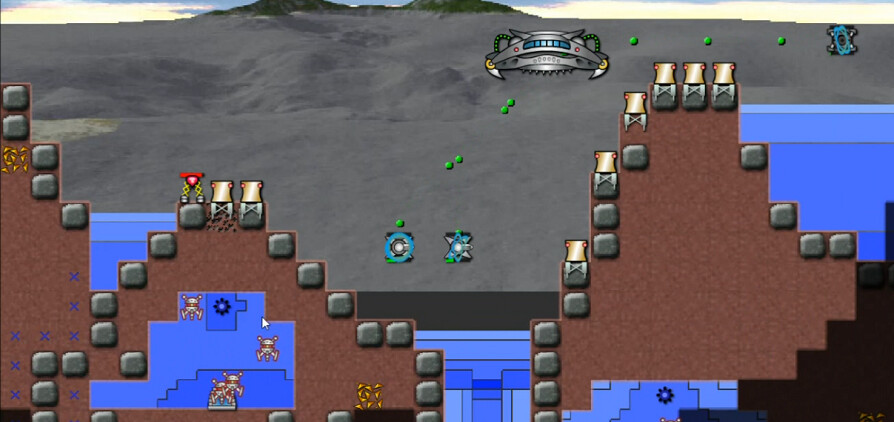
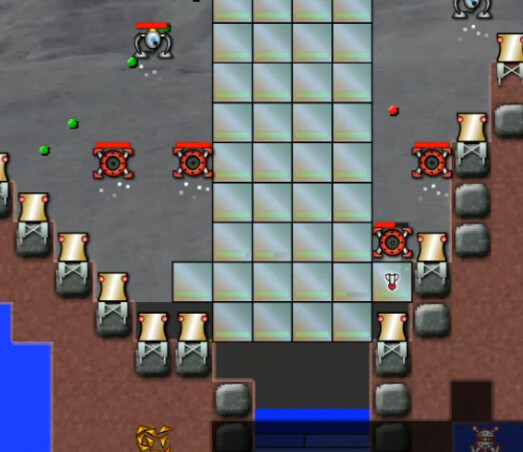
Here we can see the incoming excavation on the left a lot more clearly. After snagging the energy I get a modest amount of reactors up, a beacon so I can operate over that way, and a few weapons. That launcher on the right will hopefully clear out that pool so I can use the space for more things on that side. I don't have a huge amount of real estate to build things here. But at this point that far-left side is looking like the most pressing threat.

Here's what Lt. Varro was talking about; looks like at least all the drones near the surface have 8 HP, double the normal 4. So they'll be harder to deal with.
The plan starts out well. I add more reactors where I can, an initial Tech Dome, and the weapons come online. Launcher starts thinning out the right-side pool, Blasters fire at the gravity-defying concentration in the middle.
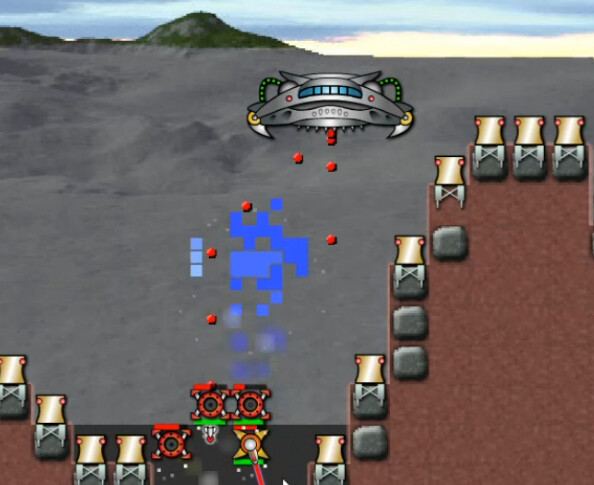
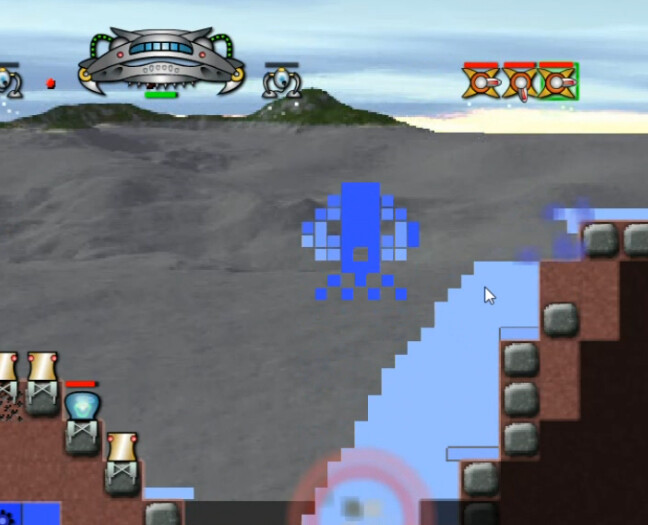
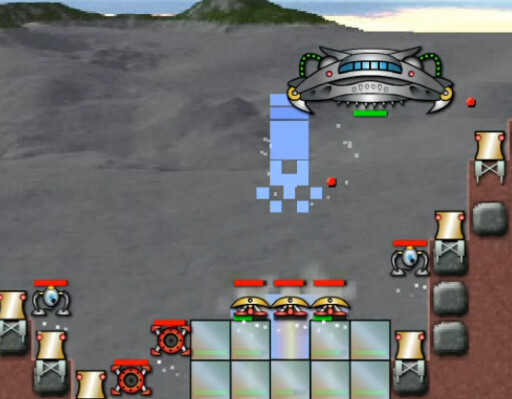
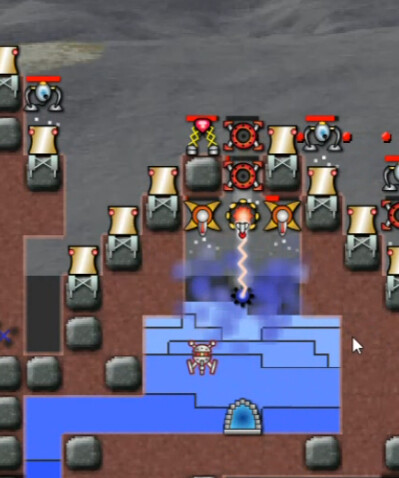
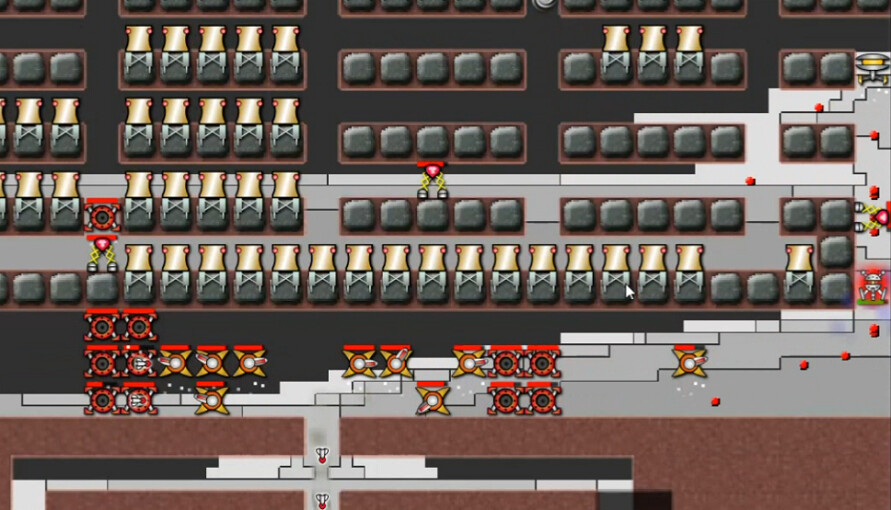
Then this happens. It's a bit hard to see here but this abomination is basically Space Invaders: Creeper World Version. It moves up, then right, then ...
Yeah, that's going to be a problem. It's raining Creeper. All I can say is 'what the heck was that?' Seconds later come the first Phantoms, which of course I've completely forgotten about. Five of them, wrecking what little I have left.
Here's the next one, which heads over to the upper left and then self-detonates. First 'Flying Bluish Creeper Creature', to be known as FBCC from here on out, emerged at 2:47. This one at about 3:20. So they don't give you a whole lot of time. If you aren't ready for the first one, you sure won't be for the second.
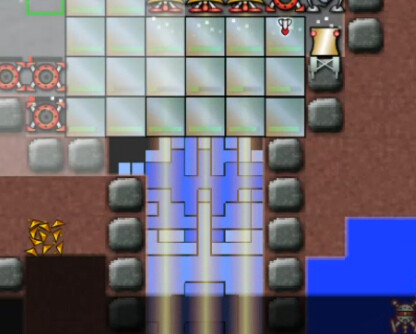
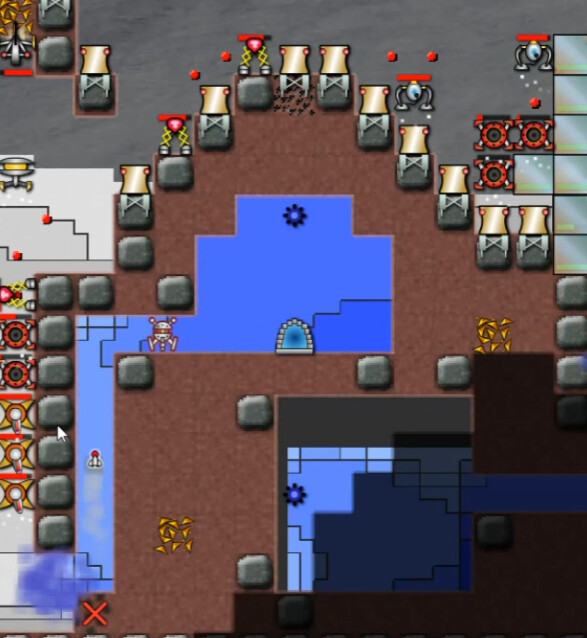
Doing my best Captain Obvious impersonation: "Yeah, okay. ... ... I don't know how to defend against that." I faff about trying(and failing) to get some sort of defense up. There's more stuff in the middle, but I take a look at the very bottom:
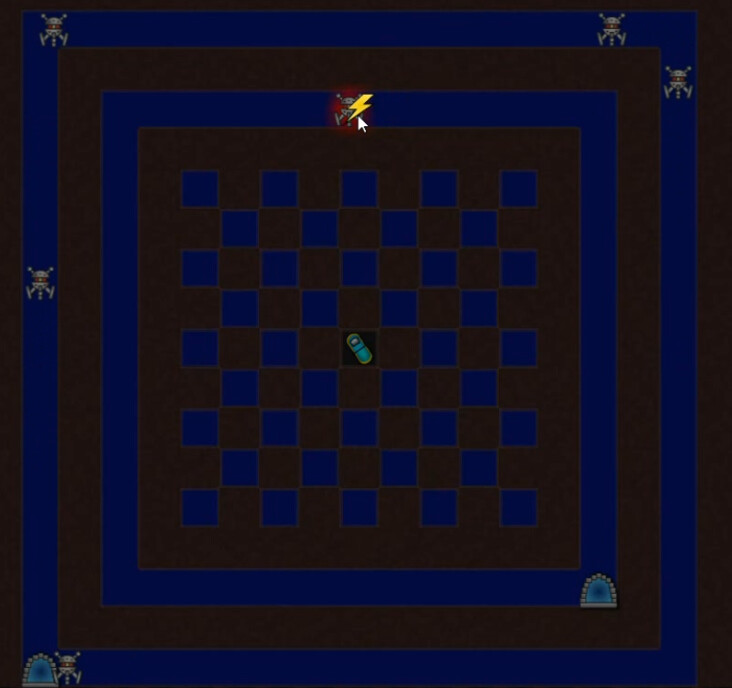
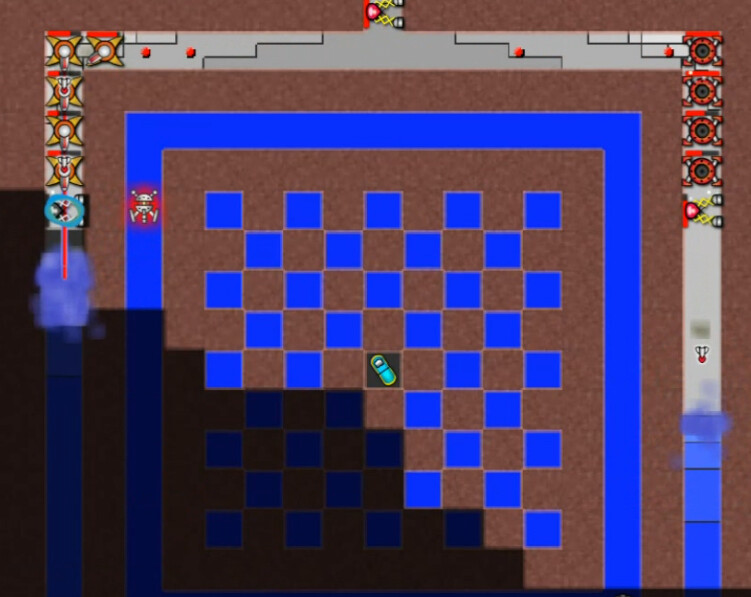
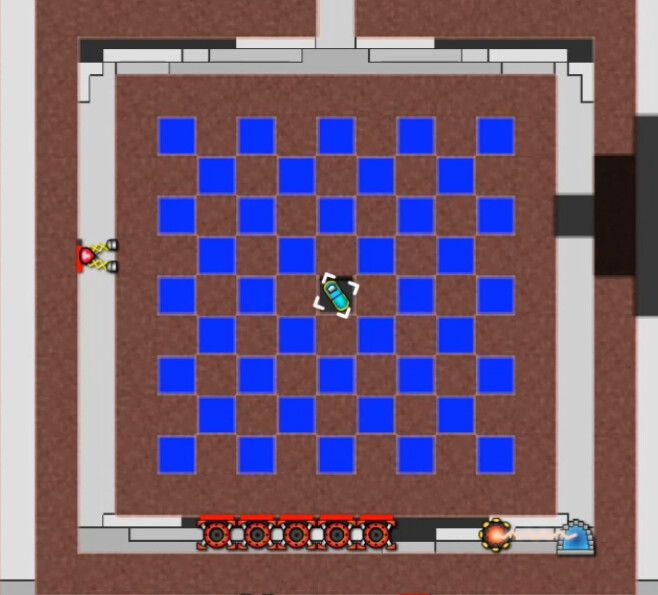
A chessboard. They're defending Thrade's capsule with a chessboard. Also, the outer rings have drones moving a lot faster than normal, but this one here on the inner ring? It's, uh, more powerful than usual. It has 750 HP. 187.5 times the standard amount. That ... could be a problem. But I sorta have other things to concern myself with at the surface-level.
Pretty soon I surrender to the inevitable re-start. Second attempt begins at video timestamp 8:56, where we rejoin at 0:42 on the mission timer.
The only thing I can think of to combat the FBCCs is a gauntlet as they come up(those who know the right answer, screaming it your screen won't help here). This shot shows how utterly fruitless it is to try to shoot it down with launchers. It just moves too fast. The missiles shoot at where it was, incinerating only empty air.
Take 3: 11:18 video, 2:31 mission timer.
This is an improvement. Blasters(14 of them here) can at least hit the thing.

But they don't do much damage, as you can see the FBCC is still very much intact.
Take 4: 11:47 video, 2:41 mission timer.
Going for the 'MOAR BLASTERS' approach. I only get two more though, 16 operational. That's not enough to make a difference. What's that line by Thomas Edison? I haven't failed, I've just discovered some things that don't work??
No, I've failed. Let's not sugar-coat it. But clearly the Gauntlet Approach isn't going to get the job done.
"I think shielding is the only thing that has a chance of working, that I can think of."
Yes, that's right, Thotimx the Anti-Shielding Warrior succumbs to the necessity of using them.
Take 5: 12:40 video, beginning of the mission this time.
The idea here was to have a wall of shields and weapons below it, and this was really a haphazardly-done, proof-of-concept attempt. It was still laughable, even for that.
Take 6: 16:02 video, 2:46 mission timer.
Second attempt, a much better try at the same idea. The vigilant observer here will notice part of the right side of the FBCC was 'sheared off' by misplaced shields down below. One problem I had here was just not getting enough launchers built in time. It was soon apparent that I was never going to have enough energy to destroy the creeper fast enough. The Protective Wall joins the Gauntlet in the annals of ideas that utterly failed.
Take 7: 16:46 video, 0:41 mission timer.
What I said here is actually important and borderline-intelligent:
"and actually ... I think we injured it over here. What if we just had a really thick shield right here where it's gonna come up?"
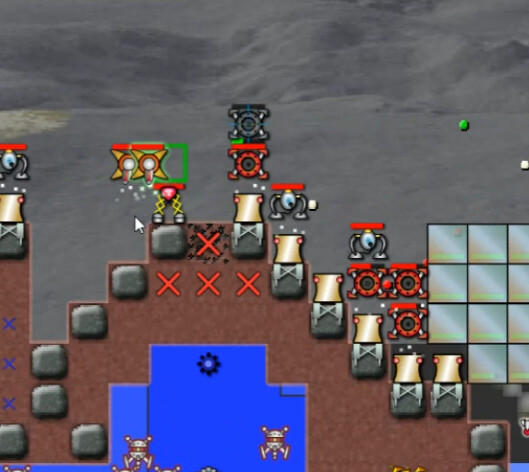
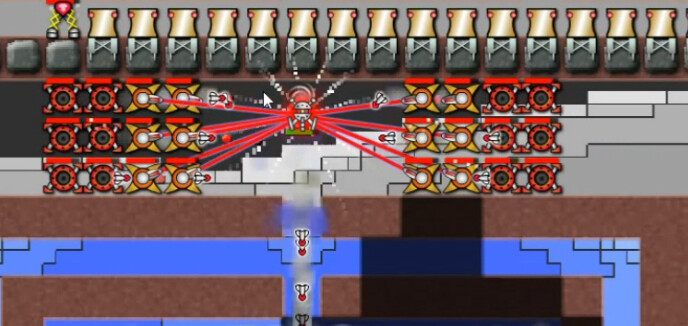
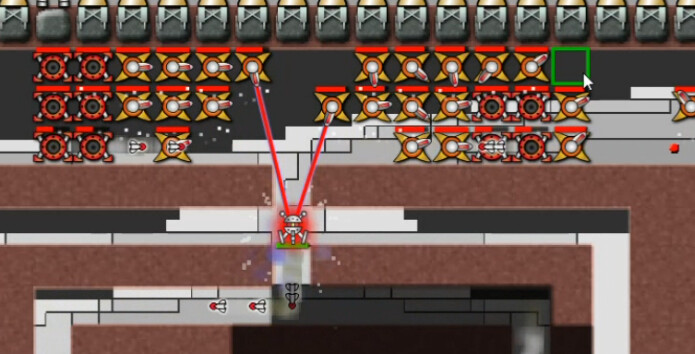
I'll call this the Shield Column approach. AKA the 'right answer'. Light has indeed dawned on my marble head.
The first FBCC is stopped cold. That shocked me, I thought it would take a good part of the shielding with it. I was not aware of the idea, which others have mentioned, that creeper density doesn't impact the rate at which the shields are destroyed.
Having launchers in position to support the Shield Column proved to be important as well. Otherwhise the creeper will bust out after gradually eating away at the shielding. Each FBCC came stronger than the last, eventually overwhelming my efforts in combination with the Phantoms. Clearly I didn't have everything figured out yet, but this was obviously a major step in the right direction.
Take 8: 23:48 video, 2:48 mission timer
Here I've basically just crammed a bunch of Phantoms and Launchers in around the column to support it as much as possible.
I decide to try and see how a Shield-Repulsor combo will work. Short answer: doesn't do much of anything. So that's another idea to chalk up in the Fail category.
I do discover something else quite important though. The 'strength', i.e. density, of the FBCCs comes from the amount of creeper concentrated in the gravity-condensed section of this area. We've seen several of them now in this attempt and this is the weakest, due to extended concentrated launcher fire. So that is important to limiting how much creeper is available to 'form' each successive attack. The repulsors are helping somewhat in keeping more from bubbling up from below -- but they aren't worth the energy I'm spending on them.
This is the first time I've gotten to the point of actually having the drones break through. So in that sense it's a victory. They take out the beacon before any of my blasters are finished, which means they won't finish, and it just gets worse from there.
But at least I've gotten to the point of surviving the FBCCs well enough that something else is killing me now. Progress.
Take 9: 31:18 video, 2:09 mission timer.
I went with a shorter column this time. It turns out that three layers of shield is enough to stop the FBCC; two is not, as this sliver comes through the middle. It's still enough to cause problems.
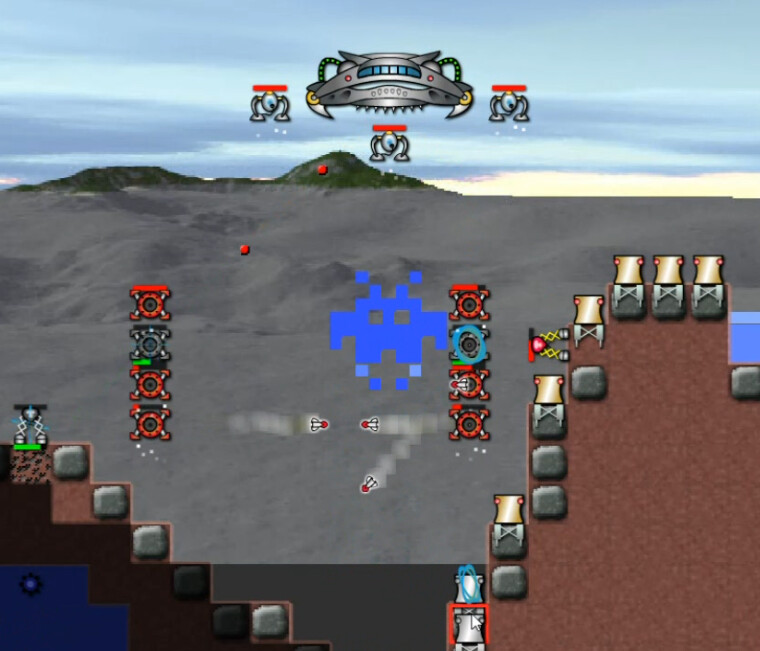
Take 10: 33:02 video, mission start.
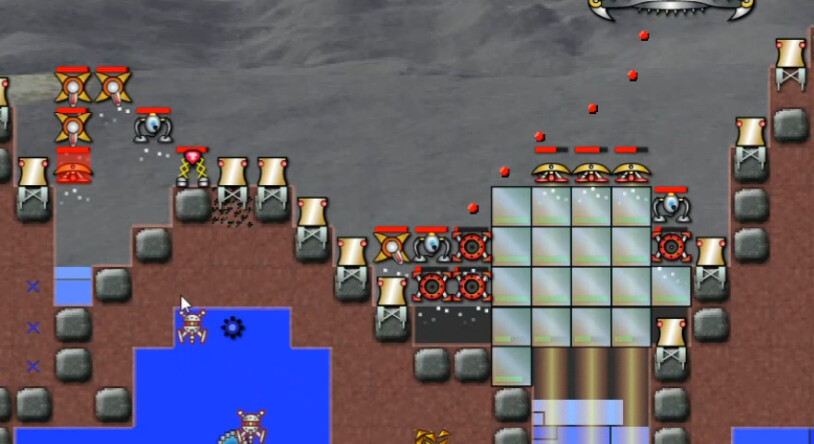
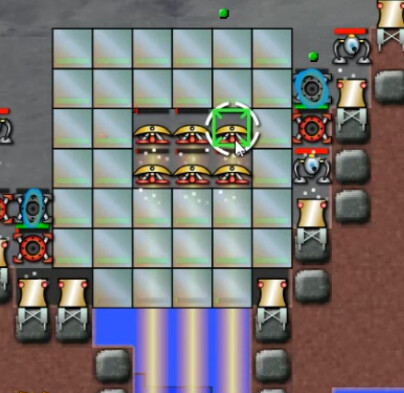
Four-thick Column, four Launchers, three Repulsors. That combination is sufficient to keep the amount of creeper supplying the FBCCs at a reasonable minimum, and essentially keep things under control, so long as I have enough anti-Phantom coverage. That means I can focus more on the coming Drone problem. I get enough blasters in place over there to stop them, but I can't push them back either due to energy problems. I try throwing a maker in below the shields a couple times in the middle, with really poor results -- again the FBCCs just come up too fast.
Eventually, after 20 minutes into this effort, I'm unable to sustain the blockade at the Shield Column due to declining energy situation. I was close this time. Very close to a sustainable defense ... but not quite there.
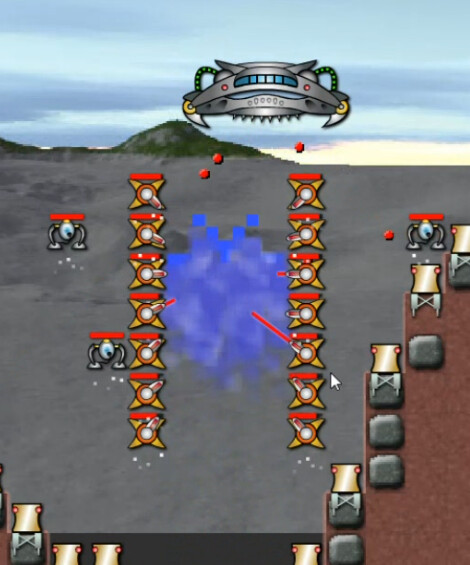
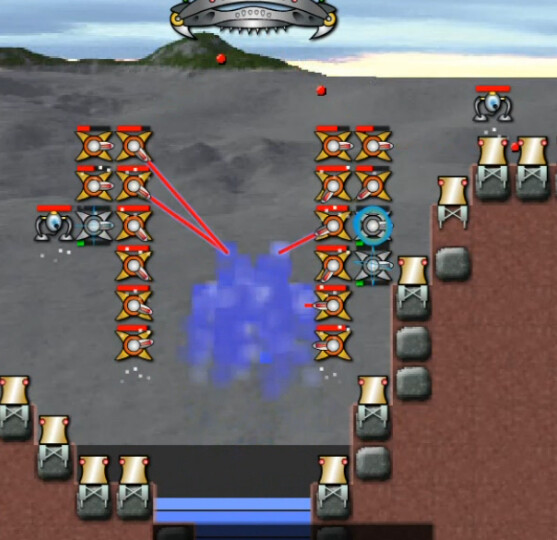
Take 11: 53:02 video, 5:04 mission timer.
This time I do it without Repulsors aiding the Shield Column, hoping the freed-up energy can be put to better use.
Three launchers now in the middle seem to be doing the job fine. Two launchers, two blasters on the left is enough -- just enough -- to stop the drones and creeper from coming up. Energy is nearly neutral(deficit of 5). This here could be sustainable. Finally.
This whole attempt is an excercise is unnecessary frustration as I work my way down the narrow tunnel on the far left. The anti-creeper helps just enough that I can slowly push them back, using the time-honored technique of using excavation to gradually expand at the bottom. Small mistakes are repeatedly punished by having to retreat and rebuild. There is a better(and blindingly obvious) way that I just didn't notice.
I did eventually get around the corner, after having paintstakingly made my way down that stupid 1-wide tunnel 3 or 4 times.
After more than 40 minutes, I found myself unable to sustain the required energy to deal with gravity-aided creeper and no support from the anti-creeper anymore. I think this was probably possible, or at least borderline so, but I couldn't make it work.
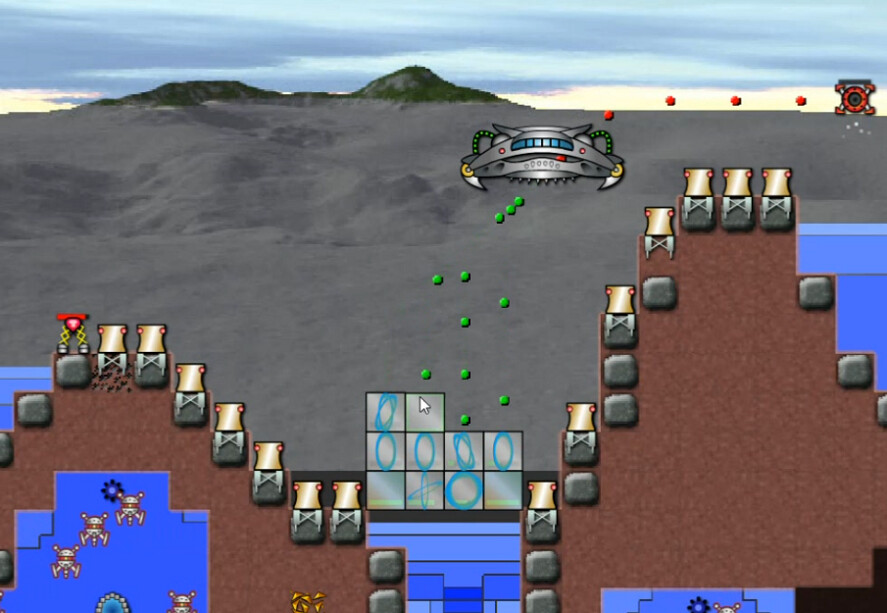
Take 12: 1:29:42 video, 3:02 mission timer.
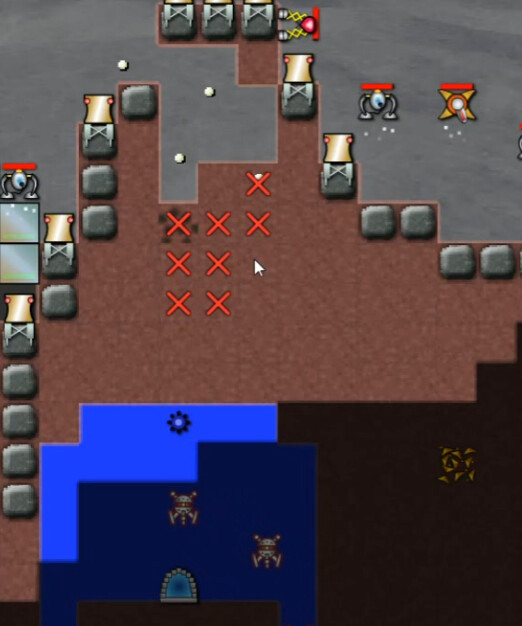
So I decide to do it the intelligent way. Prior to this, my one-dozenth attempt, I totally did not even notice that this could be excavated. The one spot where the ground can be in this area, though it's expensive to do it. I always built a reactor on there, not even noticing it.
There aren't enough facepalms on the internets to describe how I felt when I discovered this.
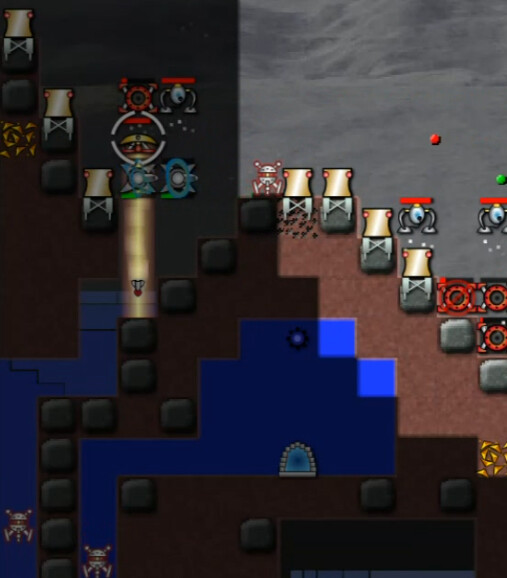
Even with the usual energy problems limiting speed of production, the first Nullifier was deployed and fired just over 7 minutes in. A fraction of the time of many failed attempts, esp. the last one. The Gateway producing the drones on this side would soon follow the emitter. And now, finally, progress was being made.
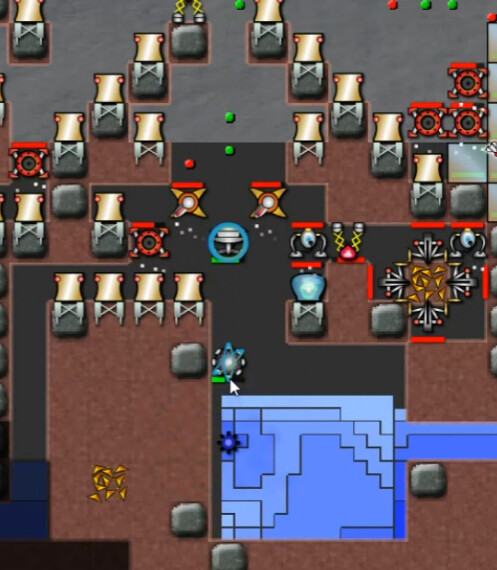
I moved in, built a few more reactors and finally a Tech Dome, and then look at this when I breach the next cavern. Nothing. Easy Mode. The gravitational forces keep the creeper so low that I literally don't have to shoot anything, just place the nullifier and be done with it. And this of course is the one powering the FBCCs.
"This level isn't THAT hard, I was just MAKING it harder" says the guy who has finally figured it out.
Similarly, although this one I had noticed just never gotten to, there is one spot where we can excavate on the right side. This is only remaining obstacle in the surface area, but it's quite tame compared to the other parts already dealt with. A wide area to dig down and deal with another emitter/gateway pairing.
Naturally I underestimate the force it will come upwards with once I breach, but by now that's just a temporary setback. I have enough of a base to handle such miscalculations.

Here's Phase One of The Tide basically finished. Finally. I've built shelves for more reactors, some Tech Domes and I'll eventually get more of them, teched up a bit(in the wrong things, but still). Now I just really need to not screw up the rest of the level. Cause I'm getting sick of it. Another timestamp here for you:
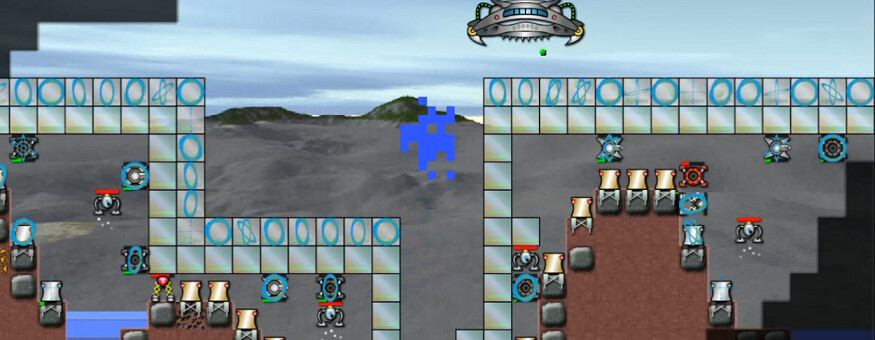
Phase 2: 1:53:36 video, 26:45 mission timer.
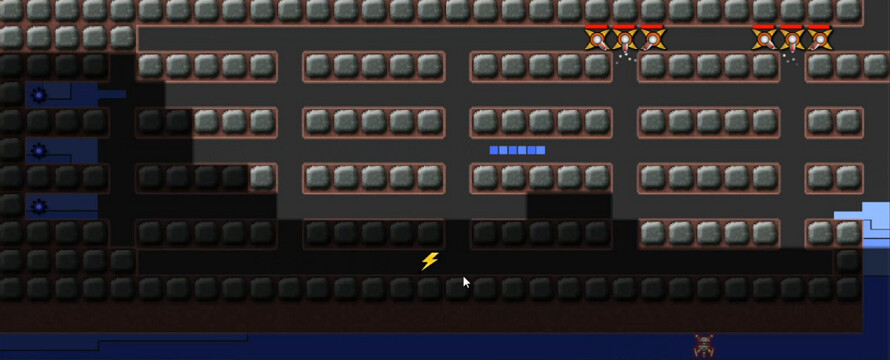
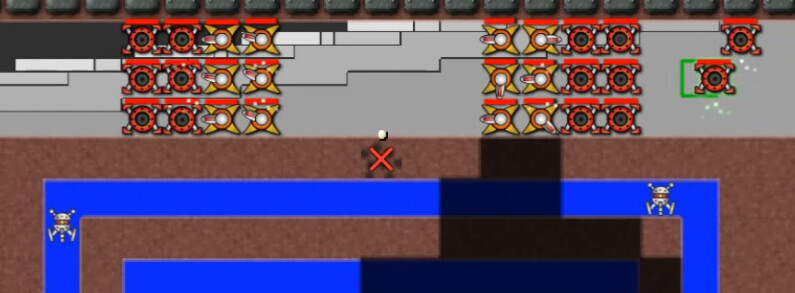
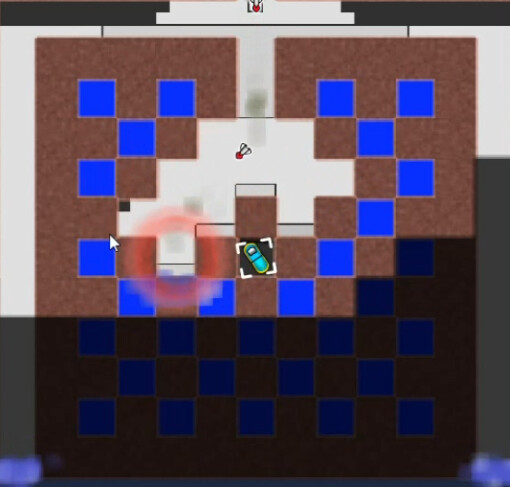
Here's the next part, Phase Two. Three emitters on the left each put out 20k every half-second, a decent amount. They also 'shoot' these short emitter streams. There's a gateway below that sends drones my way, and the narrow passageways in this labyrinth make it difficult to get the amount of focused fire needed to deal with them efficiently.
Honestly this part is more annoying than anything else.
I end up throwing the kitchen sink at the problem. Stupid amounts of reactors and launchers, I throw a maker down so I can start moving towards that gateway as well, and eventually manage to get close enough to nullify these emitters.
I don't really think there was anything interesting here, just a lot of pondering, then spambuilding, and so on.
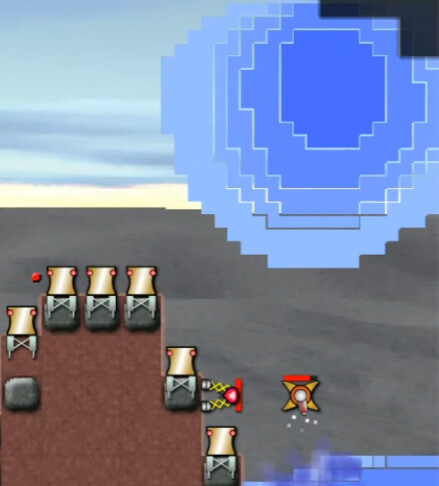
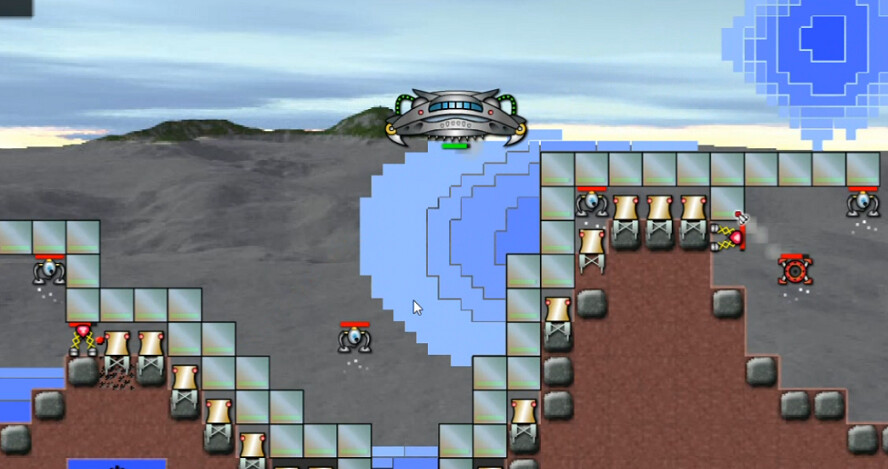
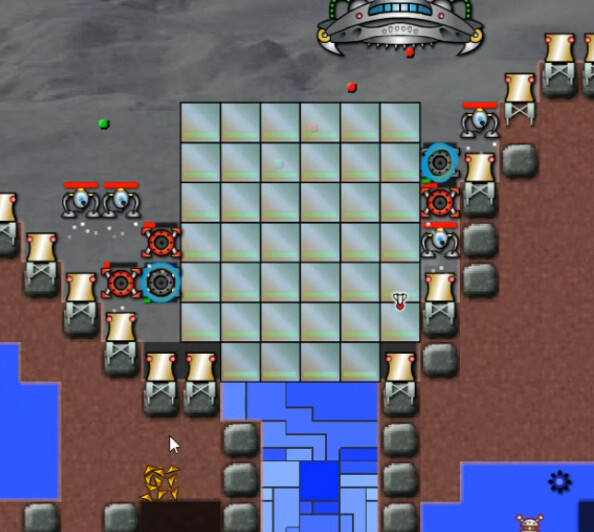
Phase Three: 2:20 video, 52:13 mission timer.
It's time to breach the outer ring surrounding the 'chessboard'. When it blows out, some creeper emerges but it doesn't nearly reach my weapon platforms. I'm producing 28 energy at this point -- with a deficit of 16-18 still. So I purchase the third and fourth Reactor Efficiency upgrades. Which gets me up to about 33. Still have a small deficit.
Takes about a solid minute of constant spam-firing before we really start to make progress.
Blasters move in first, then launchers, and I start pushing my way towards the Gateway(lower-left, offscreen). There are no more active emitters so it's in the 'matter of time' phase here.

I go with the same setup for the inner ring, and it starts well.
Unforunately, SuperDrone can take a lot more punishment than I'm dishing out. Naturally it heads straight for the nearest MicroRift. It's sheer dumb luck that it decided not to take out the Liberation Ship and kill us all. I eventually chase it down, but not before it's taken out a couple dozen or so structures.
And then the gateway just produces another one. Which goes on another rampage. By the time a third one comes around I've built more blasters, but not enough.
Here's what the fourth iteration walks into. It takes out several blasters but isn't able to escape the killing zone this time. Ok. Finally got this under control. By the six or seventh one I'm only losing one or two blasters each time, while launchers have penetrated the inner ring to continue clearing the way to the source Gateway.
I am very, very pleased to see this thing finally go down. No more SuperDrone.
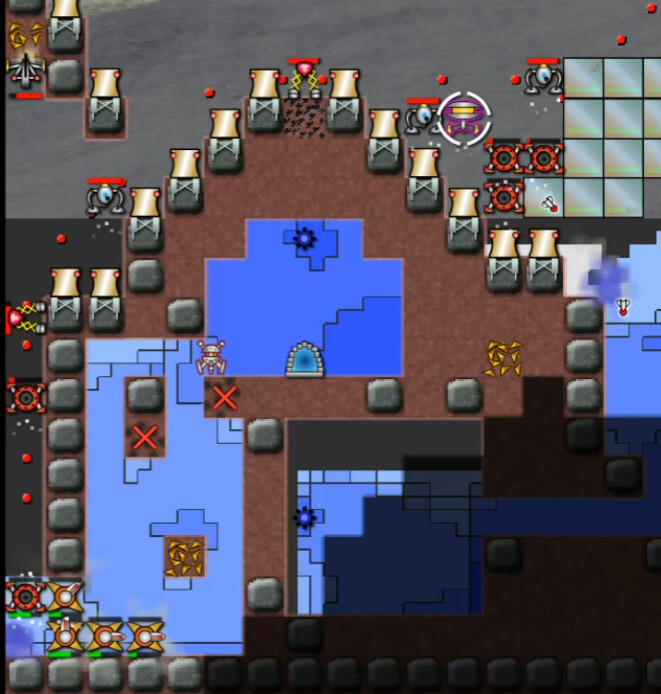
Chessboard: It's a mere 72:54 on the mission timer now as it blows, 2:41 on the video. Time to go get Thrade.
As I proceed:
"OKAY!! Now I get to figure out ... is that TWENTY MILLION?!?"
Yes. Yes it is. Each and every creeper-filled 'light square' on the chessboard has 20,000K creeper in it. Near Thrade's capsule they have 30 million, an upgrade. Which sort of creates a bit of a situation. My weapons are far enough away to handle this from a safe distance ... but once we crack open one of the squares adjacent to the capsule it's all going to to try to kill him.
After some minutes of spam-firing, I've created a corridor of safe territory to the square above the capsule. Now it's safe.


Dax isn't much for small talk -- though perhaps that's appropriate under the circumstances.


It would seem then that the course of the campaign is now revealed. The final missions take us to defend the NHA homeworld, AKA Colony Prime, and then off to destroy another Nexus. Somehow. I'm not sure if the black-hole trick will work again.