Part 79: Custom: Black temple
black templehttps://youtu.be/CE_bM0tKWEo
** Likes: 330
** Dislikes: 30
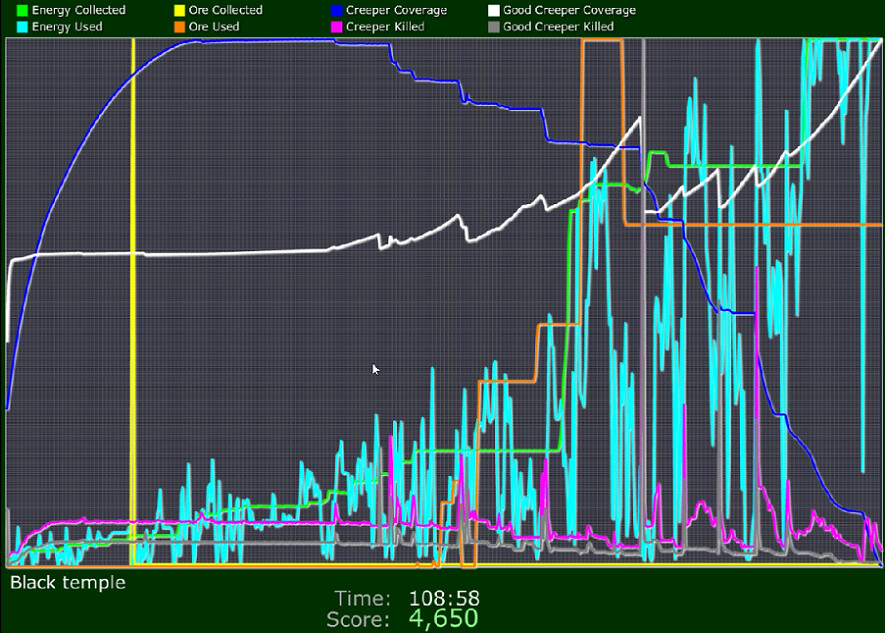
** Average Time: 105:17
If you're thinking just now 'that's a really long time', you're not wrong. If you don't want an epic slog, you've come to the wrong place. The record is a hair over 30 minutes. black temple does have, by a huge margin, the most upvotes of any map which is why it's here. And despite the length and some flaws, I personally enjoyed it quite a bit. I'll probably play it again now that I know what's going on to see how much faster I'm able to do it.
In terms of the epic scale of it, let's just say that I hit a game engine limitation that I didn't know existed in the later parts.
There's no briefing/story whatsoever. It's here you are and get to work. And it's not losable. I must say I am somewhat disappointed that there weren't any custom missions in our selection like Shields Up, or Tucana(I think?) in the first game where you are under pressure to survive at the start. I would think the community could have done some interesting stuff with that - and maybe they did and I just didn't come across it.
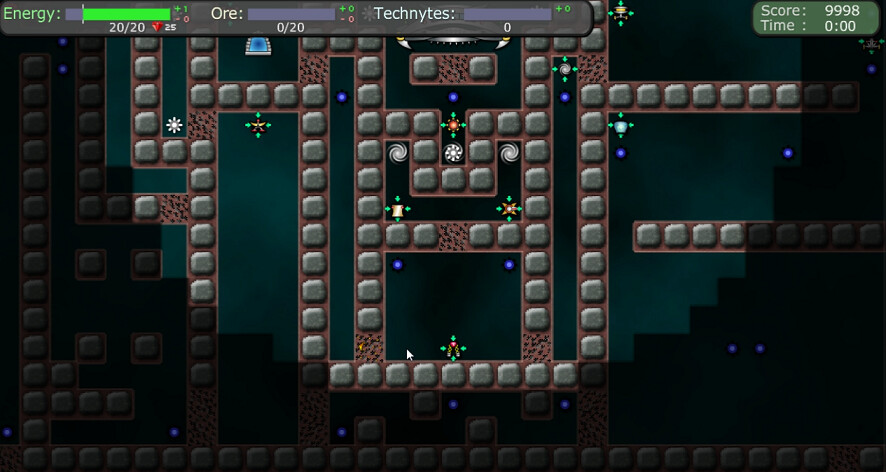
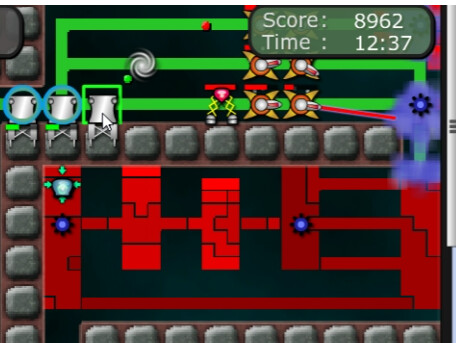
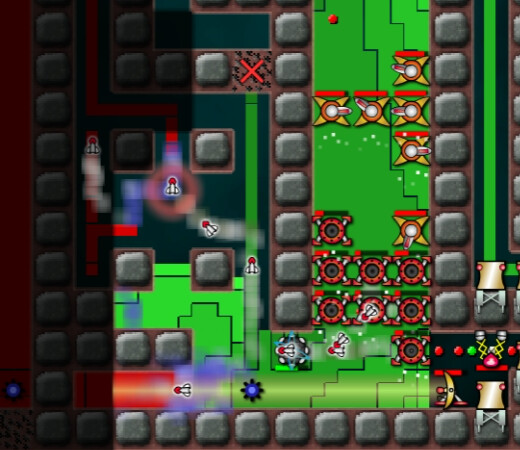
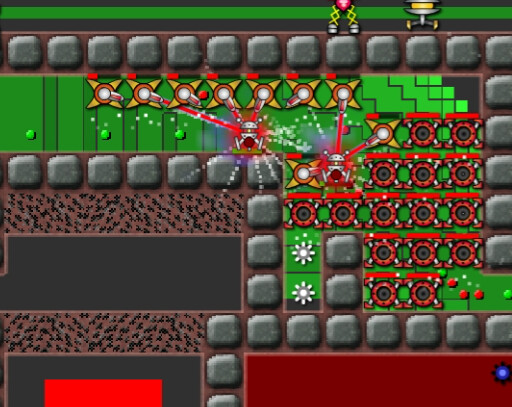
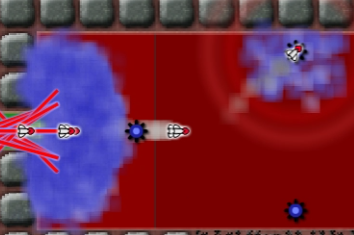
The status bar at the top covers it up here, but the Liberation Ship is top-middle with a couple of AC emitters nearby it. This mission is similar in many ways to help the rebels, and this river of anti-creeper will be critical to it. All manner of schematics can be seen in the rooms around as well. We'll need them, because here's the comprehensive list of stuff we're allowed to build at the start:
That's right, nothing. Zero. Everything is locked.
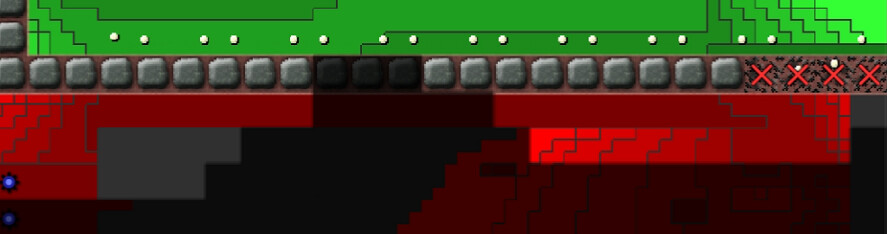
Once everything activates, literally the only thing we can do is dig. The AC holds off the creeper(which is red here, a more evil-looking color??) There's a middle part of the green AC trying to push down through this terrain, which of course is an expensive 25-cost section. It's a small thing, but this is just on of those 'why' parts. I like the overall design of the start, but literally all that making it harder to dig through does it make it take longer. We can also see that microrifts are going to be a big deal as the anti-creeper is already forging a path below through them.
After doing that, the anti-creeper dominates the emitter, I snag the reactor and blaster schematics from below along with the nullifier one above. Each also gets us points(who cares) and five technytes. So I throw up reactors everywhere and I can and blasters. It's what I have. Normal gravity and building restrictions; no sideways/upside-down silliness here.
The next room took a bit of doing; I needed to have two blasters active in order to keep the emitters under control in order to nullify them, and my first attempt didn't work. I did not at the time realize it, but you are actually totally forced to go right here. There was a MicroRift schematic in this vertical passage, but if you try to go left -- you can't actually excavate that, because it has 15 Ore and ore deposits can't be excavated. So I'm forced to go get the Ore Rig, and this is the only point in the game to use one. There's something past that which I'm very much going to want, even though it's a side trail and not the main path
through the level.
Let's talk emitter strengths. The very first one by the ship was strong(100k per 0.03s). But it diverted everything to the sides so attacking it from above totally neutralized it. Then the next room had two at 5k per 0.1. This next room has 30k per 0.1. So you've got your basic ramping-up progression. The anti-creeper continues to pretty much do the work so far, which I'm not a huge fan of. Clearing rooms at this point is little more than excavating the opening and letting the green river in.
This room below us starts a new concept that I really don't get the purpose of. It might serve something in redirecting the creeper but I don't think so since we haven't seen it before. The emitter on the right produces absolutely nothing(but does so every 0.03 seconds). There are a LOT of these in this level. I mean you still have to destroy them since it's an Obliteration objective, but is it just to make you build more nullifiers? The one on the left is 100k per 0.1, so it's almost twice as strong as the two I just eliminated combined.
Strong enough that the river doesn't just go in and clear out everything. I actually have to do some heavy lifting now.
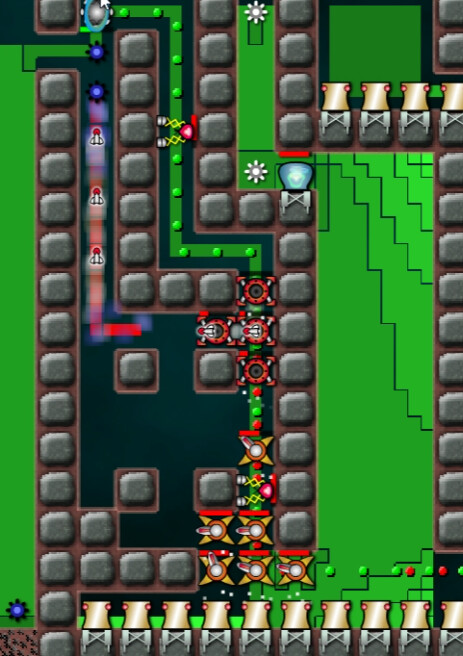
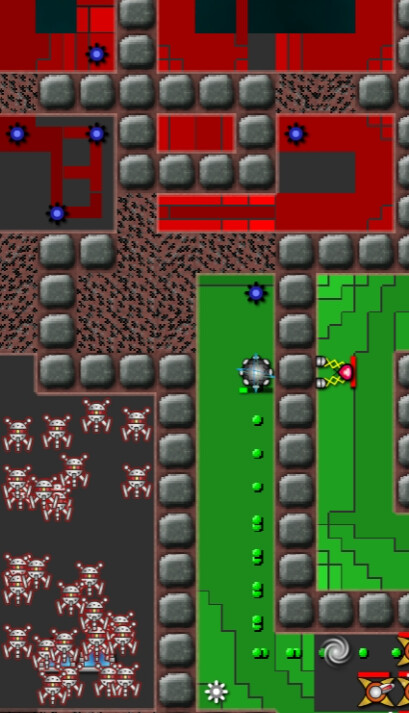
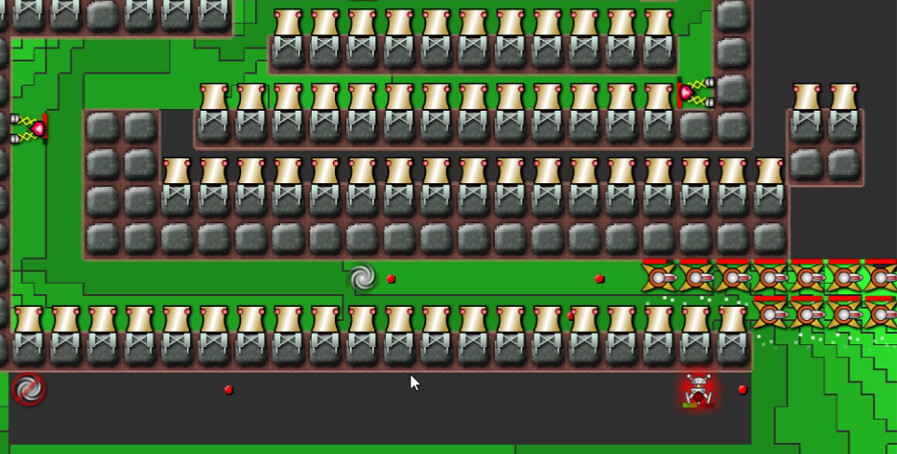
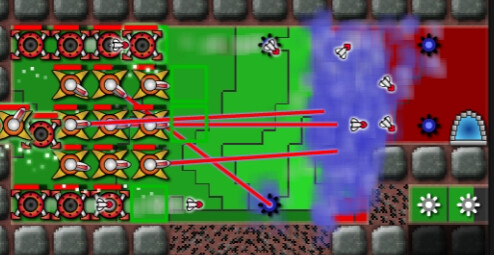
Back to the left, this hallway was easily cleared after harvesting that bit of ore, and in this room with the drones, though you can't see it here, is a Launcher schematic. Can't get to where the repulsor is from here. These drones are normal speed and super-wimpy(just 1HP each).
Back to the right now. Made my first big mistake, putting too many nullifiers/weapons once the launchers helped clear out that next room, and lost a bunch of stuff.
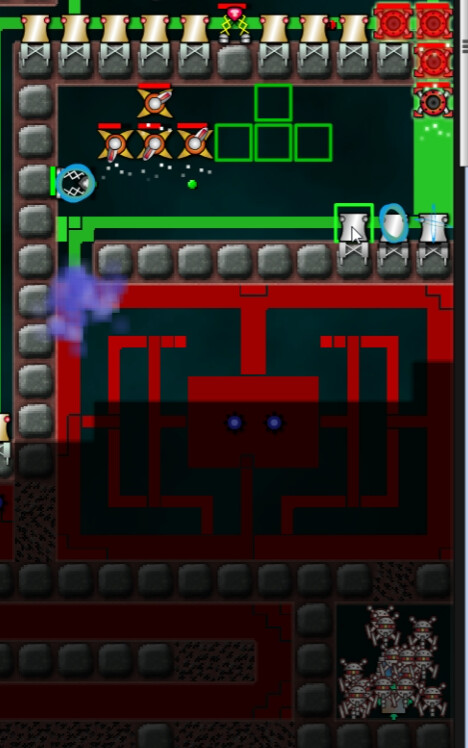
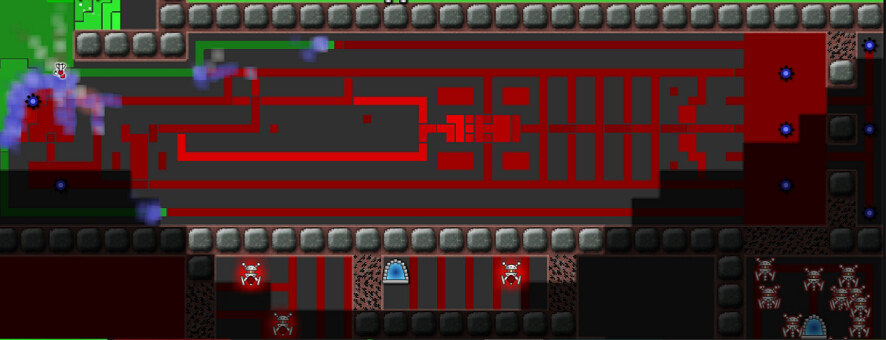
Eventually got it though, and with this we get the Tech Dome schematic. The AC all sinks to the bottom and right of the room here, so moving the blasters along that path is an effective maneuver. Time to double the resistance again; 200k per 0.1s for that next blaster pair below us, and then more drones ... along with a shield schematic in the lower-right. Using this room to put up several more reactors - definitely need to keep building those every place you can for a while here - gave enough energy to keep a few launchers firing, making it pretty easy.
I didn't see what was going on here right away, but as you breach that shield room, the AC falls in but then teleports ... to the repulsor room on the left. See that winding tunnel between the two? That thing SUCKS.
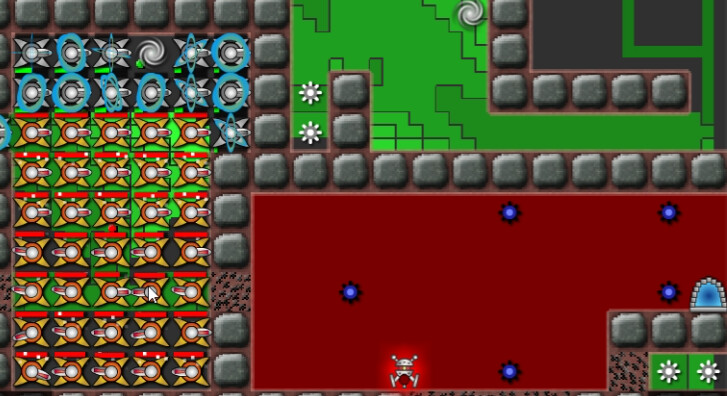
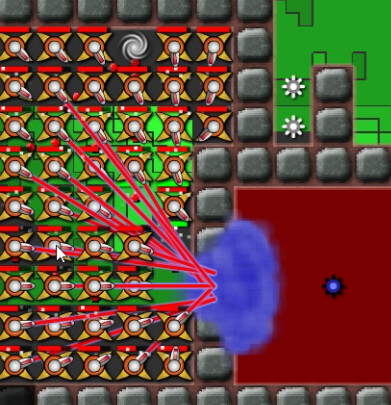
The two right-side emitters do nothing. The one on the left produces 100k/0.1. Which isn't a lot, but you have to get right next to it because of how confined the space is. The AC doesn't go in that area(not even if you open the left side). Now what I really should have done is put makers somewhere in there to combat it. But you don't have ore, someone says. See that room at the middle-bottom? That's actually effectively infinite ore. The maker in there is set to vacuum, and it has about 500 million density at the start of the level. And it gets higher, with an AC emitter under that crystal on the left which pumps out 2 billion per 0.03, or 66.6 billion AC per second.
As it is, after failing multiple times to nullify it, I had to upgrade fire rate on the blasters in order to make any real progress.
Once I get the repulsor I put it to use almost immediately. In the lower-left, one of the local emitters puts out a block that tries to surge along to the right. The repulsor helps hold it back ... we had more reactors over by where the repulsor is, but even with AC in the way, it was pushing over there and destroying it. Now I have it under control. It isn't necessary, but it helps.
Look at the part where I'm excavating here. I didn't realize it right away and lost some weapons platforms puhsing my way through the creeper maze to the left of there. But taking out that square and letting the AC through is the right way here, a flanking maneuver.
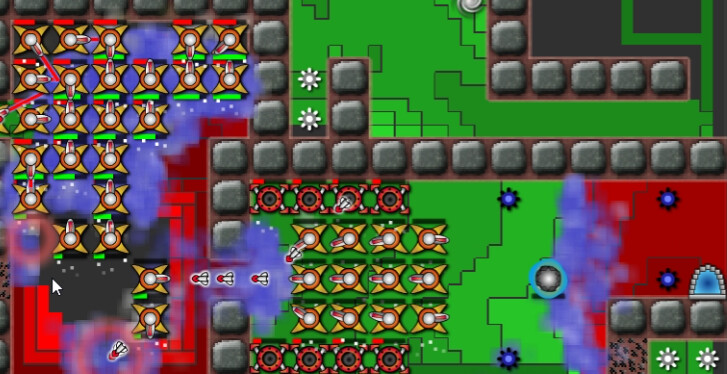
All the creeper goes downwards, so attack from the top. Ok, so now we've taken out essentially the 'first screen' worth of territory. It's taken well over 40 minutes. There's a cap of 11 Tech Domes. I already had a few up; now I build the rest.
A room of dense, frozen creeper is easily dealt with, and then it shows it can teleport too here: from the emitter to the hallway below it. It's strongly advised to just excavate all of the terrain, since most of it is normal but some has infused creeper. The next bit has us going downwards through some similar rooms ... and me finally figuring out the infinite ore vacuum bit.
Another good spot for a flanking maneuver. Beats the heck out of brute-forcing one's way through that tunnel. That upper-right emitter is a bit stronger, 500k/0.1. Then further below ...
Unfortunately there's no point at which I could give a good shot of this. More 500k emitters, gravity stuff, creeper bullets/projectiles, etc. At this point I realized it was best to just open every 'AC door' I could ASAP with excavating, my weaponry somewhat behind cleaning other things up.
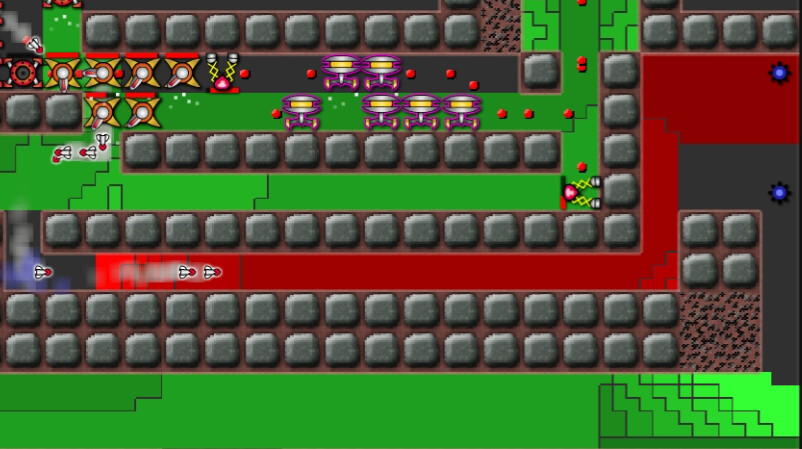
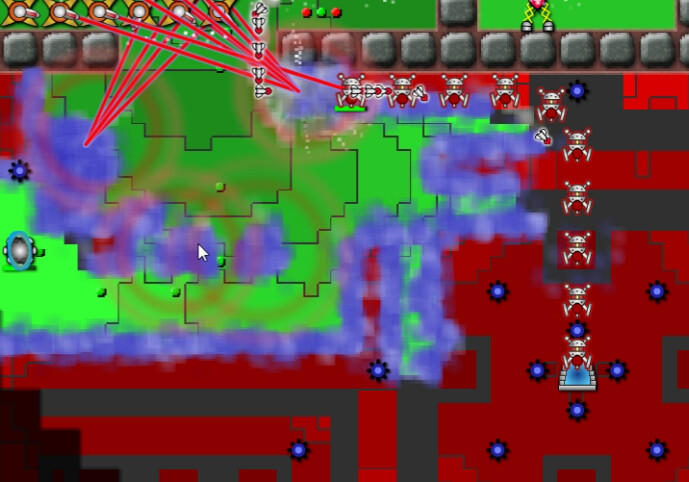
Here's what the left side of the map looks like in this area. More excavation, more nondescript creeper rooms, and then that mass of drones. You can also see here the AC emitter at the bottom; we run into those on occasion, further adding to the strength of the river. Funny thing about those emitters; only one of them is active. 700k/0.06s though on that thing. Otherwhise it just teleports around. The drones are tougher, but not that much - 10HP varieties. After this, I'm through what I'll call the 'middle' of this level. In just a little over an hour.
The 'Twisted Hallway'. I rather like this. Only the three emitters on the far right(500k) do anything. But they are really hard to get to. Then notice the drones below. On the right, more 10HP variants. No big deal. But those ones at the bottom middle? They suck. They REALLY suck.
** HP: 1000
** Payload: 25M creeper
SuperDrone doesn't quite seem to cover it. About this point I built a ton more reactors in cleared-out areas, declaring my intention to get triple-digit energy income(since 55 wasn't enough near the end of the help the rebels level).
Took me a while to figure this out also. The three emitters redirect everything towards those two narrow openings. It's enough that you aren't getting through no matter what you fire at them. To nullify them, excavate the blocks at the top and bottom. Simple, effective design here.
I did fine on the first SuperDrone room. The second one, with two of them, proved more problematic. They went on a deadly rampage.
Up through previously-cleared areas it went, with me at least remembering to deactivate Rifts before it got to them. This set of blasters was just barely sufficient to weaken it enough for the AC to finish it off.
Ok. Now I can rebuild a stupid amount of stuff and get back to moving forward. The next room had a 10M/second emitter but that's it. Child's play.
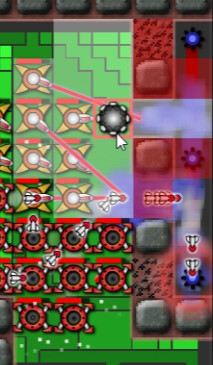
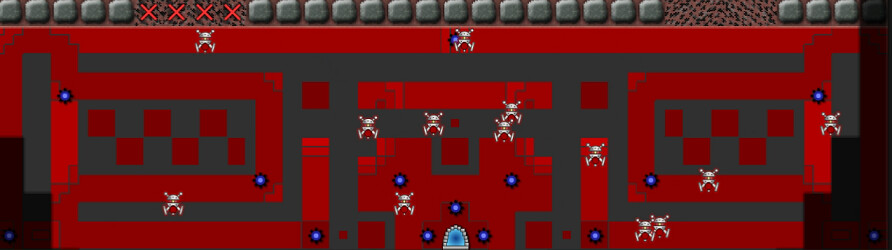
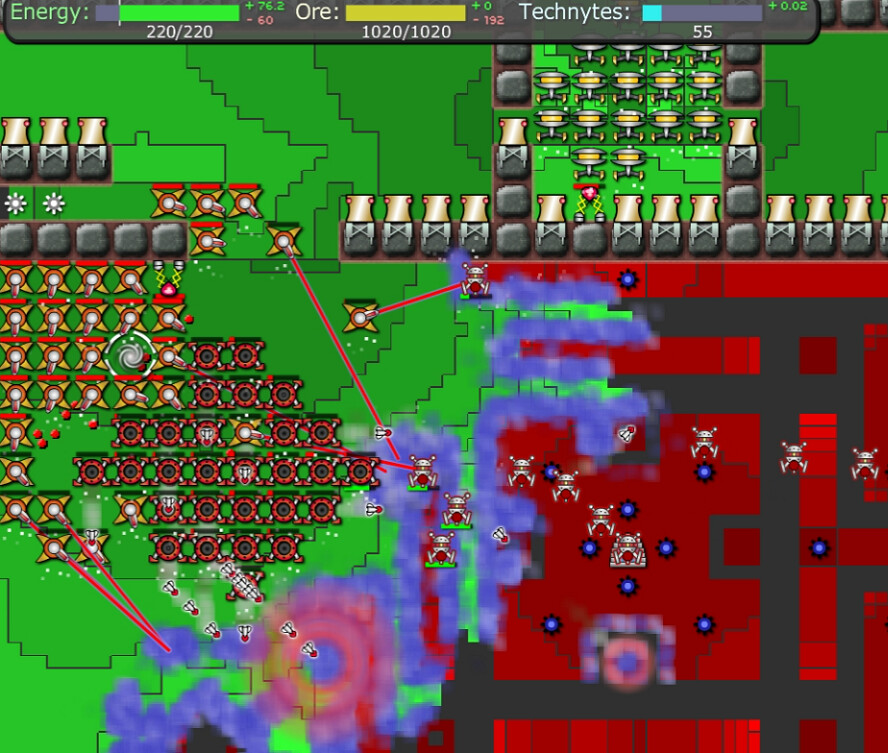
Nearing the end, we run into this room. One on each side, identical. And these are quite impressive, if I do say so myself. Those drones are the same kind we've already seen wreak havoc. The five emitters are of three types:
** 100k/0.03s.
** 100k/0.5s. That's pretty wimpy. Three of these.
** 10 million/s. By the Gateway.
That first one, closest to the door, and the last one are the biggest threats. But more than that, the creeper has been building for more than 80 minutes. Density is a solid 25 million per square. With wall-to-wall blasters, I take out the SuperDrone losing only three of them. Ok. But ...
We aren't getting in there anytime soon. So I gradually start mixing in some launchers around the doorway to start thinning it out faster. Both are severely needed here. And whatever you do, DO NOT open both of them at once.
Reduce the density to a few million, and our AC can make enough progress that the cloud expands.
Once we get in and take out that closest emitter, things start to accelerate. I found launchers on the side with blasters in the middle to take out the SuperDrone releases worked reasonably well.
And be quick about it. I don't know where this came from, but we got hit here with a bunch of creeper teleporting from somewhere. Took out a large portion of my force. After the cleanup, I had a much better blaster-launcher mix for the second room and was able to clear it much more quickly.
And then there's the final chamber. More below but it's quite similar. Those squares on the left and right side are 50M density. The drones are all 10HP with 1M payloads, and they won't stop coming. Because of them, I only wanted to open up one side ... on the left. Only the four emitters surrounding the Gateway do anything; 500k/0.06s. 33M plus combined per second. So that plus what's already built up ... we'll need some firepower.
The AC flooded in quite effectively, beginning with 1 hour, 37 minutes on the clock. It was soon followed by a massive weapons push.
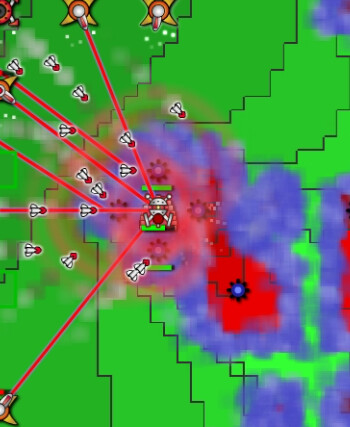
Didn't realize what was going on here at first. Note that we have a nearby MicroRift, an energy surplus, and a bunch of starved Launchers. That's because there is apparently an energy-disbursement cap of 60. Probably needless to mention there's significant lag going on here as well. I've taken out about a third of the room, and the speed in doing the rest will be limited by the fact that we need better capacitors(or whatever).
Closing in on that center complex, I came to realize that those four active emitters are all 10HP. Because of course they are. I didn't carefully calculate at this point ... I just spammed Nullifiers everywhere within range. One of them took out the gateway, ridding us of that nuisance. And finally we could mop up the very last of the resistance.
My favorite word during this map was, I think, 'insane'. But with that, our adventure with Creeper World 2: Redemption(Anniversary Edition) comes to a close. It's time for a new adventure to start. I am thinking of trying to see how good a time I can do on this level first though, esp. since it sets up well for that kind of thing with a clearly-definable 'best build order' at the beginning.