Part 15: Boss Guide: The Cannon

The Cannon
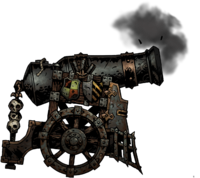
The Brigand ##-Pounder is the second boss you can find in the Weald, and its a test of patience, speed, and (in my opinion) poor boss design. The main gimmick of this fight is preventing the Pounder from firing by killing its Matchman, all the while surviving the waves of reinforcements that come to help.
The Cannon itself will always use Reinforcements! at the start of the round, and he will always summon a Matchman if one is not present on the field along with at least one extra bandit to put on the pressure. Aside from that, it doesn't do anything else unless you allow the Matchman to live until his turn, where he will use Fire in the Hole! to prime the Cannon. Once that happens, at the end of the round one of two things will happen: He will attack with BOOM!!! for both a huge amount of damage to your entire team along with stress damage, or Misfire! where nothing happens and your team gets healed 10 stress. I mentioned the math in video but to have it on paper: The initial odds for Boom vs Misfire are 65%/35% on apprentice missions, 70%/30% on veteran and 75%/25% on champion. In all honesty though, you should never let this happen since the payoff is nowhere near worth it compared to what you get for failing.
Aside from that, the Cannon is a very bare-bones fight since you'll be more focused on controlling the mob in general. The cannon has a STAGGERING 70% prot with high HP for its prot value, so this fight becomes a long drawn out slug-fest as your strongest units do less than 10 damage on average. The Cannon also possesses full resistance to everything but Move, which makes sense however you'll have no mathematical chance of getting an anti-PROT hex out so your houndmaster and bounty hunter lose their defining advantage for this fight. Move resist means absolutely nothing either, since the Matchman can prime the cannon from any position so moving it or the cannon is an exercise in futility. If you focus on the gimmick of this fight however, the main damage output will come from either the Cutthroat wearing your front row down, or the Fusilier wearing down your team in general. I would highly recommend taking out the Cutthroat since an optimized Vestal can out-heal a Fusilier, leaving you to wail on the cannon at your leisure. Finally, once the cannon is actually defeated, the Matchman has one last desperation attack with Hot Shot, which is functionally identical to the Fusilier's Blanket Fire but much weaker.
The best strategy for making the Cannon a quicker fight in general is operating with a Mark team. Bounty Hunter, Occultist and Arbalest with a mark on the Cannon will make short work of the Cannon's HP while still allowing you to have good healing options and also have the versatility for dealing with the henchmen. Bounty Hunter is especially good here since he has a move that is anti-humanoid for the Cutthroat, and a move that can deal full damage range to rank 3 where the Matchman is more than often at. Once the mark is up though, you want your Arbalest to focus on the cannon along with the BH if he's available. The extra damage from the mark is roughly the same as how much PROT the cannon has, and while that's not how the math works (The damage gets buffed first with prot reduction soon after, so a 30 HP attack becomes 10) you'll still be doing way more damage and expediting this fight in general. Other good options are a Plague Doctor to stun any undesirables, Hellion for a versatile all-range attacker, Leper for just raw damage that doesn't necessitate a mark, or a Graverobber to exclusively ruin the Matchman's day and also have mark synergy. Really though, this boss is a slug-fest and not the most mechanically interesting thing, just shoot it until it dies.
And now for some trivia: The Pounder is the only enemy with the IRONWORKS enemy type. This is mainly for flavor but it also means there is no race-specific maneuvers geared toward him.