Part 19: Chapter 13 (Part 1) and the War Room, Part 45 (Planning Rescue-Drops)
Alright, it’s time for a real chapter at long last! For the first time since arguably chapter 3, Bern is actually doing something. Now what they’re doing doesn’t make a ton of sense, but nevermind that. It’s just good to have the plot moving again at last.
This right here is FE6 at both its best and its worst. On one hand it’s yet another absurdly huge and empty map with nothing to do. And almost all of its difficulty comes from massive waves of surprise reinforcements from silly locations. Plus the plot is full of holes and the villains are ridiculously dumb.
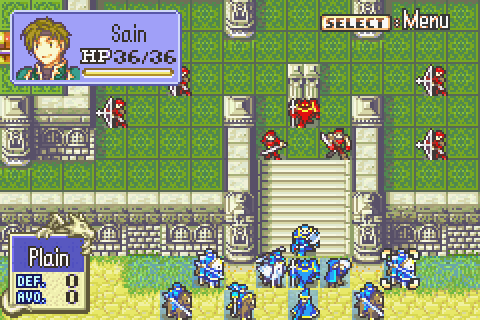
On the other hand, Guinevere is finally back and saying cool stuff. She’s a thousand times more interesting than Roy- let alone Merlinus- and removing her from the party made every conversation on the western isles wretchedly dull. There’s a fair amount of story progress and character development on this chapter. I think it has more conversations than pretty much any other one in the whole game. And at long last the difficulty is about right. Enemies are a serious challenge, but the party has grown strong, so with good tactics you can defeat them without much luck. And the terrain lends itself to at least a few interesting skirmishes, even if things are mostly empty.
Also things are finally back to being pretty. There have been way too many maps with ugly color schemes recently.
Chapter Summary:
The obviously treacherous Arcard and Roartz who had already clearly betrayed the king of Etruria and whose criminal and treasonous activities were exposed by Roy have somehow nonetheless been allowed to kidnap the king and begin a rebellion with Bern’s backing. They completely crush the loyalist forces almost immediately and Roy barely arrives in time to save them at all.
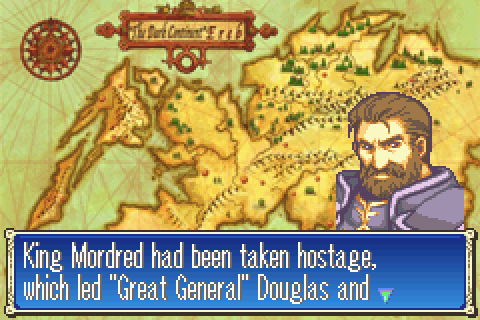
Both Douglas and Percival join the rebels because the rebels have Mordred hostage. This is both horrifyingly irresponsible and astonishingly stupid, and more so the more you think about it. Douglas in particular is a total jerk because he knows full well that Prince Mildain is alive and that therefore the rebellion could be quashed easily but he hasn’t even told the king that. That the king has gone mad with grief is really entirely Douglas’s fault, and that’s the origin of this whole sorry state of affairs. The worst part is that even if you have Mildain walk up and talk to him, Douglas will still try to kill you and prevent you from saving the king he’s thrown his whole country away to try to save.
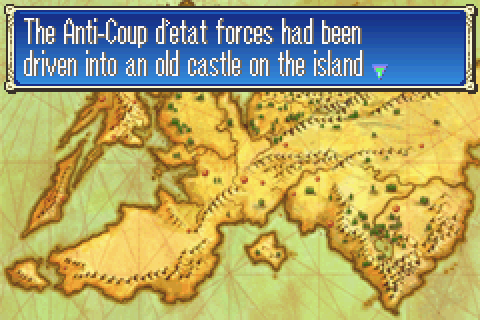
Within 1 week or something the loyalist forces are apparently pushed straight out of Etruria and somehow clear across like 500 miles of the Nabata desert to that island in the far southwest. Maybe that’s also an Etrurian colony? That would make the most sense, but it’s not stated.
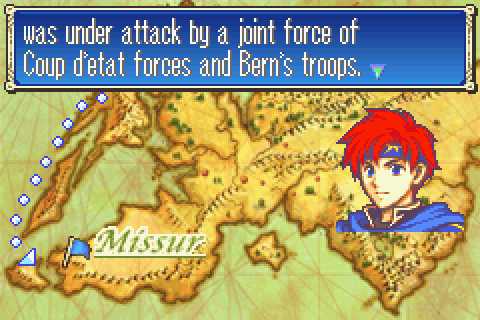
I have something of a pertinent question: how did Bern get there? They didn’t conquer Lycia and they barely even have a sea-cost (and it’s on the wrong side of the country). If they went by ship, it looks like a journey of thousands of miles along the uneven coasts through waters controlled by their enemies. If they went by land, it’s even worse since they’d to walk just as many thousands of miles through at least partly hostile and rugged territory like Sacae or Ilia. And I’m pretty sure wyverns can’t fly across oceans. And it’s not like they just have a handful of wyverns here anyway; besides this force fighting the Etrurians, they also somehow marched a gigantic army right into the middle of the desert. And the king himself too.
Clearly Zephiel is the greatest logistician of the age.
Most translators would probably have gone with “fallen”.
There are several particularly noticeable translation peculiarities in this chapter other than that one too.

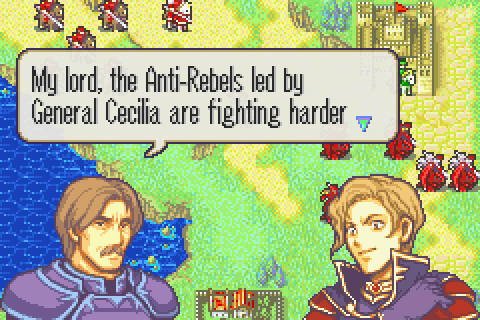
Why is he surprised? No, seriously. This war has to have been going on for minimum a week for Roy to have sailed here, possibly several weeks. She’s the only enemy leader of note. Why is he surprised that it’s her leading the forces at their last stronghold?
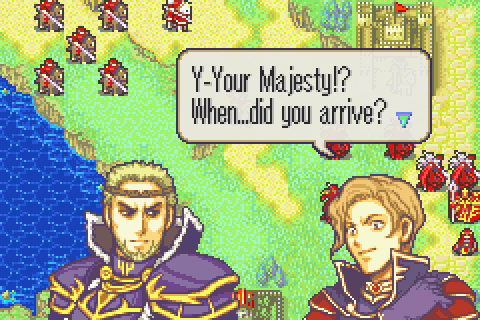
Good question. More to the point, HOW did you arrive?
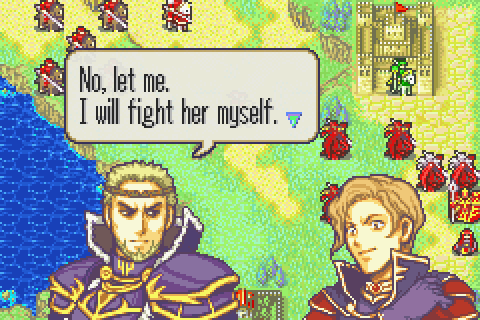
Now in this scene he’s totally eager to get his hands dirty fighting the enemy in person just for fun and exercise. This makes it even more ridiculous how he heard you guys storming through the castle in chapter 3 but then just walked away and let you conquer it and find all about his secret plans from Hector. And how he does basically the same thing here while you have his sister and the fire emblem.
The War Room, Part 45:
Way back in the War Room Part 21 (http://forums.somethingawful.com/sh...9#post442132013) I introduced the basic mechanics of the all-important rescue command. More recently, in Part 45 (http://forums.somethingawful.com/showthread.php?threadid=3716259&userid=0&perpage=40&pagenumber=8#post444925952), I talked about why rescuing is valuable. It’s finally time to start discussing a few of the basics of how to actually DO rescues and rescue-drops well. This is, of course, a bit late to be starting with this since you’ve already seen many of these fairly basic techniques in action, but oh well.
For planning and execution purposes there are fundamentally two sorts of rescue-drops: strategic and tactical. By strategic rescue-drops I refer to those planned out from Battle Preparations. These are the rescue-drops you know you’re going to do before you start the chapter. They probably serve a very important purpose, completing or allowing your units to easily complete one or more of the jobs needed to achieve your goals. Accordingly, you can devote whatever resources are necessary and appropriate: bring any characters and put them in any position in battle preparations to make sure everything is as you need it to be.
Tactical rescue-drops, on the other hand, are those you didn’t plan on to begin with. When you started the chapter you didn’t know exactly who would hit and who would miss, how the enemy would move, etc. So you didn’t know this exact situation would arise, but now it has and you want to do a rescue-drop to gain one of the benefits I outlined in Part 41. In this situation, you have to work with what you’ve got. Characters are where they are, enemies are where they are, and you probably have other stuff going on.
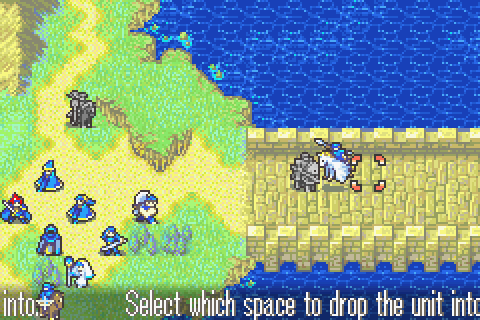
The way you plan and execute those types of rescue drops are significantly different. I’m going to start with some examples of strategic rescue dropping based on this chapter. You may find this map helpful: http://www.fireemblemwod.com/fe6/guiafe6/cap13.htm
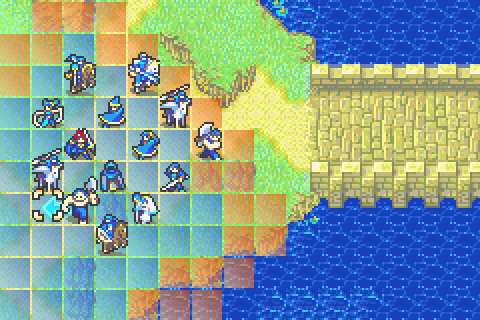
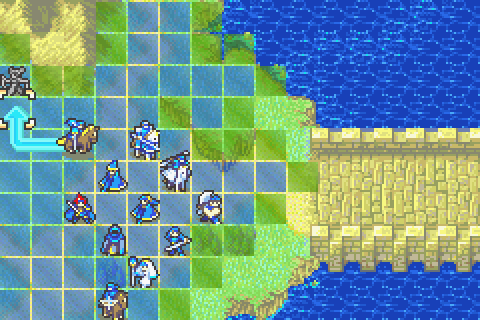
As you can see on that map, the recruitable paladin Percival is very far away in the top-rightish area. He and his units are red but don’t seem to actually be hostile. They will all leave on turn 8 if Lalum/Elphin doesn’t speak to him. Lalum sure can’t walk that far in 8 turns- but you can make it if you do rescue-drops. Here’s one good way to set up for that strategic rescue-drop:
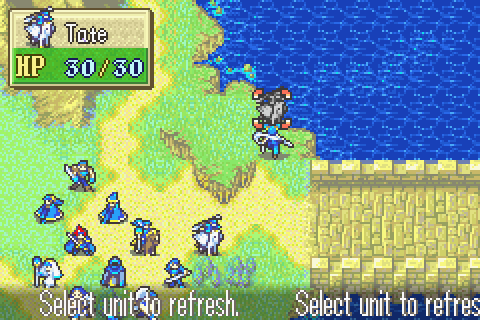
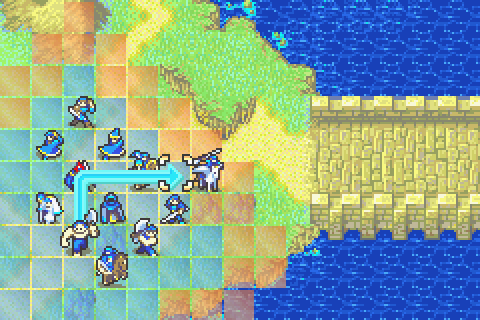
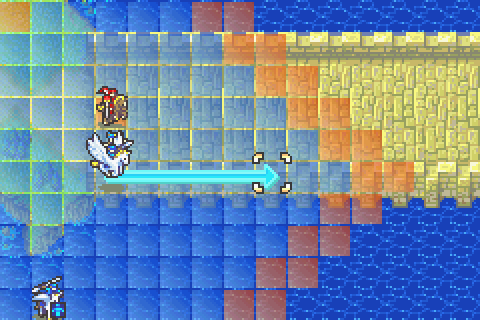
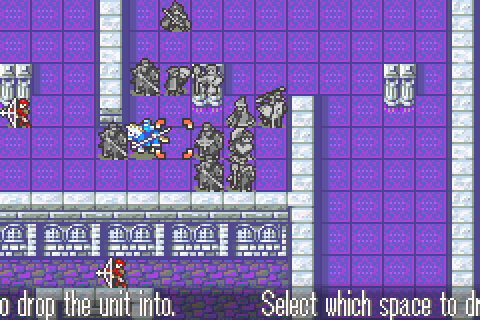
First of all, even if Lalum wasn’t the one being carried, she should still be in the front. Your dancer should pretty much ALWAYS be in the position furthest toward the rescue drop destination. Ahead of the people actually doing the carrying even. That’s how you maximize your distance. Relatedly, the people being carried should probably not be in the front if the carriers are cavalry. Put the dancer in the very front, the carriers not far behind, and the carried somewhere behind them. All that’s important is that they can move next to the rescuer. Of course with all-infantry rescue drops it’s different and both the carrier and carried need to start toward the front.
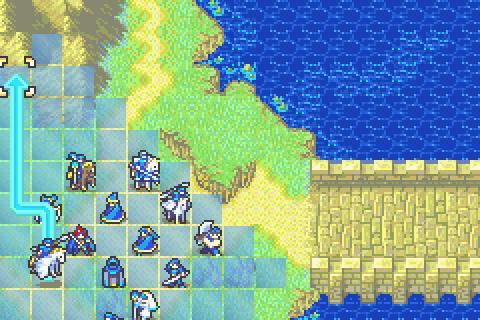
So the rescuer (Tate) moves to this exact spot. That’s because this is the furthest spot toward the goal that Lalum can dance for. And notice, of course, that I don’t just pick her up and carry her.
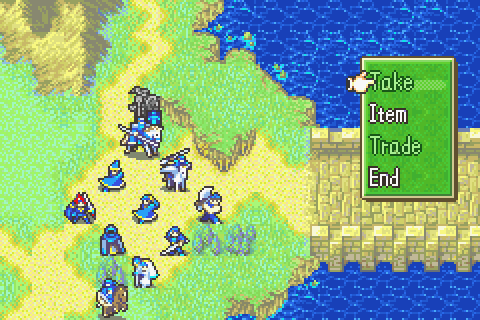
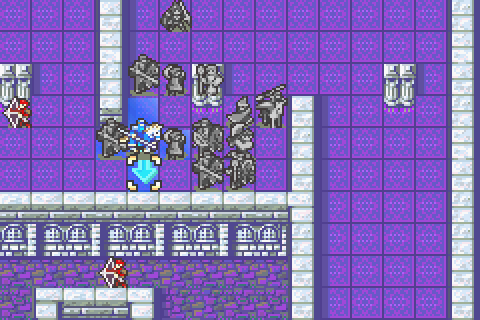
So Lalum dances for Tate as planned.
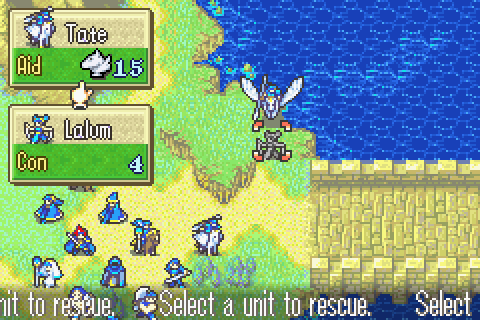
Ah ha! NOW Tate is ready to rescue her.
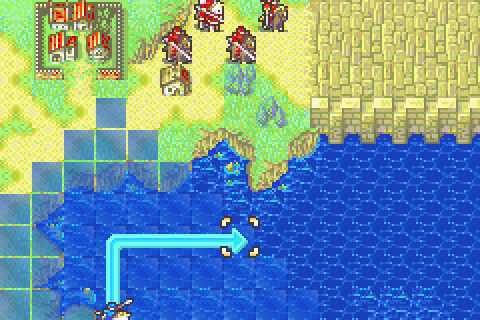
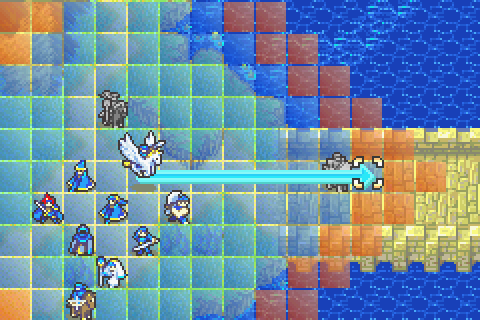
And she then flies as far as she can to a square that’s out of enemy range.
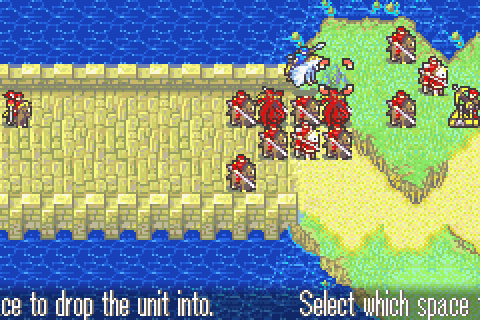
But this is going to be a double drop. Percival’s area is crawling with enemies and Tate and Lalum will definitely need some backup (Plus bait. If Gonzalez is dropped somewhere and the pegasi are out of reach, the enemy will run after him and possibly leave Percival unguarded).
As you can see, Gonzalez was put way in the back and his carrier is right in the front.
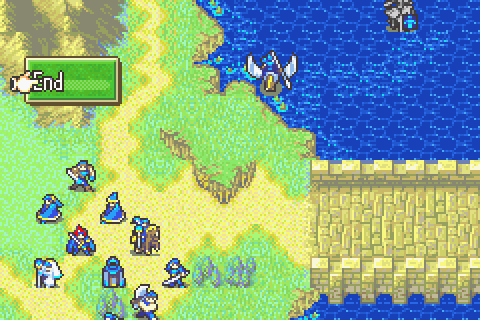
Off she goes with him.
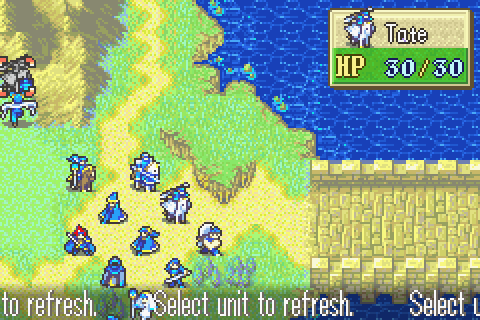
Now this part is fairly important. Tate is going to move here (it’s safe, but barely) and then drop Lalum even though they’re far from their goal.
Thany just follows.
Next turn, Tate and Lalum are both ready to go. So Tate moves only this far.
Thus Lalum can dance for her again. I could also have had Tate move 1 up and 1 right from here, but that seemed less wise given the current enemy move patterns.
So on turn 4 I could drop Lalum into this death trap. It would be moderately safer if I loitered and waited for one more turn because Thany has now dropped the distraction to the west, so the cavaliers will leave. Anyway, that’s the speediest way to approach this possible drop. It’s not a good idea to do it though since Percival can be much more easily recruited and is stronger in a few chapters.
So let’s consider another strategic rescue-drop on this same chapter. There is a crowd of dangerous cavalry in the top left and a pile more reinforcements coming from that direction. Conceivably you might want to defeat those cavaliers as safely as possible with minimum investment of characters so that your other troops can hurry east instead. In that case, the best available choice is Gonzalez. Only he can be placed on Peaks, and with their massive bonuses he’ll be invincible. The trouble is that the only peaks he can reach are dangerously close to your start position. That may just lure the enemies to the rest of your forces. It also obviously leaves him in a poor position to kill the top left reinforcements quickly after they spawn. The solution is a quick rescue drop to one of the peaks along the left edge.
This formation is probably ideal.
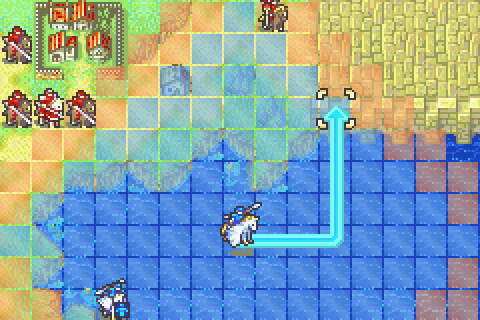
First Gonzalez- who started in the back relative to this destination- moves next to the carrier.
The carrier wasn’t even particularly close to the drop area but she didn’t need to be. She only needed to reach this spot.
That’s as far as Lalum can go to dance.
Now Tate here doesn’t fly all the way up to the top left peak. There’s no need for that. Gonzalez can safely walk on his own next turn with no harm done and 2 spaces of movement for Tate gained.
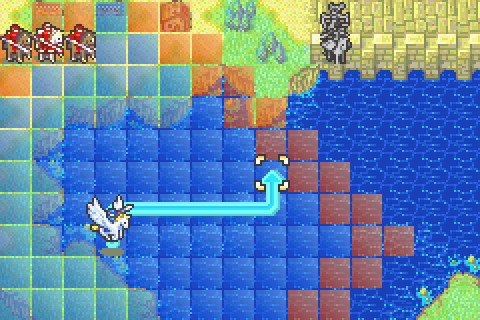
She flies back toward the action.
And now you see why everyone else was positioned as they were. It would be wasteful not to have my dancer near the front lines, so Clarine hoists her up.
She can move exactly next to Alan, who then takes the dancer.
And then because Alan had 8 move but started behind, Thany is able to perfectly move just past him.
And take and drop Lalum anywhere on the front lines you want. Now no one but Clarine and Tate was even mildly inconvenienced by this whole double rescue and Lalum is in position to help out next turn.
Another case of strategic rescue-dropping which takes even more preparation is setting up giant rescue chains. My Whereabouts Unknown one is a classic example.
Before the map began I had to decide that my strategy would be a cavalry blitz to the top with Matthew along for the ride, followed by Matthew looting the top chests, followed by rescue-chaining him all the way back to the lower chests.
Then I had to count the distance and figure out how many mounted units I would need to carry him that far. It turned out to be basically all of them.
The next important thing was to decide who to leave behind. The chain had to be set up over the course of heading north by leaving one person at a time behind to do little else for the rest of the chapter.
I decided to drop Florina first both because she was a good choice for downing this shaman and because she couldn’t fight anything else effectively.
Kent, the worst fighter among the cavaliers, was next. I counted the squares and found this to be the spot he should wait in.
Lowen was next, again put in the exact spot my square-counting said he needed to be in.
And thus when the time came, everyone was where they needed to be and the gigantic chain was executed without a hitch and without unduly compromising my ability to kill the other enemies on the chapter.
What about tactical rescue drops though, the ones where you can’t plan everything in advance? Well it’s a little bit harder to talk about how to set those up since it’s as much an art as a science. With practice you get better and better at recognizing when you could execute a minor rescue-drop mid-battle to improve your position. There are a few cases, like chapter 8, where you need to think things through more carefully though.
This situation was one of them. I wanted to make sure that archer was killed easily next turn and didn’t block the free movement of most of my people back here. I also wanted to help Astol (currently behind the combat forecast) catch up again.
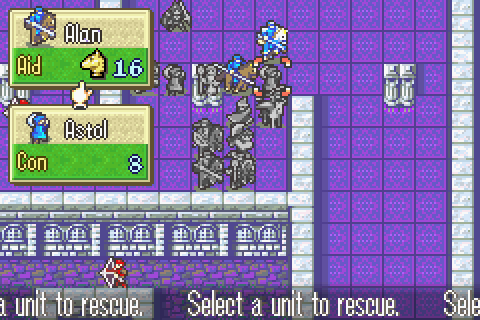
So step one was to leave Alan and Zealot un-used all turn long so that they could help out at the end and step 2 was to have Astol walk next to Alan to be rescued.
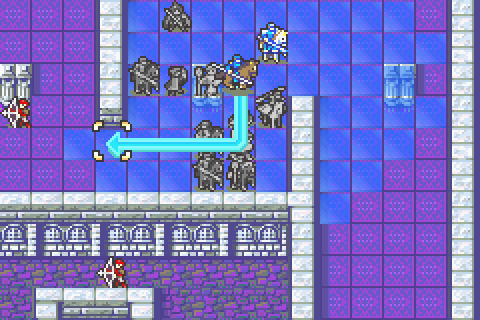
Then I had to think carefully. If I did the natural thing and moved Alan as far as possible, Zealot would have no choice but to end in the square currently selected, which meant that Astol would be in archer range wherever he was dropped. The only way to let Alan and Zealot form a proper wall of javelins was to have Alan stop one square short.
Then Zealot could interrupt his move here and drop Astol to a slightly less advanced but much safer space.
And then block. Now the archer can’t attack anyone who doesn’t have a javelin. Plus Lance and Alan are in support range.
The key was to first recognize that a rescue-drop would be helpful for Astol, second notice that Alan and Zealot were the best men for the job given their positions and therefore have them stay put all turn, and third notice that if I wanted to take out that archer, I couldn’t go with a conventional move full distance and drop approach.
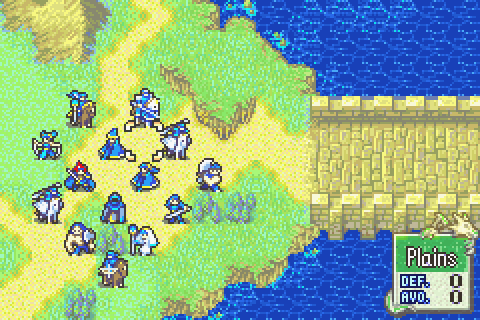
Another important aspect of tactical rescue-dropping is considering whether there’s enough space in your formation.
In this part of chapter 11 I was mass-dropping my whole army into this small area, starting with ranged people along the wall.
Space was at a premium, so it was critical to realize that Shin needed to move here and drop north rather than move full east and then drop west. The latter would leave the north space completely inaccessible and thus force Clarine to drop her passenger a space further back.
Instead I was able to do maximum pack-in and not waste any movement. Think before you drop, and think about leaving spaces open in your formation when moving your other troops.
Other than that, there’s little else I can say that isn’t better learned with practice. Just look for possible rescue-drop advantages at all times and you’ll start to see them. And then your playing will improve by leaps and bounds.
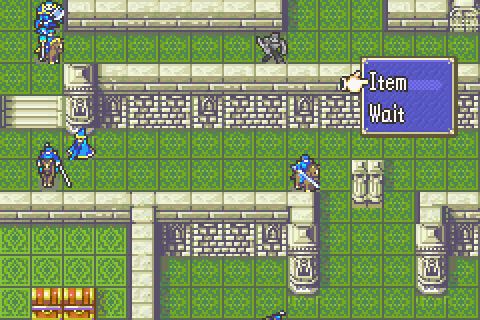
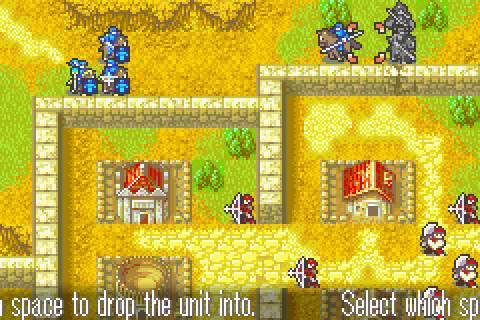
Battle Preparations & the Map:
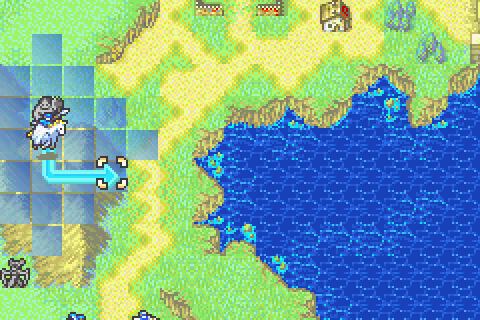
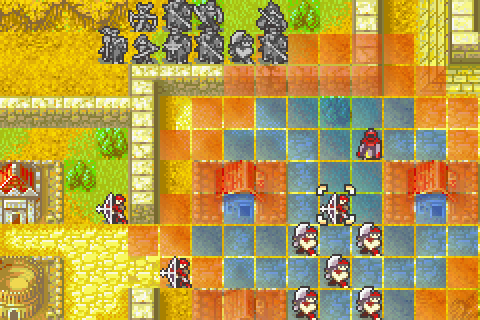
What on earth were they thinking? This is an actual screencap of the map on turn 1 as I was stitching together my map of the whole level. This whole screen’s worth of the level is completely empty- and it’s hardly the only giant empty space. What’s more, no one will ever walk across this bridge. You should never send any of your own units there and no enemies will ever cross it if you don’t. Its existence is entirely pointless and so is the map’s hugeness in general. Almost every map in this game would have been better if it was 50-75% smaller.
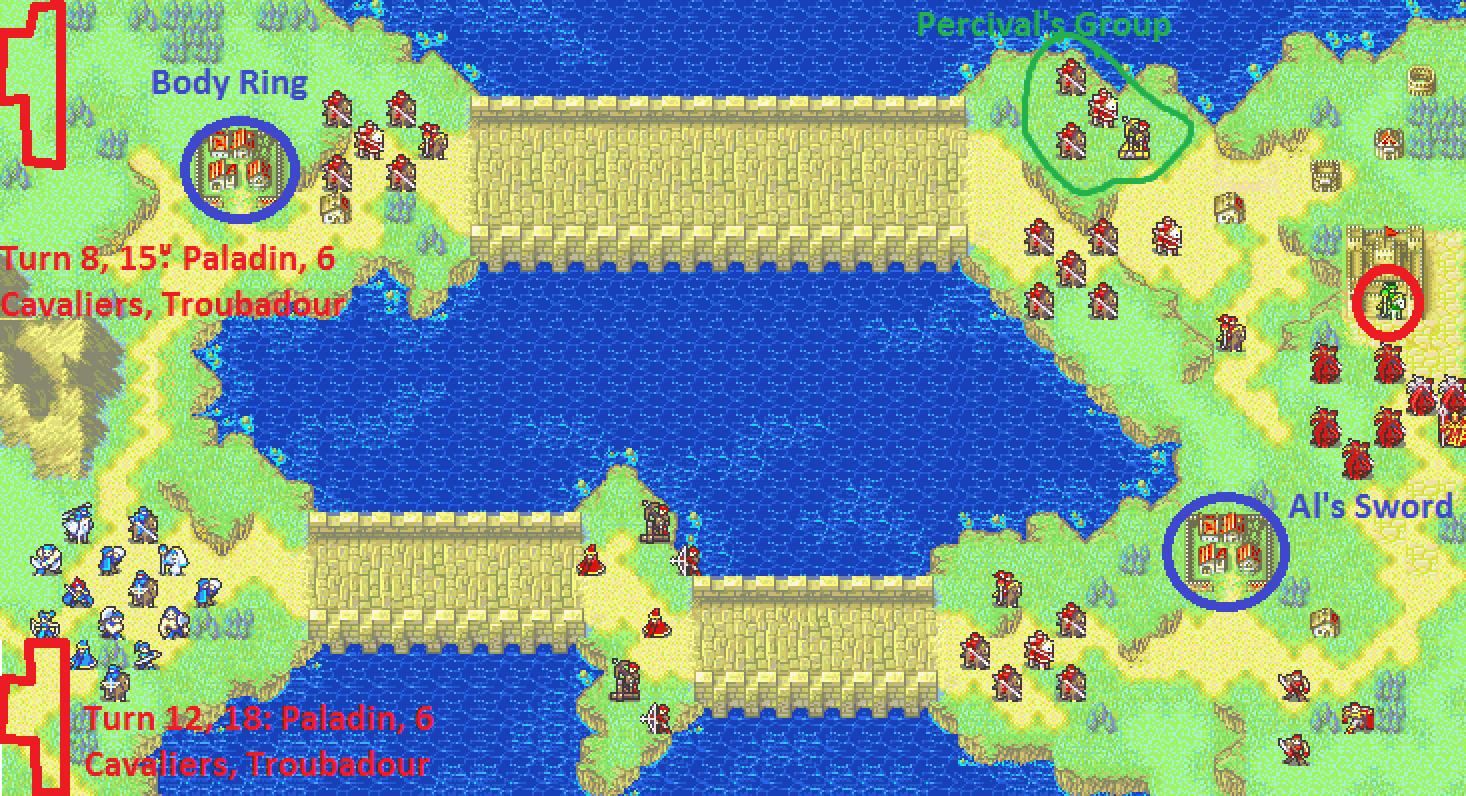
Secondary Objective: Recruit Percival by talking to him with Lalum before turn 8
Secondary Objective: Get the Body Ring from the top left village
Secondary Objective: Get Al’s Sword from the bottom right village
Secondary Objective: Do some shopping
Reinforcements: 4 waves of 6 cavaliers, a paladin, and a troubadour. They spawn from the northwest on turns 8 and 15 and from the southwest on 12 and 18. They’re quite powerful and very dangerous with their good weapons and are completely unannounced. There isn't even a pattern to their spawning. Very obnoxious.
Turn Limit: 20. Easy. However, if you want to harvest all the reinforcements you have to wait till turn 19.
It’s not enough that the map is 50% ocean with almost no flyers, even the land is rather bare of troops. This is supposed to be a giant joint army of joint Béarnaise and Etrurian rebel forces fighting the army of Etrurian loyalists. But instead it’s like 25 spread out guys (and 5 of them don’t even fight) fighting one person. On a map so huge that the small army looks even smaller. Whole turns will be spent just walking with no fighting going on. Oh well, at least it’s pretty.
The first thing to understand about this map is that most of the enemies –and some of the story events- are proximity triggered. Almost no troops come towards you until you come within a certain distance. This means you can control who you fight and when and where pretty well.
The next important thing is that the standing forces on the map will be outnumbered and outgunned by the giant waves of unannounced reinforcements. Which are all from the west for no reason. I mean, that island is the one the Etrurian loyalists are still fighting to defend. Why do the rebels already have it? It makes no sense. Anyway, every wave of reinforcements has the exact same gear: the paladin has a silver lance, one cavalier has an axereaver, one has a killer lance, and the rest have a steel lance and a javelin.
Now the enemy standing forces will be cut by roughly 50% within the first few turns as a few groups of them run at you, making the reinforcements to come outnumber the remaining enemies even more. The upshot is that you should actually have about 60-75% of your army stay in your starting area and only send a smallish force east to deal with the tiny number of enemies. It’s silly and there’s no way to know that going in.
Also, ignore Zephiel and Narshen over there on the right. And Cecilia. The boss of the chapter is Flaer. You just don’t get to know that for sure until you’ve walked onto the eastern half of the map.
Oh and Percival and his group won’t fight you and will leave on turn 8.
In terms of giving you the information you need to actually strategize, this is a terrible chapter even for this game.
Besides the fighting, there’s really not much going on in this map. The villages are completely safe, the ballista operators (one is a sniper with a silver bow) will generally abandon their ballistae prematurely, and there’s no time crunch of any kind really. Plus you can bring a ton of guys again.
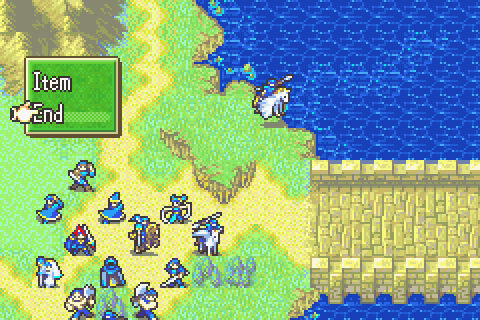
Units Allowed: 13 + Roy + Miledy (on turn 2 or so). That’s a ton; more than enough.
Units Brought:
1) Roy. Required. Not useful. And too high level.
2) Miledy. Required and amazing, she’s instantly one of my better units. And it’s a pretty good map for flyers once the initial ballistae are dealt with.
3) Tate. After her great levels last chapter, she’s a very valuable unit. Plus I want her to be stronger for next chapter and I need to train her more to get the Ilian route.
4) Thany. Like Tate but not as good.
5) Lugh. He’s overleveled, but I’ve decided I actually want to get him to 20 and promote him this chapter so he’s more powerful on 14 and can help with healing. Also I want to build support with Ray.
6) Ray. Weak for his level but a good unit when he gets going, Ray is at least fairly usable here. And I want to train him for next chapter.
7) Dieck. Remains a good unit, though the enemy have leveled past him. He’s moderately effective here and he has supports to build. I’d also like to promote either him or Rutger soon, though it seems it won’t be in time for next chapter.
8) Rutger. Like Dieck, only better.
9) Gonzalez. His lousy accuracy is beginning to annoy me, but there are few better units nonetheless. He’s quite handy here in particular due to the abundance of lance-wielding cavaliers and the peaks he can stand on.
10) Lilina. Like the other magic users, I want her very powerful going into the next chapter. Plus more support with Gonzalez would be good.
11) Lot. Reprising his role as my favorite anti-cavalry man, Lot has gotten a bit weaker from disuse but is still fairly effective.
12) Shin. I’m trying not to overuse him, but he’s still one of my best ranged attackers so he’s coming along to help other people get kills at the very least.
13) Lalum. Always a fantastic unit and good for my XP ranking.
14) Ellen. The lowest level healer, she’s going to see a fair amount of use as I rotate Clarine and Saul to try to get everyone to reach max level at the same pace.
15) Clarine. Mobility is more important than toughness here, so she’s going to ride along with the group heading east while Ellen stays with the starting troops.
Notable Units Rejected:
1) Saul. He’s now the highest level healer and he doesn’t have any supports to build. Plus I only really need 2 on a fairly tame chapter like this.
2) Alan. Too high level now that he’s promoted and kind of overkill here.
3) Lance. If Alan isn’t coming, Lance probably isn’t either.
4) Treck. I’d like to bring him to build Gonzalez support, but he’s just not good enough at fighting cavaliers to be worth a spot.
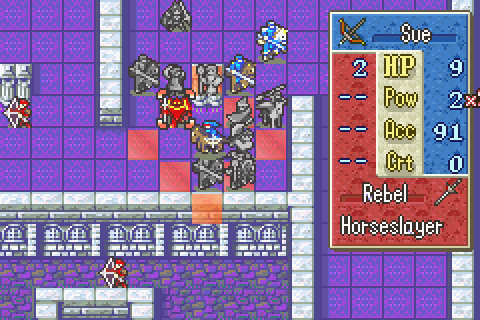
5) Sue. I need to use the nomads less and the pegasi more to get the Ilian route. Fortunately, the next few chapters are good pegasus territory.
6) Oujay. Not good enough vs cavaliers to make the cut. Unlike Rutger and Dieck, he doesn’t have many supports to build (except with Lilina, who will be busy).
7) Fir. Too high level.
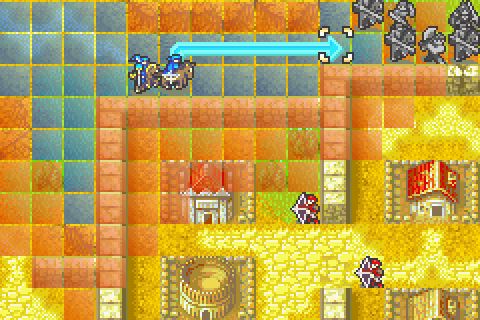
There are two parties here: one moving east to sweep up a few enemies, do some shopping, and seize the throne and one staying behind to deal with the real enemies.
The combat A-listers will mostly be the ones staying put: Gonzalez, Lilina, Tate, Thany, Shin, Lot, and Ellen for healing.
Dieck and Rutger are good but not particularly good for this level, so they’ll be going east with Roy and Clarine. Ray and Lugh will provide ranged support (and Lugh will be the best unit and the one I’m counting on to take out the boss), while Miledy will also provide some helpful backup when she arrives. Since that’s the group that needs to move more, Lalum will go with them.
Besides both Gonzales and Lot having an array of different axes, Gonzalez has the halberd to kill these troublesome cavaliers. Tate has the horseslayer.
As usual, Rutger and Dieck have 8 different swords between them which they’ll pass back and forth as needed.
Lalum and some others in the right party are holding the 4 gems I’ve recently collected to take to the store and sell.
Roy has an iron lance and javelin for Miledy.
Oh and Lugh has a Guiding Ring and a heal staff so he can promote and then get to work.
I won’t be trying to recruit Percival because that’s nearly impossible without a much stronger Tate and Lalum and also because he’ll join much more easily- and with better stats- on chapter 15 and is useless on 14 and 14x anyway.
The Characters:
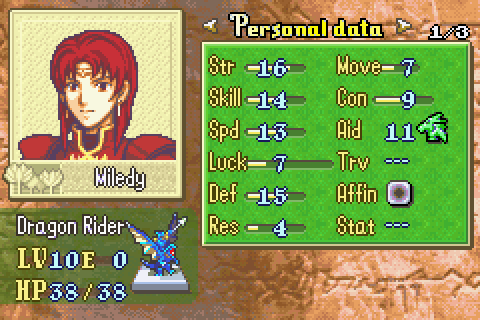
Miledy is Guinevere’s personal knight whom Guinevere abandoned to sneak out of the country alone. Since then she’s been searching for her mistress with the help of high-ranking Béarnaise officers like Gale and apparently Murdock and Narshen. As it turns out, she’s loyal to Guinevere personally rather than to Bern and is totally willing to turn around and start hacking through the armies of her homeland at Guinevere’s command.
She appears to be somewhat gullible since she has at least twice fallen for complete lies from people claiming not to know where Guinevere is as she searched across the continent. Also she somehow ended up on the Western Isles when Guinevere was definitely not there?
As a character, she’s mostly defined by her relationships to other people: Gale’s love-interest, Zeiss’s sister, Guinevere’s guard. She gets some good lines but not a whole lot of characterization in her own right.
She’s one of the best units in the game, no doubt about it. Wyvern riders are pretty much always amazingly good, and Miledy is even better than normal because of her mammoth HM bonuses. On average she gets about +8 HP, 4.5 str, 3.5 skill, 3 speed, 2.5 luck, 2.5 def, and 1 res. Mine actually has just about the worst bonuses possible, but she’s still really good. So she’s a flyer with fantastic stats where it counts and enough Def to take serious hits even if her growth isn’t that good. What more could one want?
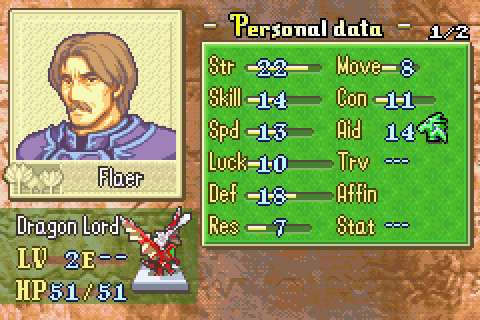
Although the game won’t actually tell you for sure until turn 8 or so or whenever you get into the right side of the map, Flaer is the boss. He’s Narshen’s lackey, seen previously in Chapter 12. And he’s arguably as incompetent and inexplicably stupid as his commander. On 12 he just left for no reason as you were attacking to… give a report on that battle. Instead of waiting 2 minutes to see how it actually went before reporting. And then he apparently just reported that it was a victory and Roy was wiped out without checking any intelligence about that matter.
How in the world no one heard that Roy actually won when Bern rules the skies is completely inexplicable. The notion that they would have no idea he was coming here with his army is just absurd.
Anyway, Narshen once again pulls a Narshen and ditches out when he could totally win if he stayed and thereby damages his career by not defeating you… while talking about how he has to save his career by defeating you. And to make things even dumber, he abandons Flaer and his men here to die pointlessly just in the hopes that they’d weaken Roy’s group. Not that he ever tries to follow up on that by making any attempt whatsoever to finish Roy’s group off.
Why in the world they introduced Flaer in 12 and had him leave just so he could die immediately thereafter in 13 I have no idea.
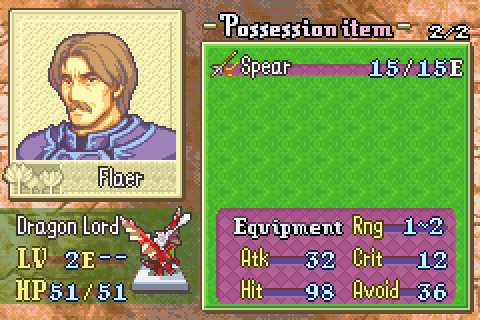
He’s got a spear and decent stats, but nothing special. And since he’s a flyer, the gate doesn’t help. The upshot is that if you have a mage who can take a hit from him, he’s incredibly easy to kill.
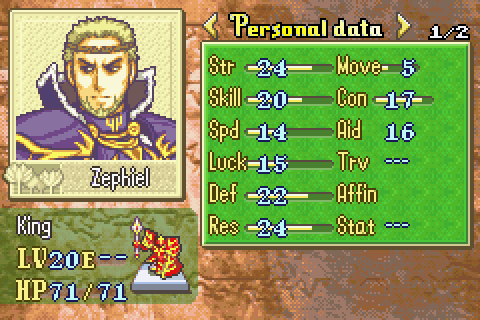
Oh, for silly reasons Zephiel is here too. He’ll once again leave for no reason even though he could guarantee his success by staying and fighting. And even though Narshen flagrantly disobeyed his orders the last time they were in this exact situation and consequently the alliance army got away, he’ll once again trust Narshen to stay and finish things. And even though not staying and finishing things caused huge trouble for Narshen before… Narshen will still make the same dumb mistake. This is chapter 3 recycled.
They’re probably trying to make Zephiel cool by having him show up and wreck Cecilia, but it’s not really impressive since she’s a sucky unit and he gets a scripted crit anyway so that it’s clear the fight wasn’t legit. So all that happens is we see his stats and realize we already have guys who could beat him.