Part 24
*Capital
I would say this is the end of the Etruria arc, but it isn’t. There is no Etruria arc. After the filler arc ends with 12x, Roy does a bunch of barely connected chapters with what might at a stretch be called an Arcadia arc. And then bam, he’s in the Etrurian capital and the war is over.
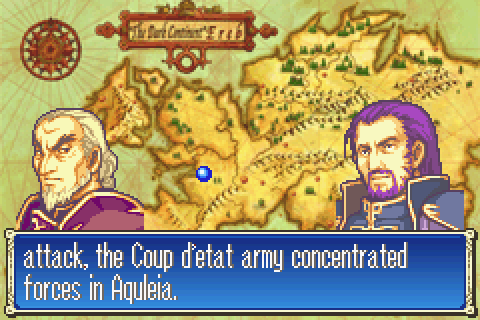
On turn 1 of chapter 13, the rebels won the civil war. They had driven the loyalists out of 100% of the country and all the way across the desert (somehow). The loyalists led by Cecilia made their last stand at the castle there and lost, with even Cecilia being struck down in combat. It was a complete victory for the rebels and left them with no enemies alive that they knew of. Total control of Etruria and a very firm alliance with Bern to boot.
Roy ignores them and mucks about in Nabata stopping Bern’s expeditionary force from destroying Arcadia or abducting Fa for a few chapters.
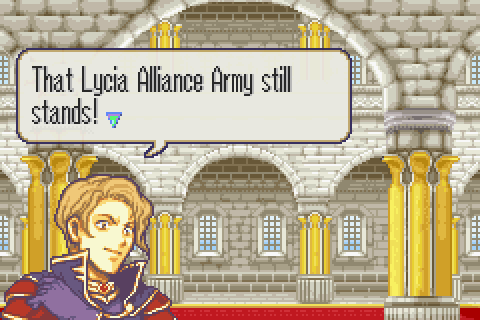
Then on chapter 16, Roy is suddenly in the Etrurian capital. He just… teleported or something. What’s more, it isn’t even the rebels he fights there mostly. No, it’s Narshen’s elite guards backed up by a few rebels like Douglas while the rebel leaders flee screaming into Ilia on their own. Where did the giant rebel army that took over the whole country go?
This story is wretched.
This chapter was almost good for this game, but is turned into arguably the very worst because of the absurd way its sidequest requirement works. More on that later.
Chapter Summary:
POOF! Welcome to scenic Aquleia, home of not the rebel army! The traitorous Arcard and Roartz flee to Ilia or maybe Sacae before the chapter even begins, abandoning their giant army and also their incredibly valuable hostage to just run off alone. Roy kills Narshen and instantly frees all of Etruria.
And got there! Wow, that was easy.
Except there’s like 10 of them. And then the leaders flee before the battle. Also why would they do this? They’re apparently just ceding the whole country other than the capital with no resistance whatsoever, even though the people of the capital are said to dislike them enough that they can’t actually fight there safely.
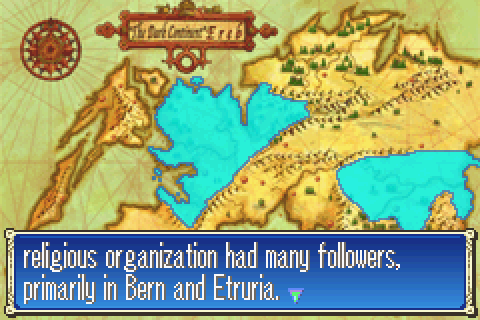
And now a digression about the St. Elimine church and how it has lots of followers in both Bern and Etruria! We were given this exact information at a more appropriate time much earlier in the game, and it was reiterated piecemeal at least once more since then.

Look, which army is it? In both this chapter and the last chapter, the game –or at least the translation patch- couldn’t make up its mind about who we were fighting. On 15 the chapter intro said Etruria, the Data screen said Bern, the R unit info said Etruria, and the in-chapter dialogue was very definitely Bern. There’s just as much waffling here, though it looks like we’re fighting a joint Béarnaise and rebel army force. That just makes their tiny numbers- especially considering the rebels apparently pulled everything they had out of the whole country to here- even sillier.
Of course they do! You never did ANYTHING to stop them! You said “I’m going to go to Aquleia and plan an attack on them. Go die pointlessly, Flaer.” Then you went to Aquleia and then didn’t actually plan or execute an attack of any kind.
It really feels like about 1d4 chapters are missing from the game here which would make both the plot and this line make a thousand times more sense. Maybe instead of wasting everyone’s time on the western isles they could have given us a real Etruria arc.
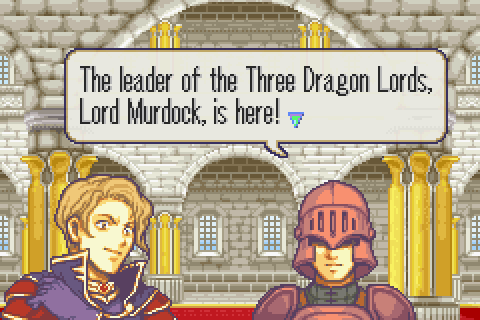
Oh wow, Murdock. We’ve been hearing how amazing and competent he is for 2 games now.
Narshen decides to try to butter Murdock up before talking to him, but it turns out the guard means “He’s in this very room at this very moment and about to talk to you in 5 seconds.”
Forget Kellam, Murdock is a veritable ninja. At 16 and 15 Con , Hawkeye and Gonzalez are both said to be giants who amaze nearly everyone who sees them. The enormous Hector can be shaded by Hawkeye. Murdock has con 20. This is off the charts. Like 8 feet tall and 600 pounds or something. Yet no one ever comments on him being even moderately large in either game. Zephiel too is bigger than 16 Con and not remarked about at all. Oh and this giant apparently just sneaked up on Narshen without Narshen noticing his presence -despite him being announced.
One explanation? I count about 20. Off the top of my head:
1) Telling Zephiel not to fight the alliance army at Araphen and to let him do it instead; a dumb idea to begin with.
2) Then just walking away at Araphen and ignoring the alliance army that was already inside the castle killing his men.
3) Deciding it would be totally reasonable to abandon his duties to go rape an Etrurian noblewoman- at a time when Bern is trying to cultivate friendly relations with Etruria no less.
4) Just walking away at Laus for no reason when the alliance army came running into a ready-made ambush.
5) Apparently just forgetting his whole army somewhere in Lycia and never remembering to retrieve them.
6) Sitting idly by for weeks while Roy killed all of Bern’s allies in Lycia one by one and liberated the country.
7) Bringing only 6 guys rather than an army- and calling for no reinforcements of any kind and doing no intelligence work on Etruria- when finally going to do something about Roy.
8) Not just killing the helpless Roy and/or Lilina before fleeing the Etrurians.
9) Making no attempt to prevent Etruria from securing the entire country or Eliwood (who lives on the very borders of Bern) from being allowed to begin reviving the alliance properly.
10) Making no attempt to either secure the supposedly valuable western isles OR sweep away the remnants of Roy’s forces OR even check Flaer’s premature report that Roy was defeated.
11) Failing to even defeat the cornered and massively outnumbered Cecilia after the rebels did all the real work.
12) Deliberately throwing away Flaer and his entire army in a battle for no gain whatsoever.
13) Not taking the Fire Emblem from Guinevere as directly ordered.
14) Not making any attempt whatsoever to ensure Guinevere was taken back to Bern and instead letting her fly right toward the enemy and immediately rejoin them.
15) Making no effort to take Arcadia as directly ordered, knowingly and deliberately throwing away another whole army in the process.
16) Making no effort whatsoever to stop the Lycian alliance army as he himself said he needed to.
17) Allowing the rebels to make the mind-blowingly bad move of apparently just letting Roy get right to the capital with no resistance.
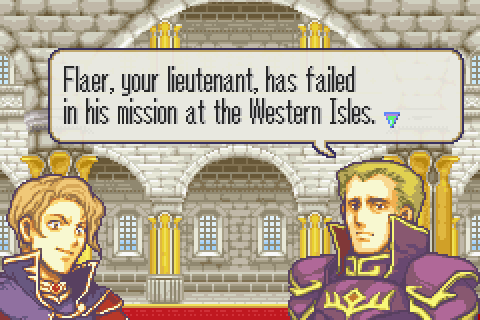
Ok that part isn’t really Narshen’s fault. That’s Flaer being almost as dumb as Narshen. What’s Narshen’s fault is that no one double-checked Flaer at all, so Roy’s whole army was somehow able to sail over and attack by surprise.
Yeah. Even HE doesn’t know why he did any of this stuff.
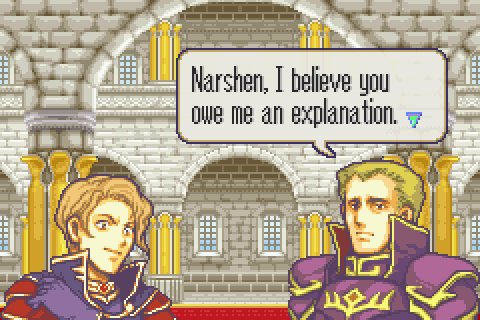
… and Murdock jumps into the bottomless pit of stupid himself. He asked for an explanation and then immediately cut off Narshen’s explanation. Everything he says will pretty much be downhill from here.
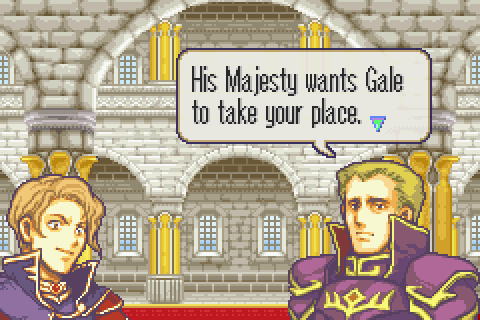
About time, everyone knows Gale is better than Narshen and the only counterargument Narshen ever made is that Gale isn’t a native of Bern.
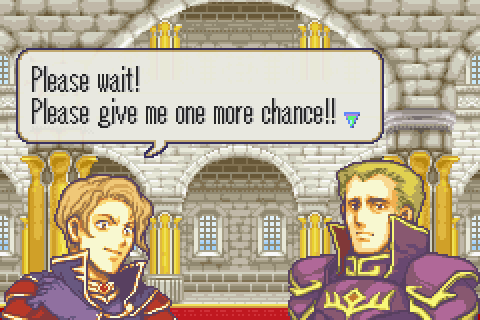
Ha! You’ve had 17 already! Surely he’s not going to give you another-
Oh wow. He does. Narshen is totally off the hook if he wins this battle. Murdock, you’re as dumb as him.
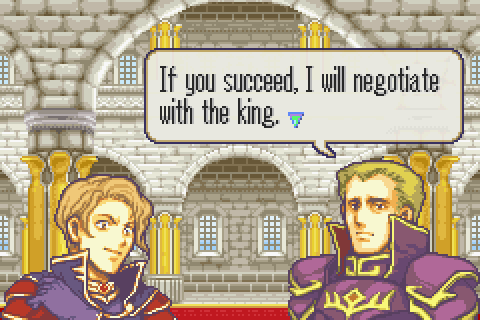
Murdock, why the heck would you intervene with the king to make sure this horrible general stays in power instead of your own trusted lieutenant who you know is better? Do you just want to keep Gale for yourself?
And then Murdock just leaves. He KNOWS Roy is about to arrive with his army, he KNOWS this is a critical battle, and he’s just walking away to deliberately let Narshen’s whole army be slaughtered instead of making any effort whatsoever to help. If Murdock joined in with some of his own troops, they would win the war right here! But no, he just leaves for no reason. That’s right. Murdock just pulled a Narshen.
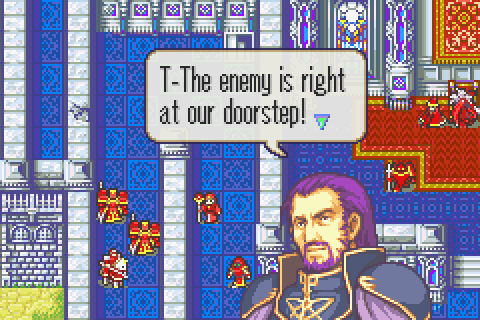
Narshen has come up with a “plan” to get out of this mess.
He’s going to say Zeiss was a spy and that’s why they lost. But… that wouldn’t actually explain ANY of the things Murdock pointed out except maybe Flaer failing in the western isles. Furthermore, if Narshen fails here, he DIES and so does Zeiss! What good does this plan even do? Murdock just said that if Narshen wins, all is apparently forgiven! And if Narshen loses, he’s dead anyway!
He sounds almost as confused about that as I am!
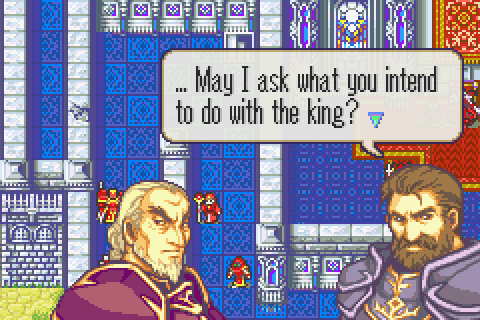
Good question! They could do all sorts of things. For one, they could threaten to kill him if the attackers continue. Or since they control him, they could perhaps have him issue a proclamation in favor of the rebels or do something else to make the city turn back to their cause. Or they could kill him to spitefully throw the country into chaos and make it easier to take control again later- maybe trying to make it look like it was the loyalists’ fault somehow. Or they could just use him as a bargaining chip to get out alive and with a ransom if they’re in the surrendering mood they seem to be.
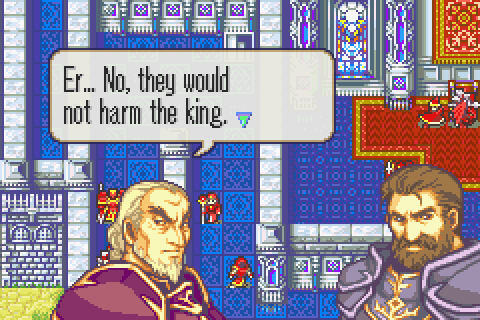
But they decide to do nothing with him and just leave him behind, fleeing themselves. Well that’s a wrap; the king is safe. Roartz himself says that Bern definitely wouldn’t harm the king even if they got him. And Bern wouldn’t even get him if Douglas doesn’t let them.
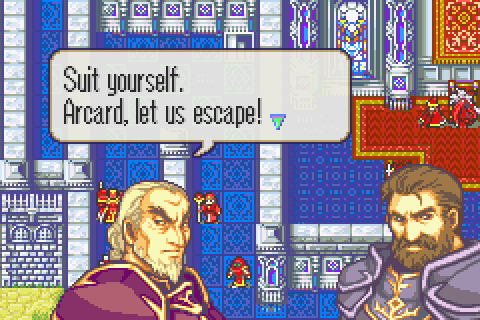
And then they just leave. Rebellion over without a fight at all.
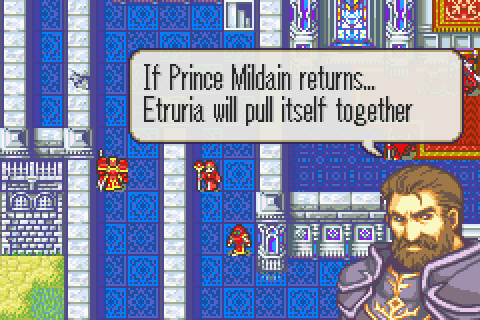
This is so true, so true. You know what else is true? Etruria would never have fallen apart if you didn’t lie to the king and tell him his son had died for no reason. Or if you had at any point put your foot down and not let the rebels take him hostage. Or if you had just refused to aid them; that would also have stopped them in their tracks.
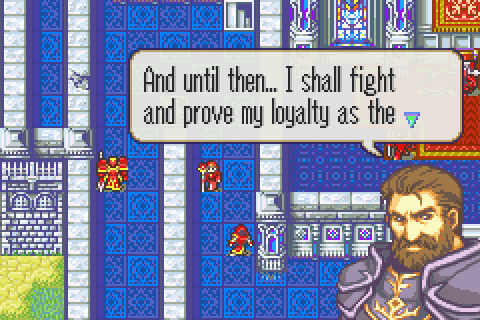
… what? If you want to prove your loyalty, go find the king and protect him! Arcard and Roartz just let him go; make sure Bern doesn’t get him next! There is currently NO WAY in which fighting Roy will make the king safer. Firstly, he’s not a hostage anymore (insofar as he ever was, since the rebels never actually used him as one). Secondly, Roy certainly means no harm to him- and Mildain is with Roy for that matter. Third, Bern might actually try to use the king as a hostage or kill him if they find out Arcard and Roartz don’t have him and Roy is winning. Fourth, if Roy is defeated then the king will never be free, his son will really be dead, and Etruria will eventually cease to exist.
Furthermore, a conversation on this chapter reveals that Douglas and Cecilia and Percival are actually NOT sworn to the king personally. They swore to defend Etruria the country and its people and are explicitly not the king’s private soldiers. By throwing away the whole country to help only the king personally, Douglas has actually been directly BETRAYING his knightly vows rather than upholding them. So his whole duty and knightly loyalty spiel is a complete lie and the opposite of what he’s actually doing.
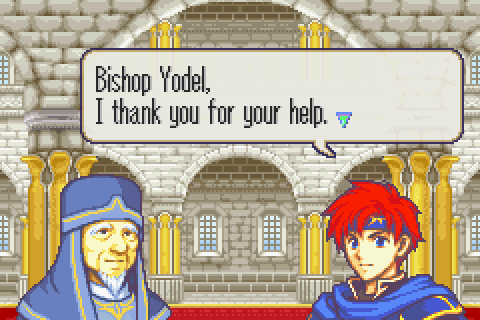
This guy made a cameo on chapter 5.
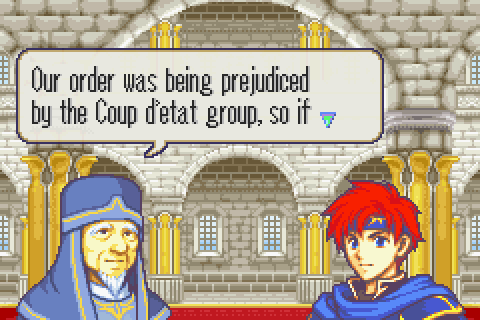
Yodel explains the reason the church has helped Roy (besides the stuff Saul already told him which is now kind of being ignored).
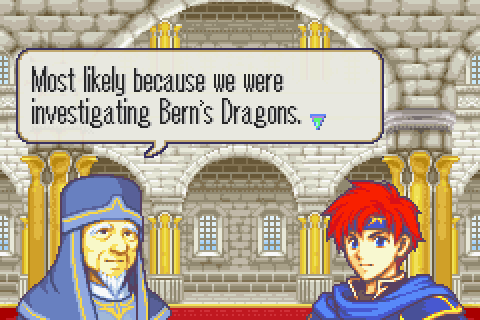
The church is anti-dragon, Bern is pro-dragon. So Bern is anti-church. And the rebels are pro-Bern, so they’re then also anti-church. Kind of dumb of them politically; they’d probably have been better off making a show of supporting the church and disapproving of the whole dragons thing.
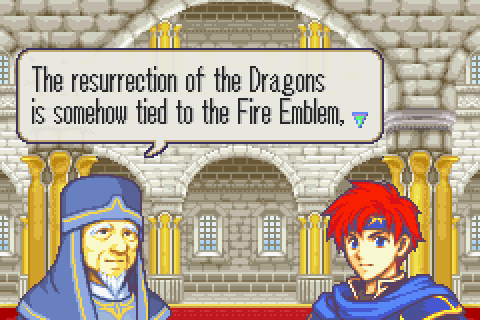
I… you know, I’m not actually sure how. Maybe using the Fire Emblem was how Zephiel broke the seal on the dragon temple? That definitely sounds plausible, but I don’t think it’s stated outright anywhere.

Yeah, about that, sorry about the whole massacre in Djuto and all. It’s been kind of weird that no one ever mentioned that battle where we attacked the Etrurian colonial capital and killed absolutely everyone.
This is supposed to be a hint about Douglas, but it’s the opposite of a description of him. He joined the rebels entirely of his own free will. Everything he says to the contrary is a lie or patent nonsense.
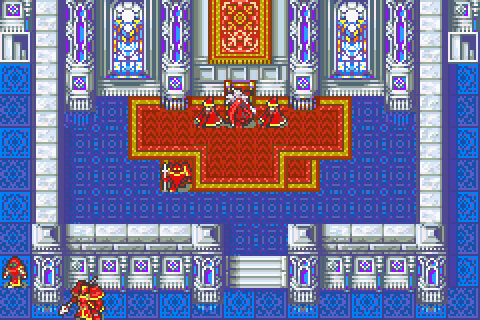
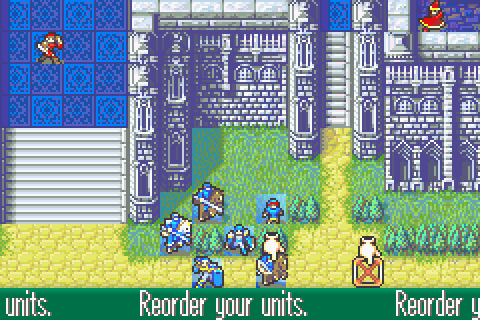
Battle Preparations & the Map:

Secondary Objective: Keep Douglas Alive
Secondary Objective: Recruit Hugh with Roy in the right area
Secondary Objective: Recruit Cath (spawns turn 10) with Roy in the bottom left area
Secondary Objective: Recruit Zeiss with Miledy
Secondary Objective: Steal the Red Gem from the central area mage
Secondary Objective: Steal the Red Gem from the top leftish mamkute
Secondary Objective: Steal the Blue Gem from Narshen
Secondary Objective: Steal the Delphi Shield from Narshen
Secondary Objective: Steal the Lockpick from the top right thief (spawns on turn 10)
Secondary Objective: Get the Berserk Staff from the first left chest from the top
Secondary Objective: Get the Knight Crest from the second left chest from the top
Secondary Objective: Get the Hero Crest from the third left chest from the top
Secondary Objective: Get the Silver Bow from the fourth left chest from the top
Secondary Objective: Get the Rescue Staff from the fifth left chest from the top
Secondary Objective: Get 5000 Gold from the first right chest from the top
Secondary Objective: Get the Bolting from the second right chest from the top
Secondary Objective: Get the Brave Lance from the third right chest from the top
Secondary Objective: Get the Restore Staff from the fourth right chest from the top
Secondary Objective: Get the Recover Staff from the fifth right chest from the top
Secondary Objective: Do some secret shopping
Secondary Objective: Build some supports
Reinforcements: Few but VERY spread out and without warning. Killing them all efficiently will take a massive commitment of manpower and careful planning. First, Cath spawns from the bottom middle stairs and a random thief spawns from the top right ones on turn 10. Then from 11 to 15 there are mercenaries from the bottom left and top right stars, fighters from the bottom middle stairs, mages from the left middle stairs, and … nothing from the top left ones for some reason?
Turn Limit: 25. A nice, generous time limit. You can’t dawdle with so much stuff to do in so many places, but you can definitely complete things in this time if you know what you’re doing.
Another absolutely enormous map with only 30 or so enemies on it. This one is one of the biggest since chapter 8, but is still smaller and easier to walk through than that abomination.
The enemies have really leveled off in power. There was that bizarre spike on chapter 11, a sharp decrease back to chapter 9 strength, and then a slow rise back to about the chapter 11 power level or maybe very slightly above. However, there are more promoted people than usual here and enemy gear is still slowly trending upwards. Lots of killer weapons and aircaliburs and horseslayers. The Mamkutes have rather different stats too:
Higher level but with lower def for some reason. Better speed though.
More problematically, there are also several long-ranged tomes (and a silence staff). The terrain strongly favors those enemies, allowing them to bombard you with more or less complete impunity over very long stretches of the map. Basically, every single one of your characters except your strongest mages will be 1 hit away from a long-ranged death at all times on this chapter until the enemy runs out of ammo. This is unpleasant to deal with. Night of Farewells and similar chapters in FE7 threw many more long-ranged tomes at you, but in those chapters you were actually encouraged to be proactive by finding ways to kill them early. Here that’s very nearly impossible. You don’t have long-ranged tomes of your own until this chapter is nearly over, definitely cannot silence or sleep the massive res enemies, and will have trouble even gunning down the bolting mage with a longbow unless your Shin is VERY high level.
Many key units- like Roy and Lalum- will be OHKOed by Purge or Bolting too, so beware of that.
The enemy are less problematic to deal with than the map itself though. There are a ton of important objectives scattered across the level and there’s almost no way to get efficiently from one section to the other. There isn’t even a rescue staff available until near the end of this chapter. In short, they taunt you by giving you the tools you want for this chapter only after it’s basically over.
One particular problem I’m going to have is that Roy must be on both the right AND the left side to recruit someone. Hugh will go to the right side no matter what, so Roy must get there- but he starts on the left! That’s a pointless bit of obnoxiousness by the map designers. Then, complicating matters further, Roy must get to more or less the exact opposite end of the map in just a few turns to recruit Cath. If only I’d remembered to actually click “Talk” on chapter 8!
Another issue is getting this member card from Hugh- who will be recruited on the right- to the top left secret shop.
The real kicker though is Douglas. Douglas must survive this chapter or you do not get the sidequest. There is absolutely no reason for this. If Douglas is alive, then the king tells you to go to the sidequest chapter to liberate an Etrurian holy site in a conversation in which Douglas is not present. If Douglas is dead, the king doesn’t tell you that. This is nonsensical.
What makes it worse is that if you miss even a single sidequest, you lose the whole game. You just don’t know it. You will continue on your merry way and then the game will abruptly end after chapter 22 with the plot totally unresolved and you’ll never see the real ending or the final chapters. And they don’t even notify you in any way that you’ve missed a sidequest here like they do with 12x. It is the dim mak quivering palm of game overs. You are already dead; you just don’t know it yet and the game will certainly not tell you. Hope you read a guide!
Now that probably still doesn’t sound so bad. Just recruit Douglas, right? Right! Except he can’t be recruited! He will flat-out refuse to join when confronted directly by Prince Mildain! Or his own daughter! And he’ll gladly murder them, in fact. Roy can’t even talk to him. That’s 3 or 4 restarts right there trying to figure out how to recruit him only to eventually realize that it's impossible. At that point you probably conclude he’s just a miniboss and kill him. He IS pretty definitely a villain afterall. And totally determined to die here. He will attack you relentlessly and never stop chasing after you even if you manage to get past him. And he loves to attack your mages and then get killed by the counter. The man has horrible defenses for a general so he’s really easy to kill, but he hits hard enough to kill your weak people. Really obnoxious stats.
So, you’ve restarted the chapter 3 times or so- after spending an hour getting to him with various characters each time until you’d tried everyone. At that point, you either make the smart choice and kill him- and lose the whole game- or you look up a strategy guide and find out you need to keep him alive. Once you KNOW that it’s not so bad. But to secretly disable the end of the game 9 chapters in advance for no story reason and without warning of any kind is absolutely unacceptable. And all the clues that suggest you need to recruit him- and the others that suggest you just need to kill him- only make things worse. Without looking up how to unlock every sidequest, you are nearly certain to lose FE6 and never know why.
And that’s the worst thing about this terrible game, worse than the nonsensical story and the flat-characters and the shoddy music and the boring level design and the guess-and-check reinforcements.
Anyway, I’m in the know, so I can actually formulate a strategy to deal with this nuisance. One commonly advised tactic is to use the Sleep staff on him. There are several problems with this. First, it’s a temporary stop-gap measure. He’ll wake up. Even if you burn the whole staff, it won’t disable him all chapter long unless you’re as fast as I am. Second, the success chance is quite low unless you’ve seriously ground up your staff users. For my roughly average Saul firing from point blank range, the odds are about 60%. If that fails, Douglas will then kill Saul. And of course I’ve lost 4 turns of disable. I can fire from longer range with a lower chance of success, but I’m still burning my whole sleep staff and just praying it works for a short-term measure. That’s a lousy strategy.
One absurd idea some people propose is that you should just avoid him. You have objectives all over the map and he will relentlessly pursue you. Unless you want to spend something like 50 turns gradually leading him around in circles as you carefully accomplish tasks without ever letting him corner one of your thieves alone, you outright can’t do this. He will go after someone and either corner them or prevent them from doing something important.
The idea of cornering him somewhere and just pinning him in isn’t much better. There are not a lot of 1 space corridors on this map and most of them lead somewhere important. Plus you have to restrict the movements of the whole rest of your army for several turns to be sure he takes the bait. And then you need to make sure the pinning unit can withstand his attacks indefinitely without help (and can’t kill him either).
Baiting him away to somewhere unimportant and having him chase a fast target is much more viable. However, you’re still probably going to need to squeeze a bunch of guys past him at least once before you can ditch him and lead him off to the unimportant area.
The best option is probably a combined arms strategy using Sleep to disable him long enough to run most people by and then having a bait unit lure him more permanently out of the way.
It’s a long enough level that you should count on restarting to revise your formations at least once. It’s just not likely you’ll get things perfect the first time. Here are those I eventually went with:
Units Allowed: 13 + Roy. It’s not a lot for such a giant map with such a huge number of things to do. But it’s enough.
Units Brought:
1) Roy. Required. He’s got slow little legs and he needs to run roughly 1.5 laps of the whole map to recruit everyone and then take the throne. Getting him around efficiently is going to be one of my hardest tasks, especially given his pointlessly awful starting position. And of course he can’t actually fight or anything. That almost goes without saying by now.
2) Lalum. Lalum is slightly less useful than usual just because having the party split up is bad for dancers. Still, she’s definitely very useful for helping keep the party moving across the vast distances. However, she is VERY vulnerable to long ranged magic. Mine will be slain in a single blow by either Purge or Bolting. That’s a huge problem and must be dealt with immediately.
3) Saul. Saul is the one who will deal with that problem. With a Barrier he can protect her long enough to run the enemy out of ammo. And with a Warp I may be able to eliminate the enemy early. He’s coming because he’s the only one who can use Warp- which is annoying because Ellen would be better with it (and with Sleep for Douglas just in case).
4) Astol. At least one thief is required. Astol has slightly more room left to gain levels and also has more Con than Chad, which will allow him to help with a couple of important rescues which Chad could not.
5) Thany. Thany isn’t actually very good, but I really want all the fast-moving units I can get. At 8 move- including the ability to fly over the annoying forests in the beginning area- she’s the best around.
6) Tate. Far, far better than Thany but not yet promoted. I hope to remedy that by the end of the chapter. Her speed will be very valuable here, though I need to watch out for the many Aircalibur mages.
7) Miledy. Required to recruit Zeiss. And definitely one of my top units. She’ll be handling some major threats this chapter. And her huge movement is very valuable.
8) Lilina. The only character who might be better than Miledy, Lilina can 2-hit kill nearly anything in the chapter and double them too. She’ll be doing healing and also killing stuff I need dead. And I hope to build support with Oujay.
9) Alan. I’m bringing the vast majority of my mounted units so Alan is finally making his triumphant return. His 8 move and great stats are nice, but even more importantly he gives bonuses to Roy and Lance.
10) Lance. Mounted, boosts Roy and Alan, and so close to level 20 himself…
11) Oujay. The best infantryman in the party will smash the hardest targets and stand up to any attack. Once I finally get him supporting Lilina the pair of them will be nigh-unstoppable. He’s also the bearer of Durandal, and I’ll be counting on him to butcher the top left mamkute- and possibly Narshen- with it.
12) Lugh. A very versatile unit, but not quite as good as Lilina. He’ll handle healing for the right party and is also armed with Forblaze to deal with the mamkute there.
13) Shin. He’s mounted and fights pretty well, so there was no doubt he was coming. But furthermore, he can wield a longbow and that’s the only way to take down the bottom right bolting mage. Unfortunately, mine falls just 1 damage short of one-round killing the nuisance.
14) Fa. I need a low-level unit to train and Fa should do pretty well. Since I’m going to do so much rescue-dropping anyway, her poor speed won’t be a big disadvantage. And the only threats who are hard to control on this chapter are people with ranged magic- which is no threat to her massive Res.
Notable Units Rejected:
1) Chad. It took some thinking, but I believe I can actually achieve every objective without starting with a second thief.
2) Ellen. I really, REALLY wish I could use her instead of Saul. Her much better Mag would let me use Warp way more effectively and also increase my chances of putting Douglas to sleep by roughly a third. However, despite having had a ton of use, she somehow still only has a B in staves.
3) Clarine. A mounted healer sounds appealing, but she can’t use Warp and I think I have enough healing as it is.
4) Gonzalez. Too slow and too hard to carry. I’m not bringing many non-mounted people here.
5) Treck. He’s got no resistance to magic, so he can’t actually do his job of tanking well. Worse, he doesn’t have the speed or the weapon rank to shred things on offense either. And I’m not bringing Gonzalez so there’s no one for him to support.
6) Noah. He’d be instant killed or close to it by ranged magic and he’s horrible in a fight. I don’t have room for dead weight.
7) Sue. Tempting. I did consider her instead of Fa, but Fa is better for XP generating.
8) Sophia. No. I need to move too fast to coddle a horrible unit like her- especially after her amazingly bad showing last chapter. She would be doubled and one-round killed by the bolting or purge guys. And when you’re a magic tank getting one-rounded by a mage, you know you’re a loser.
9) Dieck. Too slow. And Oujay completely steamrolled him in stats.
10) Rutger. Same as Dieck.
25 turns is plenty of time. That’s boring. I am going to win on turn 16, the earliest possible turn on which one can have harvested all reinforcements. And I’m going to achieve absolutely every objective.
This leaves zero room for imperfections in formation or starting gear.
The first thing to realize is that the right group actually needs to move much faster than the left group. They’re going to need very serious firepower and lots of fast people. The left group can take things a little slower since they have less ground to cover and a bit more time to cover it in. What I really need is to recruit Hugh as early as possible and then carry Roy very quickly and probably rescue chain him.
Roy has a fire tome and also the silver card for Hugh. The silver card should travel with the member card on this chapter. Other than that he has an iron sword, killing edge (for when hitting a bit harder will secure a kill), and the light brand for when he needs a ranged attack.
There is only one way to efficiently get Roy to the right side and that is to have an 8 move mounted unit in the rightmost spot of the left formation and another one in the leftmost spot of the right formation. They can rescue chain him to the right group immediately and from there he can be carried when he must be. Alan should be the one with the right group in order to accompany him. That leaves Thany for the left spot. She won’t be doing a ton of fighting, so she’s carrying a fairly standard assortment of lances and swords with no special gear.
The other 8 move flyer is the only person other than Oujay who can safely tear down the Purge user. And Oujay can’t maintain weapon triangle advantage, so he’ll miss a lot, plus I want him to stay back and support Lilina. Thus it’s Miledy who gets that dangerous mission. She gets a full use javelin which will be totally worn out, a spare javelin, an iron lance, a silver one for when she has to instant kill a mage or perhaps hack through the top left mamkute, and a vulnerary.
Saul has the necessary Warp staff as well as Sleep for Douglas, Heal, Physic for Miledy, and Barrier in case anyone needs more Res. Warping Miledy will leave him behind, so Tate and Astol will carry and drop him. Astol carries only an iron sword and his lockpick to leave room for much theft. Tate has an Elysian Whip for when she finally hits 20, an iron lance, a javelin, a slim lance for when she needs speed, and a vulnerary.
Lilina does not have Forblaze since the right side needs it. She has Fire, Elfire for killing tough foes, heal, a vulnerary and an empty space reserved for some of Astol’s stolen goods.
That leaves only Lalum on the left. She’s carrying a set of keys as well as a vulnerary so that she can pass them to whoever may be looting the left treasure room. It will not be efficient enough to just have a thief do that.
However, Oujay will immediately join the left group and is positioned for that (without interfering with the initial Roy pass). He’ll slay the dragon with Durandal and is also armed with an iron sword for normal fights, two handaxes (he’ll have to do a lot of ranged combat), and a vulnerary.
Thus the left side group will immediately send Miledy to try to kill the Purge wielder by turn 2 and shred all enemies in that area, without letting Saul fall behind. Roy will be transferred to the right group where he belongs. The rest of the left group is mainly heavy-hitters with a relative dearth of mounted units but Lalum to make up for that. With the exception of Miledy, they’ll make their way along relatively slowly and carefully since they have stuff that needs stealing to take care of. Oujay and Lilina will of course be traveling together when possible, as will the pegasus sisters.
The true right side group will consist of Roy with Lance and Alan (both with fairly standard cavalier gear and an iron axe for Alan) along with Shin and Lugh and Fa.
Lugh will handle healing but does NOT have a heal staff at the moment. Lance has that for him. If Lugh has a staff, the silence staff user will target him. It has only a 25% or so chance of success per hit, but I don’t consider a win a real one if I’m planning on taking chances like that and just hoping for a miss. The way to ensure it never even tries to silence him is just to not give him a heal staff until that Bishop is dead. So Lugh has fire, elfire, Forblaze to slay the right dragon, a vulnerary, and a steel sword to trade for Lance’s Heal.
Shin has an Orion’s Bolt, though I don’t think he’ll reach 20. Additionally he has his usual wide variety of bows: iron, steel, killer, and long. The longbow in particular is for taking down the bolting mage. There’s no way to even shoot at him on turn 1 without a dancer, Lalum is definitely necessary on the left, and Shin can’t take him down in 1 round anyway. Thus I’ll need to plan on taking 2 bolting shots without Lugh ever being allowed to end his turn with a heal staff.
Fa is carrying a set of keys. I don’t plan on her opening the doors and wasting time with chests herself, but she has a lot of free space to start off carrying them and then trade them to whoever is in a better position when I get there.
This formation allows me to immediately get Roy to the right side while also advancing Fa quickly via rescue drops. I should be able to kill the Bolting mage by turn 3 and hopefully the other nearby enemies too. A rescue-drop or two more should get Roy in range to recruit Hugh early and from there I can book it to rejoin the left group and then recruit Cath while the remaining right group spread out to loot the treasures or deal with the reinforcements.
The Characters:
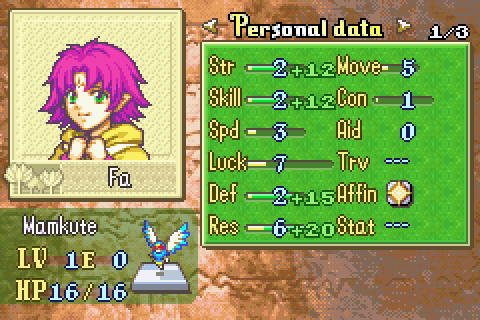
Fa is the
Roy didn’t ask permission even to bring her with him. And then he sent her out to kill people and try to avoid being killed in battle. She’s like 4 at the oldest in human years. Roy is sick. Hope all this brutal hand to hand combat before kindergarten doesn’t traumatize you, Fa!
Fa is not Myrrh. Myrrh flies, is super-effective against functionally every single enemy, is tougher against the attacks that matter, is faster, and is in an easier game by far. What’s more, Myrrh gets 50 attacks before she becomes 100% useless. Fa gets only 30.
Myrrh started out invincible and capable of instant-killing any monster enemy (which was nearly everything after she joined). Fa starts out 1-round killed by nearly everything and incapable of instant-killing anything. The only creatures her dragonstone is super effective against, mamkutes, will double attack her with 100% accuracy and kill her effortlessly even when she’s much higher level.
Fa is, in short, not actually very good. Nor will she ever be very good even for the very brief period while she’s at high level but still has uses of her irreplaceable weapon left. You should basically think of her as a General wielding Maltet but with relatively poor def and total invulnerability to magic. She moves slowly, is doubled by absolutely everything, is therefore 1-round killed by many things, but hits with nearly perfect accuracy and huge power- almost enough to instant-kill a dragon. Fundamentally, she’s great for your XP rank but not actually useful.
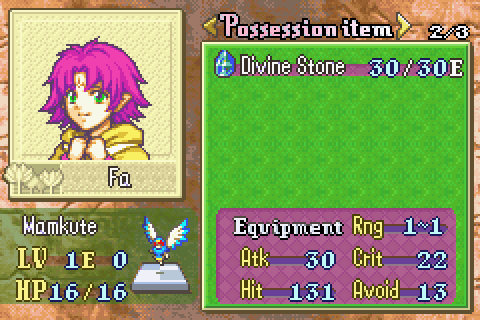
No substitute for a divine weapon ultimately.
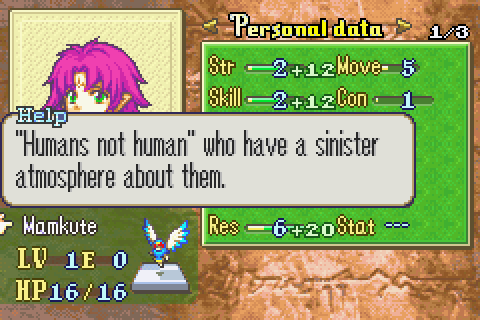
Yeah, she’s sinister alright.
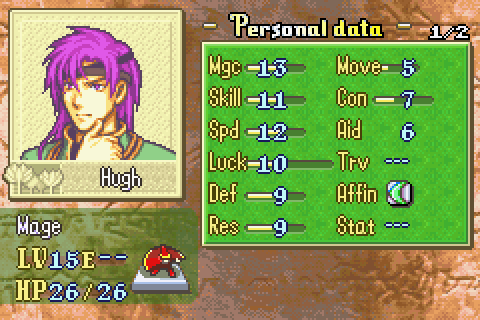
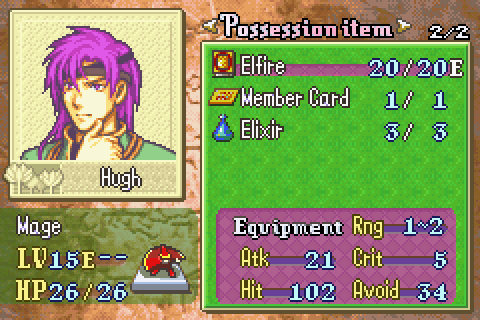
Canas’s much less mature and awesome son, Hugh lost his father when he was very young and has since been raised by his evil and abusive grandmother. Even though studying dark magic had effectively killed every single one of her children and he didn’t want anything to do with it, she still tried to force him into it. However, when she kicked him out and sent him out to travel around as a shaman, he realized he was untalented at it and hated it and became an extremely accomplished anima mage instead. Hugh is trying too hard to be roguish and cool to actually succeed at either- or much else. He’s kind of a buffoon really, but pretty likeable and more developed than usual for this game.
Hugh is fantastic. I don’t know why so many people say he’s just ok or is just a balance between the speedy Lugh and the powerful Lilina. True, he IS slightly slower than Lugh (by about 1 point) and slightly less magically powerful than Lilina, but he’s so much more than that. Just like his father, his great strength is being pretty good across the board. He’s not much weaker than Lilina, not much slower than Lugh, and completely blows them both out of the water with MASSIVELY superior defense and HP. Just like his father, Hugh can actually stand tall on the front lines and take hits as a mage. His dodging abilities are quite respectable too; on par with Lilina’s and just a few points behind Lugh. Oh and his Con is WAY better, which not only lets him use high end tomes like Bolting and Fimbulvetyr way better, but also lets him carry and drop the other small people in this game- that’s very handy.
In a game where nearly everyone is weaker than FE7 people, Hugh is actually stronger than Canas in basically every stat. Think about that one for a minute here. His only real weakness is poor Res, but that stat is largely unimportant- and he still has plenty. Oh and he even has a solid affinity and a great support pool (though his supports grow slowly). In short, he’s the best mage in the game. And that means he’s one of the best units in the game.
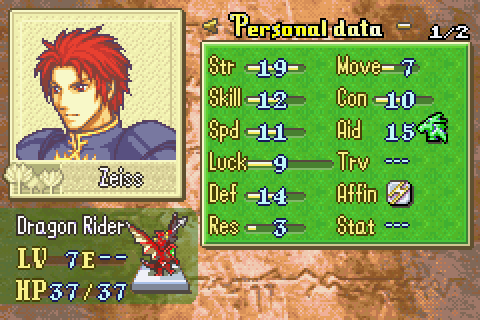
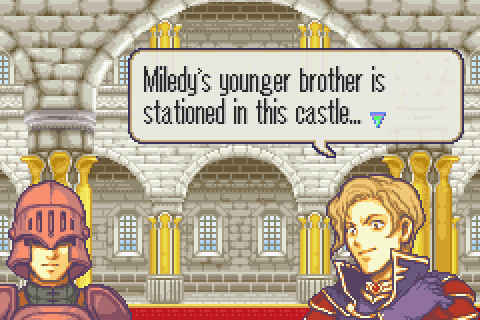
Zeiss here is one of his few competitors. Zeiss is Miledy’s younger brother and seems to be a lot less high ranking- but apparently high enough that everyone knows his name in the upper echelons of Bern. Perhaps that’s just because everyone knows he’s Gale’s girlfriend’s brother though. Anyway, he’s straight-laced and serious and his supports don’t really develop him beyond that and being a proud- if inexperienced wyvern rider.
Zeiss is Miledy but slightly better. And since she was arguably the best unit before he came along, that makes him top dog. His starting stats put Gonzalez to shame, he has much better weapon types available, and he grows a lot better too for a while. Zeiss is not, as people say, an Est. He joins already an invulnerable death machine and then actually runs into something of a wall. That wall is his caps. Like Miledy, Zeiss will cap HP, Str, Skill, and Speed pretty much guaranteed at a low level. And then there’s not much he can do, so he stagnates. This is the only reason he’s not indisputably the best unit around. Gonzalez will eventually grow way past him in Strength and Speed, perhaps enough to make up for his far inferior skill and defense. The mages will keep growing and growing pretty much all game too. But that still leaves him as an 8 move flyer impervious to all physical attacks, strong enough to kill nearly anything, and fast enough to double nearly any foe.
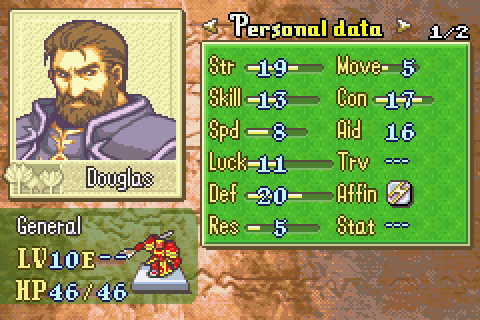
The Traitor-In-Chief of Etruria’s forces himself is here at last, though unrecruitable until he joins up next chapter. I’ve said most of what I have to say about what a jerk and an idiot he is, so I’ll just say that Intelligent Systems does a lousy job of trying to make him seem sympathetic or admirable in his supports. Screw this guy. Everything bad that happens to Etruria in this game is his fault and he gets away with it scot-free.
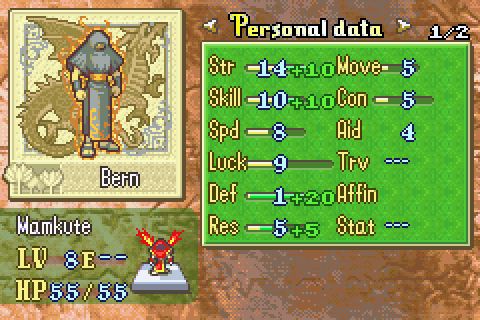
He’s a terrible pre-promote. 20 def as a level 10 general? Just unacceptable. And 8 speed! Even Barth is doubling him easily. The worst member of one of the game’s worst classes.
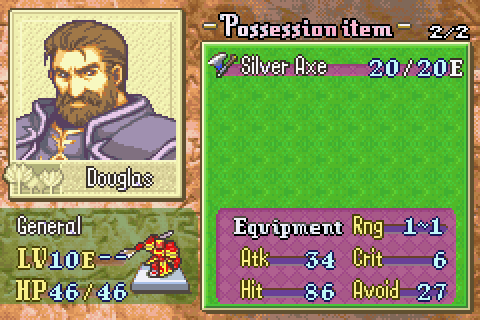
They gave him a silver axe though which means that, despite his lousy Str, he can still kill most of your fragile people. Meanwhile his cruddy Def and HP mean he’ll be torn apart if he ever attacks one of your strong people.
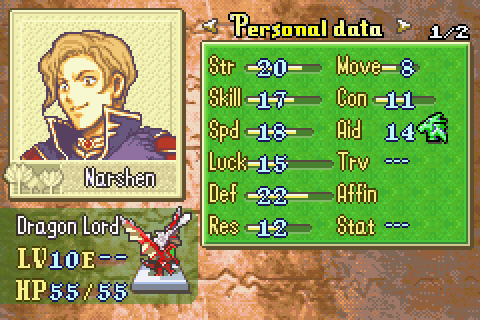
There’s really not much more to say about Narshen at this point. I could have tolerated him being cartoonishly evil, but the way he made the whole plot nonsensical is just unforgiveable.
Narshen fights a heck of a lot better than he leads, but he’s still thoroughly unimpressive. And like most wyvern rider bosses, he feels incredibly easy to kill because he doesn’t benefit from the throne he sits on.
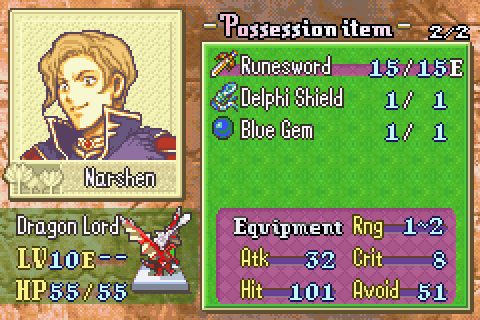
His gear is his strength. See, the Runesword is totally unlike the Light Brand and WAY better in this game. It uses his full Str, attacks the enemy Def, and heals him by the damage dealt. In other words, it’s just a really strong sword with 1-2 range that heals the wielder. That makes it arguably the best weapon in the game.
The Delphi Shield there is an item alluded to in Arcadia and seen previously in FE7; any flyer who carries it does not suffer from super-effective damage from bows and aircalibur. Quite handy. However, Narshen is still very vulnerable to magic attacks in general.