Part 16: Chapter 13 and The War Room Part 12 (Advanced Trading Tactics)
To me, this chapter has always felt like a part 2 of chapter 12. Same characters, same realm, similar enemies and it picks up almost immediately after 12 ended. However, the HHM buffs to enemy stats increase the difficulty of this chapter far more than they did on 12, so much more caution is called for.
Chapter Summary:
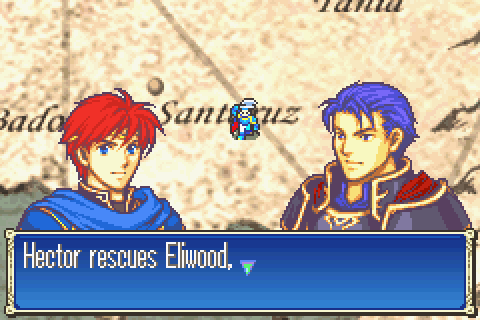
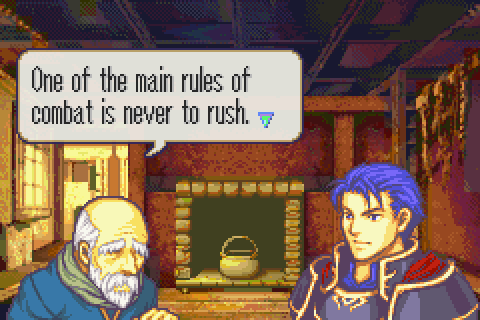
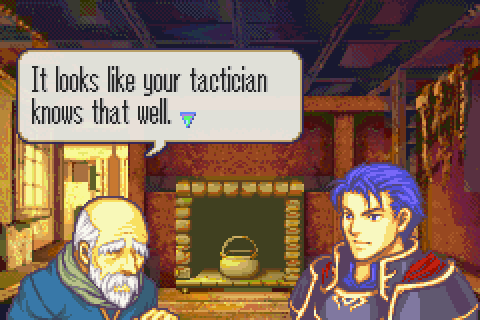
Hector and Eliwood hurry to nearby Castle Santaruz because they fear that Marquess Helman may have been attacked by the same group that accosted them. They’re half-right; Helman has just been mortally wounded by Ephidel, the one who hired all the thugs and mercenaries about, but this is because Helman threatened to stop working with Ephidel and take Eliwood’s side instead. After fighting through the remaining mercenaries, Eliwood and Hector are too late to save Helman but in time to hear him warn them that the Marquess of Laus, Darin, is involved in the conspiracy they’ve stumbled onto.
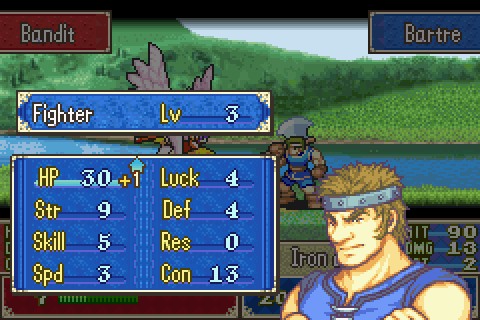
The narrator gives Eliwood no respect. He and his party could have handled that chapter with or without Hector’s help.

Remember how I mentioned that hiring the incompetent Zagan to assassinate Eliwood was a rather poor choice last level? This is the other half of why. Besides not actually succeeding, this flagrant betrayal of Ephidel’s promise was undoubtably going to destroy the Black Fang’s relationship with Helman.
So Ephidel kills him rather than let him reveal their plans. And then of course he hides the body or at least comes up with a plausible lie to spread so as to throw Eliwood off track, right? No. Ephidel just shanks Helman once and leaves, apparently just assuming that none of his servants or anyone else will come by and help him or listen to him explain what happened.
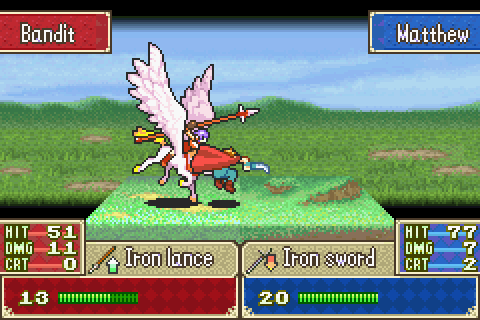
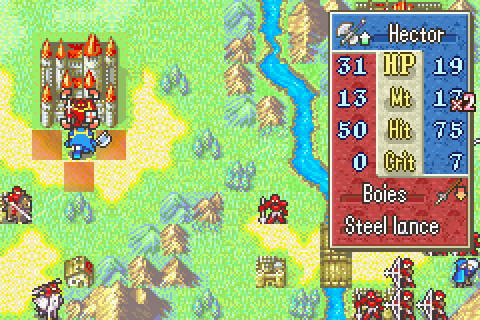
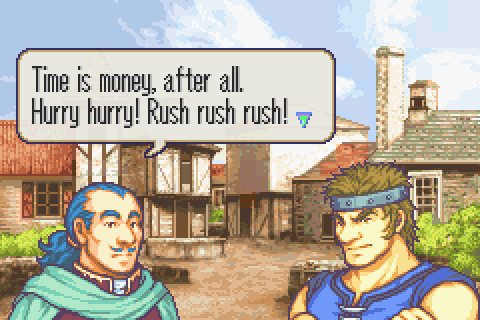
Meanwhile, Hector and Eliwood have arrived near Castle Santaruz and are accosted by another band of cut-rate cutthroats, this time led by Boies. Gotta love those pretty backgrounds.
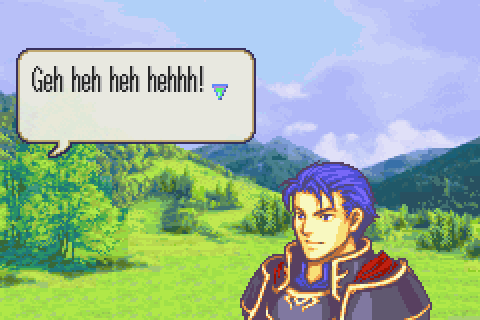
Boies is a master of the ancient art of running backwards while laughing. I don’t know why so many enemies run away backwards like that after taunting you, but I still find it looks funny 12 years later.
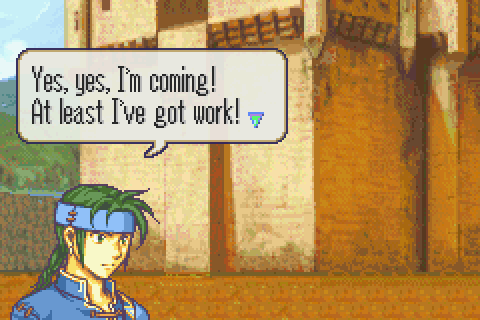
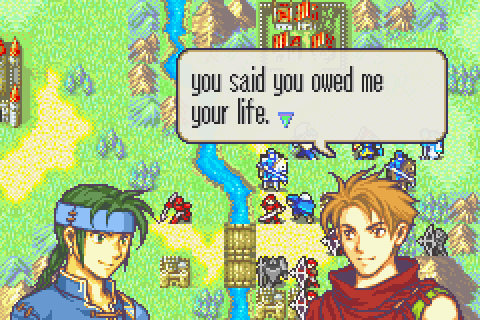
Meanwhile, at a fortress guarding a bridge that Hector and company will have to cross to get to the castle, we’re introduced to the Sacaean swordsman guy. I mean the Sacaean swordsman, Guy. He’s just another mercenary Boies hired and isn’t too fond of this group, but he’s rather desperate for coin. And he takes the opportunity to talk to himself about how Matthew once saved his life when he was starving.
I suppose that sort of bizarre soliloquy is a necessary evil here because otherwise we wouldn't know that Matthew can recruit Guy. Still, it’s generally handled more gracefully with other recruitable enemies. This case just looks like bad writing to me.
The War Room, Part 12
If you wish to master GBA Fire Emblem strategies, you must master rescues and trading. Today I’ll talk about some of the clever tricks you can do with the deceptively simple trade command.
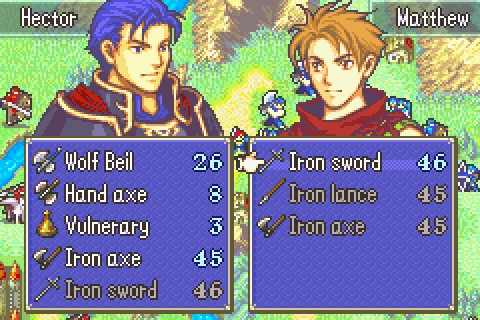
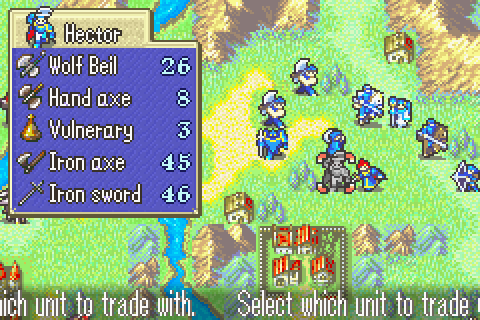
First, it’s essential to understand the basic mechanics. Every unit may initiate trading with only one adjacent ally per turn. However, there’s no limit to the number of other characters that may initiate trading with a particular unit per turn.
Another point to note is that you can not only switch items from one character’s inventory to the next freely, but also switch the order of items within both inventories. Whichever weapon is at the top of the list is the one that’s equipped, so trading allows you to change the equipped weapon of one or both parties- even when the other character has already ended their turn.
It’s critical to understand that initiating a trade does not end your unit’s turn, but does end movement for infantry units. So, say, a fighter can walk to a square which is adjacent to both an ally and an enemy and trade with the ally and then attack the enemy. Attacking and then trading is not possible since attacking ends the turn immediately. Cavalry can keep right on moving after trading, same as they can after picking up or dropping an ally- in fact, they can do both at once. However, it's never possible to do anything else after beginning that continued movement.
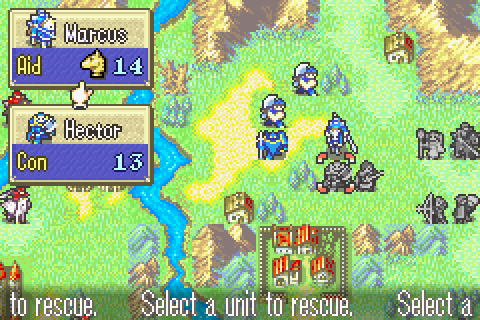
As a last interesting mechanic, note that you can trade with units who you have rescued or an adjacent ally has rescued. Just cursor through the available trading partners and you’ll find them.
Before Battle Preparations become available, trading is the only way to get equipment into the right hands. It won't be quite as essential starting on chapter 14.
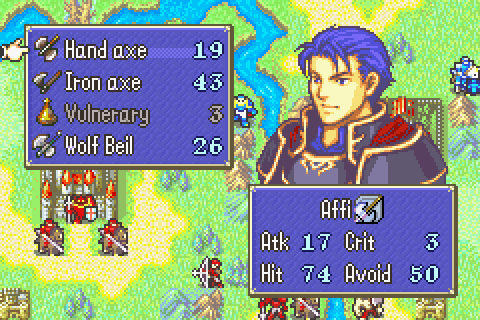
But there are still quite a few useful tricks you can do with trading. One of them is to benefit from weapon triangle advantage against multiple types of weapons in one turn. Imagine, for example, that you have Sain and Kent and wish to train only Sain. You have a nearby enemy mercenary you must kill immediately and several more enemy brigands who you don’t want to then kill Sain. Quite probably Sain can kill the mercenary in one hit with his iron lance, but will not be able to kill it with his iron sword. So you need to attack the mercenary with Sain’s iron lance, but then the enemy brigands will be able to kill Sain on their turn. The solution is to have Sain kill the mercenary with his lance, then have Kent ride up to him, trade with him so that an iron sword is at the top of Sain’s inventory, and then ride back out of enemy attack range.
Similarly, you might wish to conserve a valuable weapon like the Wolf Beil and not waste it on weak targets like Soldiers after killing a Knight. In that case, have Hector kill the Knight and then have someone else trade with Hector so that he equips his iron axe instead. Now his Wolf Beil won’t be wasted if the Soldiers attack him.
Another trick is to use the same good weapon with multiple characters in one turn. Suppose you have Guy and Raven and Serra (unpromoted) and you need to kill a pair of Knights who are in a line one space apart. But neither character can do much damage with Iron Swords and only Raven has an Armorslayer. In this case, a good solution would be to have Raven kill one knight with the Armorslayer, then Serra walk up to the square the dead knight was in and take the Armorslayer from Raven and then heal him. Then Guy can walk between Serra and the remaining Knight, take the Armorslayer from Serra, and kill the Knight.
You could also strip the weapons off an ally or equip them with something that can’t counter the enemy weapons so as to encourage the enemy to attack that ally or to prevent that ally from killing enemy units. This is handy with Marcus when you want to bait an enemy into approaching but feed it to someone else. Or to recruit people like Guy without badly injuring them.
Oh and note that you CANNOT steal items if you have 5 in your inventory. You can open chests and send something to Merlinus. You can kill enemies and send something to Merlinus. But you’re not even allowed to attempt to steal with a full inventory. So remember to have an ally on hand to pass things to when your thief needs steal many items.
Another rarely used tactic that you might occasionally find a use for is to chain-trade an item out of Merlinus’s convoy. On occasion, sending an item to Merlinus and then chain-trading it elsewhere might actually be an extremely fast method of getting a needed item across the map.
There are many other trading tricks you can employ; but these are the ones I'll be using most often.
Battle Preparations & The Map
Good heavens I wish I could do preparations on this map. The biggest challenge here isn’t the swarms of enemies and masses of reinforcements, it sure isn’t Boies, and it isn’t even the max ranking race against time. No, it’s the fact that the starting formation they gave me is almost the worst one imaginable. Not to mention the need to end the last level in a hurry means the right people don’t have access to the new weapons I just bought.
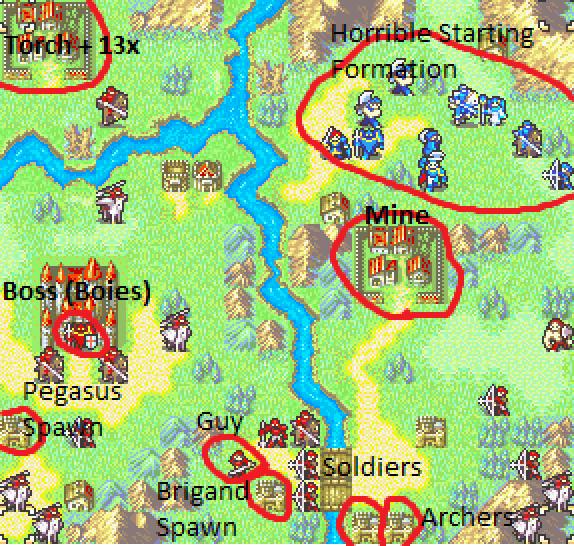
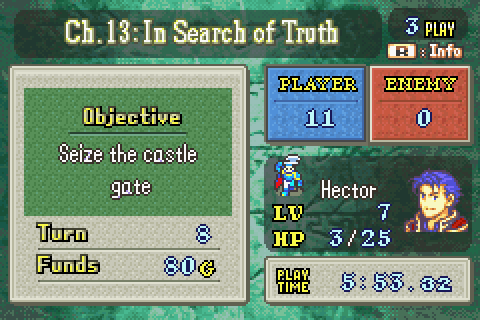
Objective: Seize gate
Secondary Objective: Get the torch from the west village to unlock the sidequest
Secondary Objective: Get the mine from the south village
Secondary Objective: Recruit Guy with Matthew
Secondary Objective: Do some shopping for handaxes or javelins at the armory.
Secondary Objective: Get people properly equipped for 13x
Reinforcements: Several groups at different times, but the last and biggest group of spawns is 5-7 from the southern pair of fortresses. Also dangerous is the turn 1 or 2 brigand spawn from the southern middle fortress since they go for the village.
Turn Limit: 12
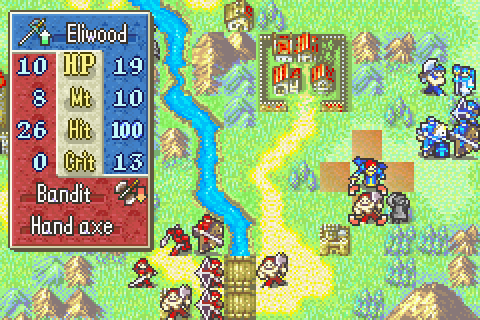
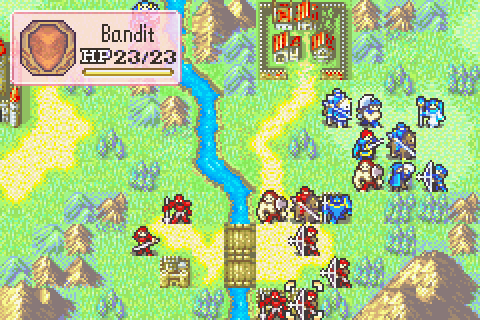
Rebecca is in the front, Oswin is in the back, Eliwood is staring at the lance-wielding Pegasus knights while Hector is far from the river you want him to cross, and in general the high mobility people are in the front and the low mobility people in the rear. Whose dumb idea was this? Probably Bartre’s.
There’s a lot to do on this map. You have 2 villages to get to, the southern of which will be under attack by brigands faster than you can get to it without a Marcus rush. Fortunately those brigands will prioritize your units over the village. The western one requires breaking down a tree that no one but a highly leveled Dorcas can destroy in one hit because Dorcas doesn't have his Eliwood mode steel axe to tear it down with. Guy has to be recruited amid swarms of reinforcements who will often have the benefit of terrain against you. There’s more shopping to do. And of course you need to get Hector over to the gate to both kill Boies and seize it.
Throughout it all, large numbers of Pegasus knights will be harassing your flanks. They’re not much of a threat on most maps. But here when you have people like a stupidly positioned Rebecca to take care of and no flyers of your own to even out their mobility advantage over the rivers and peaks, they’re at least moderately threatening.
This is not to mention that both the first thing and the last thing to do on this map are mass-trades to get ready for first this level and then 13x.
At least the time limit is generous. But since you’re still going to be in the hole from 11 being a 0 chapter and since another zero chapter (15) is coming up and 13x invariably hurts your turn count, you’ve got to trim as many turns as you can here. The reinforcements stop at turn 7, so it’s ideal to kill them all and then win on that turn.
The Characters:
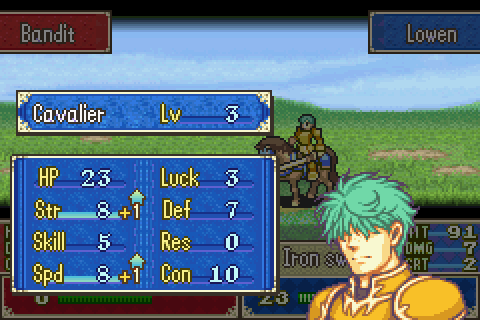
“Got to have gold if I want to eat.” –Guy, Chapter 13
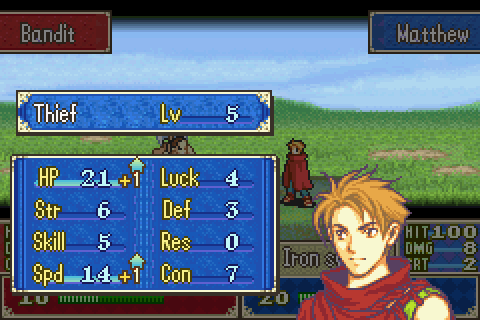
Kind of like Bartre in that the trait that defines him is wanting to be the best warrior around, but much less stupid (though really naïve). Guy’s fighting skills generally get less respect in-universe than Bartre’s even though he’s almost certainly the better character for most purposes and has a much better attitude toward how to improve himself. Perhaps this is meant to be some sort of commentary on how boasting and blustering really can impress people sometimes and it’s quite possible to ‘fake it till you make it.'
Guy got started as a swordsman because he was terrible at everything else his Sacaean tribe thought was valuable. Even Rath, a member of his own tribe, tries to ignore him. He seems to take people’s rudeness in stride pretty well though.
If he didn’t seem to be quite so… spineless and irresolute I would probably like Guy better. Oswin also puts up with a lot of obnoxiousness from other characters without complaint, but in his case it’s clear that this is because he’s too mature to be bothered and too determined to be turned from his duty. For Guy, it just seems to be a case of letting people push him around.
Furthermore, his decision to join a group of murderers for hire so as to have enough money to eat would be more acceptable if he actually jumped at the opportunity to leave them for better work, but it takes all of Matthew’s arm-twisting to convince him to change sides.
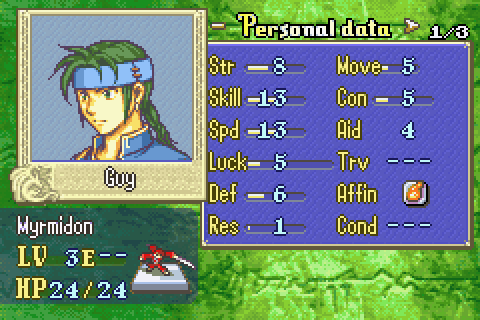
Statistically, Guy is Lyn. Well alright, not quite. But the two are very similar. There’s more difference at the low levels when Guy is far, far superior. Generally his bases are better but Lyn’s growths are better, so she slowly catches up to him. Both of them will have some of the best evasion in the game courtesy of the pinnacle of speed and very high luck. Both have mediocre-poor defenses, but Guy has better HP while Lyn has better Res.
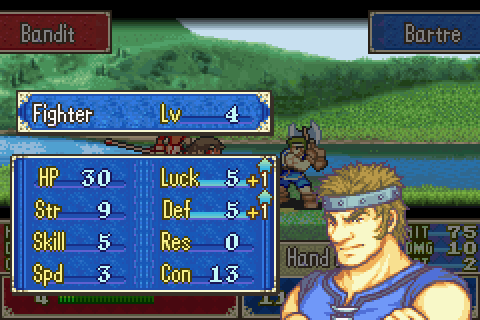
I’m going to compare him to Bartre again, but this time to point out how they’re different. Guy’s bases are quite nice- particularly since he enjoys the enemy stat bonuses all foes on HHM get, but his growths are poorly distributed. Meanwhile, Bartre starts off terrible but blossoms into a fighting machine.
People have been raving about Guy since 1990, 13 years before this game came out. Almost every FE title since the beginning has had a wildly overrated recruitable enemy myrmidon with a killing edge. Some of them were very good or even great, but they were all overrated.
And Guy is not even very good. His terrible strength and being locked to swords make his damage mediocre- even when his high critical hit rate is considered. Never being able to wield javelins or handaxes means he's pretty lousy at fighting on the all-important enemy turn too. While his dodge rate is high, other people have higher and often have better defenses to fall back on anyway. Oh and both the damage he deals and the damage he takes are inconsistent and unpredictable since he relies on critical hits and dodges.
Plus there are just plenty of other great sword users around. Raven is his eternal arch-rival mechanically and is generally much better.
All of these make him a poor endgame character for a max ranking run, but he’s definitely very usable early on. This makes him good for a nice XP ranking bonus, but he probably won’t be promoted unless his strength or defense happen to go through the roof.
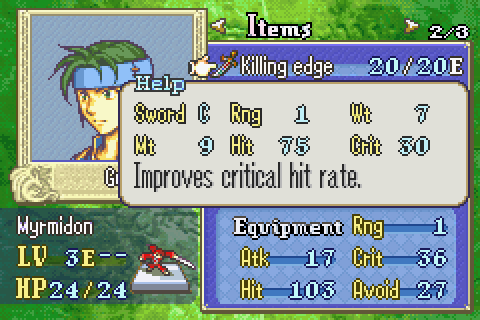
A lot of people who say they like Guy actually like this sword and apparently do not grasp that 1) it breaks quickly and is hugely expensive and 2) you could pass it to anyone else. Those are indeed ferocious stats for a weapon this early in the game, but possessing it does not make this character good. Killing edges are not better for myrmidons than for anyone else; in fact, they’re probably worse since a high crit rate is better the higher your Str is.
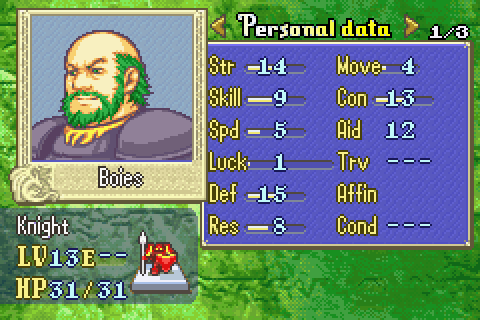
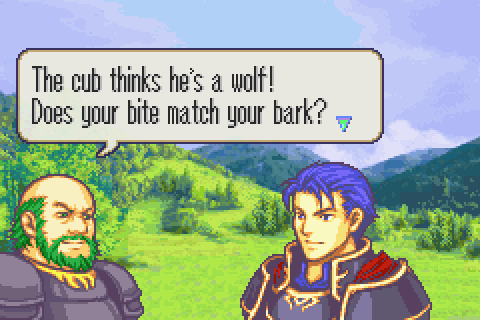
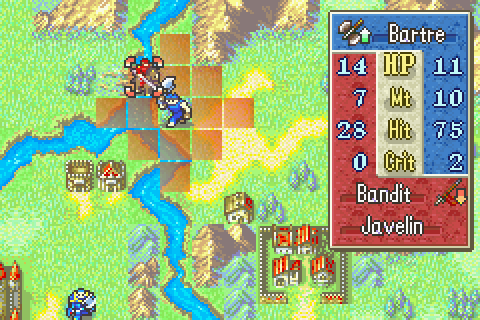
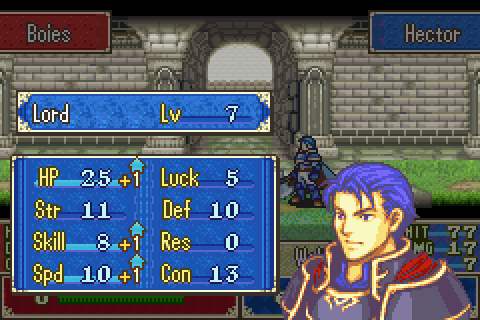
“You’ll find that I’m a bit tougher than those fools you faced before!” –Boies, Chapter 13
Apparently Scottish or something, Boies’s hobbies include calling Hector ‘laddie’ and running backwards while laughing. You’ll notice that he’s only slightly better than Wire despite being 6 or so levels higher. Nonetheless, he’s a bit more difficult to deal with because he’s sitting on a gate. Not only does that boost his defenses, it also means that if you attack him with Hector on your turn, he has time to heal before he attacks on his turn. This could easily be the difference between him dying that turn or not.
We learn less about him than Wire or some of the other early game Black Fang members or Black Fang auxiliaries. Just feed him to the Wolf and move along.
Playing Through:
Remember, this formation is what I have to work with. I have 1 turn to get them properly re-equipped and in position for fighting on 3 fronts before there are enemies everywhere.
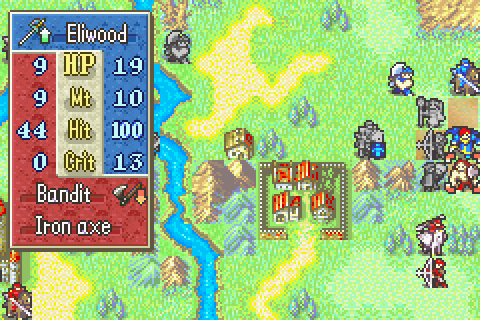
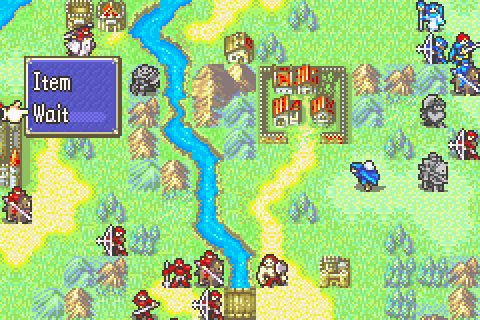
The key to beating this level is to notice that the northwestern village is much less guarded than it was in Eliwood’s story. That one cavalier does have a javelin, but one guy with a hand axe can handle him. The main enemy force is still the one to the southeast and the terrain there is largely in their favor, so you’d better send nearly everything that direction.
If you want to win fast, the only way is to use Hector’s ability to cross rivers and have him go for Boies directly. What exactly you need to do to manage all of that will depend on who’s carrying what. Here was the best strategy for me:
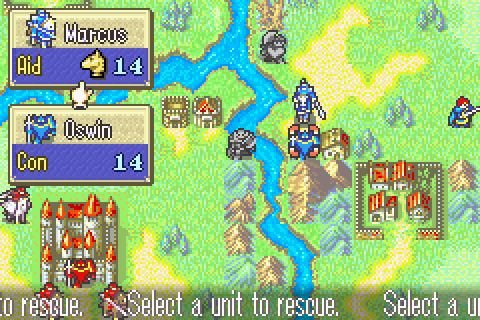
Remember what I explained before: only lords can cross rivers and doing so takes their whole move, but you can drop someone into any kind of square they can travel at all with equal ease. This means that even though the river is 2 squares wide at the narrowest, Hector will only need to actually walk one square with a proper drop. Since he’ll be dropped this turn and Matthew has stuff to do, there’s nothing better for him to do than grab an iron axe and an iron sword which will be passed to Eliwood.
A maximum forward move for Eliwood puts him next to Hector but not Matthew, hence I had Hector take a sword for Eliwood to then receive.
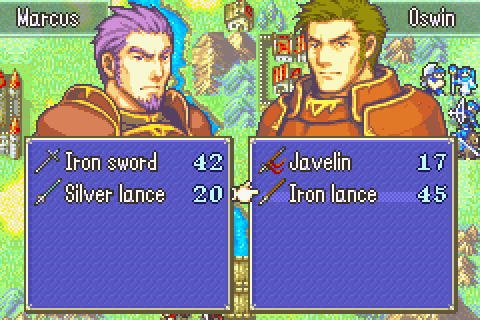
Once Matthew is out of the way and the eastern troops are deployed, Marcus can grab Hector and move next to the river.
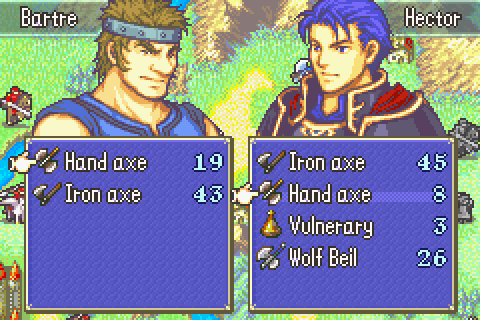
Hector will be doing more fighting and might need more than 8 uses of his handaxe, so I switch the two of them and make sure Hector is wielding his iron axe rather than the Wolf Beil for this next part while Marcus still carries Hector.

Then Oswin takes him and drops him at the point closest to Boies. Note that Marcus can now grab Oswin and rush him toward the front lines next turn.
There’s some thought involved in this formation too. In particular, it’s important to leave a space open next to Matthew for Serra to heal him if that brigand gets lucky and hits. Rebecca is there to lure the archer into injuring itself and opening itself up for a kill by Matthew.
One of the enemy Pegasus knights gives Bartre his first level up! Wonderful…
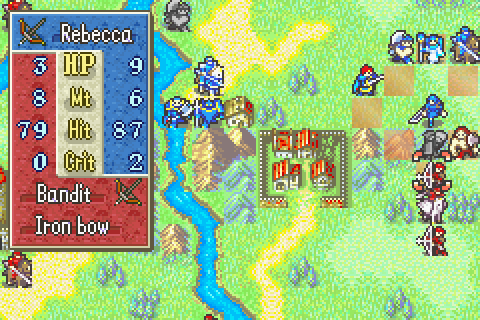
It would be nice if one could use Rebecca to soften this target for Matthew to kill instead of the other way around, but she’ll need to be at top health to survive the enemy turn . She could be protected by walling everything off to her left and right, but then the enemy archer with the steel bow will kill her unless she’s at nearly full HP. If one blocks that archer by taking the soon to be slain archer’s space, the Pegasus knight can’t be stopped from killing her. So there’s no choice but to give a kill to this worthless unit. Oh well. XP is XP for ranking purposes.
It’s a long way to the front (if you wanna to rock ‘n’ roll).
Knock the Rapier if you like, but even a measly +2 Might can be quite helpful sometimes.
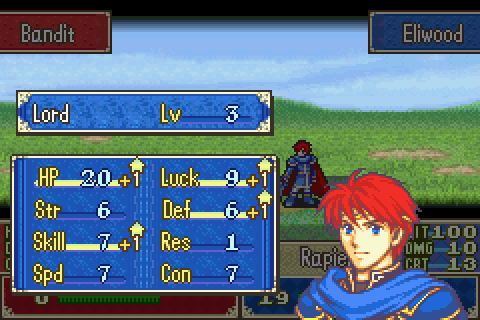
Meh. The defensive boosts are nice, but what he really needs now is speed.
Matthew scores an unexpected critical, making the next turn marginally easier. This Pegasus knight isn’t very dangerous on the defensive anyway though.
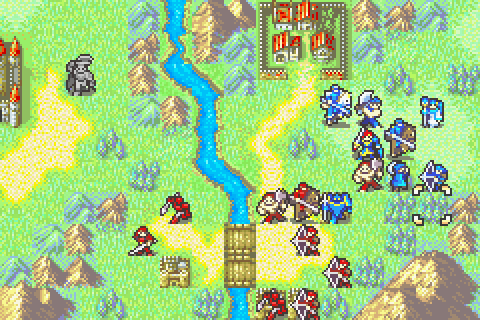
Hector finally reaches the mountain and prepares to deal with that archer.
Matthew prepares to lure that handaxe wielding bandit into not sacking the village. That archer would be a lot of trouble except I have enough people to surround him and his steel bow slows him enough for anyone to double him.
Yes! By all means, continue to swipe whatever stat boosts you want from Bartre, Hector.
Not bad. I’m actually concerned about Matthew’s speed at the moment since you can only steal from people slower than you and HHM enemy thieves can be darned fast.
I mentioned a long time ago that one good thing about Matthew is that you can count on him dealing low, but dependable damage which is perfect for feeding kills to other people. Case in point, Eliwood.
And now the reason Oswin was worth hauling all this way. Remember when I said that the problem with Marcus is he’s too strong and he kills everything instead of weakening it? Guess who doesn’t have that problem but still hits hard? There are going to be so many 5 HP archers to feed to weak people next turn!
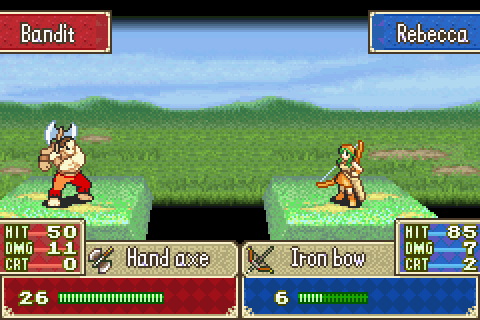
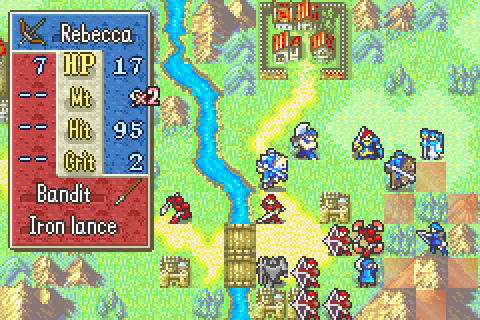
Rebecca apparently looks like such a juicy target that this guy went for her even though there were people around who couldn’t even counterattack. But that was all part of the plan; she lured him far away from his allies.
Those two just spawned down there and there are going to be 4 more of them to deal with in short order, so I need to slaughter everyone I can as fast as possible while keeping my vulnerable people safe. There’s often kind of a tricky choice to make in FE titles between defending yourself by turtling up and defending yourself by going all-out to wipe out the enemy before they can attack. Generally speaking, I find you’ll have better results going on the offensive. You want to be the one choosing who fights who, don’t let the enemy. Plus you need to kill things fast for ranking runs.
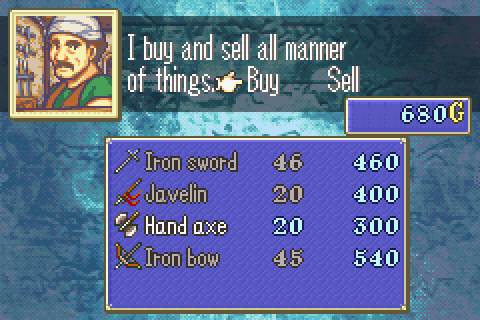
I hadn’t actually looked at the armory contents yet. Though Hector won’t be buying anything this turn, I wanted to know if I should send someone by later. I really wish I had 20 more gold to buy both a javelin and a handaxe, but I’ll have to go with 2 handaxes.
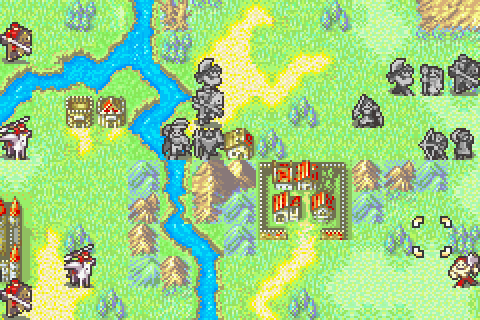
Now what to do about this mess...
Most of the enemy troops are seriously injured, but several of mine will die in 2 hits from full health. There’s also Guy to worry about. He’s lethal on offense vs anyone but Oswin and Marcus, so it’s important to stay out of his range with others.
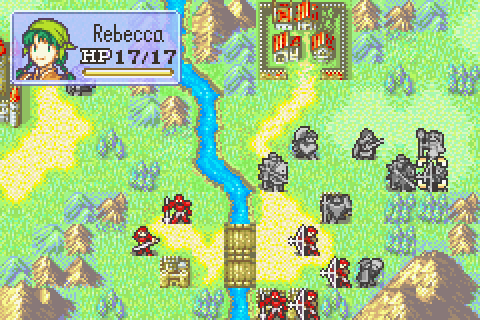
Ultimately, this was the best I could do because of Guy and it’s not very good. See, her defense is so terrible that even with iron bows the two of them could easily kill her from full. Fortunately, I don’t think the AI will go for her here because they’re going to stupidly try to kill their favorite target: Matthew.
The fight with the cavalier SHOULD be a sure thing. The trouble is that Bartre MUST move 1 north out of the woods instead of attacking from here. If he doesn’t, he’s unable to reach Merlinus 2 turns from now. And delays are unacceptable!
Well, he dodged the attack at least. I’ll be dumping him from the team soon regardless of what levels he gets.
Anyone can take down Soldier class enemies, even Rebecca. And everyone else needs to go for someone tougher.
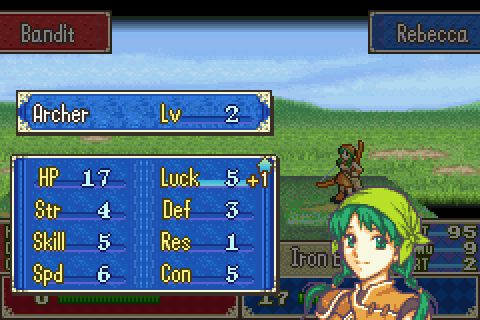
You go, Rebecca! What really annoys me is that I had no choice but to let her get so many kills that she leveled. She’s so bad and there are so many enemies with bows and handaxes that she can’t safely soften anything up. Instead she’s got to deal the finishing blow.
Meanwhile I elect not to attack Boies this turn and instead chug a vulnerary. With luck, he’ll die when he attacks Hector. Either way, I’m not going to seize the throne next turn because there are still lots of guys to kill and Merlinus to visit.
Recruited Guy. Another thing making this situation a mess is that Matthew is actually one of my better units at this point and having him give up his turn to recruit Guy is not necessarily a profitable trade. Or not much of one.
The enemies are under control (those 2 archers both have iron bows and no one there will go down in 2 shots). So Marcus can rush off for the store. If you could get the situation on the right stabilized 1 turn faster, Marcus could arrive earlier. If you could luck out with Bartre or have both him and Dorcas on the top left, you could get to Merlinus’s village a turn faster. Do both those things at once and you can totally beat this level in 7 turns and shave one off my time.
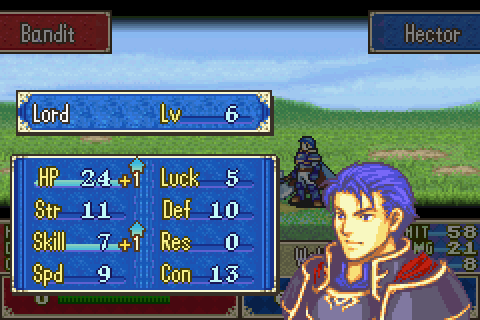
Hector crits down a cavalier by sheer luck. Then he gets a bad level. Gonna call that breaking even.
One nice thing about an emulator is that I can visit all the useless houses and show you anything interesting people say and then undo that move since visiting houses is always a bad idea for max ranking.
Uh…
It’s like the game is trying to sabotage your ranking!

Boies bites the dust on Hector’s next turn (turn 7). This means I can seize on 8 and the chapter is in the bag.
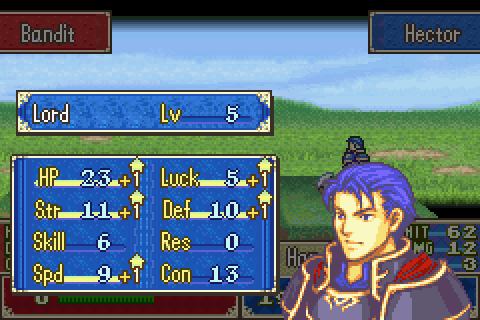
Boies gives Hector another great level.
Lowen gets his first level and it’s surprisingly decent, if not the kind of thing I want Lowen for.

I realized after it was too late that I should have had Marcus do one final trade with Hector that turn after Boies went down and then continue toward the shops. He could still reach them this turn + Hector wouldn’t have spent any more Wolf Beil. Oh well, shopping time.
In the time it took Bartre to chop down a tree, kill one cavalier with weapon disadvantage, and walk to this village, Hector slaughtered his way to the boss and took him down singlehandedly while the others destroyed the whole enemy army.
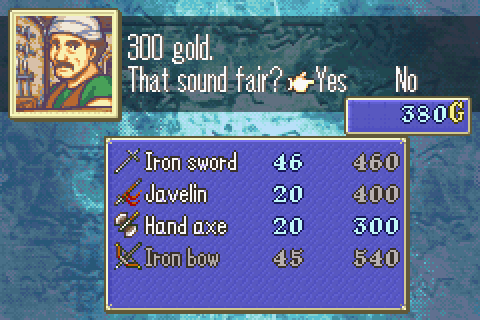
I’ll take two.
Serra has been healing every turn. The 20 gold price per heal charge is always worth spending for +10 XP. As a guideline, 1 XP is worth about 10 gold.
One other nice thing about waiting for turn 8 is that I had a whole extra turn for most people to trade things around and get geared up for chapter 13x.
Here we go…
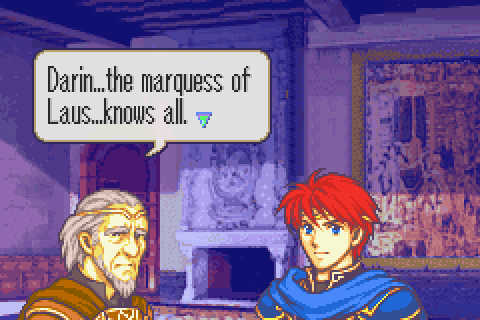
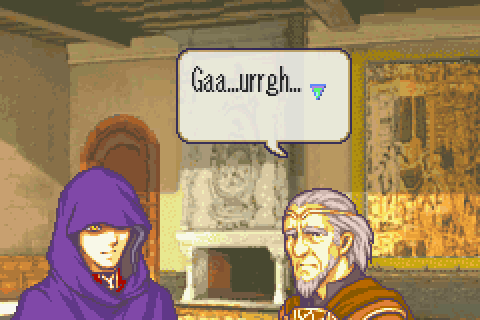
Inside the castle they find Marquess Helman, Eliwood’s old friend, dying. He apologizes for his role in the conspiracy and points Eliwood toward Laus.
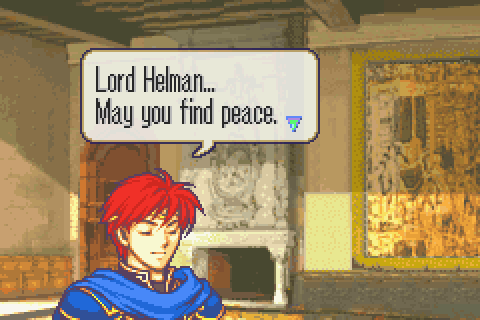
Eliwood seems to have pre-emptively forgiven Helman for whatever he did.
It’s not really clear to me exactly what Helman’s motive in getting involved with the plotters was. From what we know, he and Elbert were good friends so it’s hard to imagine that he’d have approved of abducting Elbert any more than attacking Eliwood.
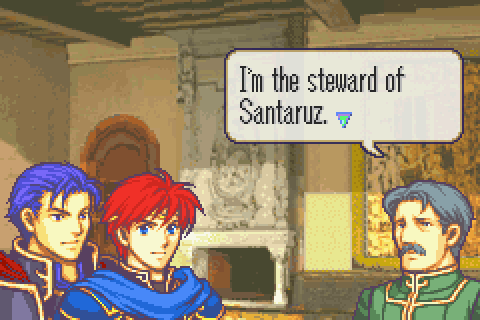
Lies, we all know that this is Reissman, the chancellor of Caelin! This game has a lot of unique, detailed portraits for random minions, but on the other hand they re-use some much more prominent ones. I’m really not sure I understand why. I mean, they must have done something like 100 portraits already. Why not just make 105 while they’re at it?
And that concludes the level! That was pretty fun really. It’s a fairly good chapter, but I do wish I could choose my own darned starting positions. Oh and I believe I killed only a single enemy with Marcus.
Total Restarts: 4 (1 due to a careless last turn blunder, then 3 more in quick succession to terrible luck)
Turn Surplus: 1 (Heck yeah, I’m already in the black!)
Things I Regret Missing: The lockpick on chapter 11, that darned archer on chapter 11, this one brigand who attack Marcus on chapter 12, and … that’s about it. Chapter 13 no regrets!