Part 21: Chapter 17 and The War Room Part 16 (Handaxes and Javelins)
Here we go, one of my favorite chapters of the game!
Also one of the more peculiarly titled. I’ve never been entirely sure whether it refers to the whereabouts of Darin or Hausen. Or both.
This is your first real chance to put most of your Lyn’s story veterans back into play and let them show Nergal what they’re made of. Perhaps not coincidentally, it’s also a map on which a lot of those units are quite excellent.
Chapter Summary:
Eliwood and Hector- now joined by Lyn- charge into Castle Caelin to try to rescue Marquess Hausen and any surviving Caelin soldiers and defeat the remnants of Laus’s army. The Ostian spy Leila leads them to Hausen, whose life she may have saved, and also informs them who their true enemy is and that he- now with Darin as well as Marquess Pherae- is at a place called the Dragon’s Gate on the southern island of Valor. They all resolve to travel there and put an end to Darin and Nergal’s plan and rescue Marquess Pherae.
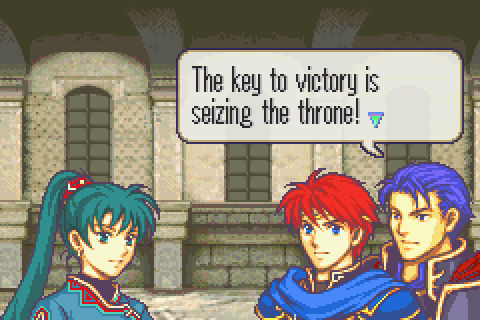
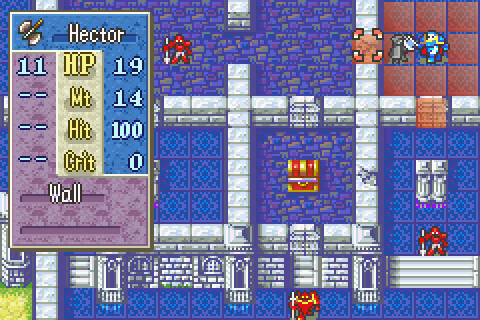
Why IS this? How in the world does grabbing that fancy chair rout the enemy? Granted, the enemy commander is usually sitting on it, but that’s just dodging the real question because it’s not clear why the enemy commander would want to be there rather than either sneaking out the back or actually leading their men. Furthermore, on some chapters (like 15 and 31) you have to defend a throne and if the enemy steps on it, you lose even though your commander evidently wasn’t on it. This isn’t just a peculiarity of FE7 either, throne seizing is in almost every FE game.
Until Hector said this you could assume it was just a game mechanic thing, but now it’s canonical that the characters actually think they’ll surely win once Hector seizes the throne.
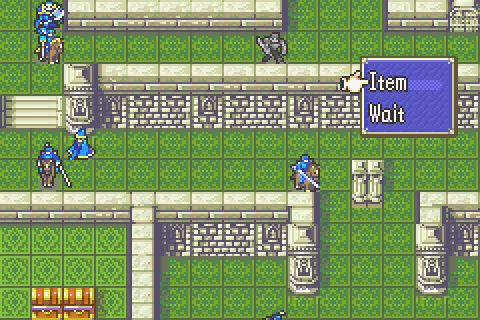
There’s really not much else to say about this map’s beginning because almost all the conversations were done at the last chapter’s end instead.
The War Room, Part 16
A long time ago I mentioned (in the context of important ways to save money for your funds rank in HHM) that javelins and handaxes don’t have a very good price to use ratio: about 2.5x the ratio of an iron weapon of the same kind.
This makes javelins as pricey as flux, the most expensive basic magic tome, and handaxes are not that much cheaper. It also makes them more expensive than steel weapons of the same type, despite a whopping 4 less might and 5 less hit too.
Compared to iron weapons, they have 1 less might and have a hefty penalty of 15 to hit and weigh much more (3 for javelins and 2 for handaxes), which you will recall from the War Rooms part 2, 3, and 4 can mean a painful speed penalty.
I also mentioned that handaxes and javelins are probably the best weapons in the game and that I would someday devote an entire war room section to why. The time has come at last because this chapter revolves entirely around them.
I’ve talked about weapon ranges before, most particularly in The War Room Part 3. For those of you who don’t already know or forgot, every weapon may only be used against targets within a certain number of squares of the wielder. A range of 1 square (like almost all swords, lances, and axes have) means it can hit enemies immediately next to the wielder (remember, diagonal counts as 2 squares away). A range of 2 (like almost all bows and nothing else) means it can hit enemies exactly 2 squares away but not next to the wielder. The best range to have though is 1-2, meaning the weapon can hit any enemy within one OR two of the wielder. Almost every magic tome of any type has this kind of range, but pretty much the only weapons that do are the javelin and the handaxe. There are a handful of others, but they’re extremely rare and often extremely expensive and pretty much just function like better javelins and handaxes anyway (Except the Light Brand and Rune Sword, but those won’t be seen for about 10 chapters).
Now it might not be apparent just why having 1-2 range would be so amazing, particularly when it comes with such a hefty price tag in accuracy and power and speed and actual price. I see the following 4 main reasons and a few minor ones:
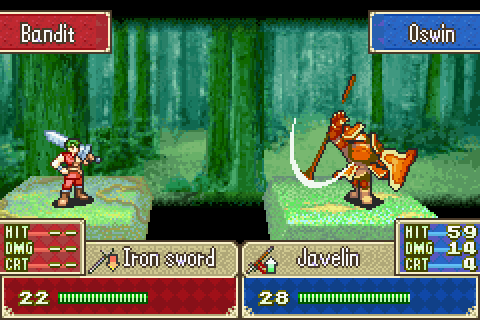
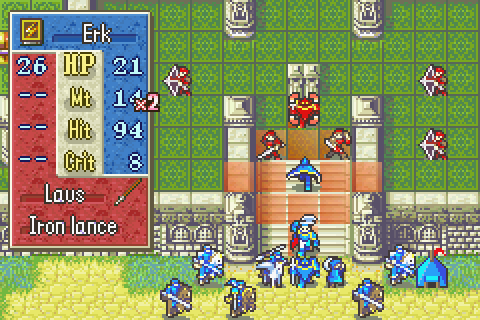
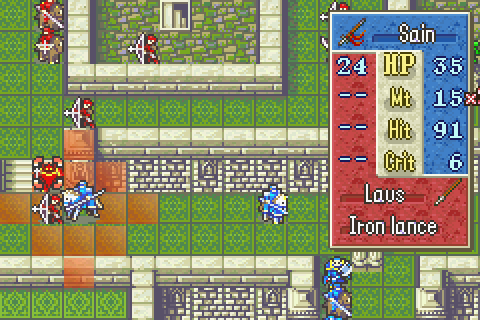
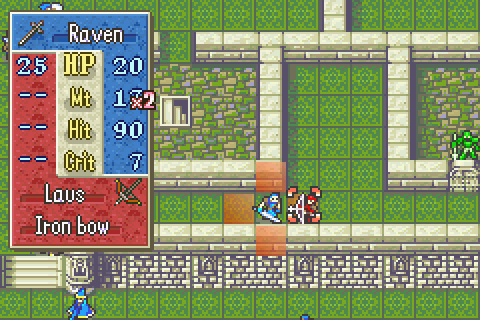
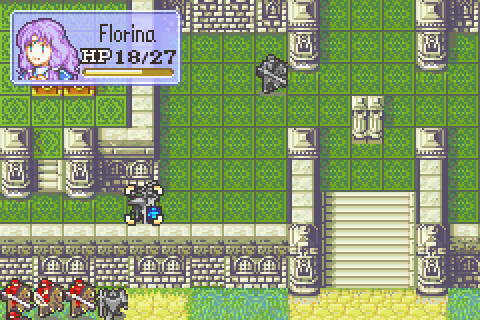
I still cannot grasp the true form of Oswin’s attack. But illustrated here is reason number 1: safety. With a javelin/handaxe equipped you can attack enemies with range 1 weapons from range 2 or enemies with range 2 weapons from range 1. Remember that you cannot counterattack enemies who are not in your weapon range. This means the enemy will be unable to counterattack you due to your javelin/handaxe, so you can score a free hit on them. This can be especially valuable for fragile characters like Florina.
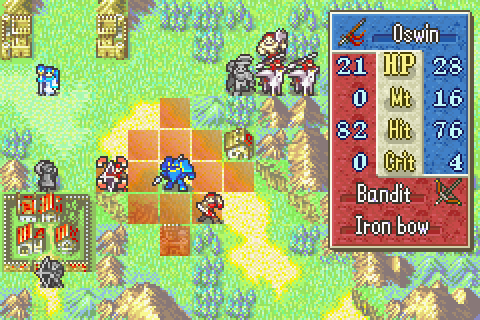
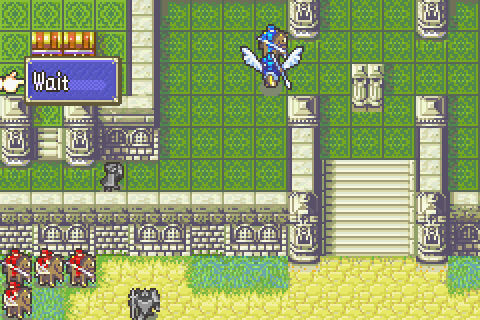
Reason 2: javelins/handaxes increase your movement by 1 square! Alright, no, not really, but the effect is similar. A knight like Oswin has a movement of 4 spaces and with a normal lance can attack an enemy 1 space away. This means Oswin has an attack range of up to 5 spaces, assuming no problematic terrain or enemy units in the way. With a javelin though he can move 4 spaces and then hit an enemy up to 2 spaces away, giving him an attack range of 6 spaces. In this example picture, Oswin could not even get into range of that archer with his iron lance- it was too far away. Having a javelin allowed him to attack when otherwise his turn would have been wasted.
This +1 to attack range is in some ways even better than the +1 movement comparison I made: for one thing it applies equally over all terrain and even through walls, whereas a movement boost doesn’t.
There are a lot of circumstances where it’s possible to kill a very dangerous or important enemy with a javelin or handaxe when you’d have to leave them alive (and possibly lose the whole level) without one.
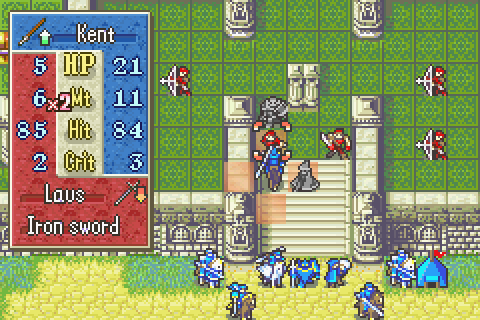
Reason three is teamwork. Often narrow corridors or other forms of chokepoints or just needing to run too many spaces to get to the enemy will make it impossible for 2 of your soldiers to both attack a target enemy who you want to bring down fast with range 1 weapons even though each of them can reach the enemy. But what you CAN do is have one person attack with a javelin or handaxe from 2 squares away and the other attack from range 1, possibly killing an otherwise unkillable target.
In this example, Matthew and Hector were able to beat this wall down in 1 turn only by having Hector use his handaxe and Matthew attack with his iron sword using this trick.
Sometimes you’ll have even more people who need to attack the same target. Javelins and handaxes are even more useful in that situation. In the extreme case, you could have 12 units attack a single enemy if each has a javelin or handaxe vs 4 for iron weapons. Obviously that will never come up in game, but it illustrates the general principle well.
Tying in with reason number 1, you may also find yourself in situations where you must take down an extremely dangerous enemy with two units neither of whom can instant kill the enemy or survive a hit from it. Let’s imagine Florina and Lyn fighting a cavalier wielding a silver lance for example. It’s quite possible that that cavalier could instant kill either of them if he hit- especially if they’re already injured- and you don’t want to just cross your fingers and hope for luck to save you 10 turns into a chapter. If Lyn or Florina attack with their Mani Katti or iron lance, the cavalier will be heavily damaged by their initial attack, but can then counter and kill them. But if Florina attacks with a javelin she can damage the cavalier from complete safety- possibly by enough so that Lyn can then kill it in one hit of her Mani Katti. This plan might have as high as 100% odds of completely safe success depending on their accuracies.
Most important of all is the fourth and final main reason: counterattacking every enemy. In FE7, the fact that counterattacks are every bit as powerful as attacks that you launch and the fact that the enemy almost always outnumbers you means that most of your kills happen during the enemy turn. At the very best each of your units can kill a single enemy on your turn. But just one of your best soldiers could take down dozens of enemies in a single enemy turn if they all attack him. And in the later chapters, you may well be facing as many as dozens in some areas.
In a max ranking run, you must be moving all of your characters at full speed toward their goals almost all the time. The main thing that will slow you down are enemies, both because they can’t just be moved through and because leaving them alive might let them kill one of your vulnerable units.
So it’s highly important to clear as many of them as possible out of your way pre-emptively by ensuring they’re killed by your counterattacks. Most enemies have 1-range weapons so you can counterattack and kill them with most normal weapons. But enemy archers, mages, and those with their own handaxes and javelins will gleefully attack you from range 2 (They understand reason 1; they must have been reading this LP!). So if you have, say, an iron lance equipped instead of your javelin, then every single one of those archers and others will be left alive and in your way to bog you down next turn. With your javelin, you might have been able to kill some or all of them and make things easier on yourself.
Of course, there are circumstances in which equipping the javelin could make you less effective overall. If the decrease in damage causes you to leave enemies alive with 1 HP or makes you too likely to miss 1-range enemies, then it might have been better to not equip the javelin to defend with that turn. So do think about such things and do some quick number checks before deciding what weapons to finish your turn with. And also remember that enemies love to attack people who can’t fight back. If you give 5 of your guys javelins, but the sixth just has an iron lance, you can bet the enemy archers will ignore the first five to shoot that one instead. Don’t let them do that. Use good formations and trading to change allies’ equipped weapons (The War Room, part 12) to ensure optimal counterattack results.
Besides those 4 major benefits of javelins and handaxes I can think of a couple of other small ones:
For one thing, I just mentioned the enemy AI’s love of attacking people who can’t fight back. You can try to manipulate the enemy into attacking someone very tough by making the tough person the only one who isn’t capable of counterattacking. Do remember that the AI loves attacking people they can kill even more though, so don’t expect the enemy archer to shoot Oswin with his iron lance for 0 damage instead of killing your injured, javelin-wielding Florina. You need to use this to prevent damage to fragile people pre-emptively, not to try to save them once they’re already in danger.
For another, why not turn the javelin/handaxe’s weaknesses to your advantage? You can use the high weight, low accuracy, and low might to ensure that one of your units does NOT kill a specific enemy and instead just damages it heavily. This could allow you to feed that kill to a hard-to-train ally.
In my own personal jargon, I have always referred to range 1-2 weapons like javelins, handaxes, magic, etc. as ‘versatile weapons.’ I’ve tried to keep as much of my own peculiar lexicon as possible out of this LP to avoid confusing people, but I think you can see why that term at least is appropriate.
I’ll conclude this War Room by returning to the question of why one should use versatile weapons in general in a max ranking run. Afterall, they chip away at your funds ranking, don’t they?
This is certainly true- in fact, as I’ve pointed out several times, the true price difference between a pair of weapons must take into account not only their price/# of use ratios but also the number of hits of each required to kill an enemy. Lower Might could make a javelin kill an enemy in 3 hits that an iron lance would kill in 2, which means that in that case you functionally spent not 2.5x as much but 3.75x as much for the same result. That’s a pretty bad markup. I generally assume that the average is for a javelin to cost about 3x as much per kill as an iron lance for this reason and the same for handaxes and iron axes.
However, as I touched on in main reason 4, the use of versatile weapons can clear out enemy hordes much faster and therefore allow you to advance much more quickly. This can easily save you quite a few turns, pumping your tactics ranking quickly. It also shores up your Combat ranking by greatly increasing the ratio of kills to fights since there won’t be so many fights which consist of the enemy archers just shooting you in return for no counterattack. One good way to think of it is that you are essentially buying turns (and combat ranking but that’s really a much lower concern) for yourself. How much would you spend to save 1 turn? How much for 2 turns? If you would be willing to forgo stealing a lockpick to end the map a turn earlier, you clearly place a value of more than 1200 on saving a single turn. This means you’d be willing to chew up 3 whole javelins just to save a single turn.
Obviously, that’s not a good idea (which means steal those lockpicks, everyone!). But the dual points still stand: 1) Even assuming a functional 3x price compared to iron weapons, javelins are still not that expensive compared to the price of not stealing even a few valuable items 2) there is pretty much always some amount of money which it would be a good idea to pay to finish one chapter. This is essentially some kind of economics problem. True, you can’t really calculate just what that amount of money is, but javelins and handaxes are the best means you have to speed up victory so they are the way you make that payment. Use your judgment and your knowledge of how many turns you can spare and still max rank tactics vs how much funds you’ve saved up and make your decisions like an economist.
Almost always, I find that the ratio of turns saved per javelin used is so high that the price of the things is almost negligible in comparison. For that reason, I name the javelin and handaxe to be the 9th and 10th legendary weapons of Elibe, peers of Maltet and Armads, and strongly advise that every single one of your characters who can wield one have one at all times. Buy them in bulk and have as many spares around as you can afford.
Battle Preparations & the Map:
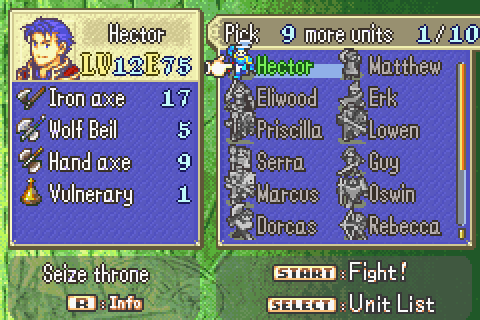
Units Allowed: 10
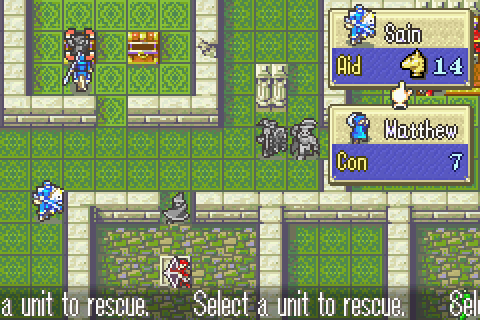
Units Benched: Serra, Eliwood, Guy, Lyn, Wil. I can’t bring 2 healers this chapter since I need all my other unit slots and Priscilla is superior for her higher movement speed and for recruiting Raven. Eliwood, Guy, and Lyn are basically all benched for the same reasons: they’re too slow and swords are worthless on this level (also Guy sucks). Wil was benched for being worthless. He will spend the rest of the story on kitchen duty.
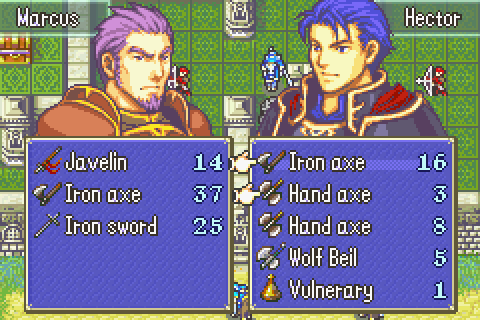
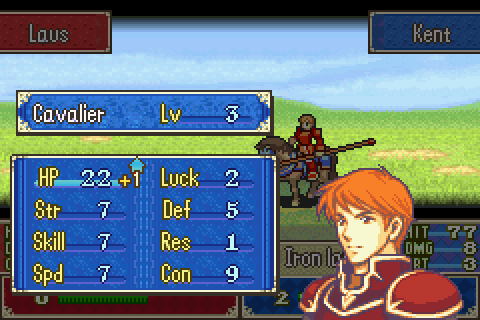
Units Added: Oswin and Marcus. This is kind of the last hurrah for both these characters. Conceivably they’ll make more appearances on rare occasions when I just really need an extra beefy person who doesn’t move or some added rescue-dropping power, but this is the last chapter on which I actually want either of them to do any kind of real fighting. Only Oswin (and Hector, but he’s busy) can stand up to the tide of reinforcements from the southwest. Plus the enemies around the starting position are Oswin’s kind of targets. Marcus is here because I’m bringing every single cavalier + Florina, they’re all necessary for the strategy I’ll be employing.
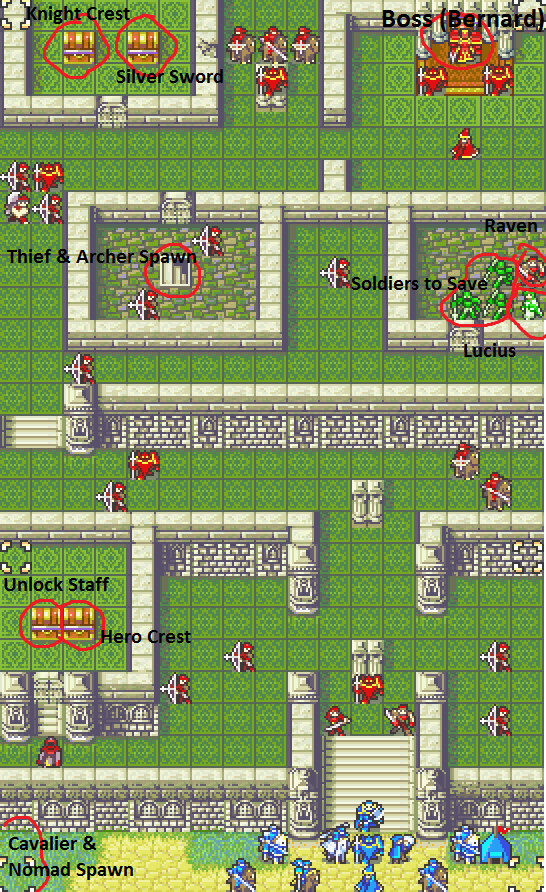
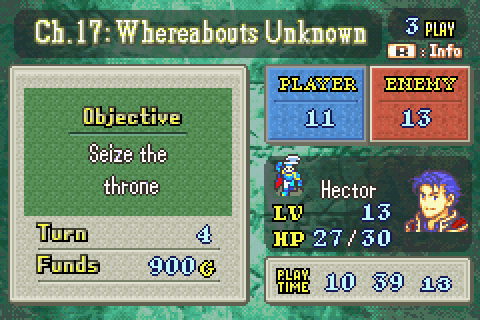
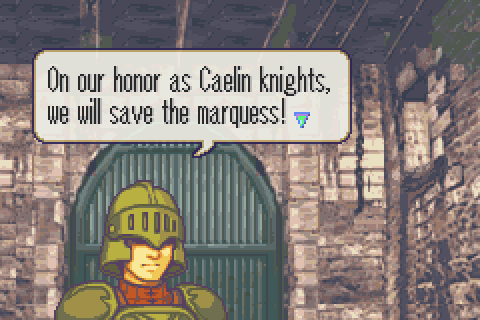
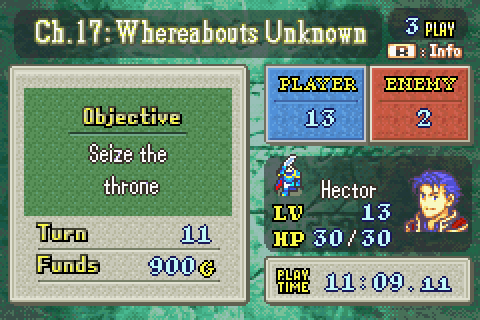
Objective: Seize Throne
Secondary Objective: Steal Lockpick from the turn 4 enemy thief
Secondary Objective: Loot the bottom left chest for an Unlock staff
Secondary Objective: Loot the bottom right chest for a Hero Crest
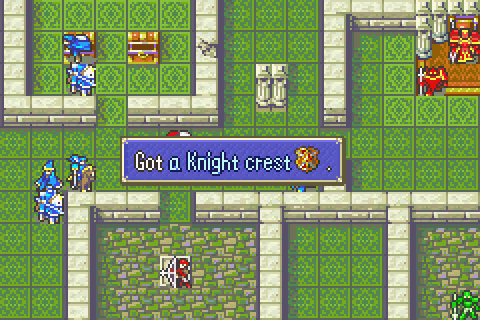
Secondary Objective: Loot the top left chest for a Knight Crest
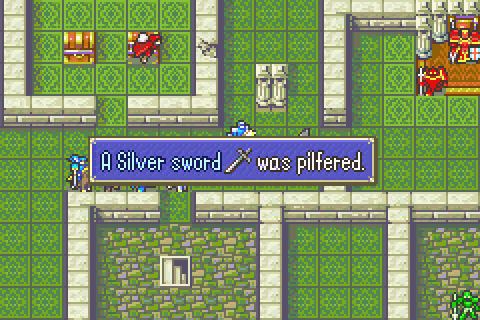
Secondary Objective: Loot the top right chest for a Silver Sword
Secondary Objective: Recruit Raven with Priscilla
Secondary Objective: Recruit Lucius with Raven
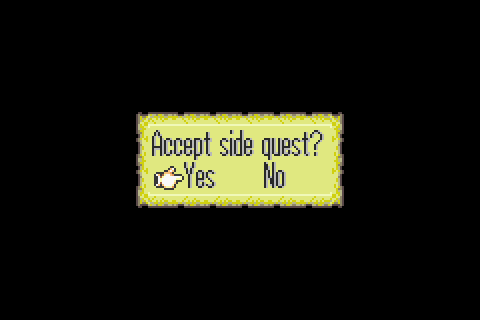
Secondary Objective: Protect all 3 green Caelin soldiers to get a red gem (and unlock the sidequest If you save at least one)
Reinforcements: A thief from the upper stairs on turn 4 with an iron sword, a killing edge, and a lockpick. A thief from the upper stairs on turn 5 with an iron sword and no lockpick (he’ll just happily run off screen immediately if you don’t present someone for him to suicide to).A cavalier and a nomad in the bottom left on turns 7, 8, 9, and 10. An archer from the upper stairs on turns 8, 9, 10, 11, and 12.
Turns Allowed: 18
Heck yeah, this is my kind of level! This is the kind of level I love about this game in general! Look at all those things to do! Look at how spread out they are! Look at how many enemies there are in the way and how many more will be spawning!
And look how little time you have! That first enemy thief will be in the top treasure room stealing the silver sword on turn 7. Hector, your front man, could not reach the room in that amount of time even if there were no enemies in the way at all. This is not even getting into the difficulty of actually stealing the guy’s lockpick too. And remember that once he opens the Knight Crest chest, the silver sword is forever lost to you (The War Room, Part 9). And don’t forget that you need to get back to the other set of chests and loot them too and that the green soldiers will suicide by about turn 9 and cost you the red gem if you don’t work hard to save them.
I love this kind of stuff; it’s a real test of strategic thinking rather than just luck to see if you can concoct a plan to get so many things done in just a few turns on HHM.
This is the perfect kind of chapter imo. It’s hard enough to do everything that even an expert player will have to think hard about it, yet on the other hand it’s easy enough to just complete that even a beginner can finish- and not come out that much worse off. That’s the best way to balance game difficulty in my opinion: let players set their own challenge level as appropriate for their ambition and skill. That’s more interesting than all the buffed enemies HHM can throw at you, let alone all the spawn-moving reinforcements in later titles, or the Awakening silliness of every single enemy past like chapter 10 wielding two or three custom-forged weapons that cost 20,000 gold apiece and having a random selection of abilities which can actually make early maps completely unwinnable if you’re unlucky.
Such a great chapter.
Let’s get cracking!
The first thing you should note is how HUGE this chapter is. It might not have the biggest total area of all maps so far, but I’m pretty sure it does. What’s more, the level is maze-y and full of switchbacks and side paths which must be taken that make it even longer than it looks. Just getting Hector to the throne with no enemies in the way would take something like 11 turns.
It’s also carpeted in archers and nomads, who will constantly be shooting at you through the one-space walls. And there are plenty of knights. Both of those factors harshly punish your sword users (Florina doesn’t fare too well either with dozens of archers around.
There’s a third thing to note, a difference from the normal mode version of this chapter (and something I didn’t remember) which completely changes the proper approach to this map: no enemy drops a chest key. On every other mode, there is an archer in the bottom treasure room with a dropped 5 use chest key. This means you can send Matthew to the north and have someone else loot the bottom room and finish up quickly. But in this version, there’s no chest key. So there’s absolutely no way to open a chest without having a thief do it. So Matthew will need to get both of those horrendously distant sets of chests while preventing the enemy from getting the top one and still finishing in time.
I’ll need a darned good plan. And every darned good plan starts with unimpeachable preparations:
When I need to approach a difficult map, often the first thing I do is un-pick every unit and have everyone give all their stuff to Merlinus, no exceptions. This way I force myself to think through every choice and not make lazy, stupid mistakes or unquestioningly bring a person just because I brought them last time. It also makes me re-distribute my very limited supply of vulneraries, which might otherwise leave me kicking myself when someone needs a heal and can’t get one later.
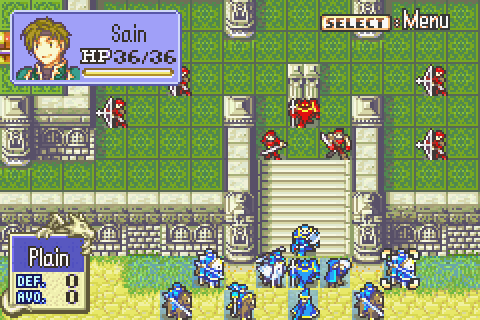
After consideration and stat-checking and enemy gear checking, etc., I decide on the above units and formation. Notice that I brought every single mounted unit, including my almost completely un-used Kent and my mediocre Lowen and even Florina to this level full of archers. I’m going to need every last one of them.
I’m going to need to absolutely crush the nearby enemies with my first strike so that I can forge ahead at full speed, so it’s important to optimize positions for that. It’s also essential to know my order of operations backward and forwards and check the numbers to make sure everything works. The above formation is the one I think can take down these enemies with the highest success rate and best finishing positions after turn 1.
For gear, EVERYONE who can use one has a javelin. That’s why I bought so many last chapter. Hector has handaxes. Mass javelins is essential for tearing down the hordes of enemy archers at high speeds. Other than that, most gear is conventional except a door key for Florina. Because she can’t handle archers well, I want her to handle the shaman by the southern treasure room and then open the door.
Erk, Hector, Sain, Oswin, and Matthew are all either vulnerable or likely to have to fight alone, so they get the vulneraries.
With that decision made, I’m ready to go.
Hector tells Market to protect the Caelin soldiers. One of several hints that protecting them will unlock something good.
It’s could be any of like 30 people! I’ll just have to kill them all!
Characters:
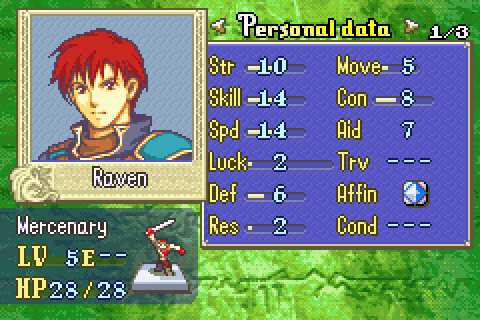
“The closer you are to your enemy, the easier it is to strike, right?” –Raven, Chapter 17
A mercenary working alongside Lucius, he was hired by Caelin some time before this attack by Laus and ended up captured after his partner was used as a hostage. Raven has a fierce hatred of Ostia and wants to kill Hector and Uther because he blames Ostia for the destruction of his parents’ Lycian realm of Cornwell, his parents’ consequent suicide, his separation from his little sister, and having to live as a mercenary himself. Raven is a nom de guerre, his birth name having been Raymond.
The truth of the incident is of course more complicated, but it’s hard not to see that Raven has something of a point. True his parents had embezzled some funds from the Lycian League coffers, but completely dismantling their realm and destroying the family utterly was tremendous overkill. That Ostia led that motion and was also the primary benefactor since most of the former Cornwell lands apparently went to them is indeed more than a little suspicious. Perhaps Raven jumped to conclusions assuming that the accusations against his parents were completely false, and certainly he’s wrong to blame Hector in particular for what happened, but he’s definitely justified in being angry with Ostia.
As the chapter opens, he joins the Laus side in the battle to get a chance at killing Hector, but when he’s shocked to find his long-lost sister among Hector’s company he’s persuaded to switch sides instead and wait for a chance to kill Hector later.
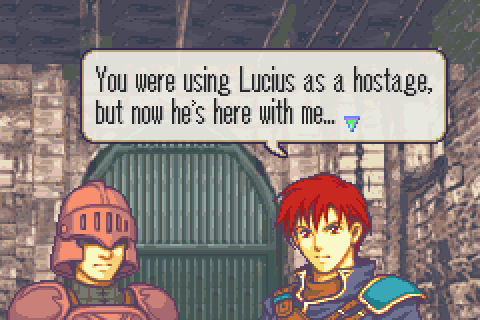
I never quite noticed before just how badass Raven is in-universe, but on this playthrough it finally struck me that he’s apparently so intimidating that a prison guard would rather let him out of his cell than stake his life on Raven not just tearing down the door and killing him. The same guard –though with thirty allies in shouting distance- is terrified by Raven’s threats that if Lucius is harmed, Raven will kill him. What’s more, he was only captured because they used Lucius –himself a very dangerous warrior- as a hostage.
I like this character more and more every time I play the game. His story has an appropriate balance between keeping enough secrets that he’s full of mystery until you do all his supports (and Priscilla’s too) and telling you enough about him that you immediately understand what his deal is. His portrait and art are just awesome. Other people’s reactions to him make it clear that he’s apparently flat out terrifying when he wants to be. And though his story of a fierce but cunning quest for vengeance is compelling, he’s ultimately able to let go of his grudge and let the past die rather than slake his thirst for vengeance murdering Hector.
It’s really the supports he has that sell the character to me more than anything though, Raven’s are among the most interesting in the game. And though he’s a jerk in a lot of them, almost all of them involve him showing that he’s not nearly as cold and mean-spirited as he usually lets on. For all that he might be the toughest, hardest character in the game, even he admits in one of my favorite supports that, “I’m human. I smile, I cry.”
The only thing I don’t like about him is how abusive and unkind he is to Lucius, his truest friend. Since I’m such a fan of Lucius, I can’t stand that at all. On the other hand, pairing the two of them up is the only way to get an ending for Lucius that doesn’t seem to result in him getting brutally murdered offscreen during the beginning of FE6…
From the moment Raven joins the party, Guy should be reassigned to sharpen Raven’s sword, shine Raven’s boots, wash Raven’s awesome clothes, and style Raven’s oh-so-cool hair. Raven caps his HP on hard mode. Not even people like Bartre or Hector cap their HP at 60. His respectable starting Str gets a sweet boost on hard mode and then grows at nearly the maximum rate of anyone in the game, ramming into his cap not long after Sain does. His skill has a solid chance of capping at 30, not that skill is that useful. At his join level Raven is, bar none, the fastest character in the game. Not even Guy or Matthew can match him with his hard mode bonuses and he grows quite well from there, again ramming into a high cap. His luck starts bad but grows well. His defense is low-solid. His resistance is low, but again that doesn’t matter much.
Comparing him to his main rival, Guy, he’s actually faster for most of the game and has higher Con. He has MUCH more Strength. Both are likely to end with approximately the same 29 skill due to HHM bonuses. Raven’s defense is significantly better. At the highest levels Guy will have significantly more evasion due to higher luck and Raven having capped his speed 10 levels ago, but they’re both seriously dodge-y and with Raven’s superior defense and Strength and the fact that Guy is slowed more by any kind of non-iron weapon, Raven holds a defensive edge in most situations. Furthermore- and this is perhaps the biggest factor- Guy is locked to swords forever, whereas Raven gets axes upon promotion- including the amazing handaxe. With that factored in, it’s just no contest. For similar reasons he’s much better than Lyn. Eliwood might edge him out at the very highest levels due to having a horse.
And that right there is his weakness really. Raven is the best infantryman in the game on hard mode, but being an infantryman is a serious disadvantage compared to cavalry- let alone flyers or mages- a lot of the time. I’m definitely going to try to use him, but it can be surprisingly hard to get him rolling considering his huge starting stats just because this is now the glorious era of flyers and cavaliers who can leave him in the dust.
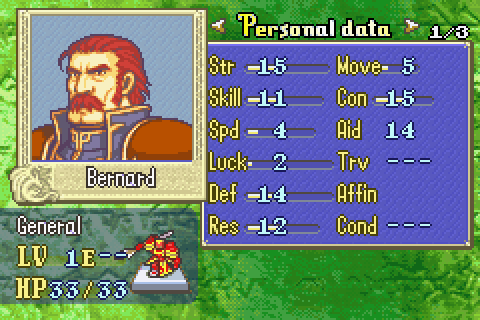
“This is a just reward for Laus’s brutality…” –Bernard dying, Chapter 17
The Knight Commander of Laus, Bernard looks to be one of Laus’s most elite warriors. However, unlike Bauker, few people have much to say about him. It seems plausible to me that his position, like that of Marcus until recently, mostly involved training the knights rather than any fighting. For that reason he actually seems to look up to the unpromoted Bauker as a superior- or at least regard him as an equal. Unlike Bauker, we definitely learn that Bernard disapproves of Darin’s plans and actions, regarding his own death as completely justified. All in all he looks like a good man who had the bad luck to be born in the wrong Lycian state.
Bernard is the first promoted enemy of HHM and even with his HHM bonuses he’s just pitiful. Even Lundgren is better overall! Bauker and Boies were quite comparable. Boies and Wire were undoubtedly stronger for their stage in the game. No problems here really except getting to him. He doesn’t even have good weaponry.
Playing Through:
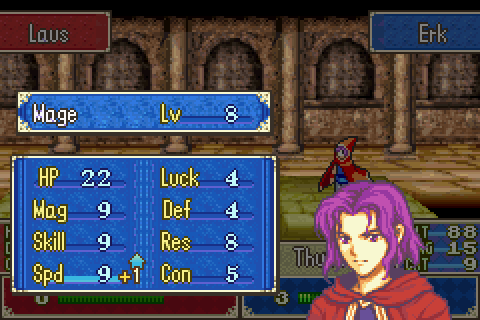
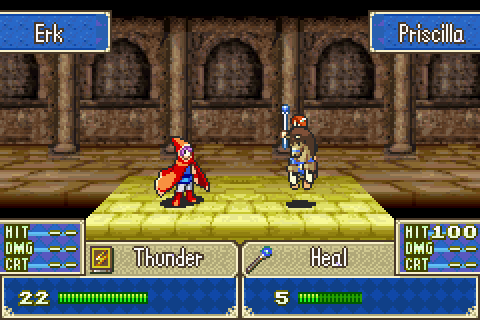
Order of operations matters. Number one, Erk has to kill this knight so that other people can freely move to behind the sword users. Note again that sometimes using the Thunder Tome is worthwhile at this stage in the game; his magic power just isn’t good enough yet for Fire alone to cut it when you need an enemy dead.

Weird but nice.
Hector got a decently lucky hit on that myrmidon. If he’d missed, Oswin would have hit it and weakened it for Kent instead. Remember how a while ago I said that 13x was the only time myrmidons were a serious threat? Well here’s an example. 4 chapters later a myrmidon is roughly on par with an un-used, bad cavalier.
Florina finishes the mercenary and gets some much-needed strength and speed. Thanks again for fixing that whole Angelic Robe debacle for me, SystemLogoff. And thanks to everyone else who tried too!
I want my paladins to take up positions to the sides of the pillars to partly block the archers and to kill the incoming next wave early. I’ll need to do some trading to make sure everyone or nearly everyone in range ends up with a hand axe or javelin equipped.
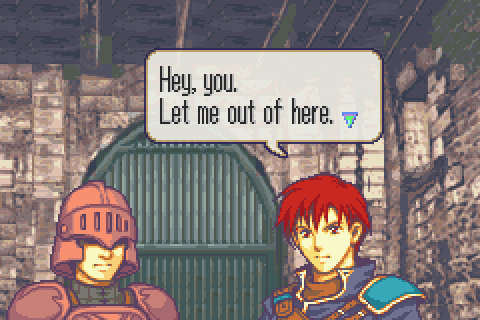
On turn 1, Raven strong-arms his own prison guard into letting him out of his cell so he can join the Laus side and kill Hector.
This line is just the greatest because apparently he actually manages to make that trained soldier on the other side of a locked door think he’s dangerous enough to make good on his threats. What a badass.
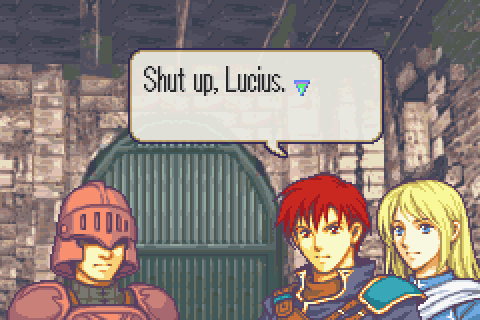
Lucius disapproves of solving all one’s problems with murder or threats of murder and he definitely disapproves of betraying Lyn for revenge on someone who didn’t do anything wrong and he’s not afraid to say so. Raven doesn’t care. What a jerk.
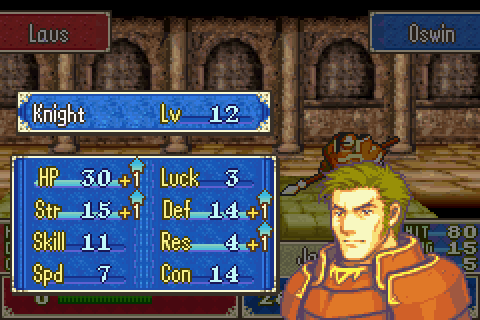
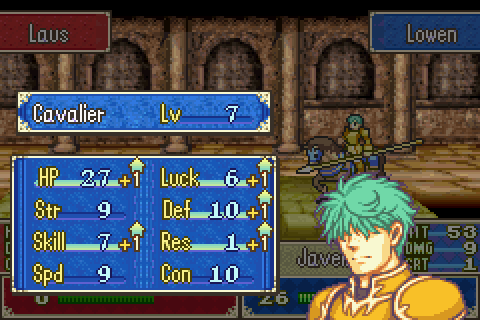
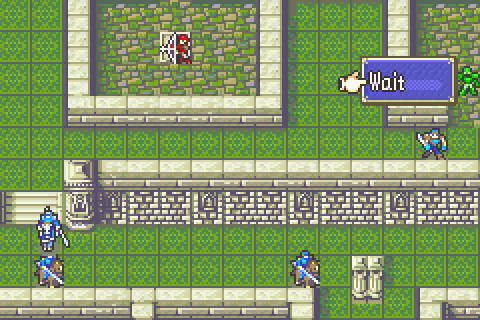
Oswin throws a javelin through a wall at the enemy archers and gets another point of every stat he’s going to need. Nice.
Just a couple of moves into the second turn and you can see my starting formation wiped out nearly all enemies and left a clear path. Erk will handle those archers while everyone else charges or rescues slow people and charges.
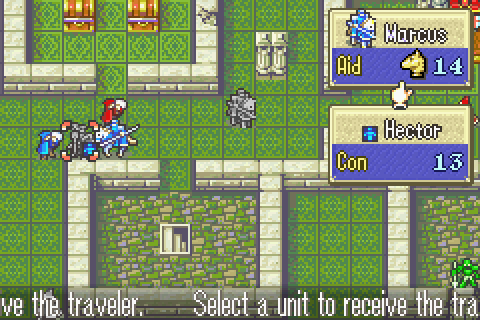
Remember: the turn of anyone who’s going to be rescued is wasted anyway, so you might as well have them do things like move to a good spot or do some trading or drink a vulnerary first. Here Matthew is moving for easier pickup for Lowen. I’ll need to move him at top speed and that will involve a lot of rescuing and dropping and re-rescuing.
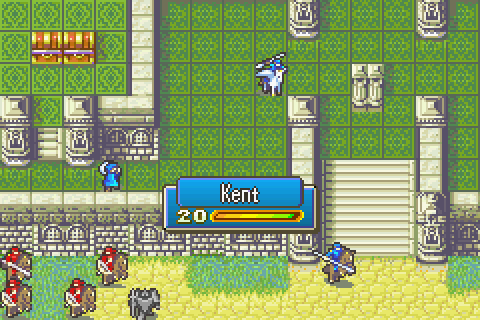
Florina prepares to take down that shaman as I ponder my limited options for Kent nearby. He’s not a very good unit and I don’t intend to use him, but I do want him to get some XP. Trouble is he’s badly injured and about to have a job to do anyway.
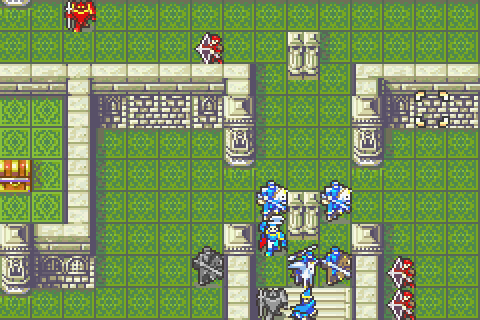
My mass of cavaliers and paladins rips apart the enemy resistance and lets me move nearly full speed per turn to this point. Here I want Sain to take down that entire wave of enemies you can see, but I also kind of need to move Marcus reasonably close so he’s in position for next turn.
Marcus is just at the edge of the range of one archer. I’m not moving Kent along after the rest of them here; I’m positioning him very carefully for a later purpose. Florina of course took the shaman down easily. Meanwhile, Oswin is slowly waddling toward the enemy spawn point below.
Sain acquired a door key. At this point it’s not 100% clear to me what the situation will be with the enemy thief when we get there, so I decide I want to keep the door key around as I acquire it from a slain enemy. But I need to send something to Merlinus. The iron sword will do.
Hector gets a nice shot and a nice level as he clears a path for the cavalry to keep charging. I’ve been picking up and dropping him along the way, same as Matthew, so he can keep up.
Another Lowenly level. He’s not getting as much XP as I hoped this level, but that’s alright. Speed is what I need here.
Florina opens the door with the key you may remember me giving her and then she starts moving back since mounted units can do that.
Here we go, I did some counting and found this is the spot I need Kent to be in for later.
I couldn’t kill that cavalier so I’ll just drop Matthew and deploy him as a wall. You can see that the turn 4 enemy thief has spawned. And that Raven is running our way, which he does in hard mode. He’ll be recruitable next turn.
Oh yeah! Sain shows us all why I’m using him for this level once again. Of course he would get the best level out of anyone this chapter…
It’s just turn 4 now and I’ve already gone so far and killed the vast majority of enemies. Cavalry mass is the only way to really do that on hard mode.
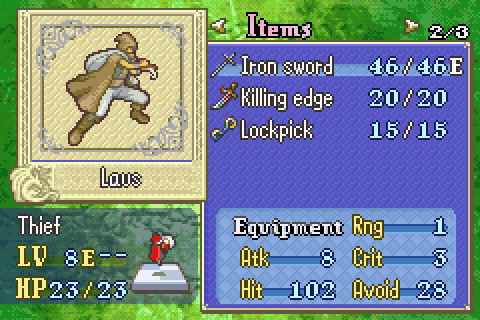
Here’s the turn 4 enemy thief. He’s got a pretty serious backup weapon as well as that delicious lockpick.
And here’s the just-spawned turn 5 enemy thief. He has no lockpick. Therefore he has no targets to get to before he just walks off the map. Therefore he’ll immediately walk for the map edge and leave unless given someone to attack. Really he contributes nothing. Probably they just forgot to give him a lockpick.
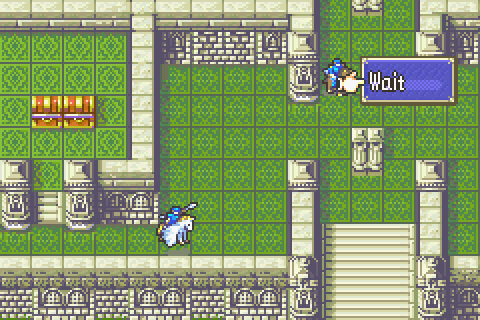
And that’s the perfect square for Florina to wait in.
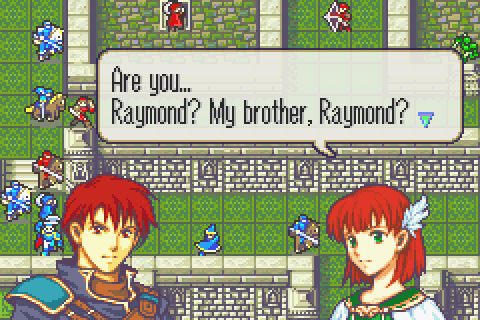
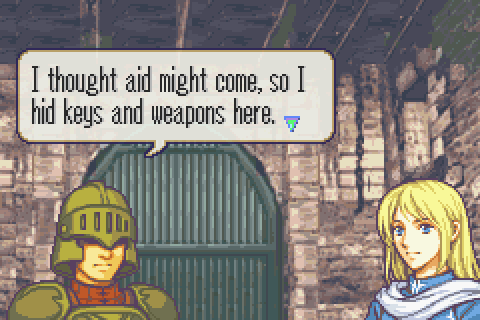
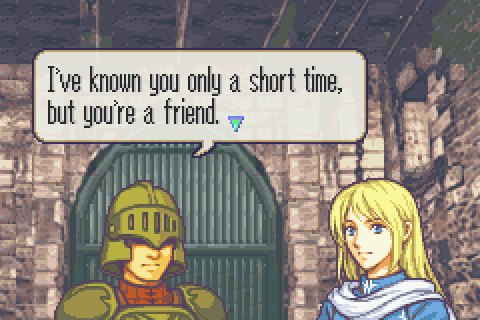
Priscilla and Raven have one of the longest and best recruitment conversations of any new character after recognizing each other.
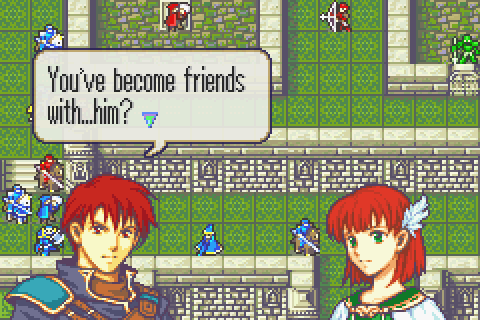
He finds she’s become friends with Hector, since she has no idea what happened to Cornwell due to being adopted very young by an Etrurian noble family who preferred not to tell her much of what befell her parents.
Erk softens up the cavalier for Lowen. Mage attacks look pretty awesome as usual.
Raven will have to get back into the prison cell to recruit Lucius soon, so back that way he goes.
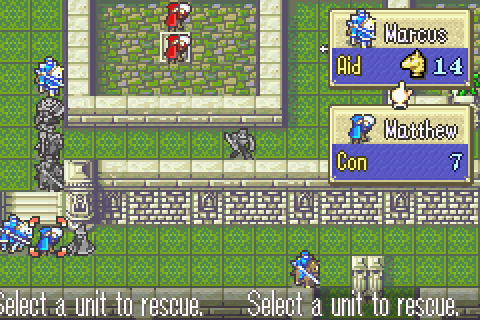
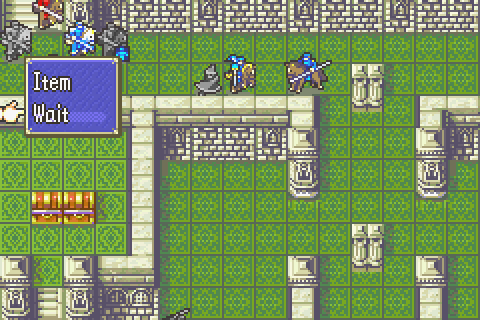
Got to move fast if I want to steal that lockpick. I’ll use both paladins to rescue-drop Matthew right near the treasure room with a turn to spare. It’s really important to flexibly pick up and drop people as your needs demand when doing a strategy like this. Don’t just designate Kent or someone the hauler for the whole level; that takes both him and his cargo out of the fight for the whole chapter.
Matthew is in position.
Sain rides on by and to my surprise the lockpickless thief doesn’t ignore him; it attacks him. Well free kill I guess.
Lowen needs to be repositioned, as do most other people now.
Meanwhile Raven is great right out of the box, batteries included and everything. Not many of my units are actually capable of soloing enemies in one round at this point.
Time to take and drop Hector. It’s going to be a race to kill Bernard and his guards and seize that throne quickly.
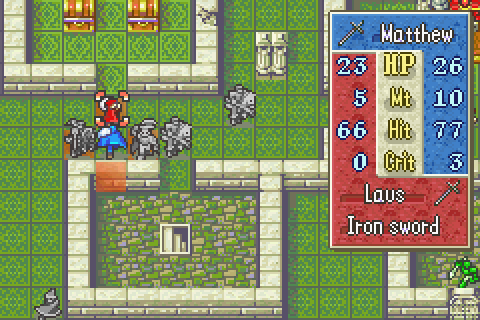
Remember what I said before about letting the enemy thieves do work for you. In this case I want this guy to open the silver sword chest and THEN let me take his lockpick and kill him. To set up for that, Matthew chips him for some light damage first.
All part of the plan…
And now the green units burst out of jail, armed and ready to run off and die to the reinforcements who just spawned. Lucius, determined just to wait for Raven to return, doesn’t go with them
So they give him some vulneraries and a light magic tome to defend himself if need be. What nice guys. Maybe they know he helped liberate Caelin a year back.
These guys could get soloed by a single archer. That, in fact, is exactly what will happen if you do nothing.

I don’t want to prevent any reinforcements from spawning by making enemies attack Oswin from on one of the spawn spots, so I move him a bit away for them to run up to.
Raven will recruit Lucius momentarily.
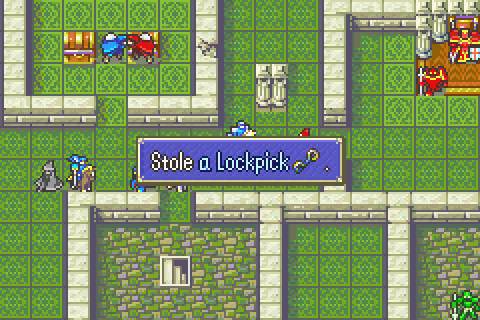
Lockpick stolen.
Now this is something of a puzzle. I have 2 enemies I want dead in short order, 3 fighting units + Priscilla whose healing I need, and I need to get Hector to the throne soon. But just as importantly, I need to get my paladins in position. I think I’ll have to spare the thief for now and have Erk finish him next turn.
Not that Hector really is going to do very well against that mage. My Hector has particularly bad resistance, but that’s always a weak point of Hector’s.
Next turn. Here goes amazing! https://www.youtube.com/watch?v=ZKYi81giDrQ that’s Distant Travels, the awesome new main map theme. And quite appropriate.
First Erk kills the thief and traps in the enemy archer who just spawned at once.
Awesome! Finally some speed!
I decide to equip an iron axe even though I’m walking into javelin range. At this point I’m more concerned with conserving my very limited handaxes than with Hector taking a few more points of scratch damage.

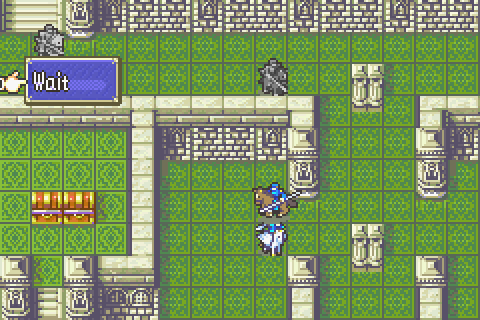
It’s turn 8 and all the top treasure is mine. It would take about 8 more turns at least to get to the bottom treasure room.
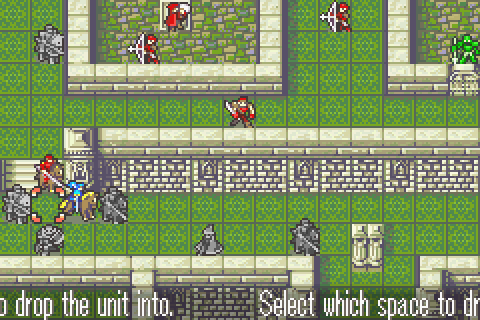
Or I can do it in one. Here’s my master plan that I’ve been setting up for all level!
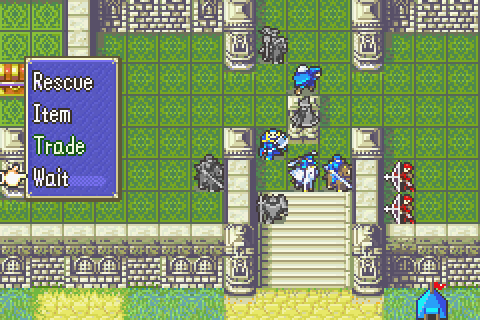
Sain grabs Matthew and runs to Marcus, Marcus grabs and runs to Lowen…
Lowen runs to Kent.
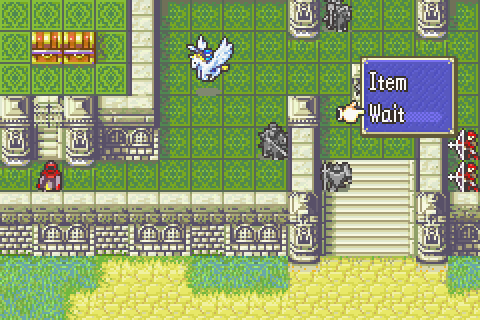
Kent to Florina
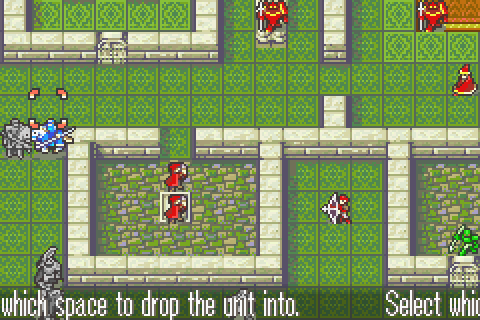
And Florina to a spot calculated exactly so that after she drops Matthew, he can start grabbing treasure next turn and she can move her full 7 back toward Oswin to start getting some XP.
Bam! I just looted a chest and moved a guy about 37 spaces in a single turn. It took a lot of planning beforehand and I had to have Kent sit most of the level out, but this was a brilliant way to save like 8 turns. The way to make it better would be to have 1 more unit- infantry or cavalry- standing where Florina is now to take and drop matthew immediately. That would shave another turn off the level overall since Matthew would end up in position and back on the ground faster. Unfortunately, I couldn’t spare anyone. You could perhaps do it by having Priscilla form part of the massive rescue chain after talking to Raven instead of doing any more healing. Then Florina could be the extra person. But I needed Priscilla.
So next turn is turn 9, on which she drops Matthew and moves for Oswin.
Raven recruits Lucius and the green soldiers try to suicide like lemmings to the constantly spawning archers.
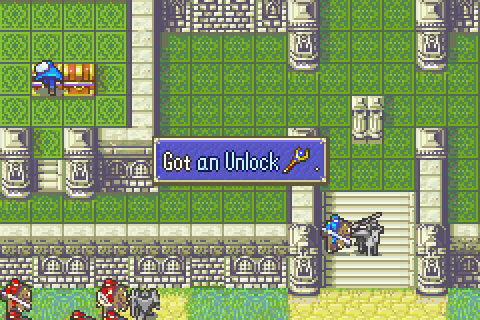
There’s something ironic about finding a staff like this locked away in a treasure chest. Unlock staves open doors for you. Interestingly, they can actually do so from range. So pretty much never useful in my experience, but interesting. Doesn’t work on chests of course.
Kent chugs a vulnerary borrowed from Florina and prepares to lure some nomads to kill on the final turn.
Erk is getting worn out by the archers and gets a bad level, but at least he got some much needed speed.

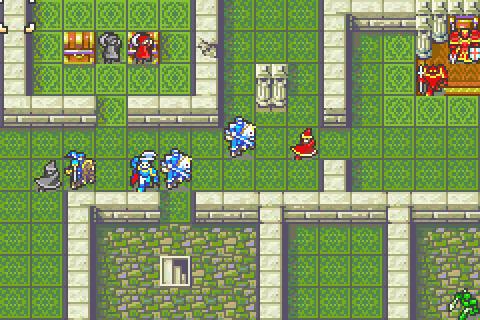
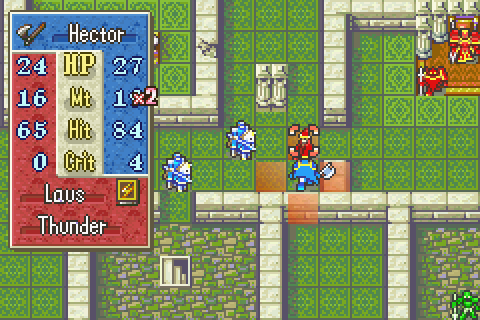
Sain weakened Bernard, now Hector just has to go for the kill! Even if Hector misses once, he’ll have his chance again on Bernard’s turn.
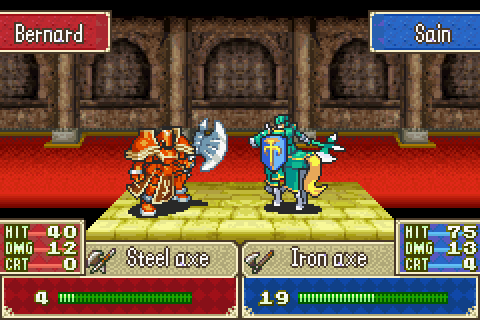
Darn. Bernard decides to try to fight Sain instead, so Sain will get the XP.
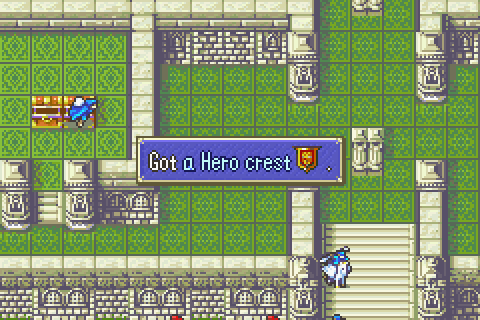
The final chest opened! I got all the treasure!
I worked really hard to get Kent that level and he proves himself entirely unworthy of any further investment.
It’s the last turn so I get in one more Priscilla heal for XP.
All I have to do is seize the throne. That was epic. It could have been done in 1 less turn if I didn’t need healing. But geez, I did everything and I did it in 11 turns courtesy of that massive, careful rescue chain. And Sain + Marcus.
The battle over, the group begins searching for Marquess Caelin when they see someone in the shadows.
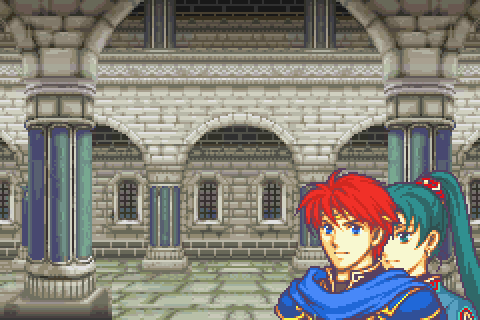
Eliwood instantly jumps in front of Lyn. You have to admire his courage. Not only is he now between Lyn and someone she might want to kill, he’s also closer to the potential enemy!
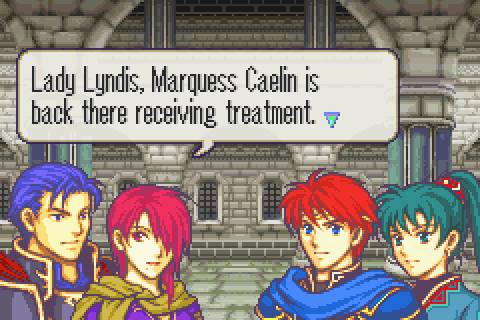
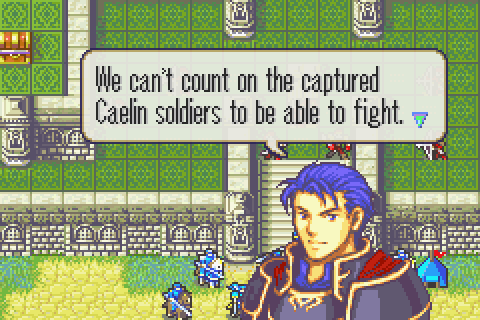
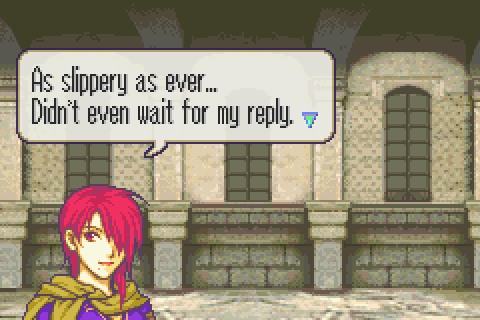
But it’s just Leila. She reveals that, having been left totally unsupervised, she not only didn’t kill Hausen but actually got him medical treatment. Ephidel is just terrible at this whole killing old men thing. One begins to suspect he might have been using a prop knife provided by Leila.
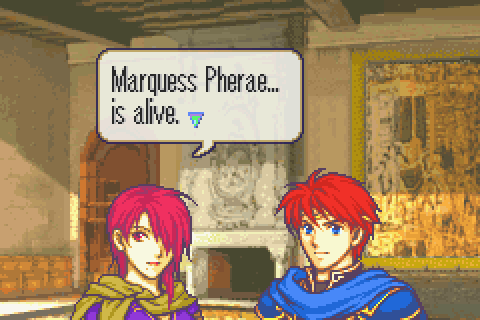
She delivers her report to them, explaining that Marquess Pherae is alive. Awesome, this is now a rescue mission. I’ve been constantly talking about Elbert this and Elbert that all thread long so I doubt that came as a surprise to anyone, but I remember that I was not sure what to expect the first time I was playing up until that point.
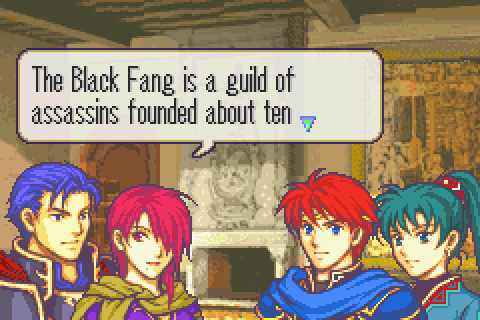
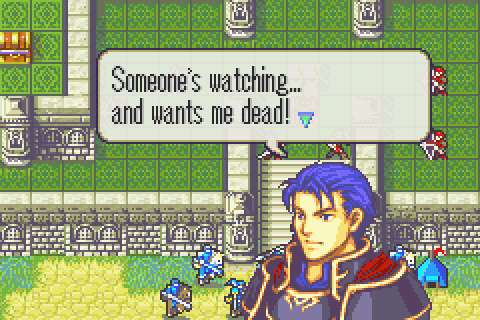
And she also reveals what she knows the founding and history of the Black Fang. It was started 10 years back by a man named Brendan Reed and once prided itself on only targeting tyrants and noblemen who abused their post.
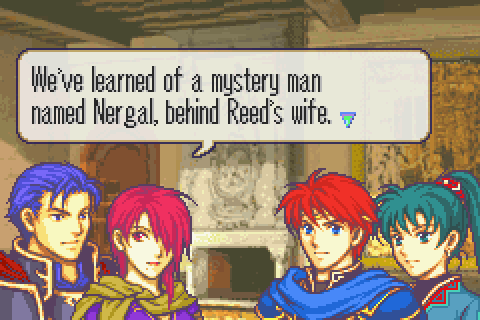
But a year ago, Brendan remarried to a woman named Sonia and since then the Black Fang has changed. Now they kill anyone they’re paid to and it’s clear to Ostian spies at least that Brendan is being controlled by Sonia who is in turn working for a mystery man named Nergal- the same person behind Ephidel.
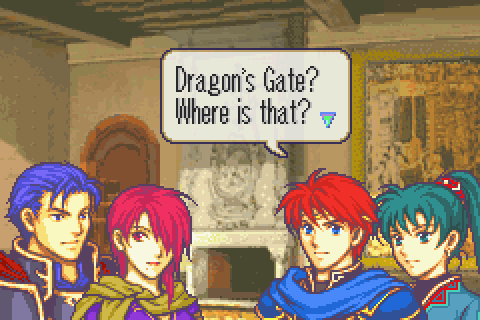
And apparently Nergal and Marquess Pherae and now also Darin and Ephidel are at a mysterious place called the Dragon’s Gate.

It’s located on the island Valor, a dreadful place with a sinister reputation because people have been disappearing there for a long time.
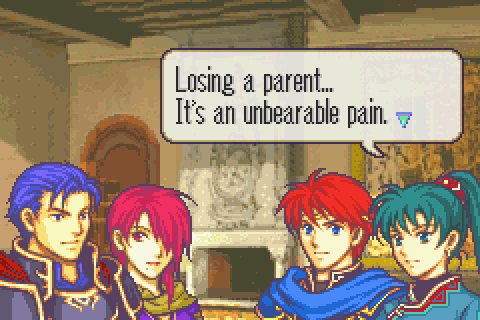
Although this is not really her fight, Lyn resolves to help Eliwood so he doesn’t lose his father now as she did just a year ago.
And Hector asks what Ephidel is like.

https://www.youtube.com/watch?v=_94fD5MR8Wg
Ephidel’s sinister theme plays as she describes the mysterious, seemingly inhuman, and profoundly stupid man.
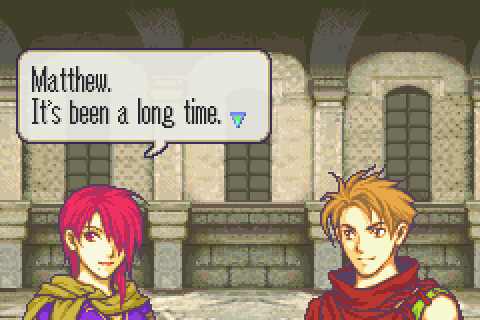
This isn’t the first hint we get that Matthew and his fellow spy Leila have some kind of relationship, but it’s where we first learn how serious they are. I really like this pair.
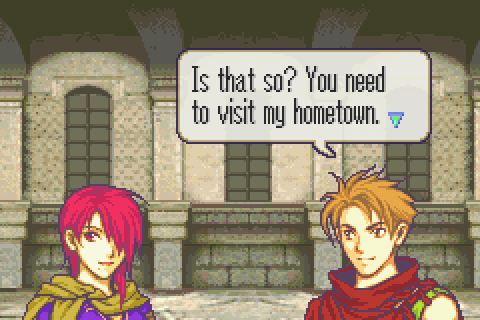
He proposes she come visit his village and meet his parents once they’ve rescued Marquess Pherae.
And because I saved every green soldier, there’s this brief scene where you get a red gem.
And that’s the end! Man, I love that chapter.
Total Restarts: 7. No more on this chapter. It’s got a couple of ‘gotcha’ moments, but nothing I wasn’t ready for.
Turn Surplus: +1 (Awesome, I gained 7 turns in one chapter and now I can get my surplus built up for 19xx!)
Things I Regret Missing: The lockpick on chapter 11, that darned archer on chapter 11, this one brigand who attacked Marcus on chapter 12, 2 more brigands who ignored everyone else to attack Marcus on chapter 13x, and 2 archers who ignored Hector and Dorcas (DORCAS!) to attack Marcus on chapter 14