Part 23: Chapter 18 and The War Room Part 18 (Damage Reduction Tactics)
Back to the story with one of the most important chapters of them all! And it’s a ship level. Quite a few FEs have exactly one of these. They typically emphasize chokepoint defense and the power of flying units; this one is no exception.
Chapter Summary:
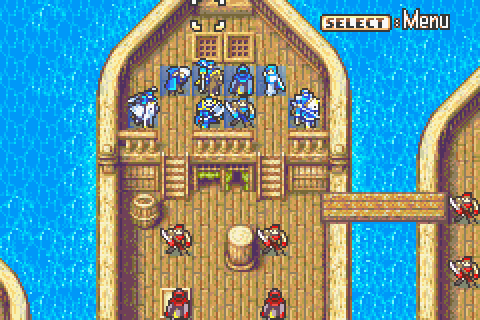
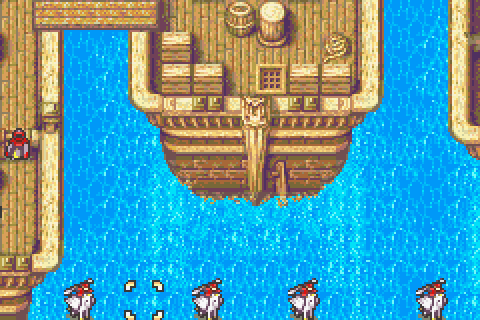
An alleged pirate named Fargus agrees to take Hector and company to Valor for free and they’ve nearly arrived when they come across a young woman unconscious in a tiny boat. It turns out to be Ninian, bewildered, without Nils, and uncertain who she is or why she was in that little skiff out on the ocean. Moments later, they come under attack by a small fleet of Black Fang ships who manage to hole them below the water line, forcing Fargus and his crew to leave the fighting to Hector’s group.
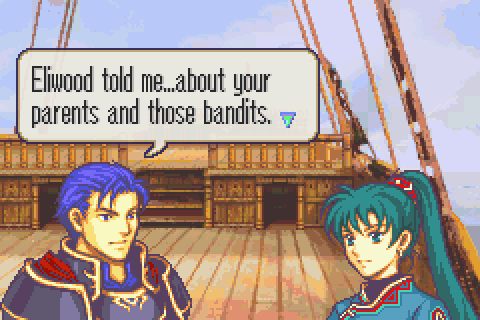
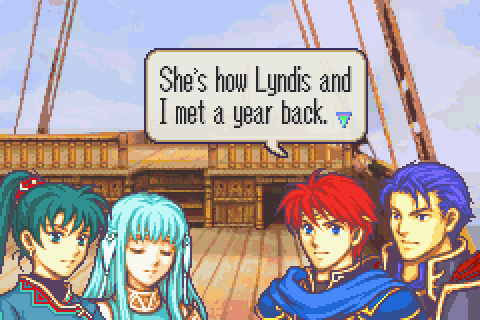
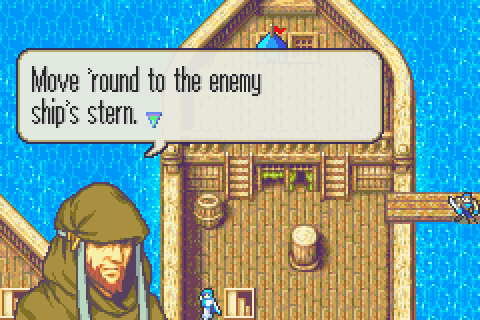
Besides new and changed chapters, Hector’s story has a great deal of new and different dialogue, showing conversations that happened while Eliwood was elsewhere. At this moment Eliwood was talking to Fargus at the stern of the ship, and it turns out Hector and Lyn had an important discussion at the back.
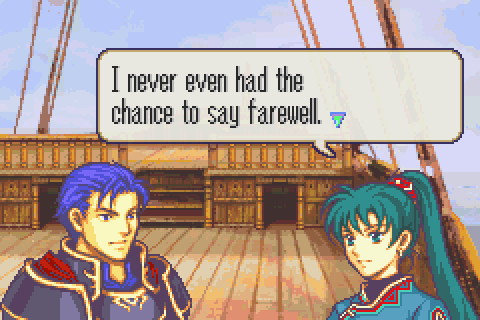
Lyn is still angry about having to work with pirates and tells Hector that it wasn’t just her parents who were murdered by bandits; it was her whole tribe. Their water was poisoned before they were set upon by surprise and she barely survived herself.
Lyn never really shared her memories of what happened with anyone before this. Not even Market. Maybe she just feels comfortable talking to Hector despite her evident dislike of him at this point.

Or perhaps she’s just been holding in the horror of it too long and had to tell someone.
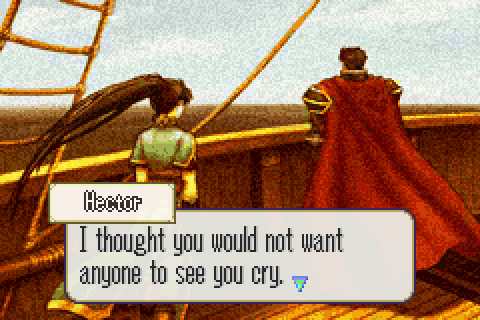
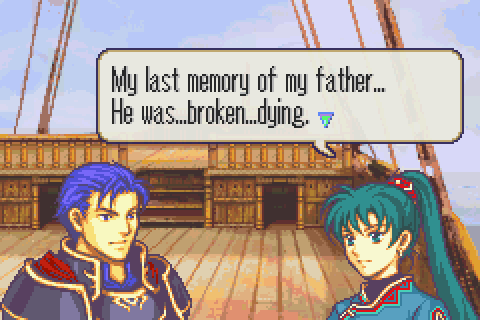
Hector promptly turns away, angering her.
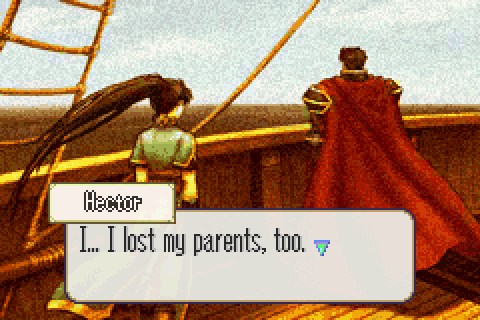
He relates the story of how he recently lost both his parents to illness
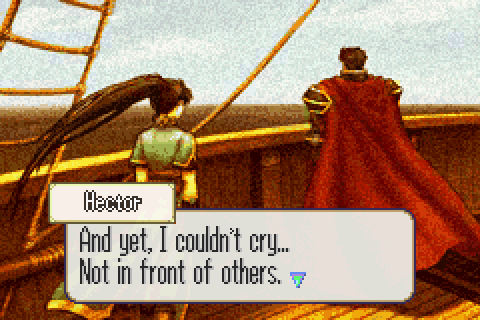
One of the themes running through this game is that everyone deals with loss and grief in different ways and that some are better than others. Even the stoic Hector understands that being unable to confront one’s loss emotionally is weakness, not strength.
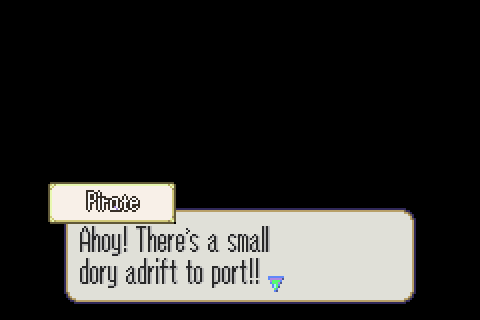
And then someone sees a boat adrift in the water, interrupting their great character-developing conversations.
It turns out to be Ninian, currently unconscious. Just like when Eliwood last ran into her actually. I told you she and Nils spend most of the story unconscious, dying, kidnapped, or missing…
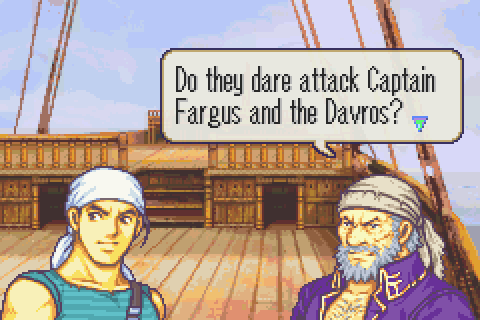
And that’s when they see a fleet of ships flying strange colors closing in to attack. I THINK the Davros is the name of Fargus’s ship. Originally I thought it was what he called his crew or something.
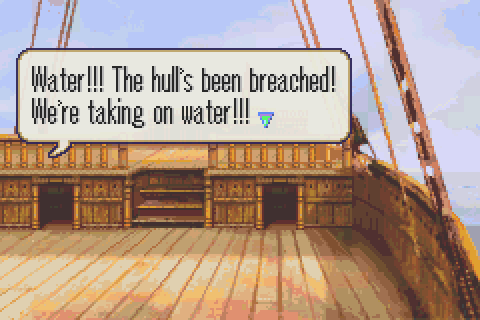
And again the Fang prove to be much more skilled at non-combat operations than at actually fighting. As they should be. Somehow they hole the Davros below the water line so badly that the entire crew and, reluctantly, their unstoppable berserker captain have to take care of it. If Fargus and his crew didn’t happen to have Hector and his warriors aboard to defend them while they work on that, there would have been nothing they could do to stop the Black Fang here.
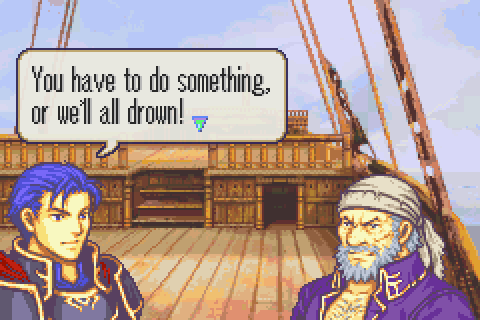
Hector talks sense into Fargus, pointing out that they can both fight but only the pirates can actually prevent the ship from sinking.
The War Room, Part 18
Since we have, bar none, the most ferocious fight in the game so far here and since I talked about how to figure out how much damage your units will take last time, this is a good time to give some tactical tips on how to reduce the amount of damage they’re exposed to. Some of these tips I’ve touched upon before or assumed everyone knew, but it’s about time I actually explained them properly.
There are a few basic tactics everyone knows of course: use beneficial terrain, use the weapon triangle, avoid equipping weapons which are too heavy and consequently slow you down, and just keep people who are too fragile out of enemy range, but here are some slightly more advanced ways to keep everyone alive:
1) Letting the boss hit first
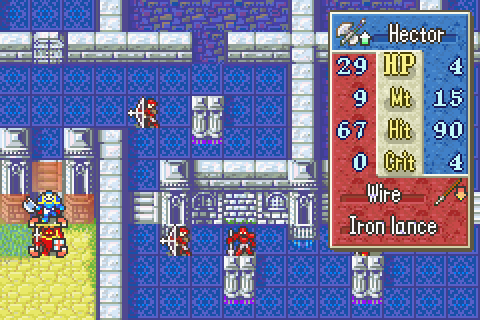
Never mind the archer for now and never mind finishing fast, what are Hector’s rough odds of victory if he attacks Wire? Well Wire has about a 70% chance to counterattack and kill him. Then on the enemy turn, Wire has a 70% chance to kill Hector again. If he fails, Hector can then finish him. So his odds of actually winning are roughly 9% (ignoring his own very small miss chance). On the other hand, what if Hector instead waits? In that case, Wire has a 70% chance to kill him, and then if Hector survives he counters Wire for 15 damage. Then it’s your turn, and you can kill Wire. Odds of success? About 30%. Still bad but much better.
Imagine a slightly different case: Hector has 10 HP and each has 100% odds to hit the other (and there’s no archer). If Hector attacks first, then you are guaranteed to lose! On the other hand if Wire attacks first, you are guaranteed to win.
Modify the above case so that Hector deals 14 damage but double attacks Wire. You get the same result: the first attacker loses.
Obviously there are circumstances where the opposite is true- like where you and the enemy can each kill each other with one attack- but those are generally more obvious. Just remember that if you and, say, a boss can kill each other in two rounds (remember that enemies on thrones and gates and forts heal!) and you don’t have any allies who could assist or enemies who will throw things off, you should let the boss attack first.
2) Avoiding killing enemies
Suppose that instead of sword users these were 4 cavaliers with iron lances and that 4 attacks from them would kill Hector. How could he be protected? Canas can’t double a cavalier and Florina wouldn’t be able to kill one, so he can’t be saved by reducing their numbers.
But notice that only 2 of them can attack him- unless Hector kills them with his counterattacks and thus makes space for more. So if you have Canas trade with Hector to switch him to a less effective or heavier weapon- or outright take all his weapons- then you can ensure Hector’s survival. This kind of thing can come up fairly often with destructive but fragile characters facing hordes of enemies at a chokepoint. If their weapons are taken away or switched to something weak, only a single enemy can attack them, but if they’re allowed to fight at full power they might kill a bunch of enemies, taking a hit every time, and then die.
3) Use your vulneraries well

Yes they cost 100 gold per shot, but if that lets you put a character in a dangerous situation and survive and thereby win the map faster, that can be worth it. The key is generally to make sure that the people who are most likely to need vulneraries (people who will be assigned to fight alone, people who will be fighting with a group that will not have a healer, healers themselves, etc.) have one before you start the map. Get those things switched around as you choose your starting equipment each level. Unless you steal some, you’re not going to get many of them- not enough to have one for everyone who might need one. One way you can help mitigate that problem is to try to make sure the vulneraries most likely to be used are those with 2 or 3 charges. This allows you to ensure more characters have at least 1 charge available in the future.
On this chapter I actually forgot to give anyone vulneraries at all after stripping people of their gear, and it really hurt me tactically later on.
4) Kill ‘em All!
Perhaps both the most basic, the trickiest, and the best damage reducing tactic is just to try to wipe out every enemy in the area- or at least enough that the survivors can’t kill any of your units. In this example, there’s 7 enemies to deal with.
In the process of wiping out 4 of the other 6 enemies I got everyone but Dorcas and Oswin out of range of the Pegasus knight, eliminating it as a threat. 7 enemies could have killed 1 or more characters easily, but just 2 aren’t much of a threat to anyone.
Doing this is really more an art than a science and will almost always depend at least slightly on luck. There are a few basic tricks to it though. The most important thing is to look before you leap: figure out which characters can kill which enemies (and thereby figure out whether wiping out enough of them is even possible) before you order any attacks.
Another trick is to not waste your firepower. Never have a strong character attack a heavily damaged enemy and don’t waste magic attacks on people with high resistance or physical attacks on people with high defense. You should also make sure to prioritize killing off highly damaging but fragile enemies over less destructive but tougher ones. It will also often be wise to kill enemies with high movement or ranged weapons as high priority targets. That way if something goes wrong and you can’t kill every enemy afterall, you can still get your vulnerable characters out of the way more easily.
5) Reduce surface area
This turn I’m in a bad situation because there are far too many enemies to kill them all, too many have good movement to escape, etc.
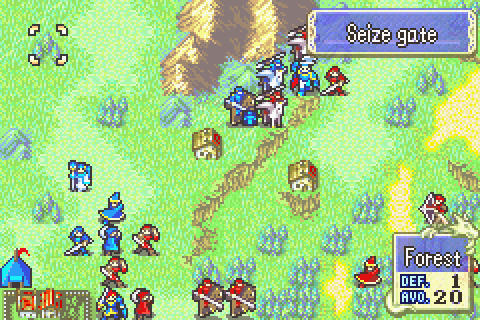
The solution is to kill the problem targets (like those Pegasus knights and mercenaries) while having people get into a formation such that few enemies can attack any individual one of them. The ideal is often to simply form a straight line of tough characters between two points of impenetrable terrain. The simplest form of that is having a single guy protect weaker allies at a chokepoint.
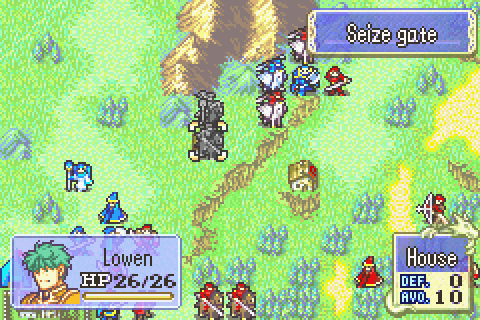
Like Lowen guarding Priscilla here. Once those Pegasus knights are disposed of, at most 2 enemies can attack Lowen and none can attack Priscilla.
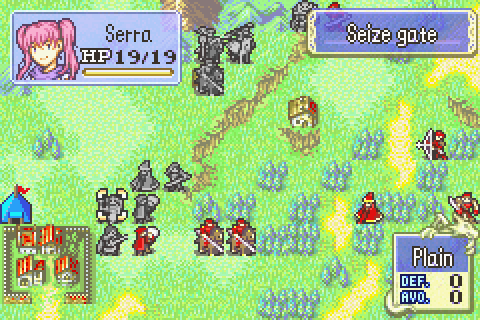
But of course, one can’t always bring the ideal situation about. Here at least I got a formation such that at most 2 enemies may attack any of my characters. And none can attack my most vulnerable characters.
Besides the basic ‘wall’ a few other formations that can be useful include a square of 4 people (each may then only be attacked by 2 enemies, fewer if the square is far enough away that only some sides of it may be wrapped around) or just surrounding or partly surrounding a vulnerable character with tougher ones.
The following chapter is pretty rough, so you’ll see me try almost all of these tactics at least once.
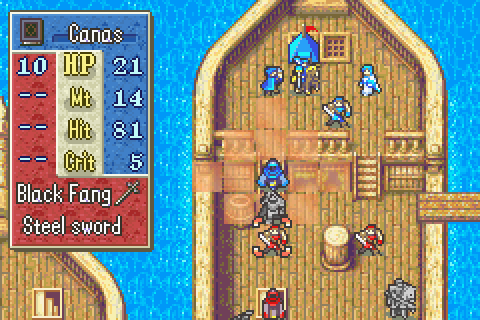
Battle Preparations & The Map
Units Allowed: 8
Units Benched: Eliwood (Too many Pegasus knights and shamans and he doesn’t have the speed or damage to fight mercenaries properly) & Lyn (Ditto).
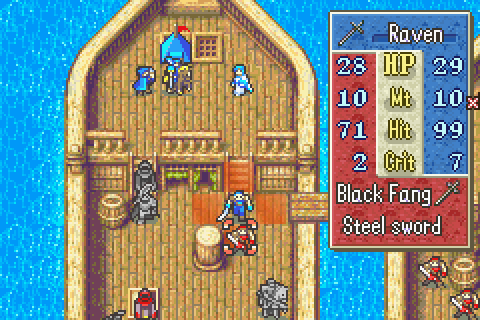
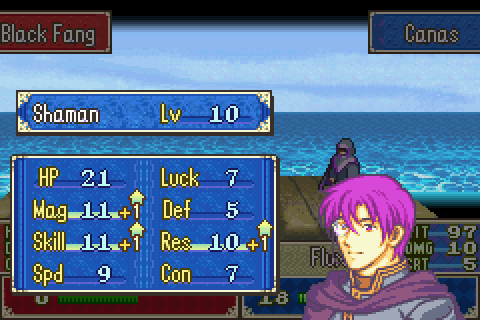
Units Added: Matthew (There are loads of valuables to steal on this chapter), Lucius (He’s good against both mercenaries and shamans), Canas (Get used to him, he’s going to be around on every level from now on almost certainly), Florina (Highly effective against mercenaries, shamans, and Pegasus knights and the only one capable of maneuvering well on this map).
Useful Units Rejected: Marcus (Sain is already an XP hog, but at least he’s effective), Oswin (Can’t actually handle shamans and way too many enemies have armorslayers, plus he’s an XP hog), Lowen (I really, really wanted to bring him and he’d be pretty great here, but ultimately I seemed to need everyone else more and he doesn’t have either the strength or the speed to be as effective as I’d like), Erk (Would be comparable to Lucius except he’s at weapon triangle disadvantage instead of advantage all over), Serra (I would have loved a second healer but I only have 6 fighting units as it is and one is Sain who I don’t want fighting and one is Hector who’s not much good here)
Objective: Either survive 11 turns or kill Zoldam
Secondary Objective: Kill as many enemies as possible
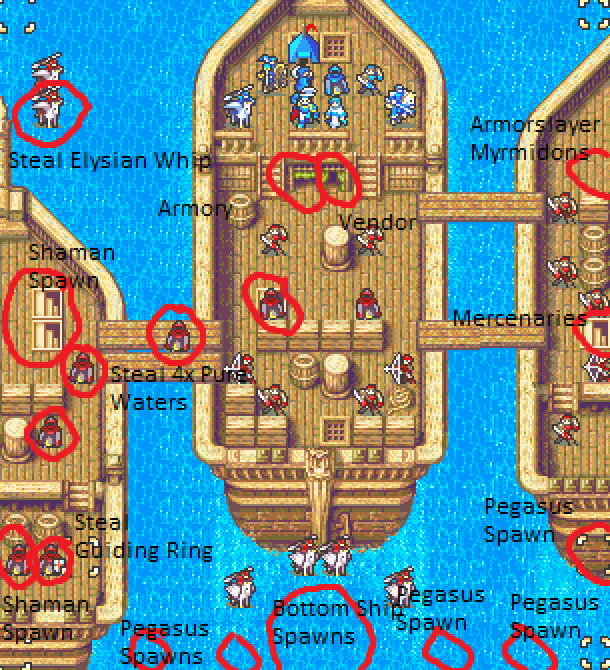
Secondary Objective: Steal Elysian Whip from top left Pegasus knight
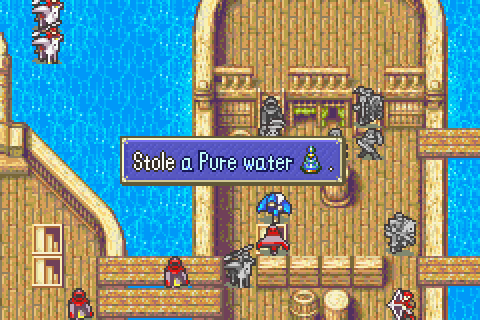
Secondary Objective: Steal 4 Pure Waters from different shamans
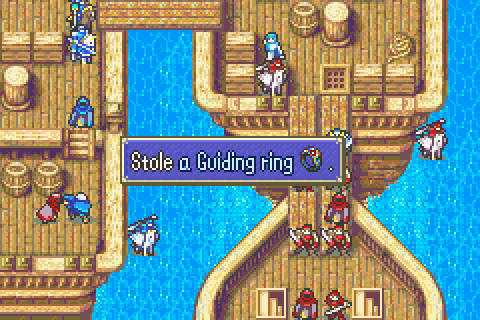
Secondary Objective: Steal Guiding Ring from Zoldam
Secondary Objective: Do some shopping
Reinforcements: So many. Way more than I could record. Here’s a partial list of those that show up by turn 10 that I noticed appearing. Turn 3, 5: 1 shaman from left of Zoldam, 1 myrmidon with an Armorslayer from top right of the right ship, 1 mercenary with a steel sword from the mid right of the right ship. Turn 4, 6, 8: 5 pegasus knights with various weapons along the bottom and lower right edges of the map and a shaman from the left of Zoldam. Turn 7, 8: 2 mercenaries, a myrmidon, and a shaman from the ship that appears on the bottom of the screen. The first wave of these spawn-move with their ship. Turn 10: 2 shamans from stairs on left ship, another myrmidon and mercenary in the usual spots on the right ship.
Turns Allowed: 11
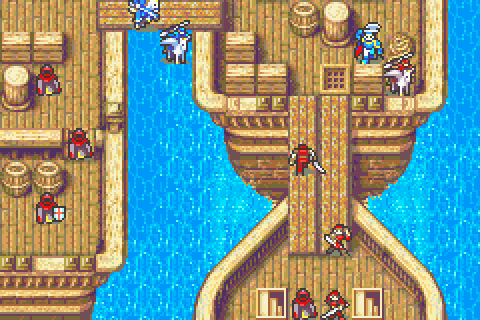
There’s just too many of them! Without a good strategy, you won’t survive till turn 3 of this map. Without a great one, you won’t survive till turn 4. And unlike most maps, things do not stabilize after the initial wave dies down because the number of reinforcements is absolutely unbelievable. It’s probably higher than the total number of reinforcements on every single map up till now combined. And they’re dangerous units like mercenaries and shamans, plus pegasus knights which aren’t a threat to your good fighters but do constantly menace weak people.
I tried so hard to exterminate every one of them, but I couldn’t do it and had to end the map a turn early. Still, I managed to avoid bringing XP hogs like Marcus and Oswin and I stole every single pure water and the elysian whip and the guiding ring. Every. Single. Pure Water. That was awesome.
The big problem with this chapter is that it’s an air map. But you only have a single air unit and she’s not even that good. You also don’t get enough characters to really defend yourself properly at all. Furthermore, the huge number of enemy shamans and Pegasus knights means you can’t really rely on formations to protect you: loads of enemies will be able to wrap right around your walls or hit right over them.
And you can’t just turtle up and actually just try to survive, because if you do that then you will fail your funds ranking. Seriously, there’s so much valuable stuff on this level. You have to go out and steal it all. And bringing Matthew means one less guy who can fight as well as one more guy to protect.
It’s a very hard chapter on HHM- totally different from how it was on Eliwood’s story- and you shouldn’t be ashamed to restart it. I lucked out and had a good strategy and good characters, so I beat it on my first try, but it was really, really rough.
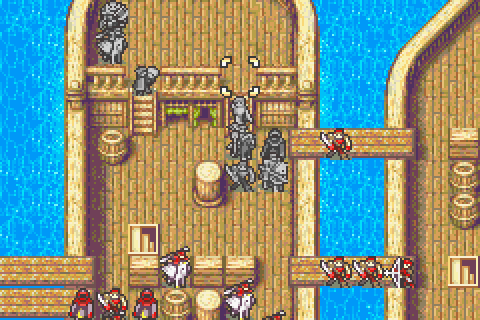
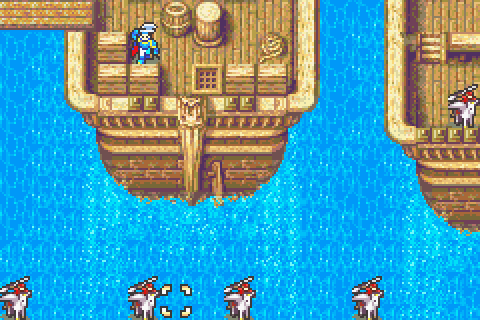
As usual, you must make your first strike count. You need to kill off the enemies which are going to be troublesome for Florina, clear the deck of your own ship, and prevent more enemies from pouring onto it en masse. So position your characters carefully.
This is what I went with. The right shaman doesn’t have a pure water, so he can be killed straight off. And by killing him from the right (which he can just barely do from this spot) Sain can block access to the ship from the bottom right boarding ramp and aggro and kill one enemy archer with his javelin.
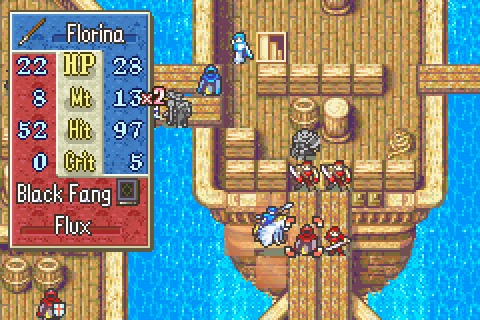
In this position, Florina can rush down and kill the other enemy archer. She’ll be exposed to heavy fire from shamans and mercenaries, but both of those are fairly ineffective against her, so if she dodges a time or two she’ll live. And Florina is one of the best dodgers in the game.
Matthew can rush out and steal the pure water off the left shaman. With Sain blocking the right entrance, Florina blocking the left, and every other enemy eliminated, he’ll actually be safe. More importantly, he’ll be in position to run back and steal the Elysian Whip off the incoming Pegasus knights next turn.
That leaves Canas, Lucius, Raven, and Hector with the task of killing the two mercenaries. If they’re lucky, they can do it. Hector is really the big ‘if’. What’s essential is that the left one dies so that Matthew can do his thievery. If that one can’t be killed, you should just give up on 1 pure water and have Matthew finish it off instead.
I re-equipped everyone but no one got anything really notable. Critically, I forgot to give ANYONE vulneraries. That really came back to bite me. Don’t make noob mistakes like that.
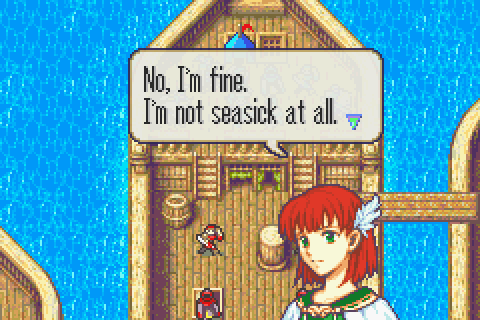
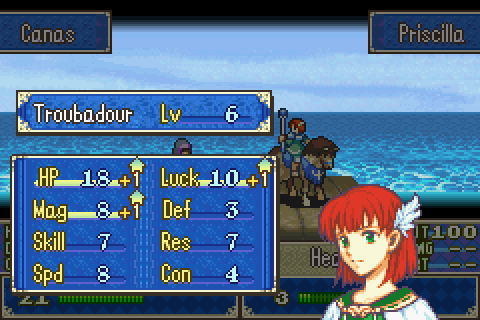
Another hidden conversation you’ll only see if you happen to bring a certain character to a certain level. Unlike many of them, I don’t really see the point of Priscilla informing me that she’s not seasick.
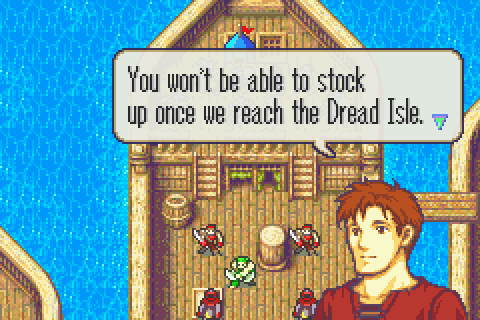
Remember how I mentioned that if you visit the inn on the previous level, Anna will make a pointless cameo and then will be mentioned again on this chapter? Well that’s this guy’s job. His name is Jake and he’s her boyfriend. He tells you to visit the shops on the ship. If you didn’t go to the inn, then… Dart tells you the same thing. But with no mention of Anna.
The Characters:
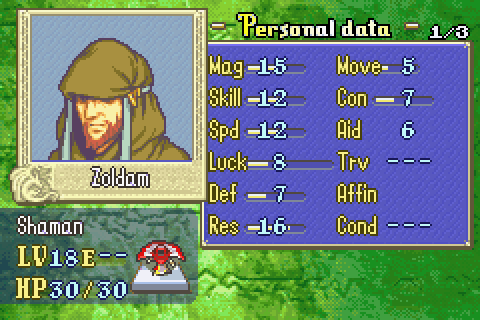
“All we want is the girl. Kill the rest.” –Zoldam, Chapter 18
Zoldam doesn’t have a lot to say, but since he’s the commander on possibly the hardest chapter of the game so far and undoubtedly one of the most dangerous bosses in the whole game, I have to respect him. He’s immune to magic and darned fast for a shaman…
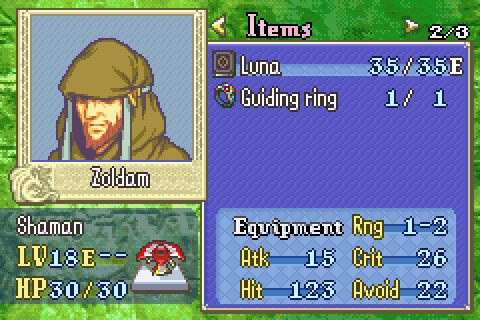
And he’s wielding one of the Legendary Weapons of Elibe. He does not miss, he does not care about your resistance, and he has a 26-Luck % chance to instant kill ANY character you can possibly field at this stage of the game. Plus he has a guiding ring that you desperately need and which can only be stolen from him and you must kill him to end the map without losing turns. Get ready for an entirely luck based fight with high odds of having to restart on what should have been the last turn.
Playing Through:
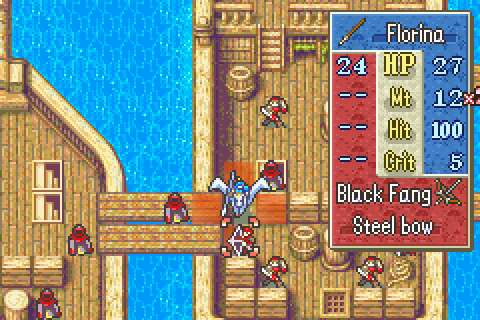
First things first, Florina must eliminate this archer. Once both main ship archers are down, she’ll be able to fly freely on future turns. This also blocks enemies from charging onto the ship and presenting more of a problem next turn. Even if you have the strength for it, don’t kill this archer with a javelin. If you do, then she’ll kill the attacking shamans. Which means you lose access to their stealable pure waters.
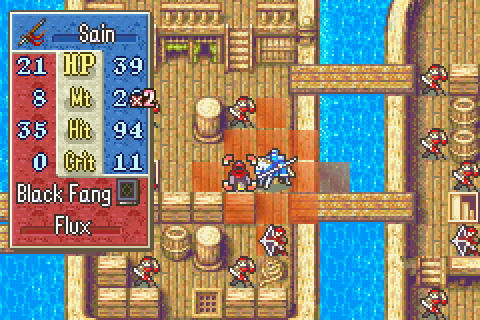
Do have Sain use a javelin here. You need that archer south of him to die.
If Hector misses, I’m going to need to use Matthew for fighting, not for stealing or I will lose. So I want to find out first thing whether he hits his target.
Ditto with Canas really. Raven and Lucius are more accurate at this level so I’m not as worried about them.
If my Lucius was higher level, I might have been able to have him attack first and weaken this mercenary enough that Raven could kill it without it getting a counterattack. But he isn’t.
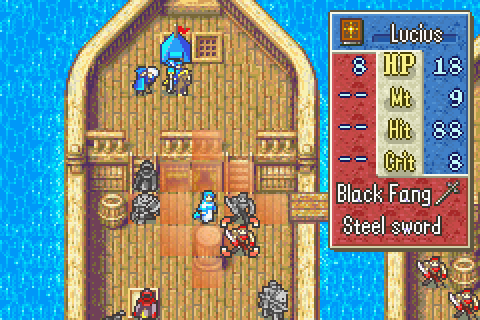
This is the first chapter on which I’m using Lucius. Like Erk, he’s totally viable even from level 1 and can quickly train himself up.
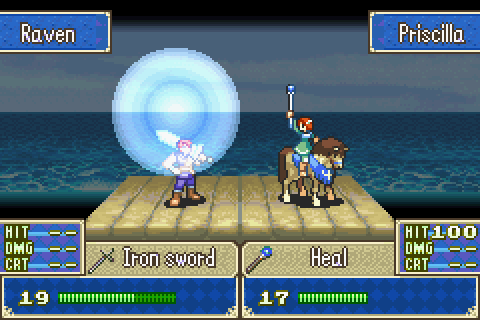
And Priscilla heals Raven. Raven has a lot of HP but not much Def and no one can dodge tank at this stage in the game, so he’ll need a lot of healing.
Lastly, Matthew steals the pure water. +900 gold! This is pretty much the ideal first turn situation: the main section of the deck is almost completely clear, both main entrances are blocked, and Matthew is in position to steal the Elyisian Whip next turn.
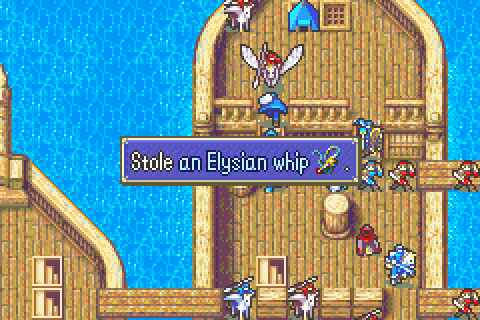
Sure enough. +10,000 gold. The only trouble is that this position will make it hard to actually kill both of those Pegasus knights. Meanwhile the southern Pegasus knights have arrived which means nowhere on deck is really safe anymore. At this stage I can either pull back for 1 turn and let Sain solo everything -at which point the rest of the map is much easier- or I can fight all out with everyone to try to maximize their XP gain and to weaken the enemy enough that I can survive the ferocious onslaught on the enemy turn.
I decided to have everyone fight. It’s difficult but probably worth it. Florina starts things off by eliminating one problem Pegasus knight.
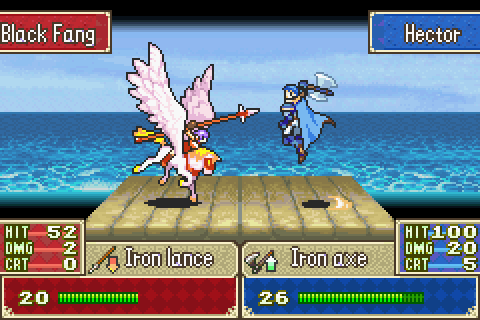
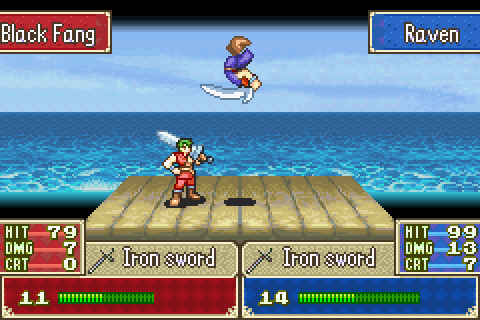
And Hector kills the other. You can see how far he’s come from Chapter 12. Back then he couldn’t instant kill these guys even with the Wolf Beil, couldn’t double them regardless, and took serious damage in return (if he even hit, which wasn’t a sure thing).
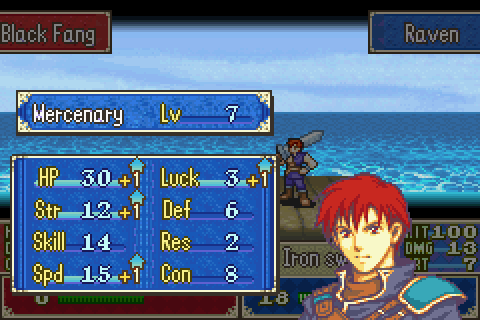
Raven shows us how it’s done. The luck is unusual and nice. Raven is the master of the left side of the screen: his HP, Str, Skill, and Speed all cap or come close to it. His Luck, Def, and Res are comparatively poor.
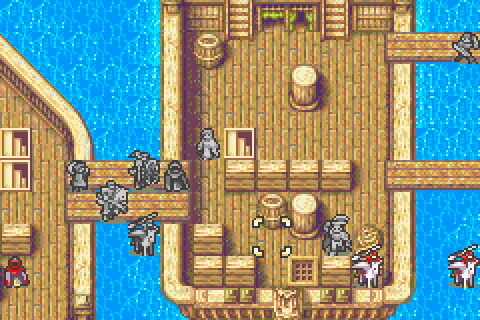
I checked pretty carefully and there was absolutely no way to actually eliminate enough enemies to be safe or to form a wall. But this almost-square will do. Only Raven and Sain- who can both take it- can be attacked by more than 2 enemies. Priscilla and Canas and Lucius can only be hit by 1. Does it look dumb? Yes. But this blobby formation is highly effective in this position. One important thing to note is that I’m certain the only person strong enough to kill his attackers is Sain- who can take many hits. Otherwise, formation or no, one of my strong but fragile characters could kill his attackers and thereby make space for more one by one until he dies.
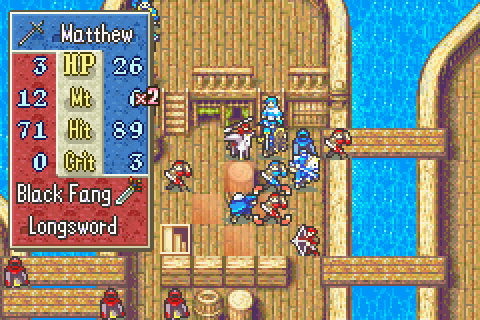
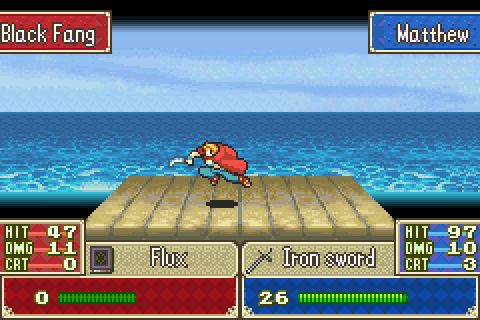
Phew, I survived, now I need to clear the deck again. At times like this, even Matthew has to fight. That longsword is an anti-cavalry weapon. It’s just no good.
And he gets another mediocre-bad level. It would be nice if I could get him to cap his speed before chapter 19xx but that’s not going to happen.
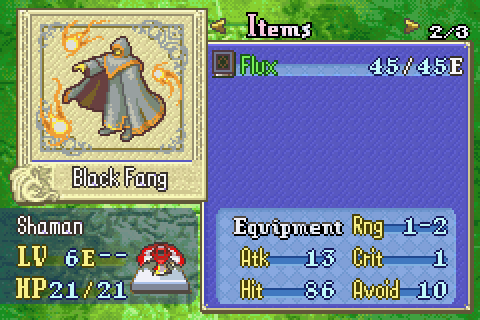
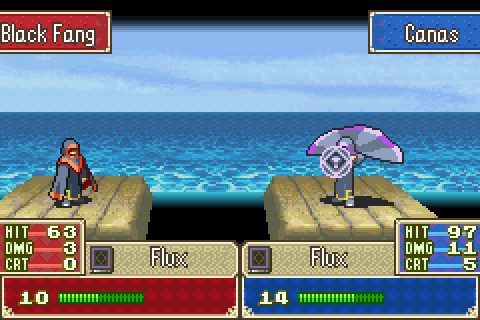
Wonderful! I hadn’t noticed at first that this guy drops his Flux tome. I’d been worried about needing to buy a new one for Canas before chapter 24 when I have barely any money left but with this one + his starting one he’ll be alright.
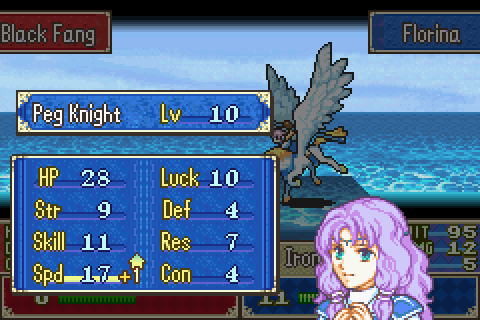
Canas has enough magic power to even take out Pegasus knights. And note how slow that Pegasus knight must be to be doubled by him already. Everyone thinks of them as speedy units, but the enemy ones aren’t at all.
Like Raven, Lucius is a master of offense whose Magic, Skill, and Speed growths are great. Unlike Raven, he has bad HP but fantastic Resistance. What I’m saying is, this is classic Lucius.
Whew! I tore down most of the big threats and the ship is now largely safe. If both shamans go for Matthew and hit he’s in trouble, but that’s really unlikely and everyone else is fine.
Uh oh. There’d been minor reinforcements up till now, but no giant waves of Pegasus knights. This is going to be tough.
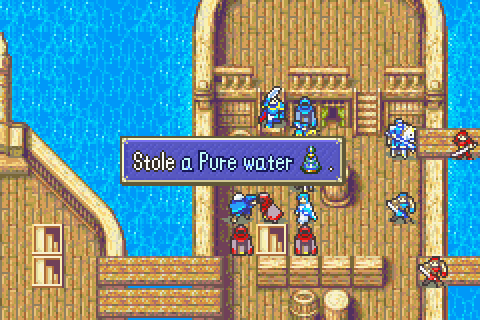
Another Pure Water is mine. That shaman south of Lucius also has one, so I’m going to keep him alive this turn.
You know, the point of this screenshot was to point out that even with just 2 levels, Raven can completely slaughter his own kind of unit. But… now it’s about his sword. Look at it bending and curving as he does his silly jumping attack! I never noticed that till I took a screen shot of it.
Oh and just to make sure you get why Pegasus knights aren’t a threat to good units: 13 Wt. Steel Weapons are generally horrible and Pegasus knights in particular are awful with them, but the game loves to give them steel lances.
5 Con. 13 Wt. 8 Speed. This means… 0 functional speed. These guys are so slow that Bartre can double them! Actually no, Bartre is so worthless that he can’t even do that. But everyone else in the whole game can! Even a starting level Oswin.
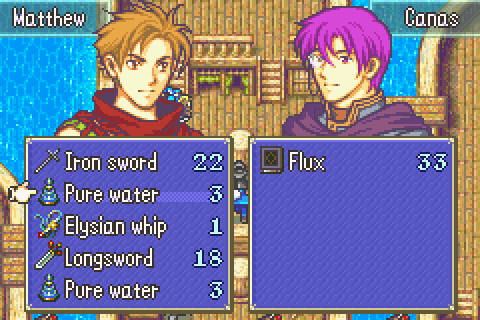
Remember, you can’t steal if your inventory is full. I had to make arrangements to offload these 4 treasures to Canas so Matthew can keep on making me rich.
Things were just looking good again when more Pegasus knights spawn. This time at least I have Hector more or less ready to deal with them if everyone else can stay out of range.
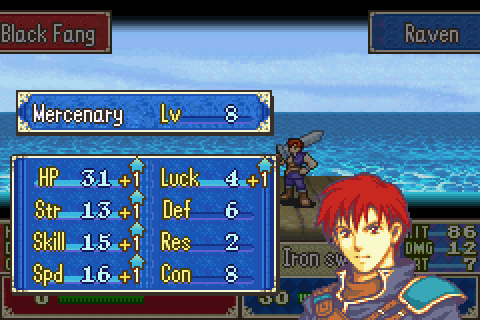
Another classic Raven level + a nice point of Luck.
Just like Raven, Canas comes so good with no or nearly no leveling that he can one-round kill people of his own class a lot of the time. Unlike Raven, he’s doing so without HHM bonuses of his own.
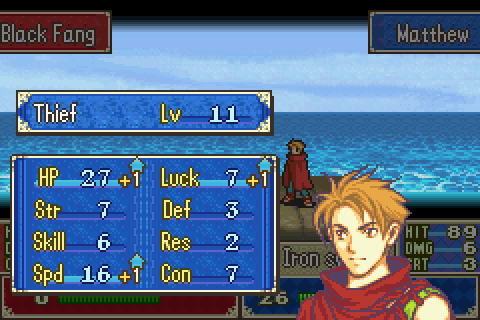
Matthew is pretty effective in fights vs mages. He has enough damage to kill them and enough dodge chance that he doesn’t need to worry about them that much even if his resistance is bad. But you can see that he’s really declined in effectiveness from his glory days on chapter 13 and 13x when he was one of my best units. Soon he’ll barely be able to fight at all.
Priscilla just keeps up the healing. She got hit in the blob formation turn as expected and I stupidly forgot to give ANYONE vulneraries on this chapter. So she’s been stuck at 3 HP this whole time, causing me some problems.
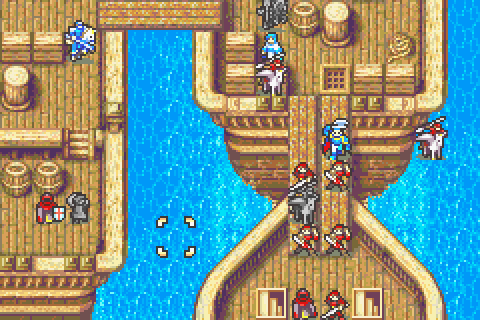
Another ship is about to appear out of nowhere and a bunch of enemies are about to spawn-move off it. Fortunately I already know this so I’m in position to deal with it. Meanwhile, a big force goes for Zoldam’s ship. There’s one more guy to steal a Pure Water from, plus I need to steal the Guiding Ring and then be ready to kill him. At the moment my plan is to steal the ring, rescue-drop Matthew out, keep fighting for another turn or two, and then kill Zoldam on turn 11.
That plan requires a fair number of people- especially since there will be more reinforcements here- but the bigger reason for the giant crowd is just that I want fragile people out of the way of the bottom ship that’s about to appear and the pegasus knights
This is the kind of thing Zoldam should say the turn BEFORE the ship arrives and enemies spawn-move off of it.
Bam! Suddenly the map changes as a ship is added and enemies pour in.
Both of Florina’s levels this chapter have been disappointing. She’s turning out waaaay too fragile and not that damaging. Oh well, the others are doing well.
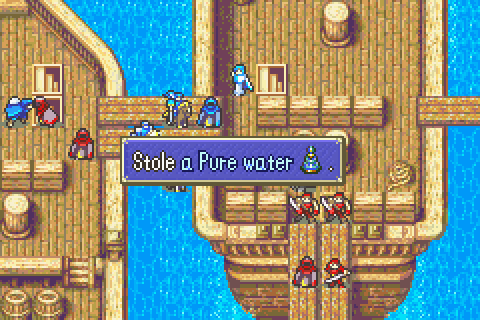
That’s the last pure water shaman, I got all 4 of the things.
If my Hector had average Def, he would actually be invincible against this crowd of sword users. Unfortunately, mine has rather bad Def so they can actually do enough damage to him to add up. This shaman would kill him in 2 shots either way though, so Florina will need to take it out.
Canas gets another good level. I was hoping for unnatural good luck and a second point of speed, but this is very nice anyway.
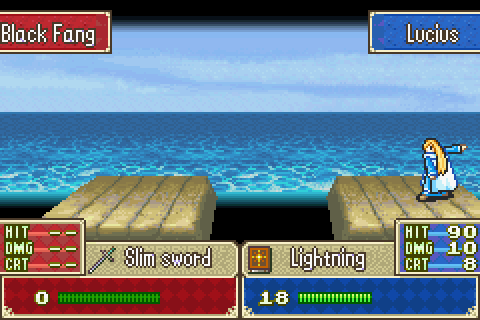
Lucius kills one of the swordsmen fighting Hector. More just for free XP than to actually thin the herd.

Another very Lucius level.
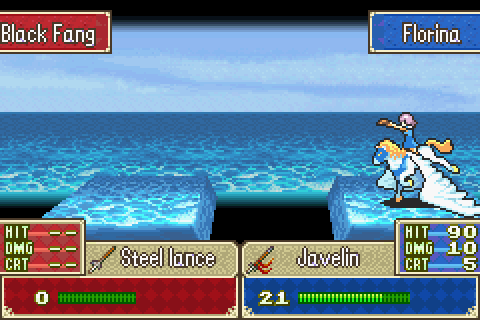
Florina may have got bad levels lately, but she’s still improved enough (especially with that angelic robe, thanks again guys) that she can fight her fellow Pegasus knights effectively.
Darn it, man! The three stats I can use least.
It shall be an heirloom of my kingdom!
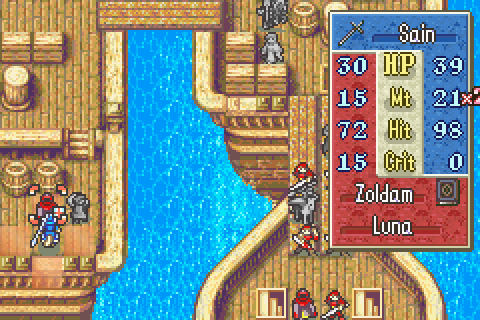
Yeah, this is a bad turn 10 situation. Hector is mangled, there’s like 5 swordsmen and more importantly there’s a shaman I can’t do anything about who can kill him, the presence of 2 pegasus knights means Florina isn’t safe either, and Raven is actually too hurt on the other ship to keep fighting. I wanted to continue one more turn, but I just didn’t have the luck for it this time. I’ll have to get what kills I can and then have Sain finish Zoldam a turn early.
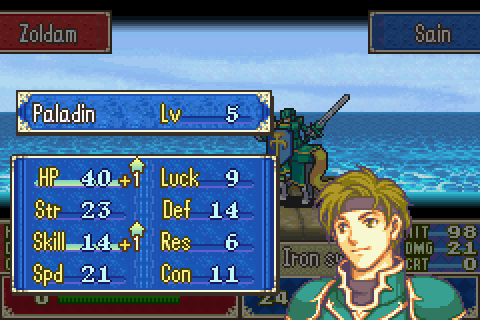
Alright! After 10 grueling turns of intense strategizing and several close calls, all my work could be undone by a single critical hit. There are 12.7% odds right now that I have to restart and it was all for nothing. This boss fight sucks.

Having been killed, Zoldam gets some kind of warning to his base. Presumably with magic. It seems to have worked since they’re aware of our presence next chapter. It’s quite unclear in not only Elibe but really the whole series just what magic can do. All the player can ever do with a mage is fight. That’s better than weapons usually, but not by much and it’s really not fundamentally different in any way. But we see enemy mages- and sometimes our own too- teleport around and send magic messages and create giant flashes of light and permanent sandstorms and countless other things. And evidently they do so without tomes, even though those seem to be necessary for battle magic.
I’m not going to complain about a level this beast gets after the blessing I got in Lyn’s story
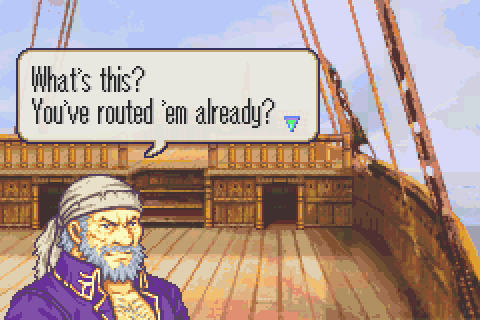
Even though we’re totally about to die, Fargus runs up onto he deck and is impressed that we won because we killed the boss. If you just survive till the last turn, Fargus instead runs up and routs the enemy himself offscreen. He IS a level 18 berserker afterall. Zoldam can’t beat him even with a critical.
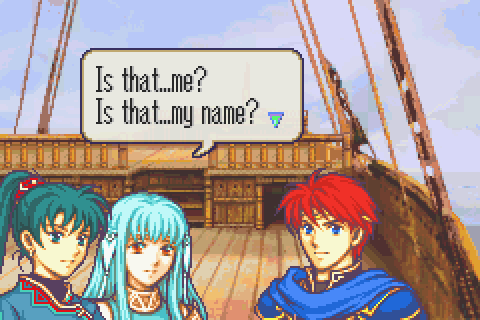
Ninian wakes up (and is heavily implied to throw up at the sight of the corpse-strewn deck) but she not only has no idea where she is or what she was doing on that boat, she’s forgotten who she is too. It looks like we’re not going to get any answers for a while.
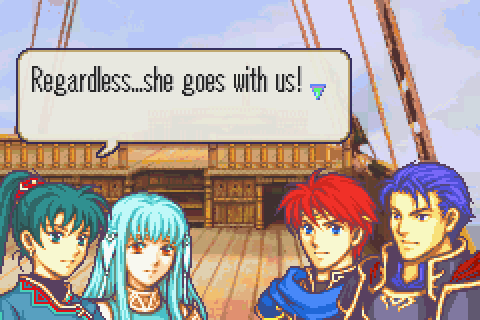
There’s a debate about whether it’s safer to leave her on the ship or take her to the Dread Isle where everyone can keep an eye on her. As the only one who really knows her, Lyn’s vote carries the day.
And we’ve landed. That’s a very pretty background. Really desolate and forbidding looking too.
Total Restarts: 8 (Phew, didn’t need to restart this time, but it was close)
Turn Surplus: +6 (I lost a lot of XP ending it a turn early, but I did at least net +1 here)
Things I Regret Missing: The lockpick on chapter 11, that darned archer on chapter 11, this one brigand who attacked Marcus on chapter 12, 2 more brigands who ignored everyone else to attack Marcus on chapter 13x, and 2 archers who ignored Hector and Dorcas (DORCAS!) to attack Marcus on chapter 14, and like 10 more enemies I could have killed if Hector could have survived one more turn on chapter18