Part 25: Chapter 19x and The War Room Part 20 & 21 (Long-ranged Magic & Basic Rescue Mechanics)
So for many years I saw people calling this chapter “Prisoner of Magic” and assumed this was just some idiot’s typo that got copied and repeated endlessly by people who didn’t stop to think about the fact that it should clearly be “Imprisoner.” And the one time I remembered this whole issue while actually playing through the game, I happened to be on Eliwood’s story where it is indeed entitled “Imprisoner,” so that further reinforced my impression that this was just some players getting it wrong.
It was only a few months ago that I realized that the chapter actually has a different name in Hector’s and Eliwood’s stories. Possibly my original theory about some dumb typo getting copied around is not far from the truth afterall.
Chapter Summary
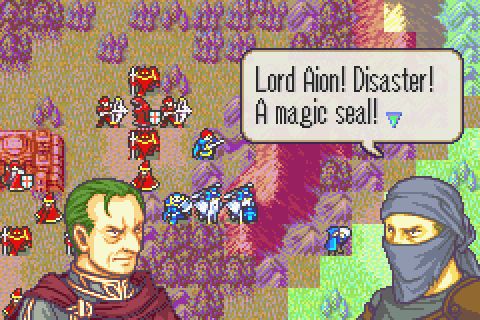
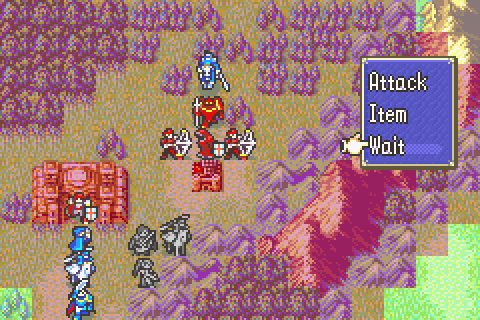
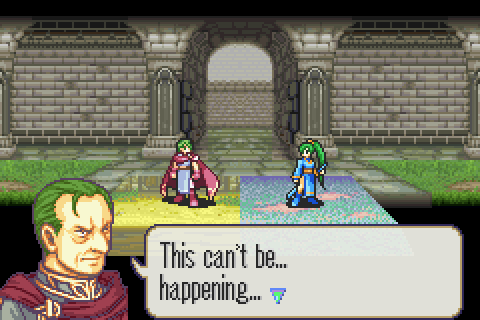
After defeating Uhai, Hector and company stumble through the dense forests of the Dread Isle looking for the Dragon’s Gate and wander into another Black Fang ambush- this one led by Marquess Araphen. There’s been a strange, unsettling, and unnatural presence felt on top of the actual dread of the dread isle for some time, and this is suddenly revealed to be caused by the reality-bending nature of a strange man called Kishuna who suddenly appears, neutralizing all magic in the area of the battle.
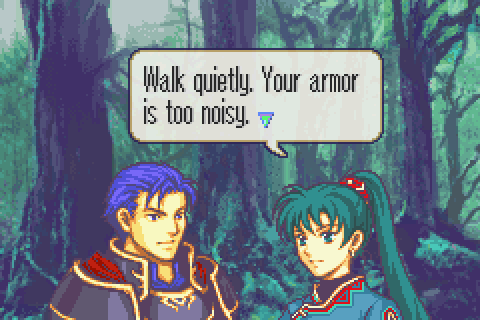
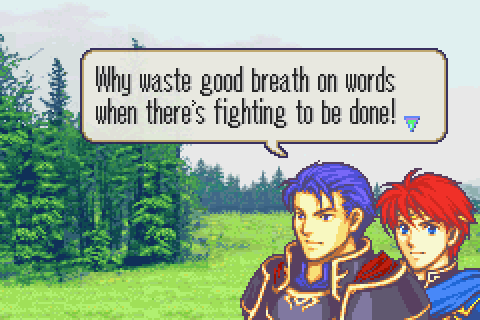
The chapter opens with Lyn and Hector at each other’s throats again because of Lyn being rude to him as usual- this time she can’t stop criticizing the fact that his heavy suit of armor makes noise.
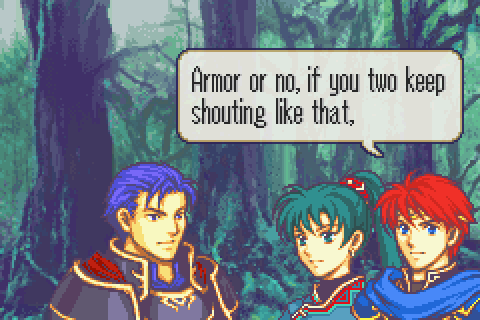
As usual it falls to Eliwood to be the adult and mediate between them while pointing out that their little shouting match is far more of a problem than Hector’s armor ever was. To their credit, Lyn and Hector do both acknowledge that he’s totally right and their remarks were uncalled for.
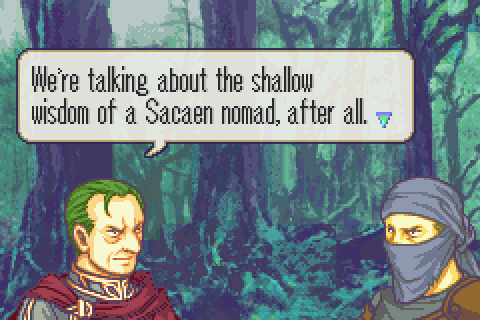
They may have swapped Marquess Araphen’s palette but they forgot to change his trademark racist jabs at Sacaens. Clearly Uhai failed because he was Sacaean rather than because Eliwood’s group is overwhelmingly powerful for a bunch of assassins to be taking on.

An enemy shaman who looks exactly like Zoldam and Heintz (they make like 8 different portraits for random minions to unimportant brigand bosses but only one shaman for the whole game?) teleports in to inform Eliwood that he’s now under attack and then teleports away. For some reason Eliwood says ‘Oof!!’ I’ve never been sure what to make of that. The guy wasn’t close enough to have punched Eliwood or anything, nor was there any animation to suggest an attack of any kind. He just popped in, chatted, and then vanished. And then Eliwood says “Oof.’ Maybe it made more sense in the original Japanese or something.
It reminds me of a painting I saw in the Museum of Modern Art in NYC one time: http://www.moma.org/collection/obje...object_id=79298
He’s right; I should wrap this up.
Battle Preparations & The Map
Units Allowed: 8
Units Brought:
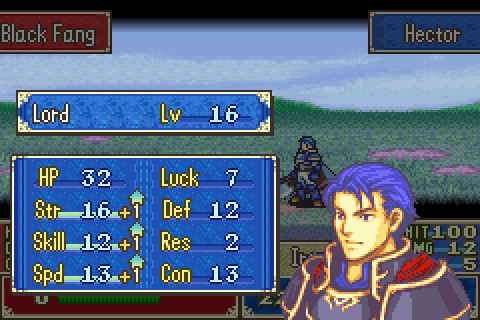
1) Hector. Required, as always. Plus he’s great for this level, also as always.
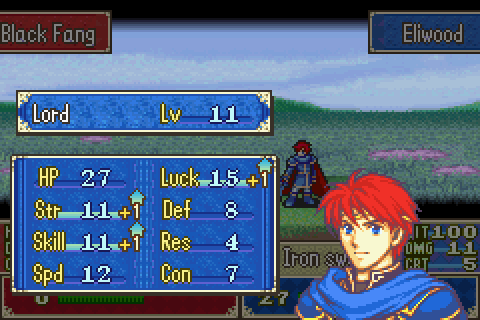
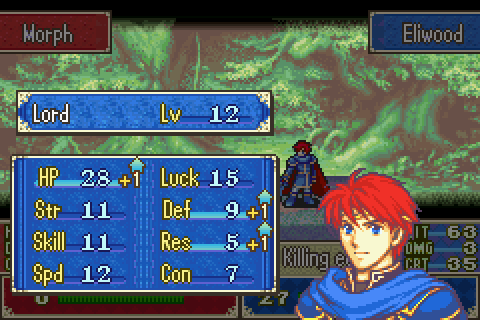
2) Eliwood. Has a good set of stats for cheaply taking on the axereaver pegasi and is effective vs knights with his rapier, plus he has an A in swords so he can hit Kishuna hard with a silver weapon, plus I need to train him hard to get Linus’s Four-Fanged Offense.
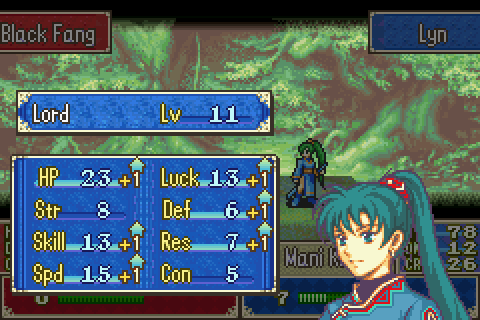
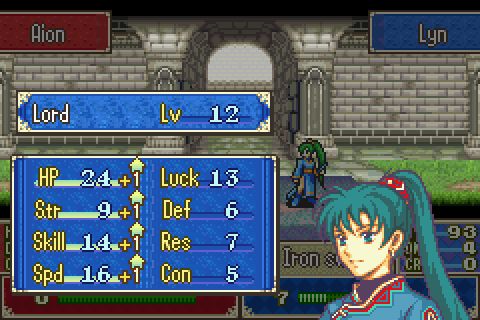
3) Lyn. Pretty much just an inferior Eliwood at this point, but I also need to train her.
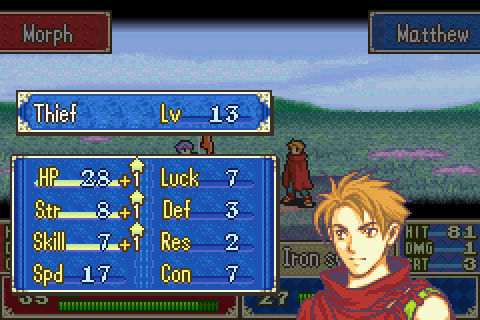
4) Matthew. Can’t fight worth a darn here and there isn’t much to steal… except for the single most valuable item in the whole game.
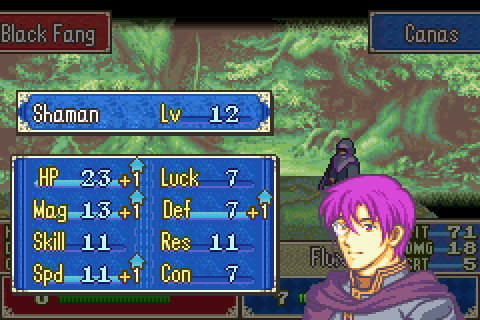
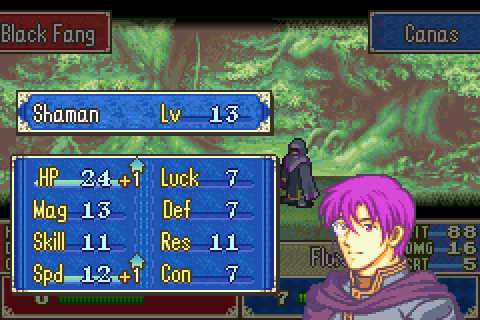
5) Canas. That dripping sound you hear right now is me drooling as I realize that Canas might be able to solo this entire level given some decent terrain to stand on. He can kill knights by the truckload with his adequate speed and huge damage and enemy mages can’t even scratch him while he kills them in 2 hits- and with one more point of speed he’ll be doubling them. True, Kishuna will make him useless in the end stages but no one else will rip up everything else on this stage so easily so it’s great XP for him.
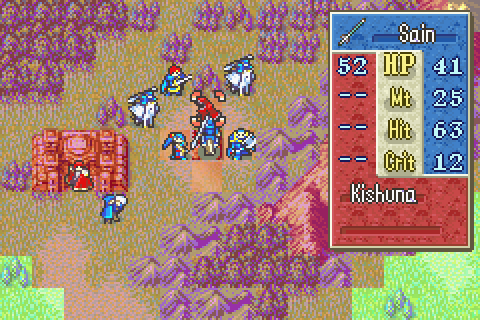
6) Sain. I don’t intend to use Sain much here, but he’s highly effective as usual. Critically, I need him to have a chance against Kishuna.
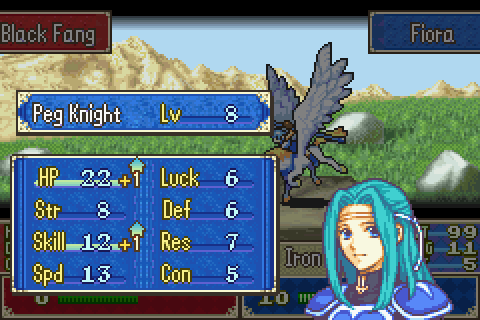
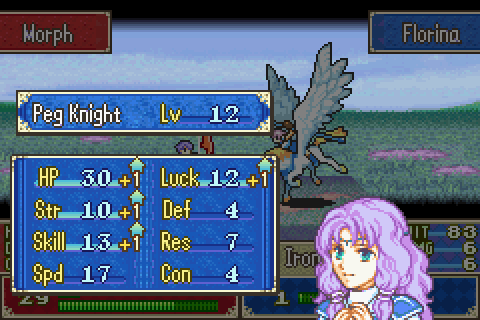
7) Florina. It’s an air-drop map, plus she’s good against mages and other Pegasus knights at this point. Not even bad against knights.
8) Fiora. Same as Florina but not as good.
Notable Units Rejected:
1) Raven. I really want to use him and he’s definitely better than Eliwood or Lyn overall, but I desperately need to feed them some XP now and he can kind of wait. Further, Eliwood and Lyn have anti-knight weapons but Raven doesn’t really, so the upshot is that they’re possibly better on this particular map.
2) Guy. As I said last time, I do want to give him some XP to make sure I get Jerme’s level, but he can’t scratch knights and he can’t survive mages and he’s really not even as good as Lyn or Eliwood at this point. Or maybe even Matthew.
3) Lowen. Lowen would almost be good here, but his Res is too low for him to be properly tanky and his Str is too low to take on knights.
4) Priscilla. For once, healing is basically not useful on this map. That you’re fighting so many mages basically means you’re either invincible or dead from full HP. Also Kishuna makes healing impossible in a big area. I also need every good fighting character I can muster to beat down Kishuna and I only get 8, some of whom have to be non-fighters like Matthew. Plus the less XP Priscilla gets, the easier I can get Jerme’s level.
5) Serra. Same as Priscilla but with 2 less movement. As usual.
6) Dart. Dart would be pretty solid here if not for the fact that each of those Pegasus knights has an axereaver.
7) Marcus. I’m not quite that desperate for anti-Kishuna firepower.
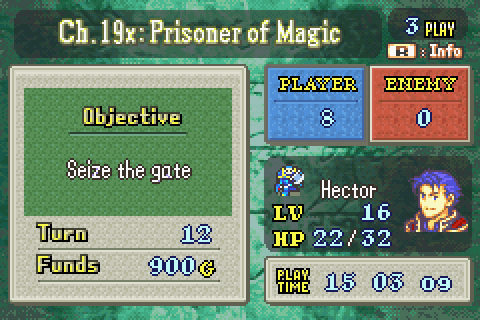
Objective: Seize Gate
Secondary Objective: Steal Silver Card from Marquess Araphen
Secondary Objective: Visit the ruin (Village) in the bottom right for a Goddess Icon.
Secondary Objective: Kill Kishuna to unlock the sidequest
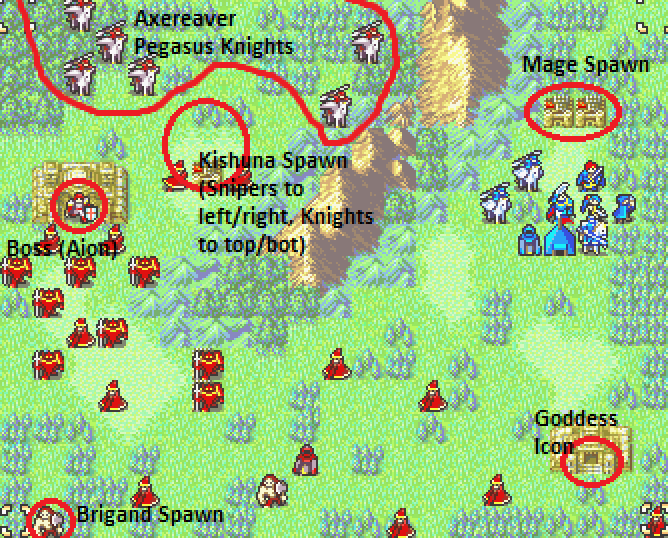
Reinforcements: Well there’s mages from the forts from about turn 8 to 12 or so. Plus a brigand or two from near the bottom left. Bizarrely, the brigand you see on the map there is actually a reinforcement who shows up before the first player turn. So functionally he’s on the map from the beginning… except not while you’re choosing your formation. No idea why they did that, but he’s no problem. A much bigger deal is that Kishuna and some absolutely elite troops are going to teleport in and spawn-move on turn 3 (though they don’t actually move, just attack). He’s got level 15 knights and level 15 snipers. No seriously, level 15 promoted units. We won’t be fighting those again for like 15 chapters. If you don’t know they’re coming and you do an air-drop, you WILL lose. Kishuna himself is the big game-changer here though, as I’ll get into.
Turns Allowed: 10
Well this is a weird, weird chapter. All of the Kishuna chapters are really, but as a first-time player this one really takes the cake since you’ll have no idea what to expect.
The time limit here is absolutely brutal; I’ve seen 0 levels with more reasonable time requirements. Looking at the map, I don’t think I could have actually won before turn 10 with the units I had. Even if I had Sain solo nearly everything. See, even he can’t beat down Kishuna’s guards that fast and must kill Marquess Araphen before you can safely kill Kishuna. And Sain can only do 50% of Kishuna’s HP with a silver lance, so you really need the ENTIRE party in position by the time you go for him. And even with mass-air dropping, that’s going to take time. And the exact positions of Kishuna’s guards + Marquess Araphen’s bolting before turn 3 makes it very hard to drop people efficiently anyway. Plus there’s just the little matter of needing to seize the gate after Kishuna is down. If Hector has to fight him, that takes minimum 2 turns to walk. If by some miraculous chance you still have 2 people capable of rescue dropping, it’s still 1 more turn.
One thing that helps a lot is that the enemies don’t have a lot of variety. Being good against both mages and knights means you can run over everything on the chapter. It’s important to notice the nature of the enemy force before battle in terms of both class and gear and think about which of your characters will do well against them. For example, knights are best beaten by magic damage or axes. Among magic users, mages like Erk are decent against enemy mages while shamans like Canas are overwhelmingly powerful against them. Among axe users, anyone with a handaxe can fight mages decently well.
This is also a chapter that’s much easier to approach when you know about the enemy reinforcements (specifically at what point Kishuna will completely shut down the enemy and render your own mages useless on offense).
Lastly it’s good to note that this is very definitely an air map. The enemy has not a single archer or axe user and the terrain is rough and ground paths to the both circuitous, so you should bring every flying unit available and use them extensively.
The War Room, Part 20
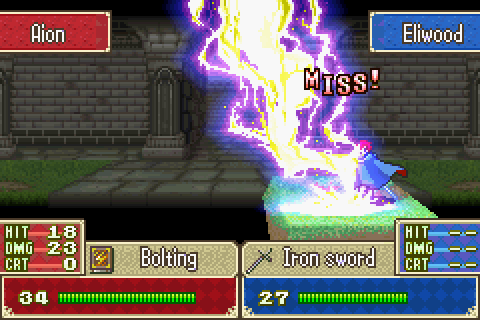
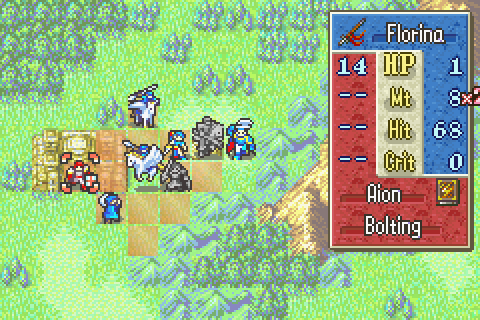
There are suddenly a dozen tactical war rooms I need to go through but not many strategic ones. Oh well, here’s another tactical one. So Marquess Araphen is packing some serious heat this time around. A long time ago I mentioned that one reason ballistae are totally unimpressive is that there exists long-ranged magic which is many times better. That’s what you’re looking at here:
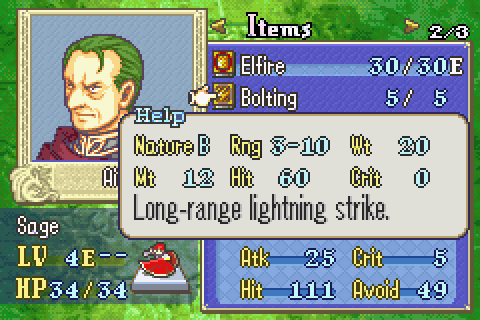
The longest-ranged weapon mentioned so far is the longbow, which hits range 2-3 and sucks even for a bow in statistical terms but is decently useful nonetheless. Bolting hits 3-10. And at this level it hits like a car carrier loaded up with pickup trucks which are themselves loaded up with bricks of solid nitroglycerin.
Look at that 12 Mt. On top of Marquess Araphen’s solid magic score and coupled with the fact that most units’ Res stats are terrible, that will instant-kill many of your troops. And it will do so from halfway across the map. The accuracy is bad for Anima, but as a boss he has the skill to pull it off. And it’s not even that bad in absolute terms anyway. The big weaknesses it carries are the 3-10 range (meaning no fighting back up close) and the 20 Wt, meaning anyone wielding it is going to have close to 0 speed and therefore be doubled by Bartre wielding a steel axe and have no dodge chance either. Also it only has 5 uses, much like a ballista. Unlike the ballista, no one can take 5 hits from it at this point and I don’t have the time to waste on that anyway.
The mere presence of an enemy with Bolting – or the similar light spell Purge- on a map should completely change your strategy and tactics for that map. You must at all times be aware of their range and position. You should concoct a plan to eliminate them as fast as possible so you can move freely. You should probably outright not bring people who can’t take a hit from it. Eliminating them is usually priority 1. But you can’t do that with this guy really because at this level he’s just too dangerous to even approach and he’s well-guarded too.
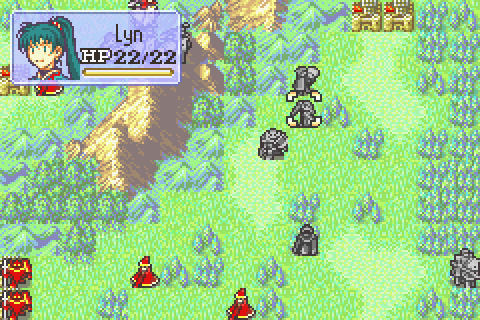
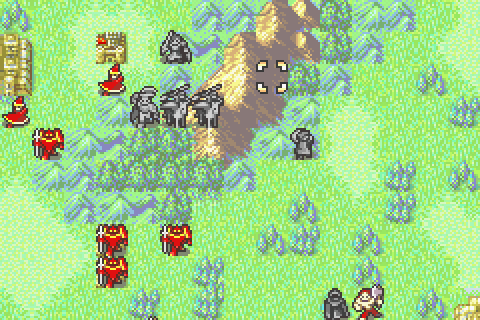
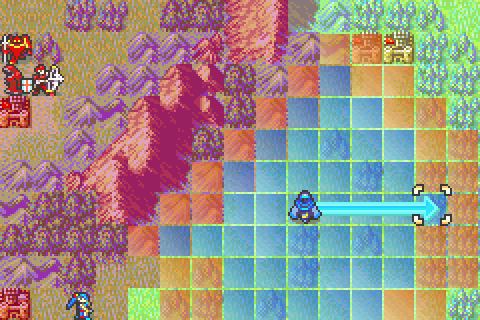
That range! There’s no way to get near him! But wait, it’s not that bad. See, Marquess Araphen is on a gate so he doesn’t move. The displayed range assumes he moves. To find the true range you need to worry about, just count out 10 spaces from him in a direction (here that reaches the thicket the cursor is on) and then just look at the diagonal lines back from that square that will form a diamond around him. Try to remember the most notable looking square that’s on the edge of the range so you can keep track of it.
Honestly, you should re-check the range of people with bolting pretty much every time you make a move until they’re dead. And if you can put a person in their range such that that person definitely won’t die even if hit, you should probably do it. The next best thing after getting to them fast and killing them is making them run out of ammo, same as with a ballista. Remember: tomes lose durability even on misses.
Back to Preparations & The Map
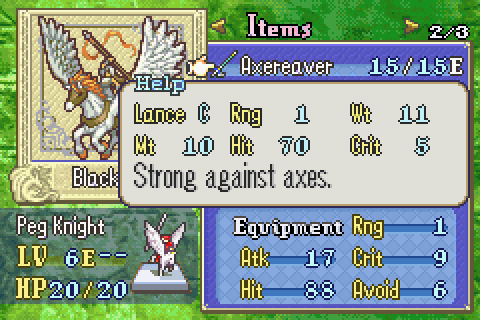
I’ve mentioned a couple of times that every Pegasus knight on the level has an axereaver and that’s the kind of thing that totally changes what your approach should be. Always check the enemy inventory before deploying to spot dangerous weapons and stealable goods. Axereavers are pretty serious weapons. They hit hard like steel weapons but with a small crit chance and they’re a good deal lighter- though still too heavy for these pegasus riders. More importantly, they’re incredibly powerful vs axes (+2 damage, +30 hit, and -2 to enemy damage and -30 to enemy hit) but incredibly weak vs swords. So while the usual counter to enemy Pegasus knights is Hector or another axe user, that would be a horrible idea in this case.
The War Room, Part 21
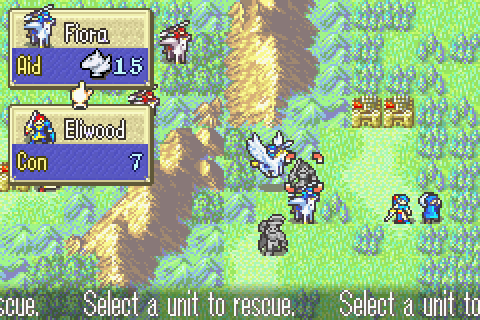
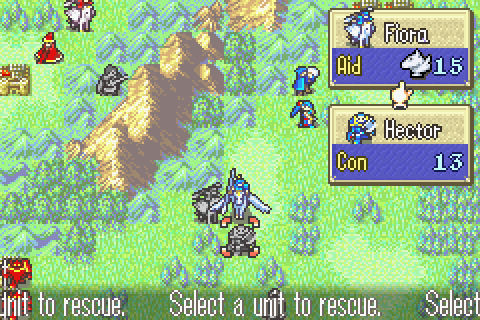
Surprise! I haven’t had 2 war room sections in one chapter for a while but this one really calls for it. It’s long-past time I did a war-room about how rescuing works. There’s so much to say that it’s been hard to know where to put it or how to begin, but I’ll just start with the basic rules of it and go into strategy in a future war room:
As has been indicated several times before in this Let’s Play, Rescue is a command much like that of using a vulnerary. For an infantry unit it immediately ends their turn, but mounted units can continue moving. It can be done after trading or rearranging items (but obviously not before, since it ends the turn other than for purposes of mounted unit continued movement).
As noted in the War Room Part 2, non-mounted units may Rescue any ally whose Con is less than their own. Male mounted units may rescue any ally whose Con is less than or equal to (25-their own). Female mounted units may rescue any ally whose Con is less than or equal to (20-their own). Apparently men ride bigger horses or something. And no one may ever rescue an ally when they already are carrying one or rescue an ally who is him/herself carrying an ally.
So it should immediately be apparent that mounted units enjoy 2 mechanical advantages when it comes to rescuing: first, most of them can rescue much larger allies than infantry units with the same Con and second, they can continue moving after rescuing an ally, allowing them to transport the ally immediately.
So what does rescuing actually DO? Well first, the rescued unit’s turn ends. Even if it has not been used yet that turn and is dropped in the same turn it’s rescued, it cannot take any action (without the help of a bard/dancer).
It’s tempting to think of the rescued ally as being pulled into the space of the rescuer, but this isn’t entirely accurate. For one thing, a rescued character does not grant support bonuses to allies within 3 squares of the rescuer. For another, they can’t be targeted by enemies in any way (the main obvious purpose of rescuing is to protect a vulnerable unit in this fashion). And the unit cannot un-rescue itself and move out of the rescuer’s square on future turns. It’s probably more helpful to think of the unit as having ceased to exist except for the purpose of trading.
So that’s what happens to the rescued unit, what about the rescuer? Well it can’t do much else on its current turn- as if it had drunk a vulnerary- but on future turns it essentially behaves completely normally except for taking a massive stat penalty. While carrying an ally, the rescuer is reduced to half base skill and half base speed (round DOWN). Essentially this is equivalent to saying it takes a penalty to its accuracy equal to its skill and a penalty to its dodge equal to its speed. The more skillful and speedy your unit, the more this penalty hurts it. Furthermore, the decrease to base speed will often mean the unit no longer doubles enemies or is in fact doubled by them. This + the dodge decrease means that carrying an ally into battle is hugely dangerous.
Now there are a few secondary commands associated with rescuing: Drop, Give, and Take.
Drop is essentially the un-rescue command and is executed by the rescuer. It’s the same kind of action as drinking a vulnerary or rescuing in the first place: infantry units immediately end their turn, but cavalry can finish their movement (but not do anything else else). Rescued units can be dropped into any adjacent square which they are capable of moving into. So Lyn cannot be dropped onto a peak by Florina, but she could be dropped onto a mountain just as easily a plain. Dorcas could drop Fiora onto an ocean or a peak even though he can’t traverse either of those himself. The dropped unit’s turn is immediately over, but a bard could allow them to move.
Give is a command executed by the rescuer which passes the rescued unit directly to another ally. It’s the same kind of action as Trading, meaning even infantry can still do things like attack or even rescue another ally immediately afterward. You can even do things like Give, then Trade, then Attack. You can only Give to an ally who would be capable of rescuing the person you’re carrying. So they must have sufficient Con, not be carrying someone already, etc.). It’s ok if the person you’re giving to has finished their turn already though.
Take is a command executed another ally which passes the rescued unit from the rescuer to that ally. It’s the same kind of action as Trading or Giving, meaning even infantry can still do things like attack or even rescue another ally immediately afterward. You can only Take an ally who you could rescue. And note that while you can Take and then immediately Drop an ally, you cannot Take and then Give. That’s important and unfortunate.
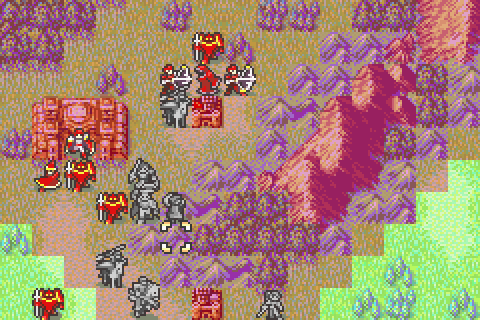
Battle Preparations & the Map
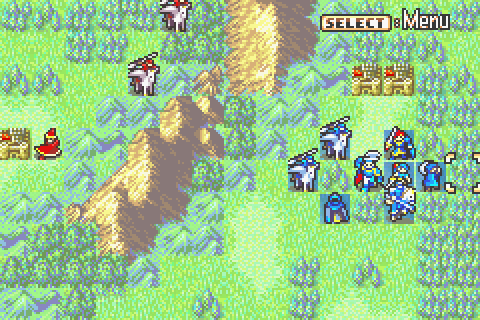
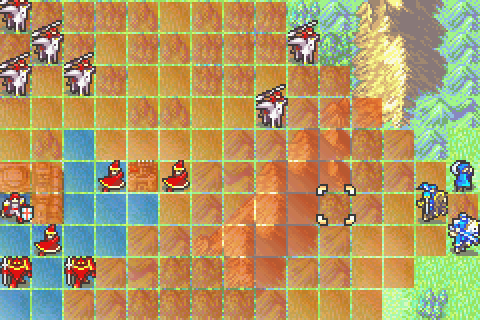
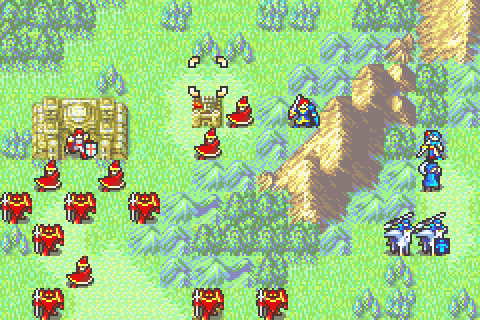
This is the first chapter in the whole game where you can have 2 flyers available and it’s best to take full advantage of that since the huge formation of mountains in the middle means otherwise you’ll have to spend far too long walking around to get to the boss.
This formation will allow me to immediately begin rescue-dropping sword users over the mountains with Florina and Fiora while Canas (backed up by Hector and Sain) begins sweeping through the main enemy groups in the south.
Equipment is somewhat unusual on this level. One reason I didn’t bring Raven is that he doesn’t yet have an A in swords, so he can’t equip a silver sword. Kishuna is tough as nails and a lot better at dodging, so you’re going to need to bring the heaviest weapons available. Sain is packing a Silver Lance, Hector has a Silver Axe, Florina has a Heavy Spear (neither she nor her sister can yet wield a silver lance and they need more firepower to take out the knights on this level), Lyn has a Silver Sword and Eliwood has the Killing Edge. The Killing Edge went to Eliwood because he has more Strength than Lyn, so his criticals will hurt much more.
Everyone has a vulnerary since I couldn’t bring a healer, but I hope not to use any of them.
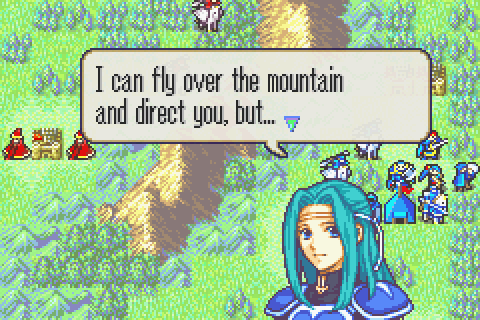
Fiora shows that she knows something of tactics herself- appropriate for someone who once led a company of Pegasus knights.
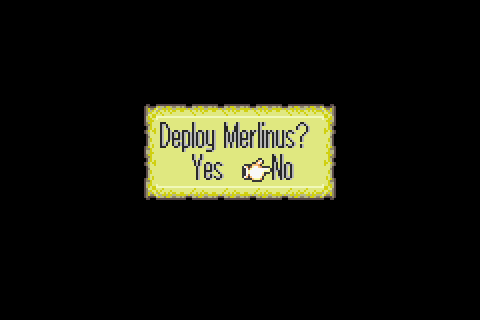
The reason I don’t bring Merlinus to this chapter is left as an exercise for the reader.
Oh fine. It’s because a ton of mages are going to spawn near him and if he’s on the map, I can’t make them go for Canas instead of him. If I bring him, he’ll certainly die since only Canas can remain to guard him. Further, Canas won’t be able to get the XP from the mages because they won’t start attacking him till Merlinus dies- which will take most of the turns between them starting to spawn and me finishing the map. I value a level or two for Canas over maybe a 10% chance of Merlinus dodging everything and surviving and therefore leveling. And both are better than leaving behind 2 other guys to kill the mages off the fortresses as they spawn and therefore being unable to efficiently complete the chapter or kill Kishuna.
The Characters:
“Combat is an equation. Those with intelligence have a natural advantage.” – Marquess Araphen, Chapter 19x
Marquess Araphen makes his triumphant return! He’s still the same arrogant, racist jerk we all know and love. And this time we get to kill him for it!
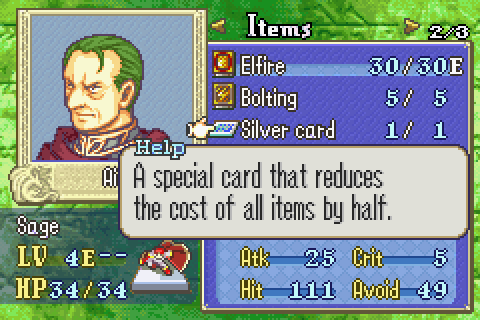
But NOT before taking this precious item. A unit carrying the silver card buys all items at half price. Since you normally buy items for a price equal to their value and the value of the item is not changed when you use the silver card, this means that every purchase with the silver card actually INCREASES your assets. Further, it’s now possible to sell an item and then spend the resulting money and actually break even! This is a game changer. It will easily be worth 40,000 by the end of the game + its own actual value and not even getting into the great usefulness of being able to buy gear more freely once you have it.
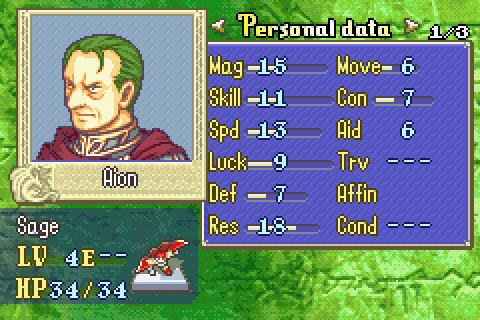
In large part because of his tremendously powerful weapons, but also because he has a gate and quite respectable stats, the Marquess is a formidable enemy. Fortunately, this next character will defeat him for you:
“……” –Kishuna, Chapter 19x
One of the most enigmatic and intriguing characters in the game, Kishuna’s nature and history are impossible to uncover in Eliwood’s story. However, several Hector’s story exclusive chapters reveal more of the truth. I’ll reveal details about him as they’re discovered in the story.
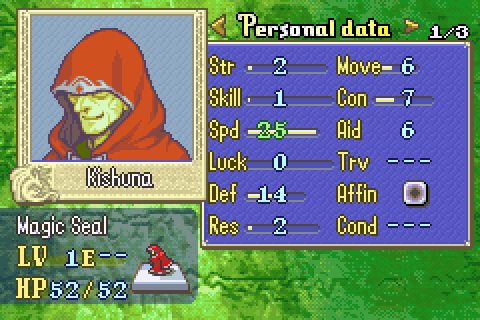
For now, it’s enough to know that he’s known of by Black Fang elites, but not under their control, that he’s unwilling or unable to speak, and that his very presence bends the laws of reality to nullify all magic anywhere near him. His unnatural presence sets people on edge and disquiets them as well.
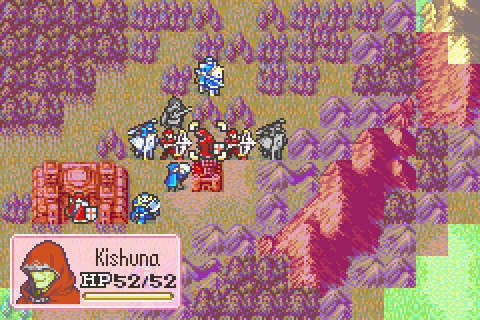
Kishuna can’t fight, but he’s almost impossible to kill. Just look at that speed! Nothing and no one can double him and his avoid of 50 means he’s almost impossible to hit. Res of 2 means absolutely nothing since even Bolting doesn’t have the range to affect him from outside his magic-nullifying zone, but that 14 def and 52 HP will mean that even those attacks that do hit him will barely harm him.
But there are 2 bigger problems: first, he brings with him a contingent of matchlessly powerful guards who will slaughter the unprepared. Second, you have only 1 round to kill him. He will teleport off the map at the end of the turn he’s attacked, so you don’t get a second chance at this.
If you want to kill him, you have no choice but to fight him with the most powerful weapons and characters at your disposal. And even that isn’t likely to be enough. To be honest, you can either hope for the 5% or so chance that you actually kill him legitimately and restart this level 20 or so times till it happens or you can exploit the RNG. In this case, I consider the latter to be perfectly legitimate.
Playing Through:
Y’know, it’s been a while since I looked at the shaman selected but not clicked animation and I was suddenly struck once again by its awesomeness. Gotta love shamans and their billowing capes and slow charge-ups. Sages make magic look easy. Shamans make magic look powerful. Sadly, druids make magic look like it’s done by weird duck things.
Hector stops just outside of mage range so they’ll aggro to Canas and Sain skirts the left side of the map to approach the village. Meanwhile, Eliwood moves so Fiora can pick him up and Florina can take and drop him.
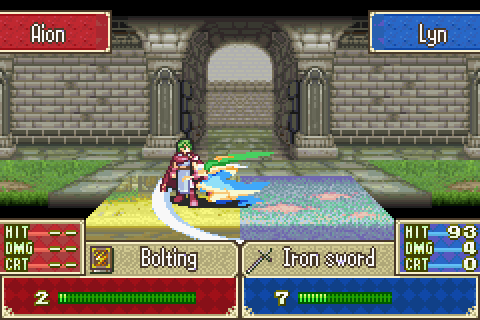
Eliwood is on a mountain where Marquess Araphen can hit him in theory but actually will almost surely miss. But he’ll go for him because in principle, Eliwood can be killed this turn if Bolting and every mage hits him. This has <.01% odds of happening. It happened. I restarted. This time I did things a bit differently, but similar in principle.
You know, that giant lightning bolt totally hit him. He doesn’t dodge nearly far enough to get out of the way of that monster
Fiora is set upon by the nearly Pegasus knights and kills them for a lousy level up.
Next turn, Hector and Florina help Canas kill the first wave of mages, then Fiora prepares to haul Hector over the mountains.
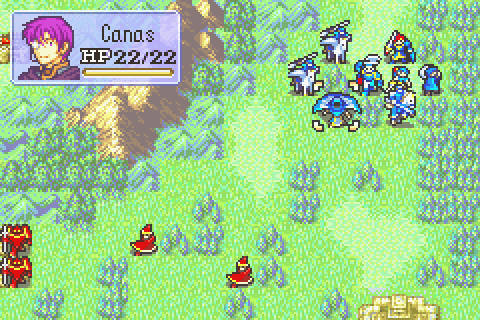
So it’s now turn 3. At the beginning of the enemy turn Kishuna will spawn from the selected space and everyone’s magic will go dead. Furthermore, a huge level knight with a javelin and a silver axe will spawn to his north and south and an even huger level sniper with a silver bow will spawn to his east and west. Anything in those areas is going to die, so I can’t really advance Eliwood. Fortunately I don’t need to because Kishuna showing up at the beginning also hurts the enemy: none of those mages including Marquess Araphen will be able to fire.

Sain visits the bottom right ruin – which for some reason not only functions as but actually looks like a village. That makes no sense. At all. And inhabiting it is a strange old bishop who feigns not to know who the Black Fang all around are. And then hands over a Goddess Icon. Well I’m sure we’ll learn all about this mystery man in 15 chapters or so.
So I crunched the numbers and decided putting Eliwood in range of the enemy about to appear was worthwhile for the chance to kill an enemy mage. On the mountain he has enough defense and avoid that it’s extremely unlikely both the sniper and knight will hit him. Meanwhile Hector is dropped in and Lyn is carried into the area to start hacking their way through Marquess Araphen’s knights and Kishuna’s guards. I need to get everyone in here promptly since killing everyone will take many turns. It’s already the end of my third turn.
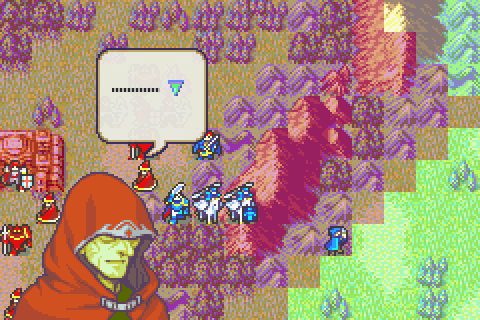
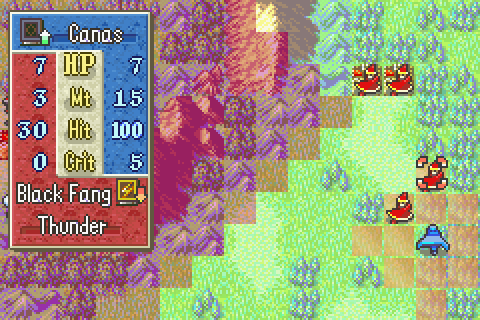
That enormous 10 range red darkness is his anti-magic zone. Notably spells and staves can be used from outside the zone into it, but not from inside it to the outside. So don’t get careless- enemy mages will definitely take the chance to run outside the area and throw lightning bolts into it at you if you leave them alone and stray too close to the edge.
Oh you have no idea.
Fighting is heavy as Lyn and Matthew are both dropped in and Eliwood and Hector chip away at the enemy. Lyn gets a wonderful level.
And even Eliwood gets a solid one as he takes down another mage. He just needs speed, speed, speed at this point. Level 11 is way too late for a swordsman not to be doubling enemies.
Heck yeah! Canas has been eating well this chapter and he finally gets a fantastic level to show for it. Also I love that dense, lush, shadowy forest background for woods on Valor.
So here we have the end of turn 6. Sain is tearing his way through the enemy while I try to thin out the last few knights. But I’m just not making much progress. Kishuna’s guards are barely hurt because I didn’t want to start using my silver weapons on them, plus these knights have been a nuisance. It’s going to be hard to wrap this up in time no matter what I do.
Next turn, I know enemy mages are coming and I want to be ready for them. From this particular wood, both mages can reach Canas but neither can use good terrain while he gets to use the forest. And I think he’ll be able to double them with that recent lucky speed boost.
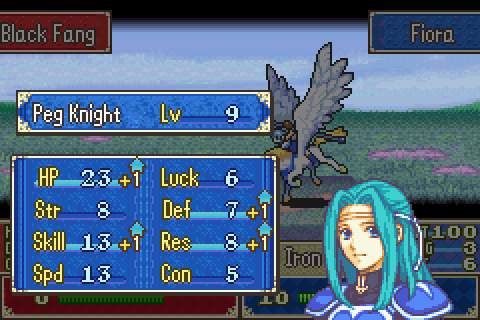
Fiora finishes an enemy others weakened and gets a mediocre level. More toughness is good on Pegasus knights definitely, but at the present time she’s too slow and too weak (look at that 3 damage) for me to level her properly. I can get her more defense in the future if I can just get more kills now.
Classic for my Hector, piling on the speed while his defenses languish.
You can see I’ve been making NO progress on Kishuna’s men. I decided there was nothing for it but to wait for Sain to get his hands on them and have the others clear the weaker enemies. And at last Matthew steals the silver card. Now I can kill Marquess Araphen. But again, only Sain can do it.
I’m going to wait by this knight rather than attack it. That means it will stupidly attack him and almost but not quite die. Then someone else can finish it for massive XP. Think about what I just said: this is an enemy tough enough that it can actually stand up to Sain for 1 round.

Oh and I finally have a chance to have Hector and Eliwood do their support conversation! Florina and Lyn also unlocked theirs, but they’re both busy.
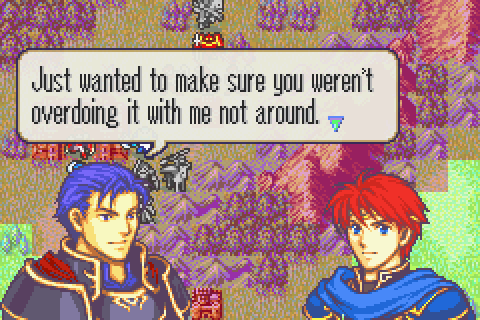
Eliwood and Hector’s C and A supports in particular are pretty great. Their friendship is a lot more compelling than the somewhat rushed supports of other people falling in love and the like. Or at least than some of those.
Luckily, Matthew was able to inflict 1 damage on these snipers. As long as you inflict damage, you can get some decent XP for fighting. But if you double miss or do no damage, you just get a useless 1 XP.
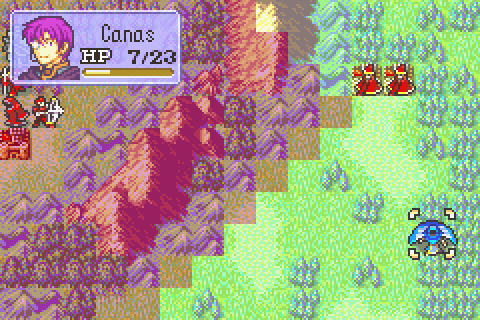
Canas took an axe to the face earlier, but I still calculate he can take on about 10 mages with thunder (and only ½ of these mages have thunder) before dying due to his forest, weapon triangle, solid dodge chance, and great Res. So no need for him to use his vulnerary.
Speed, man! Even with a Killing Edge and his solid Str he could barely scratch that knight Sain had beaten up.
I’m getting seriously worried about Florina’s overall defenses, but she’s doing well on offense at least and that’s something.
Argh, still not even done with his guards! And I haven’t even had a chance to go for Marquess Araphen yet, and the clock is really ticking.
No, Canas still can’t double these mages. Even with their thunder tomes slowing them down. It turns out the mages that spawn from the forts are much faster than those on the rest of the level. Fortunately, he’s still within 1 speed of doubling them and he can easily 2-hit kill them regardless.

There we go! For the mighty deed of killing one of those horrible snipers, Eliwood gets possibly the best level he’s got all game- and he’s got quite a few good ones. This is some Ike level stuff here.

And Florina finally kills the other one. And gets another offense but no defense level.
Here it goes! I’m in serious trouble since I’m in overtime now. And if I kill Kishuna, Marquess Araphen is free to attack But I see little choice. Everyone is ready to go, so this is my best chance to kill him. Then if Marquess Araphen just misses once with Bolting I’ve got it in the bag. I did injure him a bit previously, so it mightbe possible to finish him off on the same turn I kill Kishuna if I still have someone in range ready to attack. Alright here goes-
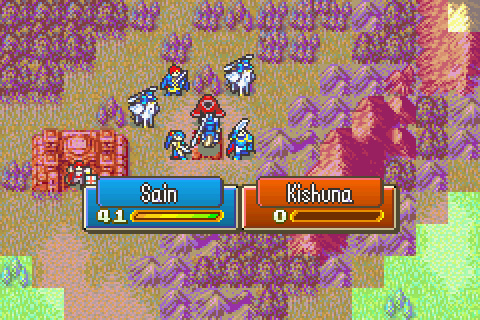
…. …. … what? Really? I JUST KILLED KISHUNA LEGITIMATELY!
Holy cow! I was all set to rewind and manipulate the RNG and wasn’t even thinking about crits, but Sain just went ahead and instant-killed him with one! Wow! You’re the man, Sain!
Hey Marquess Araphen, remember when your bolting was scary? Because Bolting cannot counterattack and because it slows him down to a total of exactly 0 speed, he’s now double-able by literally everyone who isn’t Bartre and can’t dodge to save his life.
Note that he’s not this helpless while Kishuna is around. While Kishuna is around, he’s considered to have no weapon equipped at all so he gets to use his full speed to dodge and prevent you doubling him.
As I’d hoped, he does dodge one of Florina’s javelins so I can actually give the kill to Lyn and give her some more much needed XP if I’m going to get Linus’s level.
Hey, remember that one time when you disparaged her heritage, broke your promises to help her when she was in mortal danger, and sided with that guy who was killing her grandfather after she helped save your life? No? You're just a palette swap? Oh well, you all look the same to me.
Revenge is a dish best served with a side of excellent level-ups. Meanwhile, Hector can’t actually reach the throne so the level continues one more turn while Canas fights on valiantly alone.
My favorite purple-haired god of magic never ceases to amaze.
So that’s everything dead and it’s now turn 12. That’s 2 overtime. I don’t think I could have done much better except by dropping in Sain first instead of Eliwood and having him just kill EVERYTHING. Even then, I only won this fast due to that absurdly lucky crit from Sain.
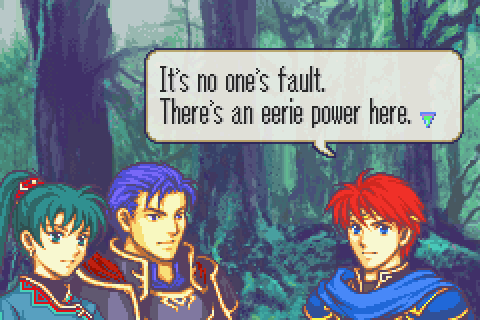
Now that Kishuna is gone, Hector and Lyn feel much better and apologize for their earlier rudeness. Eliwood says he was feeling on-edge too, but whatever the problem was seems to have stopped when that mysterious area where magic was nullified went away.
Hooray! The second-most secret sidequest in the game has been unlocked.
Total Restarts: 10 (So yeah, as I mentioned Marquess Araphen and 2 mages all hit Eliwood on his mountain on turn 1 on my first try, killing him in an extremely improbable way)
Turn Surplus: +8 (Ouch, this was the first non-zero chapter on which I actually lost turns. I don’t think I could have done more than 1 turn better feasibly either.)
Things I Regret Missing: The lockpick on chapter 11, that darned archer on chapter 11, this one brigand who attacked Marcus on chapter 12, 2 more brigands who ignored everyone else to attack Marcus on chapter 13x, and 2 archers who ignored Hector and Dorcas (DORCAS!) to attack Marcus on chapter 14, like 10 more enemies I could have killed if Hector could have survived one more turn on chapter18, and Uhai who decided to take a 100% chance of death to Sain over a free hit on Hector