Part 29: Chapter 21 and The War Room Part 23 (Conditions)

The Dragon’s Gate marks a clear end to the first part of Eliwood/Hector’s story. I remember that the first time I played FE I had assumed the Dragon’s Gate would actually be the second-to final level with chapter 20 (Dragon’s Gate is 19 in Eliwood’s story) being the battle with Nergal. I was hoping the game would go on for another 10 chapters with a Hector’s story following Eliwood’s (since I think I’d heard the phrase “Hector’s Story” before but didn’t know it referred to an alternative to Eliwood’s story).
When the Dragon’s Gate ended in defeat for Eliwood’s group, I was quite surprised and had no idea what to expect. We’re off the rails now and the plot could go almost anywhere for the next few chapters. For now, we have a chapter with a battle which is largely irrelevant but with a LOT of character development and filling in on just who Nergal is (Remember, we went into the Dragon’s Gate almost completely blind about him).
The title is very fitting for a turning point in the story that sets up for our new goals.
Chapter Summary:
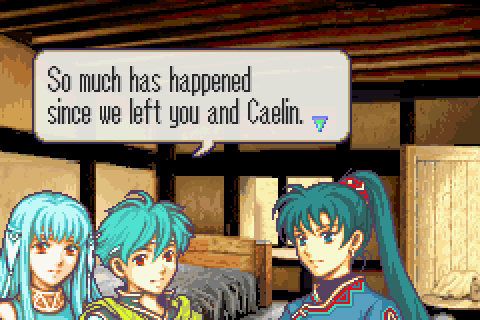
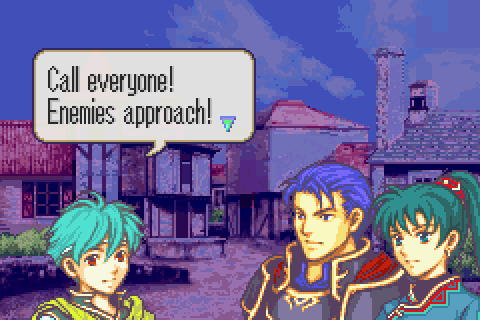
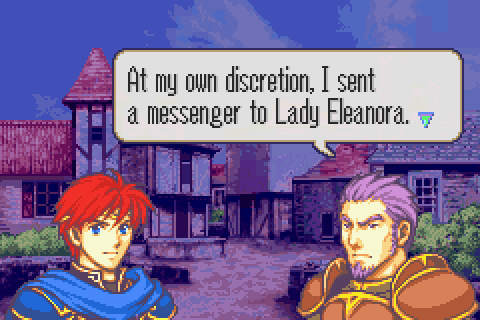
Despite their best efforts, Eliwood and Hector could not save Marquess Pherae and he died not long after wounding Nergal. Now aware at last that they were in way over their heads and with Nergal having escaped, they fled back to where Fargus was waiting and sailed for Badon. With Eliwood having had some time to grieve and Ninian and Nils some to recover, they compare notes and find out what’s been going on from Ninian and Nils before suddenly coming under attack by Black Fang sent to retrieve the siblings.
You know, this really describes Hector a lot of the time. People- especially Lyn- talk like he’s a jerk, but it’s really pretty clear that he’s mostly just bad at communicating with people. That does often go hand in hand with his kind of stoicism.
Hector, remember, had never met Ninian and Nils before this trip and Eliwood barely knew them. It’s mostly Lyn who’s most interested in finding out what happened to them and what their role is in things because she’s the one who knew them best.
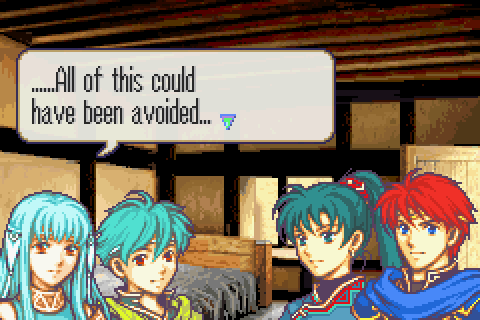
And that’s the real tragedy of it. There are so many times when all of this could have been avoided if the characters weren’t the people they are.
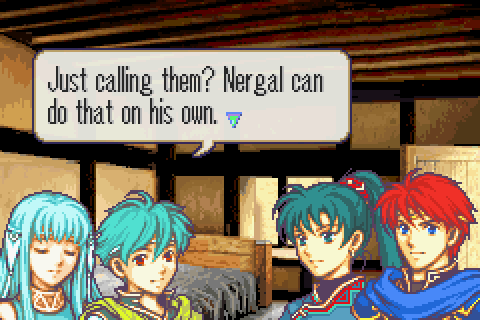
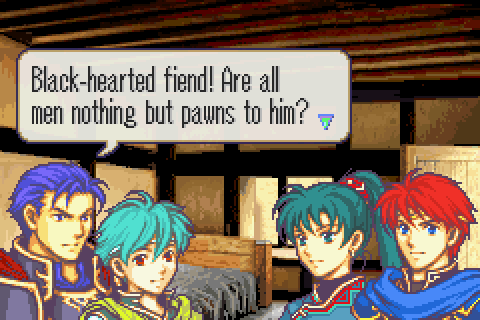
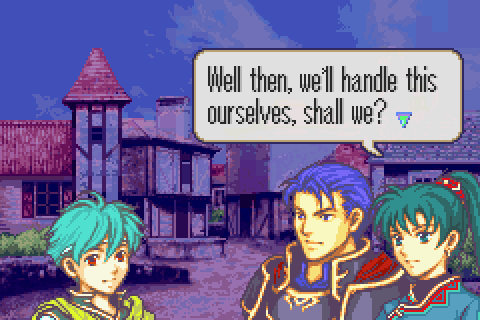
Eliwood and Lyn ask what Nergal wanted Ninian and Nils for anyway now that they’ve revealed that Nergal was after them the whole time- the Black Fang in Lyn’s story were trying to capture them on his orders.
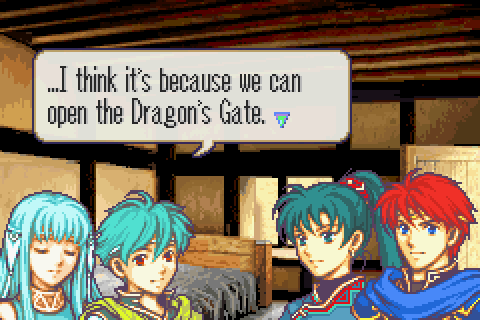
And it’s because the two of them have the power to open the Dragon’s Gate and let dragons back through into Elibe, as part of Nergal’s plot.
At this point the distinction sounds like a hair-splitting one, but it’s actually fairly important in retrospect as more of the story is revealed.
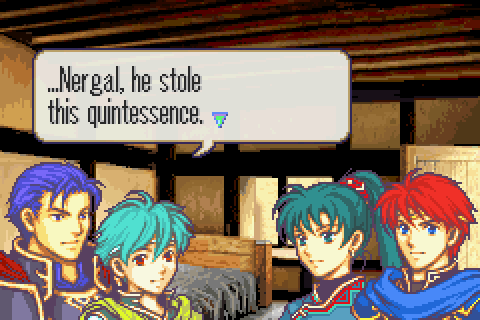
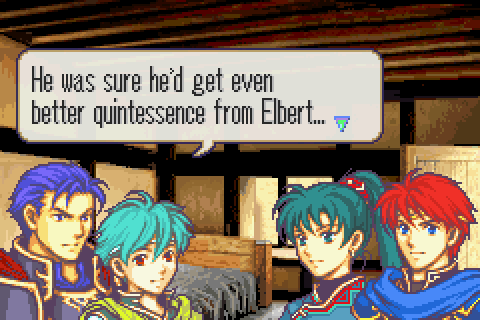
So we’ve heard Nergal mention this word “Quintessence” before but we had no idea what it was.
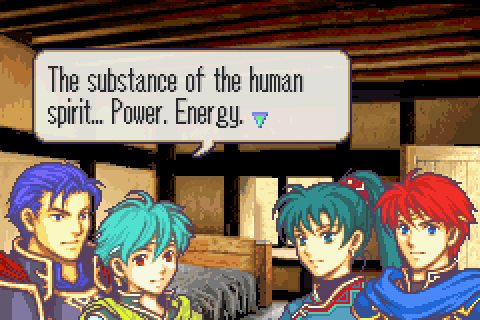
Nils doesn’t understand the magical technicalities, but does explain that Quintessence is basically life energy or the substance of the soul and that Nergal steals it, killing his victims and empowering himself.
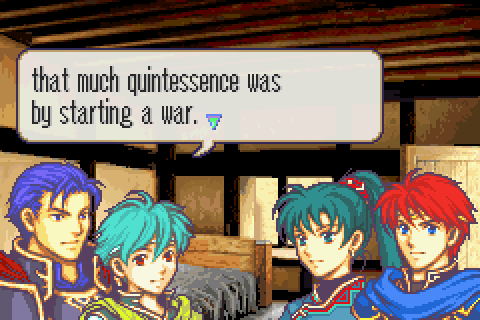
And now we find out what the heck Nergal and Ephidel were trying to do in Lycia. He didn’t care what happened to Laus, he just wanted to cause a destructive and bloody civil war which would release huge quantities of quintessence for him to steal.
Now we finally have a reason to oppose Nergal.

And now he gets into the events of Eliwood’s story. Nergal’s plans to start a war had been foiled by Elbert and Eliwood, but Elbert’s truly staggering amounts of quintessence meant the whole war was no longer necessary in the first place.
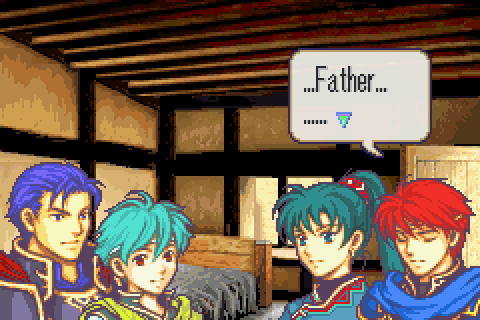
Nils is really blunt and puts his foot in his mouth here, rather casually talking about Nergal killing Elbert in front of Eliwood.
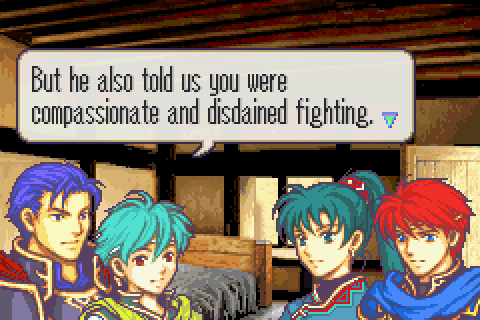
So things get awkward and he segues into talking about how much he and his sister loved Elbert, their fellow prisoner, who never blamed them for their role in his predicament.

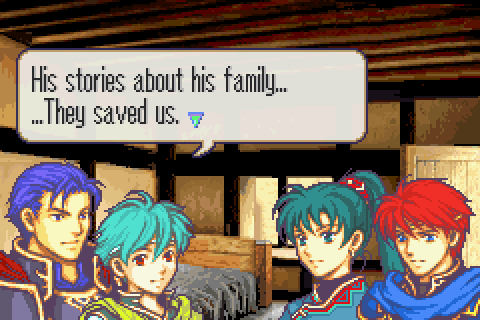
I really like this whole conversation. It’s a gigantic infodump, except that it actually doesn’t read like one. It’s one of the better written conversations in the game.
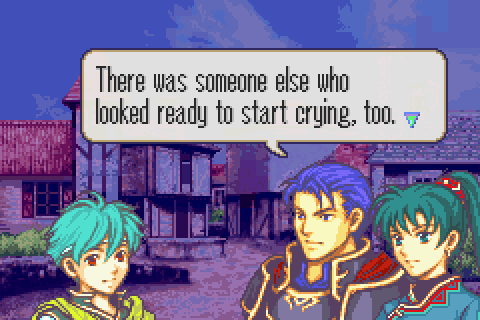
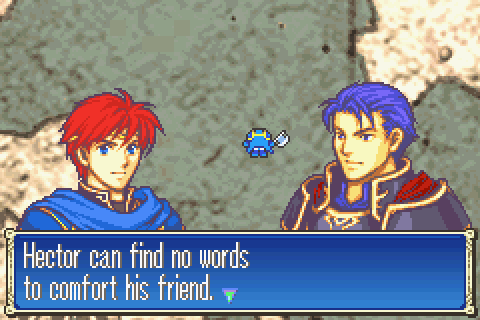
They leave Eliwood to let him grieve on his own. Lyn suggests that as Eliwood’s best friend, Hector should be with him, and he responds with one of his best character-developing lines.
They shift back to talking about Nergal and what Elbert meant when he said Nergal would return.
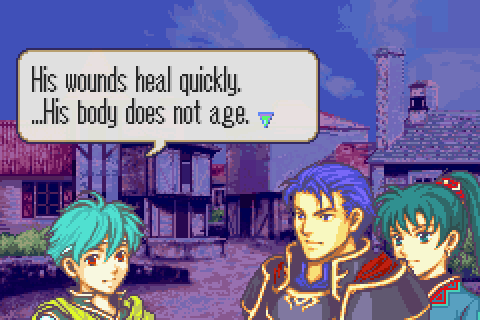
Unlike most FE villains I can think of, Nergal doesn’t sit passively back and let you oppose him freely. Even badly injured, he keeps the heat on you more or less from this point onward.
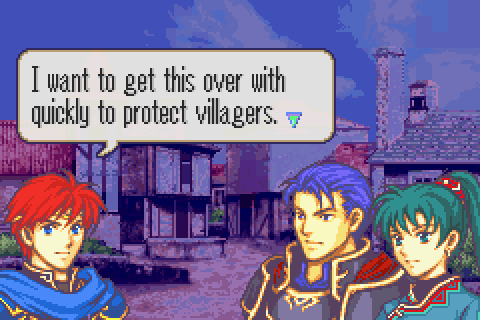
The two of them agree that Eliwood deserves more time to mourn properly and decide not to tell him enemies are coming while they fight.
Eliwood is never one to let anyone else risk their necks without him no matter the circumstances though and comes running immediately.
This chapter is really the one that fully establishes Eliwood’s character. I’d say he comes across as one of the more appealing and human FE protagonists.
This part of the chapter is really the important bit. The fight to follow does not actually advance things very much, but these scenes gave the background needed for building up the rest of the story.
The War Room, Part 23
I meant to include this War Room with chapter 19xx, but had no space for it. Oh well, this chapter is also a good time for it because while 19xx was the first time negative conditions were encountered, this is the first chapter with positive. Both are extremely important to understand, and I’ll start with negative ones.
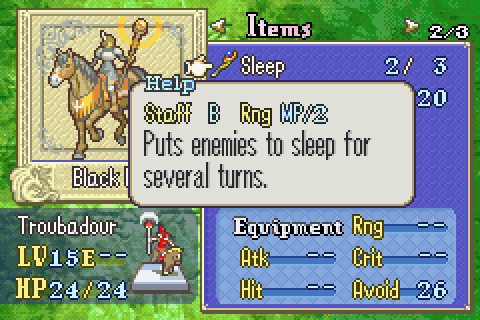
19xx was the first chapter where enemies had status ailment-inflicting weapons. There are several kinds of these, but the only ones that really matter are the staves: Silence, Sleep, and Berserk in ascending order of devastation.
Essentially, these staves inflict a status ailment on the target which lasts for 4 turns. Some statuses (or “conditions” as they’re technically called) prevent others from being placed on the target. For example, a unit with Sleep or Silence or Berserk cannot be buffed by one of Ninian’s rings and vice versa. Further, the enemy will never double up those debuffs on one unit. And as a last, interesting note, enemies will never debuff a unit which is carrying a rescued unit. In any case, here are the details of those 3 dread debuffs:
The Silence condition prevents the victim from using any staves or magic tomes- on either offense or defense. The enemy of course is smart enough not to use it on non-magic users. So being silenced makes the victim completely incapable of fighting, though I believe it can still rescue allies and it can certainly still move.
Sleep is far worse. First of all, it can affect any unit- not just magic users. Second, the victim is not only incapable of fighting, it is also incapable of moving. Thankfully it can still be rescued and traded with and, in this game, can still dodge attacks. If this happens to a unit in the wrong place, you may have no choice but to restart the level as it becomes impossible to complete in time. It’s also highly likely to result in the death of the victim unless you can protect it immediately. And even if neither of those things happens, a single enemy has spent one turn taking out one of your precious few units for 4 turns. A very good deal for the enemy indeed.
And Berserk is almost a game over automatically if you don’t have a Restore staff right nearby to undo it. The victim ceases to be controllable, can’t be rescued or traded with, and now moves on the enemy turn (starting with the next one). And it treats your units as enemies and will attack any of them in range. Horribly, the berserk unit can run right through your troops as if it’s still an ally, so you can’t block them. Even if you can pull all your other troops out of attack range, it’s still treated as a target by the actual enemy and it will recklessly attack them. 4 turns of stupidly attacking and being the target of everything in sight will kill any unit even if it doesn’t actually murder one of your other troops.
In short, Sleep and Silence can completely cripple your strategy if they happen to the wrong unit at the wrong time. If Berserk can’t be cured immediately, you generally should just restart. This means that enemy staff wielders are THE most important enemies to keep track of and kill quickly- even more important than those with Bolting or Purge. One nuisance later on is that clicking ‘A’ to view the attack range of a unit which has both a magic tome and an offensive staff will display its magic range but not the staff range. However, if you click the unit again, the staff range will display instead. This is a very important trick.
There are only 2 ways to get rid of most conditions. First, they’re cured automatically after 4 turns. This counter does not progress if the unit has been rescued.
The other way to get rid of conditions is that the C level Restore Staff can remove the condition of an adjacent ally instantly. Once you get them, they’re the most important tool you have on levels with staff-wielding enemies.
So what determines whether a condition staff works or not? They don't work by normal weapon rules.
First of all, the range of a condition-inflicting staff (and of any ranged staff actually) is 1 to (Wielder’s Mag / 2, Min 5). So that range starts considerable and can become truly enormous- much larger than even Bolting.
Secondly, the accuracy and dodge formulas are totally different- and not affected by terrain or support. The net accuracy formula is 30 + 5x (Wielder’s Mag – Victim Res) + Wielder’s Skill – 2x (Distance to target).
So at first glance all of the cards are held by the attacker: you cannot try to reduce enemy hit chance by using good terrain or standing near allies who can support you.
However, you do have some options. First and best, you should almost always craft a strategy such that you can take down the staff wielder without it ever being able to use its weapon. Perhaps a flyer or paladin assisted by a dancer can rush in from outside its range and instant kill it with proper planning.
When that's impossible, you can sometimes force the enemy to waste their charges on units with high Res on the edge of their range who they'll probably miss.
Remember that an ounce of prevention is worth a pound of the cure. Even if you have a Restore staff on hand, using it still wastes the turn of a valuable unit, so you should try to prevent the enemy from inflicting conditions in the first place by the above methods.
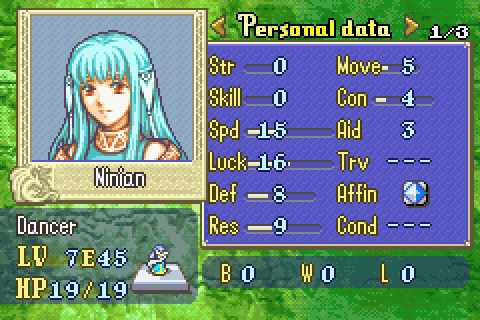
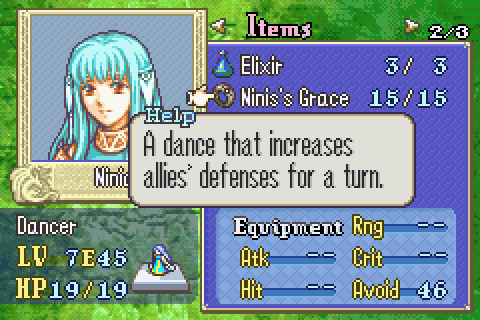
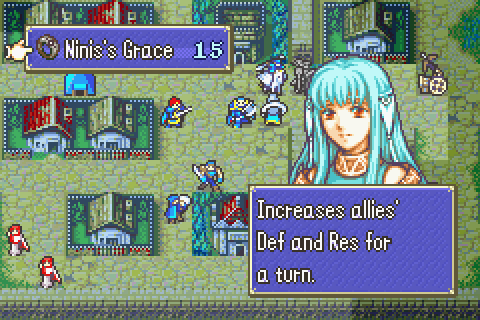
21 marks the introduction of positive conditions. Although you could compare the effects of the Torch item and the Pure Water/Barrier staff to positive conditions, they technically are not. No, the only true positive conditions are those produced by Ninian/Nils’s 4 rings.
Each of those ring effects act almost exactly like a negative status, but they only last 1 turn instead of 4 and can be granted only at range 1.
The first and best ring is Ninis’s Grace. For one turn, this grants an enormous +10 Def and Res to the unit you bestow it upon. That makes fragile units into tanks and tanky units completely invulnerable.
The second and second-best ring is Fila’s Might, acquired on the chapter Living legend. It grants +10 Str/Mag, an incredible boon for units which can double their enemies but don’t do enough damage on their own.
Thor’s Ire and Set’s Litany are acquired much later and are terrible. They grant + 10 critical and +10 avoid respectively, much too small and undependable to be counted on.
Each ring has 0 cost, so you shouldn’t worry about them eating into your funds score. Because of this and their unique capabilities, they’re among the best items in the game. But there are 2 main limits on their usefulness:
First and most obvious, each is unique and has only 15 charges.
Second and often more important is the opportunity cost. The true benefit of using, say, Fila’s Might isn’t just the value of the target gaining +10 attack for 1 round. Instead, it’s that value minus the value of the best alternative move you could make- such as using Ninis’s Grace or using Fila’s Might on a different unit or just using Ninian’s completely unlimited and extremely useful Dance ability to grant a unit another turn. Dance is generally more useful than the rings. Here are a few occasions when the rings might be useful though:
1) Sometimes you need to take on a very large and dangerous crowd of enemies. Often none of your units you want to use will be tough enough to handle the job. In that case, you may well be able to use Ninis’s Grace on someone and then let them solo the mob- or at least aggro and weaken the mob so that the rest of the team can then mop it up next turn.
2) As is well known, you can use Ninis’s grace to abuse the arena for free gold and XP. I won't be using the arena myself, so I won't be doing that either.
3) Ninis’s Grace or Fila’s Might can both be tremendously valuable to weak units you’re trying to train. The massive stat bonus can be just what they need to take on several tough enemies or finish one they couldn’t normally scratch, netting them great XP.
4) Some of the game’s tougher bosses can be extremely difficult on an HHM max ranking run. Ninis’s Grace or Fila’s Might can be just what you need to tilt the balance in your favor.
Remember that to get maximum use out of these buffs, you need to be sure the enemy actually fights the buffed unit. Try to make it so no other unit is in the enemy range.
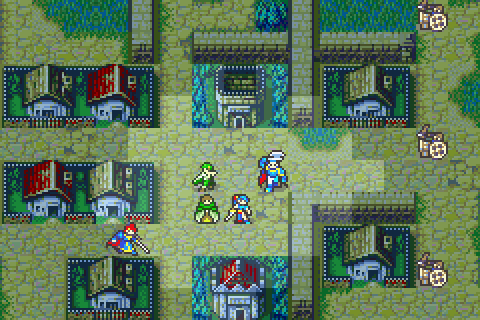
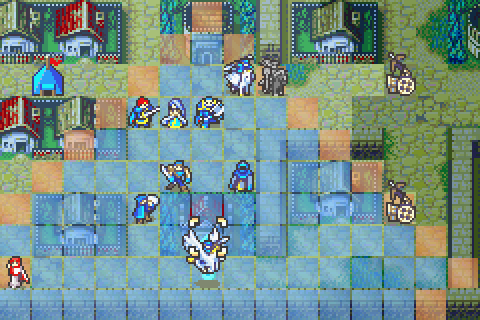
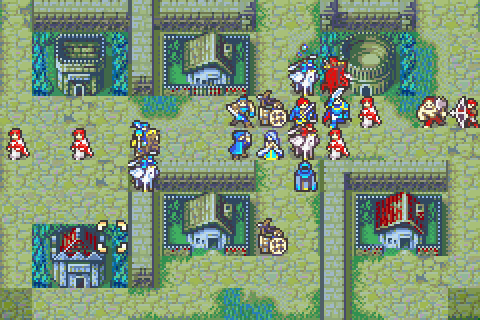
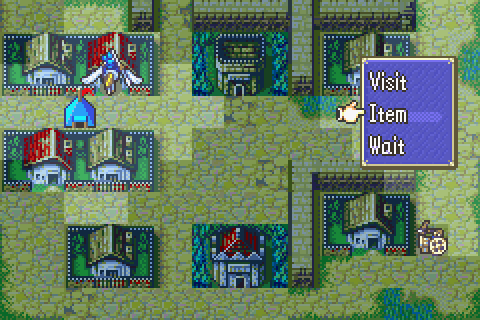
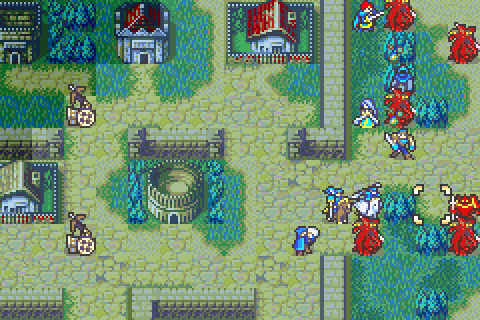
Battle Preparations & the Map
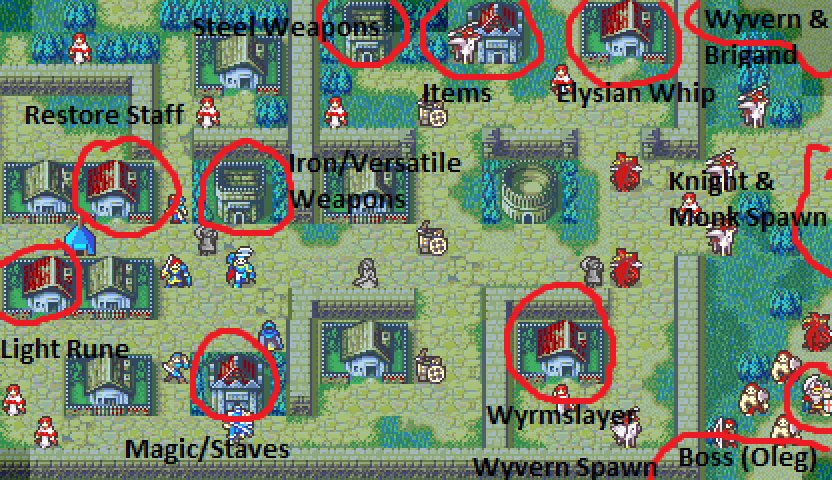
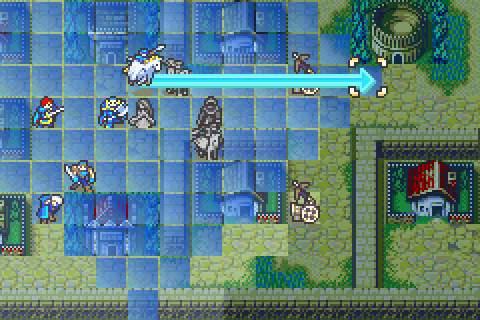
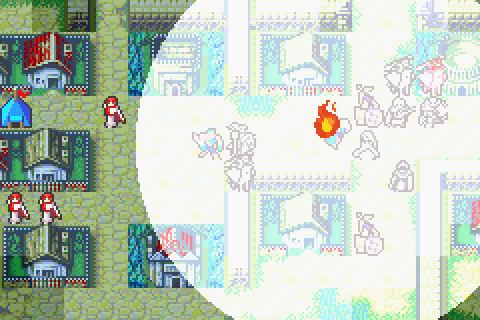
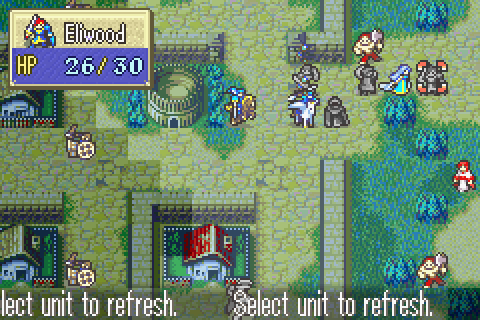
Another busy map! This one is fog of war with a nasty, restart-inducing flock of air units just outside initial vision. Here I’ve used both thieves, assisted by Ninian and torches, to illuminate almost all of the map for you.
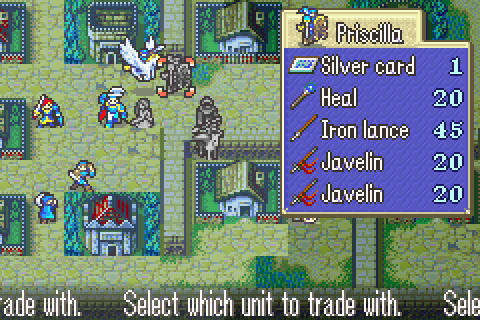
This is the first chapter since Pirate Ship (18) on which shopping was possible and it’s also the first in the whole game for which the silver card is available. Almost all of my weapons are nearly broken and there are no more stores until 24, so I need to buy a lot. Luckily, all the important gear (except for door keys) are at the nearby two stores, making things easier.
There are also a great many villages to visit, and the eastern ones will be destroyed if you don't get there fast.
Unfortunately, the enemy forces are significantly dangerous on this chapter, partly because of the terrain. One thing you should immediately notice is that the map is covered in buildings and walls. These are completely impossible for ground units to traverse but no problem for air units. Meanwhile, there is almost no beneficial terrain on the whole map (except for the tiny bonuses from actually being in a village or store). In short, this is very much an air map and the enemy is going to use that to their advantage.
Only the enemy air units pose a big threat. The monks are almost all armed with Shine, which is too heavy for them. The result is that they can deal accurate but small amounts of damage to nearly any unit you can field, but can be killed effortlessly by nearly any character. Monks are pretty much never anything but free XP and this chapter is no exception. They're not the problem. No, here’s the problem:
Look on my stats, ye Mighty, and despair!
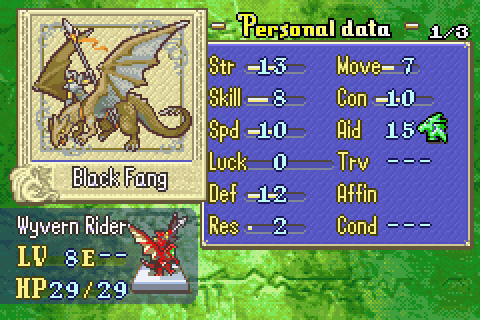
We got a small taste of the power of wyvern riders on 19xx. These wyverns are much stronger, much more numerous, and favored by terrain. But how different could they be from pegasus knights, right? Well here are this chapter’s best pegasus knights:
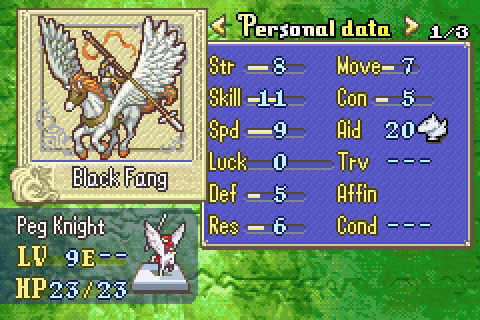
Wyvern riders are the best enemy units- and indeed the best player units- in most FE games and this is no exception. They’re actually tougher than knights due to superior HP and are in a whole different league from pegasus knights in durability, they tie the pegasus knights for the best available movement, they outspeed the allegedly fast pegasus knights, they have enough con to wield most lances without penalty- where the pegasus knights have a functional speed of only 6 with an iron lance and 1 or so with a steel lance- and they hit far harder. They are, quite simply, better than most of your available troops at this point in the game.
In particular, that 10 speed is massive, so huge that almost none of my troops can double them. Not Canas, not Eliwood, not Fiora, not Lucius, not Florina with a javelin, not Marcus until an absurd level 15 or so. My extremely fast Hector can manage it against the slow wyvern riders, but a regular one couldn’t. And of course, Sain can. So other than Sain (and Hector vs the slowest ones) I don’t have anyone capable of one-rounding one of these monsters.
Wyvern riders are allegedly weak to arrows and to magic, but in actuality 12 Def takes the bite out of an iron bow and leaves archers floundering. A rather high level (13) Rebecca with an iron bow would be dealing 9 damage per shot and would not double attack. Even a steel bow user will only deal moderate damage- and will definitely not be able to double attack. As for their weakness to magic, it’s at least true that they don’t have better Resistance than most other units- but they aren’t really worse than anything but pegasus knights and magic users either. And their massive HP mitigates most of that disadvantage.
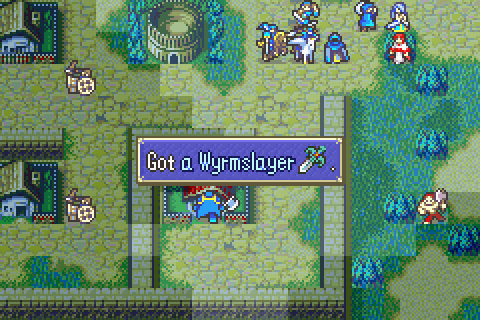
Their final weakness is the Wyrmslayer sword which is only acquired toward the end of this chapter, is too expensive to use, and due to weapon triangle disadvantage is much less effective than a measly iron bow.
In short, these wyverns are a piece of work and my main obstacle on this level. And there will be many, many more of them. Far too many to defeat without overusing Sain or Hector or Canas.
Besides dealing with these particularly dangerous enemies, there’s also the problem that the boss is extremely damaging, surrounded by spawn points, moves, and must be stolen from. The chapter ends when he’s defeated, so I need to do that just as soon as I’m finished with villages and shopping.
There’s really only one thing that prevents this from being one of the hardest chapters in the whole story and it’s this:
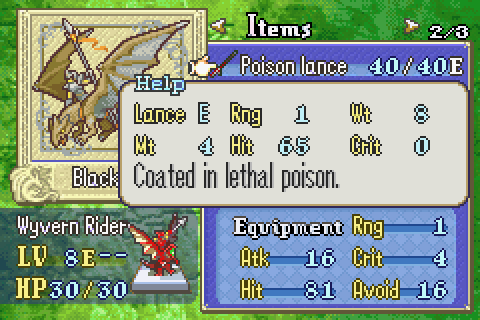
Nearly EVERY enemy unit is using a poison weapon and those absolutely suck, as detailed previously. That -15 hit and -4 might really makes a big difference in letting you kill these pesky wyvern riders in particular. The wyverns still beat 90% of my units in a straight fight of course, but it would be 95% otherwise.
It took some thinking, but ultimately I went with this setup:

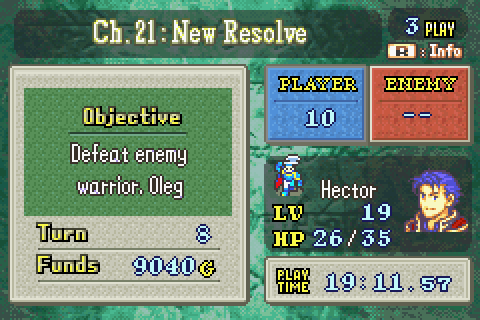
Objective: Kill Oleg (The boss)
Secondary Objective: Steal the Hero Crest from Oleg
Secondary Objective: Get the Restore staff from the top left village
Secondary Objective: Get the Light Rune from the bottom left village
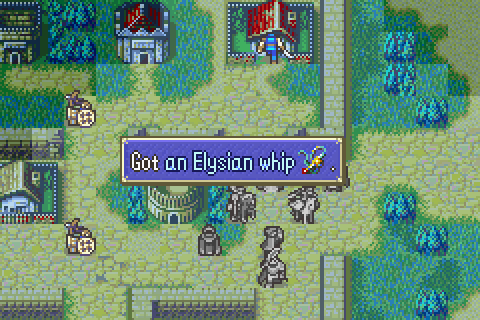
Secondary Objective: Get the Elysian Whip from the top right village
Secondary Objective: Get the Wyrmslayer from the bottom right village
Secondary Objective: Do some shopping and buy supplies with the silver card
Reinforcements: Very numerous, but other than a couple of brigands there is a merciful delay of 4-5 turns or so before they begin spawning in force. Due to fog it’s hard to be exactly sure where each enemy comes from on each turn, but it’s true that a total of 4 wyvern riders (2 top and 2 bottom) will be spawning for a while and monks will begin appearing in the middle right around the same time. Since the wyverns are completely unmanageable for most of my units, I have to end this chapter fast and not stay and fight them all.
Turn Limit: 9. This is actually not that painful at all. This chapter could be completely in just 2 turns or so if you rushed Oleg with someone like Sain, so the only thing that really slows you down is needing to get all the villages and do the shopping. You’ll notice I actually spend a fair amount of time lurking just outside Oleg’s attack range killing his reinforcements while I continue my shopping.
Units Allowed: 6 + Hector + Eliwood + Ninian. Now THIS hurts. Even an Eliwood as stat-blessed as mine is useless on this level and I can’t use my Hector much because he’s overleveled. And I need to take a healer and I need to take a thief and I need someone to do the shopping and someone else will need to be on at least part time village visiting duty and wow that only leaves about 2-3 discretionary units. Ninian is a godsend at least.
Units Brought:
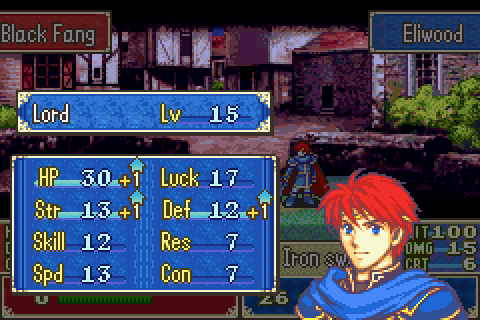
1) Hector. Required and my best or second best anti-wyvern unit. He’s the only one other than Sain who can actually win a fair fight with more than one. Or really even with just one. But mine is already level 19 and can’t promote for about 10 chapters, so I mustn’t use him much.
2) Eliwood. Required, and that’s a huge nuisance. Eliwood cannot double wyverns and with weapon triangle disadvantage, he will actually lose to one in a one on one fight despite his stat blessing and massive level. And he’s not good vs pegasus knights or monks or ANYTHING else on this level. Still, I do need to train him.
3) Ninian (not shown, but she pops up as the map begins). Required, and by far the best unit now on my team, including Sain. Ninian is dodge-y and tough enough to stand up to anything and she lets me use my strongest units twice on tough turns to ensure I take down the key enemies or my weak units twice on easy turns to maximize XP gain. Plus only with her Ninis’s grace can my first turn strategy work.
4) Legault. I need a thief to deal with fog and to steal Oleg’s Hero Crest. Matthew is horrible compared to Legault for combat and I don’t need both of them here, so Legault it is. Much like Matthew, he enjoys a brief grace period of actually holding his own in fights for a few chapters after he’s recruited anyway.
5) Priscilla. A healer is not optional on a chapter like this and Serra is just worse than Priscilla, as usual.
6) Florina. This is an air map and although Florina loses one on one fights with wyvern riders, she still does better than most of my units. Meanwhile, she’s highly effective against monks and good for shopping or visiting far-flung villages.
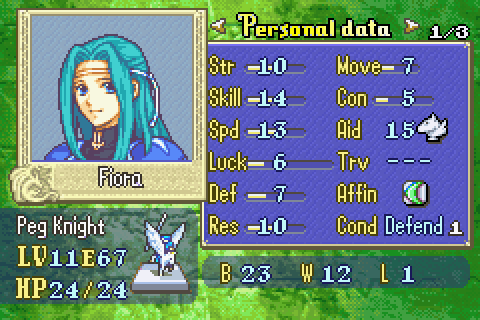
7) Fiora. Same as Florina but not as good, same as always. And of course she’s lower level, so I’d like to train her to boost up my XP score a bit.
8) Canas. Canas is an absolute must for me on this chapter. He’s impervious to monks and deals spectacular damage to wyvern riders and is tough enough to take more than two hits from one before dying. Plus I want him to promote soon so that I can finally have a healer who isn’t a complete waste of a slot.
9) Raven. My only other ‘discretionary’ unit other than Canas. In fact, I consider him the only truly optional member of this party. Raven can actually double attack wyvern riders for respectable damage and can stand up to a few hits from them. Crunching the numbers, I discovered that despite weapon triangle disadvantage he’s actually tougher AND more damaging to wyverns than Dorcas would have been.
Notable Units Rejected:
1) Lyn. Unusable. She can hit a wyvern rider for 1 damage twice. She’s not even good against pegasus knights. Or monks. Or anything.
2) Matthew. Unusable, he can’t damage anything on the level but the monks and he might actually lose to them. And one thief with a torch is enough to illuminate everything of importance on this map, so I don’t need both him and Legault.
3) Serra. I’d like a second healer, but I don’t have enough slots to afford one.
4) Dart. Man, he’d be great here. Unfortunately, he wouldn’t be as good as Raven and he doesn’t let me make progress toward unlocking Jerme’s chapter.
5) Dorcas. If I could take a 9th person, he’d be it. Solid against wyverns due to his speed blessing and weapon triangle advantage and he’d help me toward Jerme’s level.
6) Bartre. Monks are actually so bad that Bartre can beat them one on one, so I briefly considered bringing him along to take out the ones near the starting position. But he’s too slow to get all the villages and too weak to beat two monks at once.
7) Erk. He’d be good here, but not as good as Canas. If I wanted Kenneth’s level, I’d bring him instead of Raven.
8) Lucius. Same as Erk, but not quite as good here.
9) Sain. Yeah, the big guy is off the team! How about that, huh? I knew this would make beating Oleg hard, but I also know that otherwise he would sponge too much XP. By my initial number crunching it would be tough but doable to win without him, and I was right.
Hoo boy, it’s like Chapter 13x all over again! I haven’t had a chapter where I really showed off seriously good tactics since Whereabouts Unknown. Most of the recent chapters have ultimately been easy as long as my starting unit choices were well done. But at this point, my gear is so broken and battered and scarce that I can’t even equip my 8 starting units.
Fortunately, I can now sell some valuables and then go shopping with the silver card on turn 1. Unfortunately, that still leaves my troops unequipped unless I do some strategic trading and setup my formation to allow that.
The trick is that, just like on chapters like 12, I not only need to trade around items so that people can actually fight, I also need to immediately begin making serious progress. In this case I think I need to immediately aggro and damage the nearby wyvern riders while killing as many of the pegasus knights as possible. Only then will it be feasible to take out the wyvern riders and continue charging east.
In her current top right position, Fiora can get just barely far enough to be attacked by almost the entire enemy air wave. But just 2 attacks would kill her! Fortunately, with the miracle of Ninis’s grace, anything is possible. That ring will allow Fiora to tank the entire wave of attacks and kill many of the enemy pegasus knights in return.
Canas has only 9 uses of his Flux tome left- not enough to do serious fighting- and I certainly can’t afford for my MVP to suddenly be out of the fight and need to spend 3 turns running back to the store. No, I need to buy him a new flux tome this turn no matter the cost. Florina is positioned for maximum efficiency in buying him that flux tome and then flying to an advanced position where he can trade it from her and be good to go and close to the front.
Notably, I chose Fiora over Florina for the principle tanking duty because I want to train her more since she’s lower level and also because she has significantly higher Def. As the fighting intensifies later though, it’s Florina with her higher damage who I’ll want close to the front, so Fiora will actually fall back and visit the left villages and stores while Florina continues with the main army.
Legault doesn’t need to reveal much of anything for a while and can’t fight well, so he starts in the back. Raven only has one real spot available to him since Canas is more important and thus needs to be closer to the front.
Since, almost by definition, healers have nothing to do on the first turn, it is Priscilla who will do the shopping. She’s positioned to go to the store with her silver card, buy everything the party needs, and then run past Fiora to where people can trade it off of her.
Starting with Fiora. I only have a single iron lance and a single javelin remaining, so Fiora actually starts off completely unarmed. But she can immediately take Priscilla’s recently purchased goods to equip herself and then continue moving due to being a mounted unit. It’s the only way to get everyone geared up and in position on turn 1.
The Characters:
“…I am no mere dancer. My dances… They will help you. …Please allow me to help…” –Ninian, Chapter 21
Nils’s more polite and thoughtful but somewhat annoyingly shy sister, Ninian is what Florina might be like if Florina was a serous character instead of a joke. She gets less development than Nils outside of supports, but Nils can’t develop supports at all so that makes up for that. Her budding romance with Eliwood is fairly charming and the two are a rather good match. Indeed, it’s probably the closest the game comes to a canon pairing with how many scenes of just the two of them being affectionate with each other there are and how later events I can’t spoil will play out.
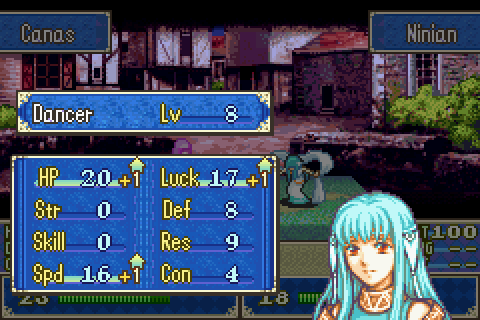
Ninian and Nils are basically the same unit. They share stats, level, equipment, everything except Supports. Only Ninian can develop supports, but that’s irrelevant in a max ranking run as I previously noted. Everything I said about Nils’s amazing usefulness goes double for Ninian right now because…
“Do you understand? I have power. The power to perform miracles.” –
Of this, quite possibly the second most valuable item of any kind in the whole game- after Hector’s Wolf Beil and ahead of even Matthew’s initial lockpick. The power of the one ring to rule them all will be on display this chapter.

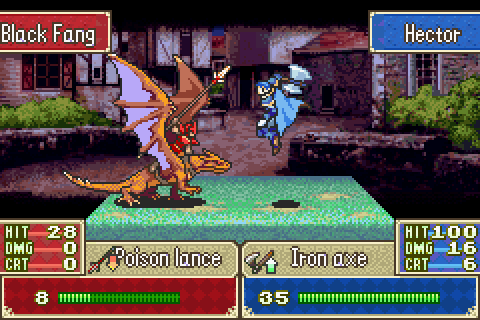
“In defeat…there is only…death. Urgh…” –Oleg, Chapter 21
A rather thuggish and violent Black Fang, apparently he knows Nergal well enough to have been tasked with retrieving the siblings directly. And he doesn’t think much of Nergal’s idea that he just offer Eliwood the chance to hand them over peacefully, preferring to seize them by force.
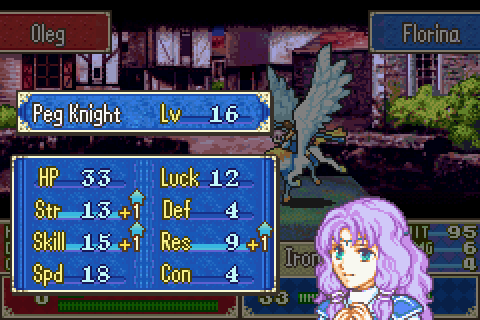
Oleg is very durable- and he’s not vulnerable to the Wolf Beil as all previous durable bosses were. He moves, unlike most bosses and he hits very hard indeed because he’s armed with…
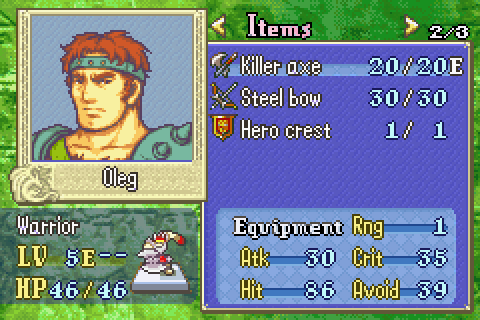
A 30% chance of making you restart per swing. Nothing and no one can stand up to a killer axe from this guy at this point, so you must never, ever allow him to use it. Lure him into using his bow and then kill him in one round. Fortunately he’s slow and won’t have any terrain bonuses, so he should be fairly easy to gang up on. The real trouble is how he and the reinforcements near him support each other. You can’t take them out because he’ll kill you if you get near their spawn points, meanwhile they might get in your way as you try to surround and finish him.
Further complicating things, you must steal that hero crest from him, so that means it’ll be harder to pile your other 1 range units next to him and kill him.
Playing Through:
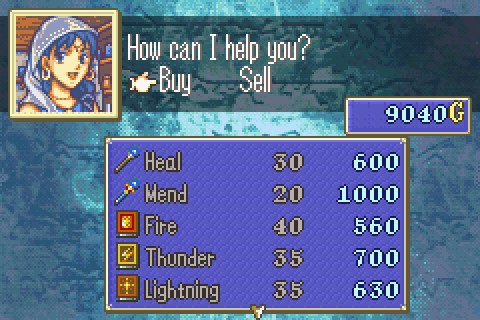
The first thing is to sell my blue gem! Up until this moment, my available cash has been extremely limited. I could just barely buy enough gear to squeak through up until this point. From now on, I have infinite cash. With the silver card, I can sell ANY treasure I want and make no loss as long as I spend the money on gear with the silver card in hand.
I’ll start with these two gems just to make sure I can buy whatever I want for the time being.
And I have quite a shopping list: 6 iron swords, 7 iron lances, 7 javelins, 4 iron axes, 8 handaxes, 4 more heal staves, 2 more fluxes, and 3 more door keys (I think I’ll make compiling a proper shopping list the subject of a war room in the near future). Unfortunately, I can’t get the latter 3 items here from this store.
So Priscilla did the buying and selling, critically, she started with an iron lance and then a javelin so that Fiora will be able to take that from her later. Now it’s Florina’s turn and she needs to visit the vendor. She doesn’t have the silver card, so I don’t want to buy much with her, but I absolutely need to get a flux tome for Canas this turn, so I’m going to have to eat that 450 gold net loss.
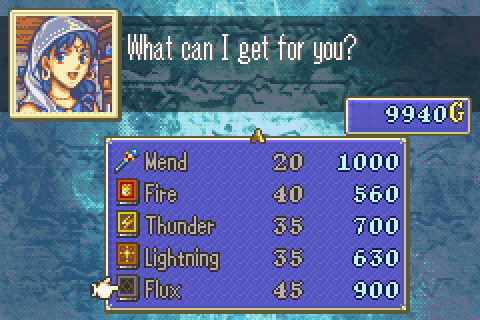
Even after buying that massive pile of weaponry, you can see I still have tons of cash. And that’s barely dipping into my absolutely mammoth treasury. Money is unlimited from here on out- I just need to make sure I acquire enough assets to stay ahead of the funds score. In order to make sure I do that, I’m not going to waste more money here than I need to so, I’ll buy only the single flux tome and nothing else.
Florina finished her movement and Canas took his new tome. Now the show is about to begin.
Ash nazg durbatulûk!
Remember, Fiora had no starting gear at all, but now she can take everything she needs and then keep right on moving.
There’s her wonderful Defend condition listed. It doesn’t SHOW the bonuses to Def and Res, but they’re applied nonetheless.
There she goes after trading, right into the center of the enemy formation (currently hidden by fog).
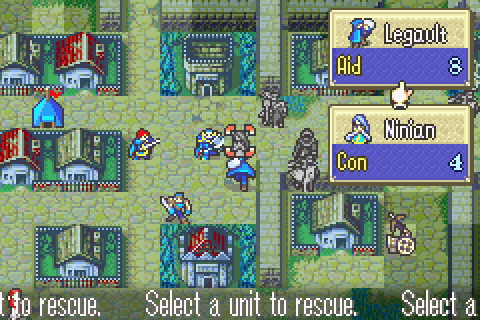
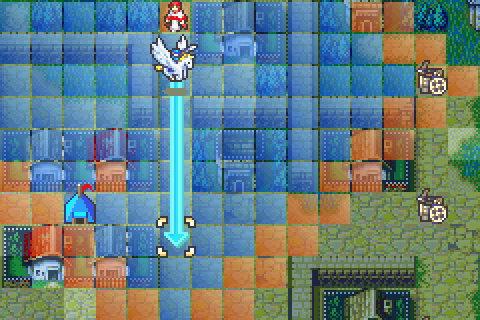
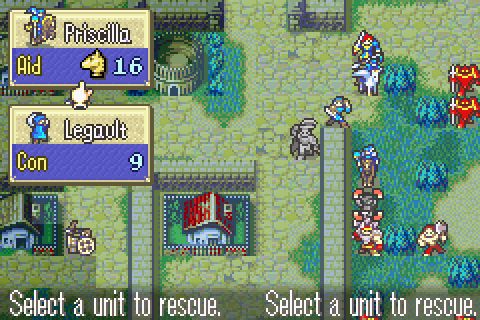
One of the many uses of rescuing is just making small changes to your formation to allow you to pack in more tightly than usually possible. Here for example, I’ll be able to move Ninian closer to the front but only if I first pull her back into Legault’s square.
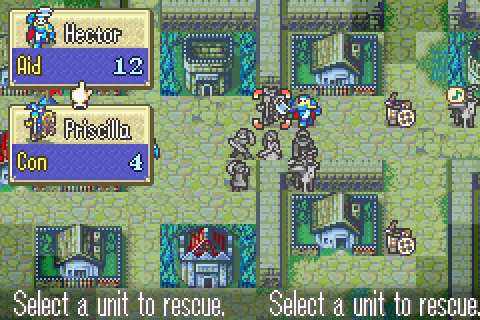
And here Hector can pull Priscilla out of the way so that Eliwood can take her spot and then dump her further back- he needs to be closer to the front than her. Use this kind of minor rescuing to optimize your formation whenever you have a lull in combat like this. It’s really mastering rescuing and using it all the time that makes serious strategy possible in this game.
That musical note on Fiora means she’s under the effects of one of the rings (Ninis’s grace in this case). You’ll note that I’m completely ignoring the monks around the left area for now. It’s much more important to get everyone properly equipped and heading east. I can send Fiora back to take care of them and the shopping later.
My turn. Fiora is badly injured, but she took down 1 pegasus knight and crippled another and also damaged the wyverns. Canas will cripple this one so someone else can finish it. Even Hector can’t dish out that kind of damage to these guys in one hit.
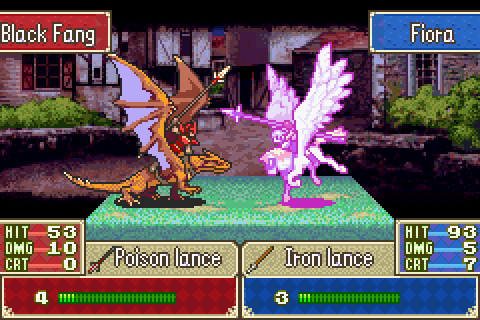
Fiora, you can see, is poisoned (hence purple) and one hit from death. And even with the absolutely terrible poison lance equipped, this wyvern rider will does 10 damage to her. Despite being 4 levels lower and up against a fairly blessed Fiora. Who won’t double him. If that doesn’t tell you all you need to know about the power mismatch between Wyverns and pegasi, nothing will.
Hector is moving up in the world! Once upon a time he couldn’t even take down pegasus knights in one round, now he can actually beat wyverns!
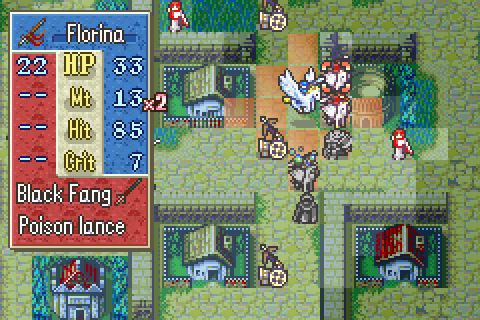
The wyverns are dead, now Florina takes up a position to help block the bottom pegasus knight and kill the top one. Certainly I could have killed the bottom one more cheaply with an iron lance, but it’s important to limit enemy access to your back row. Oh and you can see now that Fiora is poisoned (the bubbly things all over her indicate that. With 50% odds she will die at the beginning of next turn even if she isn’t attacked since she only has 3 HP left.
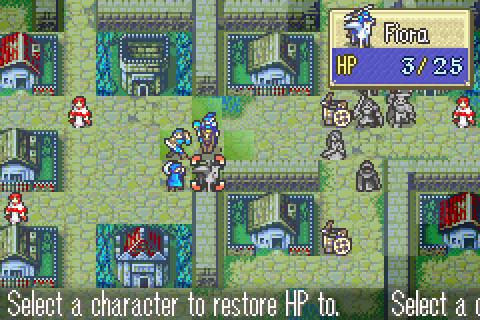
Ninian allows Fiora to evacuate- in this case moving into range of some of the bottom monks with her javelin. And then Priscilla restores her to proper fighting shape. Now she’s ready to take on 5 monks.
And now Legault is actually close enough to the front that a torch might be useful. You can see that I’m leaving Ninian completely exposed to enemy fire. But she’s level 7 since Nils was level 7, so her solid defenses and massive dodge make her one of my most durable units. Of course, she can’t counterattack, but at the very least I don’t need to babysit her like I do Priscilla.
Turn 3, the second wave of wyverns arrived (and I believe one died to Hector). There’s quite a crowd built up, but I can already tell that it’s going to completely disintegrate if I make my moves well.
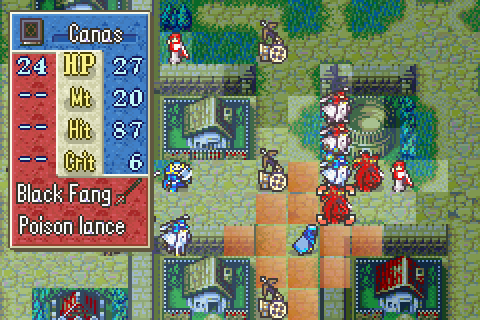
Canas initiates things by crippling another wyvern.
And he gets a darned good level out of it! The tougher Canas gets, the better!

Hector drops the monk in front of him so that everyone can charge out freely. I need that archer down so that Florina can fly safely. Raven has just enough power to beat this brigand. And what are the odds he’ll get hit?
Even Legault can beat these monks! And get a level that would be great on almost anyone else.
Remember, I really want to train Raven, and Ninian helps make that possible by dancing for him.
He got hit by the brigand of course. Actually, lots of my troops took improbable hits so they’re almost all poisoned. Fortunately, poison is weak enough that it barely matters. I’m going to blame this sucky level up on him having been poisoned though. And the enemy were killed to the last man, no one left to attack me that turn. Once the wyverns are gone, the rest are easy.

Next turn, you can see I’ve already exterminated nearly everyone in just 2 moves. Eliwood, like Raven, needs more training so Ninian gives him another turn.
One great thing about Poison is that every turn it inflicts just a tiny bit of damage which you can heal off without curing the poison. Fantastic for leveling your healers. Not that I’m trying to do that at the moment.
Everyone else is moving toward the front, but the grace period before reinforcements start is nearly over, so I need to grab this village. Meanwhile Fiora easily mopped up most of the western monks.
There’s this one north monk who won’t charge like the others, so Fiora is going to him. But for efficiency she’ll stop at this village. But before doing that, I’ll switch back to her javelin. Remember that order matters for moves like this. You can’t visit and then equip your javelin and then move on.
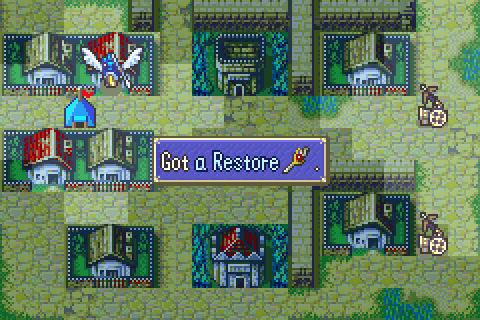
Restore! Awesome. One of the handiest staves in the game, I’ll really need this thing in a few chapters when Sleep starts getting thrown around again.
And in that position the monk will attack her and will do so without a terrain bonus.
Eliwood continues fighting and gets a good level. Actually I wish he’d gained just 1 more speed though so he could double some of these darned wyverns.
He got that level off a reinforcement monk- which put him in range of Oleg (hidden in that bottom right forest). Yet ANOTHER use of Ninian’s dancing though is to let people move back out of danger zones like this.
Another free XP heal on poisoned Raven.
And you can see how tough Ninian really is here. Mages would be doing about 1 damage to her.
Fiora doesn’t kill the attacking monk, but does get a good level. I’d assumed she was fast enough to double it, but my Fiora is REALLY slow and I was wrong. Now I need to change plans.
Hector visits the village. Since I didn’t want him hogging XP, there wasn’t much else for him to do.
Back to Fiora. I thought this move out carefully and checked all the numbers. Sure enough, she’ll just barely get hit by the monk here and then counter and kill him. And then she can visit the left village and just barely reach the bottom Vendor on turn 8- the turn I aim to win on. Perfect. Don’t leave this kind of thing to guesswork. Check your numbers. Leaving behind this monk would be worth it if I couldn’t quite do one of those things otherwise.
Every dance is 10 free XP, and Ninian gets even dodgier.
I need to know exactly who is spawning where at this point, so another torch use is in order to restore the bonus vision.
Bam! Turn 7 crisis! Everything had been going just great, right? Well now there’s going to be 4 wyvern riders and loads of knights coming in every turn till way past the deadline. If I don’t win this now, I’m going to be way overtime as I’m forced to retreat.
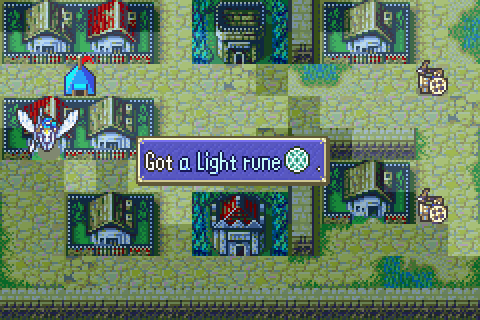
The monk dead, Fiora gets the light rune from the village. Then she’ll keep moving toward the vendor.
Hector is positioned with a handaxe here. He’ll not only thin the herd of wyverns, he’ll also aggro and badly injure Oleg- and force Oleg to equip his bow while moving into range of the rest of my army.
And at this point I realized something terrible: I forgot to have Priscilla trade the silver card to Fiora. Darn it. I had it all planned out, I had the opportunity and everything, but I forgot to do it. And now it’s way too late. Ultimately I decided to do no further shopping. That does put me unfortunately behind in heal staves, but there’s not much choice.
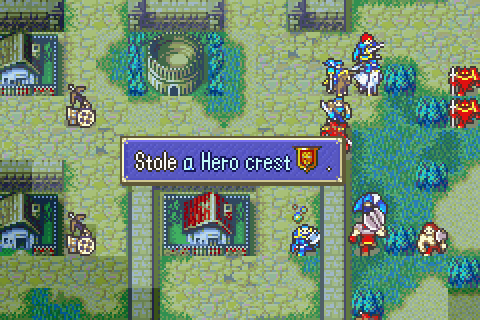
Hero Crest get!
I checked the numbers after having Hector clear the wyvern Florina can’t finish Oleg alone and no one else can join in while Legault is here. So yet another use of rescuing, I’ll just pull him out of the way so that Florina and Raven can dogpile Oleg and kill him immediately.

Raven softens him up. Meanwhile, Canas and Ninians have been wiping out wyverns on the top front to keep the heat off these guys.
Ah ha! Some of the later ones spawned with javelins, far more dangerous than poison lances, but also juuuuust heavy enough to slow them down! And that makes them just slow enough for Canas to double. Awesome!.
It’s now turn 8 and I’m about to win.
Florina kills Oleg and gets a solid level. That’s terrible Def and HP at this point considering the angelic robe. She hits hard, and that’s nice, but the problem is that she’s going to slam her Str cap somewhere along the way to 20 promoted but be stuck with bad Def forever. And that’s the win!
In the aftermath, the court of Pherae has a little scene of their own. Marcus and Eliwood are almost always an interesting pair.
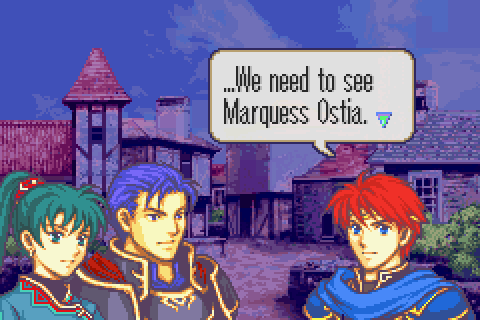
And the group make their plans. We’ve been wondering since the end of the Dragon’s Gate where the plot would go next, now it seems that’ll be the logical direction of Ostia to talk to our most powerful ally and brief him properly.

Remember Isadora? Of course you don’t. She’s seen for 5 seconds in Eliwood’s story only, being left behind to guard Eliwood’s mother. But here she is. It says a lot about how much Eliwood has been through lately that his first thought is that his mother might have been killed or abducted or something. But no, she’s fine, and upon hearing of her husband’s heroic death and Eliwood’s danger, she sent Isadora to help Eliwood instead.
Hector talks to Market and offers her an out. In case she doesn’t want to face almost certain death with the rest of the group Some might argue that that’s not really his place since Market is technically working for Eliwood.
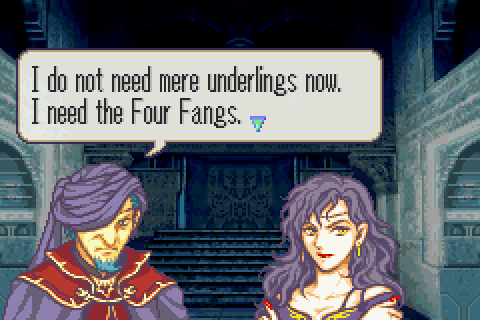
Enemy cutscene, Nergal talks to Sonia and tells her to get the Four Fangs- the most dangerous and powerful Black Fang members- out after Eliwood immediately. But just where is he? That architecture doesn’t match the Dragon’s Gate or nearly anywhere else we see. And we aren’t told where this hideout is. My best guess is that it’s a secret underground lair he created somewhere in Bern.
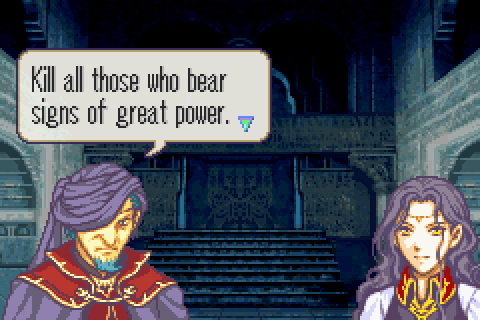
And Limstella gets her(?) orders, killing anyone powerful she can find and harvesting their quintessence for Nergal.
Total Restarts: 11
Turn Surplus: 6 (Every little bit counts)
Things I Regret Missing: The lockpick on chapter 11, that darned archer on chapter 11, this one brigand who attacked Marcus on chapter 12, 2 more brigands who ignored everyone else to attack Marcus on chapter 13x, and 2 archers who ignored Hector and Dorcas (DORCAS!) to attack Marcus on chapter 14, like 10 more enemies I could have killed if Hector could have survived one more turn on chapter18, and Uhai who decided to take a 100% chance of death to Sain over a free hit on Hector, and the chance to finish shopping properly with my silver card on chapter 21.