Part 37: Chapter 27 (part 1) and The War Room Part 28 (Scouting Maps and Revising Strategies)

A peculiar title. I’m still not really sure what this one refers to exactly.
This is the second chapter to have an alternative version of it, which I’ve referenced several times on the way here. If the total XP gained in Eliwood/Hector’s story by Serra, Priscilla, Lucius, and Erk exceeds that gained by Bartre, Dorcas, Guy, and Raven then you get Kenneth’s version of this chapter. Otherwise you get this one.
As I outlined earlier, I believe Jerme’s version of the chapter to be superior for purposes of max ranking due to the greater available treasure relative to the chapter’s funds requirement, the higher turn limit, and the relative lack of long-ranged spellcasters to snipe the low level units you’re trying to train.
On the other hand, having to not use Lucius and Erk for most of the game to train the largely useless Bartre and Dorcas and Guy instead is a pretty high price to pay.
Chapter Summary:
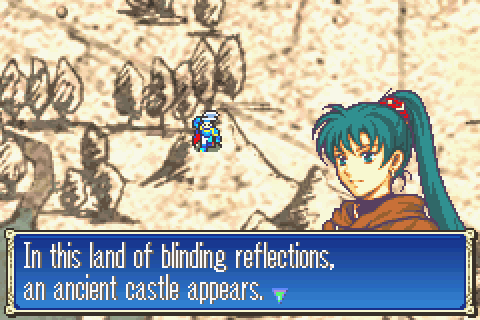
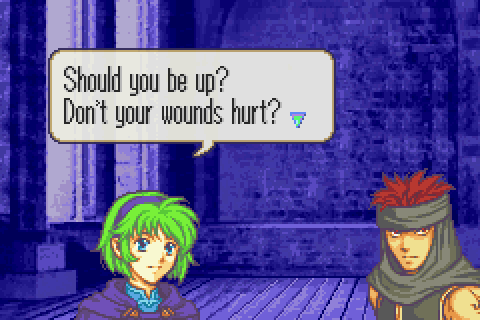
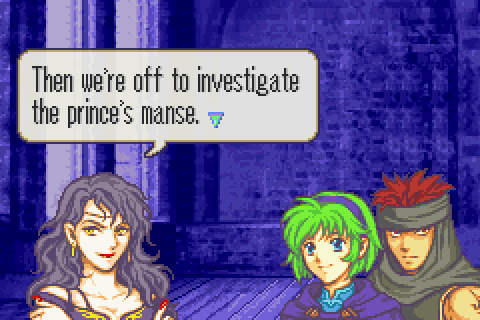
Having learned that the Fire Emblem is being held in the Black Fang’s fortress, Lyn tracks Vaida’s retreating group there. After arriving, they hear Sonia and Brendan and Nino and Jaffar discussing plans to assassinate prince Zephiel on the king’s orders. They realize that having the Fire Emblem is worthless if the prince is dead , but before they can hurry after the assassins they find themselves caught by the guard. After defeating them, they seize the Fire Emblem and then chase after Nino and Jaffar.
Although it’s generally fairly minimalist, a lot of the pre-chapter narrations of their journey are pretty cool and do a good job to set the atmosphere.
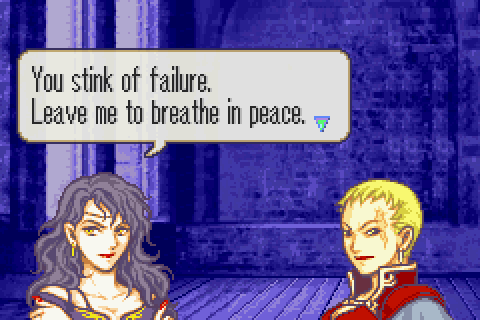
Owned. Vaida’s stupid life is spared because she was technically not actually a member of the Black Fang, but Sonia refuses to give her a second chance after she stupidly got bored and left in the middle of her mission.
The party arrives in time to see the Vaida leaving.

The lords leave the others behind in a safer place and sneak into the fortress, eavesdropping on a conversation between the leaders of the Black Fang.
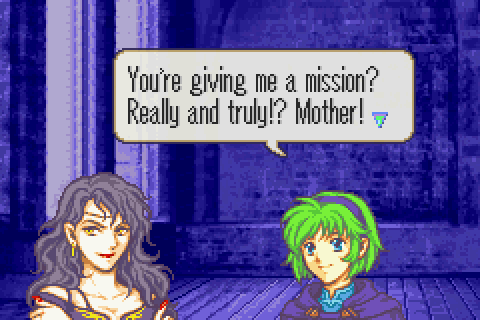
Really and truly? I get to kill someone? Yay!
I guess the fact that Nino has never actually gone on a mission or killed someone before is supposed to make this excitement endearing rather than screwed up, but really…
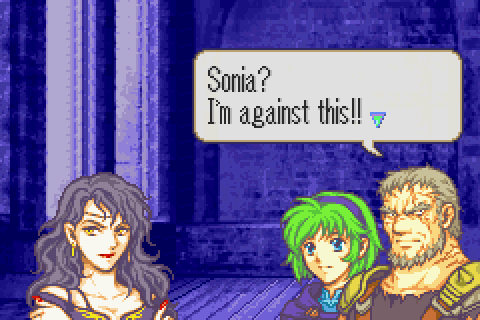
Brendan stands up to his wife to avoid her sending his adopted daughter to almost certain death.
She admits that this job would be much better suited to Lloyd or Linus, but they’ve vanished. Seeing as Limstella has no respect for Sonia, I don’t know if Sonia actually knows Limstella killed Linus and that Lloyd disappeared with a whole regiment of Black Fang to try to kill the wrong people for revenge.
Either way, she wouldn’t want to tell Brendan what happened.
And that shuts him up.
POOF!
It’s Jaffar, only recently recovered from the injuries she tried to treat. Nino again shows that she’s probably a bit too caring to be an assassin.
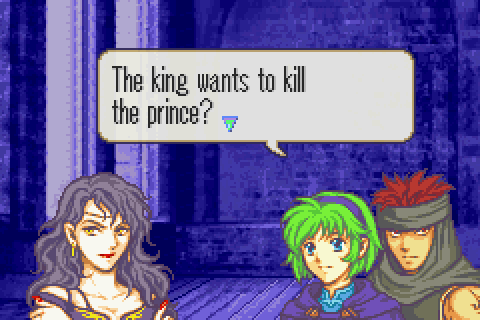
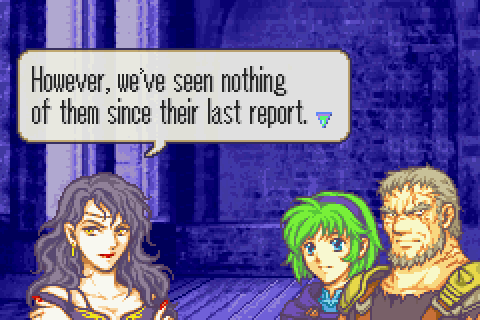
Sonia doesn’t tell either of them the reason King Desmond wants his son dead, so they’re left to just follow orders. Nino in particular is confused as to why someone would be so cruel to their own child.
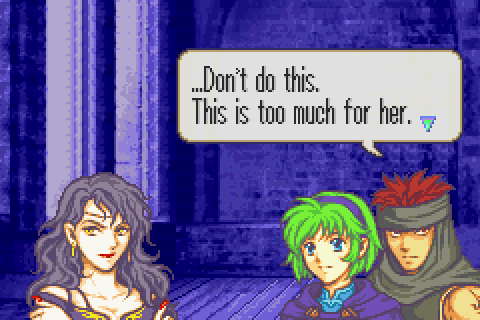
Jaffar objects to Nino being sent on such a dangerous and important mission and with good reason.
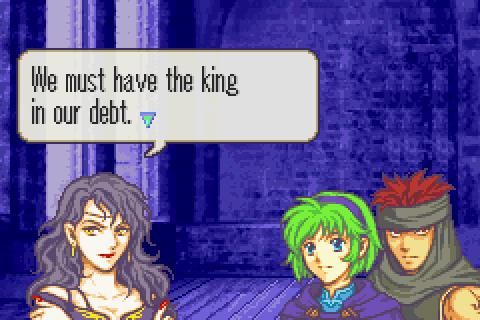
She only reinforces his legitimate point with another mention that this is important.
Jaffar shuts up and there are no further objections so they prepare to leave.
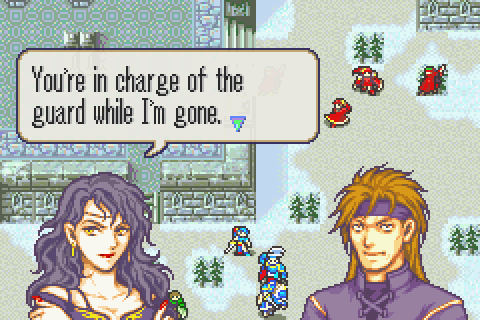
And the party moves so as to be TOTALLY visible to continue listening in as she puts this fellow Jerme in charge of the garrison.
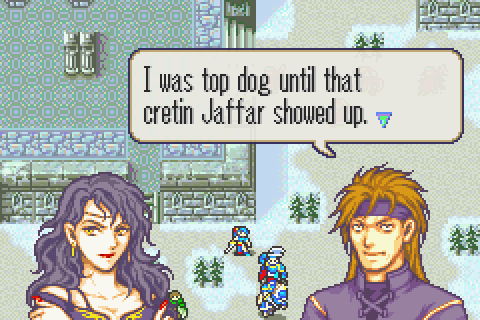
He takes the opportunity to whine about how he isn’t one of the four fangs anymore. What’s great is that Jaffar is right there.
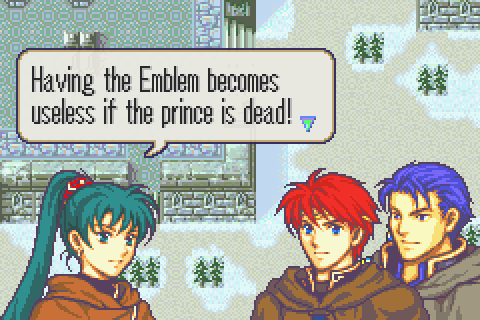
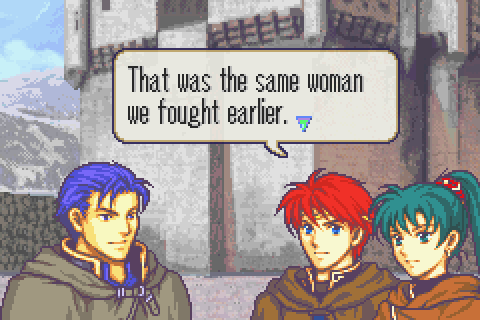
Lyn and Eliwood quickly realize the implications of this plot twist for their plans.
As they’re leaving, Jerme teleports into the middle of them all where they could kill him easily. He’s crazy.
As he quickly makes clear to them as well.

Well that’s rather forward-
I’m betting yes.
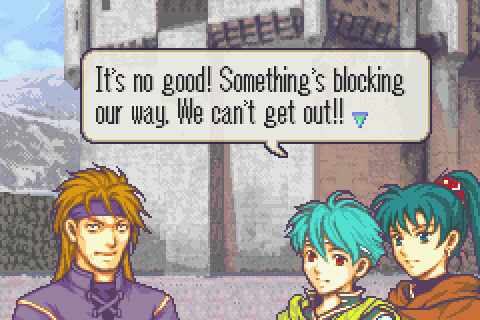
We’re apparently trapped in some kind of forcefield created by Nergal’s power and maintained by all the Black Fang alive in the area.
Battle Preparations & the Map:
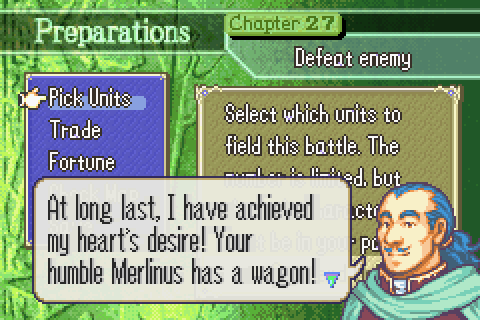
A wagon? That’s kinda lame-
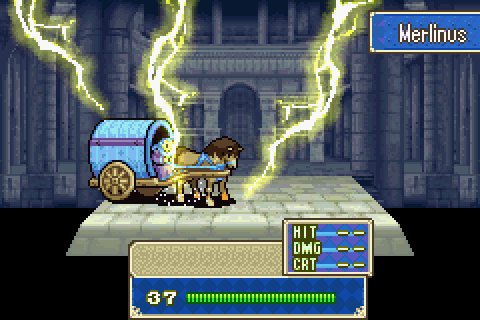
Wait nevermind, his wagon is made out of lightning, that’s awesome!
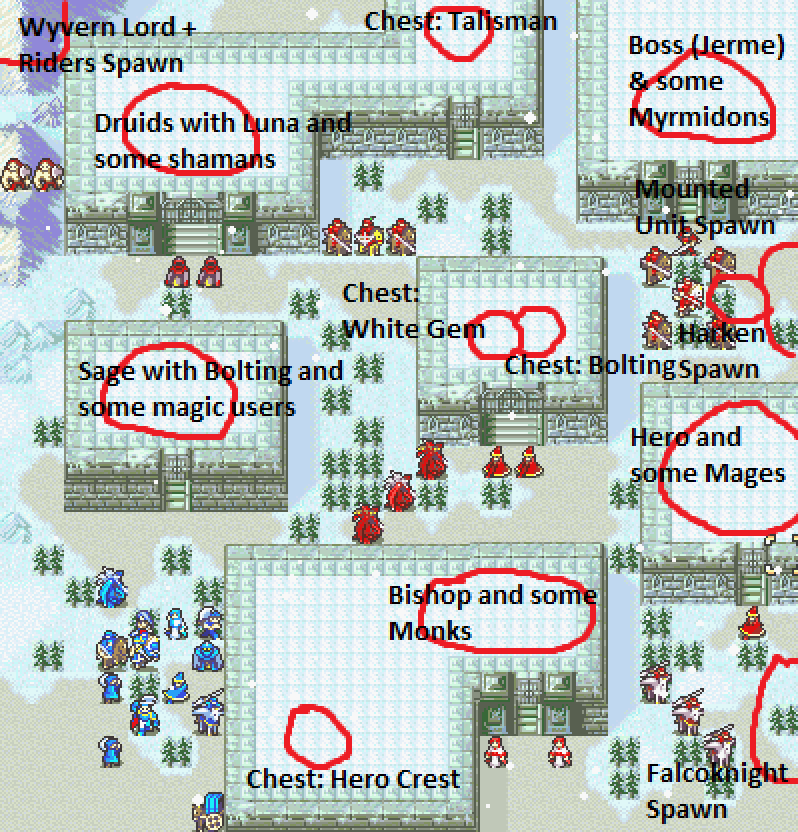
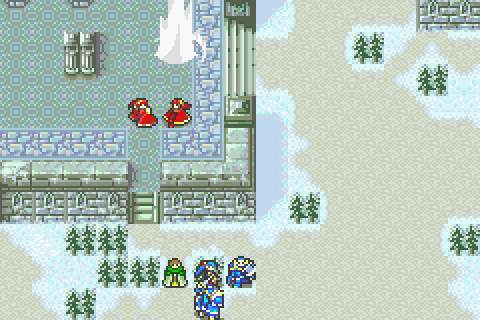
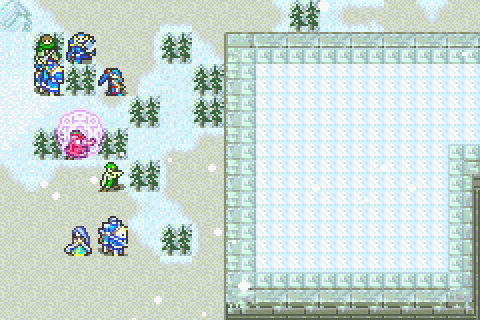
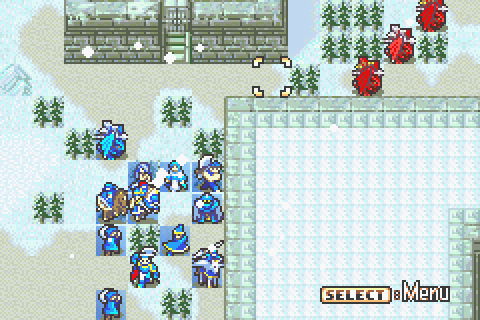
As Hector put it “What a complicated place.” This is indeed one of the most complex maps in the game and quite a tricky one.
For one thing, it’s partly inside and partly outside. Peculiarly, the inside areas are fairly wide open compared to the tight alleyways and rough terrain of the outside with all its forests and mountains.
For another it’s often snowing outside, which greatly slows everyone’s movements. But it doesn’t snow all the time and the pattern is only partly consistent. Plus you don’t get any warnings on this difficulty modes about when it will start and stop snowing, making it harder to plan ahead. Notably, snow only affects people who are outside.
Additionally, the interior rooms are completely hidden until you open the doors. Once you do that, you can see the enemies inside but they can fight you starting on your next turn.
There’s also bunches of hidden treasure but until you open the doors you can’t see where it’s located.
And for the first time there’s large numbers of promoted enemies on this chapter. For that matter, there’s an unusually high number of promoted and strong enemies in general.
The War Room, Part 28
Before you can properly approach this map, you need to scout it. In general, you should scout most maps before making a serious go at them if you haven’t max ranked HHM before. You could rely on other people to do the intelligence gathering for you though. In particular, this site: http://www.fireemblemwod.com/fe7/hhm/ENG_cap27B.htm is the best for finding out about reinforcement turns and locations and just about everything else. However the fire emblem wiki http://fireemblem.wikia.com/wiki/Pa...wer_of_Darkness is better for store contents and the like.
I generally prefer not to use sites or guides or anything and to instead just find things out entirely for myself.
When making a max run attempt you should never settle for a completion of a chapter that was just pretty good but not as good as you could make knowing what you do now. Those extra turns saved or the extra lockpick stolen or the more efficient distribution of XP could make a lot of difference down the line. In particular, they’ll add up
So as you’re playing, notice where and when reinforcements pop up and notice which fronts you need more people on and where you could make do with fewer. Notice which characters are struggling with which enemies and which characters you wish you had along.
Planning out your preparations as I described before is very important, but you’ll definitely make mistakes and the best way to find those is during play. Generally, when you realize there was a way you could have picked your units or your starting formation or the like better to deal with the level, you should keep playing till the end of the chapter and see what else you can learn and THEN restart. You’ll probably find other good changes you could make.
In any case, the following battle preparations (and the above map) were done after my scouting play when I found out who and what was behind each door and what the reinforcements would be like.
Back to Battle Preparations & the Map:
The snow is going to be about as helpful as it is harmful on this chapter. The enemy is affected too and many of them are cavalry or other units which are slowed down a particularly great amount. Plus you’ll need to spread out a great deal and the reinforcements can be dangerous to you if you don’t have the time to pull back and change your formation before they’re all over you.
On the other hand, it will greatly slow your completion of the chapter and make it extremely difficult to get people from one front to another- which you may well need to do since you have to split up in so many directions.
One key thing to understand about it is that not all units are affected equally. Infantry and mages seem to have their movement capped at 2 squares (3 if promoted or thieves) but are basically now unaffected by terrain. So for example, Canas can move through 2 forests and a plain as easily as 3 plains, but he can’t move through 4 plains.
Cavaliers, paladins, and Eliwood are hurt much more badly: their movement is capped at 2 squares (again, seemingly ignoring terrain).
Nomads and flyers fare the best at 3 if unpromoted and 4 for promoted.
So don’t bring any cavalrymen you don’t have to and DO bring flyers and possibly Rath. Ninian will also be extremely helpful here.
Because everyone is so slow and many alleyways are so narrow, you should take care not to let your forces get uselessly piled up and then blocked in at chokepoints. Always do what you have to do to push right through the alleyway immediately and seize control of the square on the other side so that you don’t have to waste lots of turns fighting through a chokepoint.
You’ll also want to spread out and do some rescuing and carrying when there isn’t intense fighting going on to maximize your movement.
What’s key is getting those doors opened promptly. If, like me, you unfortunately don’t have masses of door keys then you’ll need some lockpicks. Helpfully, many enemies on this chapter DO drop door keys so that will make things easier. You definitely don’t want to be limited by the movement of your thieves in a huge, slow map like this for opening doors –or even chests.
You also need to have other people on hand to immediately rush in and take out any problem enemies as you open doors and reveal them. Never open a door with your last unit.
Objective: Kill all enemy units
Secondary Objective: Get the Talisman from the top middle chest
Secondary Objective: Get the White Gem from the middle chest
Secondary Objective: Get the Bolting from the middle chest
Secondary Objective: Get the Hero Crest from the bottom leftish chest
Secondary Objective: Recruit Karel with Hector OR
Secondary Objective: Recruit Harken with Hector, Oswin, Eliwood, Lowen, Marcus, or Isadora
Reinforcements: Several falcoknights from the bottom right in the early and middle turns, nomads with nomadic troopers from the toppish right through the early and middle turns followed by cavaliers and paladins with reaver weapons from that area into the late turns, and wyvern riders with wyvern lords out of the top left from the early to late turns. The numbers are substantial but spread out over a big area and many turns, so they’re not a big problem.
Turn Limit: 25. (Wow that’s huge! That’s one reason I prefer this to Kenneth’s shorter time limits. It IS a long map, but the last reinforcements come on turn 19 and you could easily have won long before then if you wanted)
Units Allowed: 11+Hector (it looks like a lot, but considering that several of those have to be thieves and the rest will be spreading way out, you may well end up wishing for one or two more)
Units Brought:
1) Hector. Required and not useful, so I’ll just put him on chest opening duty with a chest key. He might help feed some kills to people later on when everyone has spread out more.
2) Heath. Flying units have a big advantage on this map and I’m going to need one of my very best units to deal with the wyvern lords from the top left.
3) Ninian. Ninian is great for preventing congestion and overcrowding as well as continuing to feed kills to my weaker units.
4) Bartre. Speaking of weaker units, here’s one now. There are a fair amount of lance users and others who he’s effective against on this map, so it’s another good opportunity to level him up.
5) Lucius. One of my few remaining low level units, Lucius is also very good to have around and easy to train. Particularly now that mine can actually take a hit from most enemies. At this point I don’t think I’ll be making him a bishop, but he at least deserves to go to level 20.
6) Rath. Rath is really hitting his stride and needs a lot less babysitting to give him XP now. His damage is high enough that he can actually kill many enemies unassisted.
7) Eliwood. I don’t really want to bring Eliwood but I see little choice here since I need to recruit Harken and all the other candidates for that job are worse. The best alternative is Hector, but Hector would need to be rushing into a fight to talk to him, which would likely cost me XP. Plus when the snow turns off Eliwood gets around better.
8) Canas. Here as a primary healer and because I’m also going to need serious muscle from time to time on this chapter.
9) Legault. I’ve definitely got to bring both thieves on this chapter. As the more combat ready one, Legault will be going with Heath toward the top chest while Matthew stays safely further back and makes for the bottom one.
10) Erk. A very good character and mine is close to promotion (< 20 XP from hitting level 20). I need all the battle-capable healers I can get my hands on.
11) Fiora. Much tougher than Florina at this point, her high mobility and goodness at rescuing people makes her handy here even if she’s not good against the enemies.
12) Matthew. I definitely need both of my thieves, as mentioned before.
Notable Units Rejected:
1) Pent. I definitely could have put him to good use on this chapter since I needed another healer. However, I have too many promoted units along already and my Erk is actually turning out better than him. Furthermore, I’m short on anima tomes at the moment.
2) Priscilla. Due to terrible mobility on this chapter, she would not be as useful relative to Serra as normal. Still, I did often wish for another healer. Ultimately, I WAS able to pull through without one, as I expected. If I could bring just one more unit, she would probably be it.
3) Serra. Still loses out to Priscilla since she’s slower on turns when it isn’t snowing.
4) Florina. I already had too many promoted units and she’s not as durable as her sister- let alone Heath- and is at this point pretty much strictly worse.
5) Dart. Dart would, as always, be better than Bartre here. However, he’s getting pretty high level and I want to use him on 28x, so I need to avoid him hitting his level cap now.
6) Dorcas. Much worse than Bartre now that the latter is leveled. Unlike Bartre, he can’t really stand on his own at all at this point.
7) Lyn. She can’t kill anything on this level.
8) Guy. Same as Lyn but slightly better, as usual.
9) Sain. I’m avoiding him, as usual lately. Too many promoted units and he’s too high level.
10) Lowen. I did consider bringing Lowen to train on this chapter, but the snow means his mobility doesn’t really help him here so he’ll be relatively easier to train on other chapters.
The idea with this formation is to have Legault split off with Heath immediately and make for the top left.
That forest to the right of the cursor MUST be seized on turn 1 or I will have to waste 1-2 whole turns trying to push past those darned wyverns, which will then further slow me down by letting other enemies get in position elsewhere on the map. I can only get there by Ninian-assisted rescue dropping basically and I have the perfect man for the job: Erk. Killing that one wyvern rider and injuring the lord will give him just enough XP to hit level 20.
Everyone else will proceed more or less together into the central area because that’s where the biggest fight will be. Both some falcoknights and some nomadic troopers will be arriving there at just the same time the snow stops for the first time, and I’ll need most of my firepower to deal with that threat.
After that the group will split up further, with about half heading south and half north. Who goes where doesn’t much matter since everyone is equipped for both jobs as long as Eliwood goes north to recruit Harken and Matthew goes south to open doors and get the chest. The decision will be made at the time based largely on what positions people just ended up in while trying to fight through the center. Canas will probably be taken back and forth between the two to heal the injured.
Erk and Fiora and Ninian are positioned so that they can just barely get Erk to where he needs to go, while allowing Bartre and Lucius (who I want to train) and Canas (whose healing will be needed) to get up there promptly too.
Erk is packing a guiding ring as well as a heal staff, so he can get right to work as a sage. Heath will absolutely need a healer to fight in the top left and I’ll need two VERY strong units to deal with the druids up there anyway, so Erk will be heading that way in short order.
Fiora has my one door key and will be pulling back to either use it or let someone else use it on that nearby building after her initial mission.
Legault is carrying a lancereaver and a wyrmslayer in case I see a chance to feed him some wyvern XP, but most likely won’t use them.
Due to the abundance of mounted enemies, Bartre is carrying a halberd in addition to his normal weapons.
Rath still has his variety of bows, though the iron one is close to breaking unfortunately.
Eliwood doesn’t have much inventory space to spare, so I can’t have him pass much to Harken except his iron sword.
The Characters:

Merlinus has promoted! It’s normally possible to have this happen 2 chapters earlier at the beginning of Crazed Beast, but as you may recall I decided to not bring him on 19x so that I could more easily feed some mages to Canas and he was killed by a berserked Florina on 23x.
Interestingly, he doesn’t actually gain any stats for promoting. However, he doesn’t really need to since his stats are already spectacular where he needs them. I mean just look at that nearly capped Skill! This guy is NEVER going to miss an attack for the whole game. Between his awesome 63 avoid and solid HP and Def, he’s now fairly close to invulnerable
Being able to now move 5 squares isn’t as much of a game changer as you’d expect unfortunately. The trouble is that almost everyone else on the team is now moving more than 5 and you can’t control his starting position, which is almost always in the back, so he has a tendency to get left behind as you push on. Another problem is that he doesn’t actually have his own inventory and can’t trade, so your other units often have to spend their turn retrieving stuff from him.
Further, he has huge Con so you can’t rescue him and 0 aid so he can’t rescue other people. As I’ve mentioned and demonstrated, trading and rescuing are at the core of most advanced tactics in this game, and not being able to do either of them hurts Merlinus badly.
Furthermore, with good battle preparations people will almost never need to take things from him anyway.
Still, he can now be used as a tank and he no longer needs a guard, and you’ll see me put him to use a few times this chapter.
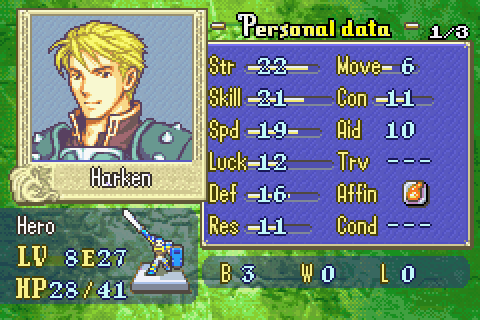
“I would rather die a knight than live in shame. I will trade my life for many of theirs.” –Harken, Chapter 27
Kind of like Fiora, Harken has a terrible case of survivor’s guilt and is barely convinced not to just get himself killed attacking the Black Fang.
He has a fairly detailed background, having been the knight of an abusive and cruel lord who ultimately cast him out before Elbert took him in. Consequently he has fairly low self-esteem and gave in to despair when Elbert was killed despite his best efforts. That he didn’t return to her and instead just tried to kill Black Fang from inside their organization until he died upset Isadora, his betrothed. Really he’s just got a ton of issues and only some of his supports resolve any of them. I’m not terribly fond of him. Partly because his life is actually amazing what with being a nobleman, working for the best person in Elibe, and being engaged to a great woman who loves him. But mostly because when Eliwood and Eleanora- and all Elibe- needed him most, he chose to let them all down.
Harken, unlike the horrible Karel, is actually a pretty darned good unit. He even shapes up fairly well against Raven, the game’s other Hero and probably the best infantryman other than Hector. His starting stats are pretty amazing and immediately make him one of my most powerful units, though his growths are comparatively poor. Still, I already have enough promoted muscle and he’s rather high level even for a promoted unit at this point, which would hurt my XP score even more if I used him.
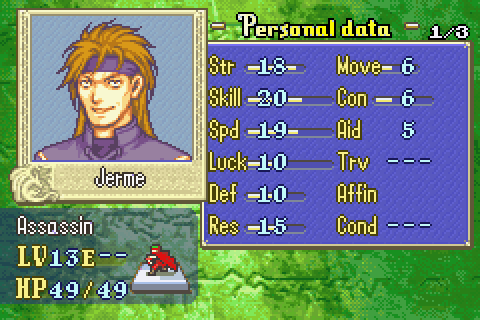
“I am Jerme! The finest assassin the Black Fang have ever known!” –Jerme, Chapter 27
Everyone’s favorite mulleted psycho, Jerme was one of the Four Fangs before Nergal had his minion Jaffar join the group and his superiors skills led to Jerme being replaced.
He’s completely nuts and spends all his time talking to his sword or about his sword or about how much he and his sword will enjoy killing various people and how that’s the only thing he likes doing.
He’s also completely indifferent to Nergal’s takeover of the Black Fang except that he’s glad Nergal keeps giving him people to kill.
Like Pascal, he’s proof that the Black Fang was horrible before Nergal joined up and never actually stood for any of its supposed ideals. If anything, having Jaffar replace him was probably a move in a better direction since Jaffar at least could be counted on to not kill people he didn’t need to.
Also like Pascal, he’s pretty awesome- if kind of whiny- during his brief time in the spotlight.
Jerme is basically no threat at all. True he’s fast relative to other bosses, but not to any of my characters at this point really. And he’s not very durable and doesn’t have a throne or anything.
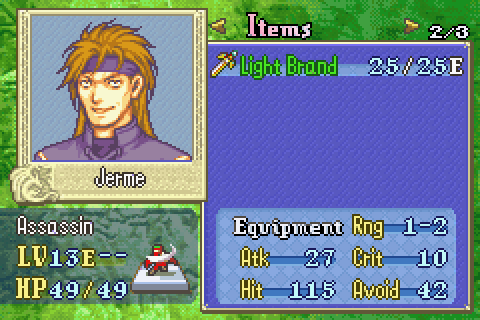
Worst of all, he’s using a Light Brand. This is not a good weapon. In particular, he will stupidly choose to attack with it at range which makes his damage terrible and prevents him from getting any criticals- not that his crit chance was actually that good to begin with.
Unless you do something stupid like open his door with Priscilla and then not move anyone in front of her, he’s no threat.