Part 44: Chapter 29 (part 1) and the War Room Part 30 (Physic)
Well THAT’S an ominous title
And an awesome one.
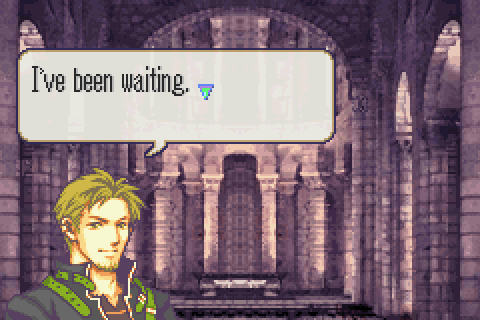
On Eliwood mode, Cog of Destiny is one of the game’s two biggest, fiercest, battles. It’s just one giant fight against both more and stronger enemies than seen before. Wave after wave of enemies will charge out of their forts and overwhelm all but the strongest defenses. If you do win, even your promoted units will have gained dozens of levels.
The huge, mountainous landscape, unique and dramatic music theme, critical importance as the final end of the Black Fang and the return at last to the main plot, and relative difficulty make it a truly epic chapter. Many people list it as their favorite chapter of the game, though for me all such straightforward battles rank below the likes of the Dragon’s Gate and Whereabouts Unknown and Battle Before Dawn.
It’s not so great on HHM, though it’s still extremely memorable. The Cog of Destiny Valkyries are a legend in their own right. And then there’s the druids, the only female druids in the game and far more dangerous than Nergal himself. Unless your team is heavily arena ground, this will turn into a desperate battle for survival by turn 3 or so and the danger will only change form, not let up, for the next 15 turns.
To me, it feels too much like Night of Farewells, courtesy of the massive number of staff wielding enemies. As if that level wasn’t crazy enough, these ones are both more numerous and more powerful. Much more powerful. However, this map is huge and wide open enough and they’re passive enough at the start that they’re not as big a threat. Plus there’s no need to steal from any of them.
That, actually, is another thing I don’t much like about the HHM version. The normal version had quite a few items to steal scattered around the giant map in the hands of really powerful enemies, so getting all of them was quite an endeavor and added something to what could otherwise be a somewhat monotonous battle if one was playing smart. But in HHM there’s nothing to steal at all, and no goals or difficulties of any kind but to just slaughter the enemy. Too straightforward.
Chapter Summary:
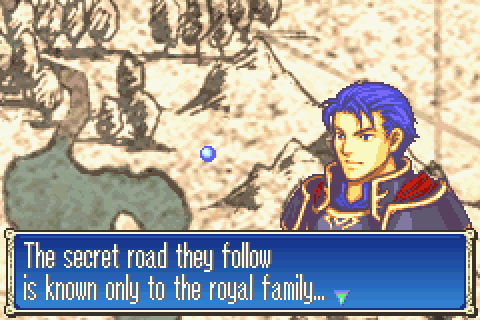
Following the map they got from the queen with such difficulty, Eliwood and company at last arrive at the Shrine of Seals as Athos told them to weeks ago. But an ambush is waiting for them and Nergal has nearly regained his full strength.
Similarly, castle Ostia’s defenses are impregnable.
That, right there? Really cool, more so the more you think about it. And the Black Fang theme plays for the last time ever: https://www.youtube.com/watch?v=yCP2ovXJQhk
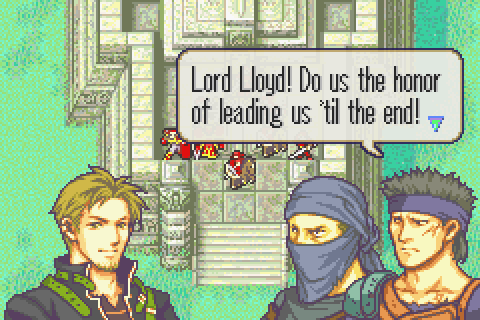
This is Lloyd or Linus’s finest moment really. The last we saw of them was after chapter 23, when whichever one you didn’t fight was led to believe you killed the other. Then they disappeared and even Sonia and Brendan had no idea if they were alive or not- it wasn’t even implausible Limstella had gotten the other one. In fact, given that she gets Jerme or Kenneth and Ursula even if you don’t fight them, she probably would have tried if given the chance.
Lloyd avoided Sonia’s spies, prevented anyone including the royal family from noticing his movements, figured out Eliwood’s plans, and moved a giant army of all the remaining elite black fang to the secret location of the Shrine of Seals before you got there. And he’s been waiting for you.
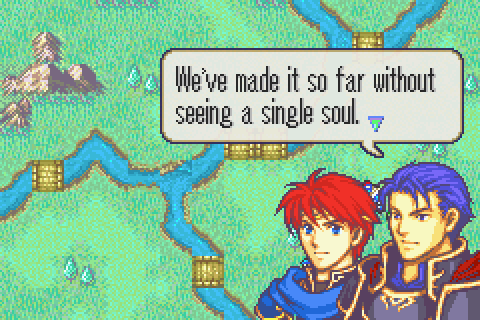
For several days Eliwood and all haven’t seen a single other person, but apparently Lloyd’s spies have been tracking them all along. Here’s one of them reporting in now.
OH and prepare to not see these guys again; most of these enemy types only appear on the Eliwood version.
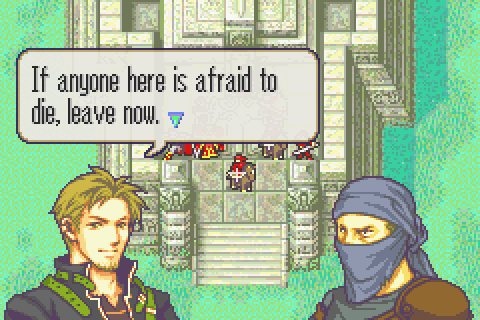
This whole speech, actually, is kind of a stock thing in FE. It shows up at least once in nearly every game. One of the enemy miniboss generals who’s been built up as good and honorable all game chooses to pick a completely avoidable fight with you when they know they can’t possibly win, and they all give similar speeches telling their men that they can leave if they want. And the men always all choose to stay.
Usually this whole FE cliché annoys me. The general still comes off as a complete ass for trying to kill you when they often know you didn’t do anything wrong and that they’re on the wrong side, and they know their men are loyal so they know they’re killing most of their troops by fighting when they can’t accomplish anything.
In Lloyd or Linus’s case it works better though because they actually still have reason to believe- up until you talk to them after hacking through their whole army first- that you killed the other brother. I mean, would YOU believe that a non-human teleporting uber-sorceress whose very existence is a secret ambushed your brother and stole his life energy just the moment after he was defeated and his troops were slaughtered by Eliwood’s group? Of course not. They totally look guilty.
Heck, they ARE guilty. They’ve been trashing the Black Fang for more than 20 chapters now, killing most of his friends and comrades systematically, and even they don’t have all the evidence that would prove most of that is at least partly Sonia or Nergal’s fault. For that matter, THEY don’t even know Limstella exists. They’ve never even heard of her!
Furthermore, these Black Fangs’ lives are pretty much over as it is. The whole black fang, like 100% except for this group, is dead. If Eliwood didn’t get them, Limstella did. And the king will likely sweep up the remainder in the next year or so for having failed him and knowing too much. They’ve lost the group many of them devoted their lives to and almost everyone in it they knew. This is not a band that has much to lose, unlike Brenya’s or Selena’s soldiers for example.
Hey, I think that’s the first palette swap of Batta all game! They really don’t reuse many of the Lyn’s story bosses compared to Eliwood’s story ones for some reason.
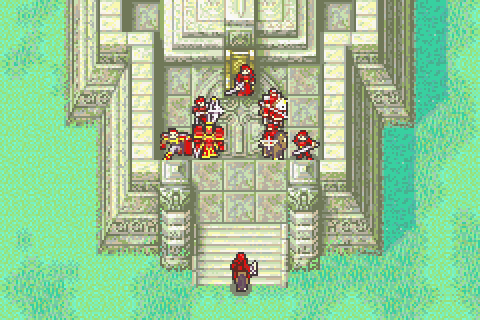
There’s no music, and a wind-blowing sound effect heard nowhere else in the game. That really gets the desolation and spooky quiet before the ambush across well.
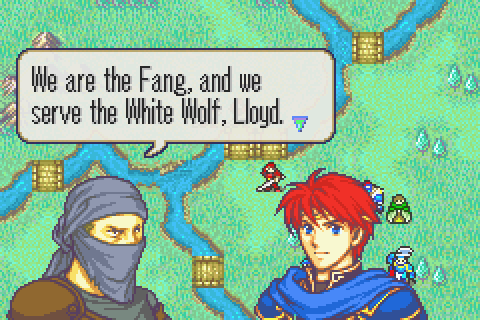
The Fang were comparably direct and forthright in announcing themselves when the other Reed brother was fought.
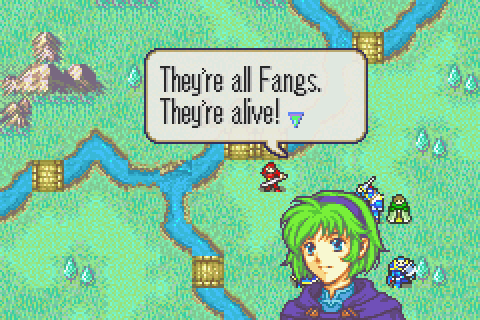
See as far as we knew last chapter, there was nothing left of the Black Fang at all. Nino is overjoyed and assumes they’ll listen to her.
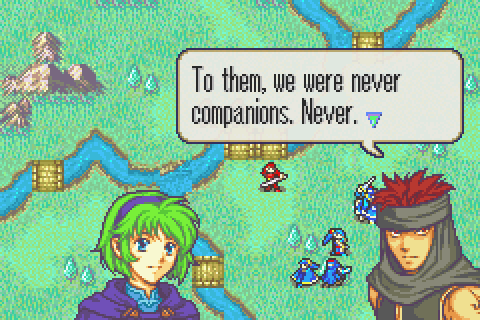
Jaffar catches her before she gets killed by one of them and explains that to these early Fang, he and Nino were servants of Nergal and not real Black Fang. And Lloyd’s group has at least begun to catch on to what Nergal has done to the fang.
Yeah, about that…
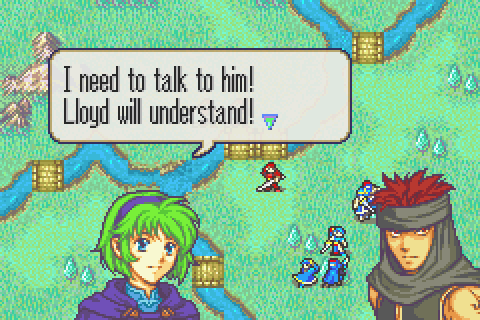
So the game really makes it seem like it’s a good idea to have Nino talk to him. At the very least it sounds like it might unlock a sidequest or something. It’s a trap. At the end of this giant battle, there’s one last trap left and it’s a nasty one.
If she talks to Lloyd, he will get off his throne and move to attack without warning on his next turn. If you don’t know that’s coming, you lose right there. Got to restart the whole thing now. And there’s no benefit.
This chapter actually has 2 ridiculous ‘gotchas’ that would not be out of place in FE6 or Awakening; the other one shall be brought up soon.
The War Room, Part 30
Although I’ve been using them for a while and have made mention of their great utility several times, Cog of Destiny is Physic Staves: the chapter, so now is a good time to finally talk about them.
Physic is a B level healing staff. It restores the same amount as a Heal staff (10 + caster’s Mag) but costs 12.5x as much. In fact, a single charge of Physic costs 2.5 vulnerary charges! That’s not money you want to just throw around.
It’s one of the rarest staves in the game. Without purchasing them from secret shops, you basically only get one (Pent carries it) but they can be purchased much earlier if you have the member card and some money on Kinship’s Bond or Dragon’s Gate.
What makes it worth all the trouble is that, unlike almost every other healing staff, Physic is ranged. Just like condition-inflicting staves the range is min(Caster’s Mag/ 2, 5). The applications of that are endless. The applications of that which are worth at least 250 gold per shot are at least still numerous. To give a few different uses:
1. Dealing with unexpected emergencies. This is the most obvious application of a physic staff. Sometimes an enemy gets a crit or you don’t dodge as often as expected and suddenly a character far from your healer is almost dead. Without physic, you might have to restart the map. With physic you can carry on. As long as whatever risk you were running saves you 2 or more turns or nets some extra XP or the like, that’s totally worth it.
2. Circumventing unit count limits. On later maps, many of your troops will be operating in semi-independent squads doing their own thing on their own sections of the map. Ideally, each squad would have at least 1 healer. In reality, the number of troops you can bring to each map (and the number of good healers) is more limited than that. If one group doesn’t need much healing but does need some, you might be able to get away with just having a person in another squad carry a physic staff and help them out at range from time to time.
3. Circumventing terrain or formation blockage. Sometimes you just can’t get to the unit you need to heal or you don’t want to because you want to have someone else throw a javelin from that spot instead or the like. Physic has your back.
4. Keeping the healer safe. Sometimes a powerful unit needs to fight a dangerous, moving enemy like, say, Vaida. If your powerful units needs healing, but your healer would be killed if they approached, Physic is the solution. Indeed, it’s key to most strategies for killing Vaida on Unfulfilled Heart.
5. Keeping the healer from hogging XP. The opposite of 4, perhaps the enemies in question are really weak and might suicide to your strong staff user and deny XP to someone you’d rather train. Physic can keep you safely out of range.
6. Circumventing Kishuna’s anti-magic field. You can stand right outside it and physic someone in the middle.
And there are many more. But there are 3 problems between the player and the unique power of Physic:
1) Acquisition. There is only one guaranteed Physic staff in the game- the one Pent comes with in Unfulfilled Heart. That’s not enough and that’s much too late. The earliest Physic can be acquired is Dragons’ Gate in one of the secret shops. It’s easier to acquire at the secret shop in Kinship’s Bond. And that’s your last chance, don’t waste it! Well not quite, you can buy them in a really secret shop in Victory or Death, but that’s basically the end of the game already. Do not miss your opportunity. Sell whatever you need to and use the silver card to buy 2 physics. 3 total is enough.
2) Getting the required B rank. Physic is a very high rank staff, a recently promoted Erk or even Lucius can’t use it. Getting to B rank staves requires using staves a ton. Most people promote to have an E in staves, which means it will take 60(!) heals to get them that B required for physic. Start early and cure EVERYTHING. Notice what I did with Canas in this game; that was juuuuust enough to get him his Physic B right as I needed it. For Lucius, who promotes to have a C immediately, it still takes a significant 25 heals to get the B. This doesn’t just happen on its own. Other staves can speed the process along slightly, but really there’s no substitute- especially in terms of price effectiveness- of just doing loads of heals. This isn’t a problem (usually) for Serra and Priscilla or for your pre-promote magic users: Pent, Renault, and Athos.
3) Needing high Mag. Sure 5 square range is handy sometimes, but it’s not game-changing like 12 range is. To really make the most of your physic staves, you need lots of Mag. Problematically, Serra and Priscilla suck in this stat. Pent is acceptable and Renault is poor. Athos is by far the best but has other jobs to do. This means you really need to train up your own promoted mages if you want a good physic user. Canas is a good candidate because he’s wonderful at everything else, easy to train, and has solid magic power. Lucius has the advantage of needing much less grinding to get to the B and having even better magic power. Lucius, in fact, is probably the best physic user all in all until you get to Athos. Don’t make the mistake of, say, promoting both Erk and Canas and trying to grind both up at once. You really want one good Physic user as early as possible. A second pre-Pent one is nice but not nearly as helpful, so don’t divide up your heals among two people.
Battle Preparations & the Map:
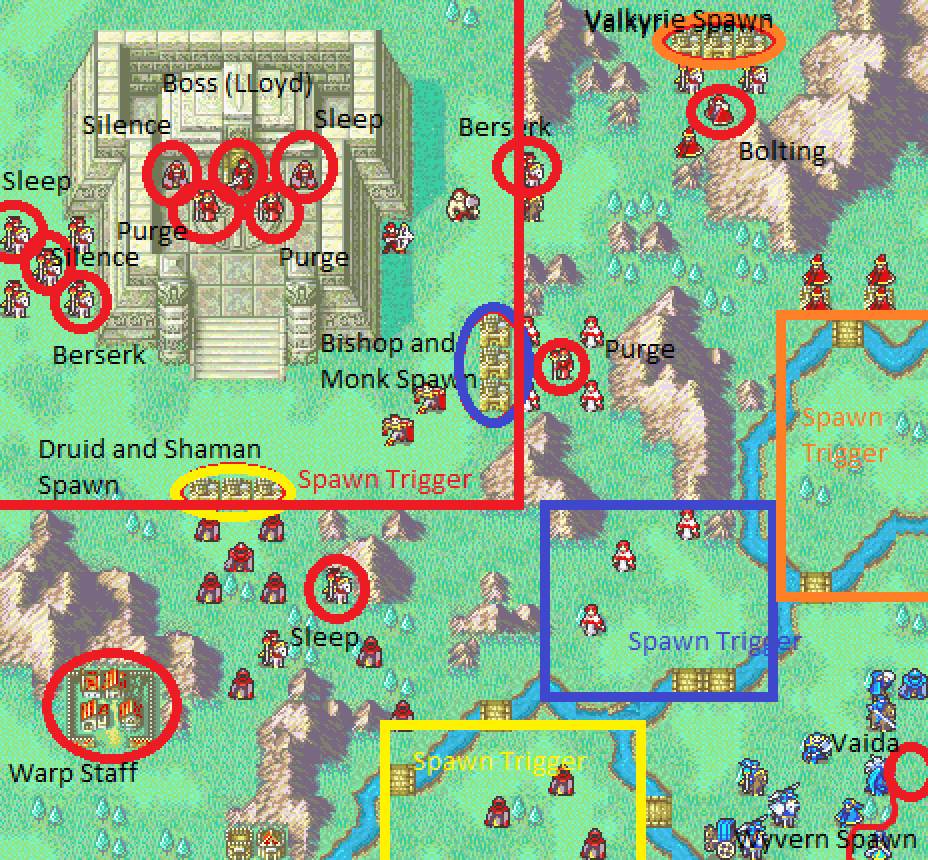
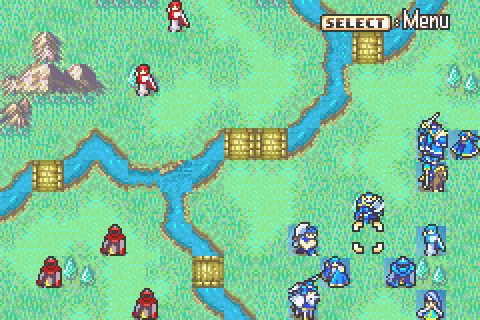
Oh it’s that kind of map alright. Looks almost as nasty as Night of Farewells at first glance, but actually it’s not nearly as bad. True there are even MORE staff users and their Mag is even higher, but they’re really spread out and the map is much more open. This means you can control who gets statused much better.
There are also a couple of people wielding Purge and Bolting, but the two bishops near Lloyd don’t move and the others aren’t much threat because the map is so big.
Much more problematic are the Valkyries, an extremely rare enemy type. Due to their fairly powerful class (8 movement, magic, staves, and massive speed are not to be taken lightly), and massive level, they are not to be taken lightly. Indeed, a single Valkyrie not blocked or killed immediately probably means you need to restart since they can get absolutely anywhere and kill all but your strongest troops. They’re the strongest normal enemies in the game and you have to fight 26 of them this chapter.
But take another look at this map. Sure at first glance it looks wide open and green, but actually it’s fairly mountainous and closed in. The entrance to your starting area can be blocked off completely at 4 bridges or almost completely at 2 since few enemies will take the paths through the woods that would approach your west or northeast entrances. You could easily stall the giant swarm of enemies at those points.
Better yet though, take a look at the mountain passes around the blue box. Do you see what I see? If you position your troops carefully, 3 units (one per pass) can completely seal off that area. And you probably don’t even need to guard the southern one since, again, almost no enemies will choose to make that approach through the woods.
And look at the arrangement of the long-ranged attackers and staff users. Yes there are a ton in total, but almost all are concentrated in and around the Shrine of Seals. You only need to deal with 4 near the beginning, and you can easily take out the Purge bishop before the Bolting sage.
Additionally, there’s only a single brigand on the map to destroy the bottom left village and he starts something like 7 turns away, giving you plenty of time to sneak a flyer in there.
The real difficulties come from 4 factors: a small number of units, a moderately short time limit, the power of the Valkyries in a straight up fight, and the top leftish cluster of staff users.
Looking at it again now after having completed it, this chapter is actually a more interesting strategic challenge than it first appeared and I can think of several creative and cool ways to finish it neatly and early. However, I beat it in a comparatively bland and straightforward fashion and did not restart for reasons you’ll soon see.
The reason began with battle preparations, on which I spent a lot of time:
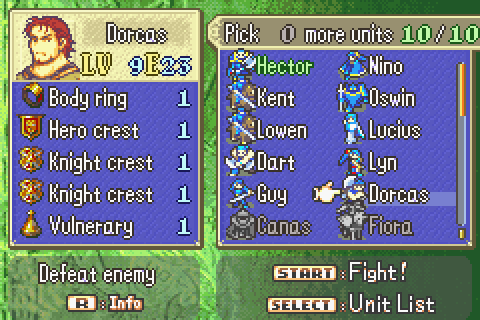
These guys here (minus Hector) are the noob squad. They are the only units other than Wil and Rebecca who are not already either level 20 or promoted. Many of them (Dart, Lowen, and Nino in particular) are already level 17 themselves. Guy and Lyn are about 15, as are Kent and Lucius. Only Dorcas and Oswin are actually still somewhat lowish level. I’m quite literally running out of bad units. But this chapter has an absurdly high XP requirement, so I’ve really got to find a way to train some of these people despite the difficulty.
The issues are that 1) almost all of the enemies on this chapter are magical and most of these troops are not effective against magic and 2) I can bring very few people to this chapter, and several of my slots absolutely must be taken up with very good healers to use Restore staves and with very strong promoted units to handle the Valkyries. This means I can’t bring many of these guys.
That in turn means that the low level people I do bring will get a lot of XP each since it won’t be divided among many other low level people.
And that in turn means that I shouldn’t bring any (or many) of the ones who are high level, because they’ll just end up hitting 20 and then not growing. I spent a while deciding who to bring because of that. Ultimately I decided on the lowest level and worst unit of them all: Dorcas for my first try, figuring I’d probably switch him out for someone better on a second and more serious run.
It’s been a long time since I did much shopping and, problematically, you may recall that I’ve been in a gradually intensifying crisis shortage of anima tomes since Crazed Beast when Erk chewed through three whole tomes unexpectedly. The problem is that absolutely NO shops since then have sold fire or even thunder tomes. As a result, I had to sideline Erk and even Nino was reduced to using expensive and heavy Elfires as I tried to save my last few charges of Fire or Thunder for when she’d really need them.
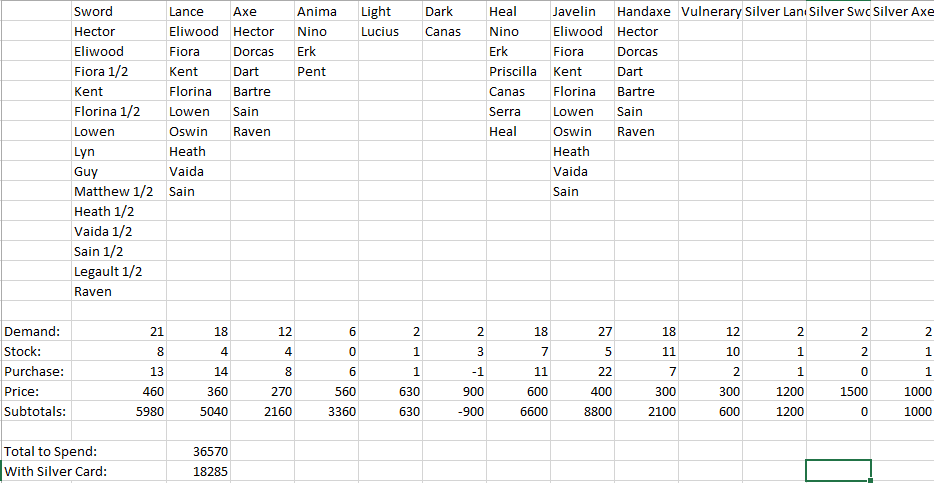
This chapter? Has Fire available. It’s time to do some shopping. In War Room #26 I explained the process I use to estimate how much to buy and this chart is the spreadsheet I developed with that method this time.
It was about time to clear up some Merlinus space anyway, so to gather than 18k required funds I sold all my torches, 1 use vulneraries, mines and light runes, and other useless odds and ends. This chapter doesn’t actually sell javelins, handaxes, or vulneraries, but I could at least pick up everything else on the list. The shortage of javelins is going to be a potentially severe problem on Sands of Time, but at least I’m not badly off for handaxes.
I also elected to buy a couple more silver weapons- in particular I wanted a new silver lance because I was forced to use a significant amount of my old one on Night of Farewells and I foresee needing to give a weapon like that to my pegasi in the future anyway.
Objective: Kill all enemies
Secondary Objective: Get the Warp Staff from the bottom left village
Secondary Objective: Recruit Vaida
Secondary Objective: Do some shopping
Reinforcememts: Many. Notably, they’re triggered by moving into certain areas rather than by turns (Just like on Crazed Beast). On the previous map I marked the trigger areas as well as the spawn points and what comes out of them. In total you face about 4 waves of 4 from each spawn point over 8 turns. That’s 16 spawned Valkyries alone. Vaida spawns along with the bottom right wyverns with the first wave.
Turn limit: 20. Definitely doable. I could shave 4, maybe even 6 turns off that without bringing only my A-listers. The main difficulty is getting all possible reinforcements and forcing your way through the Valkyries at a reasonable clip.
Units Allowed: 9 plus Hector. This hurts. This hurts really badly. Yeah, it’s totally doable, but this right here is the most challenging part of the level. Just one more person - even just to help with rescue drops or the like- would be a godsend.
Units Brought:
1) Hector. Required. Worthless vs mages and the map has almost nothing else… except Vaida and the wyverns in the bottom right. He’ll need to recruit her and might be able to help soften them.
2) Eliwood. The man is back in town! Eliwood always has solid Res and mine has had a massive blessing in that stat, plus he can wield javelins (probably the best non-Luna weapon for beating Valkyries). That makes him actually one of my strongest promoted units for taking on this level. Being fast is also helpful.
3) Nino. I think I want to promote her unless her next few levels are awful. On Eliwood mode, this chapter is amazingly great training for Nino. Here it’s really rough, but hopefully she can still get the last few levels she needs.
4) Priscilla. I do need restorers, and fast ones. Still, she’s not tough enough for this level so she’ll require a lot of rescuing.
5) Lucius. The best anti-magic in the game other than Canas, his great speed and amazing Res and Mag make him excellent here. Of course, he still can’t take on a Valkyrie since he’s lowish level and unpromoted. Good training to be had though.
6) Canas. Has Canas ever NOT been the best unit? This chapter is a whole new Canas paradigm though. Up till now he’s mostly been in a healing or boss assassin role in order to prevent him from getting overleveled. But every single Valkyrie on this chapter is basically a boss, so for the first time he’s going to be on the front lines. Heck, he IS the front line. He’s just perfect for this level. You desperately need healers, he can heal. You desperately need restorers, he can restore. You need physicers, there is no better physicer. You have to take down dozens of units with 20+ resistance, he has Luna and they’re using anima. You have to tank dozens of extremely fast anima magic users, he’s indisputably the best anti-anima tank in the game. And then you need to hit an extremely dodge-y fellow with high defenses on a throne. Luna, again.
7) Ninian. I seriously considered not bringing her because she’s been level 20 for a while and it’s not the kind of mobile chapter where her dance is really helpful and I really wanted to bring other people. Still, she remains necessary for training low level guys well and a huge asset when it comes to restoring and healing. Plus Ninis’s Grace and Fila’s Might are THE way to deal with a giant swarm of powerful enemies at a chokepoint.
8) Erk. I need healers, and I really need magic tanks. Erk fits the bill. Plus at long last I’ll be able to buy Fire tomes again, so he can finally get back onto the battle field.
9) Fiora. You must have a flyer for this chapter. And Fiora has all the resistance, which is absolutely imperative. She’s one of my most important units on this chapter, responsible for several special missions including shopping, visiting the village, and sweeping up the most problematic top left enemies to that I can secure an early victory. In fact, everyone else is basically supposed to create a diversions for her.
10) Dorcas. Hoo boy, training him is going to be rough. He’s the worst non-archer in the game probably, but he’s also my last non-archer to be below level 10. “What’s the worst that could happen?” I asked, “He’ll probably die and then I’ll restart and use Kent or something instead.” Afterall, there are a bunch of wyverns coming in the bottom right and there are woods here, so he should be able to handle those. With some help. Yeah, no, he’ll probably die. Oh well, no better chance to train him.
Notable Units Rejected:
1) Heath. I wanted to bring Heath, but he’s getting too high level. I need to save him for when he’s really needed later on or he’ll hit level 20.
2) Florina. Since she’s lower level, I wanted to use her instead of Fiora. However, my Florina has turned out horrible and on this chapter I desperately need Fiora’s superior resistance.
3) Pent. On a retry, I expected to replace Priscilla with Pent. He’s a better healer, restorer, and physicer and he can actually fight and stand up to boltings and the like. He’d be great here, but I didn’t think he was strictly necessary as long as I had Erk and Canas.
4) Dart. Too high level, not much room left to train.
5) Lowen. Too slow and no res, he’d be torn to shreds. Plus too high level.
6) Oswin. Too slow and no res AND no movement AND he sucks vs wyverns. He’d be almost untrainable here.
7) Lyn. Do you see ANYTHING on the level that attacks at 1 range? Me too; a pair of heroes who will instant kill her.
8) Guy. Like Lyn but slightly better.
9) Kent. Would probably be my first choice to replace Dorcas, he’s got the speed to be able to kill some mages and would stand at least some chance against wyverns- especially if I gave him a Wyrmslayer or Lancereaver on a forest.
10) Sain. Sain is actually my one and only character (even Canas can’t do it) who could consistently 1-round those Valkyries. No one else has as much speed and no one else has the power. If I were trying to focus on saving turns, I’d give him a Ninis’s Grace and have him kill 12 of them in one turn. I expected to have an easier time feeding kills to non-promoted people though and expected Eliwood to be able to lure more of them off to fight him, so I didn’t realize how necessary Sain would be.
It’s going to be a long, rough battle so starting equipment is important. Starting formation matters less than on some other maps but is still important.
Dorcas can’t fight many enemies on this level, so I’ve got to let him take on every one he can. He’s positioned so that (with some buffs) he can take down the bottom shaman with a handaxe and then kill the others on the enemy turn. After that he’ll join the rest of the group in the main battlefield north of the double bridge. Late in the map, he’ll head down to the forest to fight the wyverns. He’s got an assortment of hand and iron axes, nothing fancy, and a good vulnerary.
Fiora is in the best possible position for advancing quickly to the stores and then the village. The plan is for her to hook through the bottom and then left edges of the map so as to spawn Vaida as early as possible and assassinate the problematic enemies in the top left area early. That will let me make the final advance toward the shrine much more quickly, saving many turns. She’s got 2 javelins, an iron sword, a vulnerary, and the silver card.
Eliwood is armed with 4 javelins (Valkyries take a lot of hits) and a vulnerary, and I almost gave him a pure water. He’s positioned to rush up to the nearby north forts and try to make a stand against the Valkyrie swarm from there. It’ll be a difficult mission, but he should be able to do it- maybe with a physic or two.
Everyone else’s formation details are relatively unimportant, but the idea is to drop Nino into range of the monks and then have everyone swarm up into the battlefield north of the bridge. Every single person but Eliwood and Fiora will be fighting there most of the map.
Nino has the remaining 3 charges of Thunder and Fire, an Elfire, a vulnerary, and a guiding ring for if I get her to 20. Priscilla is wielding heal, restore, physic, and a flux tome to give to Canas later.
Hector has his standard gear, plus an iron lance and javelin for after recruiting Vaida (who I stupidly planned on having rescue him out, forgetting that she can’t rescue big people. Lucius is just brimming over with lightnings and a shine.
Canas is not currently carrying a flux, but does have Luna and Heal and Restore and Physic and, unusually, a Barrier. If there’s anywhere that’s useful, it’s this chapter. He and Priscilla will be trading it off now and then. I hope to have him do as little fighting as possible so as not to overlevel him here.
Erk currently has only an Elfire and his heal staff, but I’ll be sending my new anima tomes to him post haste.
The Characters:
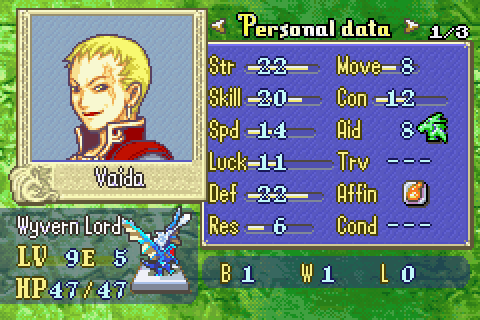
We’ve seen Vaida before and I’ve said what I have to say about what a terrible character she is, but what a great unit.
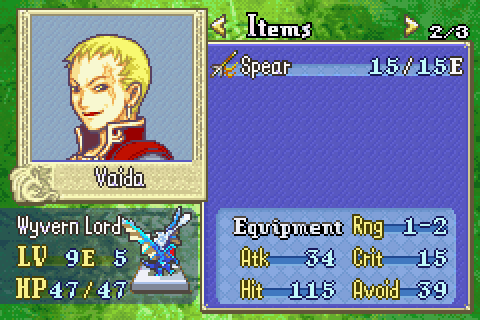
Alas, NOT the uber spear. But that thing is worth 9000 gold, an absurdly high amount. She needs other gear immediately if she’s going to fight, and I want her added to the team ASAP since my team has too few people.
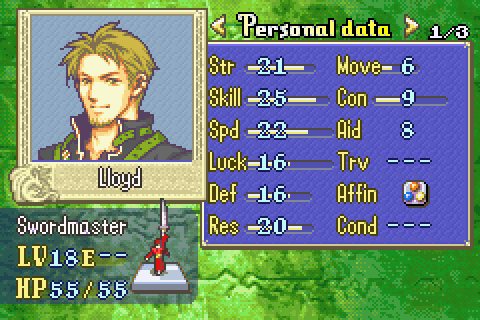
The real champion of the Black Fang, Lloyd would really have gone far in life if his dad and brother weren’t complete idiots. He’s charismatic, cunning, and incredibly skillful. The citizenry of Bern who like the Fang often seem to mean that they admire him particularly and it’s him many of the other Fangs you meet most look up to.
Unlike Linus, he’s not a reckless moron and he doesn’t fight you because he’s stupid and brutal, he fights you because he correctly believes you killed almost everyone he knew and incorrectly (but with very good reason) believes you killed his whole family too. People are always saying they wish Lloyd was recruitable and in the early days of the game, many people were spreading rumors that he was if you did the right things.
Look at those stats. And he’s on a throne. You can’t out-speed this guy and in fact he’ll double almost anyone. His avoid is so high even LUNA isn’t accurate against him and his defenses are very strong. And 21 Str on a swordmaster? Almost unheard of. Do NOT go next to this guy.
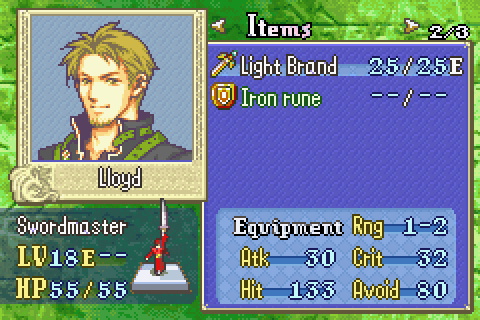
His weapon is his weakness. The Light Brand remains horrible. With it at range his damage is actually a mere 19 vs Res, which most real mages are completely immune to and he can’t crit at all! On the other hand, it does make Luna have a weapon triangle disadvantage.
Oh and that Iron Rune he drops is a nifty item that makes the bearer completely immune to crits. It will be very handy in exactly one situation later on as you’ll see...