Part 63: Ryoma (Map Overview)
Ryoma! I know that guy. I think he's been waiting patiently for a lot longer than 25 turns at this point.

Very menacing.
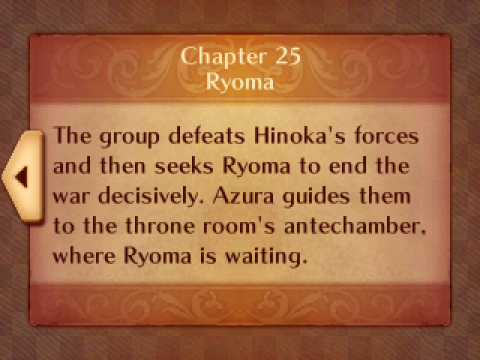
Here it is, the first of Conquest's three brutal endgame maps (chapter 27 is easy it doesn't count). Corrin must duel Ryoma to the death, and if she can't do that then the rest of the army must muscle their way past Ryoma's retainers to save her. This map is an obvious parallel to the equivalent fight against Xander in Birthright, but the dynamic is slightly different - in BR Corrin must defeat Xander before his retainers kill your other units, in CQ your other units must defeat Ryoma's retainers before he brutally slaughters Corrin. Or at least that's the idea.
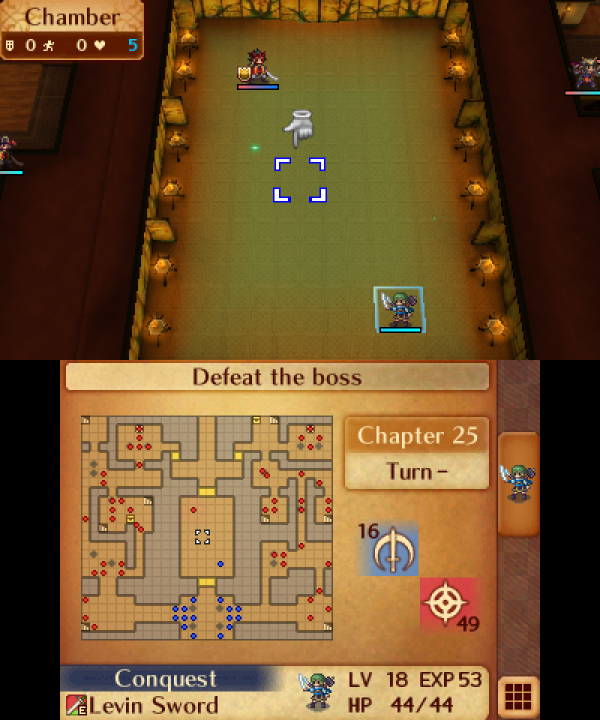
By far and away the easiest method to beat this chapter is just to have Corrin kill Ryoma. His retainers will not move until you approach them, and with good reason - they are positioned in formations expertly crafted to make your life hell if you try to get past them. The only thing that stops this map from being a run killer is that most of the map is entirely optional unless your Corrin is really bad.
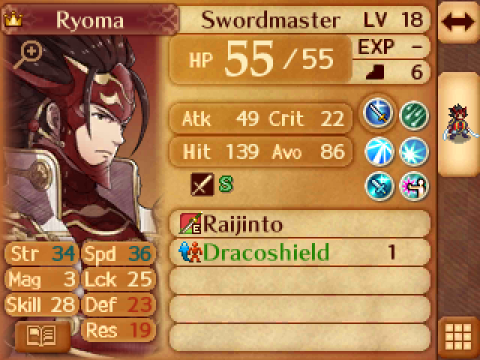
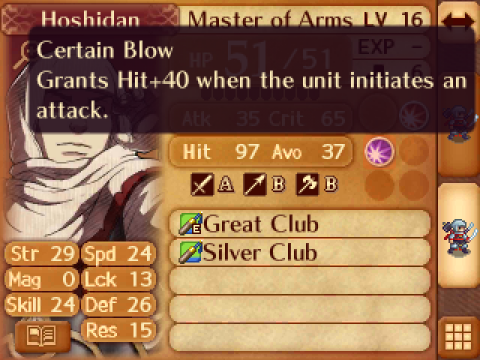
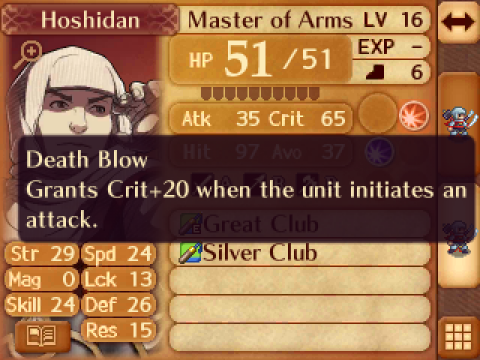
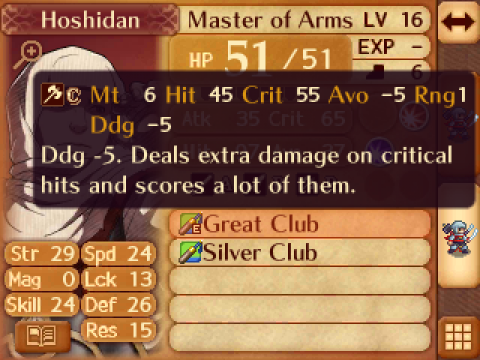
Defeating Ryoma with Corrin might be the easiest option, but that doesn't mean it's easy. He's insanely fast, he hits very hard, his sword can attack at 1 and 2 range, and he's got some rather nasty skills to boot. There's a 20 turn (25 on lower difficulties) grace period where he'll sit still and not do anything, even if you attack him, so ideally you'll want to take him out before then. After that you'll be at the mercy of his huge avoid boost from Duelist's Blow and Rajinto's 1-2 range whenever he attacks you.
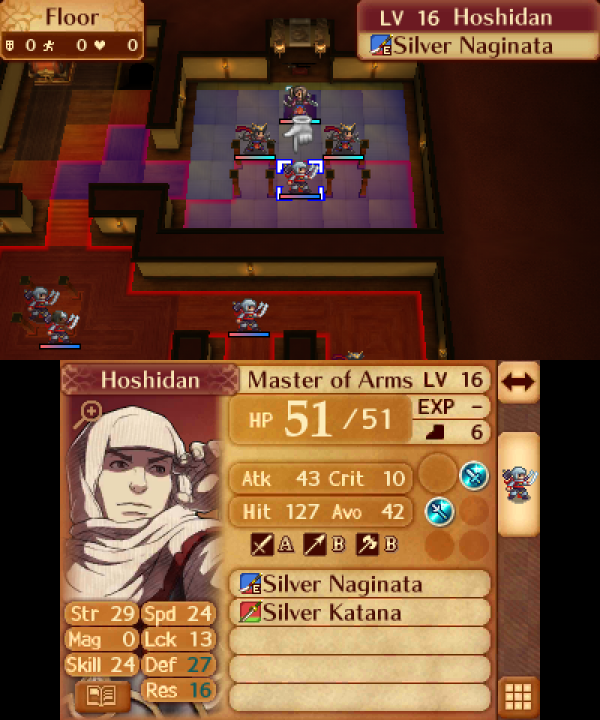
The boss room comes with a unique "Chamber" terrain that heals 5% of HP to all units standing on it at the end of each turn. It also reduces all damage taken by 70%, which both stops him from instantly obliterating Corrin with a crit and Corrin from doing the same back. A dragon vein that can only be accessed from the top of the map after defeating both retainers and opening up Ryoma's chamber will flip all the chamber tiles into -avoid tiles with no defensive boosts, but I'd be wary of doing this if you don't want someone dying instantly from an Astra critical hit combo.
There are a few tricks you can do to allow a weaker Corrin to muscle through Ryoma's big stats, or at least survive a few rounds against him once he's done waiting patiently. Giving them tonics and cooking stat boosting meals are the most obvious ones, but if you stand them next to the bottom of the arena they will be just barely in range of the rallies and 2 range passive skills of your other units, so you can also boost their stats that way. Your Corrin mostly likely will have the Draconic Hex skill by this point too. Thanks to Ryoma's enemy only "Resist Status" skill he'll only take a -2 debuff to his stats (which will decrease to -1 by the time you can attack him again), but it's still something. The combined boost of a tonic, a meal, a rally, and that debuff might be just enough to prevent him from doubling Corrin or even allow him to be doubled by them. The Swordbreaker skill from Wyvern Lord and any weapon with weapon triangle advantage will also make things a lot easier for you - F!Corrin's fast building support with Camilla makes it not too hard for you to grab it from Wyvern Lord in only a few chapters.
Otherwise you can wait 20 turns and then leave your army at the bottom of the arena in range of Ryoma's ranged attacks. He will gladly attack them if they're the best target in range (although they won't benefit from the defensive boost of the chamber tiles!), so if your Corrin is completely hopeless you can have them run out of range and trick Ryoma into attacking your better units instead. He is also vulnerable to status staves (and Corrin can be healed with Physic and Sun Festals!) from inside the arena, but Resist Status will make it difficult for you to hit him with them.
I think my Corrin will do just fine against him. She's only a single tonic away from avoiding a double, and the extra strength debuff from Seal Strength will actually be helpful here. I'm still going to try and rout the map if I can, but it's nice to know I have a way to defeat Ryoma just in case I can't get past his retainers.
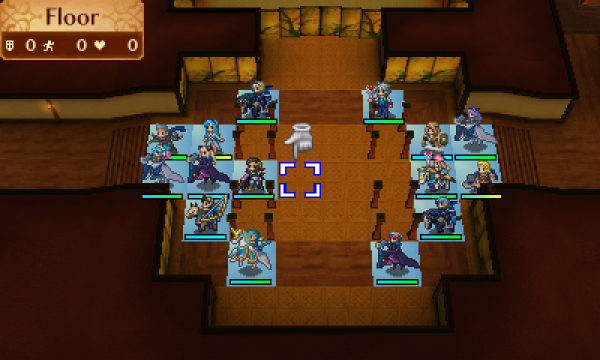
If you can't (or don't want to) defeat Ryoma with your Corrin, prepare for one of the most nightmarish maps in the entire series. At least the game is nice enough to give you 16 deployment slots instead of the lategame standard of 15, presumably to make up for Corrin being separated from the rest of your army.
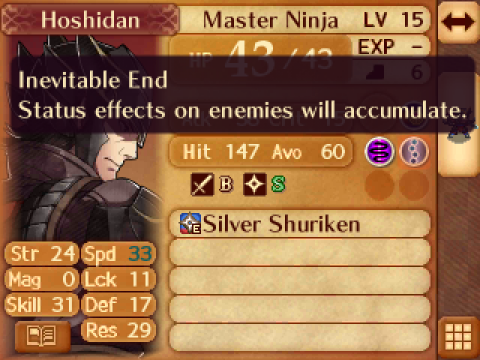
How stat debuffs normally work in this game is that only the largest debuff applies - if a unit gets hit by a -4 debuff and then a -6, only the -6 will apply. Inevitable End removes this limit. Every single enemy that can lower your stats in this map has it...
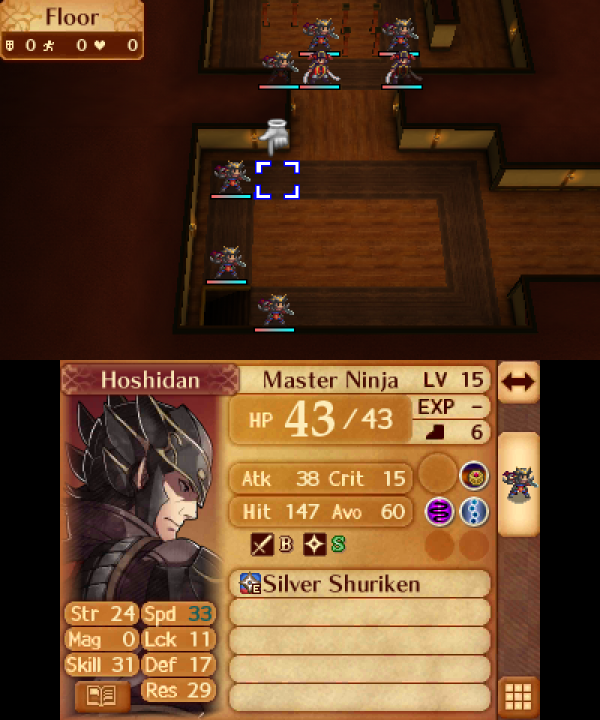

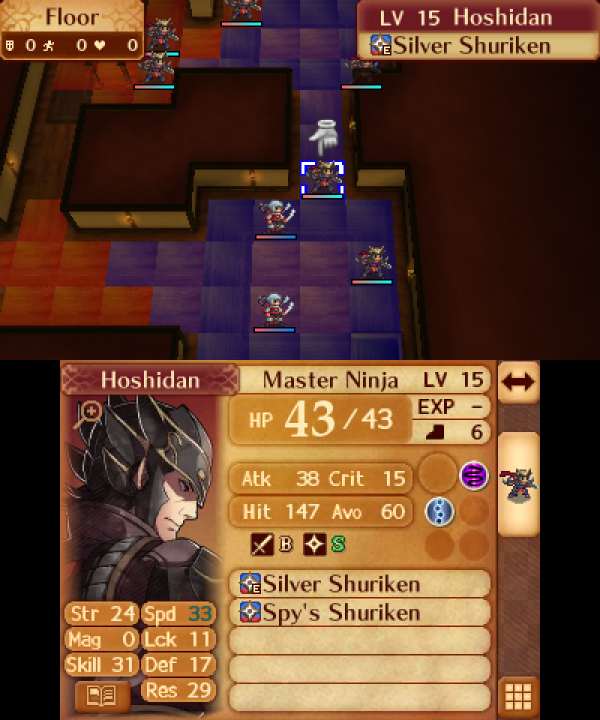
Ryoma's retainer gauntlet is split into two halves. Saizo's is on the left. The first obstacle you'll face is a load of Master Ninjas and Swordmasters. They're not so bad compared to what comes after, even with Inevitable End you can lure them over with a strong enough unit.
This room contains a chest with a Silence staff, a nice Hoshidan-only offensive staff that will help you out a lot in the final map of the game. Even if you don't care about routing the rest of the map it is worth grabbing. Actually grabbing it, though...
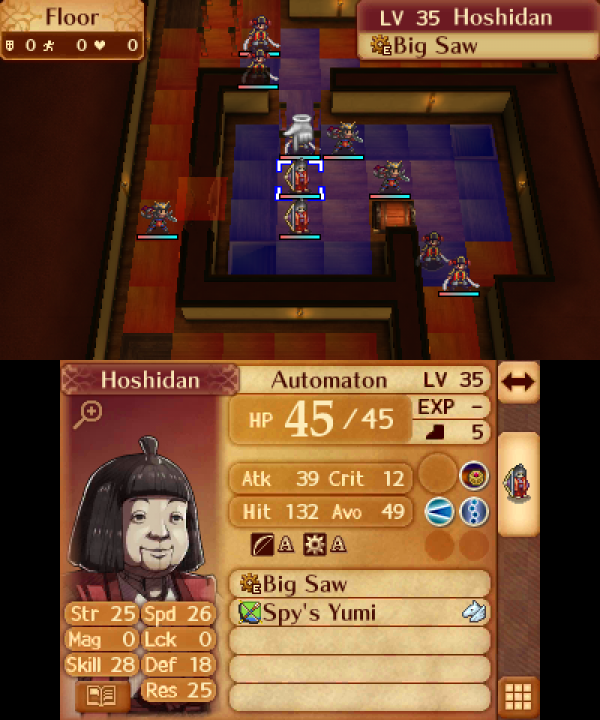
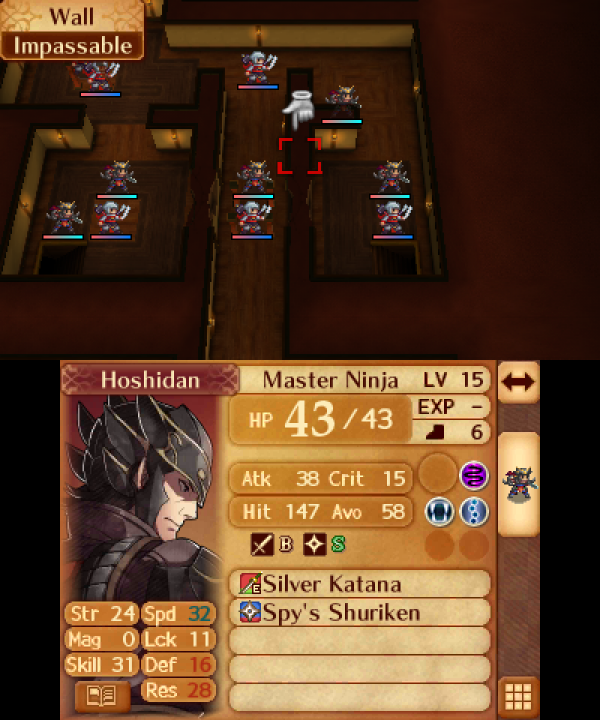
The Spy's Yumi is a bow that can attack from 3 spaces away, and only 3 spaces away. It can't double and isn't particularly useful for much, but when combined with Lunge it becomes the scariest thing in the world. Any unit who stands outside this room hoping to lure enemies over one at a time is going to get pulled in, debuffed to hell and back, and then piled on by a large number of very powerful enemies with horrible skills. There are 4 of these assholes on this side of the map and if all 4 of them hit you then you'll be slapped with -32 to your defense and left who knows where.
There are two ways to get rid of them - hit them with a Freeze staff so you have a turn to take out their allies without getting lunged yourself, or smash the breakable wall and defeat them on player phase with your most powerful and tanky units, and then hope they can survive the onslaught of all the other enemies in the room. A third way to survive would be letting yourself be lunged and then somehow surviving, but I have no idea at all how you would go about doing that. There is no way to counerattack a Spy's Yumi at this point in the game, so you cannot do anything to avoid the lunge and the -6 defensive drop if they target you.
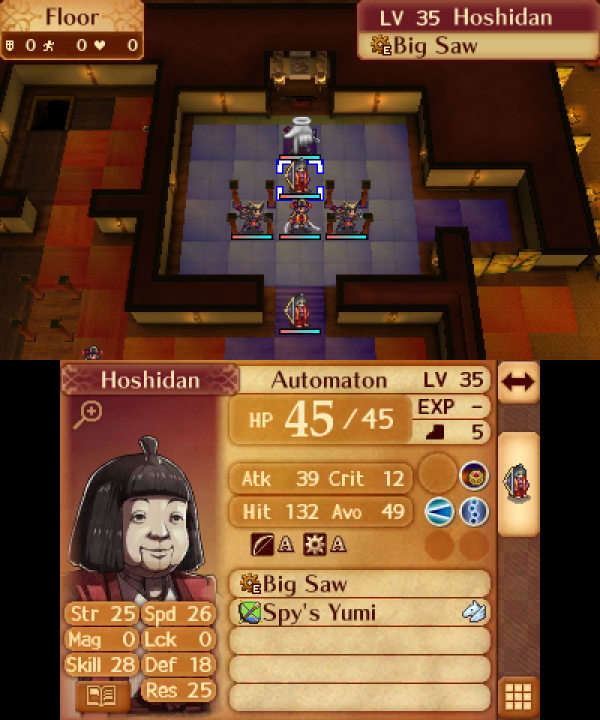
The boss room is more of the same. The lack of walls should make it easier to rush in and take out all the troublesome enemies at least. All the Swordmasters are insanely fast and deal a large amount of damage, and all the Master Ninjas have Inevitable End and an array of damage dealing skills. Tanking all of them on enemy phase would be very difficult even without the puppets.
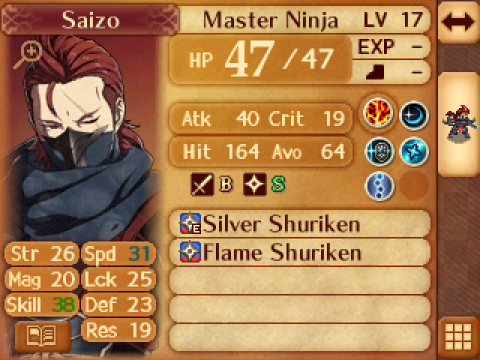
The retainers themselves are honestly the least threatening part of the map. They have decently high stats and a scary array of skills, but they will stay put so you can defeat them at your leisure without having to worry about getting lunged everywhere. Saizo's Luna skill isn't so threatening when his strength isn't all that high in the first place. Thanks to his Flame Shuriken he's also the only unit in the entire map who can deal magical damage, so don't bother cooking resistance meals.
Kagero's half of the map is of course also filled with Spy weapons. The enemies here do not have Lunge, but they do have poison skills that will let them chip away at your health from a distance with no retaliation. Even Xander can't survive against the combined assault of Inevtible End and a thousand Poison Strikes.

The Practice Katana is a Hoshidan sword that gives +5 speed to the wielder. I think this map is the first in all of Conquest that lets Master Ninjas use swords...
This section of the map is known as the Corridor of Death. The Master of Arms and Master Ninja in the middle will not move until you're in range of the Spy Shuriken enemies on either side, at which point you will be pelted with debuffs from 3 range a thousand times over and then finished off by the enemies in the middle. Freezing or Entrapping the spy weapon users is one way to get through this...
There are also walls to break down to make a player phase assault easier, but you'll have to muscle through this guy to reach them. The Shelter skill can be useful for killing enemies and then retreating out of range... The Rescue staff will be too, but you only get 4 uses of that.
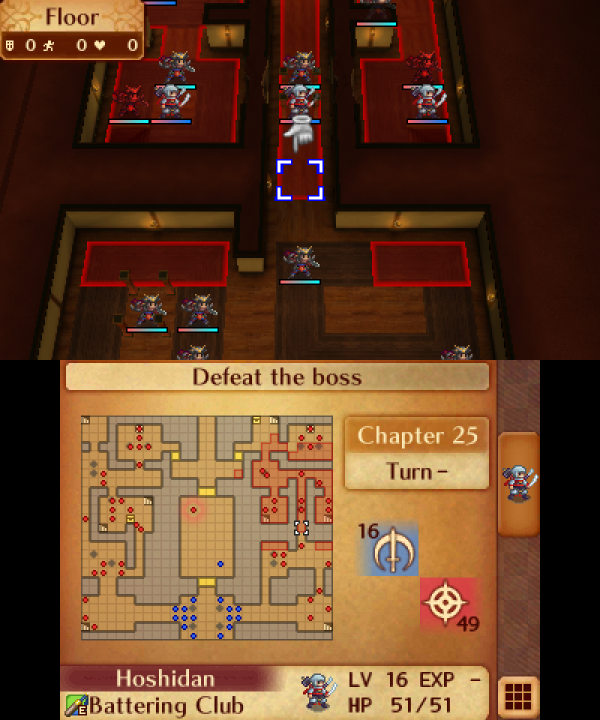
All of these red squares show where the spy enemies can get you from. Shurikenbreaker users might be able to avoid the debuffs from their attacks, but they'll still take damage from Poison Strike and Grisly Wound.
This guy also exists. I can't even remember if he's threatening or not, I just think this is a hilariously cruel combination of weapon and skills.
Kagero's boss room is a lot less scary than Saizo's, there's no lunge users to mess you up. The chest to the right of hero contains 10,000g, which is nice but not worth suffering for if you don't need it.

Kagero herself isn't too scary either, but she does come with both high crit and armour-slaying weapons. She and Saizo are both surprisingly slow for ninjas, it's odd. I think the Automatons and Masters of Arms are the only enemies on this map that they can outspeed.

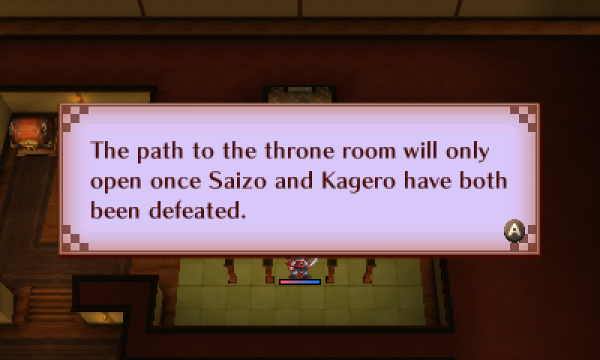
In Normal mode you get 25 turns and only have to defeat one retainer. In Hard you have to take out both, and Lunatic gives you only 20 turns before Ryoma starts moving. A large number of those turns might be spent waiting for debuffs to wear off.

Now to go and figure out how to rout this chapter. I feel the answer may lie in all those staves I've been hoarding. Ryoma just has to wait patiently for a little longer... Just remember that no matter how bad things look, somebody on the internet managed to have Corrin kill Ryoma in a version of this game where player characters were hacked to have negative growths.