Part 24: Bearbaiting
Bearbaiting
Everyone's best friend!
Note before I start: This mission feels a lot different in the SCP than in vanilla FS2. I was actually having trouble with it, which offended me. So this walkthrough will do it for you in SCP (hopefully) but it might not apply fully to vanilla. 95%? Sure. But not 100%.
There are two ways to do this mission - basically, "do I go for the flak guns or not." I'll point out the flak guns are easy if you use a single button: V.
What is V? V targets the subsystem under your reticle. This means no cycling through subsystems, which wastes lots of valuable time. It is the key to victory. You just aim at the subsystem and hit the button. Works for turrets, too, which is what we'll be using it for.
OK, mission start. It goes without saying, but you need to move fast at every single step of this mission. First, I'm going to outline exactly what steps you need to take. Without a memorized game-plan, you're not going to have time to pop all the flak guns and the beam turrets. Similarly, without having perfected your Helios technique, you won't get them all. So even if you fail this mission like 50 times in a row as long as you're learning technique and keystrokes, you're doing well.
One last thing - increasing power to engines in the bomber you're flying doesn't increase your max speed, but it DOES increase your afterburner duration. This is key to know as afterburners are critical to ensuring your Helios shots land appropriately.
So, start:
Set your missiles to double-fire. Everything you shoot in this mission will be doubled, so leave it. Ignore your guns for now, you won't be using them against the Sathanas, they're too slow.
Using V key, target the (Sathanas' right, your left) farther flak turret. Order Alpha to destroy this subsystem (Comms, Alpha, 4 - so C 1 4) and then order Delta on it too (C, 3, 4).
Afterburn low and to your left. You want to come up sort of like an uppercut - this is better illustrated with a picture so hold on a sec - to give you the right angle on the flak guns.
Target (Sathanas' left, your right) flak gun with V key again.
Fire 8 Trebuchets.
Target (V key) the other flak gun you ordered Alpha and Delta to hit, fire last two Trebs. Roll and aim at one of the far turret prongs, double Helios torpedos.
Dive-bomb it.
Call for a reload.
Target another one far away from you (across the Sathanas, ideally) - this gives you time to lock on and gives your bombs time to cycle.
Repeat the dive-bomb, find the resupply ship and reload ASAP. It should be pacing you so just hit stop.
As soon as you get 4 Helios torps (in SCP, your Trebuchets reload much more rapidly than vanilla, so you'll get 4 of these quickly as well) afterburn the fuck out of there, targeting dual Helios on the third turret. Rinse and repeat your divebomb on 3 and 4.
GET OUT OF THE WAY.
Rearm again, immediately.
Order your wingmen to disable the Demon; then when it's disabled, order them to Disarm it.
Take out the Demon's anti-capital ship beam guns (it has 3; one will be obvious to you as it fires immediately, the other is on the opposite side of the ship and the last is on the top.)
Destroy the Demon
Finish up the fighters.
Do not jump out until the _second_ time Command tells you to jump out. This'll be clearer when I show pictures.
Confused yet? Hopefully this'll help.
OK, IT IS GO TIME:
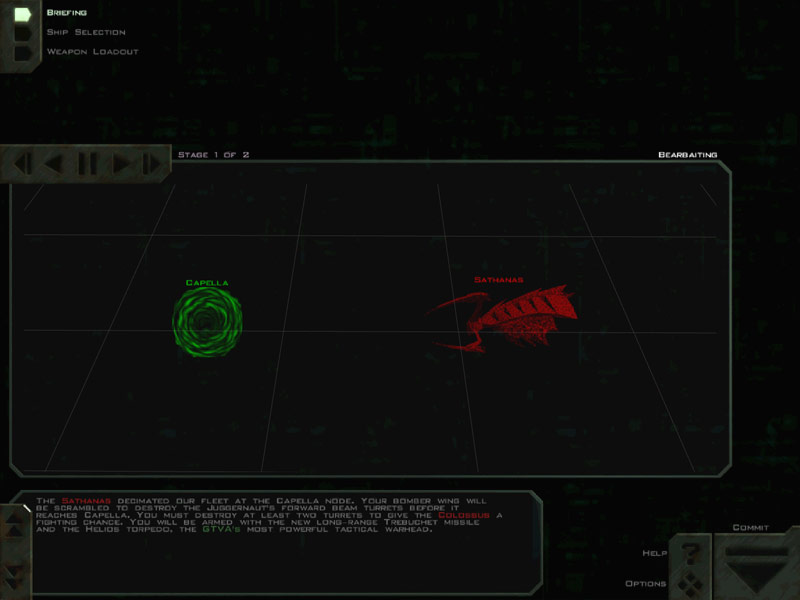
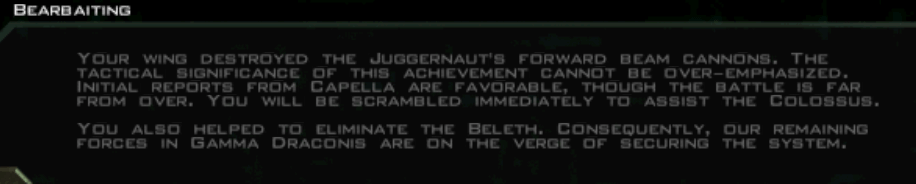
Bam. Here is your briefing. Short and to the point.
Watch it here / Mirror(2357 KB)
Listen to it here / Mirror (406 KB)
And here's the mission start. You have 8 things to do and no time to do it.
There's a GTD Hecate-class destroyer here, the Phoenicia. Frankly this thing dies in 2 seconds and the comm chatter is nothing but a distraction, so ignore it. Cold, but whatever, we're here to win.
Here, I'll show you screenshots so you can ignore it from now on:
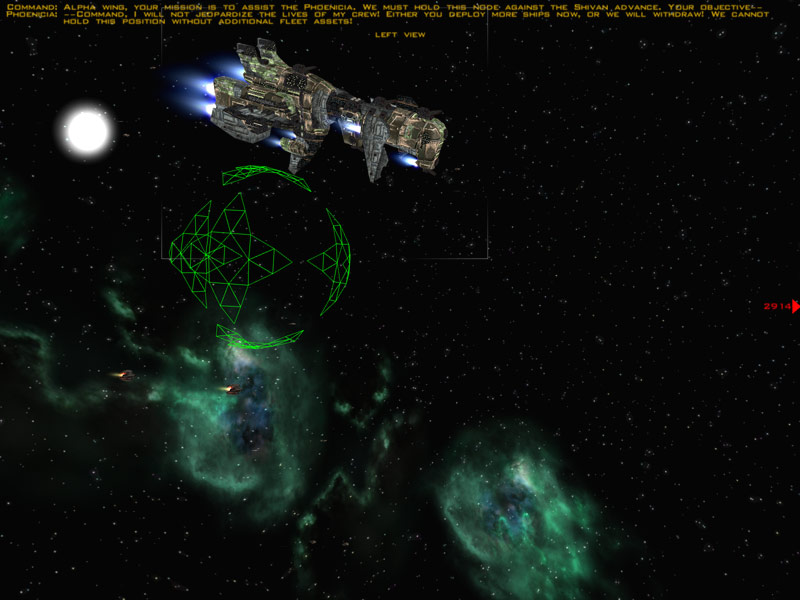
Leads to
And:
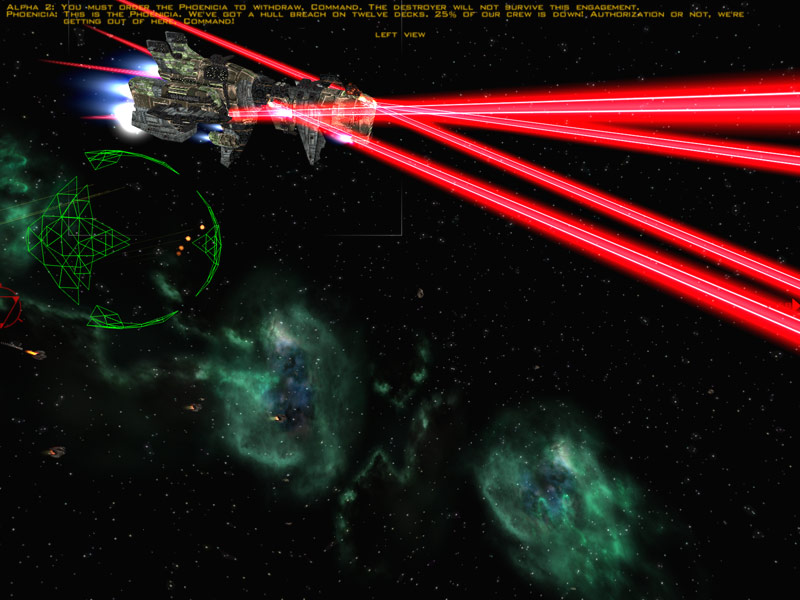
I'm sure your imagination can take it from there.
And now to important things.
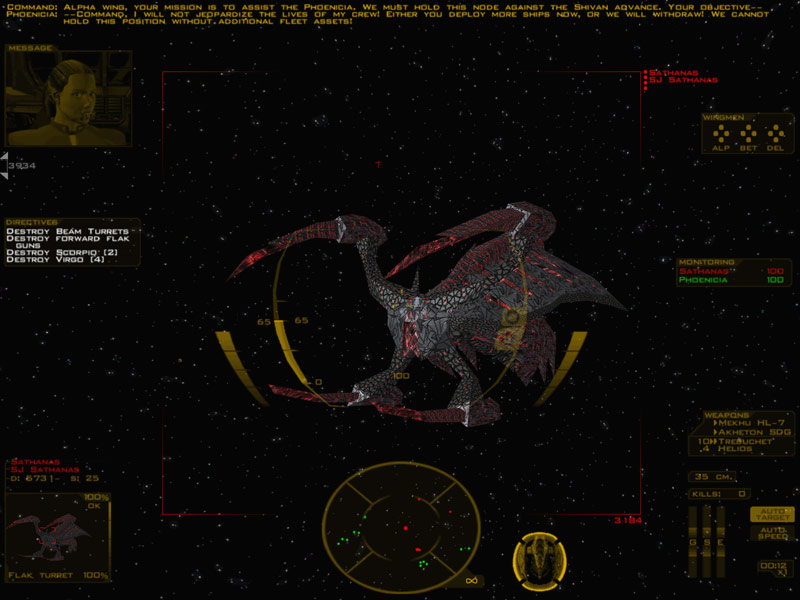
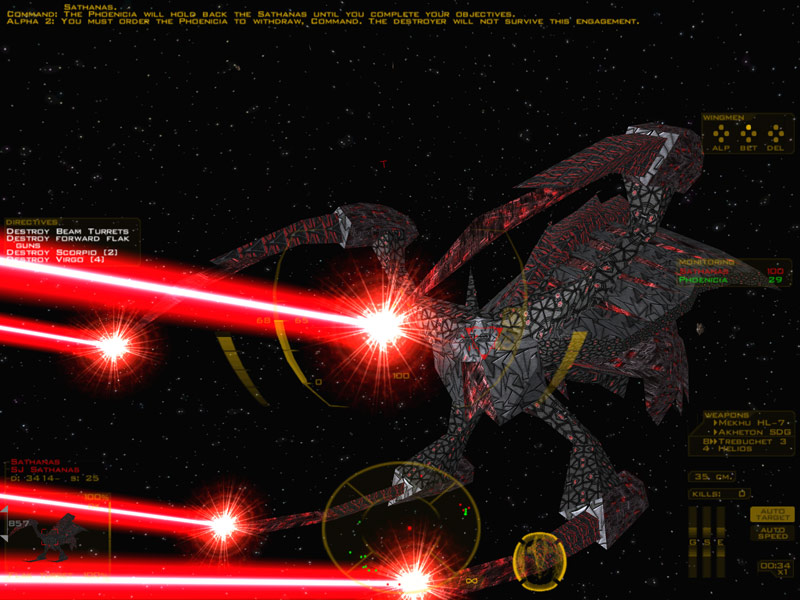
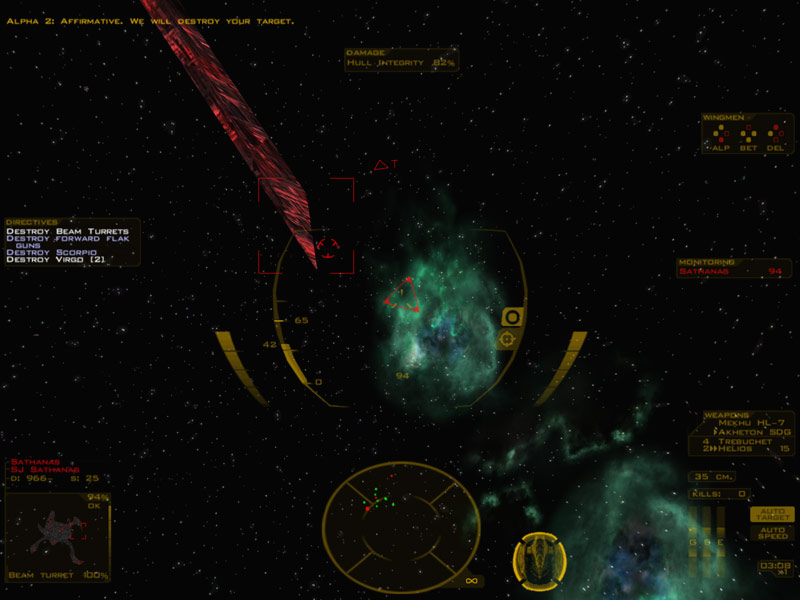
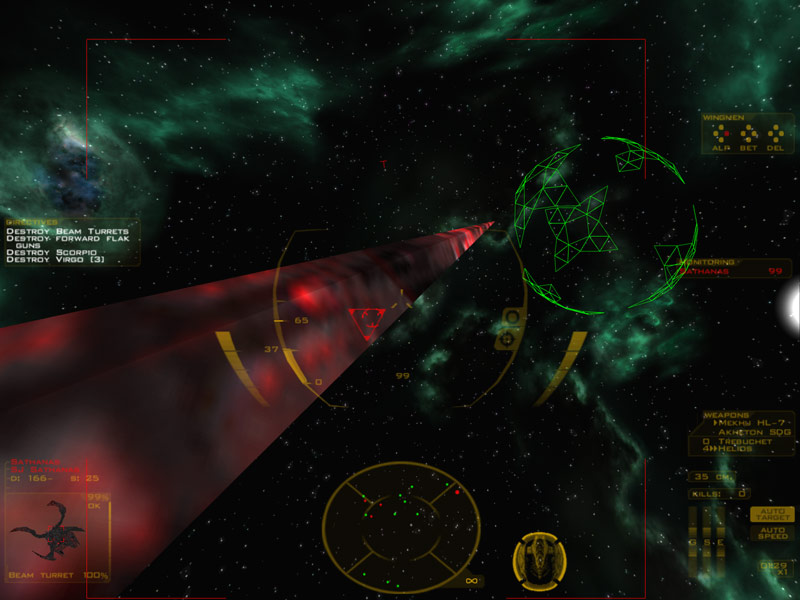
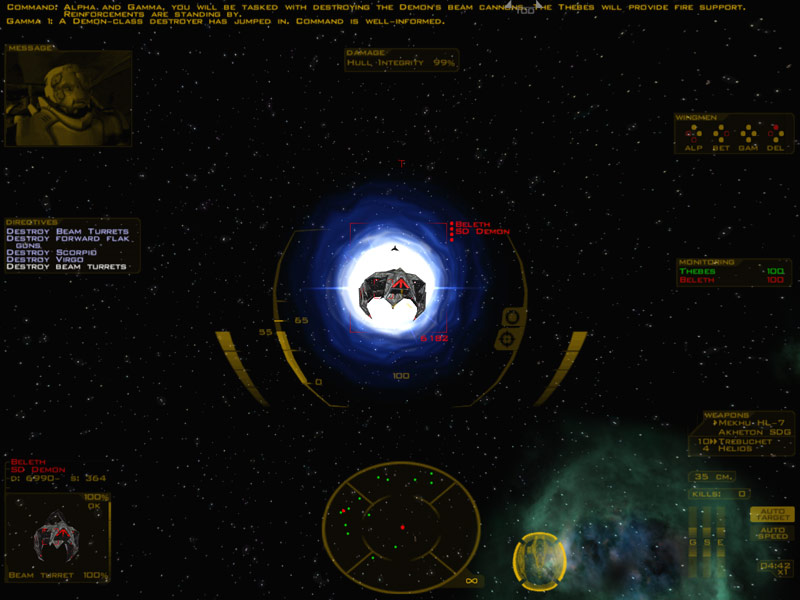
This is your view as you start the mission.
OK, I've helpfully pre-targeted one of the forward flak guns here, so you can see where it is both in the HUD and on the targeting screen in the lower left. This is the 'closer' one to you - the one you'll be firing Trebuchets at. Targeting these is a little tricky with the V key, so just experiment a bit. It's something like an average of 11 "K" target cycles to get to the flak guns and you don't have that time, you need to give your orders and hustle.
Here's a closeup that might help a bit. Again, this is the flak gun you're going after, but the one you want to order your wingmen at is RIGHT next to it. See the little thing that looks like a battleship gun turret? That's them. Each flak gun is actually a battery of 3 flak guns but it counts as one target.
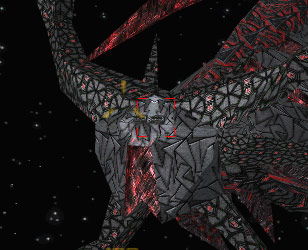
Here's a nice thing; when you use the V key to target a subsystem it prints what you targeted in the upper left chatbox. It should say "Targeting Heavy Flak." That, combined with the where you see the targeting brackets should be means you won't ever mess this up.
So, you've ordered Alpha and Delta to attack the subsystem. Dump all power into engines and do a maximum afterburner dash. You want to head "down and left." If it helps, imagine yourself as lining up to give an uppercut to these flak guns. Not too low; but low enough. The firing angles on these is a bit tricky but this is the best I've found in the SCP so far (in vanilla I preferred another angle entirely, but it doesn't work here :p)
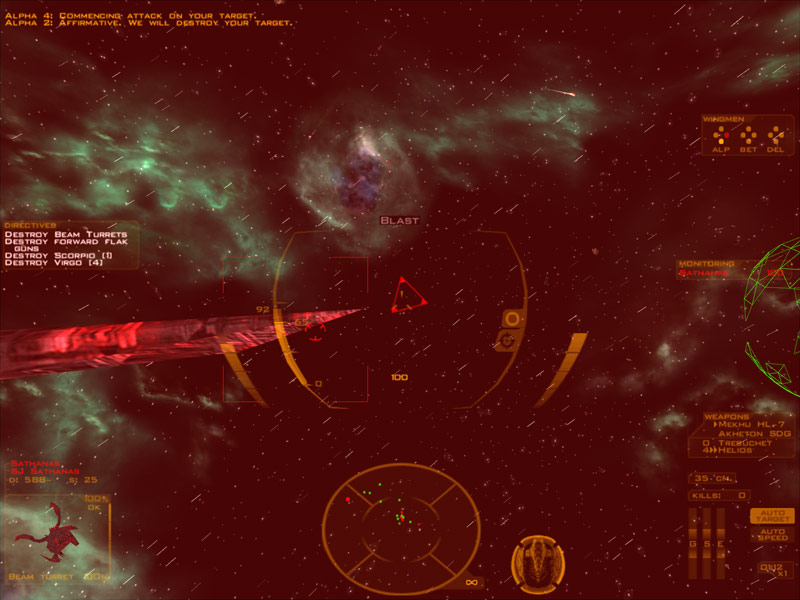
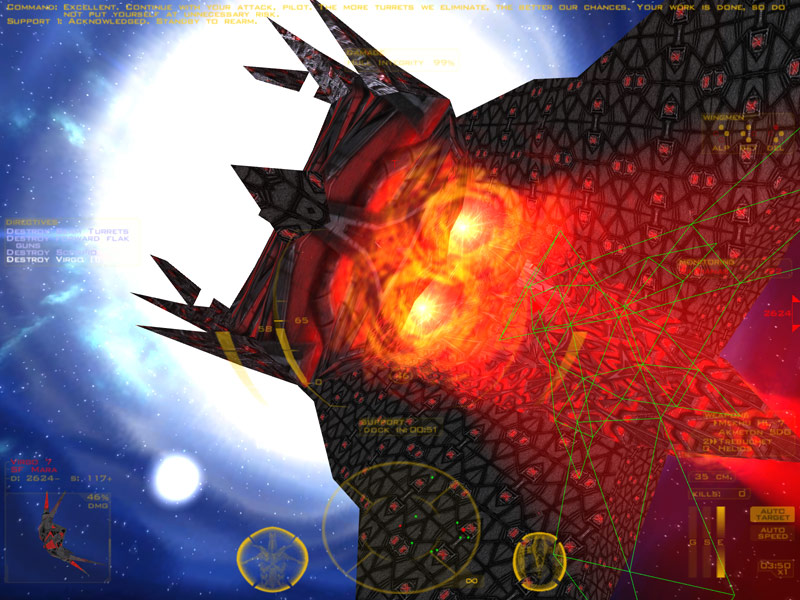
You want to get in front of the Sathanas and slightly low; say at a similar altitude as the lower pair of beam guns. Like this:
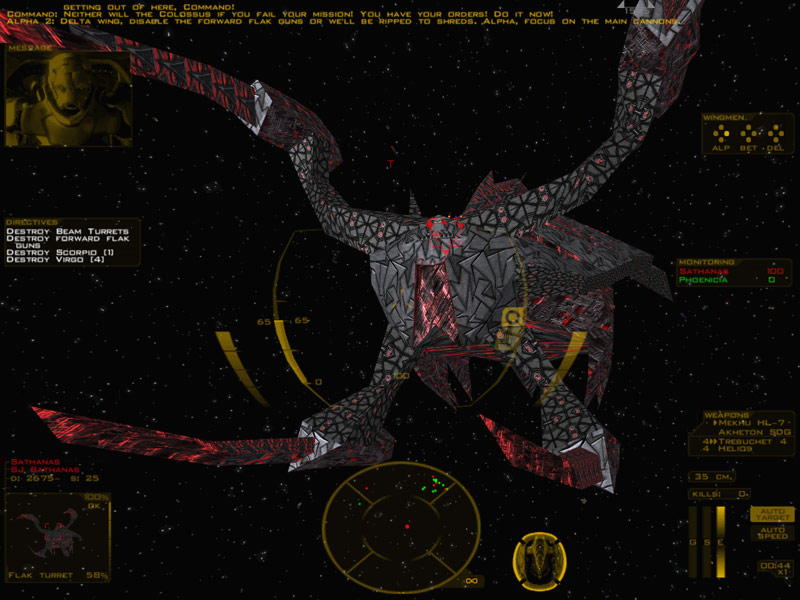
You'll be able to score hits from here. See how the flak guns are on a ledge though? Don't go TOO low. That ledge will block your shots if you go too low, but at the same time, coming up 'under' the guns seems to be the most effective angle I can see. It works every time when I do it so I'll take it. Feel free to experiment of course.
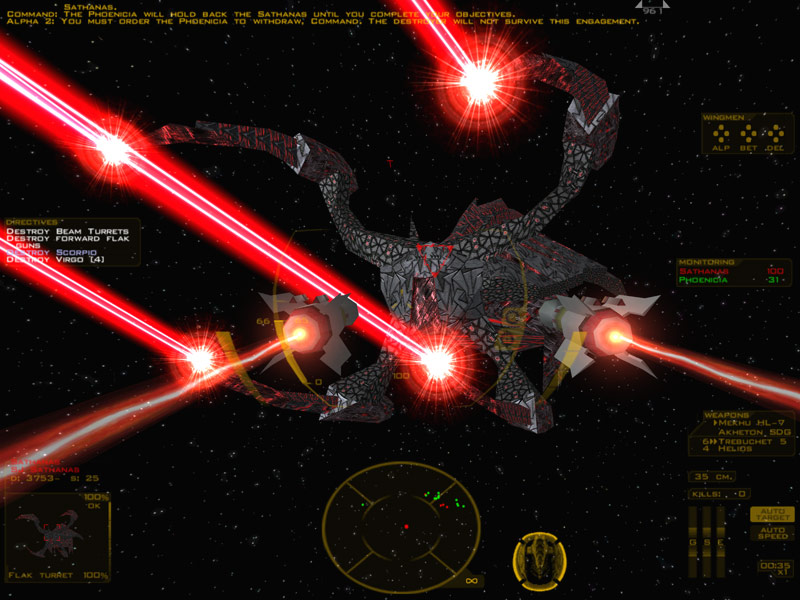
If you're fast enough, you should be able to be firing your Trebs as the Sathanas is firing its beams, which looks pretty cool.
After that it's turret time - remember the plan, nail a gun, call for a reload, nail the second gun, get your reload, take off for the third gun IMMEDIATELY after getting 4 Helios torps, don't wait for reload to finish.
There are two things of note here really - you want to target the beam turret that's farthest away from you, and you DON'T want to be on full afterburners perpetually. Helios torpedos lock on best at range; they get ... screwy locking on up close. By which I mean they DON'T lock on, which is frustrating as hell. So what you want to do is stay throttled down (not 0, the Sathanas IS moving) to get your lock, then make your run. A couple seconds before you would ram the turret, punch maximum afterburner, release your bombs while at full speed, then pull a sharp turn and watch your bombs go in from rear-cam view; this is invaluable feedback as to whether or not you screwed up. This is what I call "dive bombing."
There's really no narrative here, so I'll do what I can for pointers.
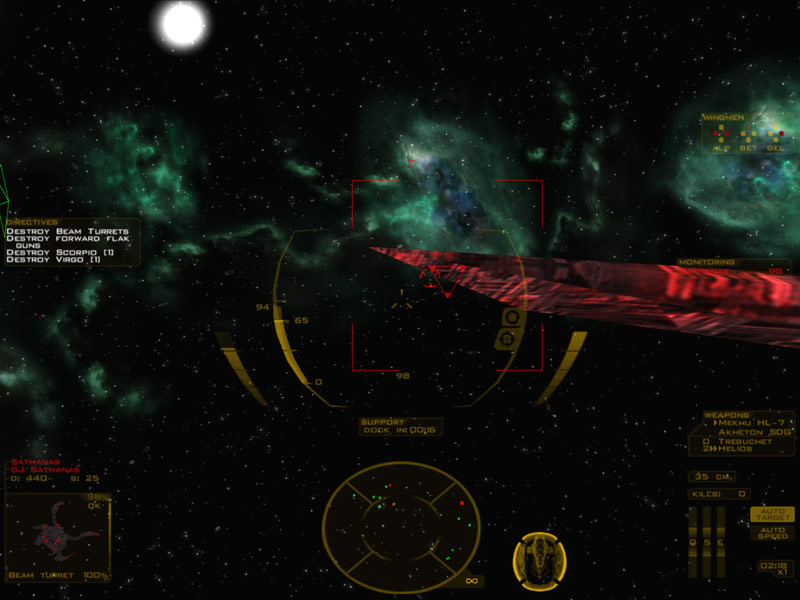
First, approach angle. You want to be in the 'forward hemisphere' of the turret. Remember the Sathanas is moving, so you ideally will be slightly AHEAD of its line of travel. For example, these angles:
Are excellent. You will likely kill the turret here. See how the angle is approaching from ahead of the Sathanas' line of flight? It's minor, but it means a lot.
These angles are good/borderline. They might work, but try and nudge yourself forward (along the Sathanas' line of travel) without breaking lock.
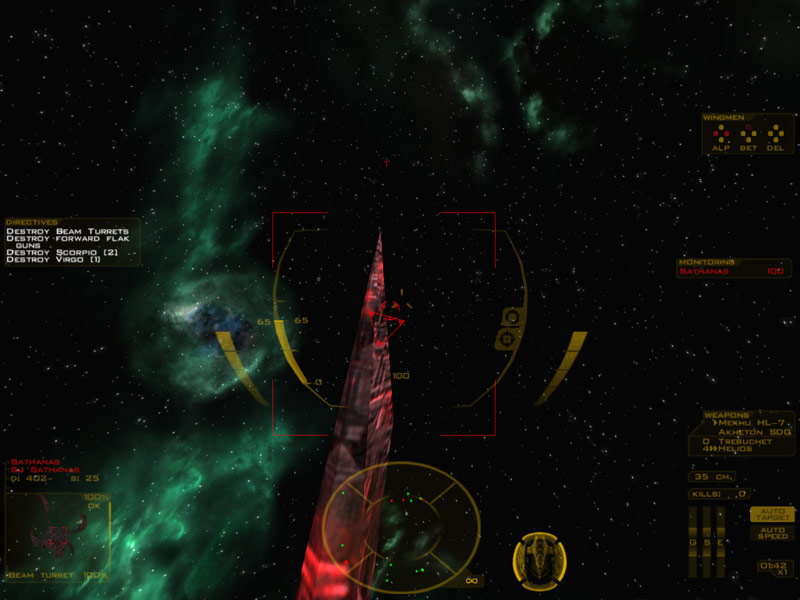
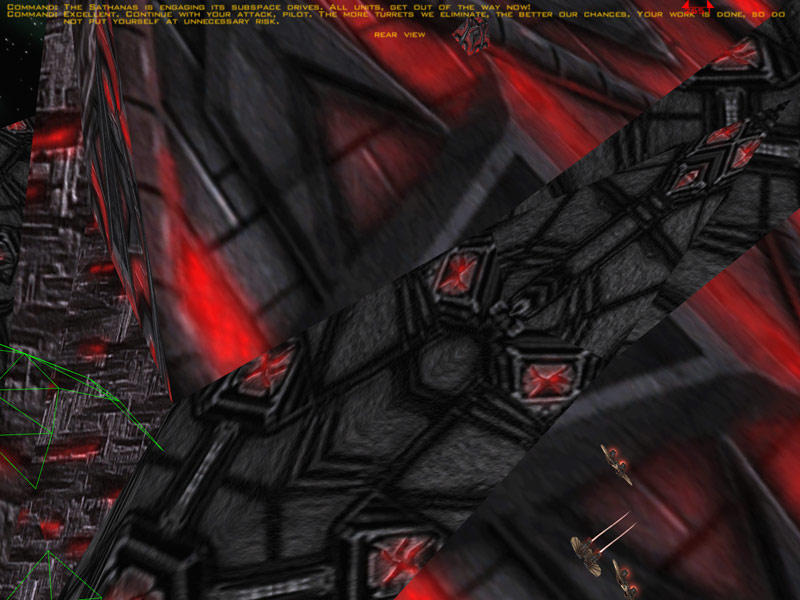
This angle:
Is horrible. NEVER get yourself screwed in a position like this. Chances are the turret will remain at 25% strength in which case, you're screwed! Hit restart.
The reason for this is really "Where the bomb impacts." At the BAD angles, the bomb will follow the approximate flight path shown here by the sad face line.
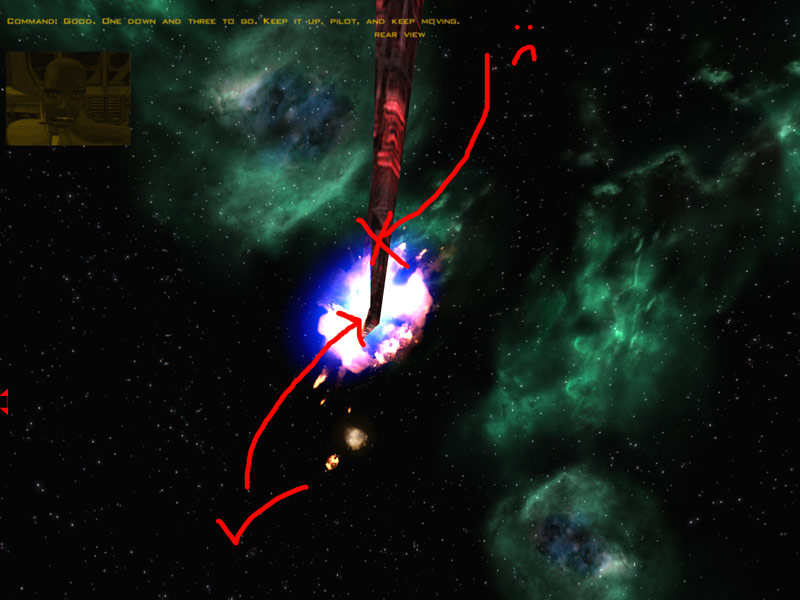
As you can see by the X, they'll actually impact and detonate on the prong behind the turret instead of giving it a solid hit. The checkmark line (exaggerated; you don't need to be THAT far forward) indicates a proper hit will land directly on the turret instead of behind it.
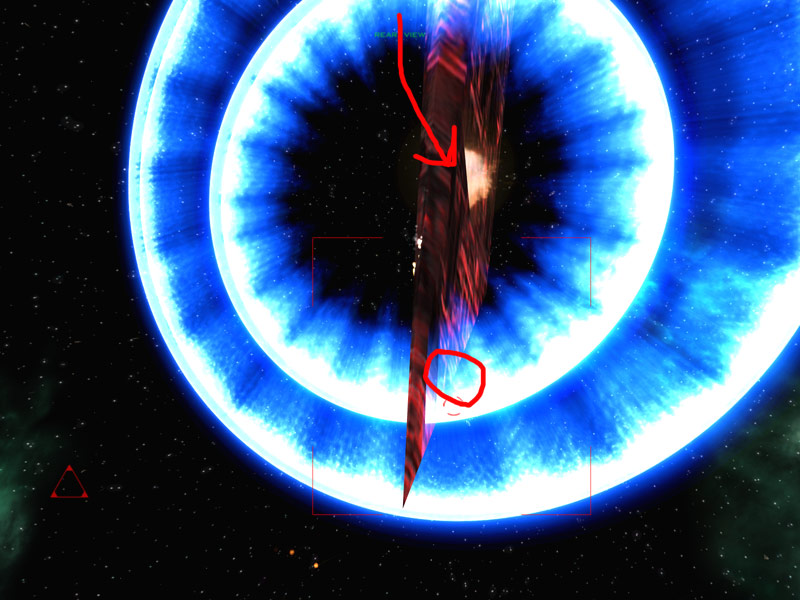
Here's another shot. You can see the arrow indicates where the bombs landed; the circled area is where you WANT them to land.
In short: If your bomb has to "chase" the turret and come in at an angle from behind, you screwed up. Don't let this happen. Ever. Part of why I advocate doing a maximum-afterburner and point-blank release run is to minimize the potential that this will happen; if you place the bombs 5 inches from where they SHOULD go, chances are they will go there. You have immense control over where those bombs land, use it.
This is a good run:
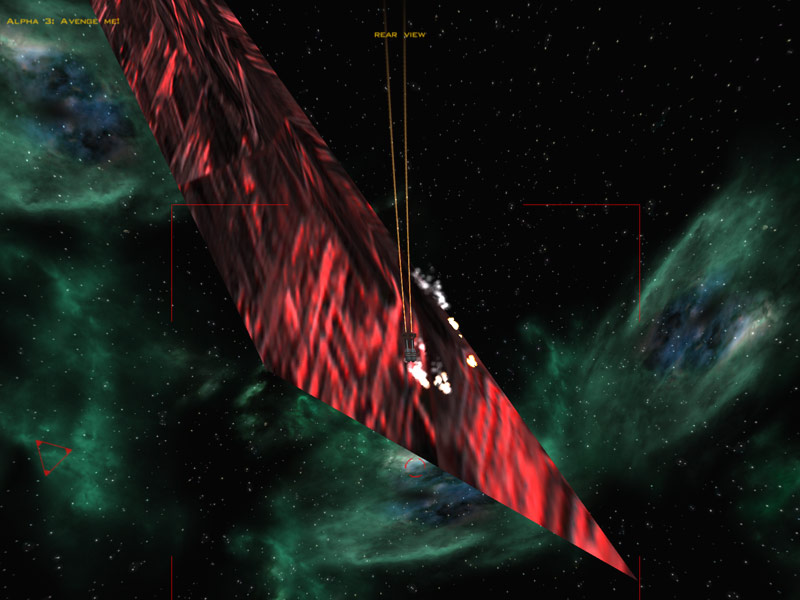
See the bombs coming in, heading for the front of the turret bit? Leads to this:
And everyone's happy.
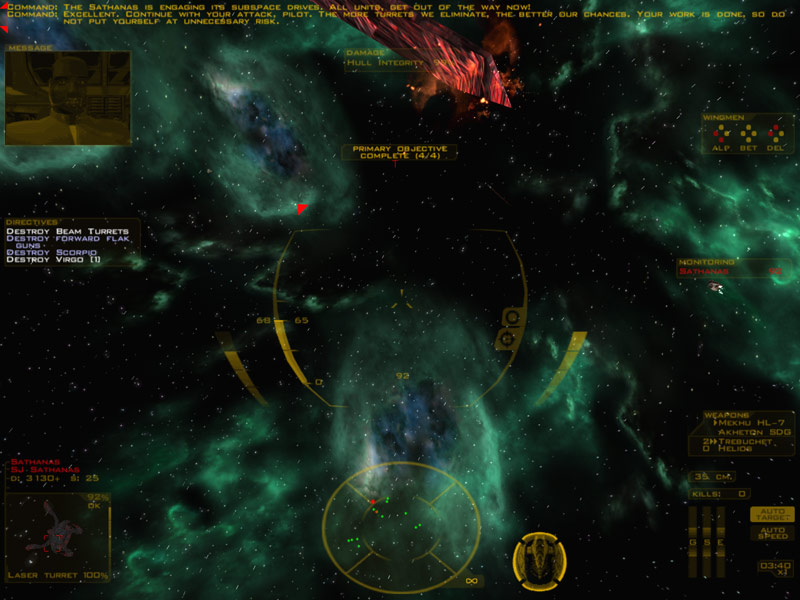
(YEAH CHECK OUT ALL THOSE COMPLETED OBJECTIVES
 )
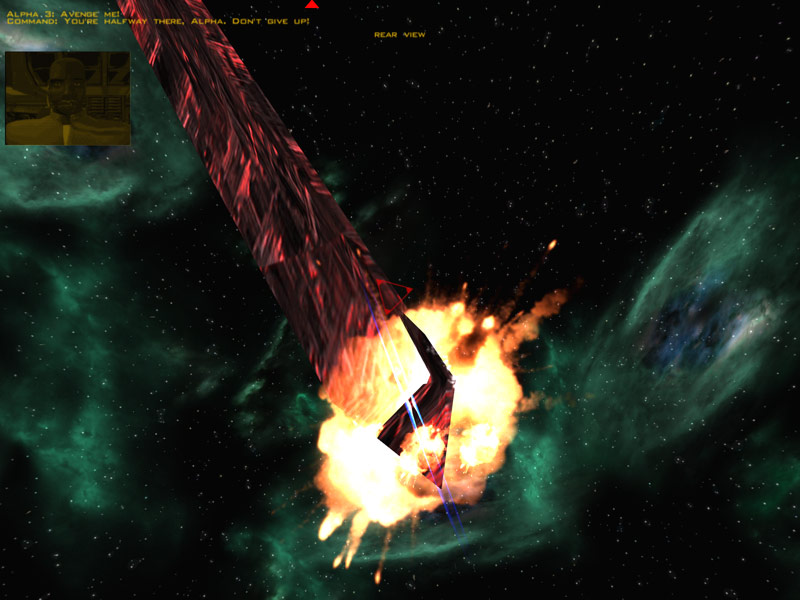
)So anyway, I got all 4 turrets in the nick of time, shall we say. Command had already warned me to get clear because the Sathanas was jumping out before I nailed it.
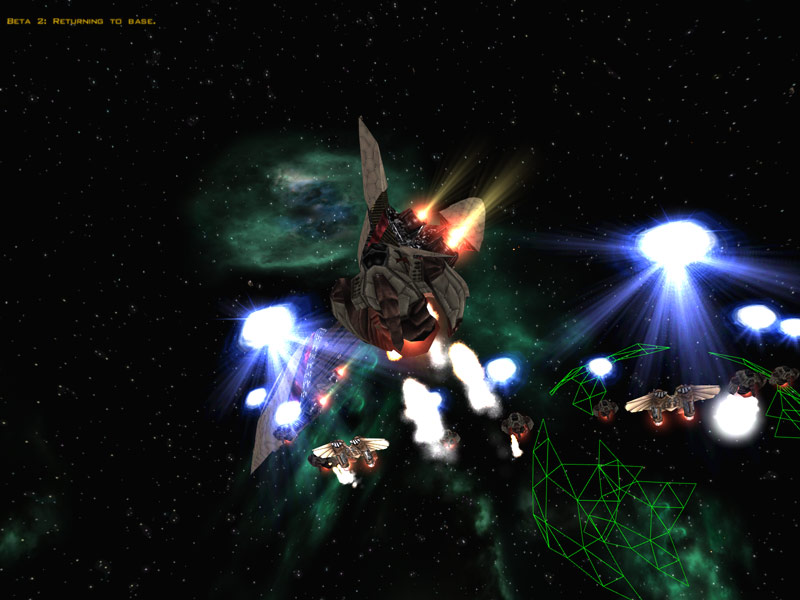
You get like ... 5 seconds here. So be careful, because the Sathanas MEANS it when it jumps out:
WIDE LOAD COMING THROUGH
Yeah get out. Enjoy getting it up the ass in Capella, Mr. No Beam Guns.
You'll get some reinforcements here; the Thebes, a Sobek corvette, and Gamma Wing. The Shivans respond with a Demon-class destroyer and some fighters.
Gamma is another wing of bombers, but they're ordered to guard you. Because, you know, bombers are such a great anti-fighter screen. Order them to disable the Beleth along with any remnants of Alpha and Delta wings.
Here's the Beleth. Oh hey, you get to destroy more beam guns. The good news here is Demon turrets are really, REALLY easy to kill. The better news is if you disable it (or order your wingmen to do so) it's REALLY easy.
And if you can't figure out which beam turret to start with, let me suggest this one:
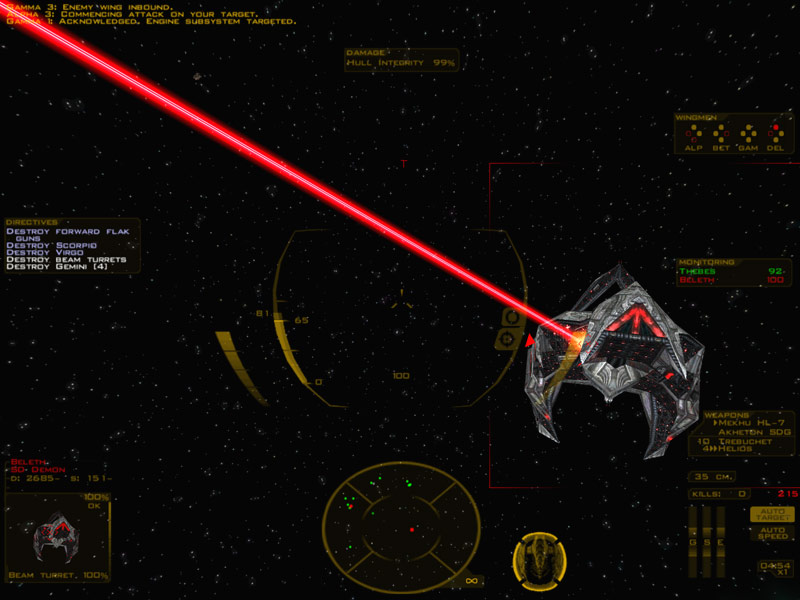
...just a thought. Just a thought.
Now this has anti-fighter beams as well as anti-capital ship beams. The objective only wants you to kill the latter. Again, one on each side, and one on the top. Trebs work well here. So do Helios torps, but they also destroy the hull pretty fast. Which is a good thing, really, unless you haven't gotten all the guns. (I honestly forget if you can just kill the destroyer without killing all the guns and still get Mission Success; I get the guns first out of habit)
After the Beleth is destroyed, you'll get this transmission:
Command: Excellent work, pilots. We have destroyed the Beleth. Secure the area and return to base. We need you in the Capella system.
DO NOT JUMP OUT NOW
Here's the part that's gotten me before, and it's frustrating. Gemini wing is 4 Aeshma fighters.
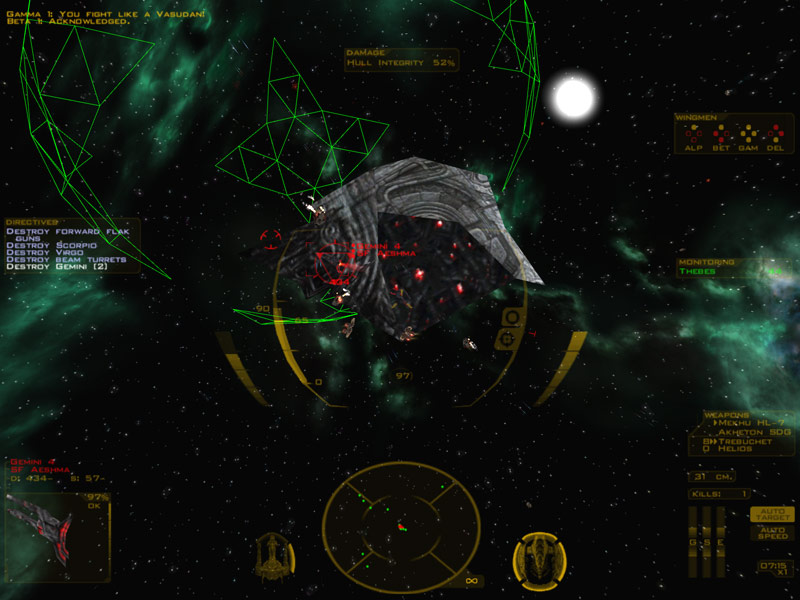
Yeah, die you little fighters. Die. See the debris from the Beleth? So nice to see giant space-chunks of a Shivan destroyer.
When you kill Gemini 1-4, the "Destroy Gemini" objective will go blue and complete. You will have a full list of blue completed objectives.
DO NOT JUMP OUT NOW EITHER
After a second or two, the objective will go BACK to white/incomplete, as Gemini 5-8 jump in. And if you already hit your subspace drives, congratulations. You fail, enjoy flying this mission. AGAIN.
Wait until the objective blinks blue again AND you hear this:
Command: Good job. Return to base, Pilots. We need you to assist the Colossus in the Capella system.
Congratulations, you've just beaten Bearbaiting.
Vasudan Power!
NEXT: The easiest mission ever since you nailed every turret already
