Introduction
Gradius V is the fifth numbered game in Konami's long running side-scrolling shoot 'em up series. Released in 2004 on the PS2, this particular entry in the series was developed by the shooter gods at Treasure, who are most well known for making the sci-fi cliche "reverse the polarity" the premise of an entire game, Ikaruga.
Gradius is a horizontally scrolling shooter (like R-type) as opposed to the more common vertically scrolling kind, which includes Cave-developed bullet hell games like DoDonPachi as well as other classic shooters like Raiden and 1942.
Being a Konami game, the Konami code does, in fact, work and provides the player's ship with a full arsenal, but we won't be using that here!
The game is split into 8 different stages. My good friend David and I will be tackling each level in a separate video using different weapon loadouts (of which there are many combinations - some more useful than others).
Let's briefly learn how to play Gradius V:
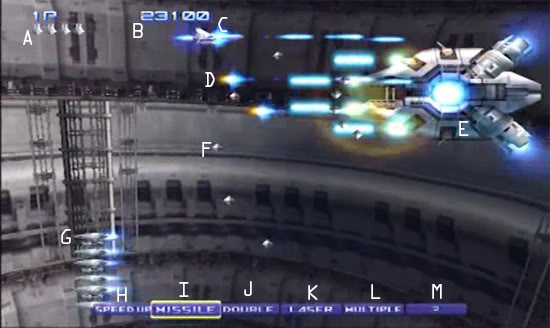
A: This is the remaining lives, if these run out you get a game over. Pretty standard. With free play mode on, you have unlimited continues, though.
B: This is how many points you have.
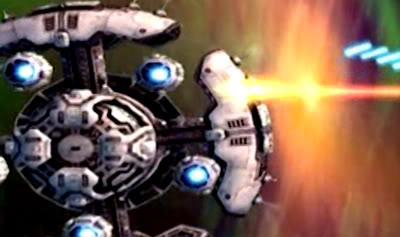
C: This is the Vic Viper T-301, the first player's ship. The second player pilots the Lord British (it's red!).
D: These are the Options that follow you (covered later in the power-up bar). In this game they are called multiples, but I will always refer to them as options thanks to Gradius III on the SNES.
E: Shoot the Core! Big enemies and bosses are only vulnerable in their glowing blue parts, these are cores. They are meant to be shot. So shoot them.
F: This is an enemy bulllet, we will be trying to avoid hitting these because they cause the fragile Vic Viper to explode on contact. There will be many of these on the screen later on. Fortunately, the Vic Viper's cockpit is its only weak spot.
G: This is a formation of enemy ships, they take only a single bullet to kill and will sometimes drop generic power-up nodes.
Now on to the Power-Up Bar:
By collecting generic orange power-up nodes, the power up bar at the bottom of the screen will tick over to the right one cell. These generic power-ups are dropped by defeating entire formations of enemies and also by the red/orange colored versions of enemy ships that fly around. By cashing in the power-ups with the Circle button the highlighted cell on the power up bar will be granted to the player.
H: SPEED UP increases the Vic Viper's speed, too slow and you can get stuck on the environment but too fast and you're likely to crash into a wall accidentally. Not that I've ever done that.
I: MISSILE activates your current load out's missile type for both the Vic Viper and all of its Options. There are 7 types of missiles:
1 - MISSILE - these fall at a 45-degree angle down and travel across the ground.
2 - EAGLE WIND MISSILE - these are a variation of the first, except that they will travel at an upward angle when on the top half of the screen, and vice versa.
3 - TWO-WAY MISSILE - one shoots forward up at a 45-degree angle, one shoots down at a 45-degree angle
4 - BACK TWO-WAY MISSILE - same as above, except they spawn towards the backside of the Vic Viper instead of the front
5 - SPREAD BOMB - fires a missile with a slight downward arc, causes splash damage with its explosion
6 - PHOTON TORPEDO - these fire downward, but are effected by the Vic Viper's momentum to an extent, they will travel across the ground and also can penetrate multiple enemies
7 - FLYING TORPEDO - two missiles fire straight ahead
J: DOUBLE activates the current load out's double shot type of which there are 5 varieties (these are also duplicated on each Option following the Vic Viper):
1 - DOUBLE - a second regular shot is added to the Vic Viper that fires upward at a 45-degree angle
2 - FREE WAY - the second shot fires in the direction that the control stick was last pressed
3 - SPREAD GUN - not as impressive as the Contra counterpoint, one shot is fired upward at a 45-degree angle, the other downward at a 45-degree angle, mostly useless because you can no longer shoot in front of you
4 - VERTICAL - the second shot shoots straight up
5 - TAILGUN - the second bullet fires directly behind the Vic Viper
K: LASER activates the current load out's laser type of which there are 4 varieties (also duplicated with each Option):
1 - LASER - the standard laser, it's blue and thin and glowy and awesome
2 - RIPPLE - the ripples expand to cover a wider area after being fired
3 - E.LASER - turns the laser into a Mega Man-style charged cannon, holding down the fire button charges the laser up, this is thing to use if you want to end bosses in mere seconds
4 - FIRE BLASTER - it's a short-ranged flamethrower!
L: MULTIPLE will spawn an Option to follow the Vic Viper around, you can get up to 4 and there are 4 different control types for the Options:
1 - FREEZE - pressing R1 will hold the Options in their current formation
2 - DIRECTION - holding R1 and using the directional stick will change the direction the Options are shooting (lasers are continuous in this mode)
3 - SPACING - Options will always stay in a tight V formation with your ship, holding down the R1 button will change their spacing
4 - ROTATE - holding R1 will make the Options rotate around the Vic Viper in either a clockwise or counterclockwise fashion (laser are continuous in this mode, too)
M: The ? cell on the Power-up bar is for (mainly) Shield and types of which there are 3:
1 - MEGA CRUSH - not actually a shield, using this will destroy all on screen bullets and small enemies (blue nodes dropped by enemies have this same effect)
2 - FORCE FIELD - the Vic Viper can now take 3 enemy bullets without exploding
3 - SHIELD - two rotating star thingies attach to the front of the ship and can absorb a set number enemy bullets as well as destroy small enemy vessels
Whew! Now that that's out of the way, let's play Gradius V!
Videos
PART 1 - Introduction and Stage 1
PART 1 - BONUS (live attempt at stage 1, loop 5, Very Hard)
Note: This video consists of increasingly frustrated retries of the first stage
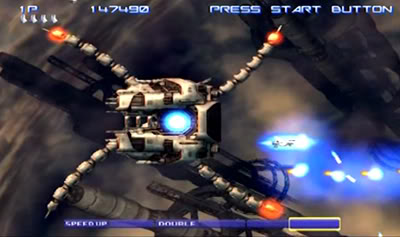
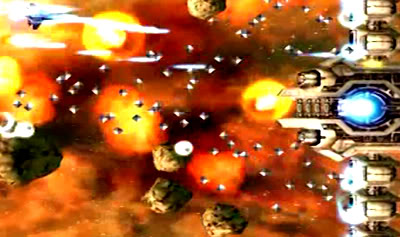
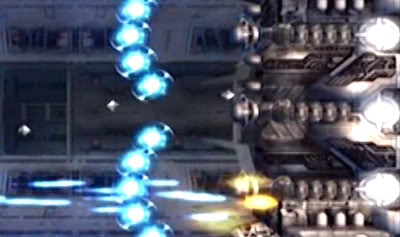
Stage 1 Boss: Big Core Revision 1.2
This guy is an original production for Gradius V, although at its core (get it? Ha!) it is a Big Core boss which has appeared in practically every Gradius game and spin-off. In higher loops it has a second core which completes the circle.
PART 2 - Stage 2 Co-op
PART 2 - BONUS (stage 2, no death, normal, loop 1)
Stage 2 Boss 1: Death Mk. III
As its name implies, this is the third major version of the Death boss. The Mk. I appeared as the fifth stage boss in Salamander (but not Lifeforce, where it was known as Gau...which might be making an appearance later) and the Mk. II appeared as the fourth stage boss in Gradius II. In Gradius II, the Death machine first got its iconic laser attack, one that the Mk. III has expanded upon.
Stage 2 Boss 2: Tetran
Tetran is a classic Gradius boss that has had incarnations in Gradius, Salamander and Nemesis games at one time or another. In Gradius V, it gains the ability to shoot lasers out of its arms.
Stage 2 Boss 3: Big Core Mk. II

The second version of the Big Core ship has appeared in Gradius II (not the NES version, though) and Gradius III before trying to shoot down the Vic Viper in Gradius' upper atmosphere here in this stage.
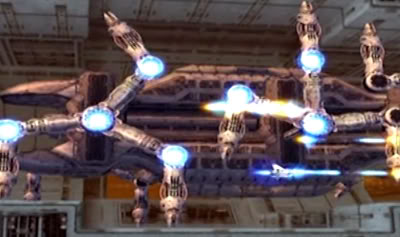
Stage 2 Boss 4: Big Core Mk. IV
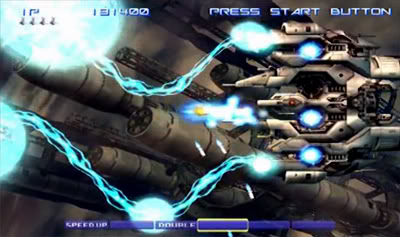
The fourth iteration of the Big Core is the "real" boss of stage 2. It has the most attacks by far compared to the other bosses. It can shoot out its arms causing energy tumors to form (as David calls them) as well as has a second attack phase with semi-homing lasers. The Mk. IV, unsurprisingly, has four cores to be destroyed.
PART 3 - Stage 3 Blind, Solo
PART 3 - BONUS (stage 3, no death, normal, loop 1)
Stage 3 Boss: Ground Spider
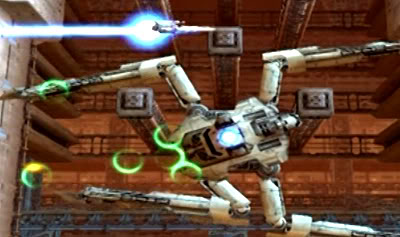
The Ground Spider wins the award for most original boss name. Fortunately, the fight itself is quite interesting, with the environment being brought in to kill you just as much as the boss' own weapons. It will crawl up the shaft and shoot ring lasers at you (these can be destroyed as they are the same as the ring lasers the Big Core Revision uses). The real trouble is avoiding the turrets and cubes that scroll up as the screen moves ever downward. Hiding behind these obstacles is also the only way to avoid the Ground Spider's sweeping red laser.
PART 4 - Stage 4 Blind, Co-op
PART 4 - BONUS (stage 4, no death, normal, loop 1, uses Code)
Stage 4 Boss: Huge Heart
The Huge Heart just might steal the award for most original boss name away from Stage 3's Ground Spider. As the name implies, the boss is a Huge Heart. The heart itself does not attack the Vic Viper directly, but rather has a crazy series of biological defense mechanisms. It has spikes, green goo, rotating laser sword spinal columns, and lasers. Lots and lots of lasers. Eye lasers, infact. After killing the little tumor on the heart's exterior the organ will take direct damage. The use of the Fire Blaster makes me contractually obligated to tell you that we killed it through the conflagration of heart burn.
PART 5 - Stage 5 Blind, Solo
PART 5 - BONUS (stage 5, no death, normal, loop 1, uses Code)
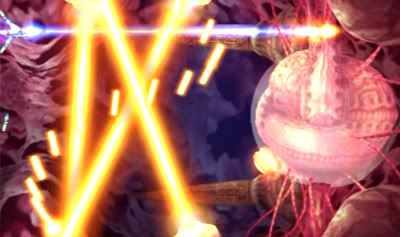
Stage 5 Boss: Blaster Cannon Core
The Blaster Cannon Core marks the beginning of the second half of Gradius V, where the difficulty in both the level and boss designs takes a sharp turn to bullet hell land. The first phase of the Core can be beaten by weaving through the dense asteroid field and using the rocks for cover (this is a theme for the second phase as well). The bullet bombs the boss drops behind it can be destroyed before they explode, but this tactic is very hard to pull off and is probably only suited to higher loop gameplay. The second phase has the Core extending its wings and assaulting you with tons of bullets. The trick is to STOP FIRING and let the asteroids tank the bullet damage for you. This is undoubtedly a very hard encounter.
PART 6 - Stage 6 Blind, Co-op
PART 6 - BONUS (stage 6, one death, normal, loop 1, uses Code)
Stage 6 Boss 1: Rolling Core
Boss Rush number 2 begins here. The Rolling Core is a boss design that has appeared in Gradius IV as well as the related Otomedius games. Essentially, it tracks one of the ships (assuming two players, of course) and will unleash two volleys of lasers - the first from its rounded outer shell and the second from its main gun. The angle on these lasers will intersect so it is imperative to watch for the points where they cross and not be there when it happens. Freeze type and E. Laser will destroy it before it can do anything, though.
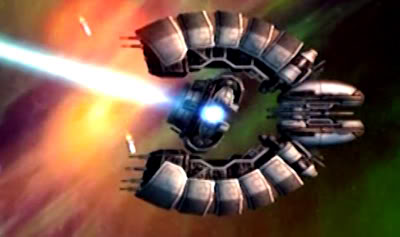
Stage 6 Boss 2: Circle Core

The Circle Core is a unique boss in that it brings it own level geometry with it. The cage is inescapable and acts as a rail for the actual core to roll and bounce around in - much like a pinball. Each impact on the exterior rail creates new turrets that must be dispatched. After a few seconds the core will be vulnerable, but it still has a few gates protecting it.
Stage 6 Boss 3: Big Core Mk. III
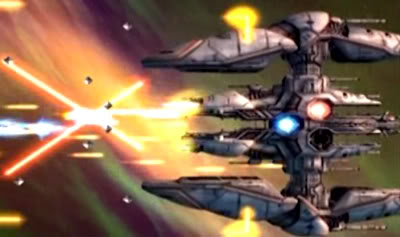
The Big Core Mk. III is the middle child of the Mk. II and IV seen earlier in stage 2. The basics of its design are similar. It will trap you in front of it with two unbroken lasers and then bounce two lasers around inside the light cage. It can also charge you by spinning, spew bullets and tracking lasers from the left side of the screen and, when a few cores are destroyed, it will change its first pattern to just a random volley of small horizontal lasers.
Stage 6 Boss 4: Covered Core Mk. II
The Covered Core Mk. II is the last boss of stage 6 and has by far the most weaponry. It can quite literally fill the screen with missiles, bullets AND lasers. Fortunately, not all at the same time. The cores spinning in the middle are the weak point and on higher difficulties there are many, many more of them. As I mention in the video, the only way to fight this guy on higher loops is to get your tiny cockpit in the spinning middle section.
PART 7 - Stage 7 Blind, Solo
PART 7 - BONUS (edited walkthrough with minimal deaths)
Stage 7 Boss 1: Beacon
This guy is pretty rough. Delicious Bacon loves to bounce blue lasers around the arena and follows it up with two horizontal red lasers from time to time. It has five cores. Its second attack pattern has the floor and ceiling change to a sinusoidal form while it hovers up and down and sprays random bullets and fire everywhere.
Stage 7 Boss 2: Keeper's Core
I think the Keeper's Core is the hardest boss battle in the entire game. The massive wall of death has three cores, but each are protected by gates. In addition, it has a six or so regenerating turrets on its front as well as the ability to shoot out three waves of blue energy shots from the gates guarding each core. All while this is happening, enemy walkers will respawn infinitely from the left side of the screen and the floor and ceiling are magnetized and constantly pulling the Vic Viper towards them.
Once its first three gates are destroyed the second attack pattern starts. Here, the boss will summon bouncing balls from the left and create unbroken vertical red lasers as well as a stream of random bullets. You have to use the bouncing balls to block the lasers all while dodging bullets and trying to do damage to the last few gates in front of the cores. E. Laser recommended.
Stage 7 Boss 3: Elephant Gear
The Elephant Gear is what I consider the true last boss of Gradius V. It has a whopping 12 cores across its three mechanical legs. Fortunately, the Gear itself has no attacks, all it does is walk back and forth. There are, however, an infinite stream of enemy walkers that spawn on the floor and ceiling from both directions.
PART 8 - Stage 8 Blind, Co-op Finale
Stage 8 Boss: Venom Brain
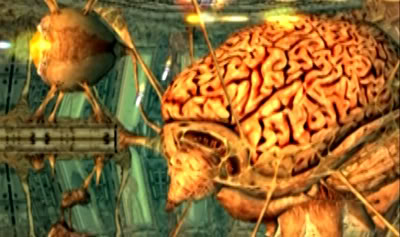
The last bosses of Gradius games are always very easy. It is one of the few mercies the game delivers to the player. The Venom Brain is no different and will even explode by itself given enough time. Shoot the eye and escape! Gradius V is over! Just hope the Vic Viper's temporal anomaly generator doesn't malfunction; you never know where or when you'll end up.