Part 3: A Venture
Part 3: A Venture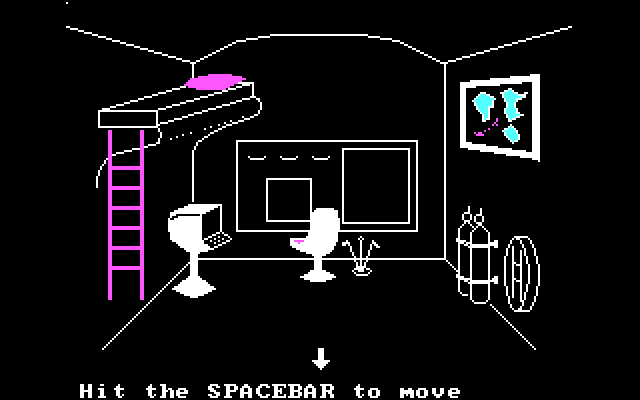
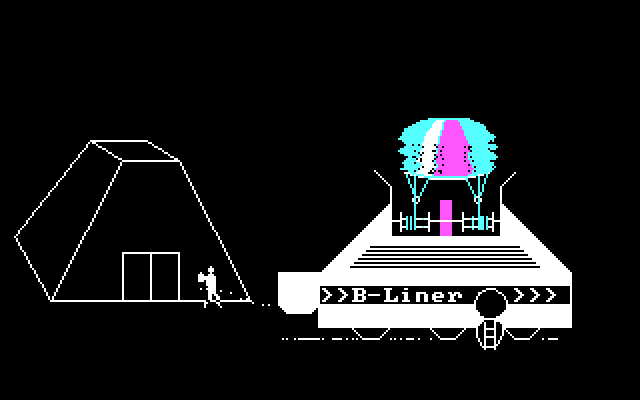
Here we are in the B-Liner's main cabin and cockpit. This is where we'll formulate, and carry out, most of our plans.

The B-Computer runs the software we bought at the Galactic Store. These are mostly database programs, and while we don't have anything to look up right now, the information in those databases is absolutely critical to winning the game.
 : The software in the Galactic Store must be bought.
I'll be weaving Uncle Smoke's advice through the updates from here on out. While the advice comes out in a linear order, its usefulness is extremely variable. Information that only makes sense in the endgame shows up before explanations of basic mechanics.
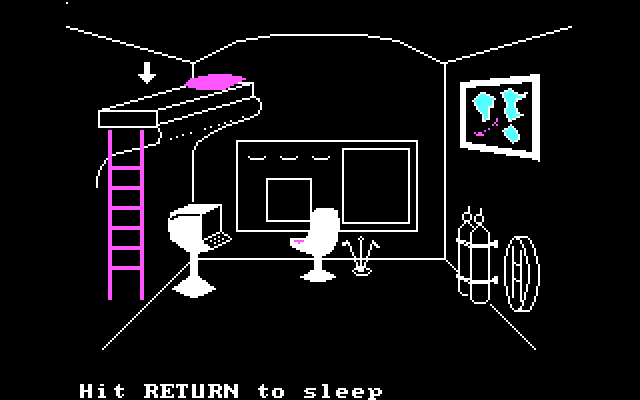
This game has sleep and hunger timers. Worse, they're not tied to the system clock, so running on a faster computer makes them advance faster. On the plus side, it's still pretty generous (I'm running the game at approximately three times its intended speed, which makes it enormously less clunky to control and interact with, and I'm still not regularly hitting the limits), and letting the timers grow doesn't do anything besides make the screen nag you about being sleepy or hungry. Also, we can sleep whenever we want because we're never far from the B-Liner, and sleeping when we need it also has us "recall" some advice from Uncle Smoke in a dream. I put "recall" in scare quotes because as players we won't have seen it before; this will be exactly like chatting with him back in Metallica.
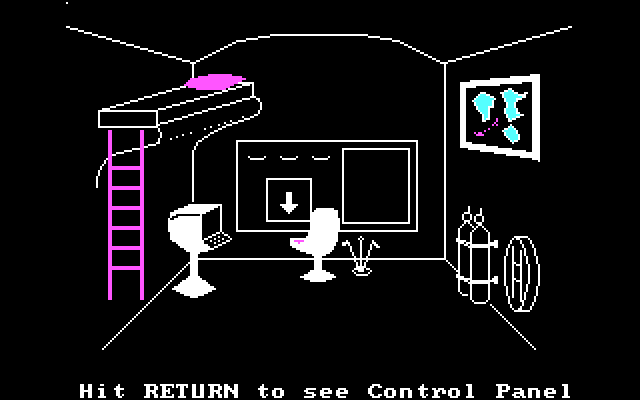
The Control Panel is mostly for flying the B-Liner, but it's got some useful other meters and sensors as well. Everything we bought that wasn't B-Computer software was something here.
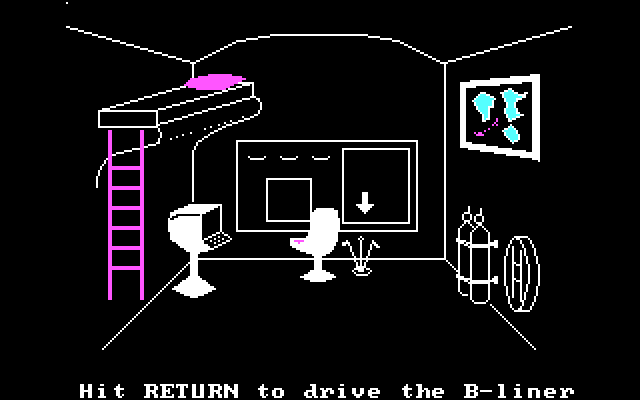
The B-Liner isn't just a balloon, either; it's also a buggy. Driving gets its own set of controls.

And of course we've got our jetpack, for when we need some EVA.
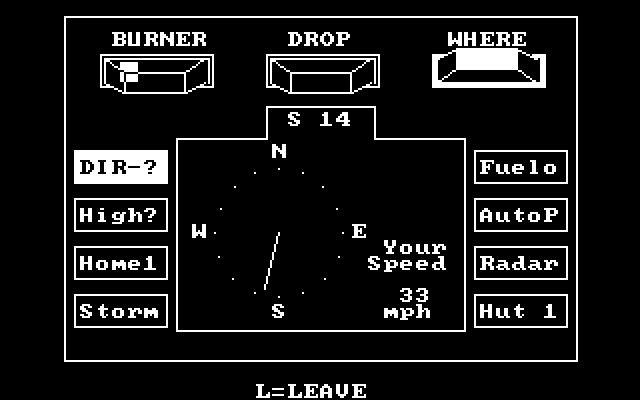
Let's take a closer look at the Control Panel. It's three big switches, a display, and a bunch of buttons:
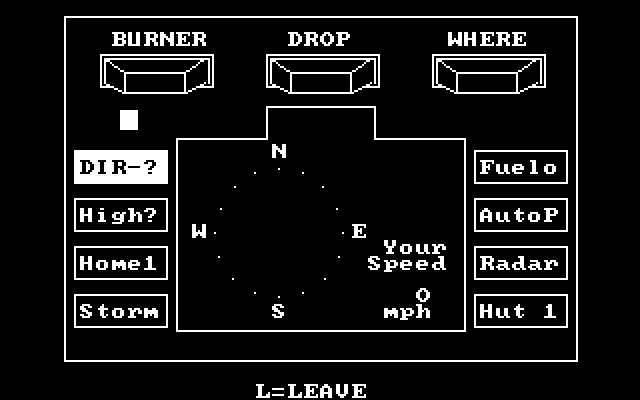
BURNER and DROP control the balloon, firing the burner to gain altitude or venting air to lose it quickly. (Hot air cools, so if both switches are off we will gradually lose altitude when aloft.) WHERE indicates our location on the map.
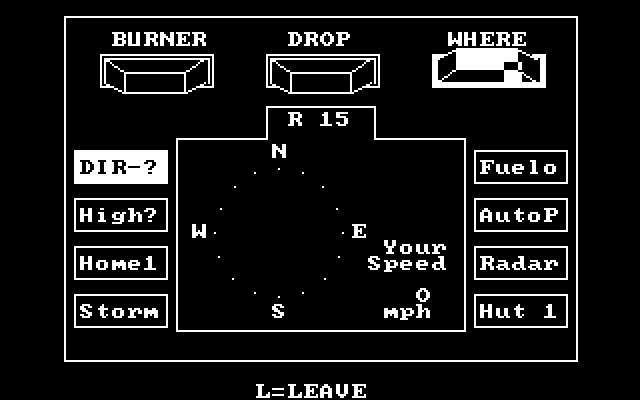
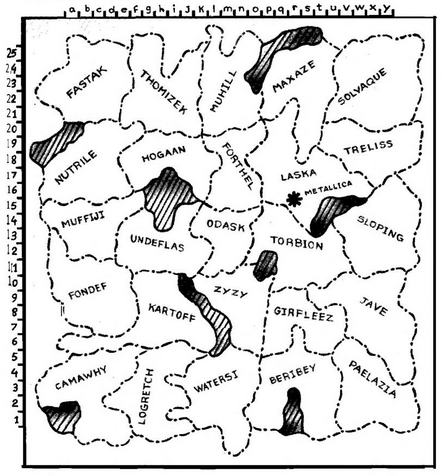
Apparently Metallica is in sector R15. That matches the map in the manual:
We also see the DIR-? display here, which shows that we have no heading because we aren't moving. We can also look at our altitude, which shows that we are on the ground.

As long as we're on the ground, let's drive.

We're the circle. The warp pipe there is Metallica. And up there in the corner is something that looks like a big rock.
Driving controls are much like the jetpack, but we can also hit 5 on the numeric keypad to brake, and we've got much better control over our speed. We can add a tick of speed in any direction with a keypress, and get some pretty precise angles out of it. We drive over to the big rook and leave the B-Liner to check it out.

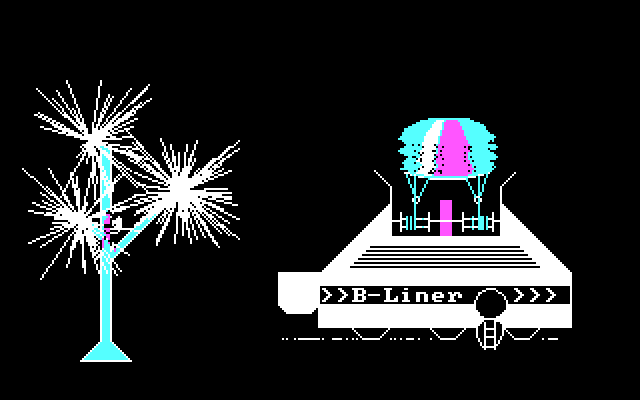
Yep. That's a big rock. Further east we find this:
 : You'll need food out there. Shake a Popberry tree for food.
Good plan. This is how we deal with hunger. We start getting pestered about food once our hunger hits 500, and it increases by some small fraction every time through the keyboard-reading menu loop. Popberries are how we drop our hunger.

In The Adventures of Smoke Bailey the Popberry leaves were serious threats to the A-Liner's gasbag. The B-Liner is made of sterner stuff; harvesting Popberries is tedious but perfectly safe. Fly over to a branch and hit the spacebar...
Then fly down to the fallen berry and hit the space bar again.
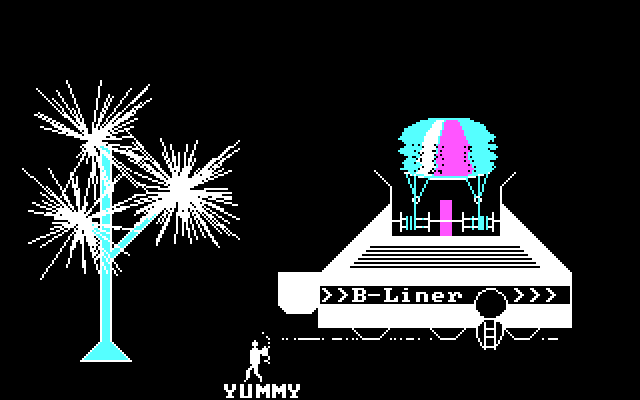
That's 100 units of hunger dropped. If you aren't being pestered, five Popberries will fill us up completely.
: Popberries that have popped sink into the tar very quickly.I was just getting to that. The place Popberries actually pop to is random, so a lousy launch...
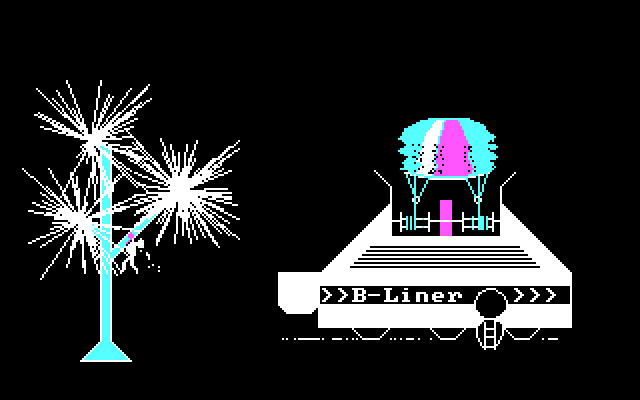
... almost certainly results in a lousy lunch.

Well, we weren't very hungry anyway. Continuing to the east we find this strange formation:

A bright line, carved in the tar.
: Lines on the Mire will help you navigate when driving.Oho. Perhaps this is the meridian dividing the sectors! But no. A quick check of our control panel shows we are still in R15.
Not a lot going on over the next ten screens...

... but then we find this.

This double line does form the barrier between R15 and S15. So here we are, fifteen screens east of Metallica. If we go one more screen east and check our control panel, the WHERE switch confirms we're in S15, and the Home1 control will give us a beacon back to Metallica. This confirms that the scale here is "one screen length = one mile":
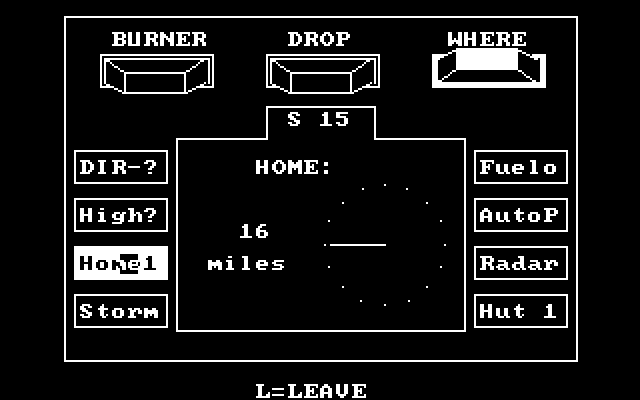
Uncle Smoke told us that we could trade chips with the Mire Folk for clues regarding the whereabouts of the Most Amazing thing. The Hut 1 control gives us heading and distance to the nearest hut.
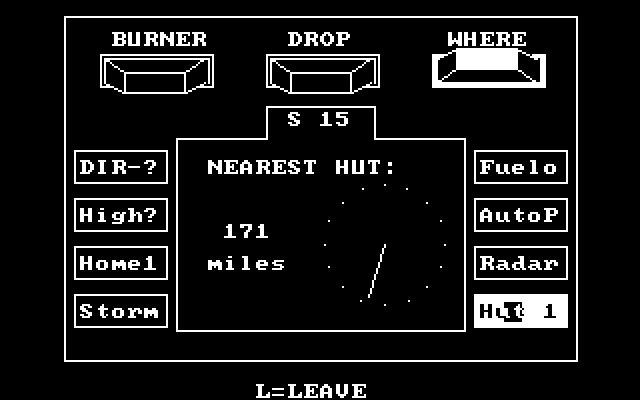

That's a longer roadtrip than I'd like.
In fact, this seems like a good time to point out how preposterously huge this game world is. Fifteen miles east takes us to the major meridian, but it's sixty-five miles west to the other one. Each minor map sector is 10x10 screens, and the major map sectors that show up on WHERE are 8x8 minor map sectors. As we saw on the map above, the Darksome Mire is 25x25 major map sectors. Multiply that out, and the world map is a square 2,000 screens/miles on a side.
... for a total of four million square miles. This is a game whose overworld is basically the size of Europe.
Maybe we'll have better luck flying. Unfortunately, the BURNER switch does nothing, because as the Fuelo control tells us...
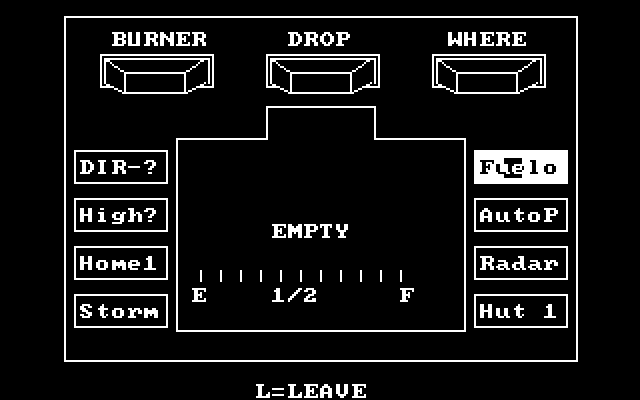
... we have no fuel.
Wait. How did we get 15 miles down the Mire with no fuel?
: The B-liner car has a Solar Battery for driving.: The B-Liner balloon needs a lot of fuel. Drill for it!It's true, we didn't see any fuel for the B-Liner at the Galactic store, nor did we have the opportunity to chop down Popberry trees for fuel. However, the big rock we saw marks the location of an oil deposit, and the B-Liner's got robotic mining equipment on-board. Drive to a rock, press the space bar, and...
Looks good, and now our fuel meter is nice and full. Let's get out of here. Fire up the control panel, hit the burner switch, and wait. There's no wind for the first 2,000 feet, but soon enough...
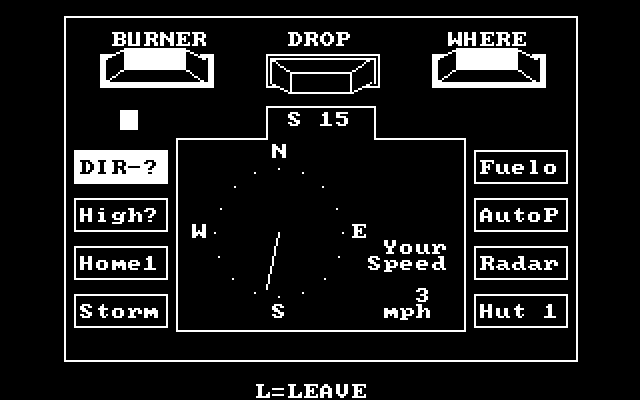
... we get a whisper of a breeze taking us in the right direction. This'll take forever, though.
: The higher you fly the faster the wind blows.: Take the B-liner up or down 'til you find a good wind.I keep the burner going, and the wind speed continually increases and its direction spirals around clockwise. One complete turn later, and the wind looks much healthier:
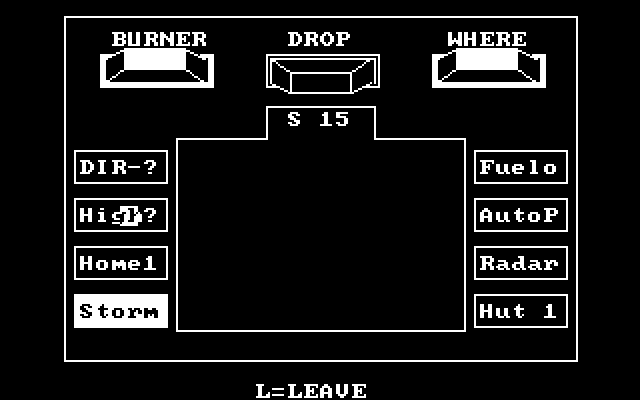
 : Storms are not worth fooling around with. Land.
I've never seen a storm in-game. Something sets off storms, though, and I think they way they work is that they blow you in random directions at incredible speeds, pretty much putting you everywhere but where you wanted to be.
Storm warnings are supposed to appear if you switch to this. It's only ever looked like this for me, though.
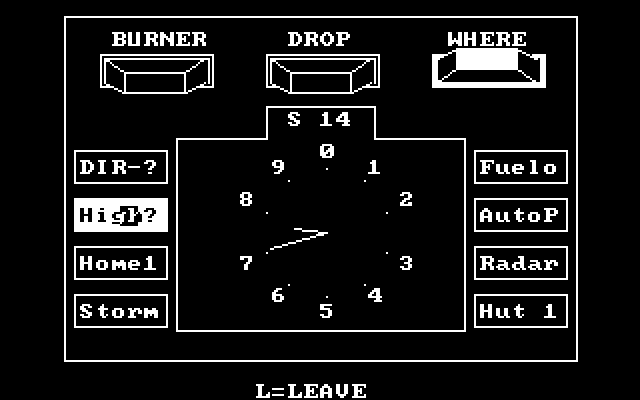
The altimeter shows us where we are, in case we want to aim for this height range directly in the future.
Honestly, I never check the altimeter. Wind directions are consistent enough that I just tweak the burner as needed to keep us in the right jet stream, and hit DROP if we get high enough that it's taking us the wrong way.
(Also shown: me bouncing back and forth between the R and S columns and the 14 and 15 sectors while I track down a decent wind)
Now, given the alleged speed the wind is blowing, it would still take us four hours or so to reach that hut. Fortunately, there is some serious time compression going on here, so within a minute of real time, HUT 1 is telling us that we're close enough to the target to drive the rest of the way. I vent the balloon with DROP and come down somewhere in sector R12. After landing, I snack on a few Popberries, and then go refuel. Getting to that cruising altitude ate about half our fuel reserves.

... that rock is alarmingly mobile, and it seems to take exception to us.

The B-Liner's armored nacelle is strong enough to resist its attacks, though. That said, the bludgeoning is enough to knock us out...

Being knocked out is basically sleeping, including the part where we hypnotically consult with Uncle Smoke.
: There are dangerous Mire Crabs out there. Look like rocks.: The faster you go the more you will attract Mire Crabs.: Once a Mire crab finds you it will send for many Mire Crabs.: Some Mire Crabs will steal your fuel or put you to sleep.Mire crabs are the primary hazard for driving, and are also the main reason we can't just set the drive mode on autopilot and go make a sandwich for 173 screens. They're infinitely aggressive, can move faster than the B-Liner can drive at maximum throttle, summon friends, and the only way to actually tell the difference between a Night Rock and a Mire crab is to drive past it at speed and see if it gets pissed off.
Getting caught by a Mire crab halts you for a while for it to finish animating the attack, boosts your "sleepiness" by a considerable amount, forces you to take the "sleep" action, and then removes half your fuel. The crabs can't actually hurt the B-Liner, but you aren't going anywhere without paying attention in this game.
For the last part of a trek, drive without rhythm, keep your speed low, and steer clear of things that look like Night Rocks. Once you find an actual rock, note its location and fuel up again immediately before takeoff.

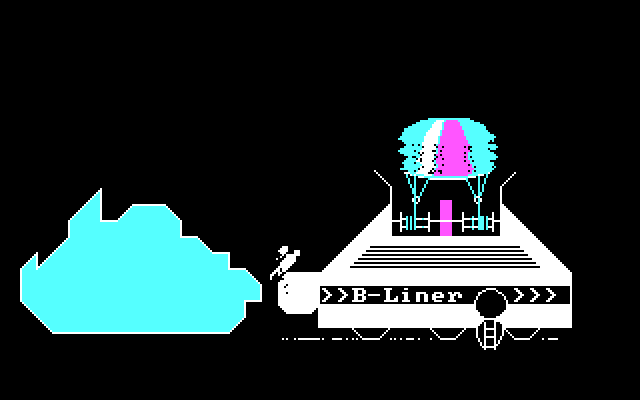
Anyway, we've arrived at a Head Trader's hut, inconveniently located right at the screen edge so that when I try to park at it I shift over to the next screen the first few tries.
"Hut", says the game text, but this thing looks more like a minor ziggurat to me.