Part 12: 18:05 - 18:20
Ordersquote:
3.II Squadron: Battleships Deutschland, Pommern, Schlesien
Maintain current speed [18] and heading [270], fire on individual enemy ships.
5.III Squadron: Speed 18 knots, heading 270 degrees. The Konig and the Grosser Kurfurst engage the BB Valiant with main guns and the Markgraf and the Kronprinz engage the BB Malaya with main guns. If BB Valiant or BB Malaya is catastrophically damaged (i.e. sinking is inevitable), the group targeting the vessel will engage the BB Warspite instead. Should 5.III Squadron enter effective torpedo range with the Queen Elizibeth class battleships and have a good firing angle, fire one salvo of torpedoes from the port broadside tubes. Secondary guns are to engage any Light Cruisers and Destroyers that enter effective range.
Friedrich der Große: turn in line to 270, engage Barham
I Scouting Group : Course zero-zero-zero true Speed two-six knots engage whatever the closest target is, since it's the only one in range, I think.
II Scouting Grp : Adjust heading to 320, maintain speed. Engage enemy cruisers at a range of 10km or less.
2.IV Scouting will turn to WSW, engage cruisers within 9000 yds and destroyers/TBs within 8000yds.
5.IV Scouting Group: turn true north - 0 - but maintain speed of 10 knots.
10.V half Flotilla : Try to get some torpedoes into those Battleships, but don't pull too far away from the Battleline. After a salvo of torpedoes, turn to heading 180 and act as a screen.
18:05
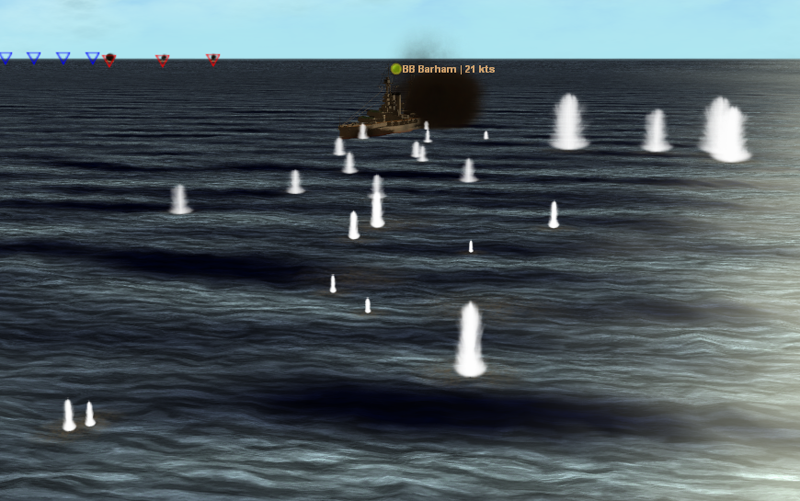
The amount of fire landing around the Barham is truly frightening, but little of it seems to be hitting, and this is only helping to foul up the aim of individual ships.
18:06
A few hits are scored though, as scores of shells land around the single British ship.
18:07
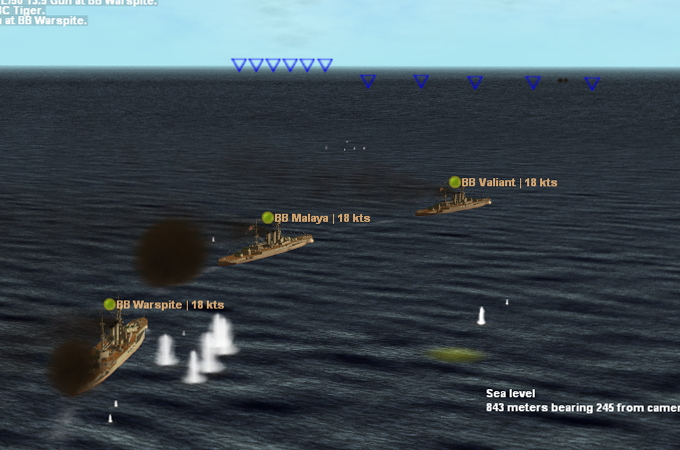
She is not the only British ship taking hits though, as the Valiant is seen to be burning and we land a solid strike on the Malaya with a 30.5cm shell.

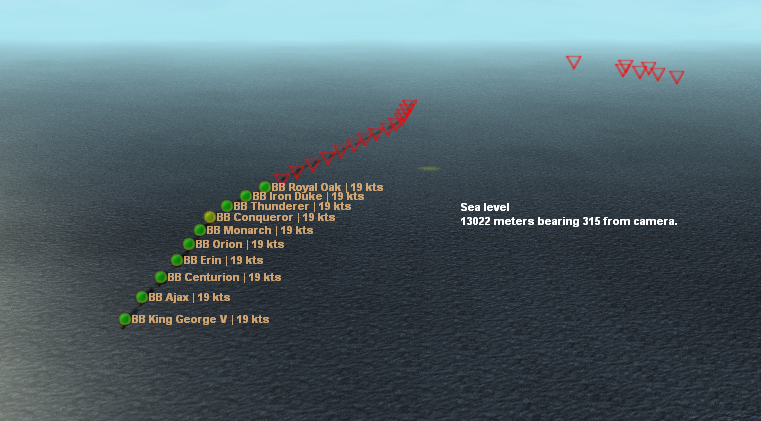
To the north, the scouting ships see the British battle line jink a little, correcting their course no doubt on the reports given by their engaged counterparts.
18:08
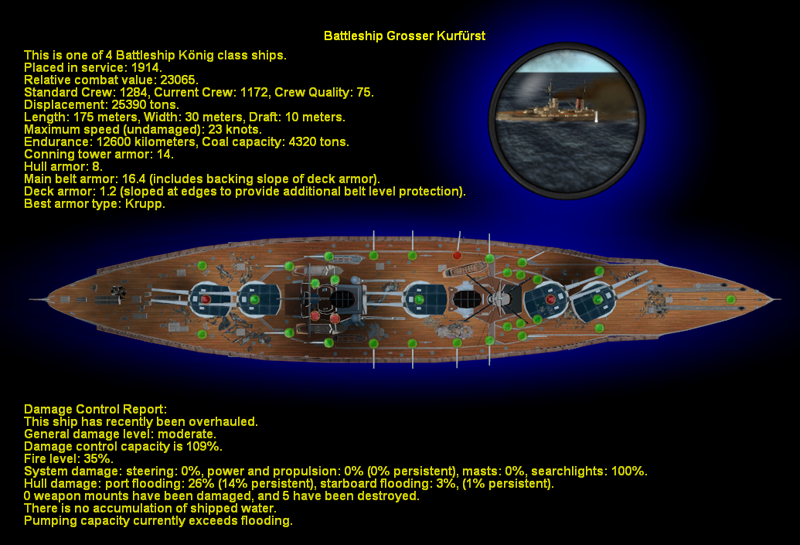
The lead ships of the battleship line are taking the brunt of the enemy fire, the British ships having crossed our T and are raining fire on the Konig and Grosser Kurfurst
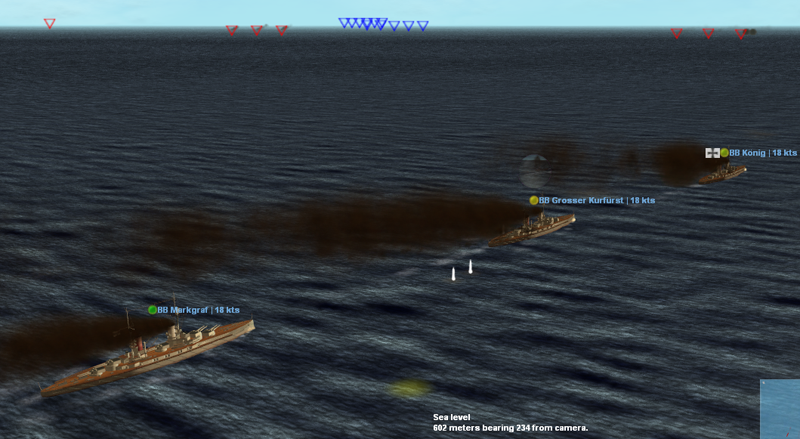
Of the two, the Grosser Kurfurst is suffering the most, she is burning badly, has had two of her mighty 30.5cm turrets knocked out in quick succession, and is currently taking on water .
18:09
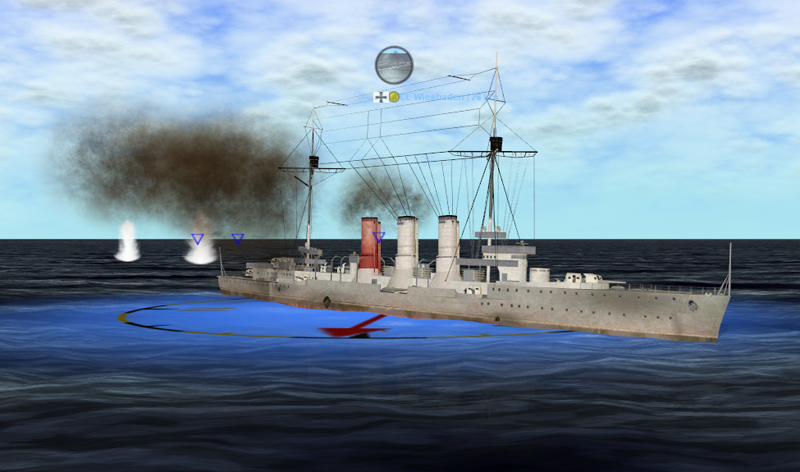
The British Battleships finally open fire, their target its the cruiser Weisbaden who quickly takes several hits and loses tow of her 8.8cm guns
A 15 Inch shell slams into the conning tower of the Konig, seriously wounding her Captain and killing a large percentage of the Bridge crew.
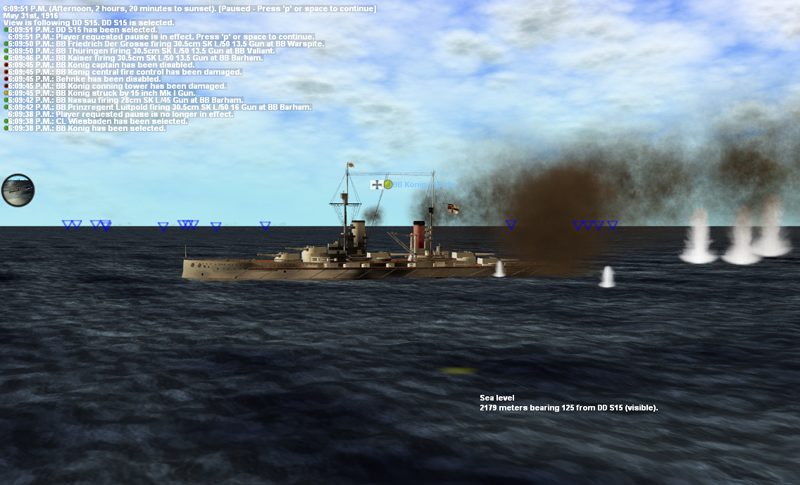
This also disables her fire control system, leaving her guns firing blind and all but useless. It will be two minutes before anyone assumes command of this ship.
18:10
The Barham is rapidly taking on the appearance of a floating wreck.
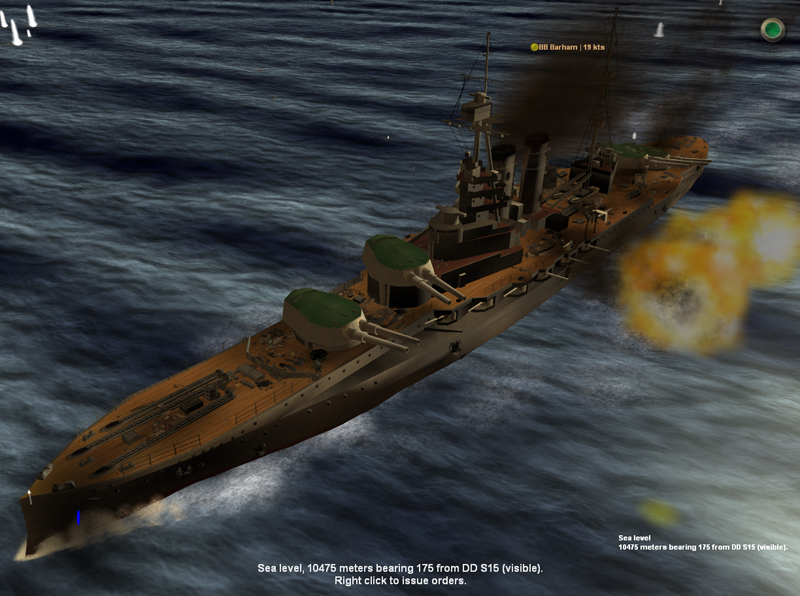
A grand total of 12 ships, including our Battle crusiers, are firing at her now. A few seconds after this shot is taken, she is hit by three 30.5cm shells at once, showing that at least one ship has her range.
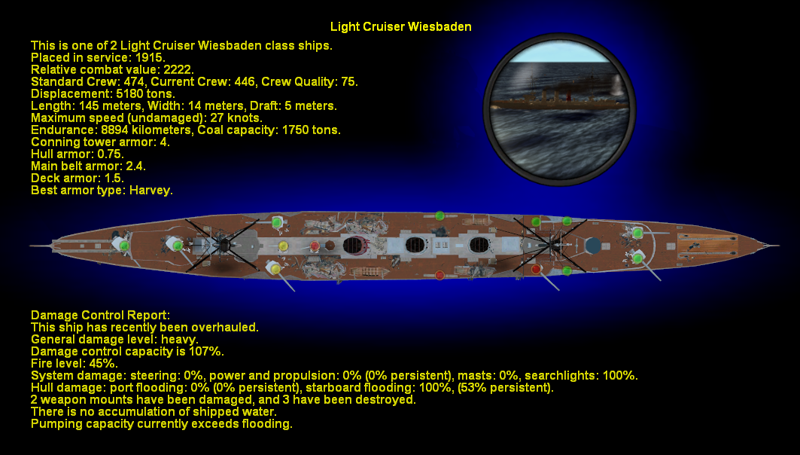
18:11
Two 13 Inch shells hit the Wiesbaden simultaneously.
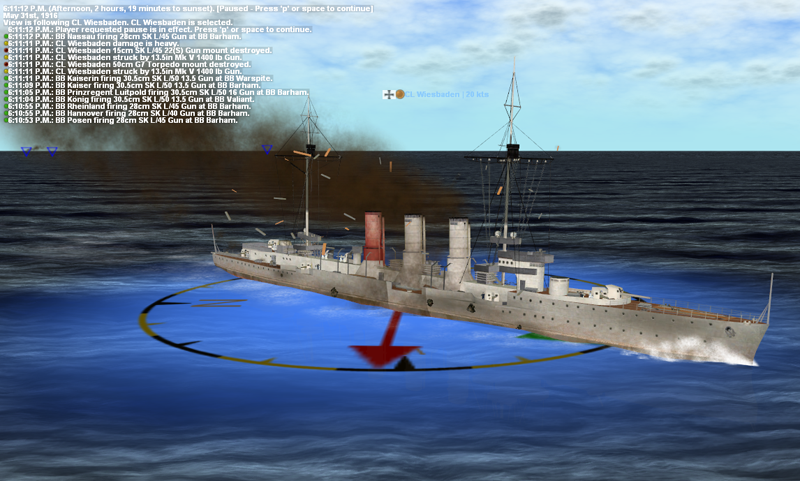
These two shots cripple her, destroying some of her guns and causing large amounts of water to rush into her. Her Captain orders a turn southwards back towards the main fleet.
18:12
The 9.V Hal Flotilla cause havoc amongst the battleships by trying to cut through the main battle line in their haste to be at the enemy.
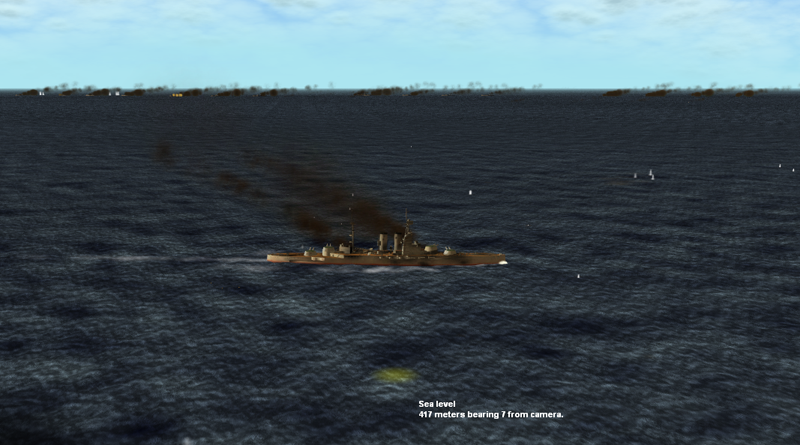
18:13
A 15 inch shell hits the Wiesbaden amidships, shattering her spine and causing her to begin to sink.

At this time, the lead ships of the British battle line also come into sight of our own battle line, at this time, only two battleships, but this is known to be only the tip of the line.
18:14
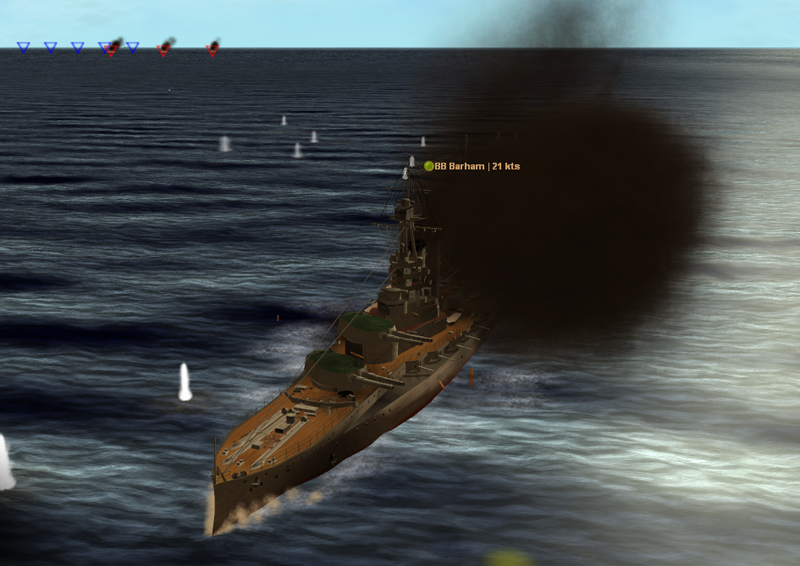
The Barham continues to take hit after hit, and cannot last much longer under this weight of fire.
18:15
Seeing their lead ship is doomed, the other Queen Elizabeth battleship turn north to flee our own ships and rejoin with the main British Fleet.
Almost as soon as they complete the turn, we see men abandoning ship on the Barham, the ship now obviously sinking.
18:17
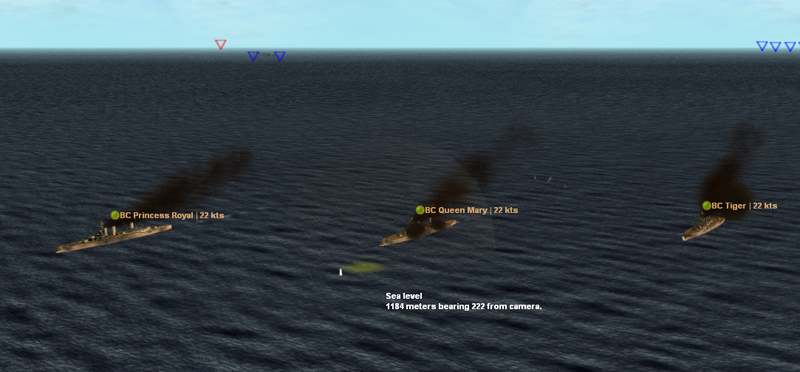
Somehow, the battle cruisers remain in the fight, although they are now taking more fire and more hits from the few of our ships that are no concentrating their fire on the sinking Barham
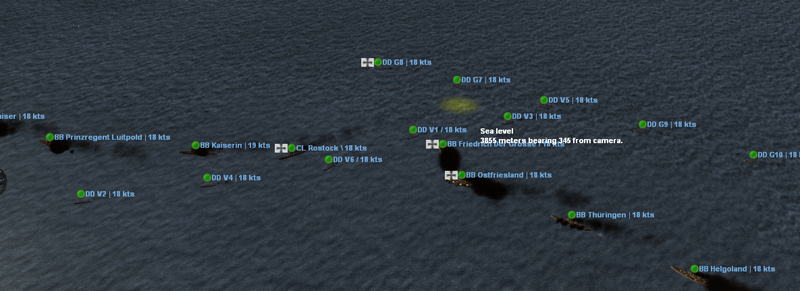
18:20
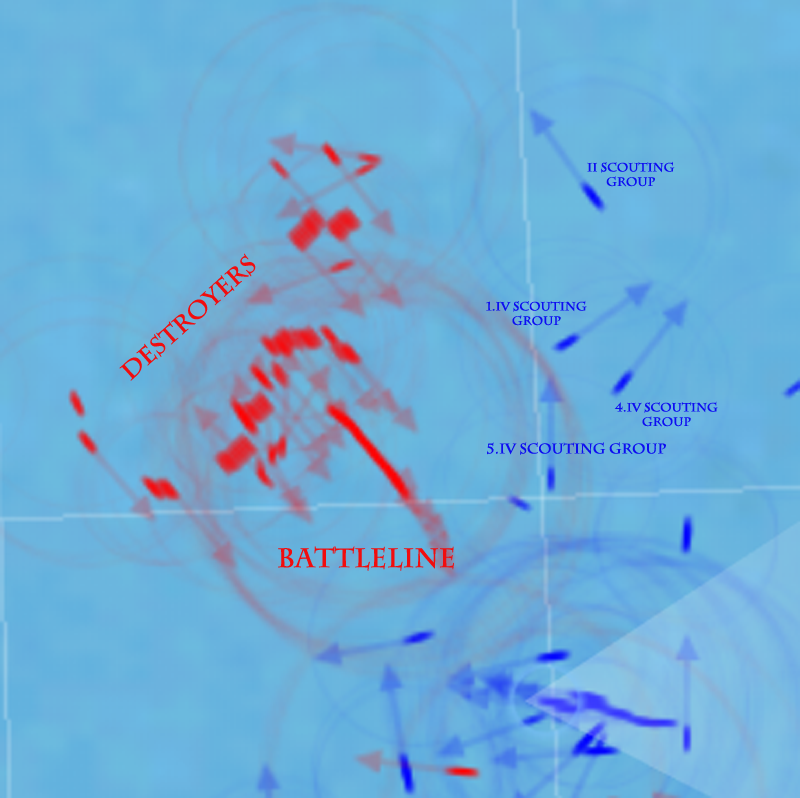
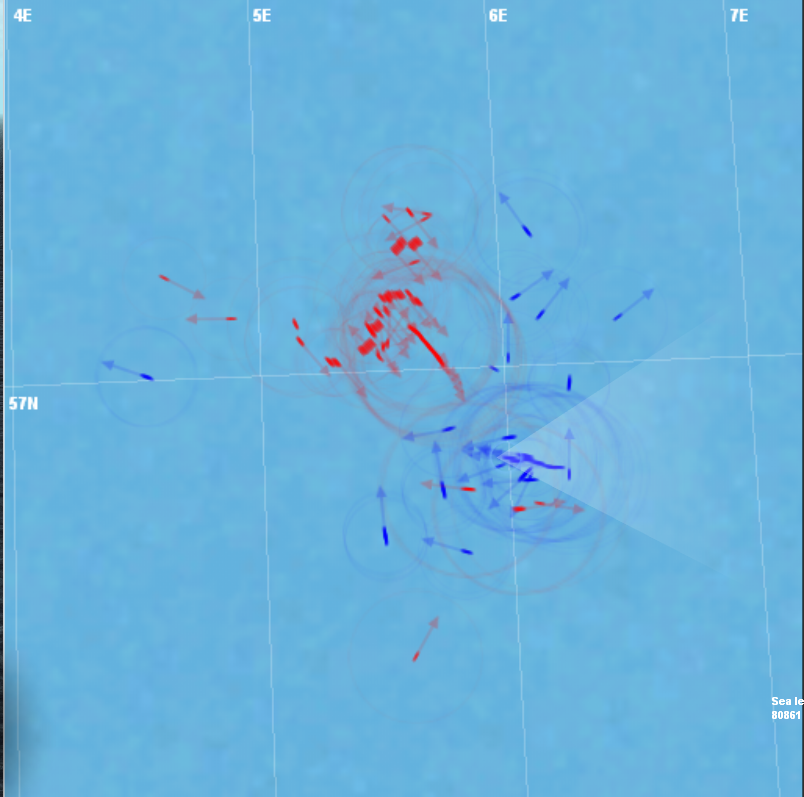
Here is your map.
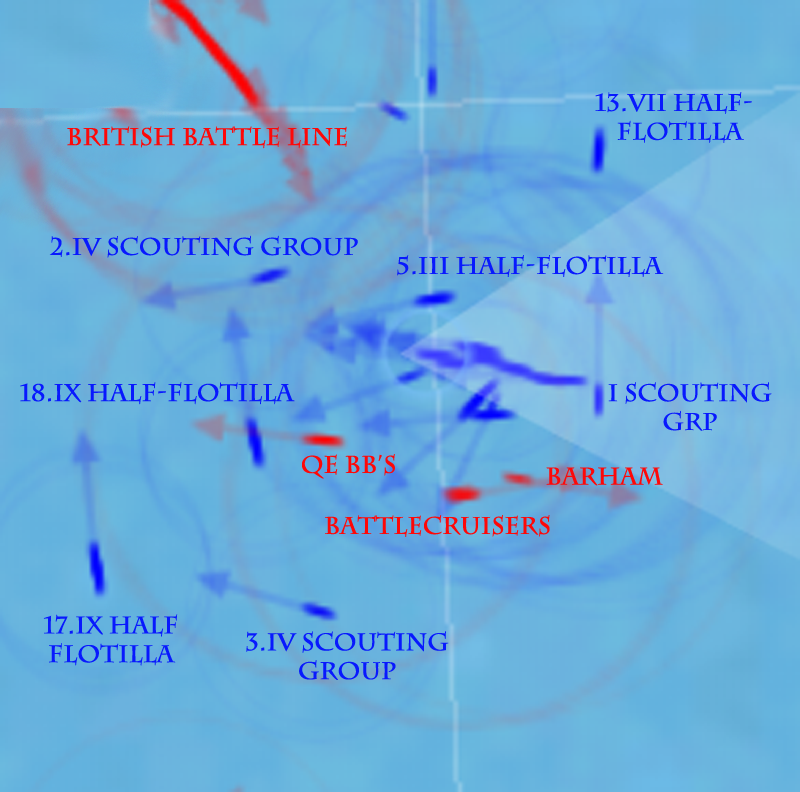
For the northern groups
Messages
II Scouting Grp to Scheer:
ENEMY BATTLELINE MAINTAINING HEADING 150, NW OF YOUR POSITION. AM PURSUING ENEMY CRUISERS TO NE OF BATTLELINE, HEADING 320
3.II Sqadron to 4.I Squadron
WE SEEM TO BE HEADING IN THE RIGHT AND/OR WRONG DIRECTION, CONTINUE AS WE ARE.
Sheer to All:
SHIPS IN CONTACT WITH ENEMY MAIN BODY SEND CONTINUOUS REPORTS ABOUT HIS STATUS
Sheer to Fleet:
5. III FOCUS ON WARSPITE 6. III. ON MALAYA 1.I ON VALIANT REST FOCUS ON BARHAM
5.IV to Scheer
Full speed ahead! Your battle line should decimate the coming line due to how the lines have formed.
Lost Messages
2.V Scouting to Scheer, copy to Hipper
2.IV SG is working around behind the enemy battleline.
Sheer to Rostock:
CLEARED FOR TORPEDO ATTACK ON WARSPITE MAKE IT COUNT

We now enter phase three of the battle, the Battleship Brawl, the fact that Scheer seems to be about to cross the British T, and the fact that we're pounding their southern ships makes it look good for some carnage in the near future.