Part 6: Salamun District

Lazyfire joins us again, as we continue our push to Visari's Palace--only to have it forcibly stalled by the introduction of the game's secondary antagonist.
Also, Lazyfire has started up an LP of Shadow Of Mordor. You should check it out!

Having secured Visari Square, we march ever onward to his palace--

--but before we can cross the bridge, we are introduced to Colonel Mael Radec, who promptly orders fire to rain down upon the convoy, destroying the bridge and cutting off access. Radec is one of the big bads of this game, second only to Visari himself. He's cruel, intelligent, and very good at his job. At the moment, that consists of stopping the ISA advance through Pyhrrus City. Radec is also willing to do pretty much whatever it takes to succeed.
Which includes blowing up vital infrastructure that could not only cripple the Helghast military's mobility, but also its ability to rebuild and restore the city after the war--but if it means saving Pyhhrus City from invaders, then whatever works, right?
 Get it? Do you get it??!
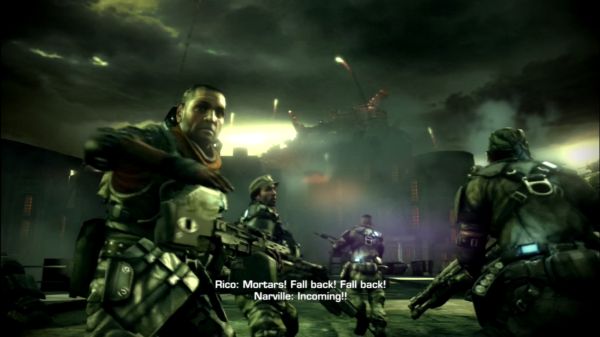
But yeah, it works. The convoy is halted, and Alpha Squad is scattered. While Radec systematically continues to destroy or secure all other bridges headed to the palace, Narville and co. are forced to regroup. Sev, meanwhile, is forced to find an alternate route back to his allies.
Fun fact: if you want, you can hang around here at this point and pick off Helghast soldiers on the other side of the gap. It doesn't achieve anything, but hey, it's satisfying.

Moving on through the stormdrain, we bump into one of my favourite bits of window dressing in Killzone 2. See, I've said it before, but the Killzone games really shine when it comes to the details. Whether those details are horrifying ammo types being revealed in instruction booklets, or complex socio-political histories posted on a website, they never fail to impress me with just how horrific, gruesome, and brutal they are. Case in point: these fun little bugs. The size of a large pair of shoes, the aptly named CADAVER BEETLE is a common sight on Helghan. They're a scavenger insect and are found, quite literally, everywhere on Helghan: jungles, cities, sewers, deserts--whatever. They perform a vital function in the planet's ecosystem, consuming anything that ever dies.
Anything.
Ever.
All things.
As you might imagine, they're quite abundant at the moment, considering the large amounts of ISA and Helghast food sources falling all around them. You can shoot them if you want, causing them to burst open in a flash of guts and lightning (seriously--look closely during the video), but they're ultimately harmless. They're more cute than anything. Look:
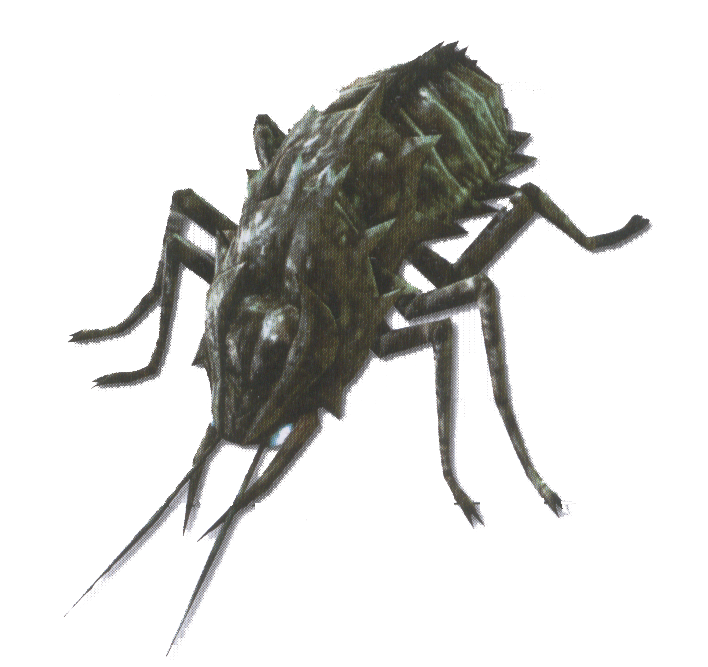
Another fun fact: if you hang around a Cadaver Beetle when there are bodies nearby, it will eventually find its way to the food source and start snacking. I love it. What a great little detail. Nearly every player is going to miss it, which is too bad, because it's wonderful. Planet Helghan is a horrible nightmarish deathtrap, and every new detail we learn about it just reinforces that thought.
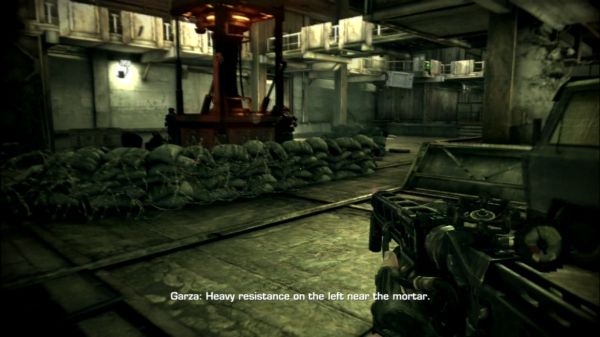
Moving on through the level, we come out into the Salamun District, another run down shantytown area of Pyhrrus City where Garza locates us. Working our way back to the rest of Alpha and the convoy, we are tasked with taking down some mortars that are giving Narville hell. After blowing up the first one, we get some plot development. Garza and Sev pick up some enemy chatter over the radio. It's Colonel Radec, issuing orders. The most important part is here:
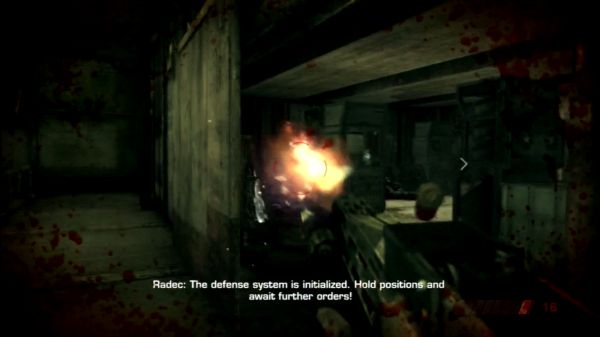
"The defense system is initialized."
Man, could that possibly sound more ominous?
After blowing up the second mortar, we get a little more plot development when Evelyn Batton calls up Sev and Garza. It's easy to miss as just a bit of background dialogue, but it's actually critical to our secondary plot, so I've transcribed the conversation:
quote:
Batton: Alpha, can you talk?
Garza: It's quiet right now, Evelyn. What's on your mind?
Batton: The short version: there's some unknown element on that metal fragment you recovered. It's dense. Unstable. It packs a massive electrical charge.
Garza: This stuff powers the arc towers?
Garza: We're on the ground. Actually, we're heading under it. We'll keep our eyes open.

That topic finished, Garza immediately broaches another one:
quote:
Garza: Oh hey, Evelyn--got some intel for you. We caught a message from Radec on Hig comms. Mentioned some 'defense system'. Maybe it's related?
Batton: I'll tell the Colonel. Keep us updated.
Garza: Copy that.
"Maybe it's related?" Ha, of course it's related! What remains to be seen is how that will manifest itself.
Moving on, we find a pile of ISA corpses:
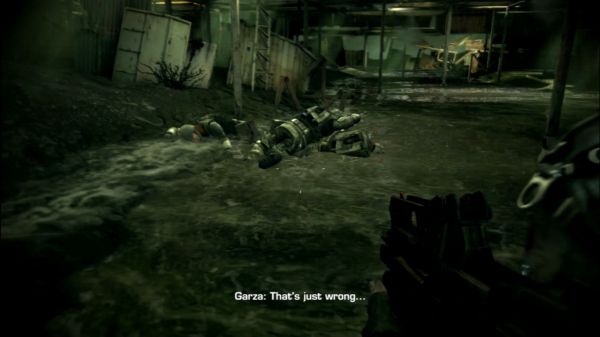
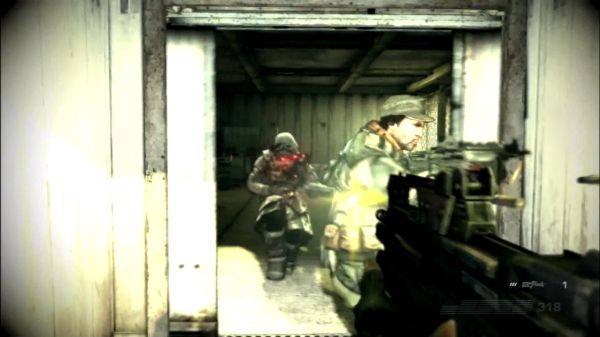
Partway through the mission, Rico will task you with checking up on a crashed Intruder location to find any survivors. Sev and Garza weren't able to save Jeffries, so maybe they can save someone else? No such luck, of course. It winds up being a whole "horrors of war" thing, and the last, injured survivor is killed by a sniper when the Helghast spring their trap--because of course the Helghast would use injured ISA soldiers as bait. We watched them do that in the last video, when we were with Rico and Natko.
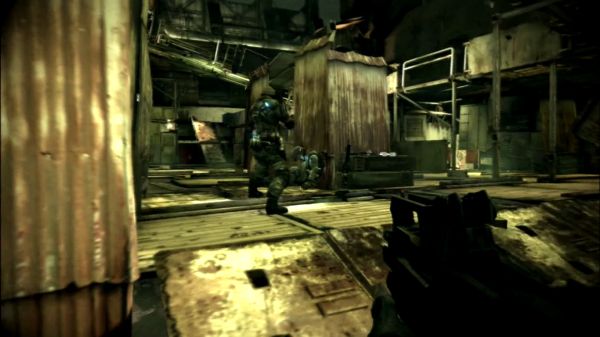
This shantytown section is another particularly hard chokepoint on Elite difficulty. Unlike last time, where we had Rico and Natko to back us up in a position with a relatively decent amount of cover, we're left only with Garza in a place covered with multiple routes, allowing Helghast to easily overwhelm you while their rockets and machine gun rain down upon from the high ground. The biggest difficulty on Elite, are the two Support Troopers firing rockets at you from the end of the stage. Now, they won't appear until you thin out the first wave and the dropships bring reinforcements, so that allows you the opportunity to get familiar with the area without being blown up.
One thing to remember about this section: you can always retreat back to the river where you found the pile of dead ISA soldiers--though if you get cornered there, you're done. Stick close to Garza, as he's going to be invaluable as a distraction and as a second target. If he goes down, all the enemies are going to switch focus to you. Stay out of the middle of the map, and pick one of the two sides, sticking in ramp walkways. They are tight corridors, so if you get overwhelming, it won't be hard or the Helghast to kill you, but it allows you to funnel them in 1 or 2 at a time, while avoiding fire from troops taking cover across the way--besides, they act as invaluable cover from the dropship's machine guns. You might think the covered areas at the top level would be sufficient, but they are vulnerable to rocket launcher fire. The Support Troopers are great at hitting you with splash damage. Once the dropship flies away and you've eliminated any immediate Helghast threat, take out the nearest Support Trooper--I recommend taking the left path for this, as you can then sprint to where they were taking cover, giving you perfect protection from the second Support Trooper, and depriving the other Helghast soldiers from using the emplaced machine gun. From there, play it safe until the second Support Trooper is down. With that obstacle clear, you can take out the remaining Helghast at your leisure.
I essentially use this strategy in the video, but taking more risks since it's on Normal difficulty.
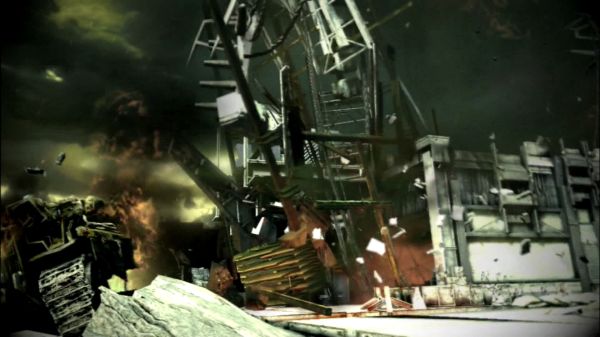
Moving on, the level ends with Alpha Squad doing what it does best: breaking things. I'm not sure if that building was part of an electrical grid or a communications tower of some sort, but I love that Garza's first response to not finding roof access is to simply collapse the entire building. Whatever works, I guess.

"Oh no! I'm playing Killzone 2, but I'm so used from the AI tactics in Killzone 1, that I have no idea how to handle an enemy that uses cover!"
Do you find yourself saying that when playing this game? Have no fear, as Visari Corporation developed the answer to your prayers. Murder the Flamethrower Helghast nearest to you and take his gun and learn to love that spray arc:
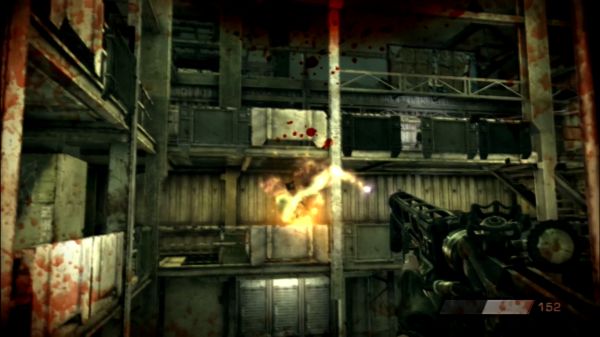
It reminds me of the flamethower from Turok 2: Seeds Of Evil--if I could have found a decent image or video of the arc in that game, I would have posted it. Enemies in Turok 2 didn't bother with cover, but it's a brilliant tool here, great at clearing out pesky Helghast.
Also, if you haven't had an ally die on you yet, it gets forced on you here:
After Garza opens the door, a Helghast with a shotgun rushes in and kills him. It's possible to kill the Helghast before, but you need to be prepared, and even then, he still manages to knock out Garza. Note, due to my accuracy, I probably hurt Garza more than I helped him. Still, it's a nice touch, because it makes sure that every player has had the opportunity to use the Revive Gun before the game gets too difficult.

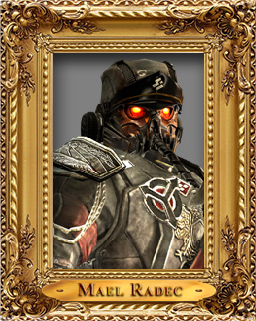
Sure, Hakha isn't in this game, but that doesn't mean we can't enjoy Sean Pertwee's voice acting, right? We'll just cast him as a different character! In this case, Colonel Radec.
Colonel Mael Radec is Visari's personal bodyguard. Vicious, cruel, and loyal, he is sometimes referred to as the "Hound Of Visari". We hear mention of his name way back aboard the New Sun in the first chapter, but this is the first time we've seen his face or heard his voice. He grew up poor during the Helghan depression, and joined the military the moment Visari started making his power plays. His skills saw him quickly rise to the rank of an officer. An incredible marksman and hand-to-hand combatant, Radec is also a gifted tactician. He's not necessarily the best at looking at the broad picture, but that's okay because Visari and his Generals worry about overall war strategy--they rely on Radec to
Since he came from a lower caste, Radec actually requires his breathing apparatus, much like the men under his command. It's rare for a Helghan from such a background to rise to such high heights in the military, and in fact, only one other Helghast has managed to do so: Killzone: Liberation's Colonel Tendon Cobar. Radec was personally left in charge of the defenses of Pyhrrus City and is responsible for deploying the arc weapons we've seen thus far.
Ever wonder why Pyhrrus City is so quiet and sparse? Radec was the man responsible for evacuating the civilian populace to Konstantine City--that's why we only find soldiers and traps in Pyhrrus.
Radec also has a reputation for being fearless. He is known to lead his battles from the frontlines, even going so far as to be the first to enter a room even if it's a breaching maneuver. He is trusted to train the soldiers of Helghan, and is known as 'The Schoolmaster' in his own building, the Radec Academy. The design for Radec takes a lot of inspiration from the Nazi Waffen-SS.
We'll be seeing a lot of him.

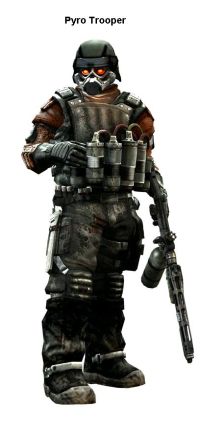
Pyro Trooper
Have fairly unique armour for a Helghast, in that it's not all black. They're more easily identifiable by the fact that they wield flamethrowers, though. Keep your distance from them--not always easy, since the flamethrower has a decent amount of range to it. They're not quite as clever as their Killzone: Liberation counterparts, so they won't give you too much trouble by blocking chokepoints until you get much later in the game.
They actually aren't that hard to deal with, despite having some of the highest health/armour in the game. They take a lot of hits, sure, but head-shots are still one-hit-kills and it's pretty easy to keep your distance. Worst comes to worst, just rush'em with a knife and they'll go down fast. They'll never engage in melee, preferring to retreat and use fire.
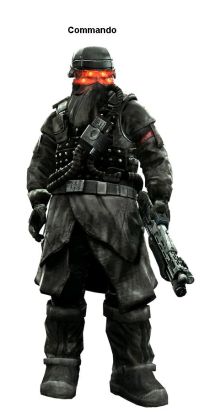
Commando
Visually distinctive in that they have four-eyed goggles. The commando operates much like shock troopers do, in that they'll try to close the distance between you quickly in order to shoot you. Unlike the shock troopers, their shotgun does a lot more damage. Also, they have more armour, so it's harder to stop them. If you can keep your distance while putting them down, you'll be fine. The section where we encounter them in this chapter, where Garza is more or less scripted to take a fall, is difficult because the tight corridors play to the Commando's strength.
This situation doesn't occur often, so don't live in fear of these guys. They're nearly harmless in the open.

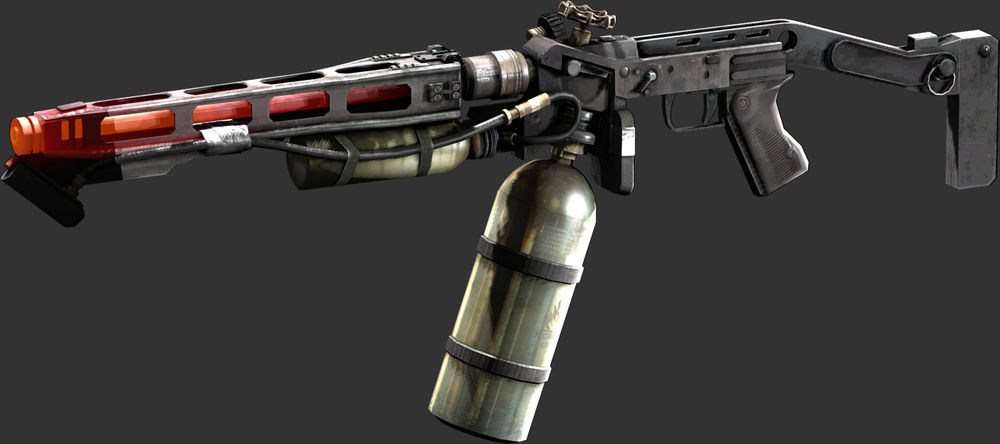
VC1 Flamethrower
Another Visari Corporation weapon. Why does Visari Corp make all the fun guns? Not only is it great for clearing enemies from out of cover, but it's also great at striking fear into them. I mean, did you hear the screams the Helghast made in the video? This flamethrower doesn't have a particularly large ammo capacity, considering the size of the fuel canister--much as it's represented in Killzone: Liberation. The flame stream's arc is super useful, and while the gun is a lot of fun to use, it's still pretty much a gimmick weapon. Ammo for the weapon is scare, though it does wind up appearing more frequently than other gimmick weapons we'll see later on. With that in mind, it's sort of a take it or leave it weapon. It's not bad, so use it if you love it. You won't find a lot of ammo, though, so if you're worried about running dry in a fire fight, either be okay with picking up a fallen rifle halfway through a battle or bring a different gun.
If you look at the barrel, you'll notice it shares similarities with the StA-3 machine gun, which was modelled after the German MG-42. You'll also notice the VC1 looks sorta like the flamethrower Sigourney Weaver used in Aliens. Also, this is one of a few weapons that don't regularly appear in multiplayer. The flamethrower appears exclusively on a single DLC multiplayer map--though to be frank, I never found the flamethrower as much fun in multiplayer.
Enjoy using this weapon while you can, because later levels will have Helghast pointing them back at you.
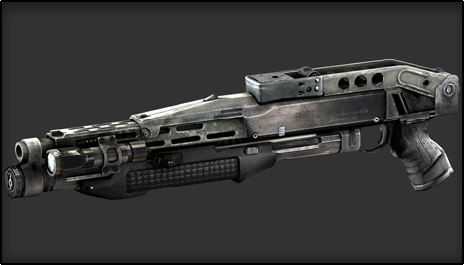
LS13 Shotgun
ISA made. It's basically the M13 Shotgun. In fact, it is the M13 shotgun, just with a different name--so, I guess it also comes with poison shells. Hmm. Unlike in Killzone 1, you can only fire a single shot--not that shooting 3-shots at once was a great benefit. It's a bog-standard video game shotgun, so its range is terrible, its fire rate is slow, and it takes forever to reload. It's powerful, though. I mean, most enemies can be killed in a single shot if you manage to strike them with all 20-pellets in a round. That said, I don't like it. It's not fun. It fires too slow. My play-style benefits from having an excess of bullets to throw, particularly at longer distances. If the shotgun works for you, then cool, but I'm not going to use it. Oh, and it's Natko's favoured gun, so "ew", I guess.
As an aside, the shotgun doesn't come with any zoom function in this game. Instead it gets a flashlight. Which is useless, since there really aren't any dark areas to use it in.
One more aside--or, fun fact, really. Due to the whole 20-pellets in a round thing, it was possible for people in Killzone 2's multiplayer to get over 100% accuracy.
Trip Mines
They're about as effective as they were in the other games: not very. They're not common at all and they're often not in your path, so they're not very effective. I presume they work like the trip mines in Killzone 1 where if you have Helghast DNA they are coded not to detonate. There's no playable Helghast character in this game, nor are the weapons abundant enough that we get to see a Helghast run through one, so I guess we'll never know for sure. Regardless, if one gets in your way, shoot it and move on.
Smoke Grenades
Unlike in Killzone: Liberation, the player does not get to use smoke grenades. There ARE multiple grenade-types in this game, but they're all lethal. Honestly, I'm not sure if this grenade came from a Scout or a standard Assault Trooper, as you don't see them get thrown very often. As you can probably tell, they aren't very effective. Their use doesn't increase with difficulty, either, they just don't get used very often. It's interesting that they're being fielded, I guess.
Auto-Mortars On Stilts
The exact same as the Auto-Mortars we've seen in previous levels, except elevated. Still not a real threat to us--as they're currently bombarding Narville and the rest of the convoy. They function as set-dressing here, although since they are marked by our objectives, we are required to blow them up using the SixAxis D-Charges.

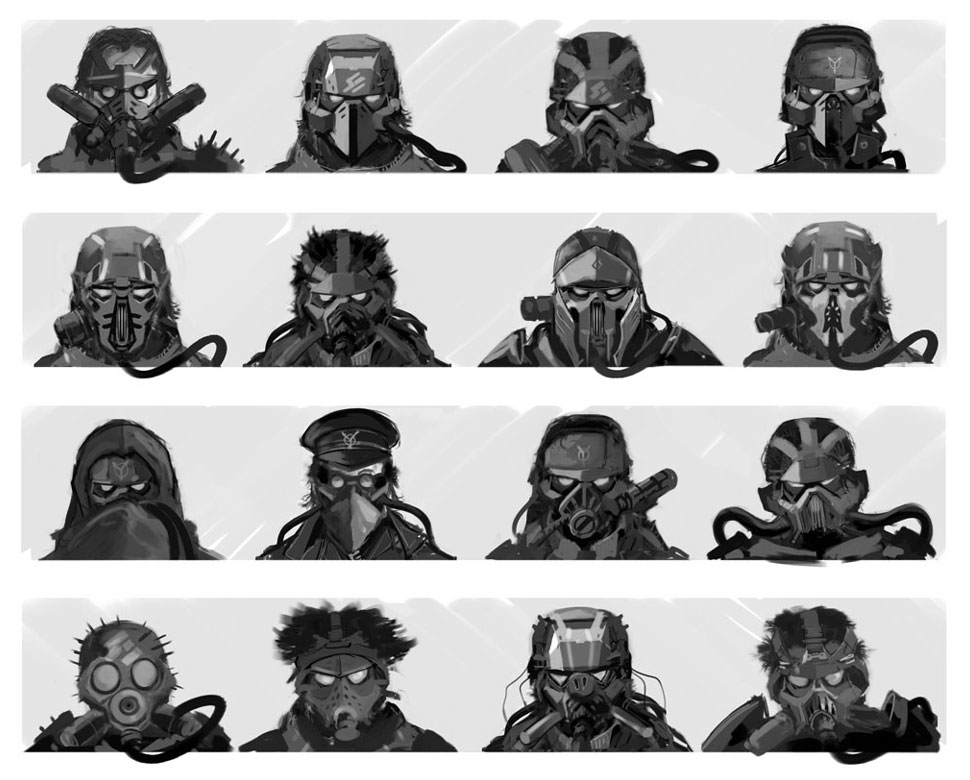
A whole lot of really rad Radec concept art:
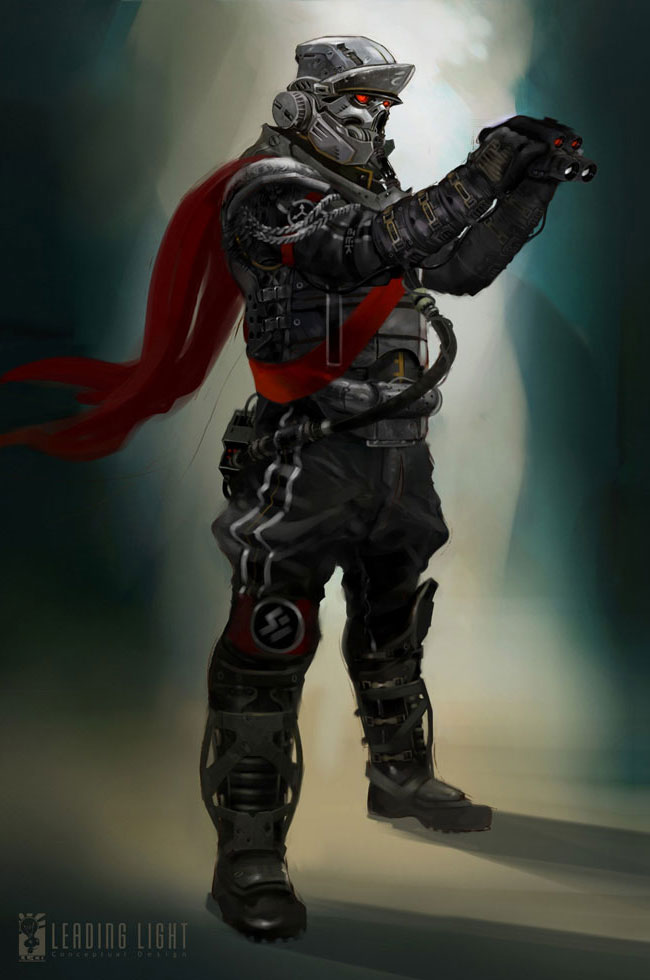
Final Radec design.
Early art looks like they toyed with the idea of having Radec be of a more noble background, complete with hair and exposed face:
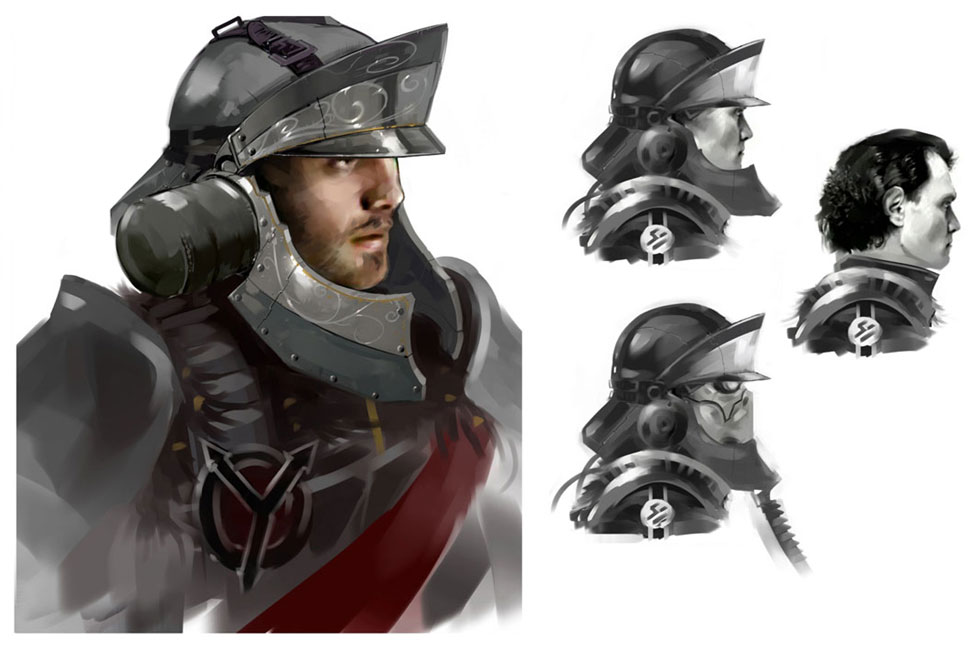
Some of these designs are pretty awesome and metal, but I can see why they didn't go with them. The Nazi SS uniform is evil enough without having cartoonishly evil black spikes and black feathers jutting from it.
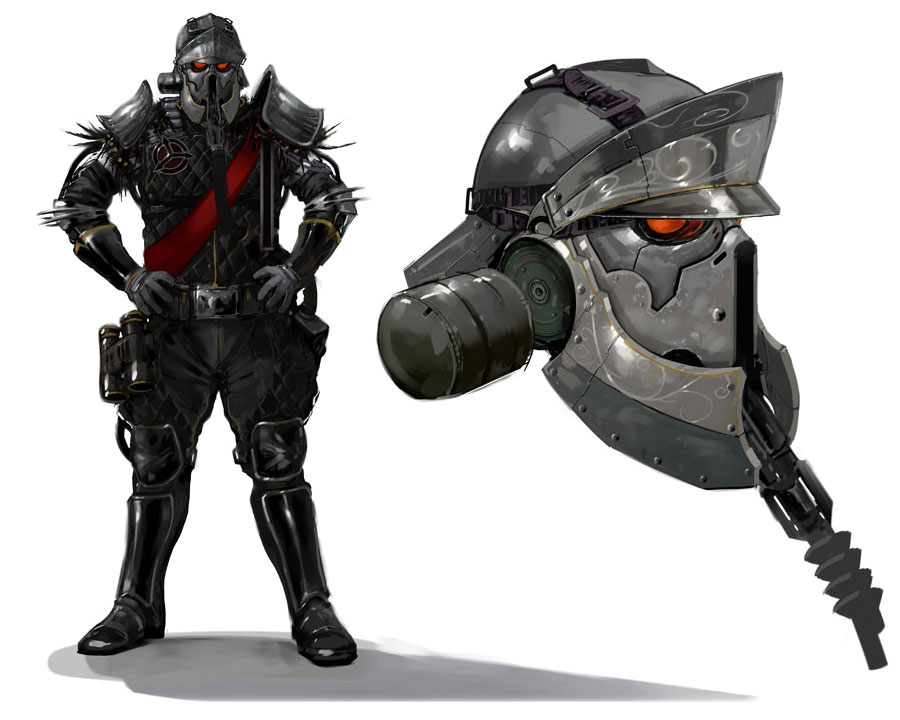
More early designs without the unique helmet:

Lastly, a bunch of different mask designs for Radec: