Part 7: Salamun Bridge

Joining us this video is CJacobs! You may remember CJacobs as a guest from the previous LP. I assure you, he still knows next to nothing about Killzone as a franchise. CJacobs is currently working his way through a Resident Evil: Revelations 2 LP. You should check it out of you like evil and residents, and especially if you like revelations. nine-gear crow and I have also helped CJacobs create an abomination. If you like abominations, boy howdy, you should take a peek.
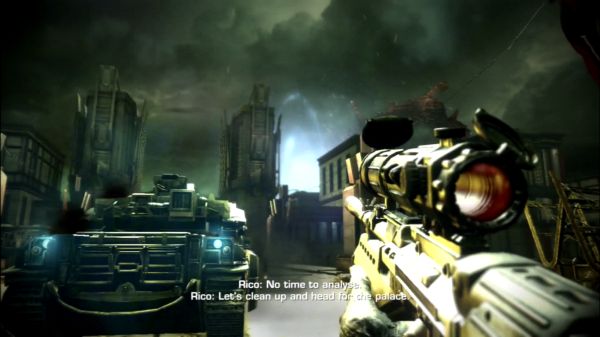
Anyways, we continue right where we left off last video. With Lazyfire, we trudged through Salamun District to get to the final intact bridge to Visari Palace: Salamun Bridge. Expect a fight.

The fight up Salaman Bridge is slow and violent. It's exhilarating to play, but I've reserved much of my praise for the Gameplay section below, because ultimately, the intense action isn't what I want to focus on here. What is most important about the bridge fight occurs in the background and can easily be missed--marked only by the AI chatter:
Hello, B-Plot. We've seen big blue explosions before. Think "arc technology". Oh, what was it Batton said about the material we found last episode? Oh yeah, "unstable".
(Also, I love the lighting in this shot. Whatever is going off next to me, a grenade or whatever, look at the way the light shines through the scope. Pretty slick.)
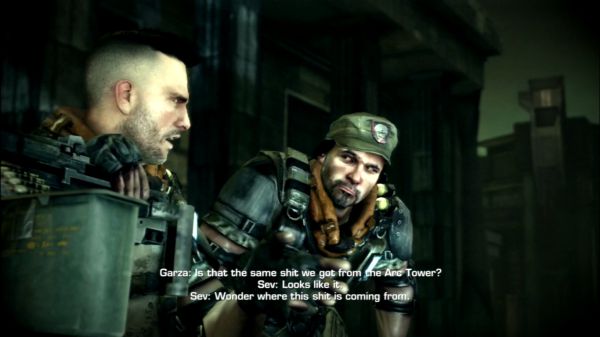
Yes, yes it is the same shit from the arc tower. What else could is possibly be? (I love Garza's facial expression here).
It hasn't been spelled out for us yet, but if you're paying attention, the pieces should be falling into place. From last video:
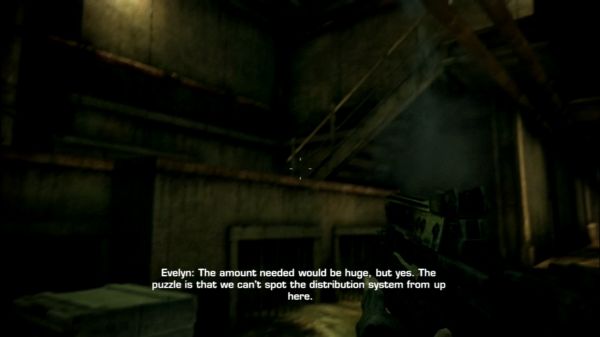
It looks like the distribution system is an underground pipeline. It's no wonder that the ISA couldn't spot it from orbit--and still couldn't spot it when their ships started getting shot down. The mystery deepens! Literally, because now it's underground! Get it?!
The bulk of this post update takes place in Radec Academy:
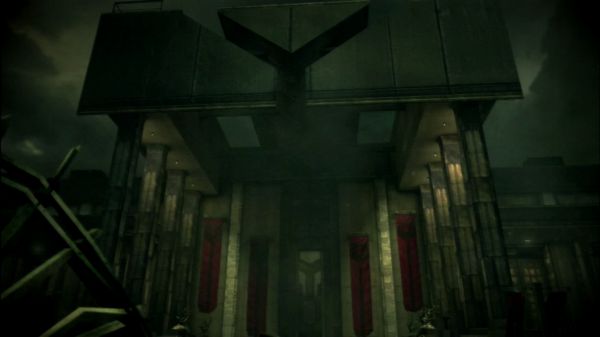
As CJacobs notes, the design for the building is very brutalist. Now, I'm not an expert on brutalist architecture, so I'm not even going to try to pretend. I know the name comes from the materials used, that the buildings are meant to display function rather than comfort, and that the whole movement was seen by some as a reaction to the frivolity of a bygone era. If you're more familiar with this type of construction, please let me know.
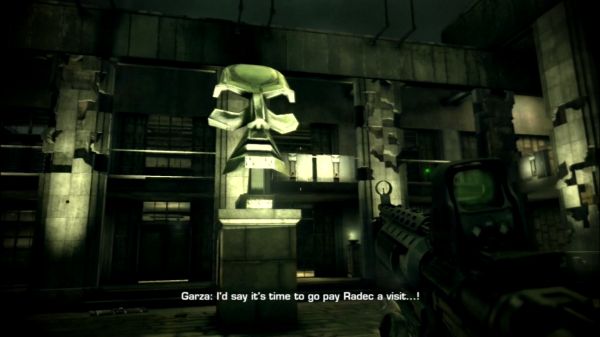
That said, the building itself is full of all sorts of iconography (including an actual destructible icon that goes towards your trophy count), art, and maxims courtesy of the Helghast. For one, the Helghast triad is incorporated just about everywhere in the design:
There are a pair of art pieces that could be seen as a monstrous homage to Visari. That, or a futuristic 1984 Big Brother reference:
Repeated on metal plaques around the building are these sayings:
quote:
"Violence has its own economy, therefore be thoughtful and precise in your investment."
quote:
"If you want peace, prepare for war."
That last one, especially, is reminiscent of the Party's slogans in 1984, particularly "War is Peace".
Aside from that, dead trees litter the space:
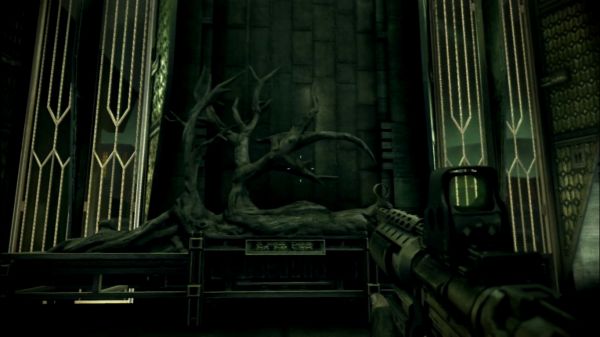
As Garza notes, this is the nicest architecture we've seen yet. This, here. This place where Helghan's soldiers are trained to become elite killing machines. This place that was named after one of its most brutal living war commanders. This is some of the nicest Helghan has to offer and it's still monstrous and horrible.
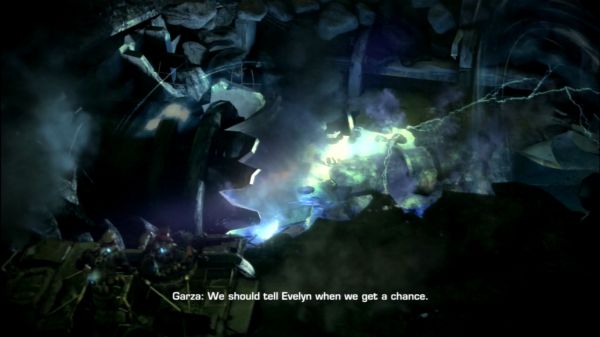
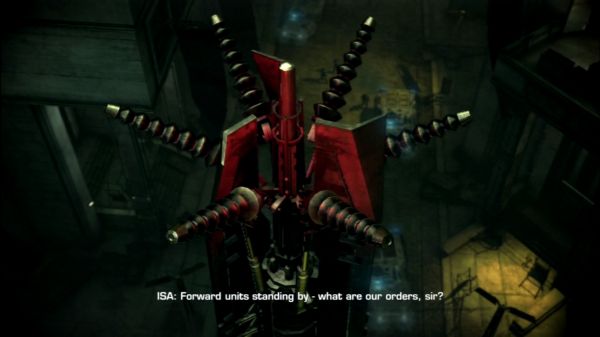
Anywho, back to our B-Plot, which as been simmering nicely in the background. Remember when we overheard Radec talking about a "defense system"? You know how Evelyn said they weren't able to pinpoint how the Helghast were powering their arc weapons? Heh.
Heh heh.
*sigh*
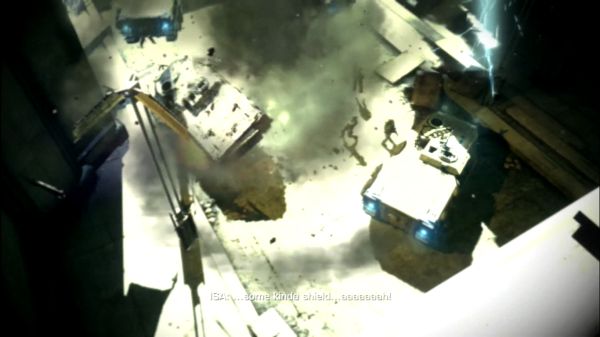
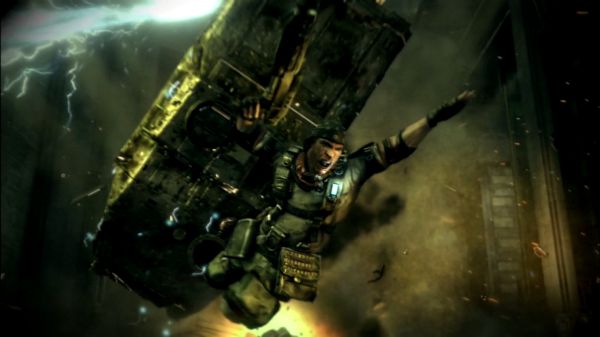
There is not a
 big enough. Oh, and sorry to disappoint, but Natko survives. If there's one thing he's good at, it's not dying in a cutscene.
Anyways, cut to Radec:

This is a great shot. Radec is overlooking Pyrrhus City, gazing down on the destruction wrought upon and by the ISA. The ocean is off in the distance, and what is presumably Corinth River comes up towards the palace. Judging by this shot, I'm willing to hazard a guess that this is our overall progress through the game so far. From where we landed, way out by the shore, through the canal and slums, Visari Square, Salamun District, across the bridge, and right up to the palace gate. Too bad there's a massive underground Tesla cannon network blocking the way. I love that you can see the arc electricity surging across the streets.
Better shot of where we would have landed back in Chapter 1:
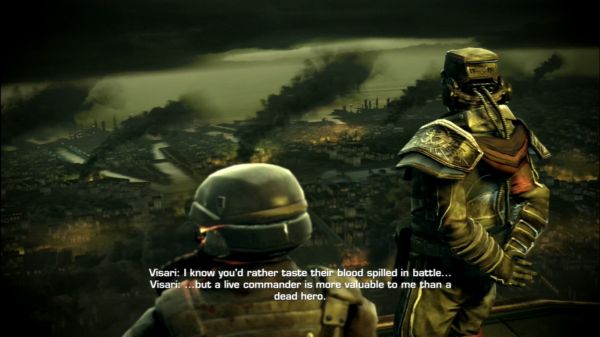
Killzone is all about the details, and I love this glimpse at our progress--even if it is just the ISA cutting a burning swath of destruction through the capital city.
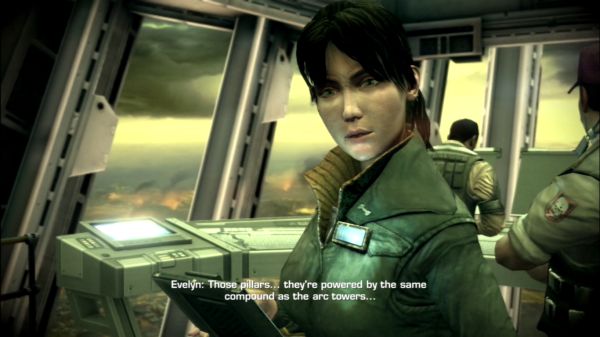
Oh, and if you haven't been paying attention to the B-Plot at this point, Evelyn spells it out for you. Note: you can see Pyrrhus City burning in the background.
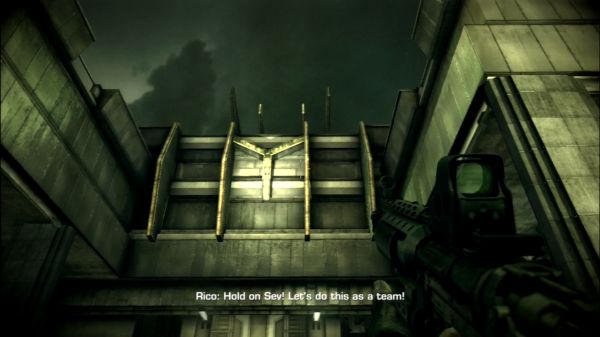
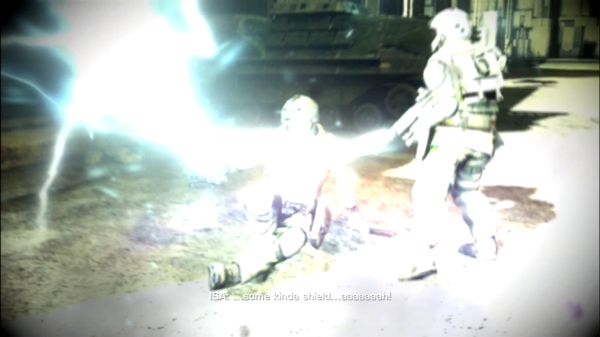
Lastly, I'm going to end this update with a shot of Rico because it shows that, if nothing else, he is a professional. Observe:
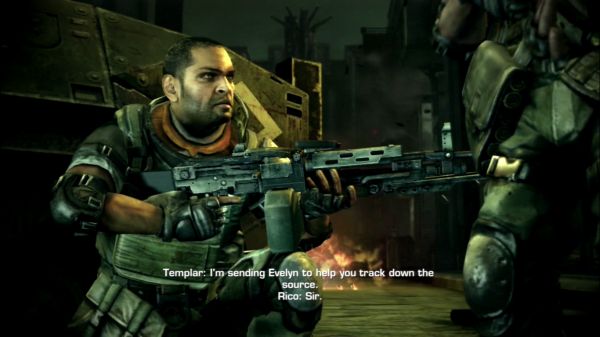
TRIGGER DISCIPLINE!

Here we're introduced to what is probably my favourite aspect of Killzone 2: really fighting for every inch of ground against the Helghast. Essentially, you're fighting down a corridor--so like pretty much every console shooter, but hear me out! Each side has a limited number of commanders and an unlimited number of grunts. The infinitely respawning soldiers keeps the action constant and gives the illusion of two massive forces crashing against one another. However, kill a commander, and your side pushes further up while theirs retreats. Keep killing the command units, and you'll break their advance force.
Some people disliked this part of the game because they don't like infinitely spawning enemies, but I think it works here. The AI commanders stick out and are programmed to be aggressive, so they're often out front. The "commanders" are enemies with powerful weapons: rocket launchers, flamethrowers, sniper rifles, and grenade launchers. Really, you're going to wind up prioritizing them anyways because their weapons make them so dangerous. If you're playing in such a way that you're focussing on the standard riflemen first, then yeah, you're gonna have a bad time.
Your progress is marked in several ways. One, your soldiers will run up to and take cover at what the game considers your "frontline". In this level, it's represented alternately by an ISA APC:
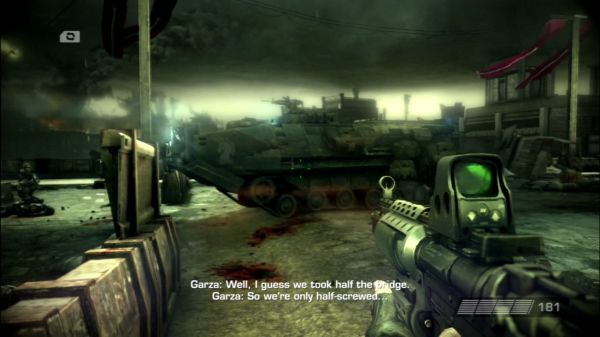
And an ISA tank:
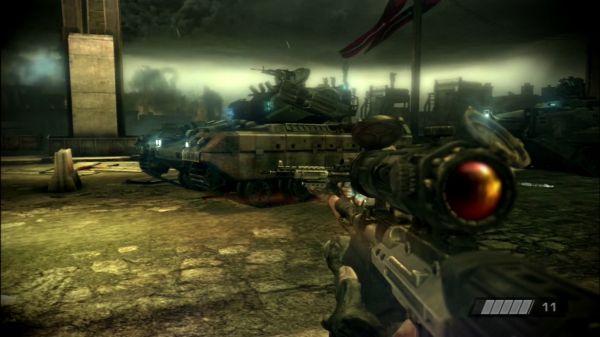
In later areas, they'll follow your lead, advancing when you advance, and retreating when you retreat. The nice thing about Salamun Bridge is that the vehicles prevent the Helghast forces from regaining ground. This won't always be the case. In later levels, if the Helghast push you back, they will retake ground. Which is the other way of figuring out your progress: look for where the Helghast are standing. They will reinforce themselves so that they can provide covering fire for each other.
As I've mentioned before, I feel Killzone 2 is one of the few war games that is able to successfully recreate the feeling that you are fighting for each step you take in a war zone. It's intensely satisfying. So, props to Guerrilla Games for that.

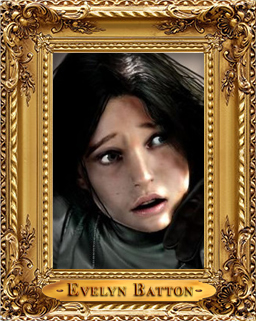
Voiced by Jules de Jongh, who is predominantly known for her work in children's television, particularly Thomas & Friends (as in Thomas The Tank Engine). She has done a number of video game roles, aside from Evelyn Batton, such as Faith in Mirror's Edge and Triss in the first The Witcher. She's also done a number of Need For Speed games, voices in Ni No Kuni, Dead Nation, Escape From Dead Island, Remember Me, Overlord II, and a few other games. So she's done some stuff.
Evelyn Batton is one of the ISA's chief nuclear scientists and was tasked by General Stratson to develop the Red Dust nuclear bomb--the nuclear bomb that the Helghast stole. In fact, Batton's sole reason for being here this far from Vekta is to try and help locate and secure the Red Dust nuke. Her research is considered to be years ahead many of her colleagues, not just on Vekta or Helghan, but across all ISA colonies and Earth. Usually seen with a revolver sidearm. I neglected to give her a bio up to this point, but I figure now is appropriate because she's going to be getting a whole lot more screen time soon.

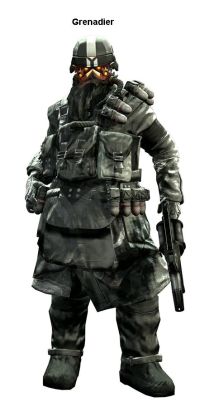
Grenadier
In the heat of a battle, they aren't easily discernible from other Helghast, but their weapons will quickly give away their locations. The grenades fired by their guns not only leave a trail, but they flash and beep loudly. Also, though the grenades explode upon impacting a living target, the grenadiers tend not to fire directly at you. Rather, they fire around you to flush you out of cover for other Helghast to hit. So not only are they easy to find, but they often don't pose too much of a threat. Really, they provide more of an interesting break in standard combat than anything else.
Note, they will switch to a pistol if you rush them.
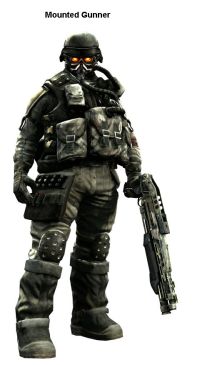
Mounted Gunner
Trained to use the mounted machine guns, these guys usually don't post much of a problem unless you're terrible at taking cover or a bad shot. When out of cover, they'll use the shotgun. Sometimes you encounter them without any mounted machine gun, so that you go straight to the shotgun part! Treat them like basic infantry, as their tactics and health aren't any different. The only problem is if they get up close, because the shotgun can quickly put you down.

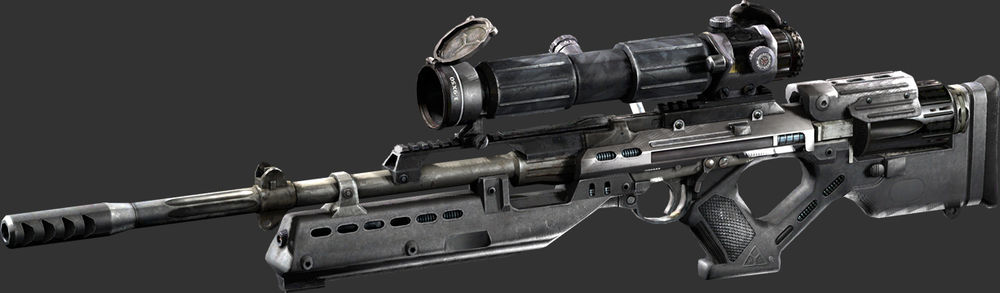
VC32 Sniper Rifle
Manufactured by Visari Corp. Seeing as the Stahl Arms sniper rifle seen in Killzone 1 was a fucking joke, Visari Corp set out to fix that problem by provided a standard sniper rifle (based off the StA-14 Rifle) that actually worked. Nothing fancy. No weird aiming reticle, or orange overlay, but a bog-standard sniper rifle with a helical drum. Has two zoom modes and has six shots. Slow rate of fire, but does high amounts of damage. You really don't need anything else in a sniper rifle, right?
But is it good? Well, it's a sniper rifle. If you're terrible with them, ditch it. There aren't enough areas that really need it to justify hauling it around if you perform better with a different gun.
Note: you can actually get this gun in Chapter 3 - Visari Square. When you claim the square and have the fend off the Helghast, Garza will climb up onto a small building before the gondola to cover you. If you follow him, there will be a sniper rifle lying nearby.
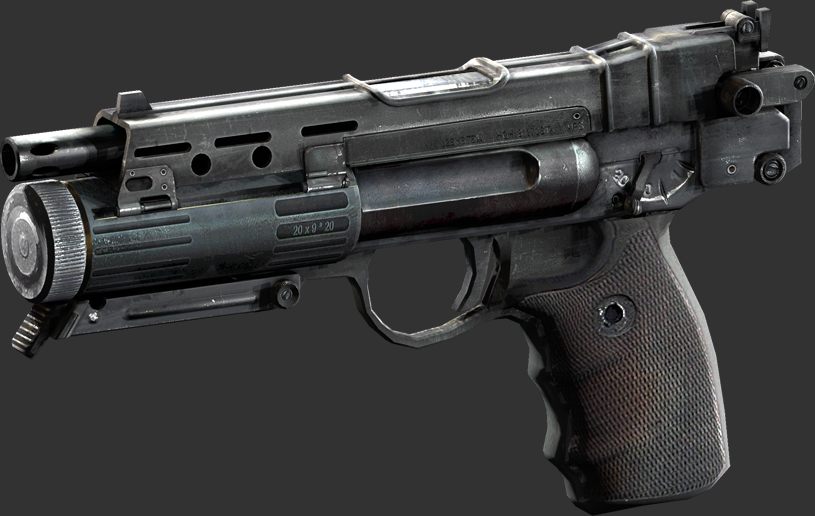
StA-18 Pistol
Brought to you by Stahl Arms, this gun is standard issue for the Helghast military and replaces the joke of a gun, IvP-18 Tropov Machine Pistol, that we saw in Killzone 1. Despite looking remarkably similar to its predecessor, the StA-18 is actually good and fun! It lacks the burst fire, but it fires single shots more quickly.
Despite being the sidearm of choice for EVERY HELGHAST SOLDIER, the gun doesn't automatically drop. If you see a Rifleman switch to the pistol, killing him will cause the rifle to drop. Bummer. The pistol only drops in certain locations, Salamun Bridge being the earliest you can grab one. It doesn't pack quite the punch that the ISA M4 Revolver does, and it's damage output is more drastically affected by range. That said, it's still possible to get one-hit kill headshots.
The fast fire rate, combined with sidearms having infinite ammo, makes this a great weapon. I prefer it to the M4 Revolver, in fact, because if I miss a shot with the revolver it takes longer to squeeze off a second round. With the StA-18, I can at the very least throw out a few bullets, as you only need one or two to stun a Helghast, giving me time to properly line up the killing shot. I'd say take this over the revolver any time.
Note: in multiplayer, this pistol is the default sidearm for both Helghast and ISA forces. It's also clearly the weaker weapon compared to the M4 Revolver, so much so, that'd recommend you switch to the M4 the moment you unlock it. You can't make a human player flinch in multiplayer, so the StA-18 loses its advantage.
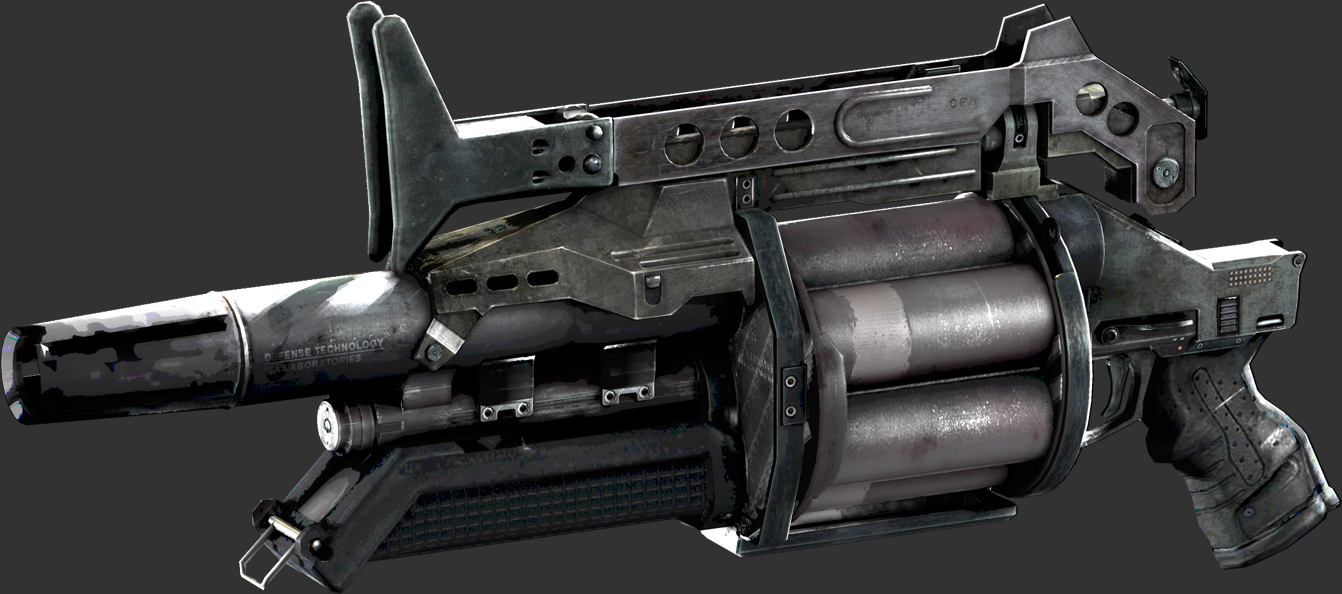
M327 Grenade Launcher
Developed by ISA Laboratories, this is essentially the same gun we saw in Killzone 1 but without the proximity mine second functions. It detonates upon impacting an enemy, but otherwise has a short timer--as you saw in the opening of the video.
As a weapon, it's okay, I guess. It appears occasionally, but its usefulness is really dependent on the situation, and rarely do you find yourself in a situation in Killzone 2 that necessitates the use of a grenade launcher. I'd much rather use standard frag grenades or seek out a rocket launcher. I pick it up here to show off, but I don't think I ever bother grabbing one again in this LP.
The top folding stock is never used in this game. Or in any Killzones, for that matter. It's just there and sort of bounces around a bit whenever you fire the gun. Cool detail, but yeah, it never gets unfolded.

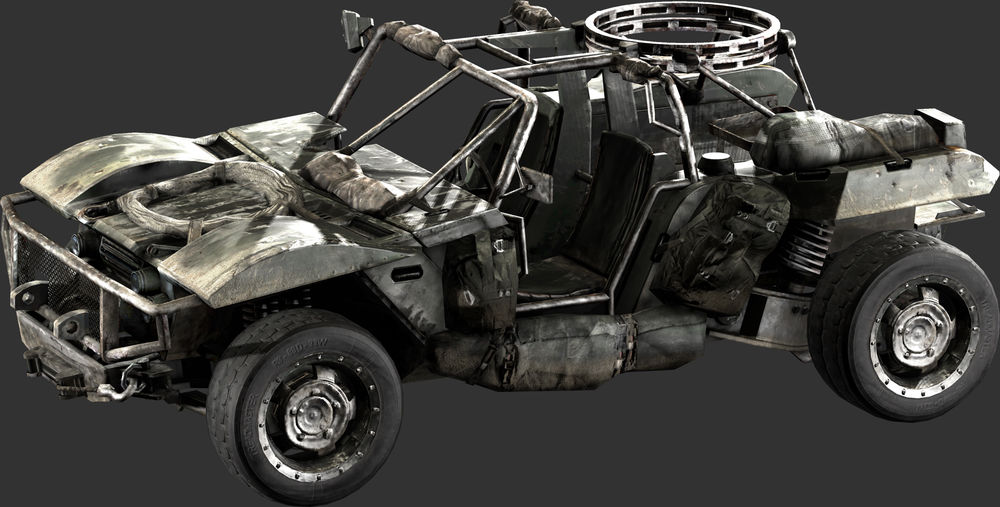
ISA Jeep
Aka the ISA Buggy. All-terrain, fast, meant for hit-and-run assaults. It's very lightly armoured, making it susceptible to small arms fire. It does come with a mounted machine gun that can rotate 360 degrees. Usually deployed alongside heavier armour, such as the ISA Archer Tank. We don't get to drive these ever in the series, so really they're just here for cutscenes and lore purposes.

Concept art for the Academy suggested it might look more sterile than what we got in the final version:

Interestingly, a lot of architecture on Vekta looks kinda like this by the time we get to Mercenary and Shadow Fall.
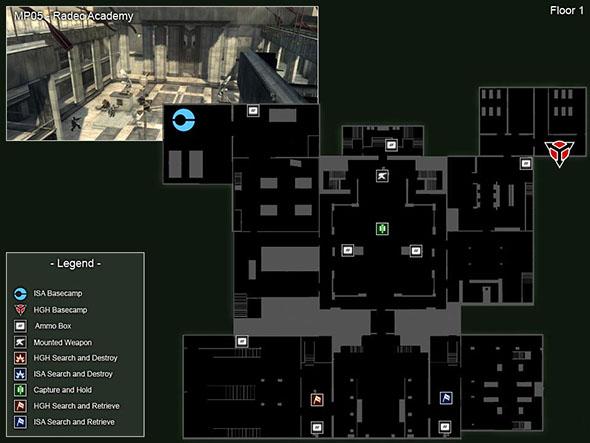
The academy looks a bit different in multiplayer. For one, you can access multiple floors. Also, the layout is been slightly altered. The Radec Academy map is one of the more popular ones online, and you can still find people regularly playing it:
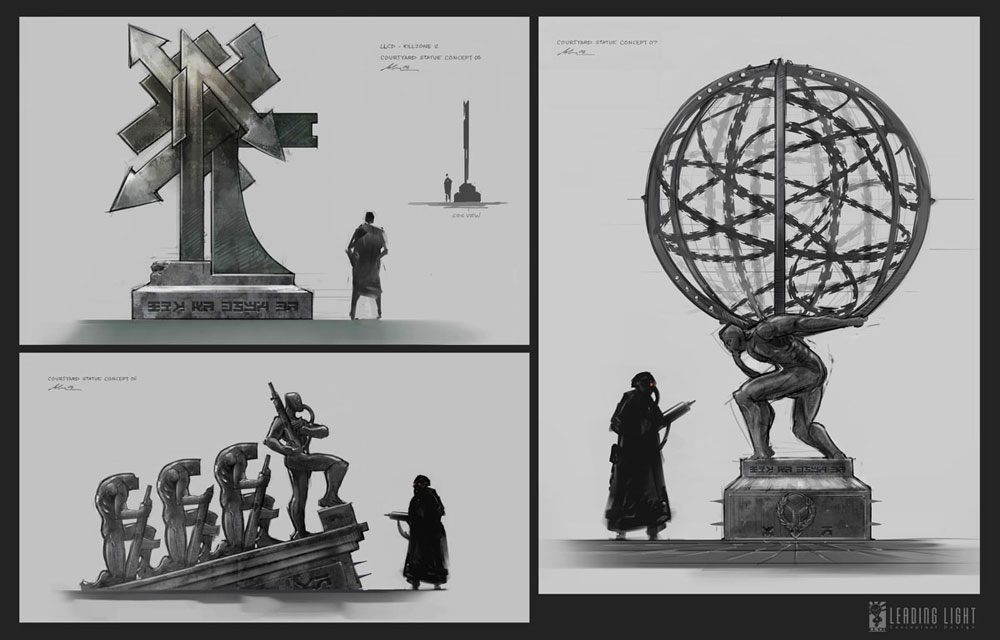
Here's some concept art for the statues in the academy courtyard:
.jpg)
There appears to be an Abraham Radec statue--oh, and there's a heroic looking Visari statue in the corner. I really enjoy the Helghast soldiers, armed, just hanging out looking at art.
Here's concept art leaning more in the modern art direction: