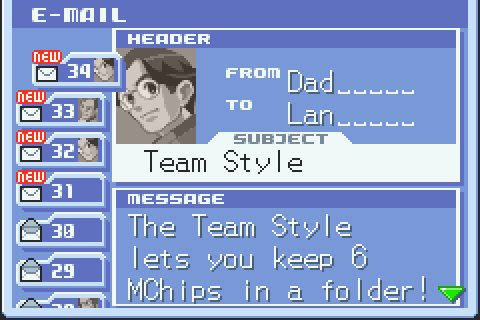
Part 71: A Flash of Insight.
Navi S-ranking SeriesQ: Isn't this part of the Let's Play?
A: Yes, this is simply a sub-section of the Let's Play that focuses solely on S-ranking the bosses. That's why it's a separate section in the Table of Contents.
Q: Can't you just show this during the updates themselves?
A: I can, but I wanted to take a different approach in regards to bosses. Since a lot of readers are learning things about the mechanics, I figured I would keep to those expectations and impart more of my knowledge. There's a lot more than one would think concerning each boss, and an update per boss should let me say what I need to say.
Q: How will these posts be written?
A: As follows:
-----------------------
[Intro picture]
Overview: General boss opinions and the approach
Tier List: A lengthy section containing most of the Battle Chips that some players would use to fight the boss. I divide the chips into tiers, ranging from God, Good, Bad, and Retard tiers. My reasoning will also be explained, as well as how you could use some of the lower tier chips.
[screenshots of folder]
[relevant video with voice commentary]
Conclusion:
----------------------
Q: Can't you just use [ridiciously strong tactic]?
A: Of course, but that's not really the point of the Let's Play. If I wanted to, I could cheese the whole game with a couple of super strong, or cheap tactics. But if I did that, would you learn or see anything cool? Would you have seen the Bruce Lee combo? No, of course not. That aside, seeing how someone uses a non-cheap strategy can be entertaining in its own right, and it encourages readers to use their chips in creative needs. Only then will you truly start to improve.
Q: Ground rules?
A: Just check out the overview to each boss, and the overview to the entire sub-series below.
---------------------
Well, that pretty much covers it. I'm making this as sort of teaching tool for any looking to fully complete these games. If you started out like most, I can guarantee you found out about how getting all the MegaChips required killing every boss REALLY quickly without getting hit. And your reaction was most likely "wat how the fuck do I do that my chip folder sucks and dodging is hard
 " Well, that's exactly what I'm here for. If by some chance you are new to this series and don't forsee how to S-rank the bosses in under 20 seconds, then these posts will help you immensely and get you thinking about how to S-rank bosses across the entire series.
 Now, not having certain chip codes is a very real problem. At least two codes of most chips are version-exclusive, with one of the five being from a Custom Style-only situation. In other cases, HP affects which chip you get, and that's not even counting Off-Color Custom S-ranking and Custom Style S-ranking! Jesus Christ, getting chips is hard. As such, the folders you see me build will NOT be the most fluid. I am doing this to simulate what an average player would reasonably have access to. That said, I highly recommend you get quite a few Custom Style-only rewards before doing this. More options will make this a lot easier.
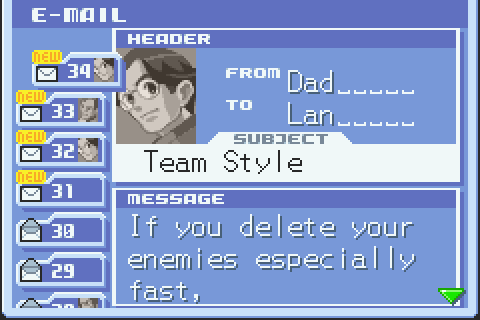
And let's debunk one thing before I start: to get all the MegaChips, you need to kill bosses in under 20 seconds with a busting level of S with Team Style for the highest reward: NaviChipV4. Now, it isn't really 20 seconds, it's really 18.5. You see, when you kill a boss, you get that fancy blowing up animation right? Well, in that animation, the game's clock is still ticking! That means you are losing 1.5 precious seconds! When we're dealing times like these, every second is precious.
Some technical information:
-It takes 8.5-9 seconds to fully fill the Custom Gauge (depends on the game). It takes exactly half of that with a FstGauge chip or NCP.
-There is a 50% chance you will get 2000 Zenny at a busting level of S, 25% chance at a busting level of 10, and a 3.125% chance at a busting level of 9. There is also a 46.875% you will only get 1000Z at busting level 9. TL;DR: Bring Collect NCP

-The timer is still ticking when a boss is exploding (above)
-You can only get the V4 chips from bosses with an S-rank and Team Style equipped (also above)
-V3 chips and lower require an S-rank(under 30 seconds and with no damage). However, with Team Style, this means you need to aim for a small window of 20.00 to 29.99 seconds! Unequip Team Style for an easier time with this
-To get a V2 chip, you must score a Busting Level of 9. The time doesn't really matter as long as you can attain that rank.
S-ranking only really requires two things: experimentation and patience. That's it. That's why I spent the time getting lots of chips early on. By having more chips, we have more options to approach the problem, thereby opening the door to experimentation and theory. Furthermore, with patience on your side, you'll less likely get pissed off when you get a terrible draw, or if the boss decides to not spawn for 40 minutes.
Moving onto overall chips. These tiers will apply to every boss in this sub-series. Each boss will have their own sub-set of tiers concerning what chips are effective.
Staples
 OR
OR 
If I'm being honest, White's exclusive chip is better for S-ranking. Whereas Folderback allows you infinite sustain and infinite damage, NaviRecycle can simply win you the match. NaviRecycle will re-use the last Navi Chip used, along with any and all chip power-ups it had. So, a PlantManV4 with 4 Wood+30's getting used twice is FAR better than using Folderback to hopefully draw them all again. Regardless, that doesn't make Folderback a bad choice.
 AND
AND 
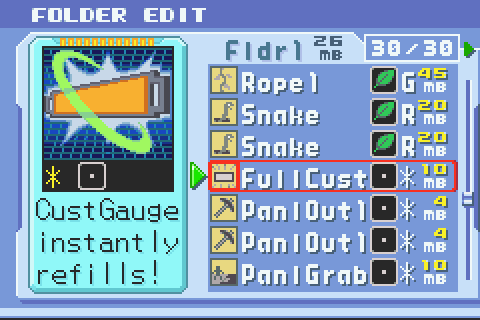
Be smart and run both of these. With FstGauge halving your turn time and FullCust allowing you to instantly access your chips, your chances at an S-rank can literally quintuple. I suggest you make FstGauge your regular chip, as continous usage of that is mathematically superior than setting most anything else as your Regular Chip. If you don't have the MB for it, then setting FullCust as your Regular Chip is just as good, provided you know how to make plays.


Use common sense in picking these. Running an Aqua folder? Throw in the Aqua+30. I recommend no more than two of any of these, with the exception of the first two.
 OR
OR 
Have a couple of either of these in your folder. Whichever fits the boss or situation better. I got HeatTeam, so expect to see more GrassStages.


You. Need. A. Defense. I'm serious. You want to do well, but because you're doing so well you get excited, meaning you get jumpy, take a hit, and then lose your S-rank. And it'll be completely your fault because you couldn't keep your emotions in check and let the boss get a free hit. Unless you're a machine at dodging, pack a defense, pure and simple. Run two copies of most of these. I prefer Barrier. It's * coded, permanent, and reliable. Auras only work if you can safely use them with other chips.


Everyone needs to take some area every now and then. Excellent support. Why isn't this in your folder? Pick at least 2 copies of any of these.
Areagrabs help immensely for almost all chips in the game. Run at least two of these. You can run two Metagels, two areagrabs, or 4 PanelGrabs. Common sense still applies, however. Don't run too many random codes just for more Areagrab support.


These are useful. You only get one in the game without trading or cheating, so make them count. I highly recommend you distribute your BugFrags to the Omega-level variant of the virus in your feeder, then practice up so that you can time the Omega virus every single time on the roulette. In other situations, you WANT the level 3 variant (EarthJelly, for instance) for certain bosses, so be mindful of this. Generally speaking, KillerEye is the best one, followed by Scuttlist, but there are situations where the others are useful. Just go with what would be the most effective for the boss.


 : Too good not to use. Anything that cuts through mercy invincibility is a HUGE plus.
That right there should comprise at least 10 out of your 30 chips. The other 22 can be from what I outline below, or the chips I outline in the bosses.
Solid picks


 : Great damage and can be useful. If you have them, throw these in. For Zeushammer, be extra careful to use over a hole, or have Barrier/Invis/Shadow/AntiDmg up.

 : Works well against most of the bosses. High speed, * code, and hitstun. A good choice.

 : Lightning fast and provides some good paralysis time. Helpful for combo chaining.

 : Good damage, and even provides utility and synergy with grass folders. If you got the timing skills, use these.
Banned


 : Second best NaviChip series in the game. All you do is press A, and watch as your enemy is at your mercy. If I just facerolled, then I don't think you'd actually learn anything.


 : Best NaviChip series in the game. Banned? Yes indeed.
 : We can exceed 1000 damage with their chips and its godly potential. So, I'm not running these. That, and I got the wrong element to use them.
 : Here's a pretty easy cheese you can do. Lose over 1000 HP before entering a fight with any boss. Use this chip and watch as that Navi just took 999 damage! For similar reasons, this is banned in my sub-series.
 : Elemental Shockwave is fucking ridiculous. And the fact you can use that 4 times only makes it worse.
 : This is an event chip, so while it's damn strong, most players won't have the ability to use it at all. To keep this guide section relevant to what the normal player can find or build, this must be put here.
 : Same as Punk. Event chip, blah blah blah.
 : You are not ready for this level of power, peon.
Useless/Not Worth The Effort
 : There is hardly a point to this chip. In any situation in S-ranking you can forsee it being useful, I can argue that you either A) took too long and thus you failed to S-rank anyway B) get more utility out of using a different stage chip! Metal Stage only makes it harder to break your panels. Even if you're fighting against GutsMan, you should already know how to fight with such handicaps.
 : This chip is flat out bad. When your enemy touches a Lava panel, they take 50 damage and can't be hurt by most chips for a solid 2 seconds. And this will continue due to the fact that the boss will step on another panel! This takes WAY too much time to be efficient. Now, yes, on bosses like MetalMan it works because of his innate FloatShoes, meaning you can power up but outside of him? It's a bad move. Just don't use it.
 : Think about it. If you get hit ONE time, you cannot get an S-rank, so why is something that halves damage helpful? It isn't. However, to get an easy Busting Level of 9, you need to take 2 hits. So in that situation, it's worth using somewhat. However, it's a bit unreliable to draw this, just so you take half damage from two attacks. You should have a decent amount of HP anyway.
 : The time it takes to use this just isn't worth putting chips in for. Those precious 5 seconds are just that: precious.
 : Use this and I'll smack you.
 : Only fun when used for gimmicky setups. You don't have time to enjoy those sorts of things.
 : I'm confused as to why you would use this. Confusion is great on bosses in Battle Network 3 since it holds them in place, but just use
  for your confusion needs.

 : LOLOLOLOLOLOLOLOL
 : WOOO I CAN USE MY CUSTSWORD EASIER. No.
 : Not worth the time investment. I mean sure, if you plan well, you could probably time the maximum amount of 260 damage as the last attack you do that turn. A bit too risky, though.

 : This Let's Play may have gotten you to adore these. If that is so, then I am happy. However, by the time you are good enough to work these into your S-ranking folder, then your capabilties are far beyond this sub-series.


 : too stronk cupcum nerf plz
 : Good chip, but seriously useless on bosses. So this one is obvious.
 : so cool
 : If you think this is helpful, then I cannot teach you.

 : These are virus killers, not for bosses.
 : Even if you run the one setup where these are useful, these just aren't worth the damage. Stay away from these.
 : Notice how only these are listed here. The previous versions of these chips come in * code, so that's some easy folder filler if you dont have anything else.

 : You should have outgrown these by now.
 : I CAN HIT ONE PANEL FOR 100 DAMAGE WOO
--------------------------------------------------------------
First up!
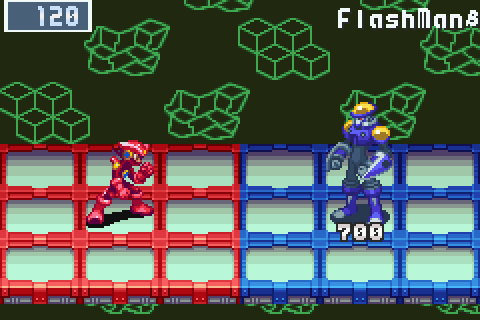
Overview: FlashMan.exe was the first boss I ever faced. Coming back to the first Battle Network game I ever played, I conclude that he is still pathetically easy and probably the first place to begin your S-ranking path of destruction. Like most bosses, he has a very specific cycle of movement. Move, move, pause, move, move, attack. Use this to your advantage and attack near the end of the cycle to stall him out. By hanging near the front column, his AI will react to you and attempt to use SparkArm (that close-range hand move). Abuse that to leave him VERY open to an assault. This isn't even necessary, as with 700 HP he is as squishy as a marshmellow. You have exactly one concern: those damn light bulb obstacles. If you don't have the right chips ready, you're getting paralyzed and losing a point on your buster rank. Bring a few Barriers as a safety net.
Top Tier
 : Giver's Giving Tree Gives Death. GrassStage+PanelOut+OldWood = 880 damage = death
 : 200 damage and hits everywhere? It's great. Can also be used to kill those pesky bulbs.
 Set down that GrassStage and watch him become completely useless. Confusion in Battle Network 3 keeps the boss in place. Just watch out for the bulbs as he'll just spam his attacks randomly.
 : This boss has a high amount of mobility. Mine is one of the perfect answers to him.
 : Read the overview. You can screw with his AI to make this a viable option.
High-Average Tier
 : If you're following the general solid picks, then this is easy to use with your aregrabs.
 : It stops him from doing anything to you. Once you use this, follow up with


 : Use these to destroy those bulbs, if for some reason, you don't have a Barrier up.
Suck Tier


 : If the boss has high amounts of mobility, do not use THROWING CHIPS!! Not

 or
or  and definitely not


 : Too slow. I mean, yeah, you could work it, but stick to other things.

 I'm guilty of using these on FlashMan, but I know how to control the boss' movement and I can predict what they'll do. You need a high amount of skill to use this well. A shame, since RockArm is a decent chip series.
YouTube Commentator Tier
: SWORDS ARE SO GOOD GAIZ : SWORD SWORD SWORD SWORD
 : His mobility is too high to make reliable use of this.
-------------------------------------
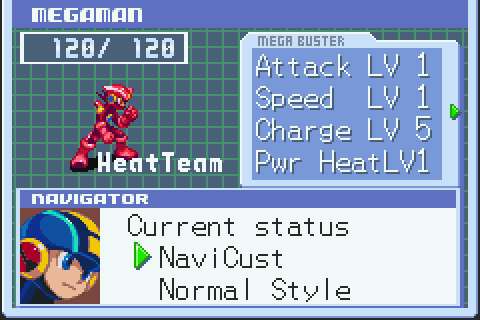
In order to pull this off, we need to get Team Style first for the V4 chip requirements.
Yeah, it's not really clear, but it only applies to bosses, and killing them in under 20 seconds yields a different result.
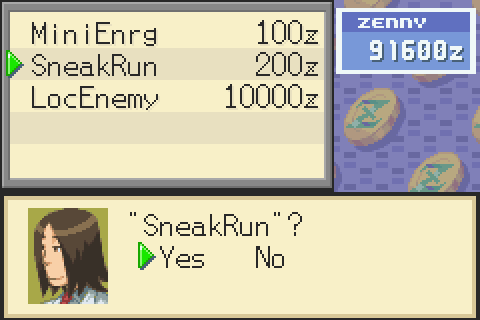
I highly suggest using the SneakRun SubChip over the NCP. By not using the NCP you save 5 spaces in your NaviCust. That's enough room for a Custom+1, something that's VERY useful for S-ranking. Make sure to grab some LocEnemys. It's 10000Z, but you're more likely to run into the boss again.
And I maxed the style, just because.
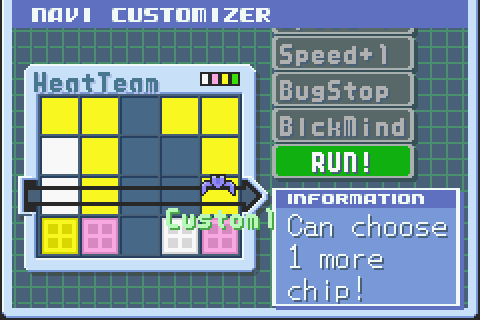
Pretty sparse NaviCust, but that's all you need for him.
So now that we're ready. Let's run around for god knows long to encounter the boss.

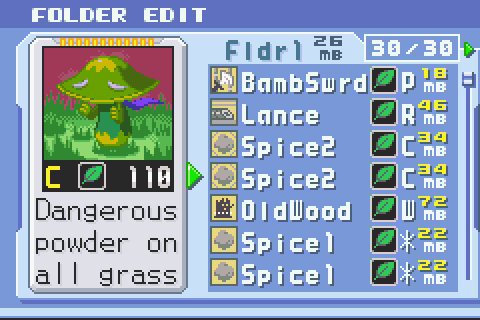
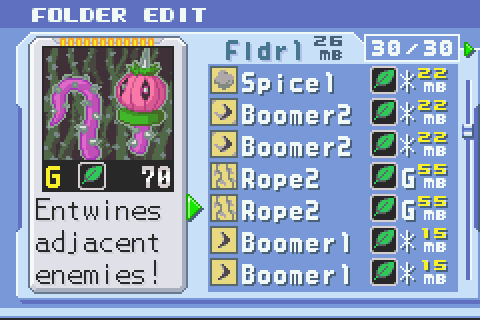
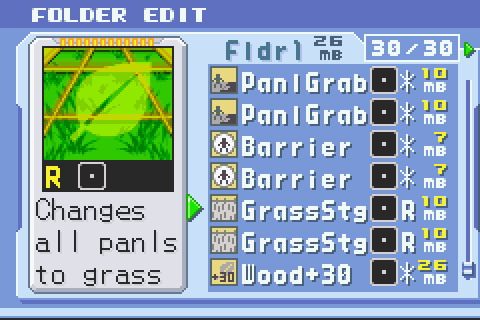
The folder is pretty basic. You should have no problems building this. Go use Collect for the Rope1 chips, but make sure to grab 4 Boomer1 * and 4 Boomer2 * (Custom Style S-rank on the virus).
Live voice commentary is actually hard.
https://www.youtube.com/watch?v=MNnwJf7SS74
Tell me if you like this format, I don't think this was ever done before.
