Part 79: If You Ever Have Trouble, Just Use Sensor3.
Yeti has finals to study for, so I'll post something else for the week. These have to get done at some point anyway.
Overview: DrillMan...the bane of everyone's childhoods. I'll concede that this boss has elements of poor game design. There are no clear weaknesses to this Navi, and his insane speed, power and defense makes for a deadly combination that gives even some professional players some trouble if they're ill-prepared. Fortunately, this is why I'm here.
Drillman is at his most vulnerable when the fight starts. You have a very small window of opportunity to get off an attack that causes him pause. Make this attack count. Use a paralysis, or chip with hitstun effect like AirShot. Should your opportunity at causing massive damage escapes, the fight will immediately become one that demands a much more...unique approach to fighting.
Equip the BrakChrg NaviCust Program and have a Charge Level of 5 at all times. This will prove invaluable in keeping your S-rank alive. Utilize obstacle chips to block the drills and remove a headache or two from the fight. Chips that attack him head-on are inadvisable with the notable exception of Sensor. Go grind a few Sensor1-3 chips and stock them in your folder. Watch him fall. He has a measly 1,200 HP, so if you can get a combo going, he'll fall fast. It doesn't matter what chips you use -- you will need speed. I highly suggest you prepare yourself to move faster than you normally do.
Top Tier


 : His own chip works wonders here. Destroys drills and deals good damage. Enough said.


 : Even if you miss the bowling ball, the pins will automatically home in on him, disrupting his attacks!
 : Have an Electric Style? Watch as DrillMan's own drills are used to make this chip do insane amounts of damage. It's Game Over with an IceStage.

 : You could not ask for a more perfect counter for DrillMan. Destroys drills, has the potential to hit multiple times due to frames, paralyzes and pierces Invisible. Why isn't this in your folder?
 : Due to the way this chip aims, it's superior to the other forms. Take this over Magnums 1 and 3.
 : Shares a code with Magnum2, so I can see why you may want to use this.
Average-High Tier


 : With the command code allowing free control, this chip can be used to smack DrillMan around, as shown in the video.


 : Loses only to DrillMan due to being able to break drills.
 : Free drill protection and decent damage. Keep those reflexes trained, however.
 : DrillMan LOVES your area, so this is an obvious choice. Be warned that DrillMan is still VERY fast, and it will require good timing to use this. I've had this attack miss more than my fair share.

 : Destroys drills and can stop DrillMan in his tracks. Not a bad option.
 : Notice that the first level of Boomer isn't here. I'll touch on that in the last tier section.


 : Good options, simply due to the protection each of these grant you. Like his fat, wet cousin, these are more useful than you would expect.
Suck Tier


 : It's true that these can block the drills, but that's all it can do. Plus, you will need good timing to pull it off. It just can't exceed RockCube in usefulness.


 : I don't really like these. They are far too risky for too little reward.
 : The only reason this isn't completely at the bottom is because it can destroy a drill. But really, good luck timing that.

 : They can block the drills, but you aren't seriously going to use them for that purpose, right?


 : You don't have the time to plan this out and use it well. Despite hitting hard, it doesn't amount to much.
IGN Game Journalist Tier


 : Behold, the only time you will see ProtoMan listed on a bottom tier. Ironic considering the .gif

 : What are you DOING!?


 : "Needs more speed 7.5/10"


 : Good luck getting these off with the animation.
 : Worthless.

 : CAN destroy drills, but I guarantee you will never pull that off. If you do, I will be astounded.
 : Due to Capcom's terrible coding, this chip has a high probability of getting ignored. If DrillMan attacks from the bottom row, Boomer1's slow movement will hit a drill...and continue to go right past the boss, dealing nothing. The other two levels will hit the drill AND the boss.

 :
: 


 : This suffers from the same problem as Boomer1.

 : Look, I don't care how much you like the Program Advance. This is bad.


 : Slow, doesn't destroy a drill and can't damage the boss. Need another reason?

 : GIRLLL POWER
------------------------------------------
Believe in the Giver that believes in you.
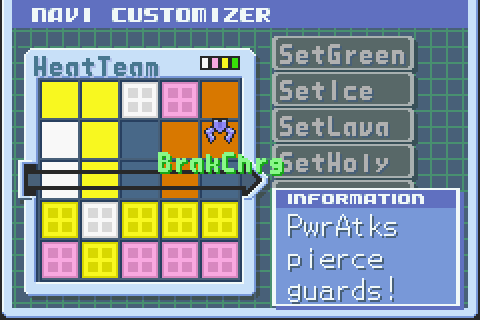
We're going to be using BreakChrg NPC today. Make sure you input the requisite error code to use it. Luckily, the game gives this to you for free!
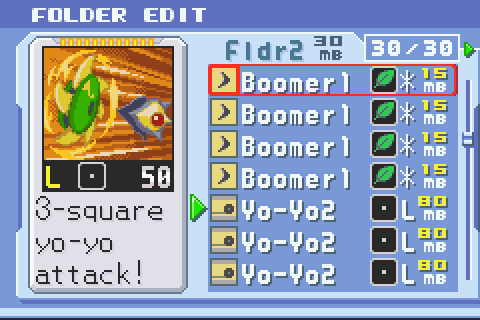

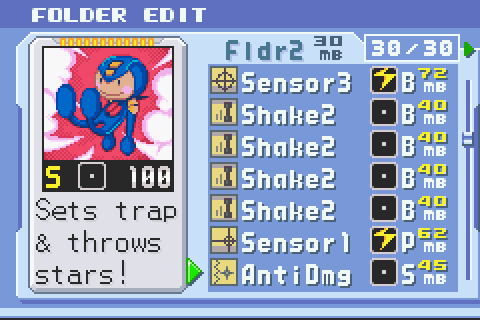
What I used for the V4 chip. Now, this folder is actually very easily built! AirShot3 x2 can only be gotten from Number Trader and from Higsby's Chip Order System. You can grind out AirShot2 * in Beach Area 1's Green Mystery Datas and it's easy to acquire 4 AirShot 1's from starter folders. Boomer1 and Boomer2 * are Custom Style S-rank drops from the respective virus. While it's true Boomer1 * is a bad pick, it's only being used to keep the combo chain going. The main idea is to simply prevent DrillMan from ever reaching "Drill Mode." Repeated usage of hitstun chips such as these will achieve that goal.

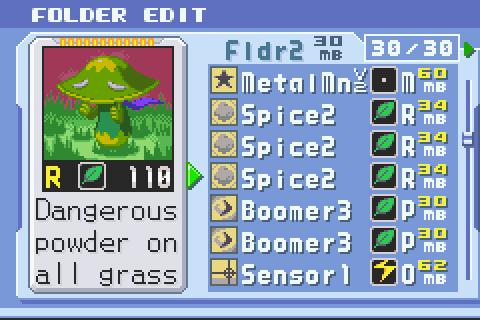
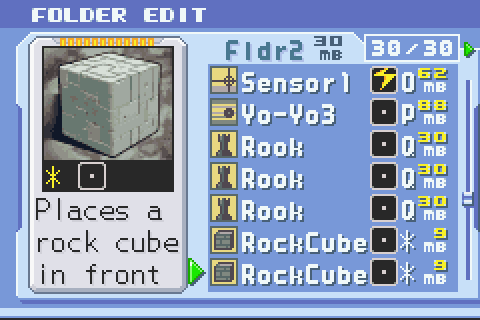

This is mainly for obstacle chip defense demonstration. Used for the V3 chip. In here, we actually get some use out of MetalMan's chip to make DrillMan shut up. Rooks have 500(?) HP, so they can definitely tank a few drill hits before they go under. Rook chips can be farmed in Secret Area 2's Green Mystery Datas.
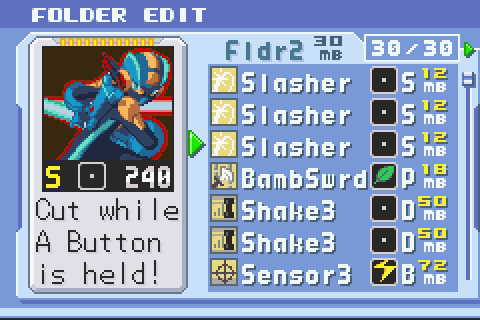
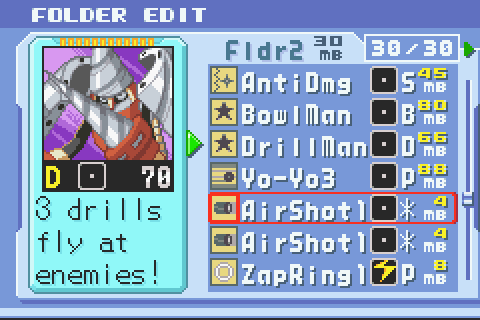
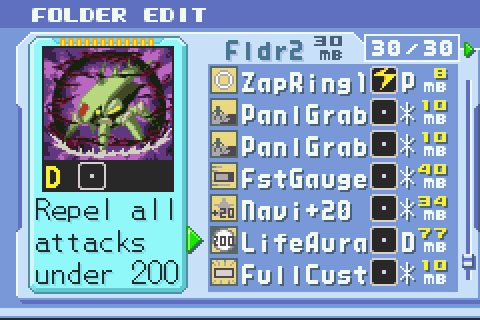
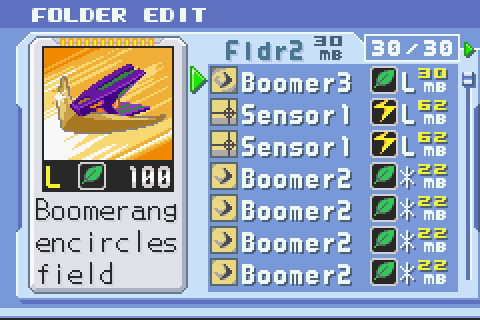
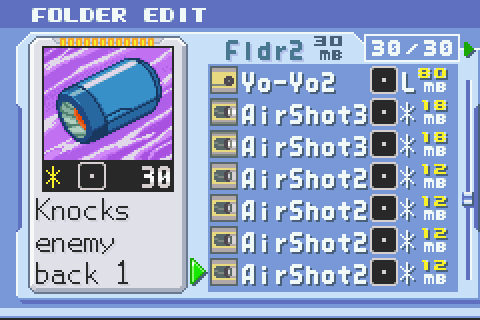
Used for the V2 chip. BowlMan and DrillMan are there for drill busting if I need it. Notice that I actually preset AirShot 1 here. That is very important! By presetting a hitstun chip right off the bat, we can stop DrillMan's drill mode right away, and thus allow for free additional hits. Shake2 and Shake 3 are in there to show off the potential usefulness of them in the fight, while Slasher is a good pick if you have the speed for it. And of course, we can't forget Sensor.
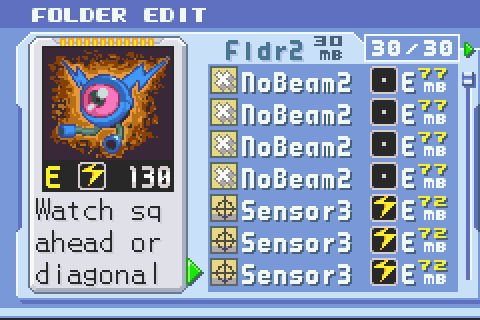


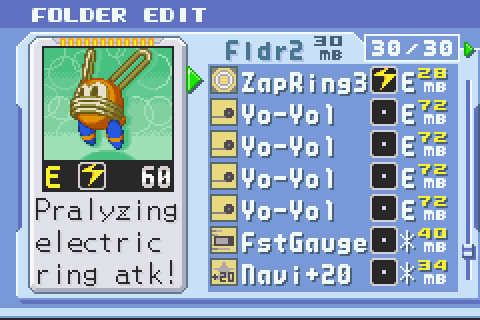

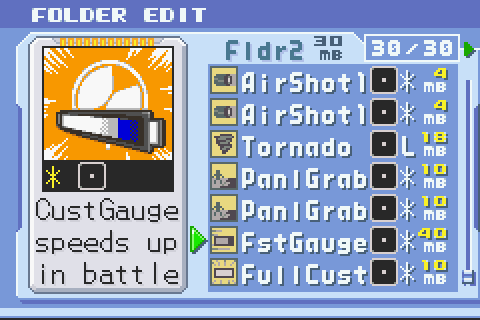
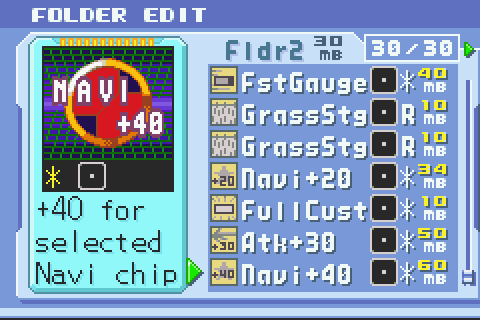
 E Code! As explained, this is a bit of a nerfed version of the E code build, since there are far more powerful options for this. However, it doesn't really matter given the potential power of one of Ground Style's programs. With some NaviCust finagling (and even making some decent use of BugStop!), we can make this build one of the most fun to use in the game. Give it a whirl next time you play this game.
https://www.youtube.com/watch?v=LAFAHWGzjiE
The Almighty Combo


This was shown in the video. If you have these chips in E code, then try it. You won't be disappointed. True E coded folders will rock KillerEye E, VarSword E, CrsShield3 E, Metagel2 E and Random Meteor E. This folder had to be nerfed.