Part 1: Tutorial Campaign, Map One, Part One
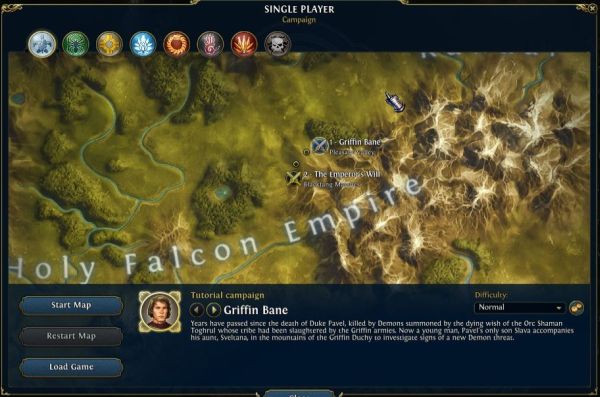
We kick things off with the Tutorial Campaign.
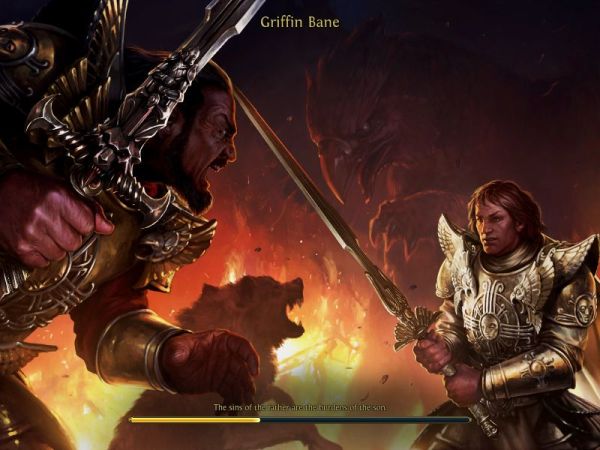
The guy on the left looks like a bear. Seeing how the campaign is called 'Griffin Bane', he's most likely the bad guy.
Video Link Here! (YouTube via Polsy)
Good luck to whoever Pavel is.
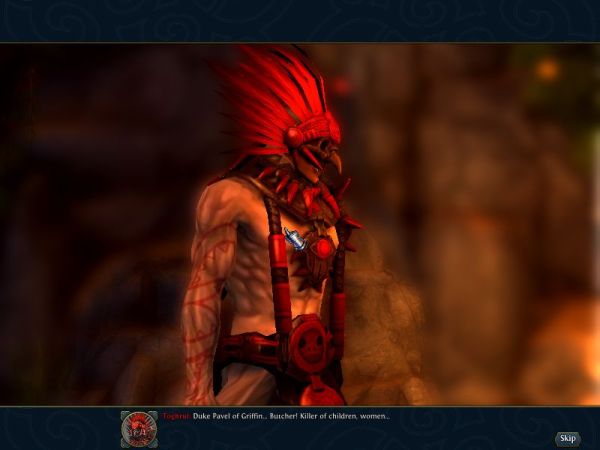
We now move to an entirely different scene.
This is Slava, our protagonist for our Tutorial campaign. The lady who's a bit... blue-ish is his aunt, Svetlana.
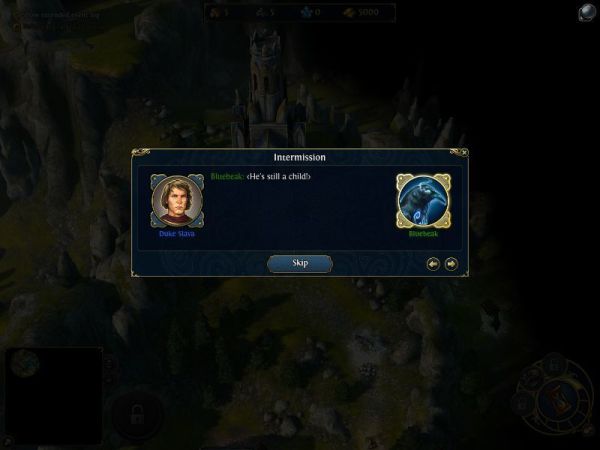
And this is Bluebeak, a talking raven that travels with Svetlana. Nobody ever questions why he can talk. I guess these things are a given in Might and Magic. It's worth noting that Bluebeak actually only speaks in squawks, so presumably everyone knows magic birdspeak.
 Come now, Aunt Svetlana. Someone was hitting the ale, saw a Fire Elemental, and the stories grew. There hasn't been demons here since Toghrul sold his soul two decades ago.
Oh, so we're twenty years ahead.
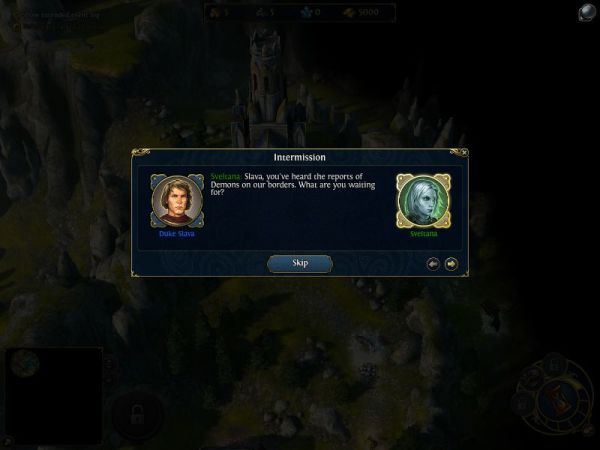
 You aren't taking your responsibilties seriously. It's your duty as a duke to find out the truth- and destroy the demons if they're here. Fine. I'll tour the duchy and chase your wild geese.
 <Sarcasm! A fine way to treat your aunt!>
Sveltana then leaves and we're given charge of Slava.
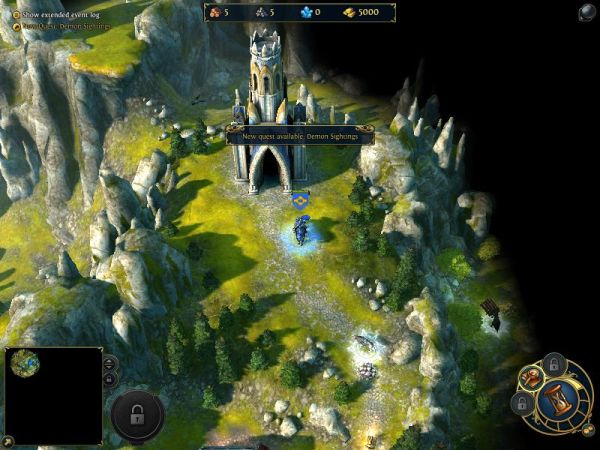
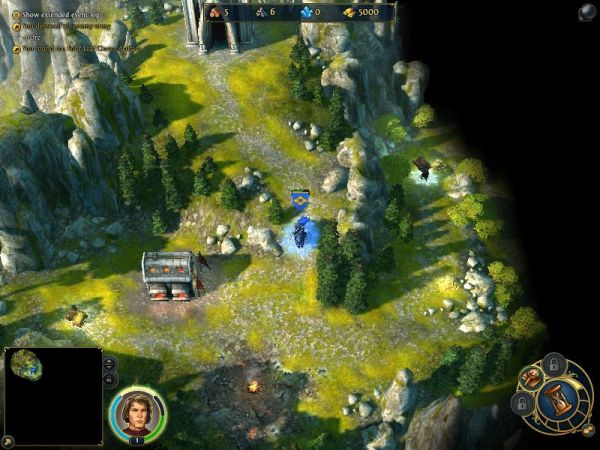
There are a few quick things of note on the world map. You have a bar on top showing your resources, from left to right: Wood, Ore, Crystal, and Gold. Fans of the series may notice that Gems, Mercury and Sulfur are gone. Just a few ways where HoMM VI is simpler than its predecessors. There are also pickable resources like that on the ground- the pile of pebbles just behind the wolves in front of Slava is Ore. There isn't much else to do but move ahead (by clicking on the spot you want to move) and charging into the wolves that block our path.

HoMM VI now gives you the option of retreating after you've seen how much of each enemy you're facing, at the cost of some movement points. We have nothing to lose by moving forward, though. The numbers below each troop represent how many of that troop is in a 'stack'. So in this case, we're facing one stack of 6 wolves and one stack of 5 wolves.
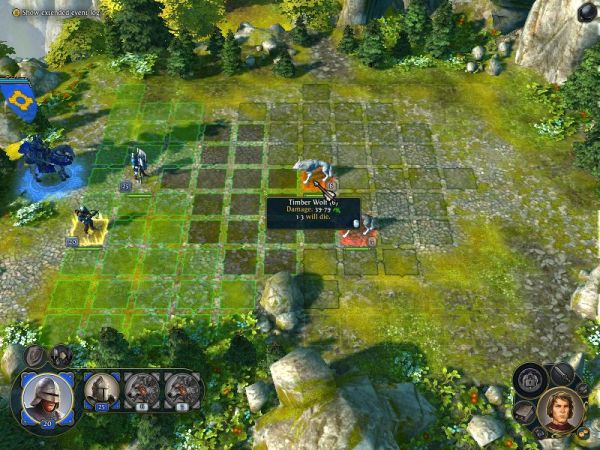
We zone to the battlefield. The battlefield is divided into a grid, and the green squares represent how far we can move with our current troop. The wolves were faster, so they've already moved. You can also see the turn order on the bottom- we're controlling the Crossbowmen now, the Sentinels are next, then it's the wolves' turn again.
The Crossbowmen are ranged creatures. These can shoot and hit the enemy from all the way across the battlefield, a very helpful attribute. Some ranged creatures have a penalty if the enemy is too far away, but Crossbowmen fortunately don't have that. The downside is that they can't shoot if any enemy stacks are next to them unless they move away or the enemy stacks are killed, and unless stated otherwis they only melee for half damage.
Hovering around one attacktable target gives us the damage range for our attack. Damage is dependant on the troops' normal attack power, the targets' defense power, and our hero might and troop size. Here, we can see our Crossbowmen can kill 1-3 wolves. Not enough to finish them off, but at least we can weaken them.

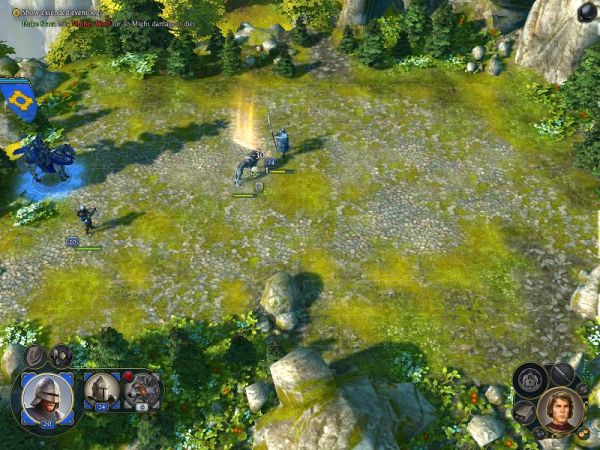
My poor screenshots skills block the troop size, but our Crossbowmen killed 2 wolves, leaving 4 behind. Our Sentinels are melee troops; they basically have to move next to the target to attack them. We can see the Sentinels can kill anywhere from half the enemy stack to wiping them out completely. The 'Retaliate!' in red means that if there are any survivors from the attack, they will strike back at our attacking troop. Each stack usually only gets one counterattack per round.
Long story short, it's now the second round, and the wolves have attacked our Sentinels, killing one.
(The stack of wolves is standing over the corpse of the first stack, hiding it from view.)
Our hero also gets one action per round- this can be used on any allied stack's turn that round, and comprise of casting spells, attempting to run away or surrender, using spells or racial skills, or perform a physical attack. We can't use spells or racial skills now, so we'll just use Slava's physical attack on the wolves.
It looks pretty silly, but it at least kills a wolf. Hero attacks are pretty weak till the later levels.
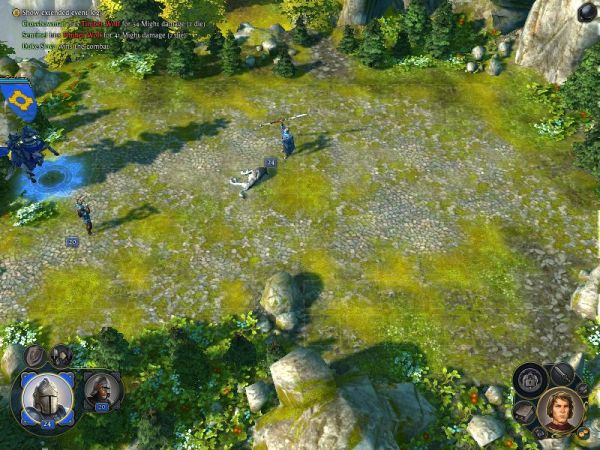
Our remaining troops finish the wolves off and we celebrate.
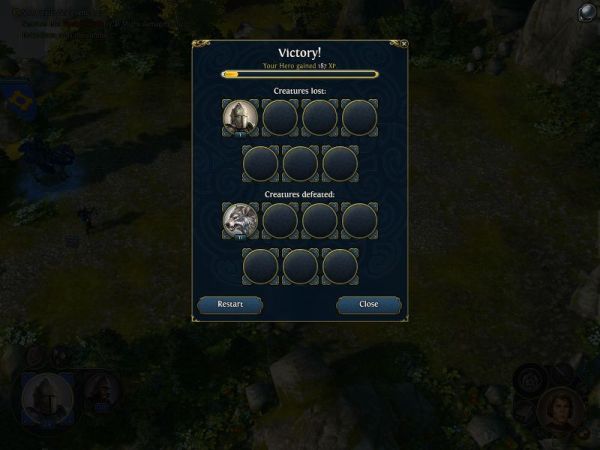
We get a results screen at the end of each battle showing how many troops we killed and how many we lost. We also get the chance of re-doing the battle all over if we want better results.
Moving ahead a little furthur, Slava's potrait finally shows up and we can examine him. The number below his potrait is his level, the green bar to his right shows how many movement points he has left, and the blue bar is his mana.
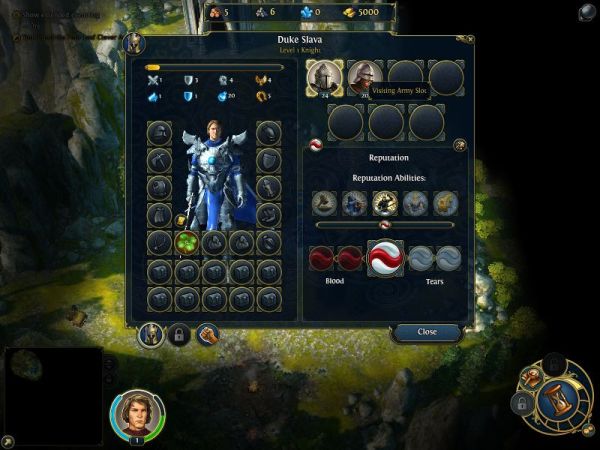
Slava's a Knight, the Might hero of the Haven faction. Anybody familiar with the series should be familiar with the Haven (or the Castle, as it was known before HoMM IV). It basically features lots of humans with medieval technology, mythological beasts and heavenly things, and lots of shiny. It's a well-rounded faction, favouring defense and healing, but overall competent in everything.
Slava's stats are the two rows above him.
Top Row, from Left
- Might represents physical attack power. It strengthens troops that deal Might damage like our Sentinels and Crossbowmen.
- Defense determines our troops' defense against Might damage.
- Attack Power determines the strength of our hero's physical attack.
- Morale determines the chance of a troop triggering a Morale bonus, which allows them to make a second free turn at half damage. It's the Haven's primary stat. Negative Morale can cause a troop to randomly lose their turns.
- Magic determines the strength of our spells and the power of magic-using troops. We don't have either, so it's useless right now.
- Magic Defense strengthens our troops against magic, similiar to Defense.
- Mana is what our hero uses for spells. Slava has 20/20 mana right now.
- Destiny, or Luck, determines the chance of our troops triggering a Lucky Strike, which doubles the damage. If we have negative Destiny, there's a chance of an Unlucky Strike that halves the damage.
Reputation Abilties are a new addition. By default, all heroes have a neutral ability exclusive to heroes of their specialty and faction. Through actions on the world map and in battle, they can generate 'Blood' and 'Tears' reputation. Earn enough, and they can move up a rank on the meter, changing their appearance and class and gaining an ability exclusive to that class. Each new class has 2 ranks, for 2 abilities. For storyline purposes, we can't change from Blood to Tears, so we're stuck once we change a class.
Let's look at our troops. People who've played HoMM before are familiar with the concept of Tiered troops- each faction has troops from Tier 1 to 7, with Tier 1 being the most plentiful and weakest and easiest to hire, while Tier 7 are exceedingly powerful, but very hard to obtain and expensive. HoMM VI does away with that. Instead, each faction has 3 Core Units, 3 Elite Units, and a Champion Unit. The Core units are all roughly equal in population and strength, and ditto for the Elite Units. Both our Crossbowmen and Sentinels are Core units.
The Sentinel's stats are similiar to read to Slava's. There are a few new stats though:
- Initiative determines how early our stack acts each round. Troops with higher Initiative go first, and it's represented by a horsehead. Our Sentinels have an Initiative of 20.
- Health shows how much health each member of the stack has. Our Sentinels have 21 health each, and the damage is done to the topmost member first- once it dies, then any leftover damage moves down to the next member, and so on. So if our Sentinels took 39 damage, our first Sentinel would die, then our second one would be left with 3 health, so we'd have a stack of 23 sentinels with the topmost member with 3 health remaining. Health is represented by the heart.
- Range is only important for Ranged Troops- it shows how far they can shoot across the battlefield before suffering a penalty to damage. It comes in three varieties: None, like our Sentinels, who can't shoot, Half, which means, shooting from half or more of the battlefield away halves damage, and Full, which means they can shoot at any range with no penalty.
- Movement is just how many tiles on the battlefield a troop can move per turn. The battlefield is about 12x10 tiles, including the starting row of both sides.

Biography posted:
The Sentinels are volunteers who have proven their loyalty to the Emperor and their devotion to Elrath. Renowned for their discipline and military coordination, they are the first line of defense of the Holy Empire. They have sworn an oath to protect their brothers-in-arms with their heavy shield and, if needed, their lives. For their own personal protection, they rely entirely on their faith.
    Sentinel
    Damage: 2-4 (Might)
    Defense: 7 (16%)
    Magic Defense: 1 (5%)
    Health: 23
    Initiative: 20
    Movement: 5 (Walking)
    Range: None
    Destiny: 7
    Morale: 7
    Cost: 75
    Growth: 9/week
    Abilities: Shieldguard, Shielded, Living
Shieldguard posted:
The Sentinels of the Holy Empire have earned their honorable status through acts of courage and demonstrations of fearlessness. On the battlefield, they react quickly to protect those who are in danger around them, moving in unison like the first rays of light on a cold winter’s morning.
Shieldguard causes Sentinels standing next to allied troops to take 35% of damage that would be dealt to those allied troops to the Sentinels instead, at 80% strength. Multiple Sentinel stacks can apply this effect to any one stack. This is pretty useful for absorbing damage off weaker troops like Crossbowmen.
Shielded posted:
The Sentinels of the Holy Empire are renowned for their discipline and military coordination. At the first sign of an attack from the sky, they lift in unison their powerful shields forming a veritable wall of protection over their heads. Whenever any sentinel cries “to the sky”, the others react immediately, crouching and raising their shields.
Shielded is a free passive 25% reduction from Ranged Attacks.
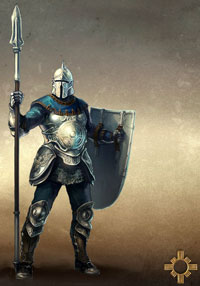
The Sentinel is a pretty basic starting creature - it's got decent movement rate, and solid physical defenses. Poor damage is made up for in numbers, and their ability to split damage from allied stacks make them great guards for your weaker troops. Patch 1.5 nerfed their magical defense and health, but they're still pretty much one of the sturdiest Core creatures out there.
Biography posted:
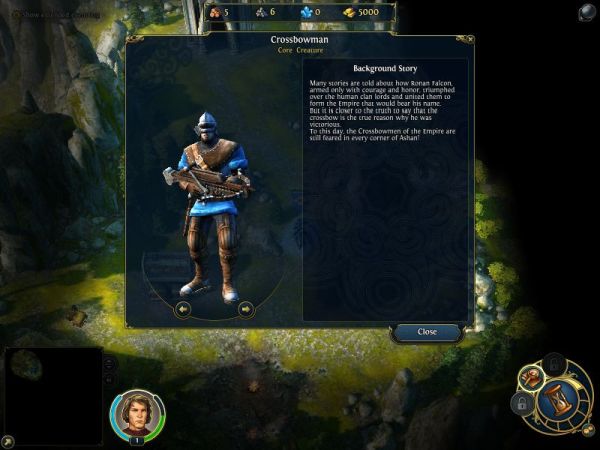
Many stories are told about how Ronan Falcon, armed only with courage and honor, triumphed over the human clan lords and united them to form the Empire that would bear his name. But it is closer to the truth to say that the crossbow is the true reason why he was victorious. To this day, the Crossbowmen of the Empire are still feared in every corner of Ashan!
    Crossbowman
    Damage: 2-4 (Might)
    Defense-: 3 (7%)
    Magic Defense: 1 (5%)
    Health: 22
    Initiative: 30
    Movement: 5 (Walking)
    Range: Full
    Destiny: 6
    Morale: 6
    Cost: 110
    Growth: 7/week
    Abilities: Armor Piercing, Living
Armor Piercing posted:
The Crossbowmen of the Holy Empire are feared by common soldiers as well as knights. Their coordinated volleys are renowned, but their lethal reputation comes from the tremendous power coiled in their weapons. The bolts launched from their crossbows are said capable of piercing dwarven marble.
Armor Piercing causes the Crossbowman to ignore 35% of their targets' Might Defense. Fantastic all around and makes them even deadlier.
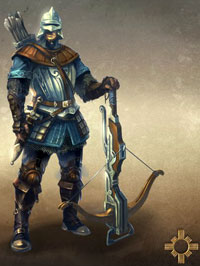
Crossbowmen are pretty good for a Core creature - their health isn't too bad, and while their defenses are poor, their fantastic range and ability to ignore armour gives them a mighty punch when in high numbers.
Next time - Actual gameplay!