Part 57: Iwojima: February 19, 1945
It's been more than four years since Japan started the war with us. But we're finally bringing it close to them.
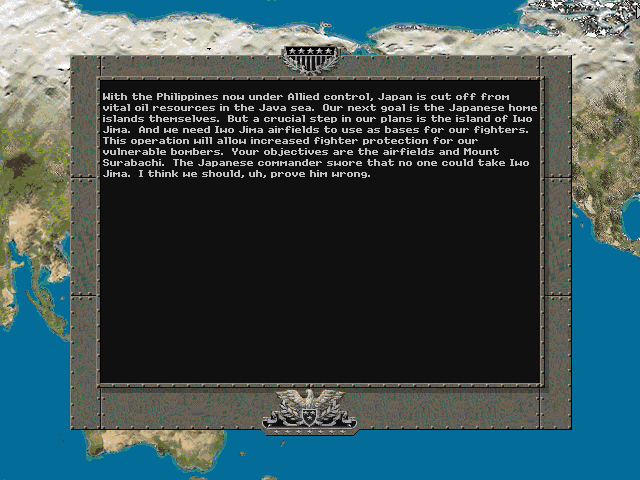
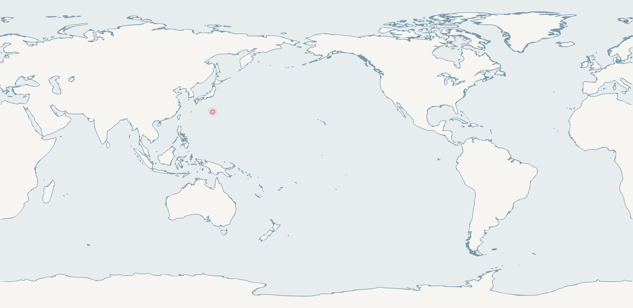
There's just one target island this time: Iwojima. This will put us in range of the main islands of Japan, and when we finally make our invasion - if it comes to that - we'll really rely on this base to make the push. It's not much more than a big rock, but we need to blast the Japanese off of it.
Iwojima : February 19. 1945
Objectives: Suribachi [200], Airfield #1 [50], Airfield #2 [50], Airfield #3 [50], Nishi [20]
Victory Start: 0 - 1188
OOB
pre:
Unit Name                      Unit Type [Transport]        Exp

Land Units

1.12th USMC Engineers 1943     USMC Engineers 1943 [M2]     ****
2.Stay Frosty                  USMC Marines 1943 [M2]       ****
3.15th USMC Marines 1941       USMC Marines 1941 [M2]       ****
4.17th Marines 1943           USMC Paramarines 1943           -
5.26th Seabees                 Seabees                         -
6.31st USMC Marines 1943       USMC Marines 1943              **
7.M8 Greyhound                 M8 Greyhound                    -
8.21st M3 Stuart               M3 Stuart                   *****
9.29th M5 Stuart               M5 Stuart                      **
10.Boondoggle                   M3A1 Lee                     ****
11.14th M4A1 Sherman           M4A1 Sherman                  ***
12.32nd M4A3E8                 M4A3E8                          *
13.30th M10 Wolverine          M10 Wolverine                  **
14.18th M15A1                  M15A1                         ***
15.19th 75mm Pack Howitzer     75mm Pack Howitzer [M2]         *
16.20th 75mm Pack Howitzer     75mm Pack Howitzer [M2]         *
17.11th 105mm Howitzer         105mm Howitzer [GMC]            -
18.25th M7                     M7                              -


Aux (by qty)
3                            USMC Marine 1943 [GMC]          ***
3                            USMC Marine 1943 [GMC]         ****
1                            USMC Paramarines 1943 [GMC]     ***
1                            USMC Engineers 1943 [GMC]       ***
1                            USMC Engineers 1943 [GMC]      ****
1                            M4A3 Sherman                     **
1                            M4A3 Sherman                    ***
2                            USMC Sherman POA                ***
2                            USMC Sherman POA               ****
1                            75mm Pack Howitzer [GMC]         **
1                            75mm Pack Howitzer [GMC]        ***
2                            105mm Howitzer [GMC]             **
1                            105mm Howitzer [GMC]           ****
1                            155mm Gun [GMC]                   *
1                            155mm Gun [GMC]                  **

Air Units

19.7th F6F Hellcat              F6F Hellcat                    -
20.8th F4U Corsair              F4U Corsair                 ****
21.9th F4F Wildcat              F4F Wildcat                  ***
22.Pretty Pixel Pilots          P-38 Lightning                **
23.10th SB2C Helldiver          SB2C Helldiver             *****
24.1st TBM Avenger              TBM Avenger                   **


Aux (by qty)
4                            FM2 Wildcat                   ***
1                            SB2C Helldiver                  -
3                            SB2C Helldiver                ***

Naval units

25.3rd PT Boat                  DD PT Boat                     -
26.24th PT Boat                 DD PT Boat                     -
27.23rd Somers                  DD Somers                      *
28.Northampton                  CA Northampton             *****
29.Yorktown                     CV Yorktown                    -
30.Independence                 CV Independence                -
31.16th Iowa                    BB Iowa                       **
32.Atlanta                      CL Atlanta 44                  -
33.Gato                         SS Gato                        *


Aux

DESRON 2,3,6                  DD Sumner                       **
DESRON 5,7,8                  DD Sumner                      ***
DESRON 4                      DD Sumner                     ****
Amsterdam                     CL Cleveland 43                 **
Cleveland                     CL Cleveland 43                ***
Brooklyn                      CL Brooklyn 44                  **
Boise                         CL Brooklyn 44                 ***
Reno, San Diego               CL Atlanta 44                  ***
Salt Lake City                CA Pensacola 45                ***
Idaho                         BB Nevada                      ***
Saratoga                      CV Lexington                    **
Bismarck Sea                  CV Casablanca                    *
Cape Gloucester               CV Commencement Bay             **
Starting Prestige: 499 after purchases
The battle on Leyte was kind of a tough blow for our forces. We lost some good artillery units, as well as one of our crack infantry units. We'll likely make it through this battle okay with naval and air support, the loss of experience for those units will be something we can't get back.
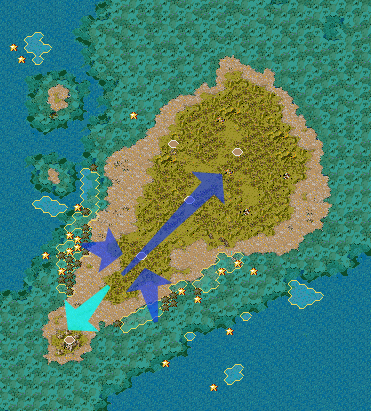
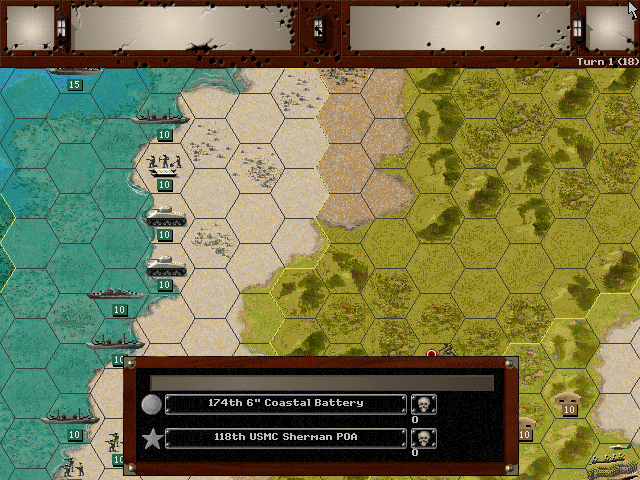
It's crucial that we capture Airfield #1 early. From there we should have a strong position in the island's center from which we can drive straight for the other two. This is a risk, as we're heading straight between known enemy positions, but our expectation is that they'll be too wedded to their defensive bunkers to exit them and come after us. At least we hope so. Suribachi commands a view of the entire island, and we'll need to take it as well. It will require a separate force, as crossing over the roadless beach will likely take too much time for any other troops.
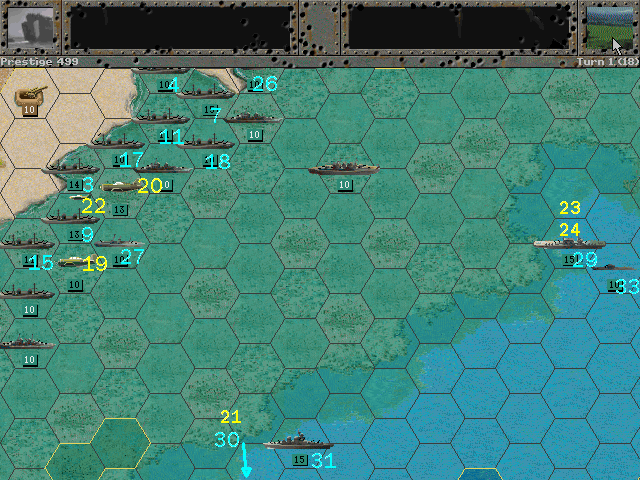
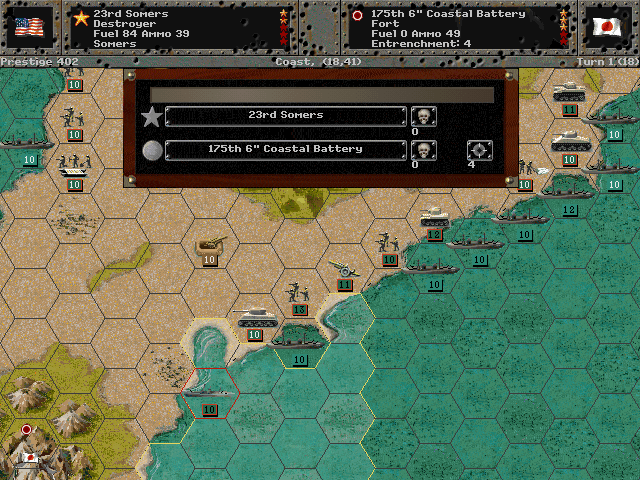
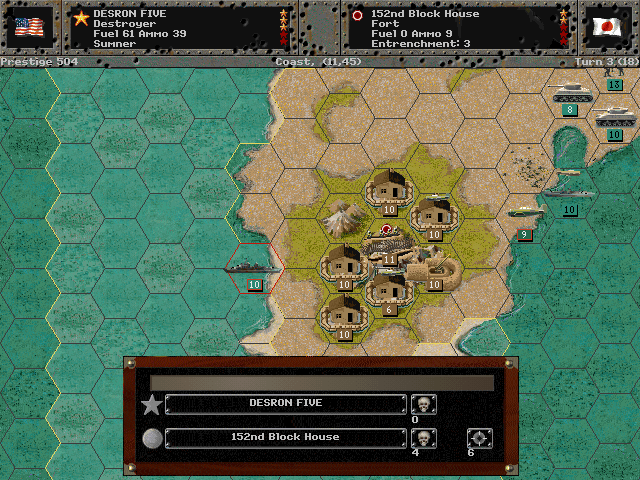
Our core is responsible for the landings on the eastern shore. The smaller ships will stay close in to guard the landing craft and provide direct support. The rest of the fleet will stay on hand to assist with air operations and, where possible, to bombard tough fortifications.
Allied Turn 1 (USA): February 19, 1945
Fair, Dry
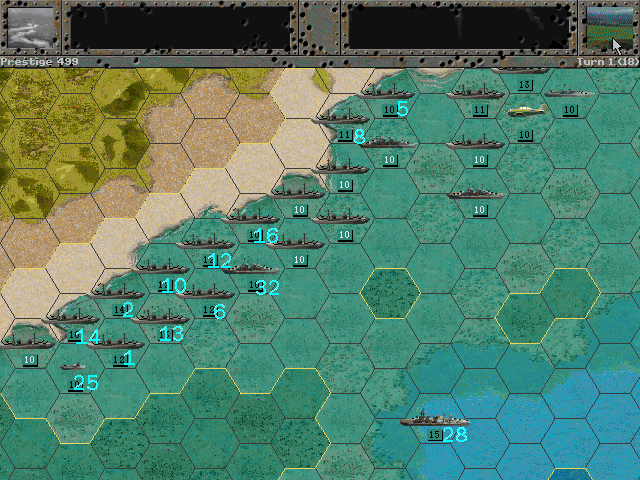
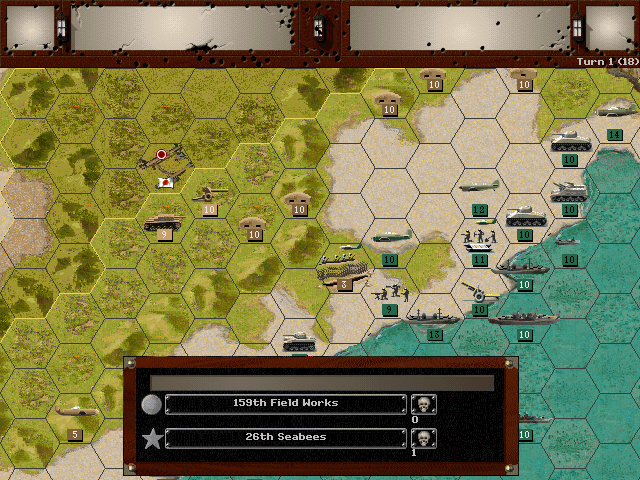
Resistance on the shoreline is light, but we can see extensive dug-in positions just a bit more inland.
Indeed, most of the low-lying sandy areas are hardly even defended. It shouldn't be difficult for us to get ourselves on the island, and there is so far no visible threat to our ships.
Axis Turn 1 (Japan): February 19, 1945
Fair, Dry
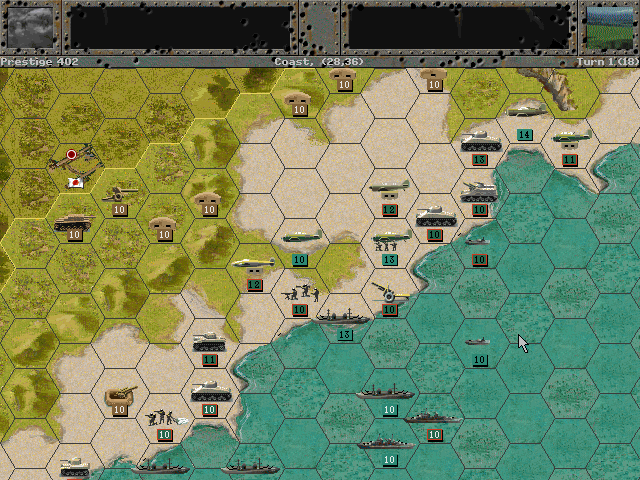
Naval shelling managed to suppress the only enemy position that could have posed a threat to the unloading troops; they cannot really harm us.
Guns all over the island open up on our forces, but the fire is quite inaccurate.
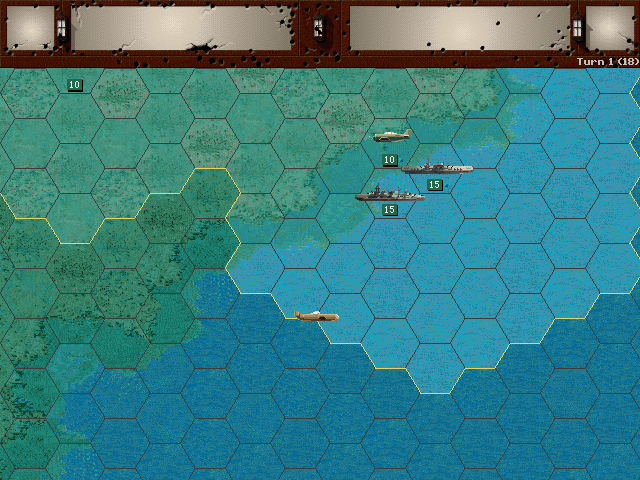
We do encounter planes. Not fighters, but kamikazes. None of them dare brave the AA guns on our ships.
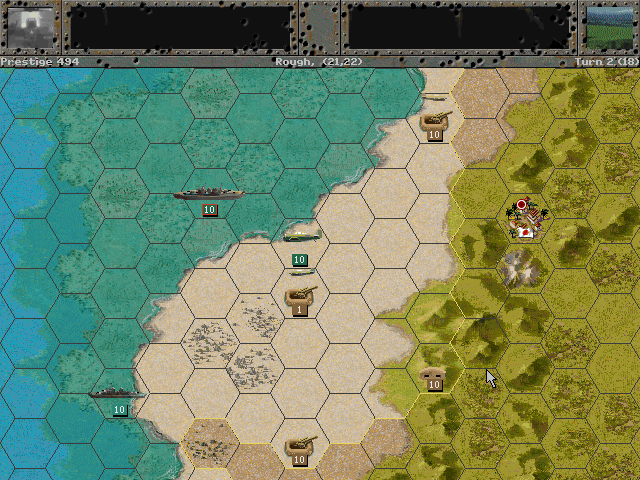
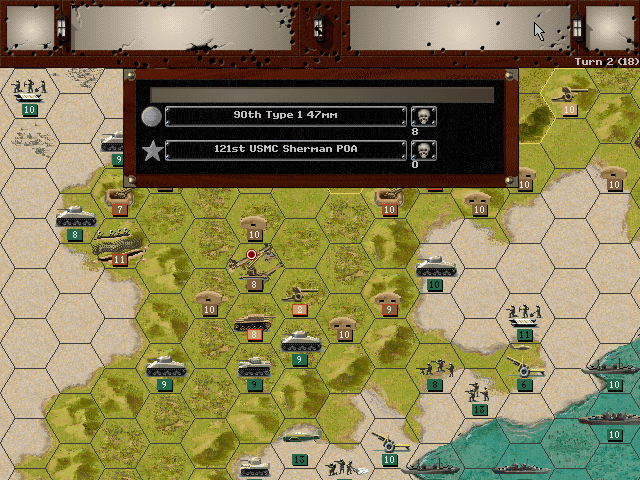
Allied Turn 2 (USA): February 19, 1945
Fair, Dry
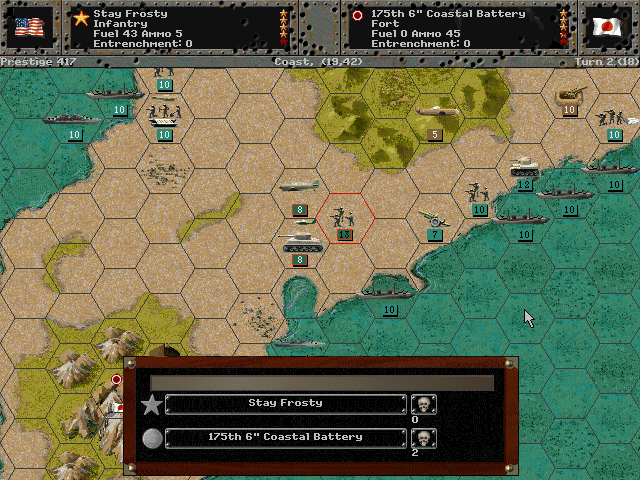
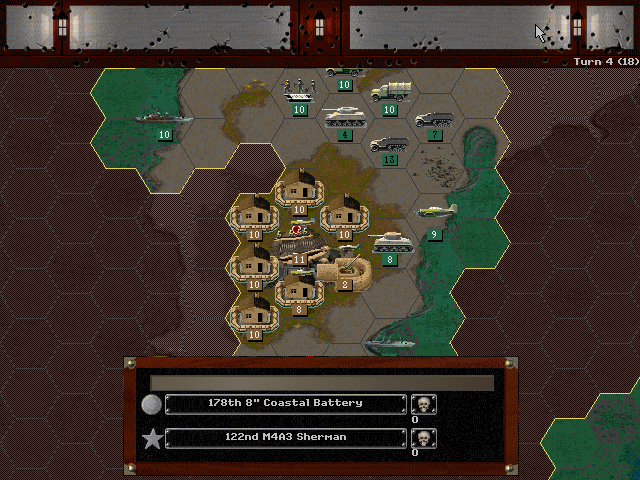
Our Marines knock out one of the larger coastal gun emplacements.
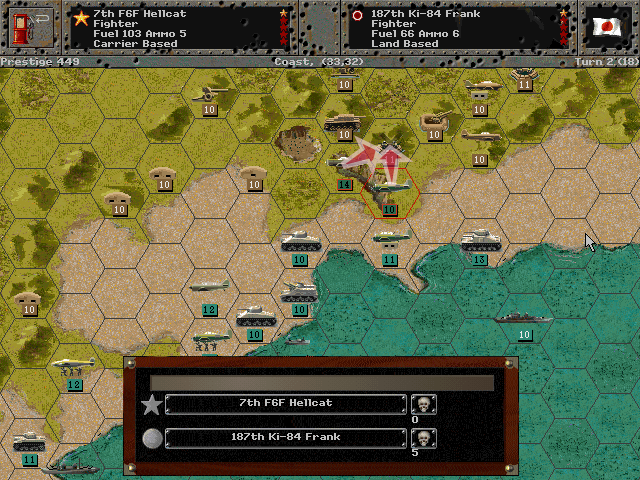
The Japanese have a new fighter plane, but our pilots have enough experience to deal with them easily.
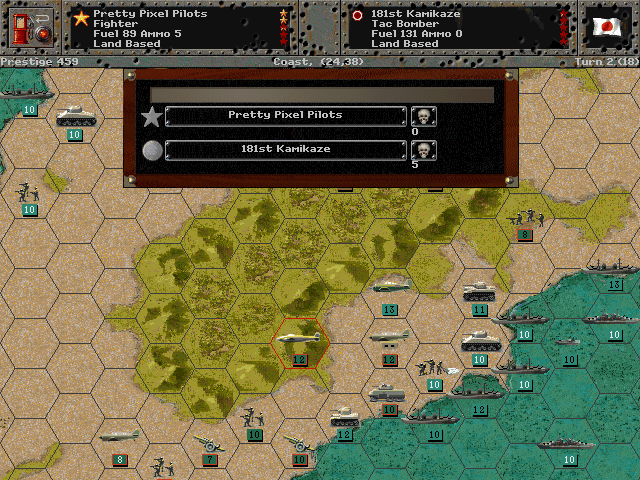
Many of the kamikaze planes are shot down before they can do any harm to us.
Tanks rush toward the first airfield.
The ships and planes on the northwest side of the island soften up the bunkers and guns.
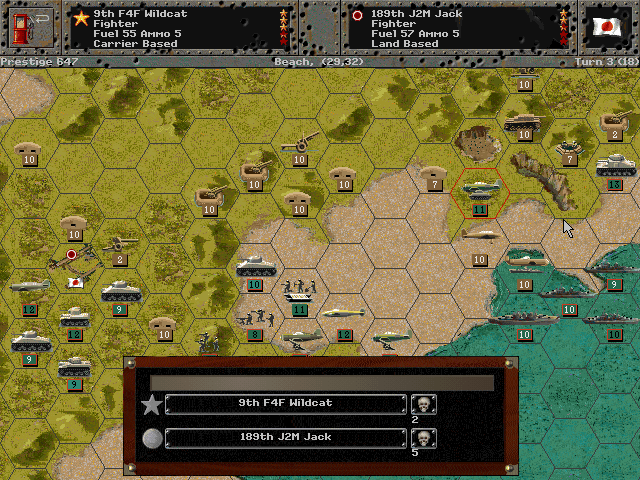
Axis Turn 2 (Japan): February 19, 1945
Fair, Dry
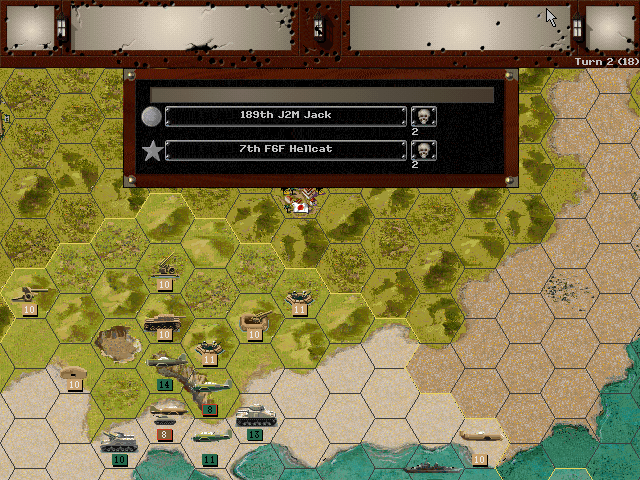
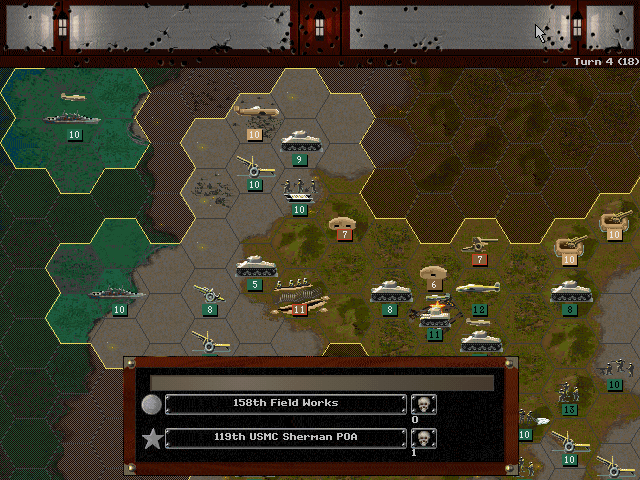
The Jack represents a serious challenge to our fighters, but the Japanese lack the numbers to make it worrisome.
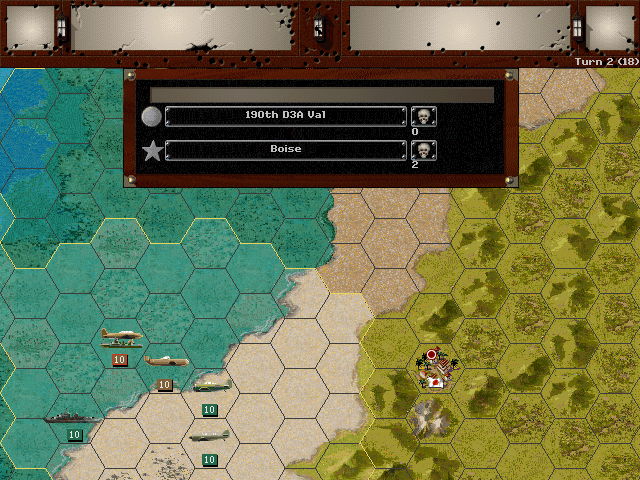
Surprisingly, the Japanese still have some dive bombers. These are land-based, not from a carrier, but still can hurt us just as easily.
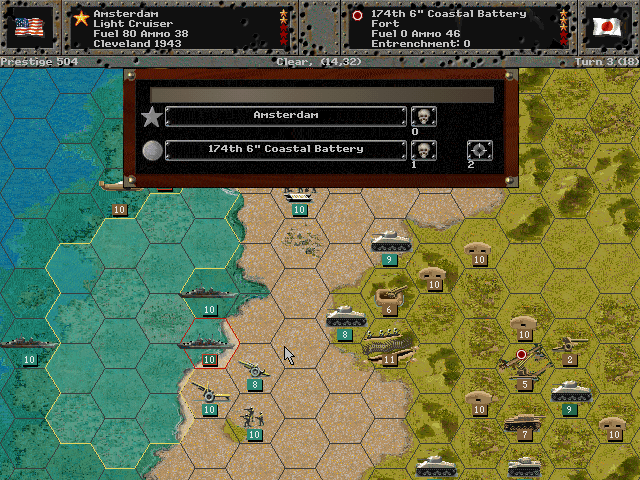
Forces on the western side come under heavy fire.
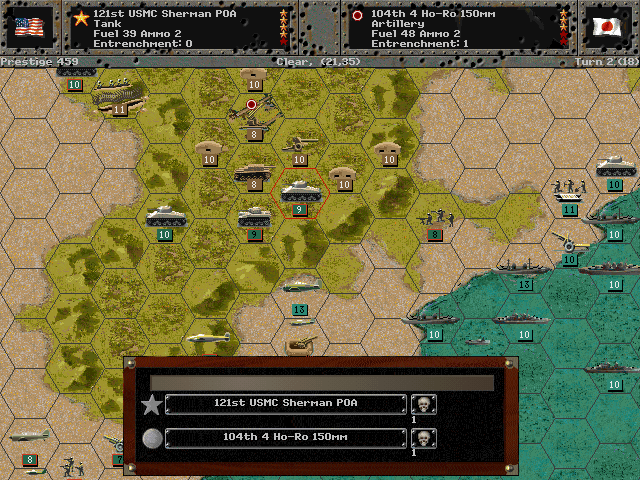
Japanese anti-tank weapons are generally a joke, however. Our Shermans can shake their fire off pretty easily.
Allied Turn 3 (USA): February 20, 1945
Cloudy (Dry)
Suribachi is a mass of defenses, but its location at the tip of the island is in bombardment range of most of our smaller ships.
That may have to wait until those ships are finished clearing the way for the main attack force.
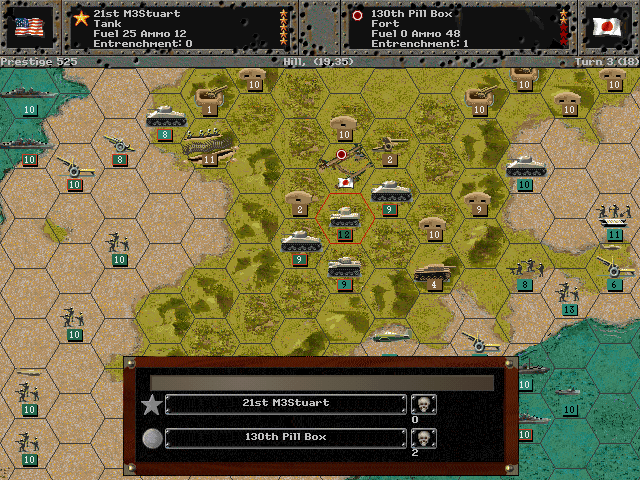
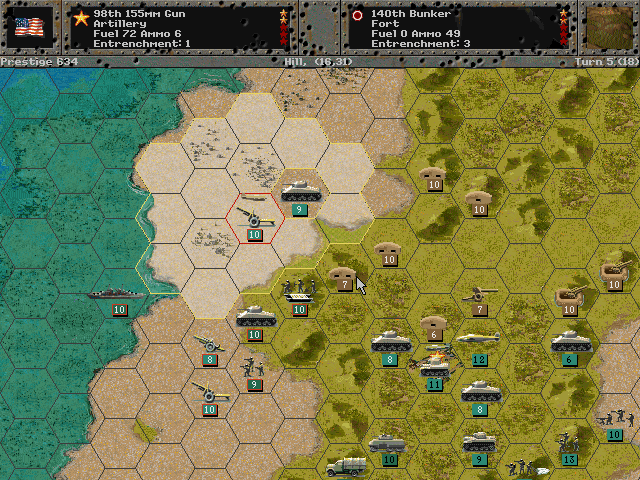
We clear the first airfield, but the bunkers near it prevent us from claiming it just yet.
The air battle is going in our favor too.
Taking out these additional structures is not necessary, but we do want to make sure the enemy doesn't pull away forces to hold the central airfields.
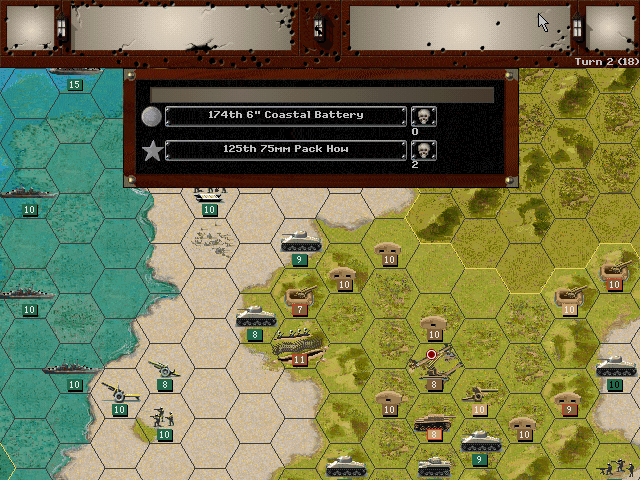
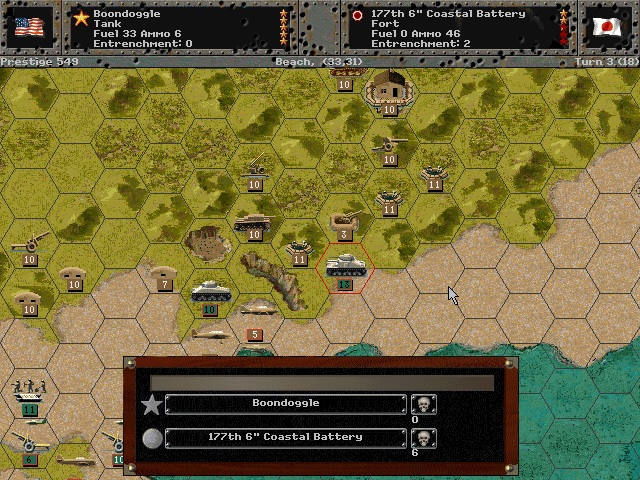
Axis Turn 3 (Japan): February 20, 1945
Cloudy (Dry)
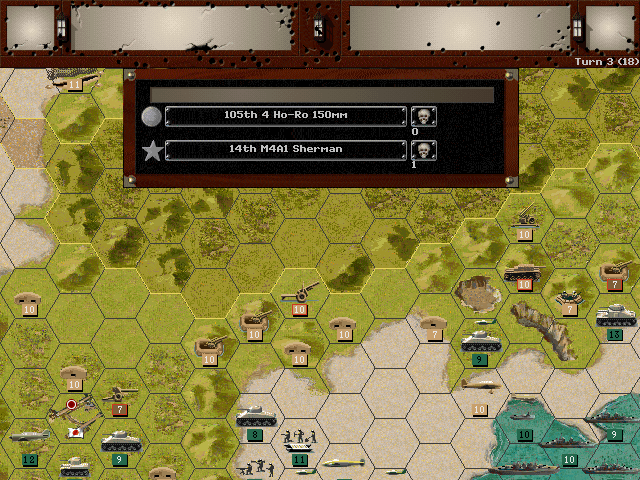
These heavy artillery guns are a bit of a nuisance, especially as we can't get to them at the moment, and they cannot easily be shelled from offshore.
The network of defenses at Suribachi inflicts heavy casualties on the first troops to arrive.
Allied Turn 4 (USA): February 20, 1945
Rain (Dry) NIGHT
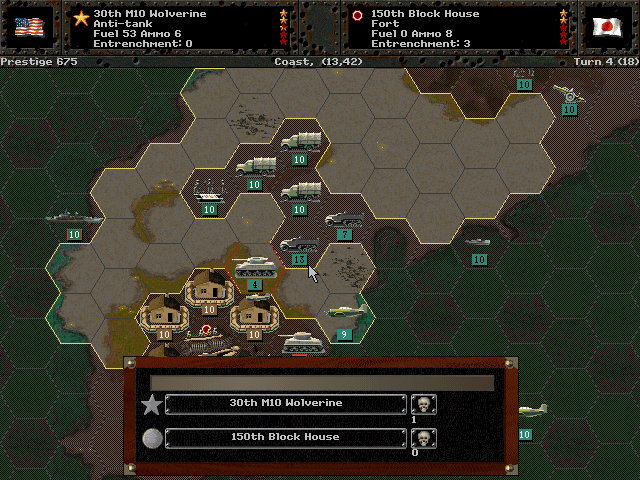
Under the cover of night, we drive across the rocky island to get most of the infantry in range to assault Suribachi.
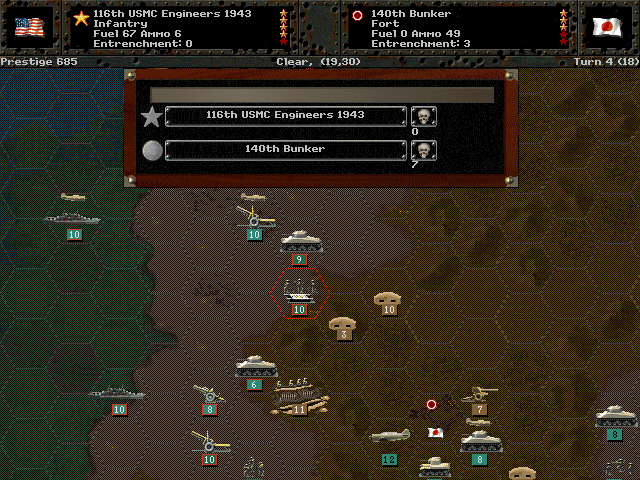
Night assaults nearly take out another bunker on the west side.
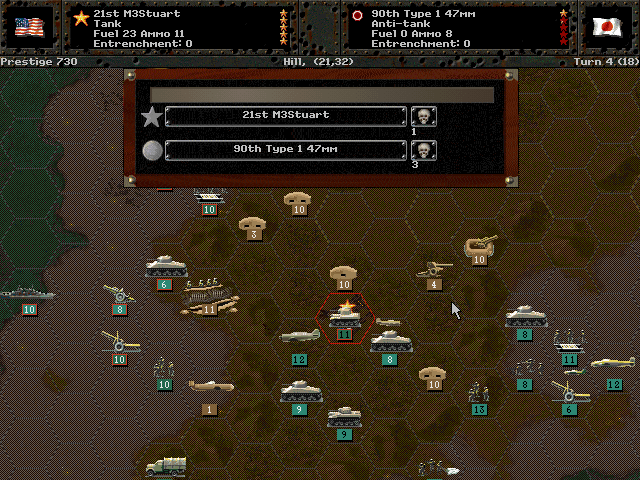
We also move in to capture the airfield.
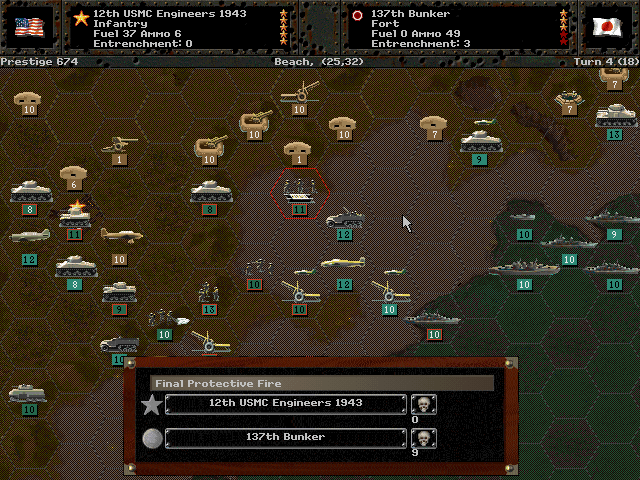
With the airfield in our hands, we work on opening up a better route toward the center.
Axis Turn 4 (Japan): February 20, 1945
Rain (Dry) NIGHT
Thanks to the darkness, the Japanese guns are unable to get their artillery to land on us.
Even the fire from the caves isn't harming us much.
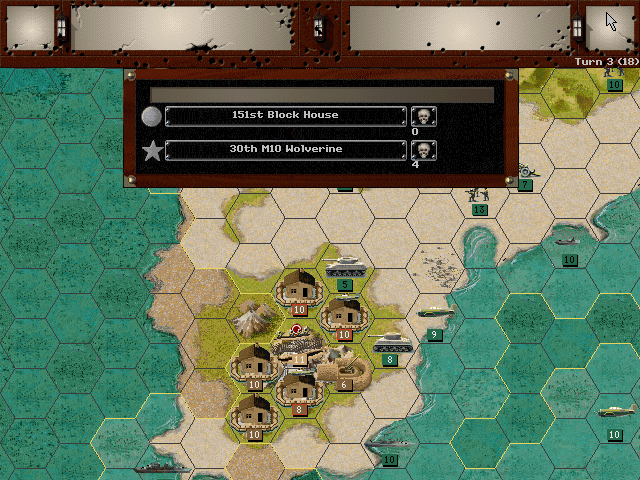
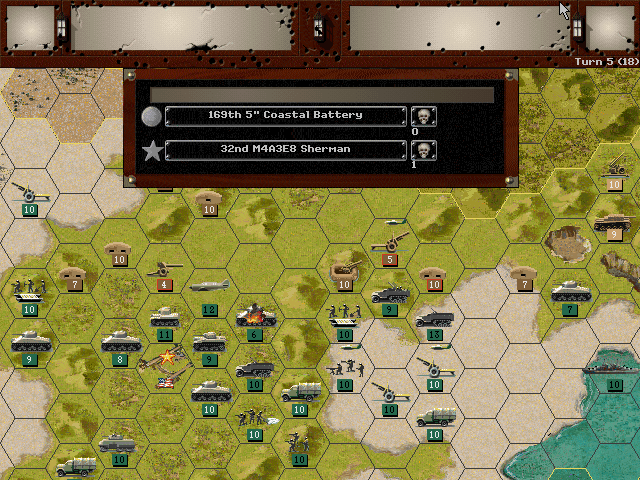
Allied Turn 5 (USA): February 21, 1945
Cloudy (Dry)

The attack on Suribachi begins in earnest. It is going well so far.
In contrast, the attack the western side is not making much progress.

More of our forces need to shift up the beach so that we can get to the center faster.
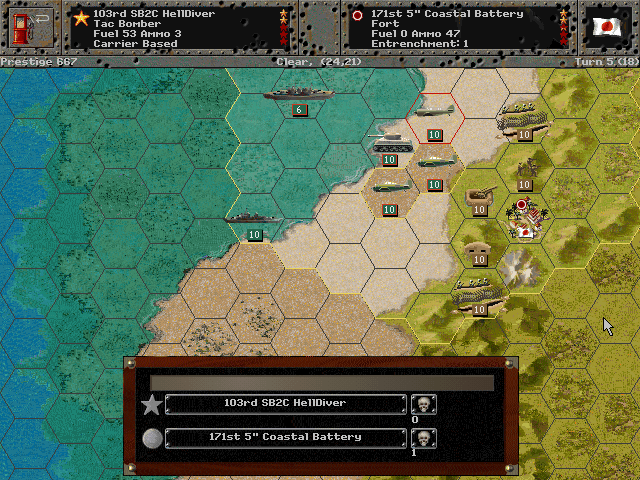
There is one more bright spot: A small force of tanks has managed to spot for the bombers and cruisers. We've cleared the northwest beach all the way to Nishi.
Axis Turn 5 (Japan): February 21, 1945
Cloudy (Dry)
Our front line troops are fairly worn out just from being constantly in battle; all those light losses just keep building up.
Unit Spotlight
M4A2 DD 'Duplex Drive' aka 'Donald Duck' Amphibious Tank
PG Name: Sherman DD Type: Tank
Effective Date: 12/44
Value:18 Cost:312 Spot:2 Move:4 MM:Amphib Trans:N/A Fuel: 45
Init:9 SA:11 HA:12 AA:[2] NA:1 GD:12 AD:3 CD:2 TT:Hard Ammo:12
The modification to the M4 to make it an amphibious tank did not actually require all that much; an inflatable flotation system was attached all around the hull, and a propeller (driven by the engine) was added to the rear. It make the tank easy to outfit for water crossings, and able to fight immediately when it came ashore.
This system was a joint development with the British, and it seems to have only been employed in Europe (primarily for the Normandy invasions, but also for river crossings). I haven't found any mention of its use in the Pacific Theater.
In-game analysis: This is effectively identical to the original M4 Sherman, but it trades speed on land for the ability to go in the water. It's unquestionably the strongest amphibious unit in the game, but it's a rather specialized unit.
Patrol Torpedo Boat (over 500 built)
PG Name: PT Boat Type:Destroyer
Effective Date: 6/42
Value:3 Cost:36 Spot:1 Move:8 MM:Coastal Fuel: 144
Init:3 Range:1 SA:3 HA:4 AA:[2] NA:5 DA:6 GD:14 AD:9 TD:16 TT:N/A Ammo:4
The idea behind the Torpedo Boat was that it could be a very small, light craft that could move in quickly and launch torpedoes and thus be a serious threat to enemy capital ships. In practice, the unarmored craft were so fragile that direct assault was unlikely to lead to success. They nevertheless did require enemy gunners to keep a sharp lookout. As the war went on, they were more often used to engage smaller unarmored craft, and often switched from using torpedoes to weapons better suited for this role, such as heavy machine guns or anti-tank guns (as with JFK's PT 109).
In-game Analysis: The truly disposable boat in this class. These are very cheap, and mostly useful if you just need something to be on the water searching for subs or other ships. Often it is better to have several small destroyers instead of one strong one, since they can hem in units like subs to keep them from escaping. Assuming the slots are available to fill, swarming the waters with these can be a smart move.
Consolidated (later Convair) B-24 Liberator
PG Name: B-24D Liberator Type:Level Bomber
Effective Date: 12/44
Value:65 Cost:432 Spot:2 Move:8 MM:Air Fuel: 240
Init:5 SA:1 HA:4 Size:40 AA:[10] NA:5 GD:15 AD:12 TT:No Ammo:10
The B-24 was supposed to be the plane to replace the B-17. Even though more of them were produced by the war's end, the design could not beat the B-17 in certain aspects, and as a result they fought side by side through the end of the war. One notable aspect of the B-24 was the placement of the wing at the top of the fuselage; it was more fuel-efficient (though this turned out to be mainly a result of the airfoil design) and allowed for a greater bomb capacity. While it did beat the B-17 with those features, and it more or less equaled it in speed and armament, it could not reach the same altitude as the Flying Fortress. Crews also found its internal feel more restrictive than the comfortable B-17. It was still the most-produced aircraft of any in the war, with just shy of 20,000 built (a number even more remarkable considering that the initial models did not enter service until 1941).
In-game Analysis: It's impossible to purchase this without feeling like you wish you could afford a B-17. I can't see any reason other than lack of prestige for choosing it, as it's no better in any capacity. Its value stat is also high for its price, making it a prime target for the enemy. It's possible to save a little more and at least get a B-17F.