Part 6: Shenanigans
Part 6: ShenanigansActually, Solaris can wait for a little while longer. Let's cover some of the weirder mechanics, and the glitches that I'm not using in the main run.
NON-OBVIOUS MECHANIC #1: FAILED SORTIES
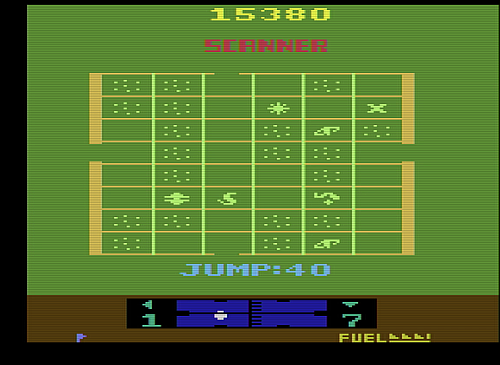
When we left off last time, we'd entered Cobalt Quadrant:
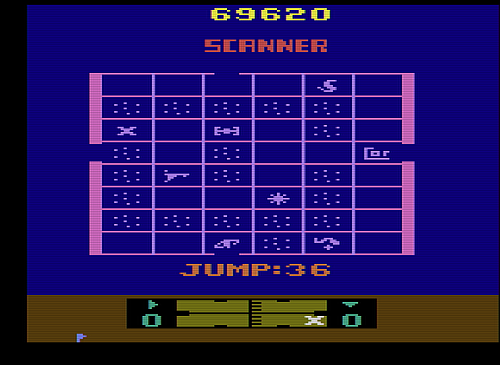
That Corridor is placed in an interesting way. It's in a position where running it will take us east.
But what if we don't bother?
This dumps us right back in the same sector, none the worse for wear but also not advancing anywhere. Sorties against Corridors are one of three kinds where you can just kind of fail to accomplish anything:
- Corridors will be failed if you don't fly into the hangar.
- Zylon Planet Raids will be failed if you fly past a hostage without rescuing them.
- Federation Planet Defense will be failed if you let an attacker fly past unmurdered.
In each case, you end up in the same sector on the map, with nothing accomplished. You don't get partial credit, either; if there are three hostages that needed rescuing on a raid, and you miss the third, there will be three to rescue when you come back.
This means failing on defense is the most troublesome, because the doomsday timer keeps counting and you're very likely to end up having the planet explode underneath you while you attempt to repair your mistake.
NON-OBVIOUS MECHANIC #2: BLOCKADES
 This is a starfield. You can't enter these. I'm not talking about them. The more interesting cases are actually plentiful right on the first map of the game:
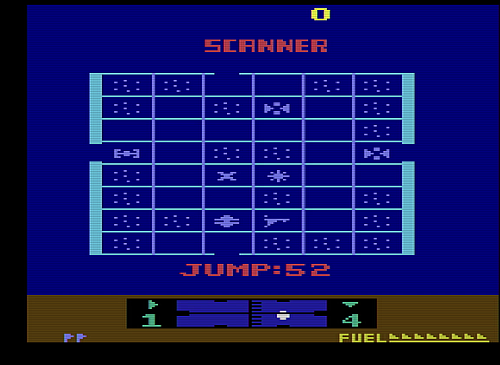
Almost every feature of this map can be encountered from one of two directions; the Federation planet from west or east, the Star Pirates from east or north, the eastern Blockader by west or south, and the northern Blockader from south or east. However, you can't turn corners through them.
The rule here is that if you move into an occupied sector, you can only leave in the direction through which you entered. So if you need to get past it, or turn a corner (like we would need to do to head north from Cobalt sector through the Corridor, up at the very top), we need to actually clear it. Failed sorties won't count, either; we must succeed.
NON-OBVIOUS MECHANIC #3: PLAYER TWO NAVIGATOR
If you have a second controller plugged in, you can swap between the quadrant map and combat mode at any time with the second controller's fire button. This is usually only a curiosity. If you swap into combat mode from the map screen, it's basically like warping to an empty sector. If you swap to the map screen in the middle of combat, your cursor is frozen, so you can't do much.
The only legitimate uses of this capability are to quickly swap back to the map screen after a victory, so that you don't have to bother waiting for the map screen to show up on its own, or for jumping back out somewhere else before combat actually begins if you realize that you warped to the wrong sector.
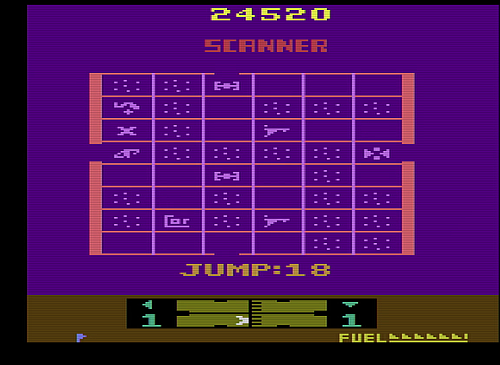
GLITCH #1: OVERLAPPED BLOCKADES
You can have multiple things that aren't you in the same sector. The map screen flickers between then when this happens, so Doug Neubauer pretty clearly knew what he was up to here:
Blockading works just as we described, but there's a small bug here. When you win your mission against the enemy fleet, your motion is no longer blocked, and you can leave the battle sector in any direction. This ignores the fact that you might still be blockaded by the other object in the sector.
And that allows our first trick.
TRICK #1: THE SAVIOR'S PASSKEY
Enemies don't usually overlap other enemies. What they do usually overlap are the Federation planets that they are attacking and that you must defend. Let's have a look at Lime Quadrant again:
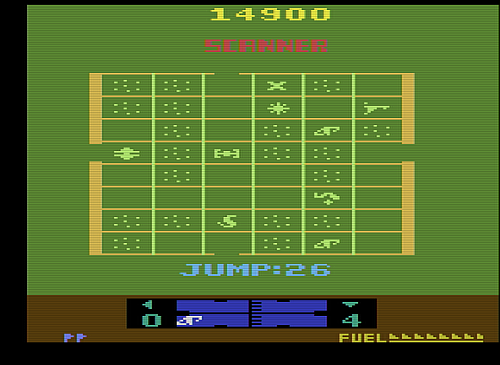
There's a nice juicy Zylon planet behind the Federation world, but we can't get to it because the Federation planet blocks us from getting there. At best we have a raid as a consolation prize if we fail to defend the Federation world.
But.
If we let that attack group move in and assault the Federation world, then once we rescue it we can leave in either direction. That leaves the Zylon planet ripe for the taking!
This does, however, leave us with the sticky question of how exactly we plan to get back out.
For that, we'll need a second glitch.
GLITCH #2: THE NAV GLITCH
When you successfully complete a sortie, various things happen. The enemy you defeated vanishes from the map. Your freedom of motion is restored. And you exit the quadrant if you're at an exit sector.
But there's a bug here. "Where you're at" for the purposes of these effects is not where you actually are. It's where your cursor is pointed on the nav screen. The enemy goes away no matter what, but if your cursor is somewhere else, the effects are likewise displaced.
To trigger this glitch, you need to be relatively nimble, but it's not hard:
- Select an enemy fleet and warp to it.
- Before combat starts, while your hyperjump is still audibly winding down, hit the button on controller 2 to flip to the nav screen.
- Use controller 1 to move the cursor somewhere else. (Where depends on what trick you are trying to pull.)
- Press fire on controller 2 to return to combat mode. (If you press fire on controller 1, you actually warp away to the location you picked, ruining the glitch.)
- Fight and win.
TRICK #2: TUNNELING
When you successfully complete a sortie, any obstacles to your motion are lifted. That happens with respect to where your cursor is, thanks to the nav glitch.
So if we used the Savior's Passkey to get into the northeastern corner of Lime Sector, we can use the glitch to get out.
First, we warp to the Zylon Planet.
Then, the moment we land, we kick up the nav screen and get the cursor back on the Federation planet.
Then we complete the raid.
Even with the nav glitch, it does remember that it was the Zylon world that explodes and not the Federation one. But it has forgotten that it was the Federation world and not the Zylon one that was blocking us. We can then proceed west and head back out into the Galaxy at large with nobody the wiser.
But it gets better.
Let's pick a fight with some enemies that are of no real interest to us. And THEN!

We breeze right through that wormhole as if it weren't there—because thanks to our victory over those other chumps, the game thinks for the moment that it isn't. We can fly east.
Which kicks us right into the middle of Purple Quadrant. We've skipped about a third of our main route just with this.
But we can do better still.
TRICK #3: QUADRANT CONTROL
Much like blockades, the game decides whether or not you change quadrants by looking not where the battle happened, but where your cursor is. So when we fought through multiple forced detours in Purple Sector, we could have skipped every last one by cutting to the nav screen right at the start and retreating the cursor a single sector before the battle was joined.
That saves us several hyperwarps. In the specific case of Purple Quadrant, we kind of wanted to take those detours anyway to get our life count up, but a sufficiently daring player would save time with the retreat. Likewise, if our route from Cobalt Quadrant took us north or through the wormhole, retreating from the Corridor before running it would spare us some time.
You can also do this trick in reverse, moving your cursor onto an exit quadrant and blasting free of the quadrant without fighting the exit guardian at all. However, this trick is of limited utility—you're having a fight either way and if you can reach the exit with the trick, you can reach it without it. You really might as well just engage the exit guardian directly in the first place.
With these tricks, we can pare down the shortest route to the halfway point from nine steps to five:
- West from Home to Red, fighting the Kogalon Star Pirates that guard the exit.
- North from Red to Lime, fighting through blockaders.
- Tunnel through the wormhole in Lime to reach Purple. Maybe hit up the Zylon world on the other side for free points. If you do, use Quadrant Control to exit to Purple immediately after the raid completes.
- Take the wormhole to Purple North, optionally crushing the Zylon world first. (If you do, use Quadrant Control to not be kicked back to Lime.)
- Crush the Star Pirates, the Attack Group, and the Blockaders to reach Cobalt. Skip Grey Sector with Quadrant Control while fighting the Star Pirates.