Part 9: Tech Post 1: Introducing the Atari 2600 VCS
Tech Post 1: Introducing the Atari 2600 VCSBefore we really dig into how Solaris does what it does, let's take a brief tour of just what the Atari 2600 can do in the first place. My primary reference here is the Programmer's Reference Guide from 1979, which is still, as near as I can tell, the primary reference information for homebrew developers.
The Atari 2600 was the most popular and successful console in the second generation of game consoles. The first generation were devices like the Magnavox Odyssey. The first-gen consoles were made entirely of logic circuits, and to the extent that you could make them play different games, you did it by tuning the circuits or replacing plugboards that changed how they were wired. You also had devices that were custom circuits that could, say, play Pong.
The great insight that led to the second generation of consoles was that instead of a circuit that played one game or a set of related games, you could put a microprocessor in the console, and then you could hook up detachable ROM chips to its address bus with a modular cartridge system and this would let one console play any game your developers could come up with. You could even release more after launch and they'd just work!
So let's start our tour with the details of this genuinely revolutionary innovation.
CPU and RAM
The Atari 2600 uses a variant of the same 6502 chip that we know and love from the Commodore 64, the Apple II, and the NES. The stock 6502 chip can address 64 kilobytes of memory, which can be backed by RAM, ROM, or special memory locations that talk to I/O ports. It's also got some pins to send external signals: RESET, Interrupt ReQuest (or IRQ) and Non-Maskable Interrupt (or NMI).
But it's 1977 here, and pins are really expensive, so Atari went with the cheaper 6507 model. This was, in silicon, identical to the 6502, but it had fewer pins so it basically couldn't do as much because there was no way to for the chip to communicate or hear everything it was actually capable of.
In particular, the 6507 drops some address pins, so it can only address 8 kilobytes of memory. It also removes the ability to receive IRQ or NMI signals, but since those are usually used for precise timing or I/O information, that's no great loss.
The 2600 splits up its 8KB address space to give 4KB to the cartridge ROM, and then the other 4KB to the RAM and the I/O registers. 4KB is a bit cramped, but it's still actually pretty decent. For those of you who followed along with Chokes McGee's COMPUTE!'s Gazette LP, the only games that cracked 8KB were the extremely text-heavy BASIC games, and even the really sophisticated games like Crossroads 2 were more like 6KB.
Solaris is 16KB. It's using a special cartridge that has four 4KB ROM chips, and if you try to read from certain locations on the ROM, it will swap which of the four is used. (Obviously, the code that does this has to be replicated across all the ROMs or it will suddenly be reading garbage for code.) This general technique is called bankswitching, and the NES in particular made incredibly heavy use of it. The Atari's use of the technique was far more modest, but it does at least get us out of the 4KB prison and lets us have significantly larger games.
Where things get a bit nuts is the RAM. While it's possible to pack extra RAM into a cartridge, this wasn't generally done and Solaris doesn't do it. Instead, it is restricted to the Atari 2600's native RAM, which is a princely 128 bytes. Not kilobytes. Bytes.
This is even crazier than it sounds. The 6502 series chips—and the 6507 is no exception here—kind of assume that you have access to at least 512 bytes of RAM, because the chip itself hardcodes certain capabilities into that region. The first 256 bytes (the "Zero Page") are faster to access and many addressing modes (the ones that look like array dereferences) only work on addresses in the zero page. Bytes 256-511 are reserved for the CPU's execution stack. When you call a subroutine in machine code, the return addresses are stored by the CPU in this region, and it counts down from 511. The push/pop instructions also work with this stack.
The 2600's architecture deals with this by having locations 0-127 be I/O registers, and then it mirrors its 128 bytes of RAM across 128-255, 256-383, and 384-511. So if you push a value onto an empty stack, it looks to the CPU like it gets written to locations 511, 383, and 255 simultaneously.
Atari 2600 programs don't make heavy use of function calls.
I/O: Joysticks and Config Switches
This, on the other hand, is a refreshingly simple relic of an earlier era. There are a bunch of switches on the console that correspond to the NES's SELECT and START buttons, and a few other switches for difficulty selection and display type and such. These are simply treated as memory locations, and the CPU can look at those memory locations to discover the position of the switches.
This is an Atari joystick:
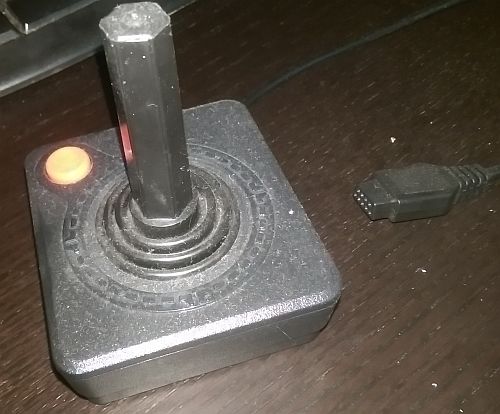
It's basically a D-pad with one button, and the plug is the 9-pin trapezoidal port that you can find on really old mice and similar serial devices on the PC. This isn't serial, though. The joystick has switches (up/down/left/right/fire), and so each direction has its own switch and thus its own pin. Checking the joystick state is again as simple as just looking at the contents of a "memory" location, and it all fits in a byte with room to spare.
Sound
The Atari was never intended to play music. It's got 2 channels, and you can set either one to 1 of 15 "instruments" and then give it 1 of 32 frequencies across five octaves. Not exactly fine control, but the "instruments" aren't all in tune with each other so you can get a few tunes out if you're really clever and lucky. Generally though this is for sound effects alone, and it's honestly not bad. It sounds better and integrates better than the Apple II or VIC-20, but it's less flexible. The NES and Commodore 64 blow it out of the water, but those are next-gen so we'd expect no less.
Graphics
Here's where all sanity ends, and here's where we're going to go party. The Atari 2600 does not exactly have a notion of graphics, at least as we know them. The hardware has only a vague model of sprites or backgrounds. Where you would expect a GPU, the Atari has a device it calls the Television Interface Adapter, or TIA for short. It is very strongly tied to the broadcast television/composite video standard, and the game software itself is responsible for ensuring that the output is appropriate for display. Third-generation systems like the NES would have their equivalent chip handle the transformation of a display into television data on its own, and use the interrupt mechanisms to report to the CPU that it was time to compute a new frame. On the Atari, the software has to throw the VBLANK and VSYNC signals manually, and count out each of the scanlines in the VBLANK period and the display itself.
And since it has to do that, the TIA actually only knows about one scanline at any given time. Drawing a display on the 2600 is a matter of setting up the graphics registers for the current scanline, waiting for the stuff you want drawn to actually be sent to the TV, and then changing all the values that need changing for the next one.
192 times a frame, 60 times per second.
So it does have a notion of a background color, and of a foreground (the "playfield"). The playfield is 20 pixels wide and covers half the screen. It can be either repeated or mirrored on the other side. If you want an asymmetric playfield, you need to alter the playfield registers at exactly the right time mid-scanline so that the left side has been drawn but the right hasn't started being drawn yet.
There are also two sprites as we know them, 8 pixels wide and 1 pixel tall. These are called "player 0" and "player 1", and to get sprites that are bigger than one pixel tall you just change their values in between scanlines. The Atari 2600's horizontal resolution was 160 pixels, which is kind of laughable but turns out to actually be the absolute maximum you can have without getting color distortion on an NTSC standard definition television. (Since we're controlling each scanline individually, the vertical resolution is as good as it gets until the HD era, which basically means it's doing as well vertically as the PS2. Good times!) Player sprites can also be horizontally magnified so that each pixel in the design is 1, 2, 4, or 8 pixels wide. You can also replicate the player sprite across the screen, and if you're real precise in your timing, shift the graphics mid-scanline so they aren't all clones of each other. (Of course, it's not so bad if they are all clones of each other, either; that's pretty much exactly how Space Invaders worked.)
In addition to the player sprites, each player has a "missile", which is a one-bit sprite that's the same color as the player. Like the player sprite, it can be horizontally expanded or replicated. (To vertically expand it, you'd just leave the Missile Enable mode on longer.) The playfield also has a missile, but it's called the "ball".
You can really tell that this system was designed pretty much exclusively to implement Combat and Pong. But even this is less confining than it sounds: if you look at games like Yars' Revenge you can pretty readily pick out how these components are used to build a more sophisticated game without any cheating:
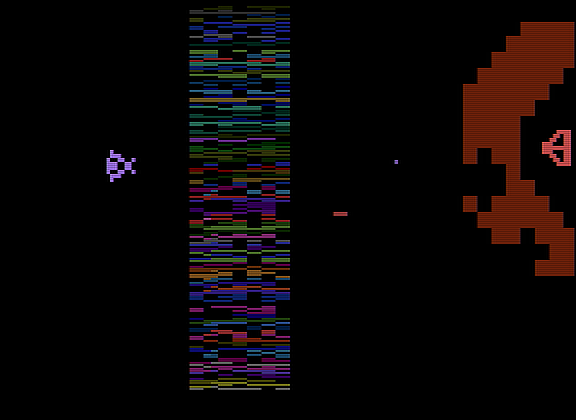
- The player (the housefly thing) and the enemy base are the two Player sprites.
- The static mid-screen and the base's shield are the Playfield.
- The player can shoot one shot, and that's the player's missile.
- The little bar that hunts the player is the enemy base's missile.
- It's not in this screenshot, but the player also has a superweapon called the Zorlon Cannon which, when present, is clearly the Ball.
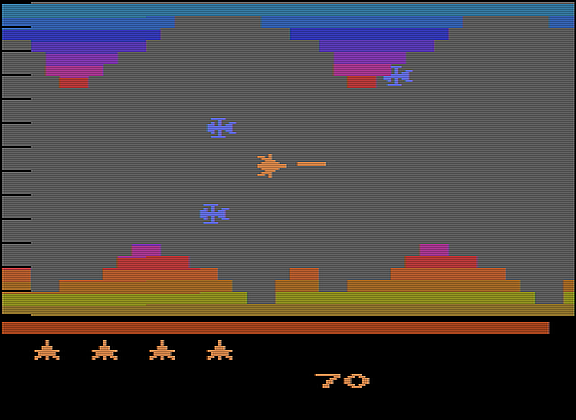
This "comb" effect is ugly, so most developers would do the nudge every single scanline, nudging sprites for 0 if they didn't need to move. This produced a display with a black bar down the left side of the screen, and that's way less obnoxious. Solaris follows best practices and does this.
Each player sprite has its own color, which it shares with its missile, and the playfield has a color that it shares with the ball. These are selected from a palette of 128 colors evenly spaced across the color wheel, which is unironically really good and actually better than pretty much anything else until you hit the 16-bit era. Also, since you're changing stuff each scanline, you also can just as well change colors then too, which is why you'll see a lot of horizontal striping effects on Atari graphics.
The TIA also handles collision detection for us, and it's pixel-perfect. Any collision that happens is "remembered" until we check it, so we don't have to check every scanline for a collision; we can just draw both full sprites and check once we're done.
A Weapon For Sanity
Placing sprites and playfields both require writes with exact timing to I/O registers, repeatably, in order to get a stable display. Being off by a single CPU cycle will cause the display to lurch over by 3 pixels. Getting the wrong number of cycles on the frame as a whole will cause our television display to roll. How can we do anything here?
We have two things to help us out, and they're both tremendously powerful.
First, there's a generic programmable timer that's part of the TIA we can use for measuring just about anything we want. Traditionally, we use this to count out the VBLANK period, so that we can spend the entirety of the VBLANK period computing what the next frame should be. Once that's done, we simply wait for the counter to wind down, shut off VBLANK, and start generating the display again.
But there's still going to be some wobble there because the tightest possible loop on the 6502 is like five cycles long. Even if we had IRQ capability—which, as you may recall, we don't, because the 6507 removed those pins to save money—interrupts take the better part of a scanline to fire and there's just as much wobble on those as any other instruction. Here's where the Atari system hands us a weapon to even the odds, and this weapon is a thermonuclear bazooka. By reading or writing memory location 2, the CPU is shut down until the very end of the current scanline, and then it's started up again right at the start of the horizontal blanking period. This is 100% reliable and cycle exact and perfect. If you want to count out N scanlines, just read that location N times. If you want to place a sprite 45 pixels from the start of the blanking period, have your write instruction happen fifteen cycles after a read from memory location 2.
This is ungodly useful. I've messed around with graphical effects a bit on both the 2600 and the Commodore 64, and I'd have killed for an equivalent to this on the C64. (There are ways. But it's much harder.)
A Final Note
Everything I've described is pretty much howling madness from the point of view of any modern software developer. But by being so unconstrained, I do think that this improved the Atari's longevity. It didn't cease production until 1992, and it had commercial software made for it all the way through. Its competitors of the time, like the Intellivision, sank without a trace when the NES and friends came along, but the 2600 was sufficiently oblivious of its environment that its very weaknesses let it stay relevant longer, because every time someone found a new trick, it was like a hardware upgrade.