Part 3: The Base
The Base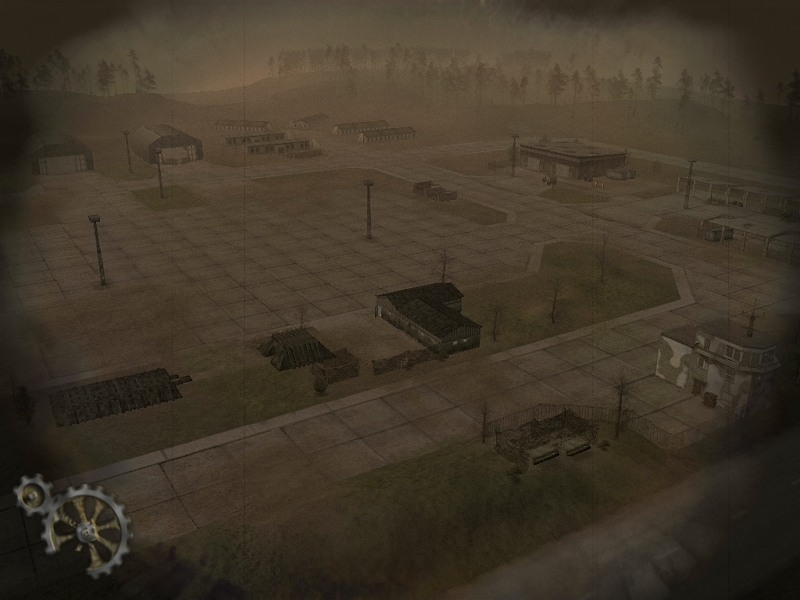
Welcome to our home! She's a beauty, ain't she? Told ya that the dump from the first update wouldn't be anything like it. Well, since you're new to the place, let me give you the guided tour. Please stay with the group, and resist the urge to touch anything. There is some dangerous stuff around here.
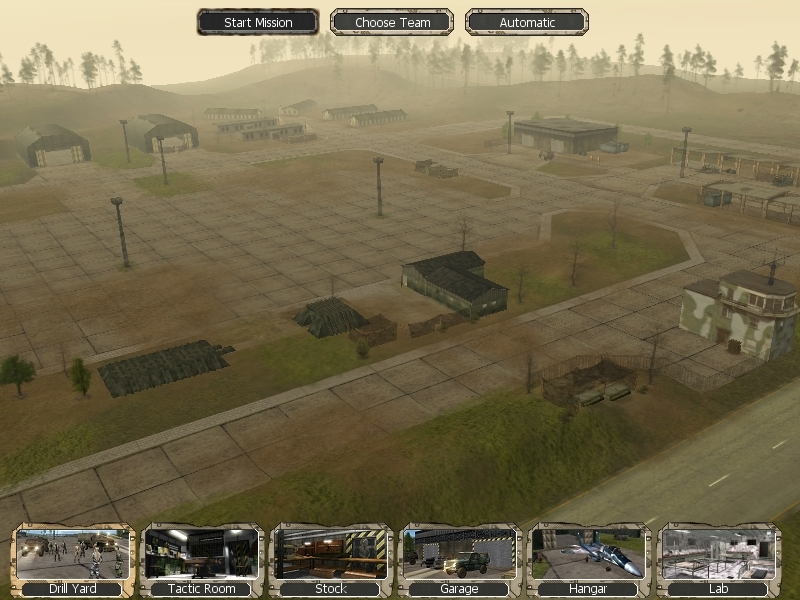
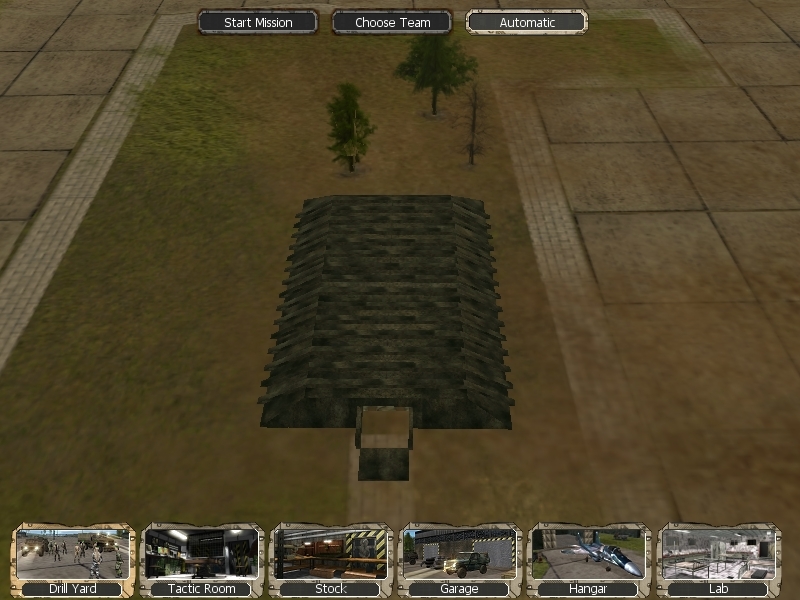
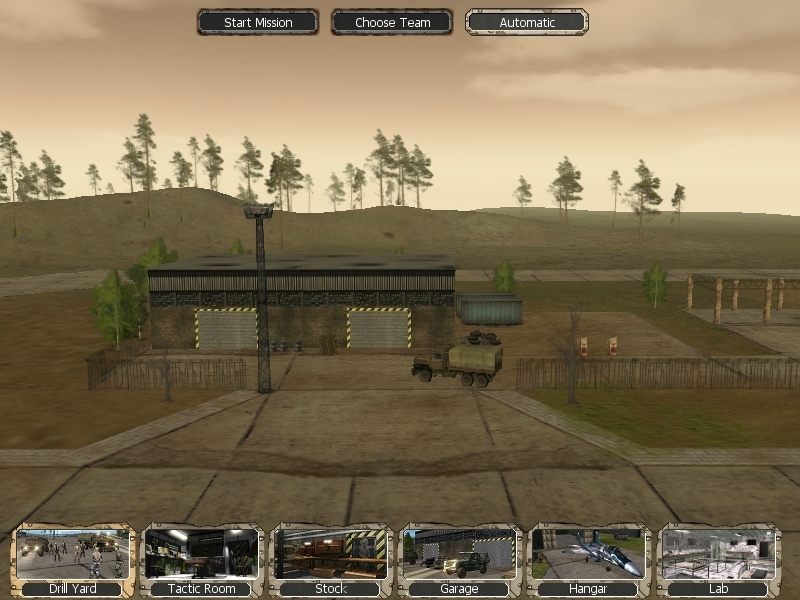
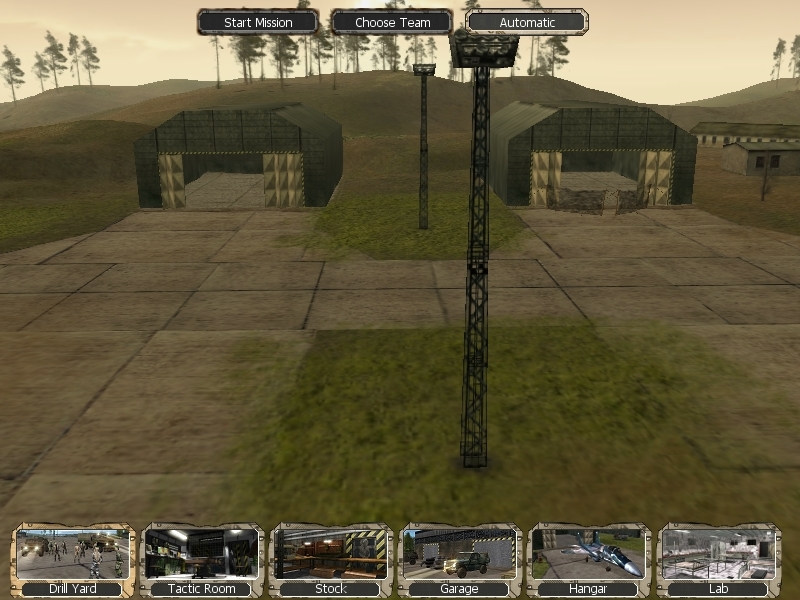
Right now, we are in the Drill Yard. Here you can choose which soldiers and vehicles you want to bring for your current mission. You can also automate that process, if you like. In fact, all the facilities in the base can be automated, but the game is rather shitty at making good decisions, so it's better to stay away from that option entirely.
Clicking on the pictures at the bottom, will take you to the corresponding facility. And if you do it from the Drill Yard, the camera will do a zoom on the facility in question.
Just follow me to the next stop, please.
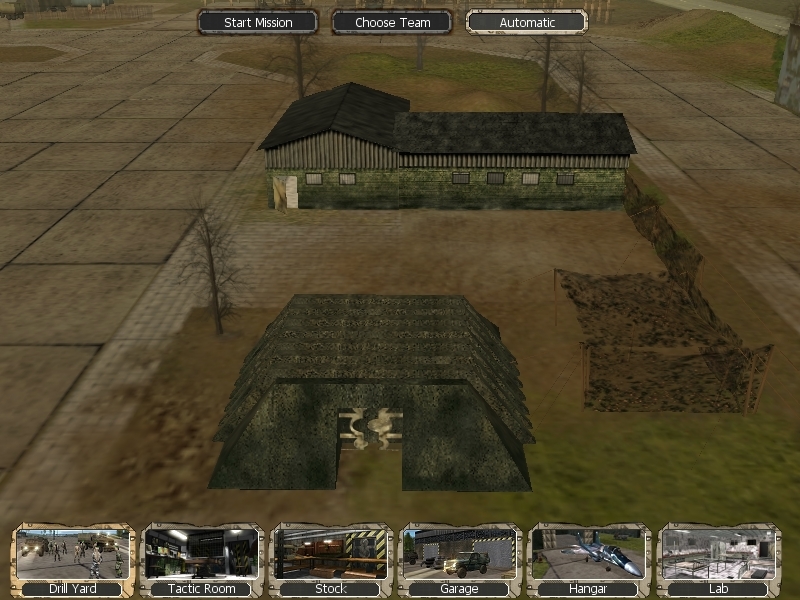
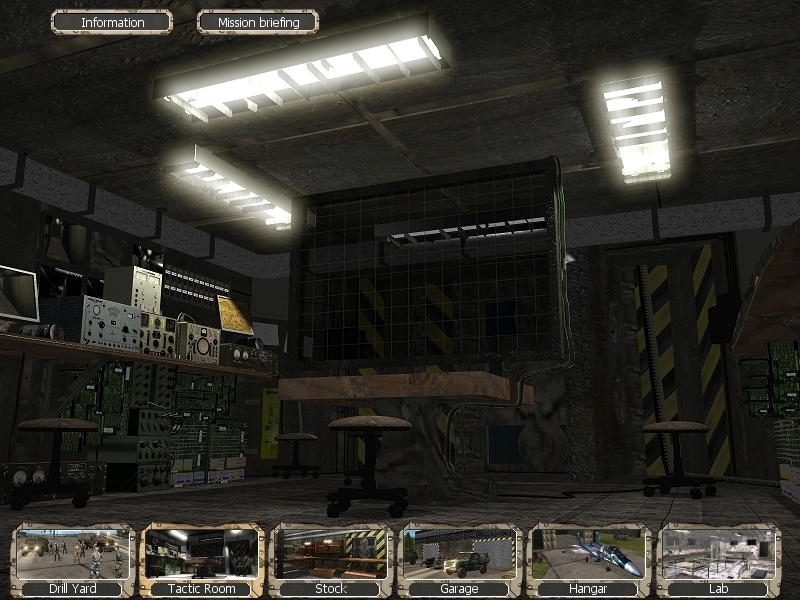
This is the Tactic Room. Here we will get our mission briefings, before we go out into the world. The briefings are fully voiced and give a small preview of the coming map. They are pretty neat!
Aside from that, we can also access information about the main characters and the different factions here.
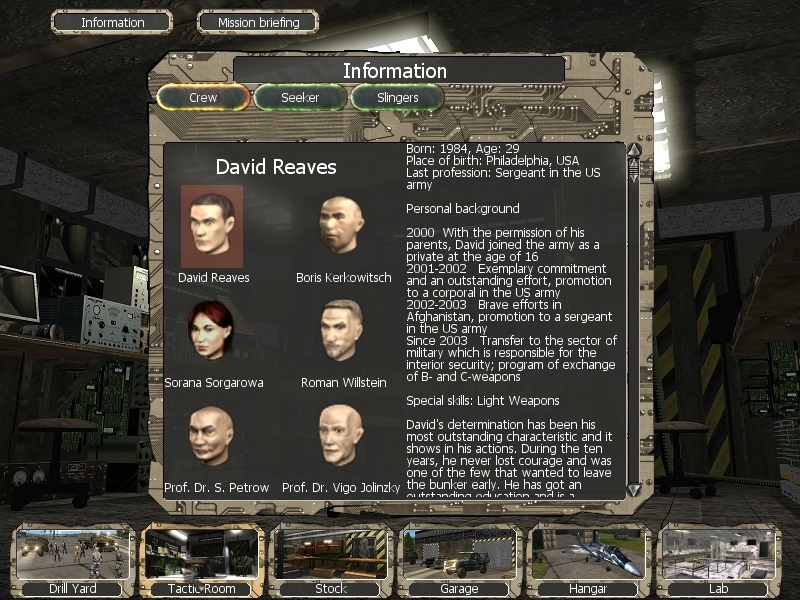
I already said that I'll transcribe the bios soon, but I want to quickly talk about a character that the game kinda didn't properly introduce till now: Roman Willstein.
He is the leader of the group, due to his military rank and experience, but we will never actually see him in the game. His bio states that he suffered a mean leg injury while doing repairs in the bunker. Due to the limited supplies, his leg couldn't be fixed properly and he has to walk with a crutch. That's why he's of no use outside the base. He is the one who will plan our missions, and give us the briefings. He also narrated the introduction, and one image in there actually shows him with a crutch.
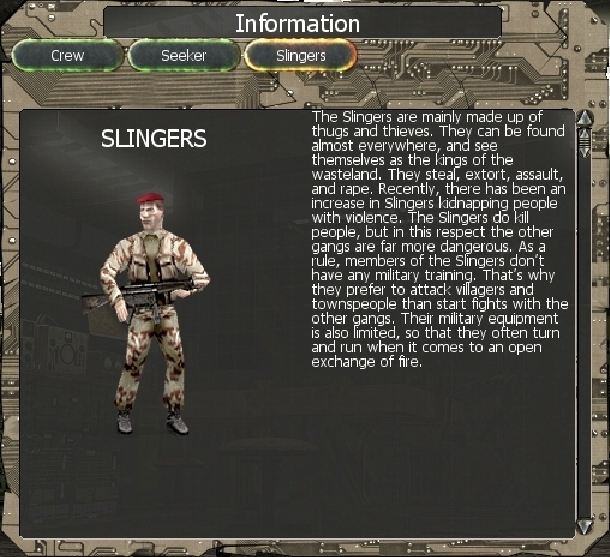
Right now, we have access to the information tabs about the two factions we have encountered so far, the Seekers and the Slingers.

Have you seen everything? Okay, then let's move on to the next stop. I don't want to get ahead of myself here, but I'm sure that you'll like it!

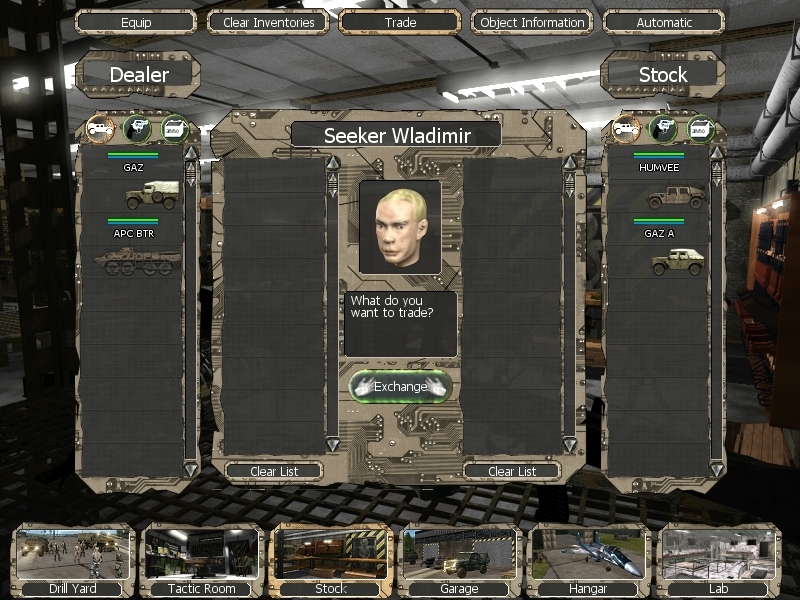
This is the Stock, where you can equip your soldiers, look at your gear and trade for new things. Hey! Yes, you back there! Please don't touch the guns. Most of them are loaded and should only be handled by professionals.
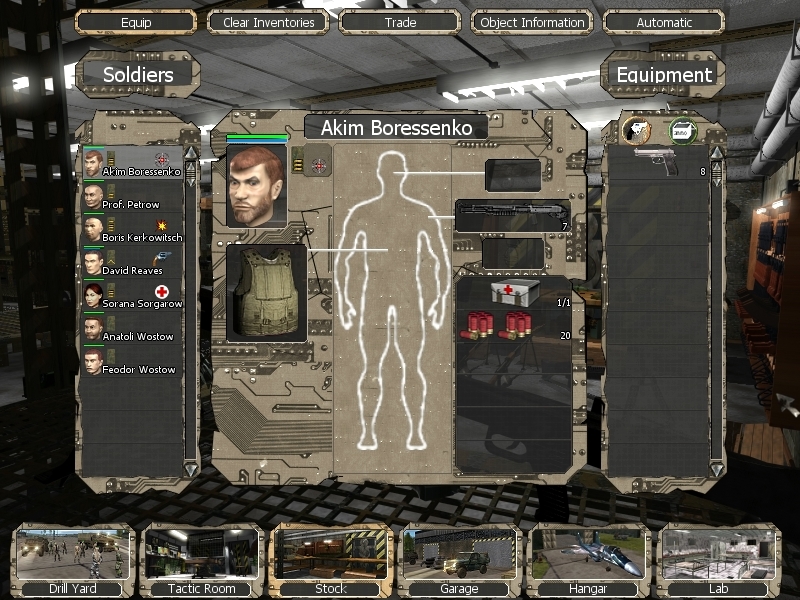
Equipping your soldiers is done through this simple interface. The slots are mostly self explanatory, but I guess I should say that the top slot is for face gear, and that the slot below the weapon holds throwing weapons. Every soldier has six inventory slots, but they have tight stacking limits. How exactly you use their inventory space, highly depends on your style and on what gear is available to you.
In this screen, you can also see our last hires from the first mission; Anatoli and Feodor Wostow. I'll generally show new soldiers during missions, but it also doesn't matter much. The people who don't belong to the core team are blank slates without any character whatsoever. They don't even keep their silly voices.


In the Stock, you also can access the game's encyclopedia. It has entries for all the vehicles and weapons in the game, and for most of the other stuff that you'll find. The little picture even does a continuous 360 spin. This screen is actually a bit of a spoiler, since it shows a vehicle that we haven't seen yet.

But enough of that, let me show you something much more interesting - the trade window.
Hey, Wlad! How are you doing? Oh me? Yeah, I'm doing a guided tour for the newbies, and now I have to explain this weird trade system you've got going here. Ah, come on. Don't be mad about it! I already told you that we could streamline this process a little bit better...
Anyway, this is were you'll probably spend a lot of time. Trading between missions is pretty important, and it has some sneaky rules to it. First up, there is no currency and you have to trade things for other things. Under his face, Wlad will give a response about the trade, and this is your guide for how much your items are worth. Now, behind his replies is a sneaky system that will never be mentioned or explained to you - his profit rate. If you have read the info tab about the Seekers, you learned that they have to pay taxes to their guild, and that is the only hint about this system. And it's a stretch to even call it a hint. Wlad's selection of items is randomized and will be different in each game. But you can influence the quality and quantity, by paying attention to his profit rate.
Wlad has four different responses.
"Never!"
This is obviously showing that you're not offering enough stuff, you cheapskate.
"If you really want to..."
Means that he will be making a loss with this trade. It's tempting to go for that response all the time, but it'll ruin his selection in the long run. Especially in the early game, you should stay away from that response. Otherwise you'll ruin your chances at having better gear available to you early on. I'm only going with this response, if there's a large bunch of expensive things that I really want without burning all of my capital. And that won't happen often.
"Ok. Let's trade."
This response is neutral and will not influence his selection. It's a good idea to aim for this response if you don't want to rip him off, but also can't offer enough for a good trade.
"Delighted!"
This is the response you usually wanna go for. Because it means that Wlad makes a profit, and will expand his selection. But don't just pile stuff and overtrade like crazy! You have to be a bit careful in balancing your trades, so you don't loose too much in the end.
I have no idea how the system exactly works, in terms of actual numbers and whatnot, but that is basically the gist of it. And if you don't figure this out, you can ruin your trader for the whole game! But you want to have him prosper, so that he can offer you the best tanks, choppers, guns, and other sexy tools of destruction. Wlad will basically be the only source for certain vehicles and types of ammo, so treat him well.
")
Since I'm a horrible min/max type of player, I put a lot of balancing and thought into my trades to make the smallest loss I can get away with. Let's take a look at how I do that.
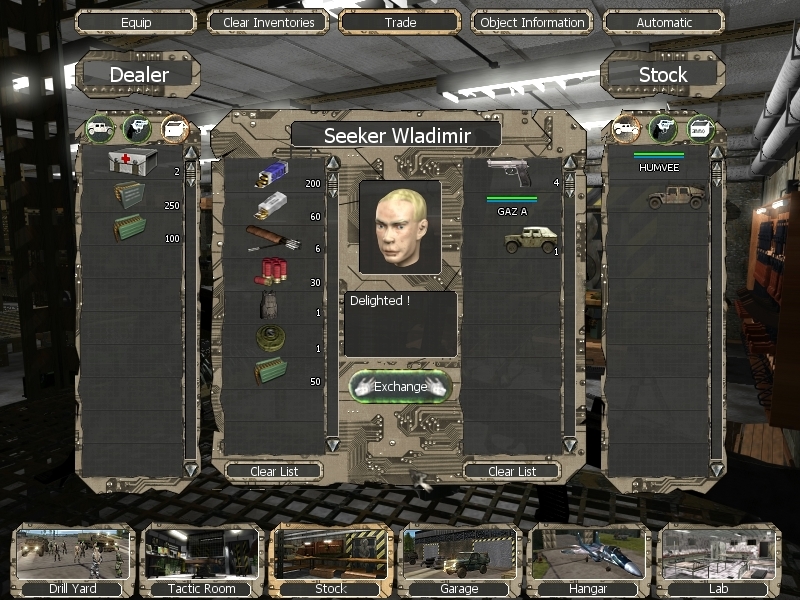
This trade is carefully balanced, and as good as it can get right now. I'm offering just enough stuff to keep him at the good response. I just picked the things that I wanted, and then piled some things that I wanted to get rid of. Then I checked how many more things I could add to his side, without changing the response. That's why I buy shotgun ammo and a single mine, for instance. I don't need those, but it's a way for me to preserve some of my capital. I think I could have gotten more 9mm, which is the cheapest item in the game, but Wlad was dry. But I won't bore you with my tactical trading-action, and will just talk about the new things that I buy. As said, I'm horrible about stuff like that, but I'm also doing it to have the best gear for this Lp.
There are some new items in that trade, so let's look at them.
- 9mm rounds
- 5,45mm rounds
- Crossbow bolts
- Shotgun rounds
- Heavy Vest
- Anti-tank mine
- 7,62mm rounds
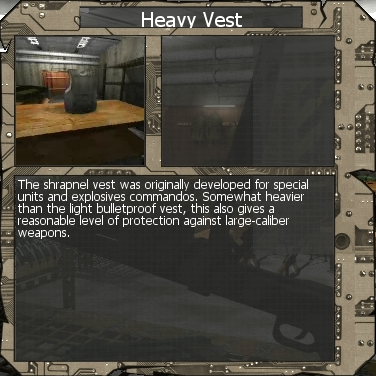
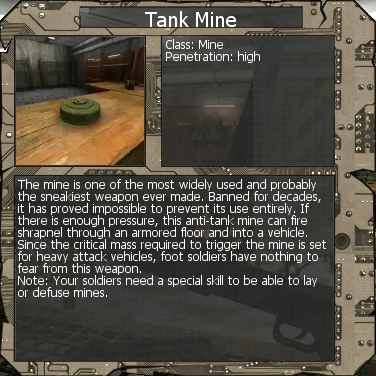
The Heavy Vest is obviously a better version of the Kevlar Vest, and I'll talk about mines in the next update. 5,45mm is for an assault rifle that we'll see much later, but I already stockpile some ammo for it. Also, while Wlad does offer a Crossbow, I only buy the bolts since I'll get a free one real soon.
Phew, that was a lot to digest, wasn't it? I can understand if you start to get weary, but we're already at the halfway point of our tour, and there will be some refreshments laid out at the next stop. So, if you would please follow me...
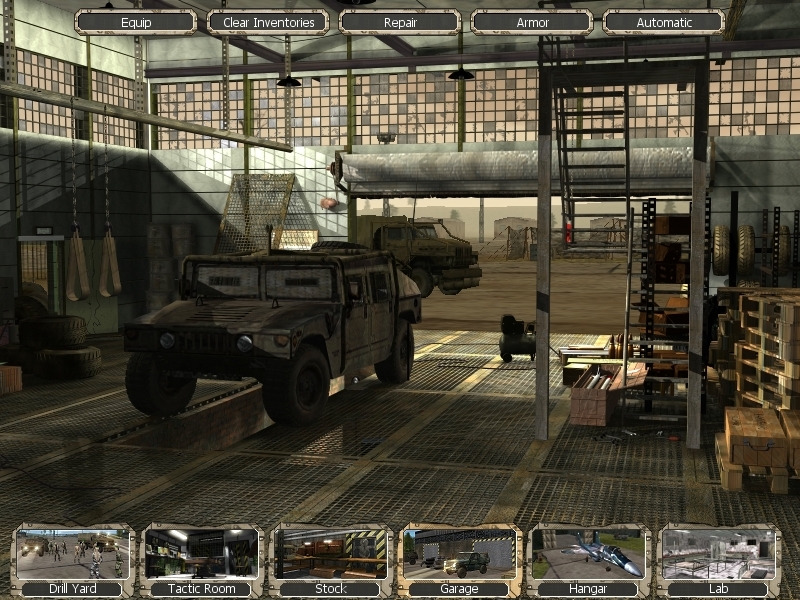
This is the Garage, where all ground vehicles are handled. Please, have a drink and a sandwich from the table over there. You can also take a seat, but again, please don't touch anything. We don't want somebody to have a nasty accident with the heavy machinery in here, now do we?
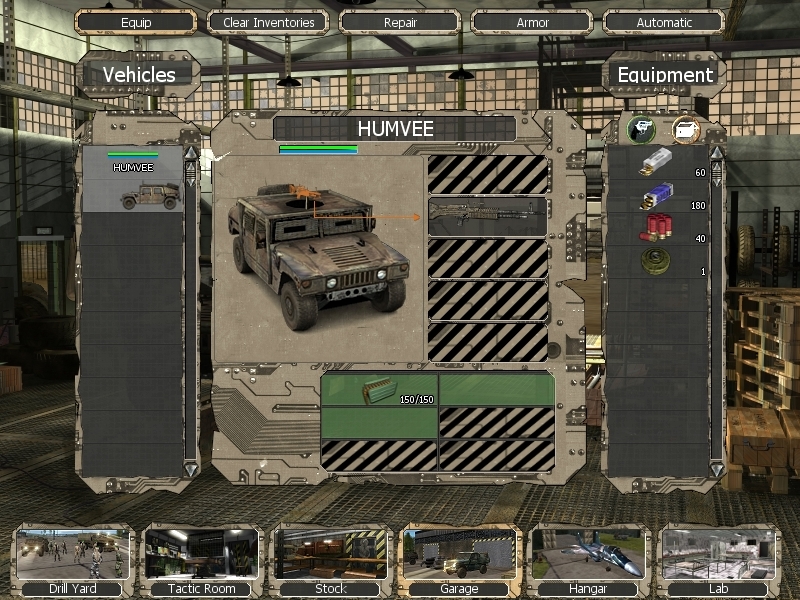
Equipping vehicles works very much like equipping your soldiers, though vehicles have different slots. Our Humvee has a single hardpoint for weapons, and there are three different systems that the Humvee can fit. We already have the M60, and the other two systems will appear in short order. Most vehicles have fixed weapons though, which makes sense since you can't really unscrew the cannon from a tank and replace it with something else. Lastly, vehicles also have inventory slots but there are two kinds of slots for them. The Humvee has general slots that can fit a wide variety of items, and they also have higher stack limits than the slots that soldiers have. You have to use these slots for the ammo that the Humvee needs, supplies you want to bring, or loot that you want to take. How you balance that is really up to your style. The other kind of inventory slot can only take ammunition. This makes sense as tanks aren't known for having a lot of interior space, right? Those slots basically represent magazines for tank shells, or machine gun rounds.
Of course, the Garage is also used to repair your vehicles after combat.
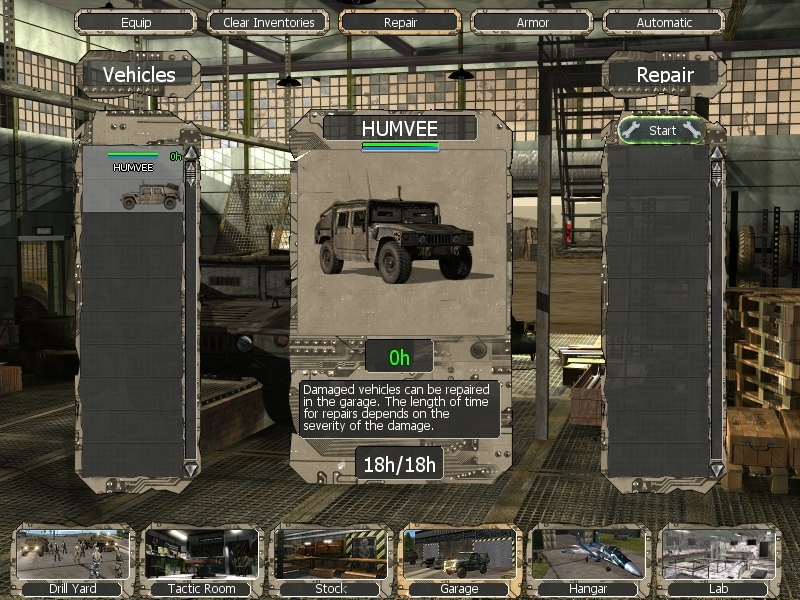
Repairing costs you time, and you only have a certain amount of hours each time you are at your base. This amount will increase as the game progresses, but the time-pool is the reason why I'm so adamant about taking minimum damage. See, it's shared with another function that is very important for the difficulty that I'm playing on.
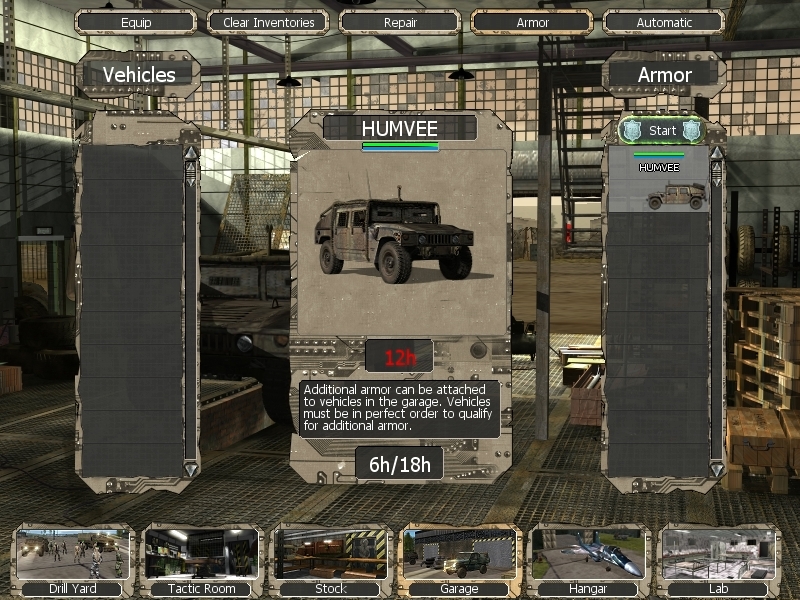
You can apply a permanent armor increase to your vehicles once. This will turn the blue armor bar into a white bar, and makes your vehicles more durable. And remember, due to the difficulty setting, my vehicles are weaker by default. But since the time-pool is shared between the two functions, having multiple damaged vehicles probably prevents you from doing this. To give you some perspective on this; the Humvee would just flat out disintegrate when hit by a tank shell. With the upgrade, it'll survive a nasty hit with a sliver of health left, and can be repaired. Though, the crew would probably still die. Yeah, vehicle crews will take damage while driving, and there is even a special kind of ammo to exploit that. I've been thinking about how I introduce you to the exact damage mechanics behind vehicles, but I'm going to postpone it until we have more vehicle combat as examples.
Well, is everybody fit and refreshed? That's good to hear! Then we can move on...
This is the Hangar, and here you can handle all your aerial units. This works very similar to the garage, with a few exceptions. But I can't show them now, as we have nothing in here. Sorry, I would have loved to tell you about this, but we're still kind of getting our gear together. Anyway, please follow me to the last stop of our tour.
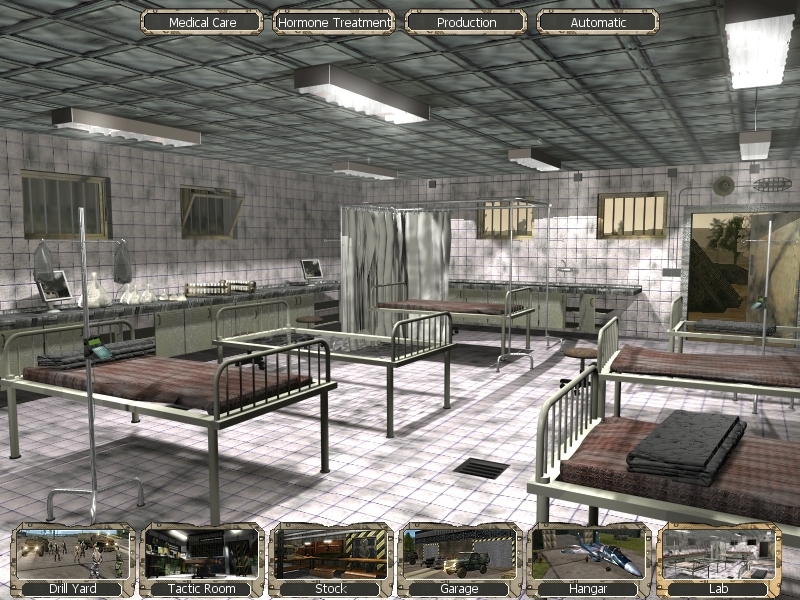
This is the Lab. Its main purpose is to provide medical care for wounded soldiers, which also works on a time-pool like repairing vehicles does. This time-pool, is again shared with another function, so you want to fix your wounds before you end a mission. It's perfectly okay to burn through your medkits, since they are not hard to come by.
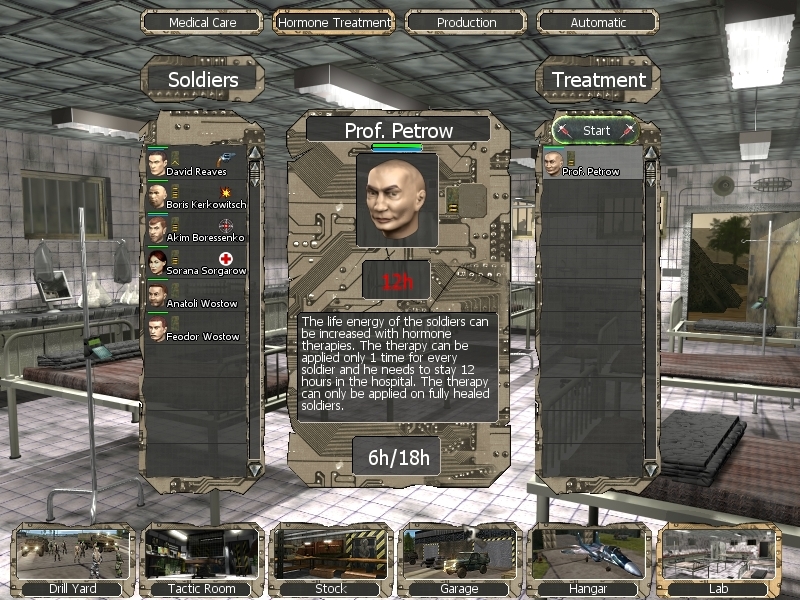
The second function I'm talking about, is Hormone Treatment. It's similar to the armor function of the garage, but permanently increases the health of a soldier. And that increase is nothing to scoff at, as it can literally mean the difference between life and death. Overall, you'll get enough time to treat all your soldiers eventually, but it's a good idea to do this as fast as possible.
The last function of the lab, is the production.
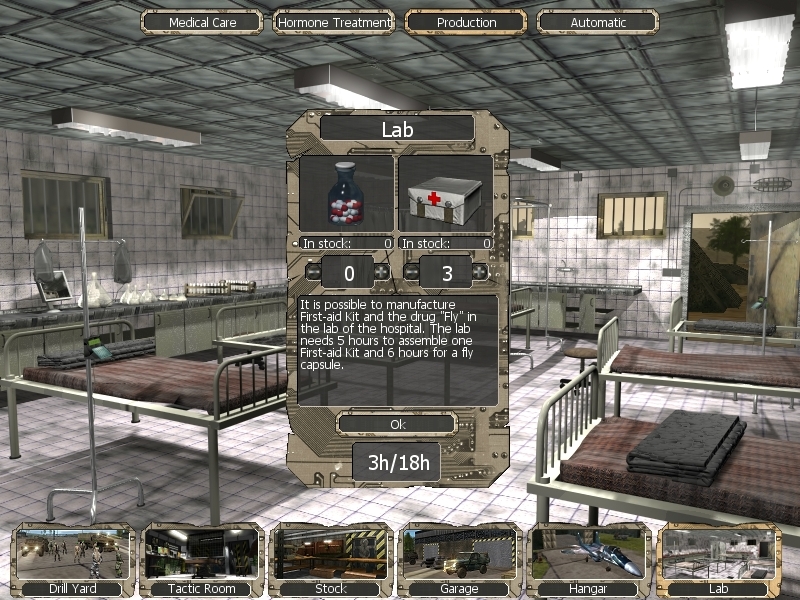
Luckily, this works on its own time-pool, so you can just crank out all the medkits if you want to. I'm mostly going to produce Fly though, since it's a free trade item for me.
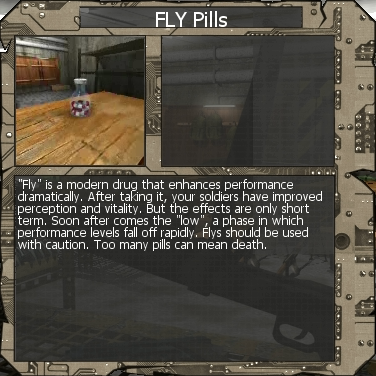
I never felt the need to actually use the pills, so I can't tell you the exact effects.
Well, this concludes our tour!

I hope that I did a good job, and didn't bore you to hell. For those of you that want to stay with us, please assemble next to the Stock. One of our officers will await you there for the recruitment process. You don't need to have any previous military training, as our main criteria is how ridiculous your voice sounds.
