Part 117: Operation Mange Poutine: Inspecting the Ground
Good news! Managed to get three, count them three, screens of ACTION! this time. Seems the key is to record in short bursts. Unfortunately, when things got tense, or at least intense of thought, I forgot to 'change reels' if you will. Had a 1.25hr video that was useless. Damn.Anyhoo. We're here to talk about the Turk's turn. Which, I feel, went pretty good. Following the trend of less damage each turn, but I feel that it was significant damage with the addition of some sheer bravery.
Inspecting the Ground
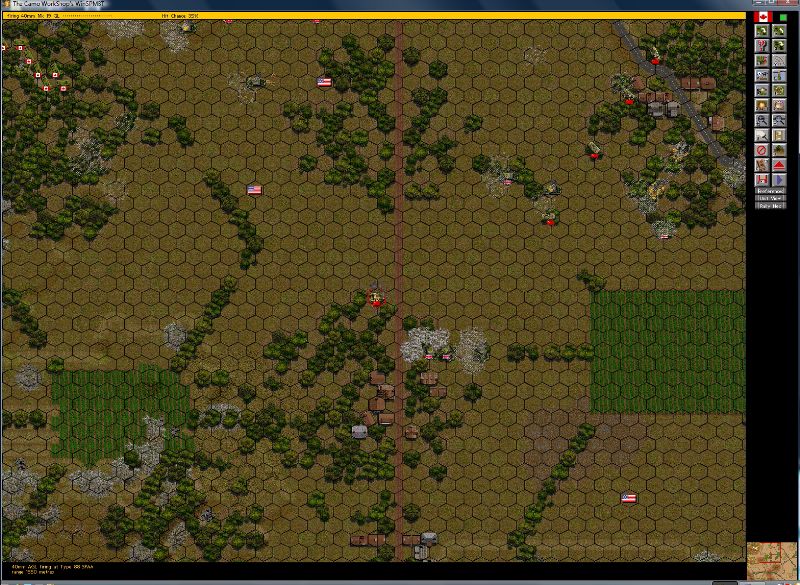
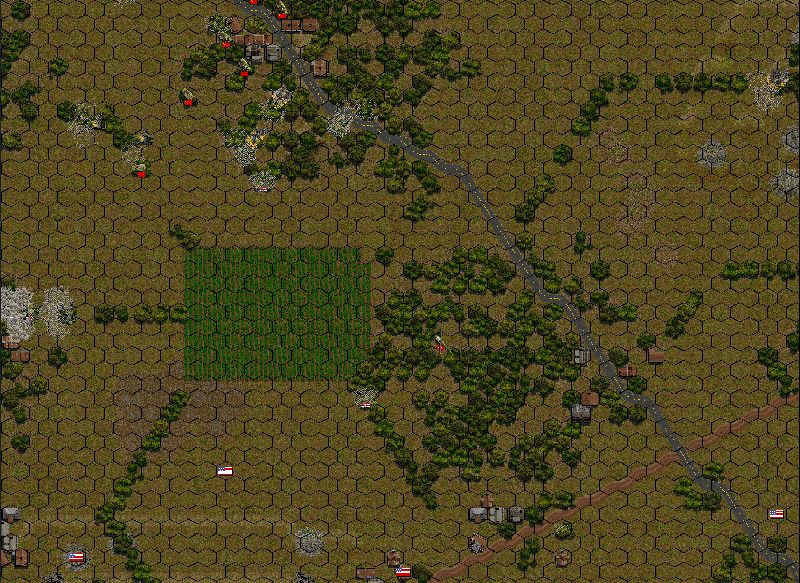
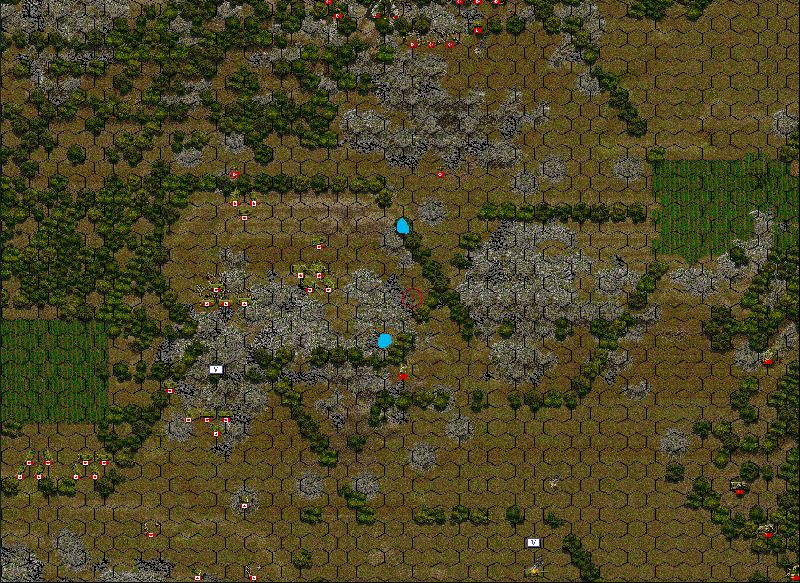
Opening up the files, my first thought was to check out the land in front of my forces. Crescent-Red Valley looked something like this:
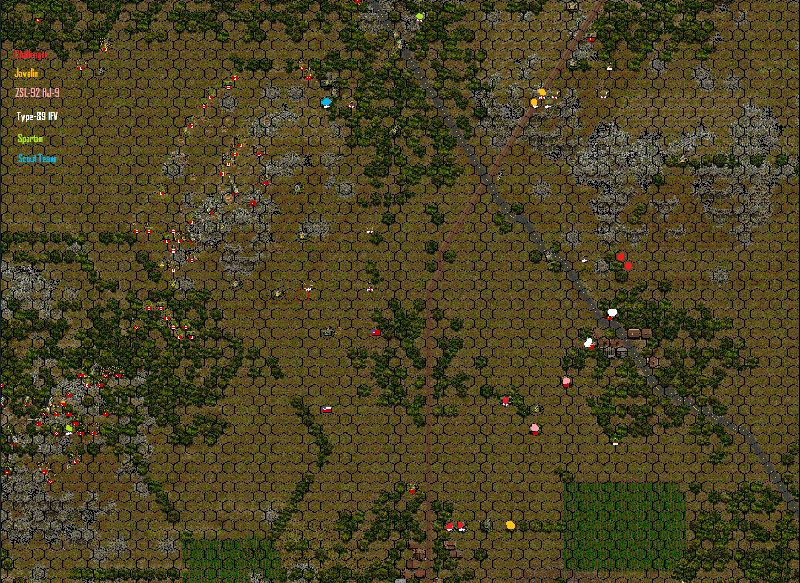
Click for full
5 Challengers (one of whom is immobilized) spread as two on each side of the valley, 3 Javelins (possibly 4) spaced with the Challengers, 2 ZSL-92 HJ-9s centrally located, 2 Type-89 IFVs at the fore of the Crescent Hamlet, a Spartan insinuating himself on both sides of my line, the last Type 88 SPAA in the middle, and even one Scout Team chilling admist our line between Crescent and Sand Hill.
Quite the force before us. Parts are thin and battered (British); others are fresh and newly arrived to reinforce (Chinese). With the British positions largely known and the Chinese still setting up (they're HJ-9s are useless this turn), they are fabulously weak this turn. Question was how to capitalize on it.
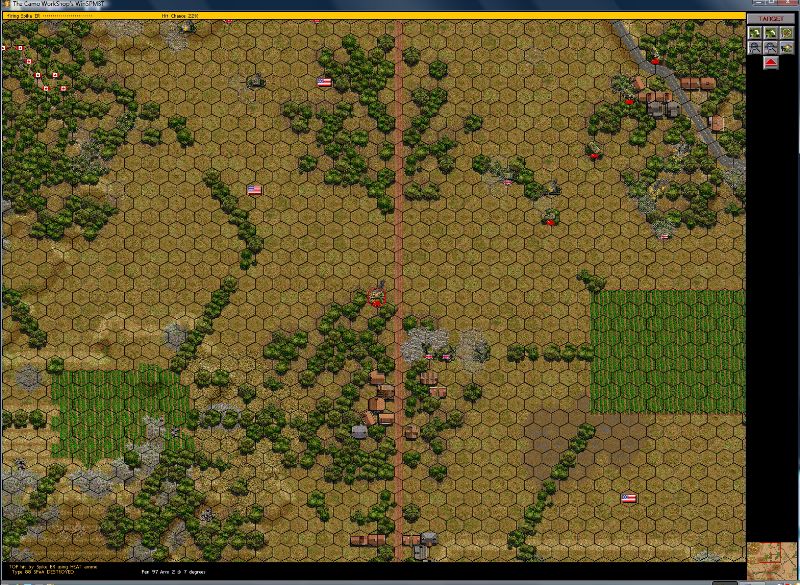
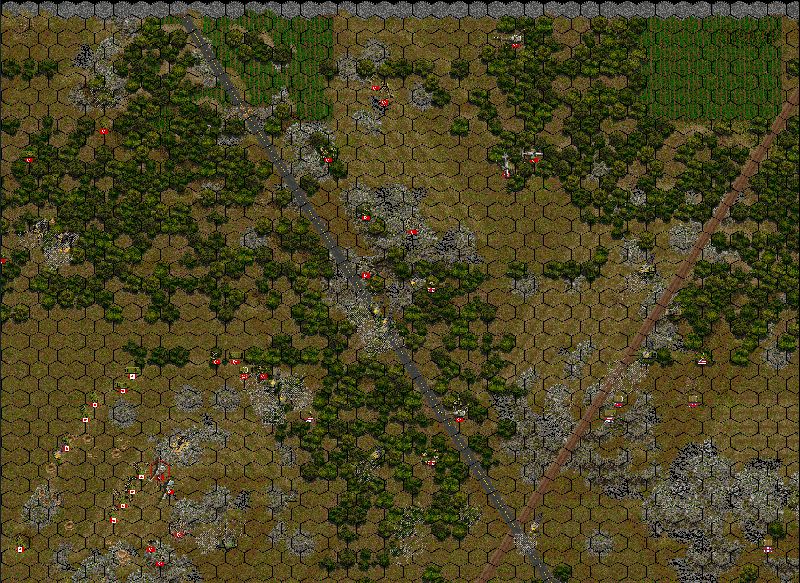
But before making any moves I also inspected the rest of the line. The most interesting, and most telling, portion was the American's. For one, this little honey made itself known:
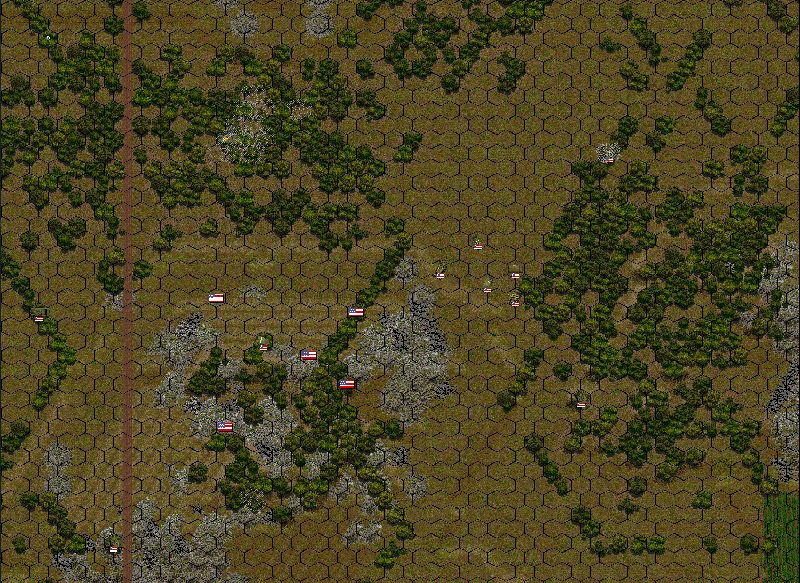
Click for full
Looks like a portion of the American forces are heading north toward Red Ridge. Could be that they're swinging around through the forest between Red and Yellow to attack, but Yellow Ridge isn't very treacherous to cross. To my eye, this is a telling symbol that a full-scale attack is not coming in the south or at least not in a significant amount or timely manner at this moment. Added evidence is only two M1A1 AIMs are visible moving. Only two in that big, wide, open plain that has two sets of Canadian recce eyes covering. It'd take some skillful and masterful maneuvering to hide a sizeable force in that open plain.
So, did you guys spot the two new units in that shot? There's a new humvee and a new tank:
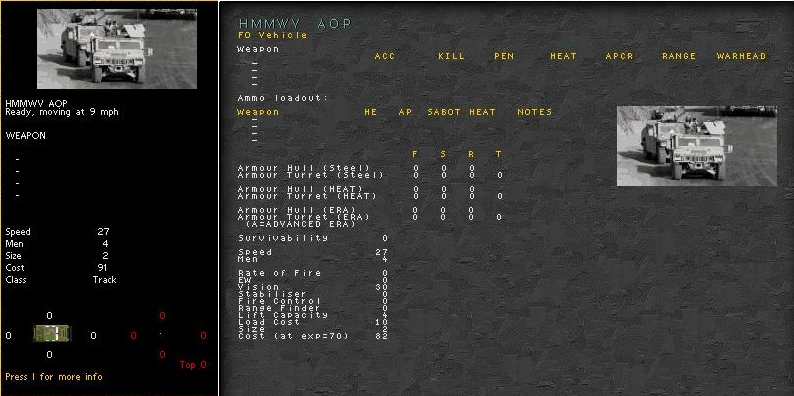
It's the American equivalent of bunnyofdoom's Greek Jeep FOs. They have not optics upgrades, fancy artillery calling gizmos, armor, or any appreciable defense. What they do is move fast and call in artillery quicker than normal units. It has its uses, if narrow. Okay, not really all that interesting. The Americans did a battery of artillery; makes sense they'd bring at least one FO. No, the really interesing thing is this:
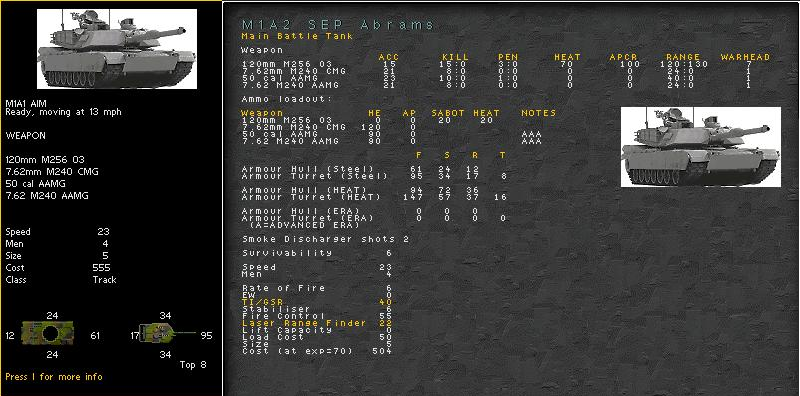
The M1A1 AIM! Wait a second? How is that interesting? We already know the Americans have AIM variant Abrams. Well... the AIMs we've identified have been labeled M1A2 SEPs by the game (for some odd reason). These boys are labeled (by the game) as M1A1 AIMs. But look at the stats; they're better than what we've ID'ed as an AIM. Stronger armor, better fire control, and the tank has a crew of greater than 70 experience. This is the real M1A2 SEP crewed by the regular Army. A right solid, nasty modern MBT.
A company of tanks, if a mixed bag, should have put the strain on The Merry Marauder's budget. Shouldn't be too many more heavies.
Doing Shit
I expect this is the part you're waiting for. What did I manage to do. In short, blow up the last Type 88 SPAA, finish off that immobilized Challenger in the center of Crescent-Red, immobilize two annother two Challengers (one from each pair on either side of Crescent-Red), eliminate the last of the Spartans, pop a Land Rover, and kill that ZSL-92A that's sitting on Crescent Ridge Ne of the Javelins. The damage dealt in a nut-shell
To go into a bit more detail, I started the turn as I'm wont to do with my light ATGMs, the Milans. The one on Crescent Ridge had no sight on anybody and shifted position. The one on Sand Hill made a try on a ZSL-92 HJ-9 but only managed to lightly damage it (likely still deadly). He followed up that shot with a attempt at one of Type-89 IFVs. Having moved less, Milan had a better 65% chance to hit, but he missed.
Finished with my Milans, I decided to nab the easy kill of the Spartan stuck in my line on Green Ridge. A 40mm AGL situated in an adjacent hex made short work of the Spartan then tried to lob a few rounds at the Type 88 SPAA, but the thin armor refused to yield to the grenades.
Click for full
Intent on relieving myself of the last deadly object in the valley to my helicopters, I tasked one of my Cobras to lob his last Spike ER, ATGM, at the damn thing. The top attack missile turned the SPAA to scrap.
Click for full
With the flak threat dealt with, I turned my attention to the Javelin teams on Crescent Ridge, the other enemy denying us freedom of movement. Two M2 .50cal machineguns dropped off last turn popped up and attempted to suppress the damnable ATGM teams. Much to my suprise, real damage was done.
Click for full
One team was destroyed outright, and the other received a casualty (the second of three possible)! The British forward deployed ATGMs were almost dealt with entirely! Further action would most assurely be leveled later in the turn.
Continuing with units that did not have to move to strike targets, I came next to a TOW launcher on Green Ridge. With sights on both the immobilized Challenger in the center of the valley and a nearby ZSL-92 HJ-9, I chose to only blow up the Challenger for the ZSL had moved far enough to bring down my chance to hit to less than 20%. Not worth chancing the loss of a valuable TOW-2b for no gain. The safer option of the Challenger did net it's end. Challenger number 16 racked up. Four left.
To deal with the last four I unleashed my Cobras. Four missiles managed to two strikes, but even with their top-attack warheads all they managed was to immobilzed two Challengers (one from each pair). With no more powerful anti-tank weapons at my diposal or with line of sight, I had to be content with levying up some artillery to finish off the Challengers (1.5 turns from now). With the Challenger issue decided for the turn, I let one Cobra expend his last Spike ER on the ZSL-92A chilling near the Javelins on Crescent Ridge.
With the AA in the valley dealt with, I released my Cobras into the valley to hunt with their 20mm cannons. The northern pair managed to suppress the damaged Javelin team on Crescent Ridge and pop a Land Rover skulking near Crescent Hamlet, the hamlet just south of Crescent Ridge). One of the southern Cobras attempted to savage the second ZSL-92 HJ-9, but was unable to crack its armor. The daring lad decided to land in the middle of the valley instead of retreat behind a hill.
Click for full
Taking after the brave Cobra, my one recce helicopter exuberantly decided to jet across the entire valley and make it to the other side of our opponent's line.
Click for full
He made it all the way from Green Ridge along to the circle of forest SE from Crescent Hamlet along the primary road. Seems there isn't much enemy strength between Crescent Hamlet and Red Ridge. Exploitable perhaps.
Largely just shuffled my infantry for the rest of my turn. Loaded up my boys on Sand Hill. One more turn and they'll be airborne again. Moved the boys on Green Ridge toward their choppers, and moved the boys on Crescent Ridge forward to the Javelin positions.
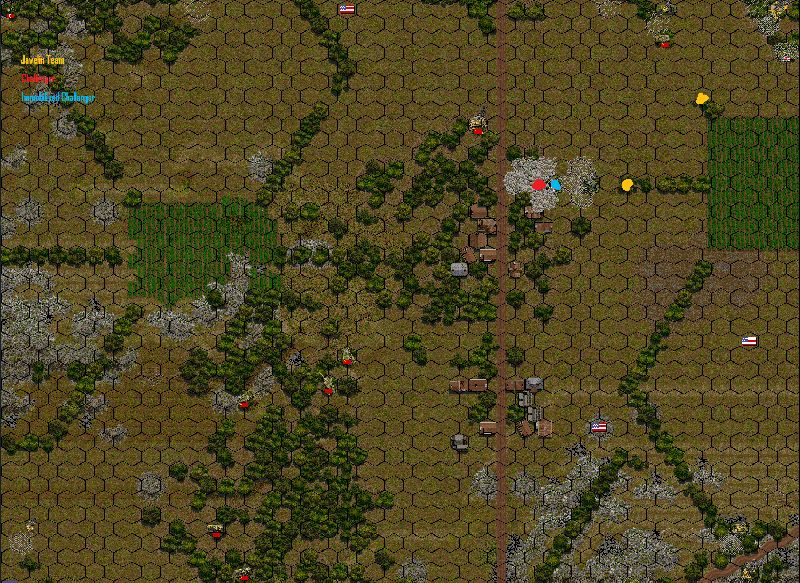
Making one last effort to kill the Javelin teams on Crescent Ridge I threw forward one of the Sand Hill choppers, with a Airmobile section on-board. He zipped forward expended all his attacks on the Javelin team, and managed to finish it off! There are no more Javelin Missiles on Crescent Ridge. There's still two teams without any missiles, but we can now move in the Maple-Sand Valley without fear. Just watch out for artillery. There's also a Scout Team (marked on the first image) that has MBT LAWs that will fuck you up. Chaos. Get your boys off/out from behind Sand Hill. Move toward Crescent Ridge, more artillery is sure to come, but for the love of GOD do not go within a hex of the Scout Team I just mentioned. THEY WILL FUCK YOU UP!
Click for full
However, we ain't done with Javelins yet. Moving one of my Cobra scout cars forward a Javelin from near the southern pair of Challengers launched a missile. My boy was right lucky and managed not to be killed, but that's confirmation that there is a pair towards the south of Crescent-Red Valley. There seems to be no end of them. And the Land Rover popped near Crescent Hamlet might indicate another pair taking up position inside.
Click for full
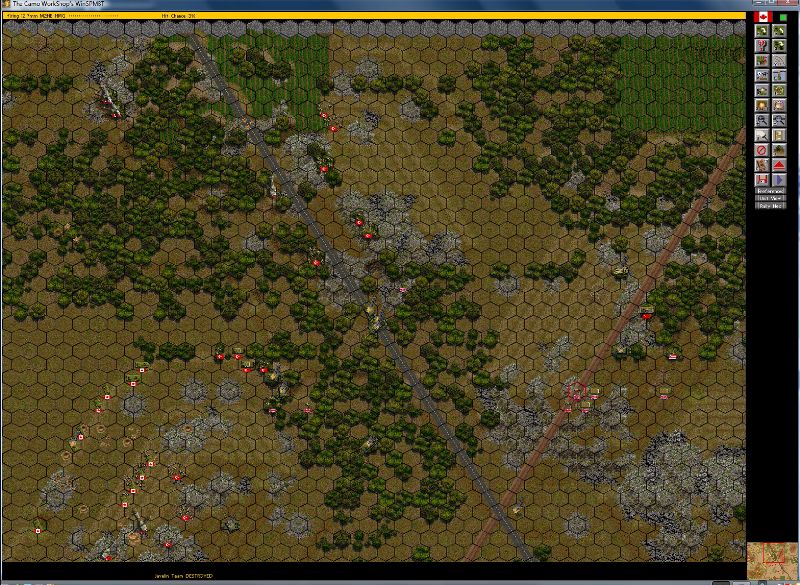
The other notable thing was the Recce Bird's gallop to the far side uncovered three of the four ZTZ-99A2s hiding in the forest between Grey and Red Ridge. What's interesting is that one pair of the platoon is moving backward. They're swinging around to gain sight on Green and Sand Ridge to support the British and the positions in Crescent-Red Valley. Also the IFVs in the same forest haven't moved. 'nother sign that our opponents might be acting defensively at the moment, not offensively.
We should certainly still get the Greeks making some semblence of a line, but the time to panic isn't here yet.
End of Turn
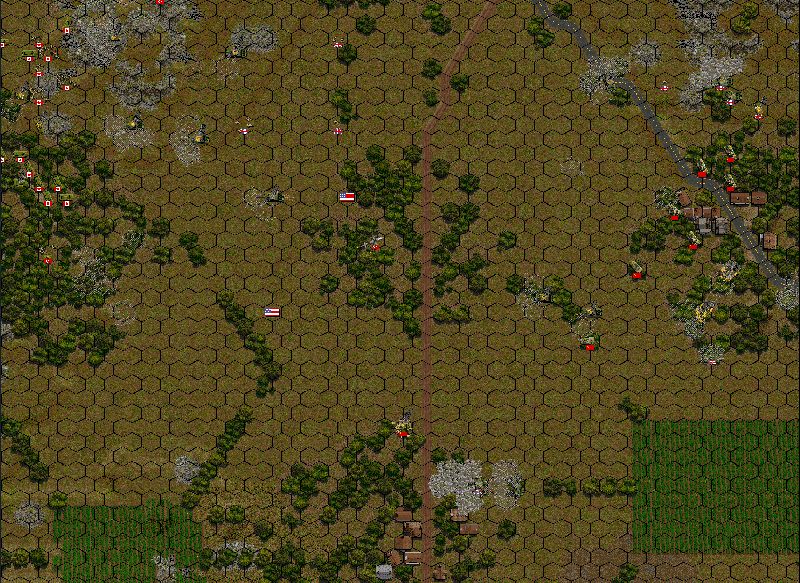
Here's Crescent-Red Valley at the end of the turn:
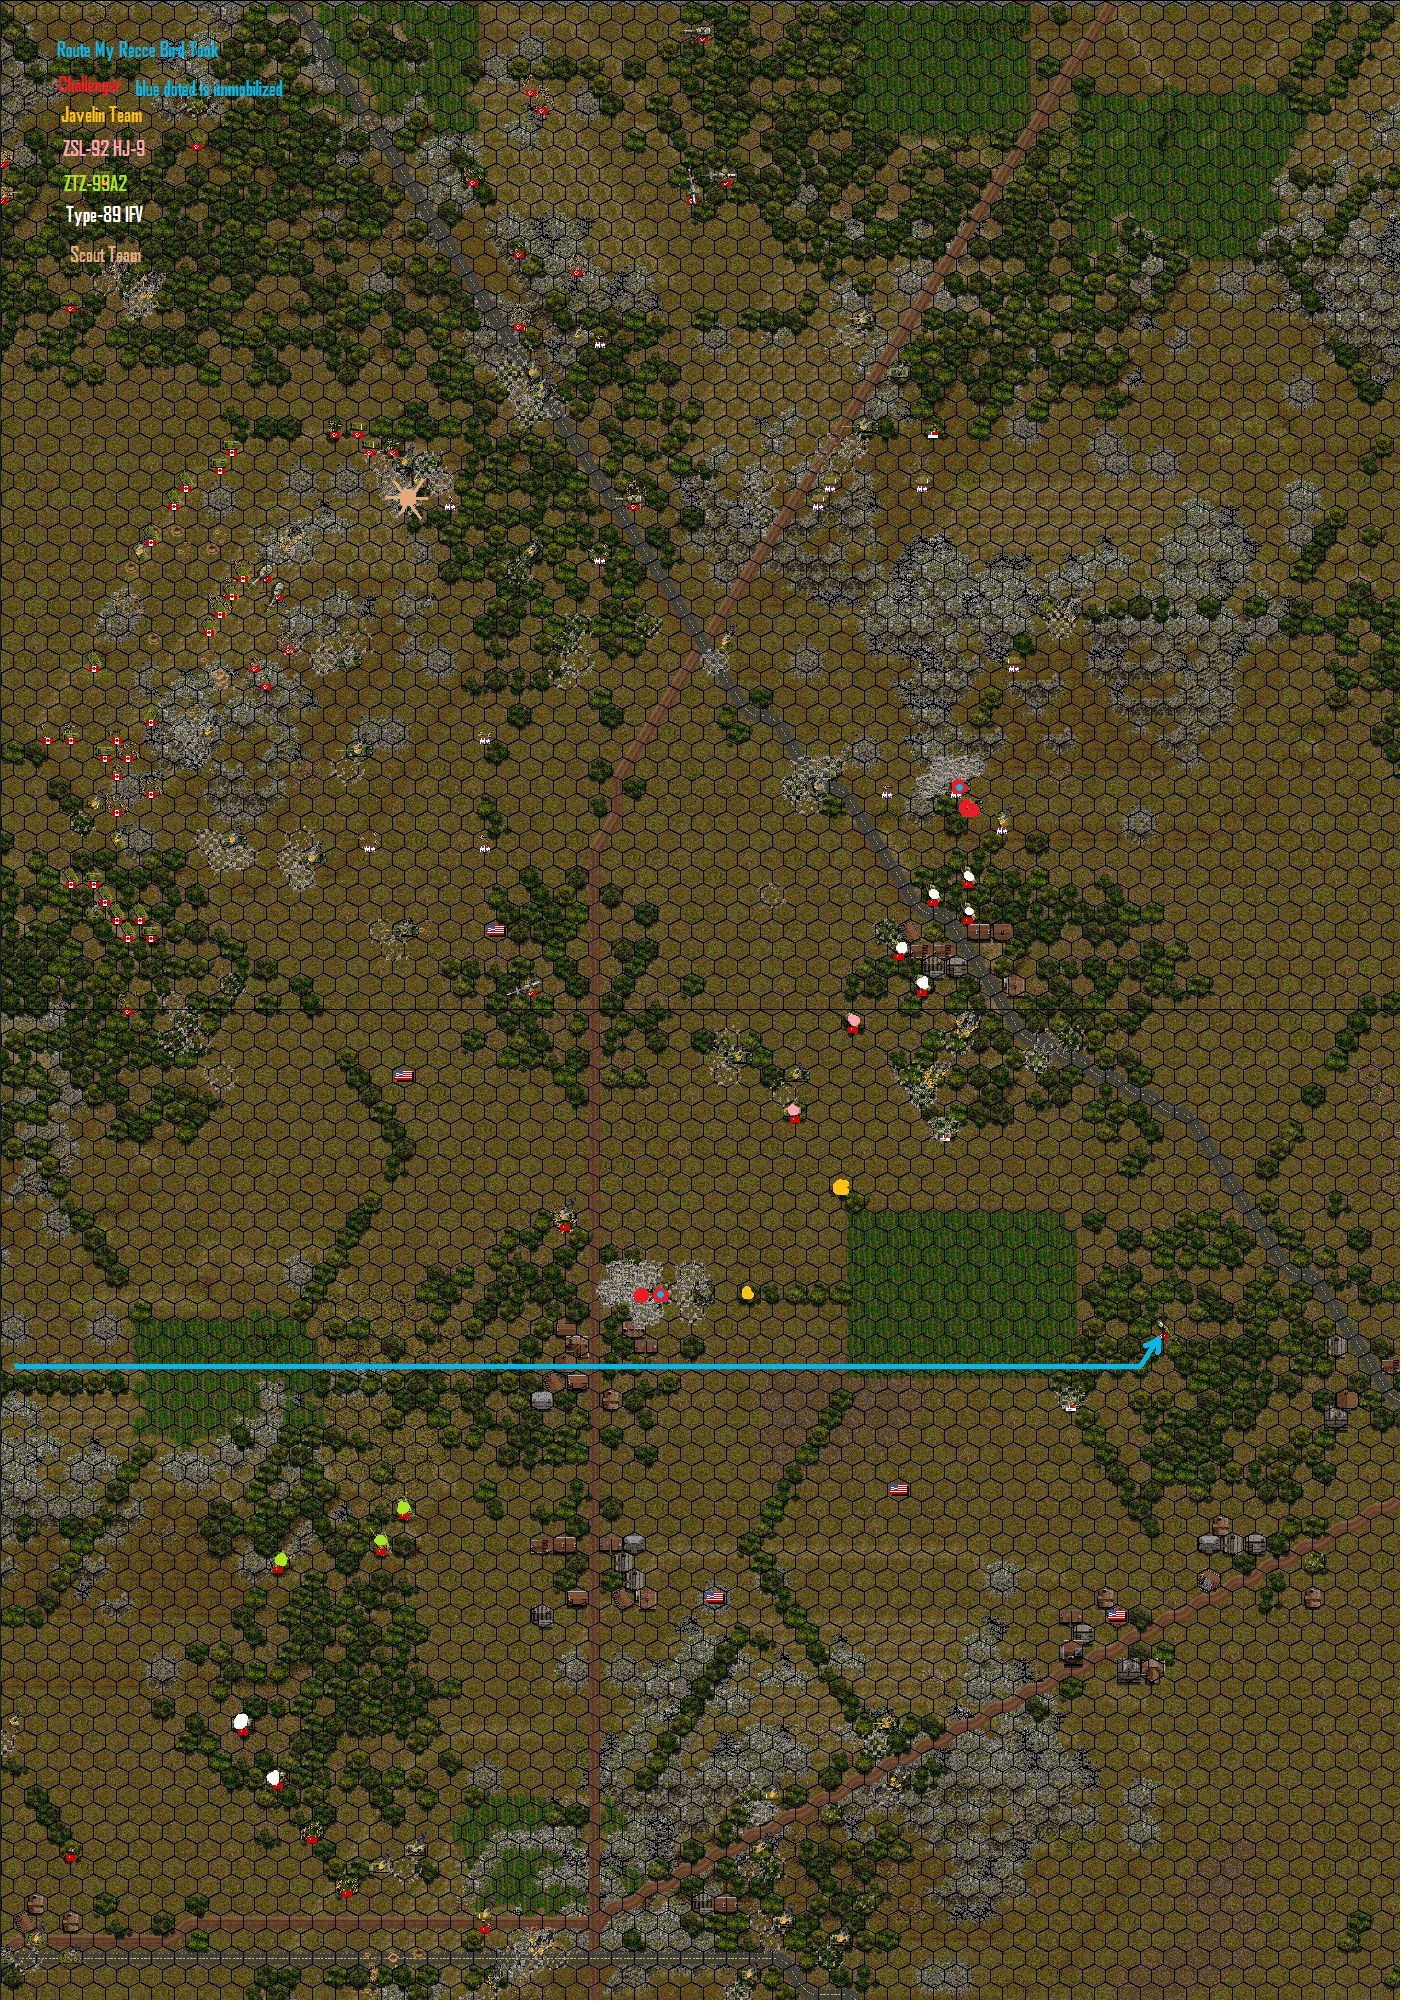
Oh and Canada? Just going over the hexes near your Leopard 2s next to Grey Ridge. Found two hexes that should give you view of the ZSL-92 HJ-9s in both the Crescent-Red and Blue-Red Valleys. Task two from the platoon on each and we could mop up four of our opponent's powerful ATGM systems when they're vulnerable for no cost to ourselves.
Click for full
Now it's well past when I should be asleep, so I'm going to just apologize for any lack of clarity, fix things/answer questions tomorrow, and post the updated kill board tomorrow. But to reiterate:
1 Challenger killed (4 left!)
2 Challengers immobilized
2 Javelin teams killed (don't ask)
1 ZSL-92A killed (don't ask)
1 Type 88 SPAA killed (now extinct!)
and 2 Spartans killed (now extinct!)
Plus went exploring! and moved shit toward Crescent Ridge.