Part 34: The Trooper
#32 - The Trooper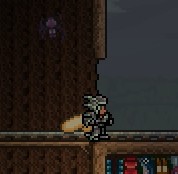
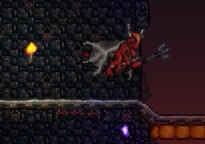
Hello everyone, and welcome back to Rivershire. Sam just finished building a set of Titanium armor. The immunity set bonus is pretty good, as it gives us a 2 second window of invulnerability for 30 seconds every time we deal damage to an enemy. I know that sentence is a little hard to untangle, so bear with me through this...
We shoot a green slime with our shotgun. This action gives us a buff called Shadow Dodge for 30 seconds. A few seconds later, a blue slime hops through us. Instead of taking the damage, we get a 2 second window of complete invulnerability. This set bonus, like I said, is pretty damn good. It's not as broken as it might sound, though, because the effect has a 30 second ICD as well. So we can only benefit from Shadow Dodge once every half a minute.
So, are you all ready for the big event? While Hard Mode has a bunch of bosses, the first three are still the most badass to me. When the 1.1 patch came out, these guys were the endgame, and they were appropriately hard.
So why don't you go back and click on that link up at the top as we get started on this ass kicking tour.
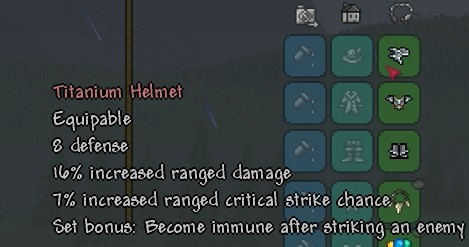
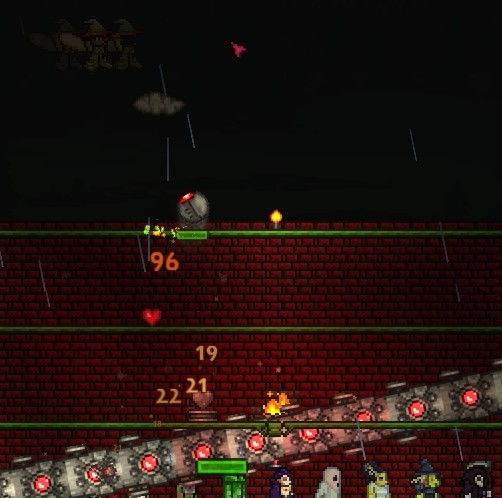
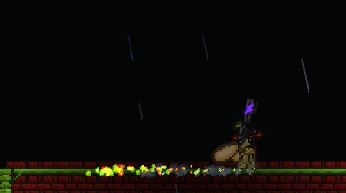
The rain is a nice, if unintentional, touch. It always makes for a good climactic confrontation. I'm not going to show off every weapon, but I've reforged everything to have the best possible modifiers.
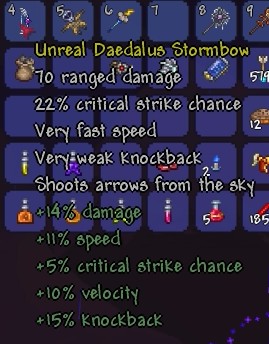
This is our MVP, however.
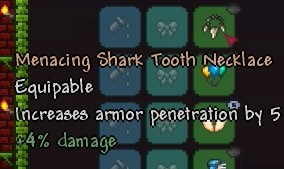
All of our accessories have similarly been reforged to provide +4% damage each. That's an additional 20% damage with all five accessories! Some people are probably going to give me shit for not reforging to Warding on my accessories, because that used to be the thing to do in the 1.1 patch.
The Warding modifier gives you +4 defense per accessory, which adds up to 20 total defense. That's almost a 50% gain over our 38 defense right now, but remember the math from earlier in the LP. That 20 defense is only 10 damage reduction. More to the point, however, is the fact that Warding means you're planning on getting hit a lot. I like playing aggressively and prefer to end fights before they start through overwhelming preparation.
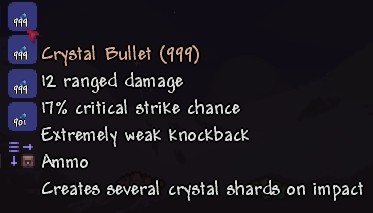
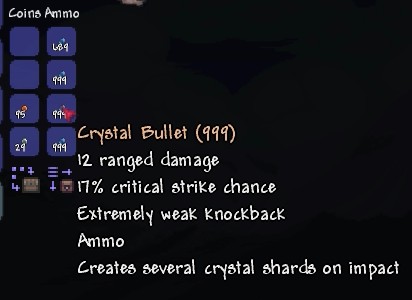
Our shotgun will be using these crystal bullets, while the Daedalus Stormbow will be using the remainder of our Frostburn Arrows that I created back in normal mode. Well, that's enough dawdling from me so...

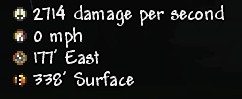
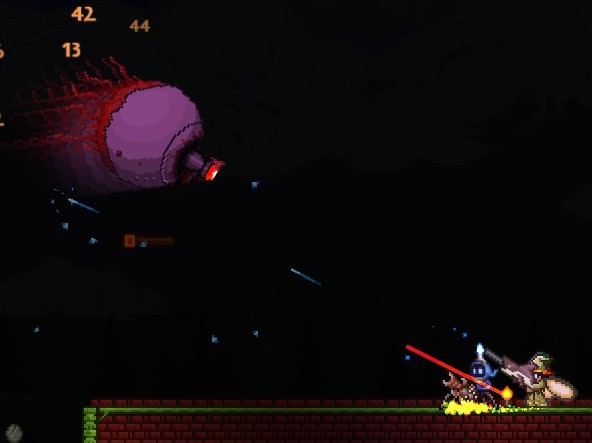
Destroyer Boss Fight
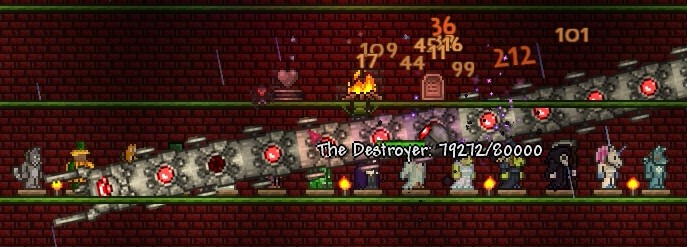
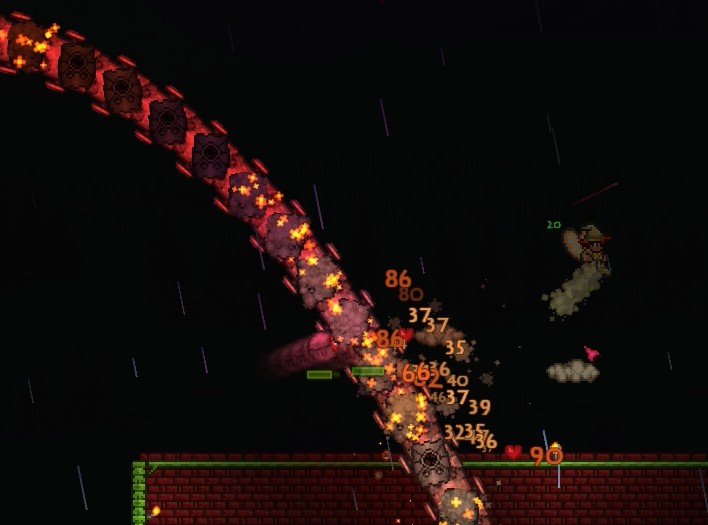
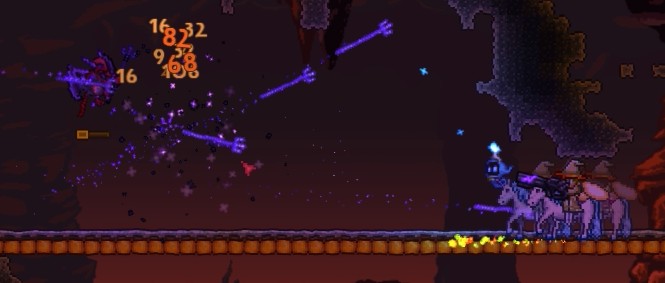
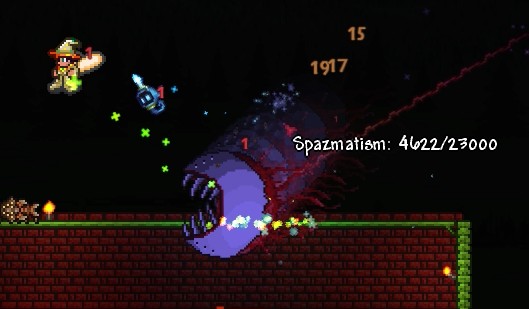
The Destroyer is the hard mode version of the Eater of Worlds. And, yes, you've read that right. It has a staggering 80,000 HP. It's also the single longest enemy in the game, being made up of 82 segments stretching for an astounding 239 tiles.
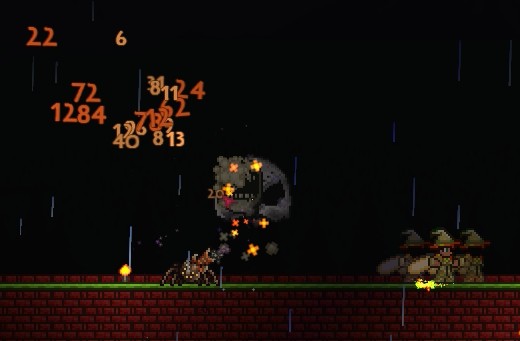
The Destroyer is also made up entirely of metal, with each segment having a red light. Those red lights will detach throughout the fight and turn into these floating probes that are attacking us here. The Probes will always drop a healing heart when they die.

The Daedalus Stormbow doesn't trivialize this incredibly dangerous boss, but it does level the playing field. Because the boss is so long, the arrow rain has a much higher chance of hitting multiple segments
According to Dr. Fetus the Destroyer can't be hit with debuffs.
Dr. Fetus posted:
The Destroyer can't be hit by debuffs. Not since 1.2.1.2..
In fact, we're dealing almost 3,000 DPS to this boss thanks to the Stormbow.
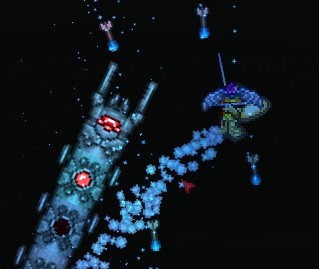
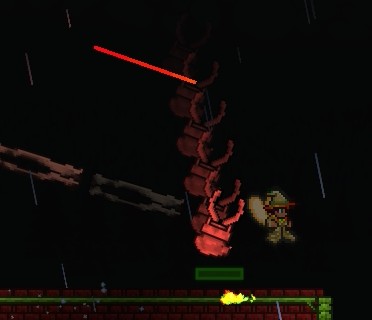
Because the Destroyer has the same AI as the Eater, it tunnels along and tries to hit you with its head. Unlike the Eater, we can't destroy its heads, so we have to actually dodge out of the way. If the head smacks you, then you're gonna take about 70 damage.
The boss's body also will shoot lasers at you just by virtue of being nearby.
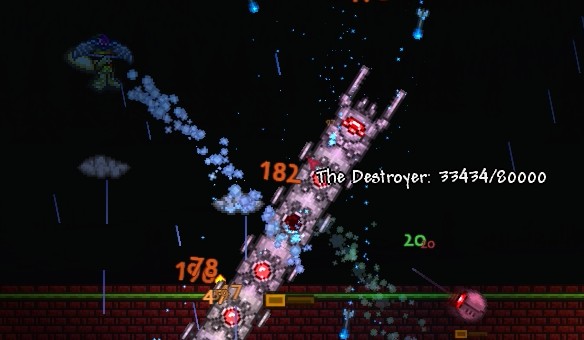
Because I prepared so much, the fight takes barely any time. The video that I linked above is 70 seconds, which includes 15 seconds of Probe cleanup.
When it dies, its whole body explodes at the same time.

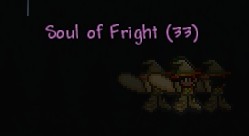
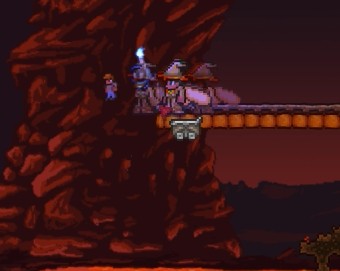
Hard mode bosses always drop a bunch of gold and some greater healing potions. The first three also always drop a bunch of hallowed bars and a unique type of soul, which you can see floating up at the top of the screenshot.
At the time the screenshot was taken, I was busy trying to kill the last of the Destroyer's probes, so I didn't record picking them up. But those are about 30 or so Souls of Might.
That's one down so... NEXT!

The Mechanical Skull boss is next.
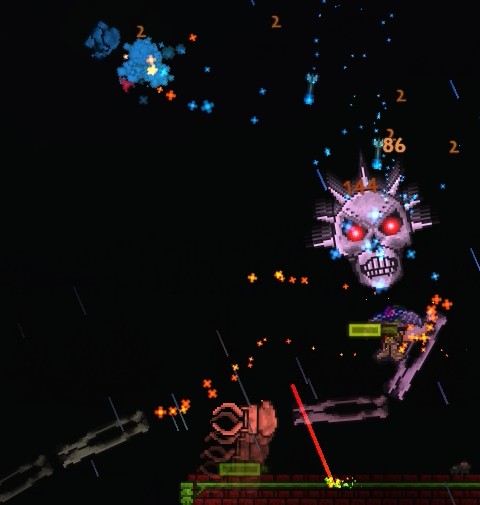
Skeletron Prime Boss Fight
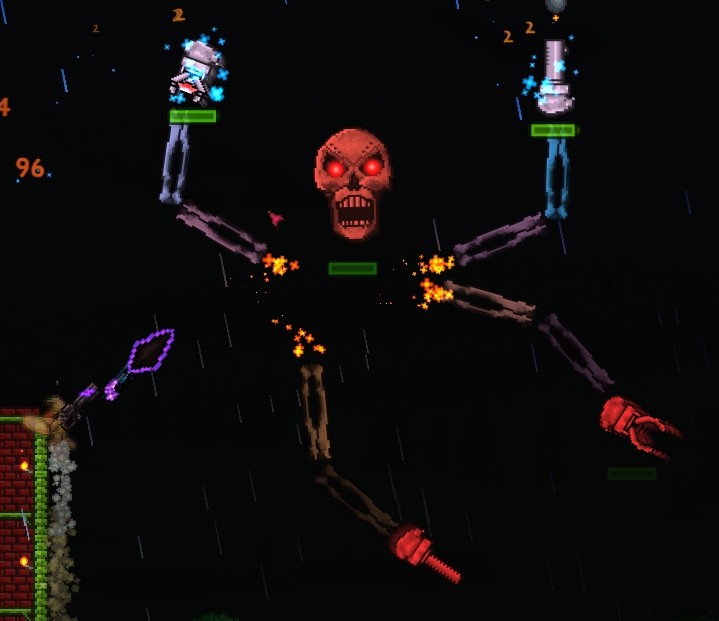
Skeletron, as you can see, has gotten a bit of an upgrade. Like the Destroyer before him, he's made entirely of metal and is honestly the easiest of the first three hard mode bosses as long as you're moderately good at dodging.
First off, the four limbs each have different attacks and different amounts of HP.
The Prime Cannon is the one in the top right of the image. It shoots bombs up into the air like Yosemite Sam. It has 7,000 HP and is probably the least dangerous of the four limbs. When Skeletron Prime enters "rage mode" the Prime Cannon will rapidly shoot its bombs at the player.
The top left of the image has the Prime Laser. This shoots a laser like the Destroyer's body or the other boss we haven't seen yet. In "rage mode" the Prime Laser will shoot more rapidly. It has 6,000 HP.
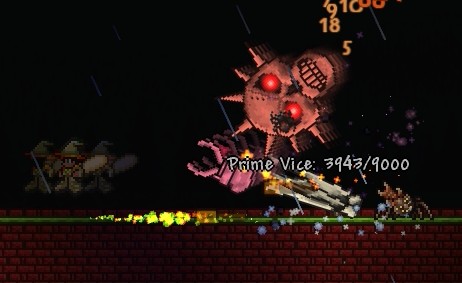
The lower right of the image has the Prime Vice. It's one of two melee focused arms, and like its brother the Prime Saw (lower left), all it does is occasionally swipe at you. In "rage mode" they both swipe more often. Both melee arms have 9,000 HP each.
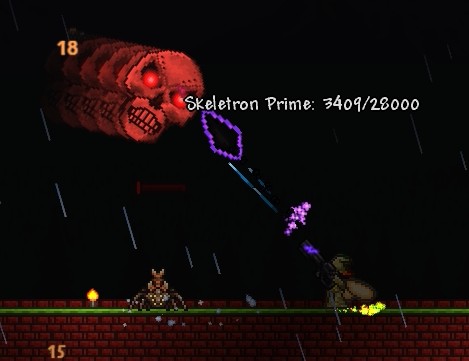
Skeletron Prime's head is much the same as the normal mode counterpart, just with more HP and defense. It even does the spinning thing at you in "rage mode". It has 28,000 HP.
Even though Skeletron Prime is the "easiest" you still have to actively dodge around. You've got four arms swinging independently of each other plus the head all to keep track of while you're dodging around. It can get pretty complicated quickly.
Pictured: the much-vaunted rage mode.
Because you have to be constantly on your toes throughout the entire fight, this is easily one of the most fun fights in Terraria. It tests your mobility in ways that no other fight does. Even with the gif and the screenshots, it's hard to show just why this fight is so fun. So be sure to watch the video I linked above.
The laser dies without much fanfare.
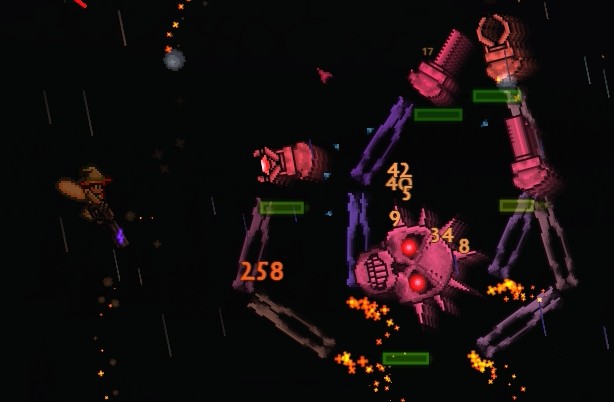
Like Skeletron before it, Skeletron Prime gets easier as each arm dies. Here we've taken out both ranged arms, so now we just need to dodge the melee ones while blasting them down.
The Onyx Blaster shines in this fight in particular. Direct hits on the arm we're aiming for still let us score incidental hits on other parts of the boss. Even misses will usually mean a hit on another part of the boss.
Now all that's left is the vice grip.
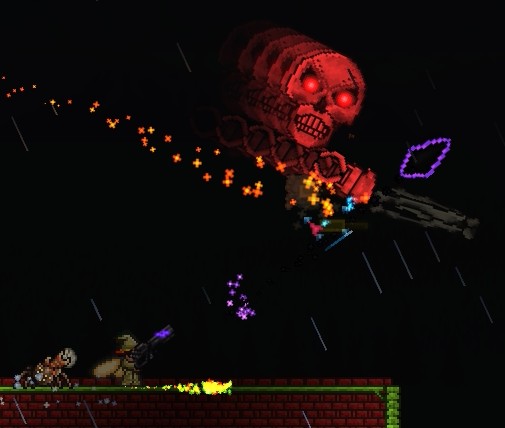
With only one arm and its bladed head, Skeletron Prime is a pretty pitiful sight.

Finally the head is by itself and the fight is all but over.
So let's just put this boss out of its misery, shall we?
Out of the first three hard mode bosses, Skeletron Prime is the one you have to watch the time for closest. If morning comes and the Destroyer is still active, it just fucks off back to wherever it came from. If morning arrives and Skeletron Prime is still active? It goes berserk and turns into Dungeon Guardian Prime. We all know what that means.

So with the night halfway over, let's retreat back to the base to regroup.

First things first, we're going to need to buy some illegal gun parts from the arms dealer.
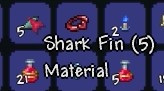
We're also going to need a couple shark fins. I'm sure most of you can see where this is going.
Lastly let's pull an old friend out of retirement.
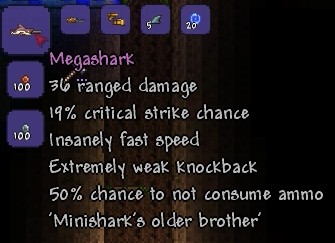
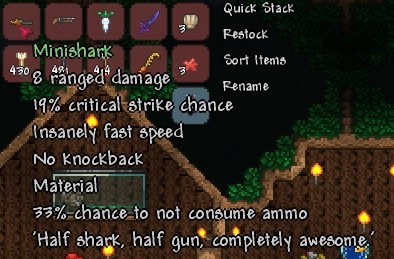
If we combine all of those items, along with 20 Souls of Might from the Destroyer, then we wind up with a Megashark. Our little Minishark has grown up and become Death, the Destroyer of Worlds.
I have a feeling we'll be keeping this baby for a long time to come.

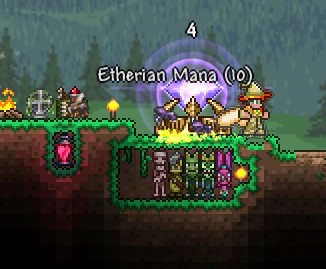
Because we've killed at least 1 mechanical boss, the game has progressed forward and a bunch of new content is now available. For instance, the tavernkeep now sells the tier 2 weapons, as well as armor sets. This means that the tower defense has graduated to tier 2 as well!
The new turrets are much stronger than the first set, and are needed to make any progress. So I hope you grinded up at least 25 defender medals ahead of time.

I briefly touched on it earlier, but Hallowed bars drop from the mechanical bosses. These are the next step up in progression from Titanium. We'll need to kill the mechanical bosses multiple times in order to get enough bars to make everything. Of particular interest to us is the armor, which looks awesome as hell and takes 54 bars.
You can also make legendary weapons with Hallowed bars. With 12 bars we can make either Excalibur or Gungnir, both of which are absolutely massive melee weapons. We can also make a Hallowed Repeater, but we're pretty well covered with ranged weapons for now.
There's more, of course, but we'll need drops from all three bosses first. But before that, let's look around this post-mechanical boss world a little bit.
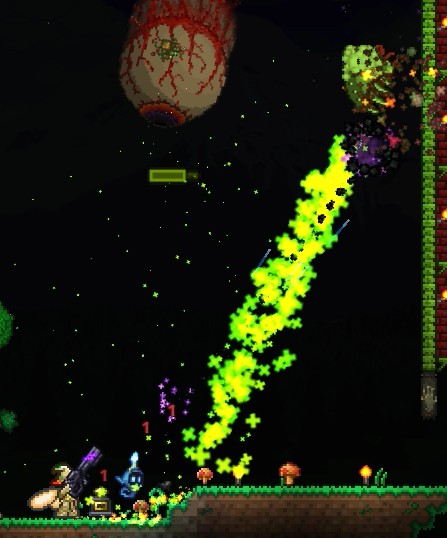
Well that didn't take long. Meet the Red Devil, one of the most dangerous normal enemies in the game. They don't even start spawning until at least 1 mechanical boss has been defeated.
These spears are why these guys are so dangerous. One of those spears will take off more than 140 health from us! There's also a new type of bat in Hell, the Lava Bat. I have difficulty distinguishing them from common Hellbats at a glance.
While we're down here, let's kill the Wall of Flesh for laughs.
24 seconds later...
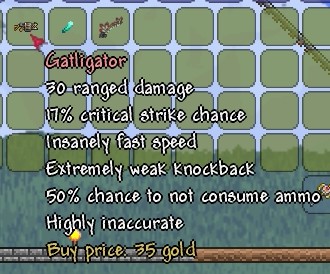
Moving on... rarely during hard mode, the traveling merchant will sell a Gatligator. It fires as fast as the Minishark or Megashark, but is super inaccurate. It sprays in roughly a 40 degree cone in front of you.
The last thing to show off is the tier 2 tower defense stuff. I don't actually have a successful recording of one, so you'll have to bear with me. There are a lot of changes, however.

More enemies appear on each wave, and at earlier waves than they do in the tier 1 defense.

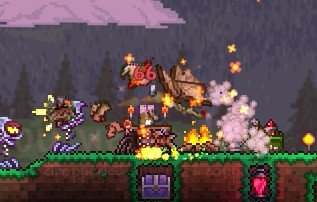
New enemies also get introduced, like the kobolds here.

Then things get out of hand.

Drakins have a shitload of health and make the world's most annoying noise when they take damage.

As you might imagine from the next step up in difficulty, it's just harder. Also worth pointing out is that the defense no longer ends on wave 5. Instead we have to last through wave 7.

Wave 6 is where my only recording of the tier 2 defense ends. Things get out of control quickly.
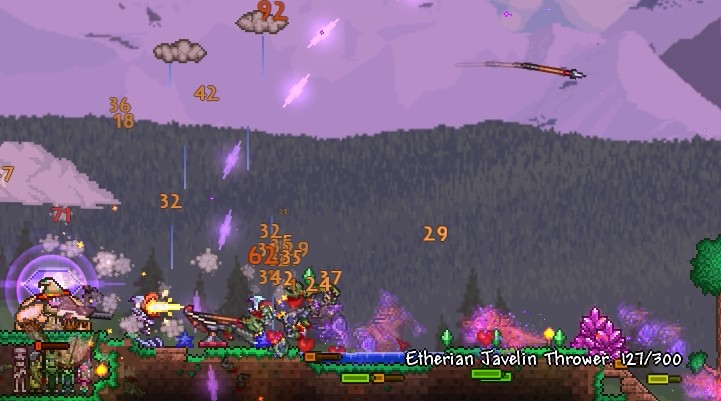
Wither beasts put up this weird shield that... according to the wiki, the shield cuts your defense by half. It's called Withered Armor, appropriately enough. Many years of playing MMOs has trained me to not be anywhere near the obvious bad aura, so I don't think I've ever been hit by it.
By the way, watch out for kobold gliders. They kamikaze into you for a truckload of damage.
Now, I don't have a screenshot of it, but the tier 2 defense ends on wave 7 with another miniboss encounter, this time against a gigantic ogre. This thing spits sludge at you that slows you down by a lot for way too long. But we're interested in what the ogre drops.
Apprentice's Scarf
Squire's Shield
Huntress's Buckler
Monk's Belt - (Each one of these is an accessory matching a set that the tavernkeep NPC sells. They increase sentry damage by 10% and increase the max number of sentries you can have out. None stack with each other.)
Tome of Infinite Wisdom - (A magic weapon.
Phantom Phoenix - (A bow that shoots multiple arrows at once. Converts arrows into flaming arrows regardless of type. Occasionally shoots a gigantic phoenix that pierces through everything it touches. 24 ranged damage.)
Brand of the Inferno - (Equip this with a shield and right click just before an attack hits you, and you'll dodge damage and be able to retaliate for 500% damage. This buff stays if you switch to a different weapon. 44 melee damage.)
Sleepy Octopod - (A staff. Has a really awkward swing arc and requires you to charge it to deal damage. 40 melee damage.)
Ghastly Glaive - (A giant spear weapon.
Creeper Egg - (A light source pet. It's in a couple of the above screenshots. It's a little ghost with a candle on its head. Unlike most other light source pets, it keeps up with you perfectly.)
Ogre Mask - (Ugh. More godawful masks. I'd be interested to see how many players equip these awful things for more than a second.)
Ogre Trophy - (More trophies? Sure why not.)
According to Zoig I got some stuff wrong about the defender items.
Zoig posted:
Two things ya go wrong about the defender items there.
The Tome of infinite wisdom shoots tornadoes with its right click at any time, not randomly.
The ghastly glaive only summons ghosts when you hit with the glaive, and it doesn't fire in a straight line, it hits any enemy on screen with a dragon from nowhere.
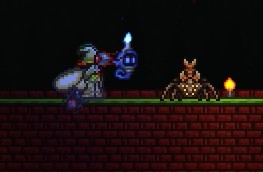
Let's get to what I'm sure you all have been waiting for. If you're good at recognizing patterns, then you'd have guessed that the last mechanical boss would be based on the Eye of Cthulhu.

You're right. They are.
The Twins Boss Fight
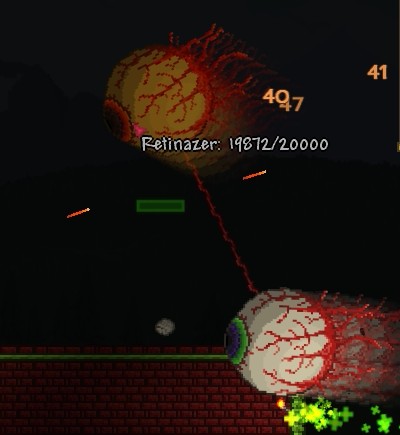
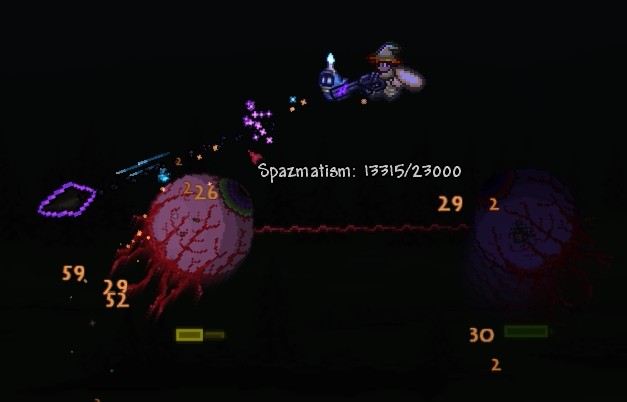
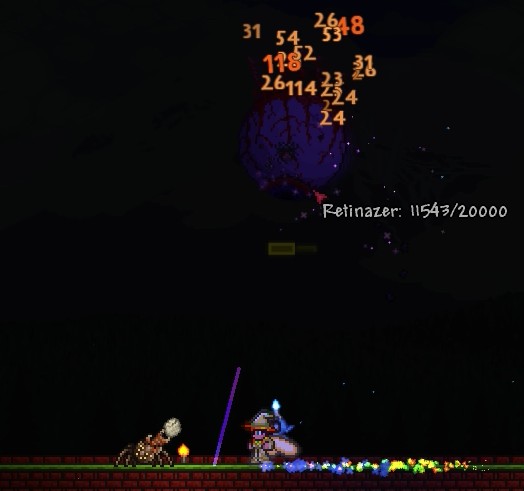
Hoo boy. The Twins are probably the hardest of the mechanical bosses. To start off with, they are linked by a thin red cord and where one moves, the other must always follow.
Spazmatism is the more dangerous of the two eyes. It fires cursed flames at you, while Retinazer "merely" fires lasers. A mistake that many players make is bringing the two twins down equally. This is perhaps the worst thing you could do in this fight.
In the first half, they are less dangerous. Their shots miss more often than not, and the big trouble is merely dodging them.
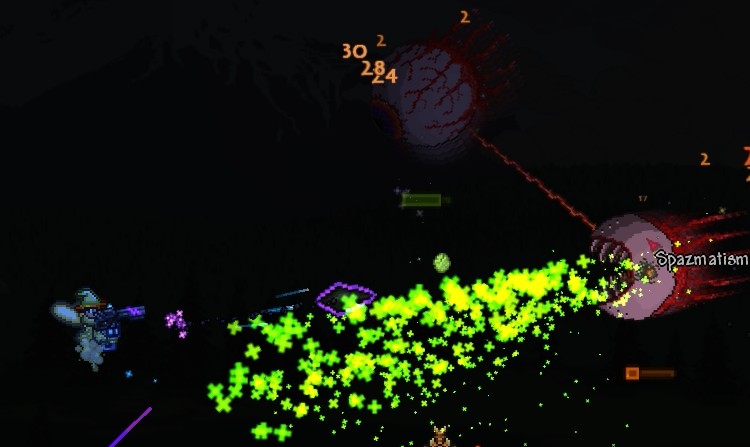
The Onyx Blaster will wreck them assuming most of the shots connect.
At least it will, assuming you don't forget to equip the right bullets. Not that, y'know, I've ever done that.
No matter what, though, just concentrate all of your fire into one of the two twins.
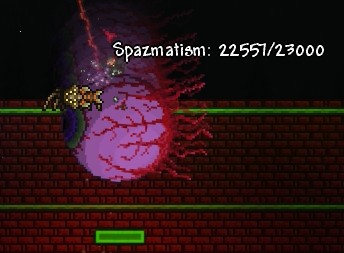
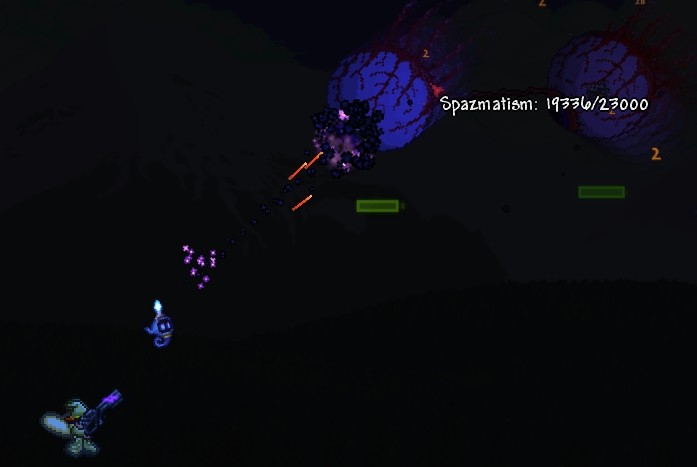
Once Spazmatism gets below 9,000 HP, like the Eye of Cthulhu before it, it transforms.
This is why you don't want both twins transformed at the same time. One doing this bullshit is bad enough, but both at once and you're just asking for trouble.
Sometimes Spazmatism gets tired of shooting a fountain of cursed flames at us and decides to charge instead.
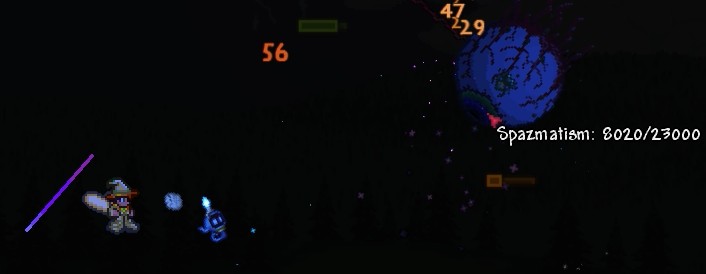
Once you're down to a single mechanical eye, the fight is a lot less complicated.
Relatively so, at least. This is a hard mode boss we're talking about after all.
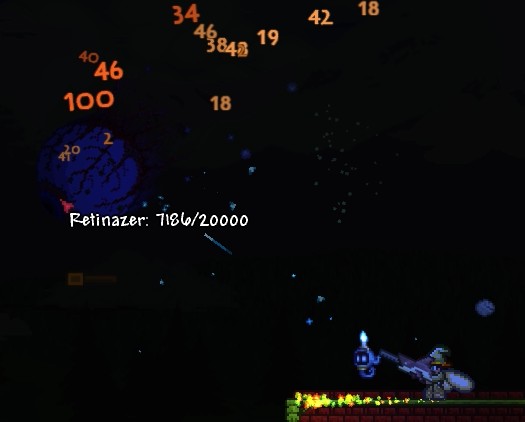
Once Retinazer falls below 8,000 HP, it also transforms.
Instead of turning into a flame spouting asshole, its cornea turns into a gigantic laser cannon.

Also instead of charging, Retinazer prefers to spam its laser.

But eventually both will fall.
Before we continue, I want to take a moment to explain something. I've been incredibly lucky in this LP. We all know that and it's plain to see. But the biggest stroke of luck I've had has been invisible. You see, from the moment we enter hard mode and smash an altar, we're fighting a losing battle against the RNG.
Each night, there's a 10% chance for any one of these three mechanical bosses to spawn on their own, regardless of how prepared you are. I spent dozens of nights exploring hard mode and getting ore and all the nonsense I've been showing you for the past seven updates. Not once in all that time did a single one of these bosses spawn.
Like the Eye of Cthulhu before them, there's a status message that pops up when one of these bosses is about to naturally spawn. I waited so long in the hopes of them popping up so I could show them off, but they were camera shy it seems. So, in the interests of being complete, here are the status messages...
You feel vibrations from deep below or You feel a quaking from deep underground - Both of these messages mean that the Destroyer has come to... well, destroy.
You feel the air getting colder around you or The air is getting colder around you - Both messages mean that Skeletron Prime has decided to spawn on his own.
This is going to be a terrible night... - This means the Twins have come to say hello.


With that ominous note, I think that's a perfect time to leave off.
NEXT TIME: We get out or machetes and pith hats. It's time to venture into the jungle for the first time since hard mode began.