Part 5: iv. Battle UI Explained
iv. Battle UI Explained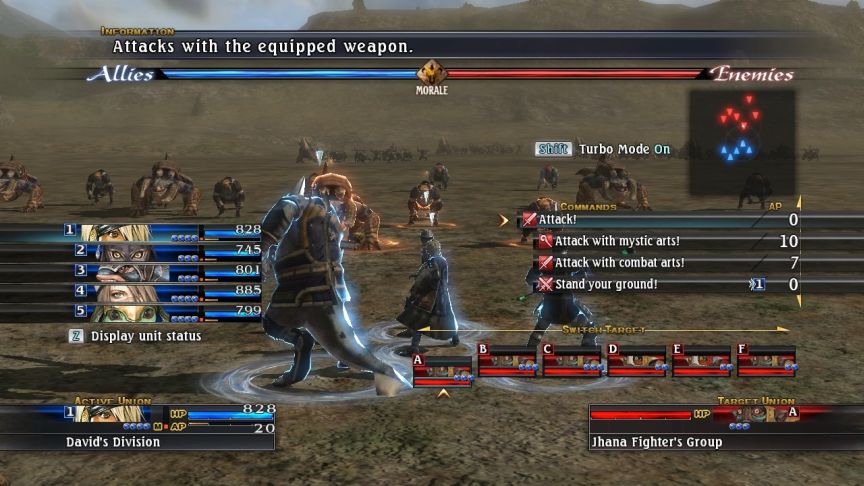
The Battle UI is pretty busy, so I’ll highlight each piece individually, and grey out the unimportant bits for each discussion.
So, let’s start from the top and work our way around counter clockwise.
The information bar describes what the currently selected Battle Command does.

This is the Army Morale bar. Morale is very important later on, because it affects a lot of things. High morale means you do more damage, take less damage, and get more chances at Critical Triggers. (Critical Triggers will be explained later.) Morale tends to feed into itself, so if you start doing poorly, your morale will drop, which means you’ll do worse. The longer the blue portion of the bar, the better you’re doing. The redder it is, the worse you’re doing.
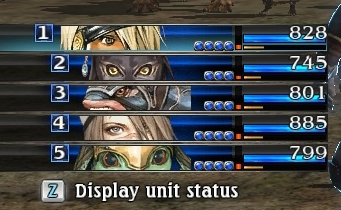
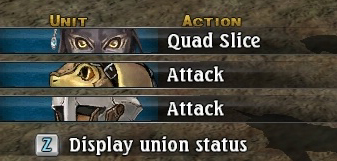
These are the unions under your command. The currently-selected one is highlighted in blue and offset to the left slightly. It shows their condition and what status effects, if any, they are under. The “Display Unit Status” command toggles between showing you all the unions, and what the individual units of that union will do once the battle starts. (That does not mean that they WILL do it, things can change unexpectedly on the battlefield.)
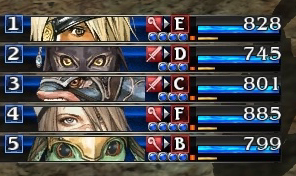
This shows the union status once commands have been issued. There are now icons and letters (or numbers, for friendly unions). The icon represents the type of action the union will take, and the letter is the union which is being targeted.
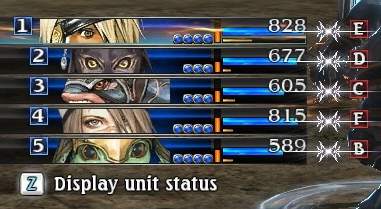
To the right, you can see new icons representing the current state of the union. The arrows meeting indicate that the union is deadlocked with the enemy union represented by the letter. The orange glow on the first union means that union is able to execute a special attack.
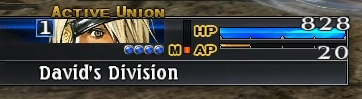
This has the unit number, a portrait cutaway of the unit commanding the union, and the name of the union (the name is almost unique for every possible leader).
The dots and their colour represent the individual units and that unit’s status. Blue means the unit is healthy, purple means that the unit is alive, but has a negative status afflicting them, and red means the unit is knocked out (KO) and cannot take any actions. I’ll tend to use the term “dead” interchangeably with KO.
To the right are three gauges. HP is the union’s health. It is the addition of the total health of all the units comprising it – ignoring whether or not all the units are actually still alive. Situations where four units are alive, but the union only has 1 HP, and situations where all but one of the units are dead, but the union is at full health are both possible in the game.
Below is the AP counter. AP is Action Points. It represents the actions a union can perform. A union’s AP is comprised of the initial AP each individual unit gains per turn. Leftover AP is added to the pool. The more AP, the more powerful the actions you can perform.
The orange M bar represents Union Morale. If it caps out, the union leader can use a special attack. Assuming they’ve learned one, which tends to have specific conditions. And that’s not counting special attacks which have “low health” trigger conditions.
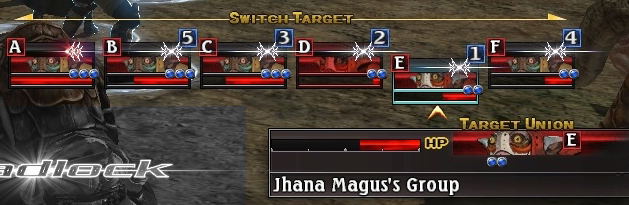
These are the enemy unions on the field. The currently targeted union is indicated by an arrow and a vertical offset. You can switch targets to other unions (but in some cases, you may not be able to target them). The meeting arrows and the number indicate that they are in a deadlock with an allied union. The red double arrow means that the enemy unit is performing a flank attack on an allied union. Unions at critical health (30% or less), like D flash red.
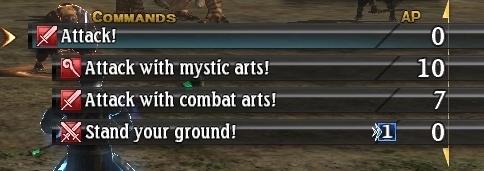
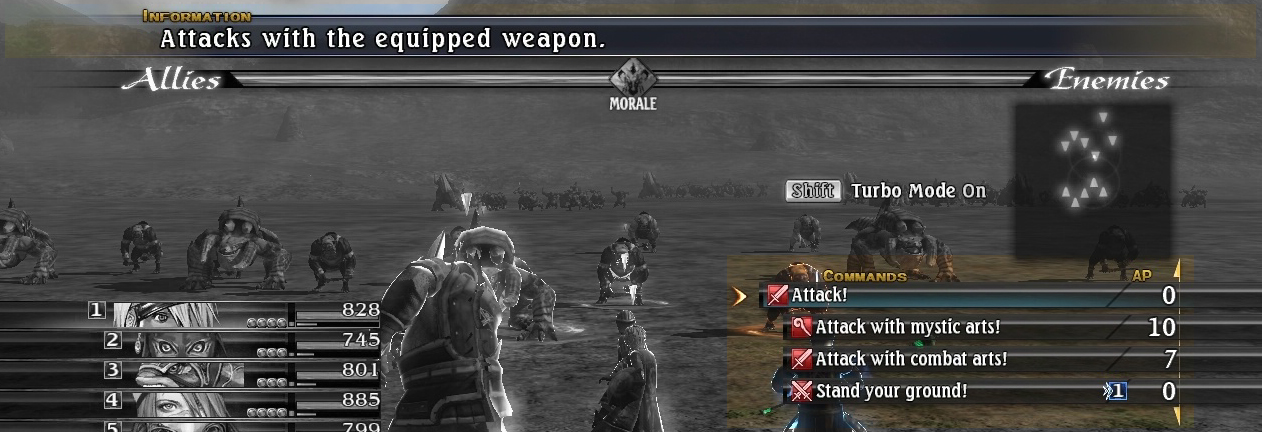
These are the Battle Commands, the orders you give to each union. The currently selected command is indicated with an arrow and horizontal offset, and has a short description saying what it does. Combat arts, Mystic arts, and Special Arts cost AP to perform.
You can only get up to five commands per target, but switching targets can give you different possible orders, so if you don’t like what you see, try switching targets.
Pressing the “Display Unit Status” command key will show you exactly what units will perform what actions. Units which haven’t got enough AP or the right arts to act will default to either a basic attack or to Stand by and do nothing, depending on the command.
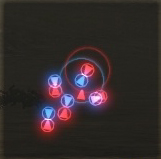
The battlefield minimap displays the relative positions of all enemy and allied units. This is mostly helpful when trying to target unions when trying to avoid getting intercepted. The current union is indicated with a pulsing blue circle, and the targeted union is indicated with a pulsing red circle. A dotted line will go to a targeted union if you are not currently deadlocked with it. Deadlocked unions have a solid circle.