Part 4: Exploration & Combat

Now WITHOUT table-breaking images!
Here we go with some actual gameplay for White Knight Chronicles. Like everyone familiar with this game in the thread has indicated already, it’s mostly terrible and grind-tacular.
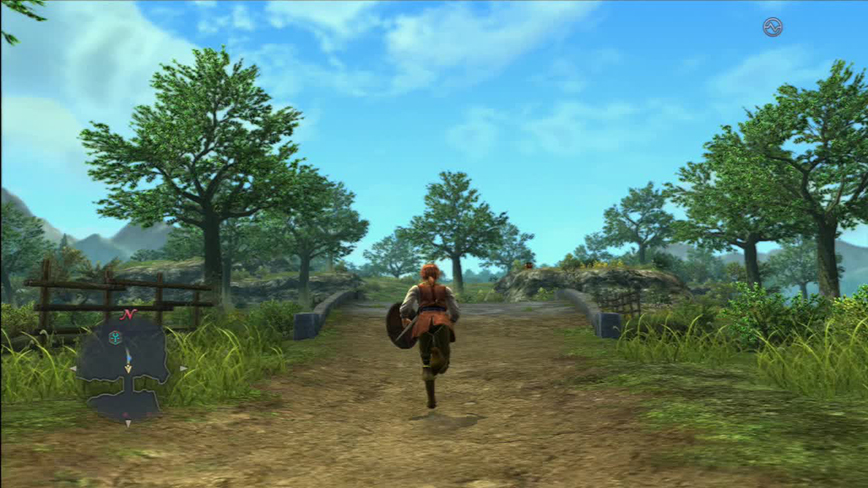
Being out in the field controls a little different from being in a town. For instance, you can see that Leonard now has his sword and shield equipped You’ll also see in subsequent screenshots that Orren is now present on the field as well.
Enemies populate the area and are persistent presences, exactly like they are in Final Fantasy XII. All combat takes place in the field, so there’s no random battles or battle space like say Final Fantasy XIII.
To initiate combat mode, simply close in on an enemy enough to auto-target it and press the X button on the DualShock 3.
Doing that brings up the command bar. Dear god, the command bar.
Let’s take a gander at the various parts of the battle menu, shall we. Just call me Professor Crow, because I’m about to learn your ass some stuff.
Remember that too-good-to-be-true announcement trailer I posted in the OP? How it was beautifully motion captured and filled with fluid, realistic character movements? Yeah, there’s none of that to be found in the finished product. You’ll see it better in the videos and some (
 , maybe if you ask nicely though) in the Miscellaneous section, but this game is painfully stiff and awkward in motion.
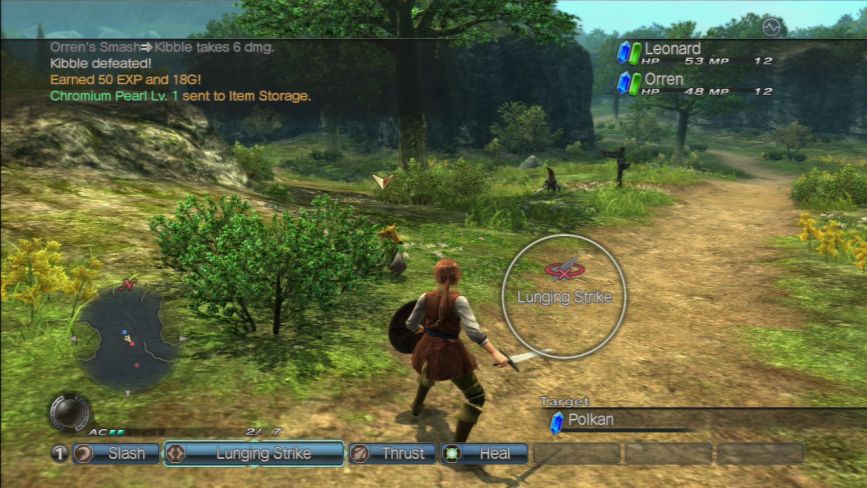
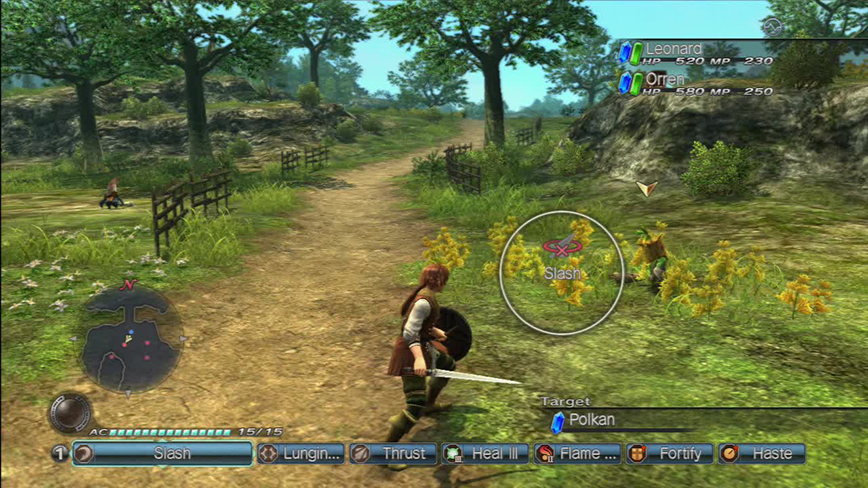
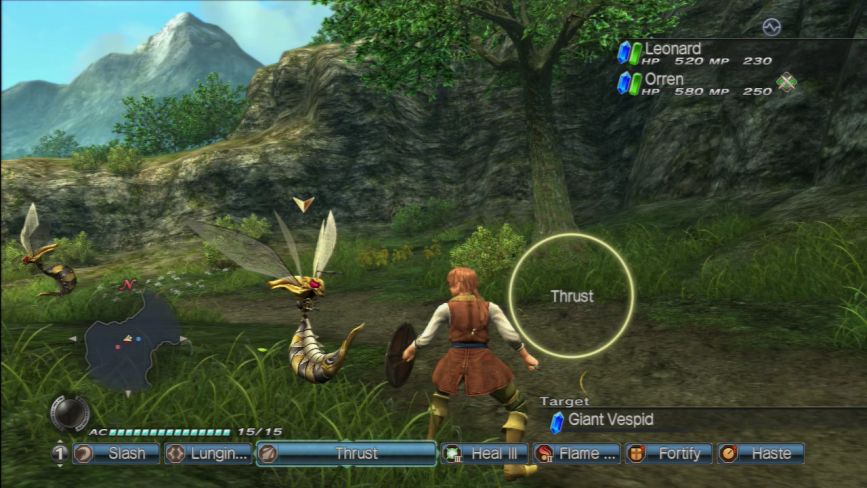
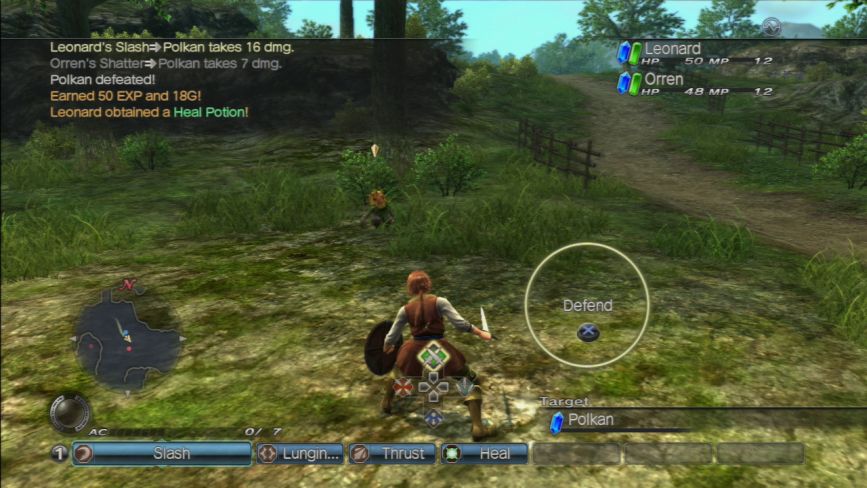
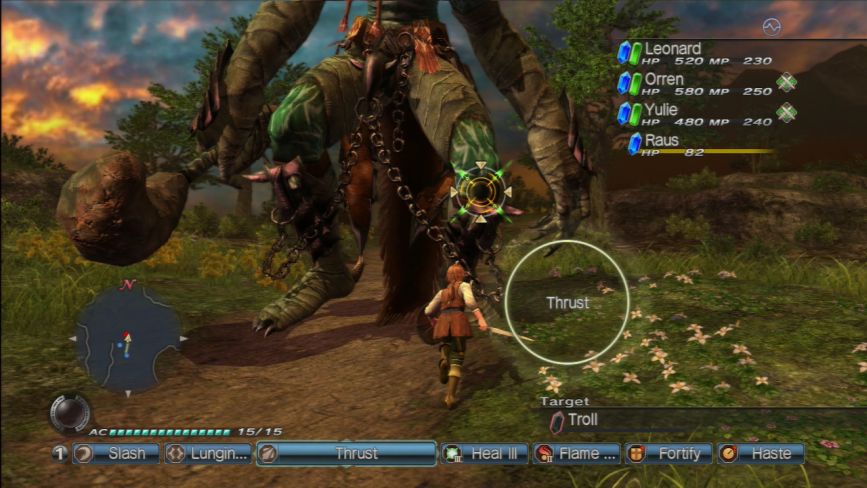
This here is your basic battle screen. This is what pops up when you enter combat mode.
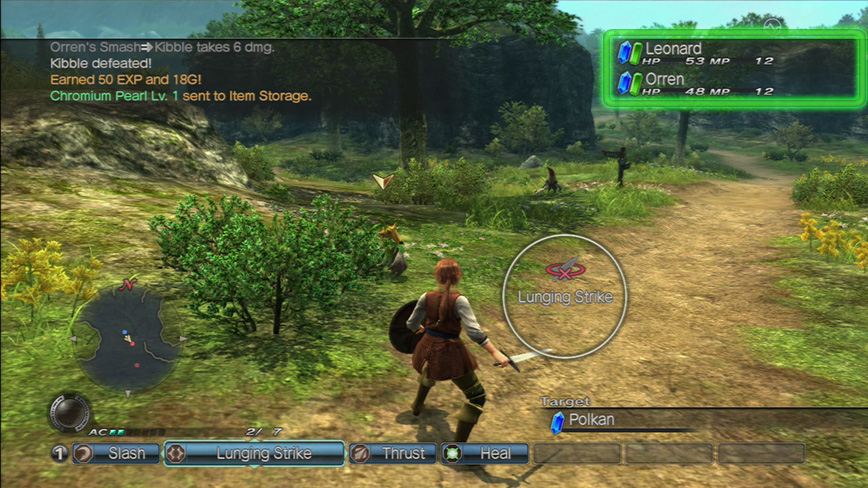
In the upper right corner is your HP/MP and Status bar. HP and MP are represented both numerically, and by those two gems, blue for HP and green for MP. As your HP and MP go down, the gems will start to diminish.
Status effects, both positive and negative will appear as icons just to the left of the HP gem.
This panel shows all your current active party members.

Enemy status appears directly below the party status. It shows off the name of the enemy you are currently targeting, as well as a graphical representation of their HP. Enemies don’t get MP status in this game for whatever reason.
Again, buff and debuff status effects will appear to the left of the enemy’s HP gem.
This thing here is the turn wheel. It’s White Knight Chronicles’s version of an Active Time Battle counter. The wheel is actually a bar that fills up in a clockwise pattern. When it makes a complete circle, your character can perform their next action.
Certain factors affect the speed at which the wheel fills in, namely weapon types, characters’ agility stats, and general equipment weight. We’ll be seeing that in action soon enough though.
Also note the sword icon with the red X and circle around it. This means the selected skill, in this case Leonard’s Lunging Strike, cannot be performed because he’s not in range of an enemy. Once he’s within an acceptable range the icon will disappear, telling you you can now use that skill.
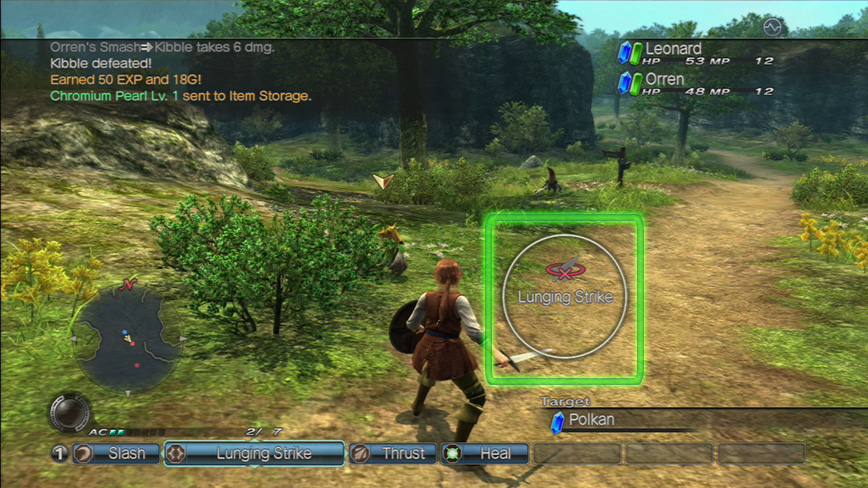
Normally there is an overlay denoting each ability's area of effect and range, a glowing red circle or box which appears around your character for each selected ability. Moving to a point where your target it within that circle or box will allow you to use that ability. You can turn this function on and off using the game's options menu. I have it turned off at the moment for the sake of appearances, as it's actually quite obtrusive when it's enabled.

Like so.
Fun fact about the original White Knight Chronicles battle system: it was so slow and shitty that Level-5 completely reworked it for the sequel. They remade the first game on the second game’s engine and used it as a mulligan.

This is the Command Bar, the stupidest RPG battle interface ever designed.
Like I noted in the last update, it’s three rows of seven potential skills for a total of 21 possible actions, in addition to a fourth bar for items, defense, changing equipment, changing targets and changing command sets.
The command bar is controlled through the D-pad. Up and down rolls through each separate line of commands while left and right slides the cursor (the blue highlighted part there) along the skills in each particular line. Once the action wheel in the middle right of the screen is full, you press the X button and your character will perform the selected skill.

This is the fourth bar of the Command Bar, like I mentioned earlier.
This bar lets you use consumable items from your character’s item bag, change their equipment on the fly (again though you can only change to equipment that the character has in their personal item bag at the moment). You can also manually pick a new battle target, which is kind of useless since you can do that using the L2 and R2 triggers. You can send your character into defense mode, and you can also change command sets.
This last option is, ideally, a rather solid gameplay feature. Note how I said ‘ideally’. In practice, it’s just another mess.
With five sets of 21 skills that means you have 105 potential skill slots at your disposal. This is great because you can tailor each skill set to suit a particular battle role, having one skill set for your physical attacks, another for offensive magic, another for healing and buff/debuff magic, and so on and so forth.
But this being White Knight Chronicles, there has to be an element of tedium involved with it. So when you hit the Command Set button, instead of bringing up a menu that lets you pick the set you want to change to Final Fantasy XIII Paradigm Shift-style, it instead cycles through to the next skill set in your line up.
That means you need to scroll back down to the Command Set button because it defaults to the first skill of your first command bar line every time, and do the process over again until you get to the skillset you want. It usually takes about five seconds per skill set too.
The AI, however, won’t even bother switching between command sets because the AI is beyond stupid. You need to parachute into control over characters 2 and 3 and change their skill sets manually if you want them to use other skills.
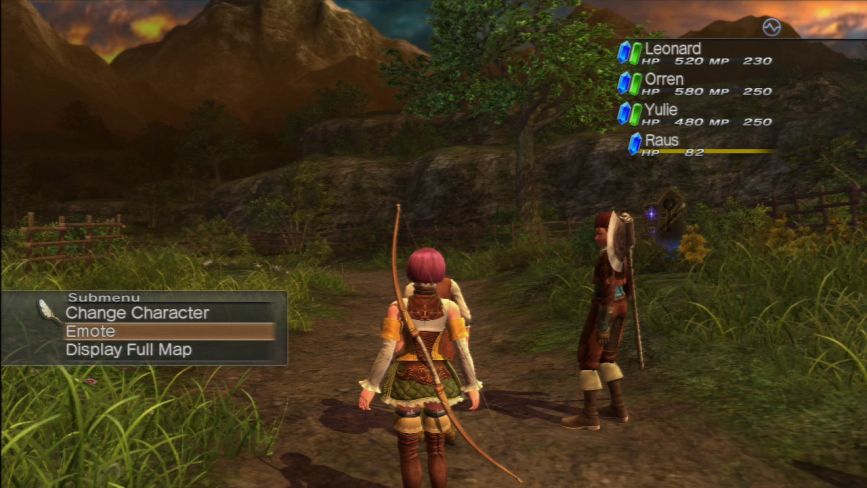
Speaking of that, pressing the Select button opens up an action menu both in and out of combat. Usually its used to hop back and forth between characters, but you can also command your characters to do all sorts of funny little actions. This was usually used by players online without the benefit of a keyboard or microphone to emote to other players through physical gestures. Because the Avatar is essentially a mime, so Level-5 just went whole hog with the idea and gives you a full three pages-worth of actions to screw about with.
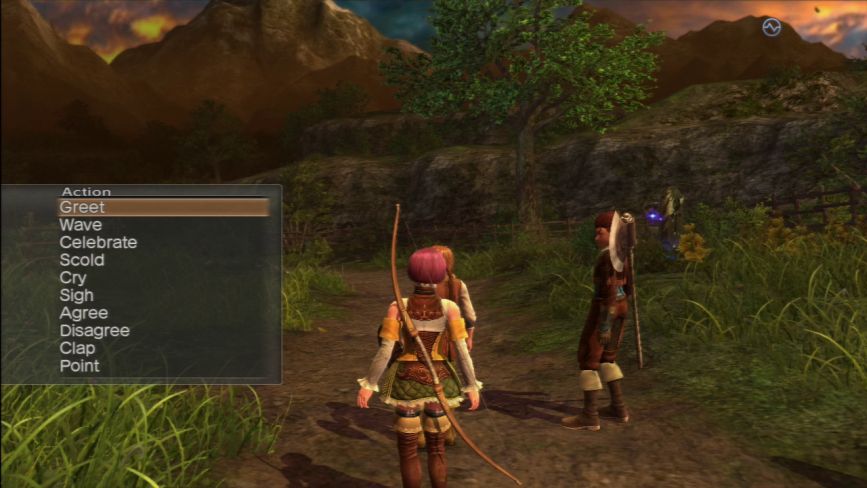
Pro ejemplo.
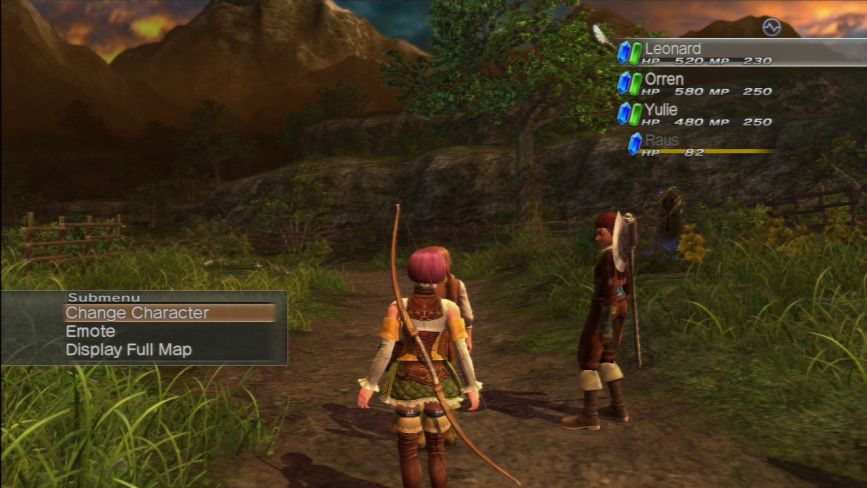
The Change Character option makes a cursor appear in the party status window, allowing you to select which character you want to hop into, excluding guest characters like Raus, of course.
Though, honestly, why the hell would anyone want Raus to be a playable character?
Also, for all the crap I give Leonard as a character, I’m going to be playing as him for like 80-90% of the time I have access to him because he’s such a middle of the road character. He’s good with a sword and shield and doesn’t really need to use any magic, which is a good thing because casting even simple magic spells takes forever and you can’t do anything while you’re casting, not even move.
There’s a fourth option that opens up in this sub-menu after we make it passed the opening credits (...in Chapter IV
 ), but I'll cover that when we get there.
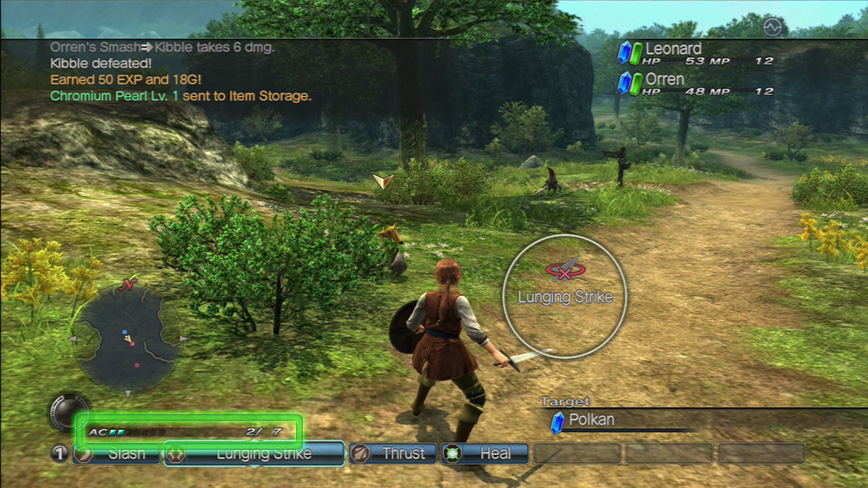
Continuing on with the tour. This is your Action Chip or AC bar.
ACs are used in conjunction with certain powerful physical and magical attacks in addition to MP. Combos also use AC, but I’ll get to that in a moment. There’s one other thing that also consumes AC, but that’s spoilers for right now.
At the start of the game you have space for 7 AC, though this will eventually scale up to a total of 15 AC in short order.
AC is accumulated by attacking enemies or by being attacked by enemies, or through AC replenishing items called Charge Drinks.

I don’t know what the hell this thing is for.
Actually, I do, but it’s not relevant to anything we’re doing at the moment. Patience, patience.
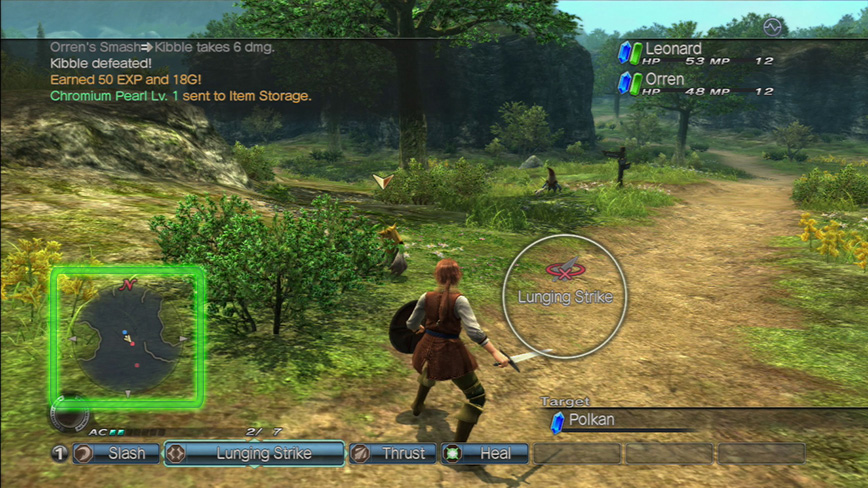
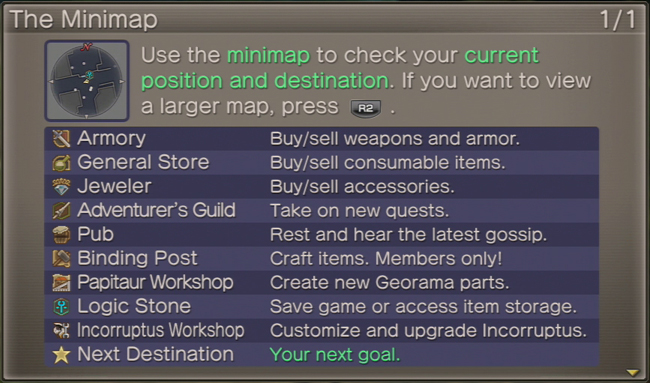
This is the minimap. It’s mini, and it’s a map. …What the hell else were you expecting me to say about it?

And lastly, this is the Live Log. This can be turned on and off at your leisure through the game’s settings. It’s a play-by-play for the game.
The Live Log will tell you stuff like what skills are being used in battle and by who, how much damage they do, how much EXP you gain from defeating enemies, what items you get from enemies and chests and farm points, and in quests will also update you on mission-critical developments.
This is also where the game’s text chat would pop up during the days when GeoNet was still online.
You can customize the Live Log to be as verbose or as sparse as you want it to be as well as colour coding it base on conditions.
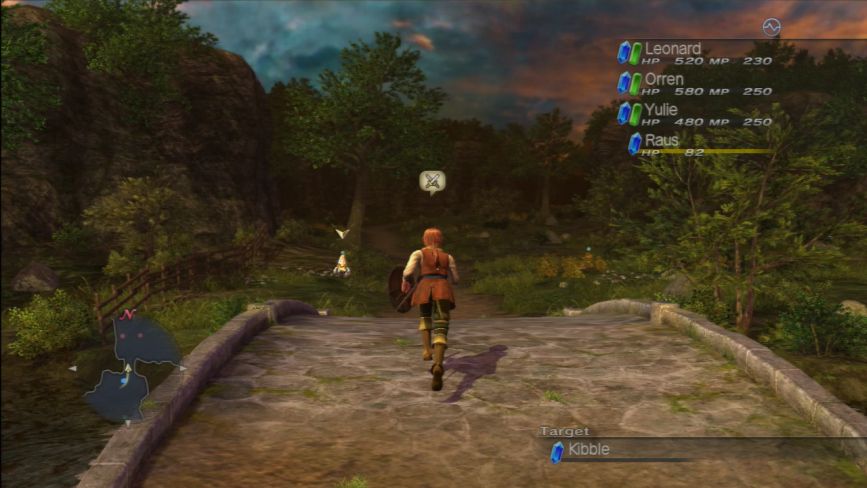
Anyway, let’s get on with some exploring.

Littered around towns and fields like Balastor Plain are treasure chests like this one. You might have seen one of these in the background at Rapacci’s place. They’re all the same, red with gold lining. I have no idea why they have been scattered all over the planet to a level where they’re more ubiquitous than weeds, but here they are. Some chests have items in them, others have stuff like weapons and armour in them.
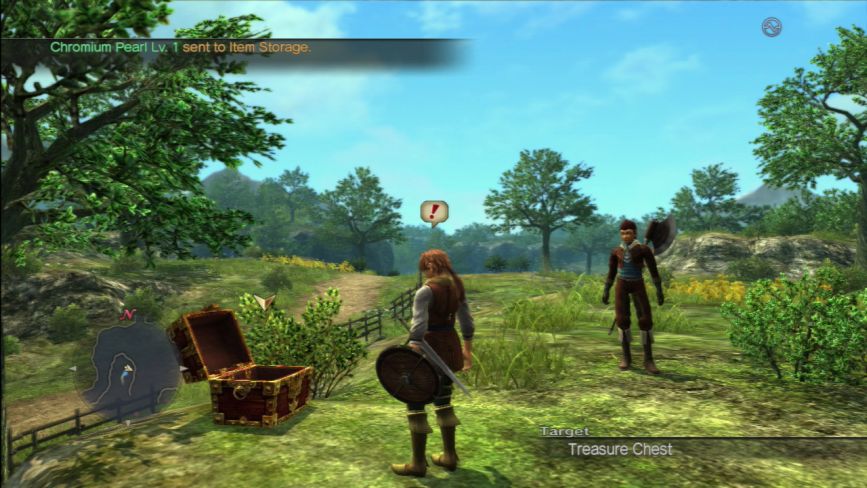
This one has a Chromium Pearl Lv. 1 in it. If this means anything to you at this point in the game, you have my sincerest sympathies. In the original game, there’s something more mundane in this first chest you encounter in the wilderness, but since this is a New Game+ run, there are higher level items loaded in to each chest.
This Chromium Pearl is an upgrade item which can be used to upgrade our weapons and armour. This is but the event horizon of the black hole of grinding, farming, and spreadsheet insanity that is White Knight Chronicles’s item, upgrading and binding system.
I will get into this nonsense in more detail at a more appropriate time, however.
Here's a quick fact about chest in this game: in the first game they were a plain brown colour, and tended to blend into the background of areas, leading to people apparently missing them.
So Level-5 wildly over-corrected this problem by making every chest in the game fire truck red and gold increasing their original size. Because I guess Level-5 thought people who played the original version of first game were stupid.
...They weren’t wrong on that point, necessarily, but that’s an entirely different matter.
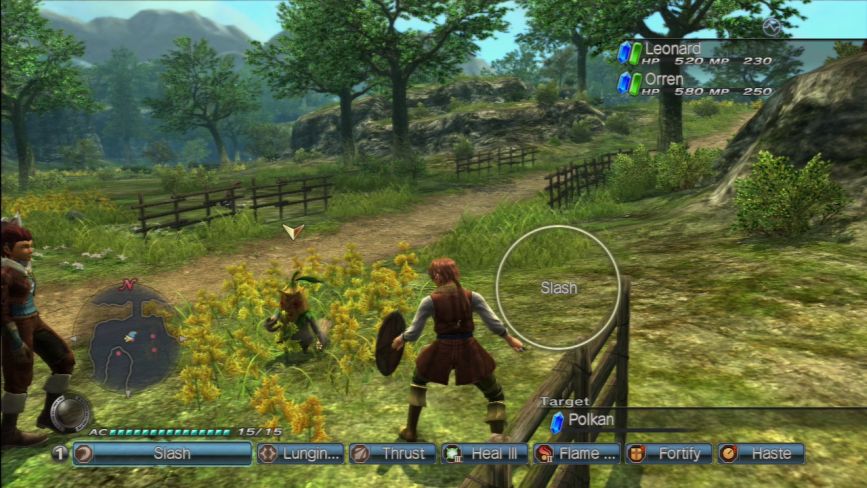
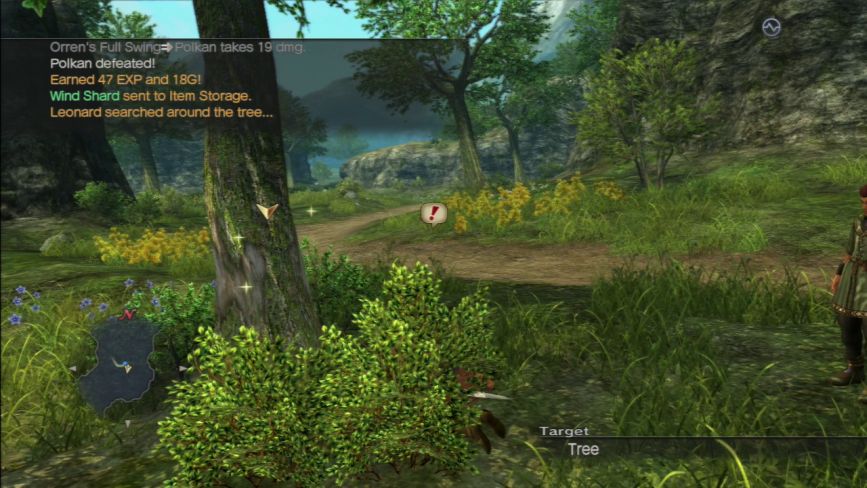
I’m just going to take a moment to introduce you to the enemies we find here on Balastor Plain. First off, these little guys are Polkans, small woodland creatures who apparently are actually made out of wood. They’re pretty much harmless. They carry wooden clubs are more than likely to actually fall over onto their back rather than actually connect with a swing of it. Polkans take critical hits from slash attacks, the ones with the curved arrow, that I’ve got highlighted here. They go down in a couple of hits, even for Lv. 1 players starting out and are actually docile.
That’s right, they won’t engage you in battle, you have to seek them out and initiate combat, like Leonard is doing here.
Leonard just straight up murdered a wood Jawa. Nice going shitface.
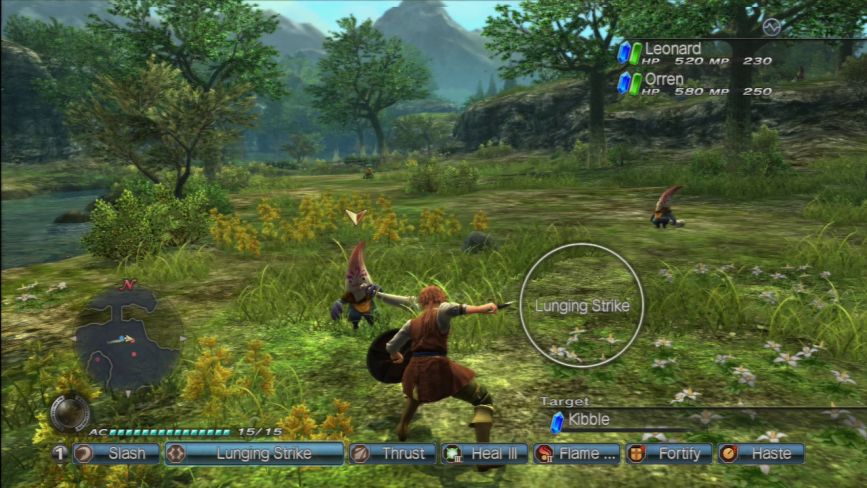
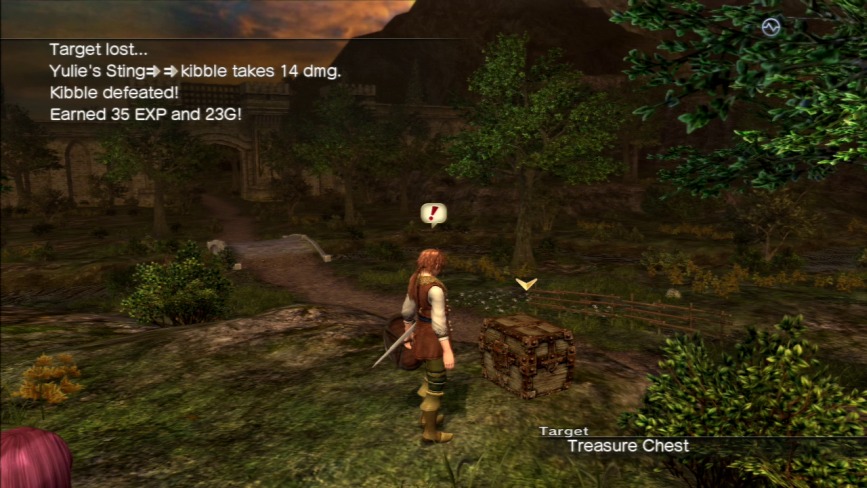
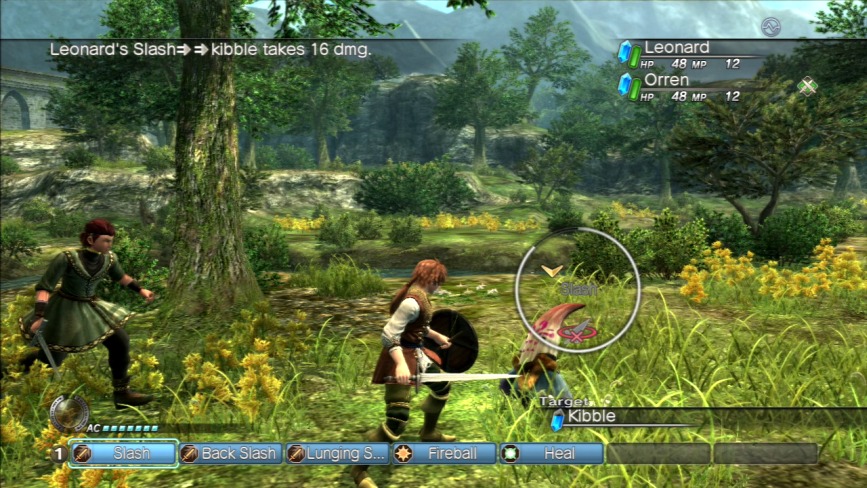
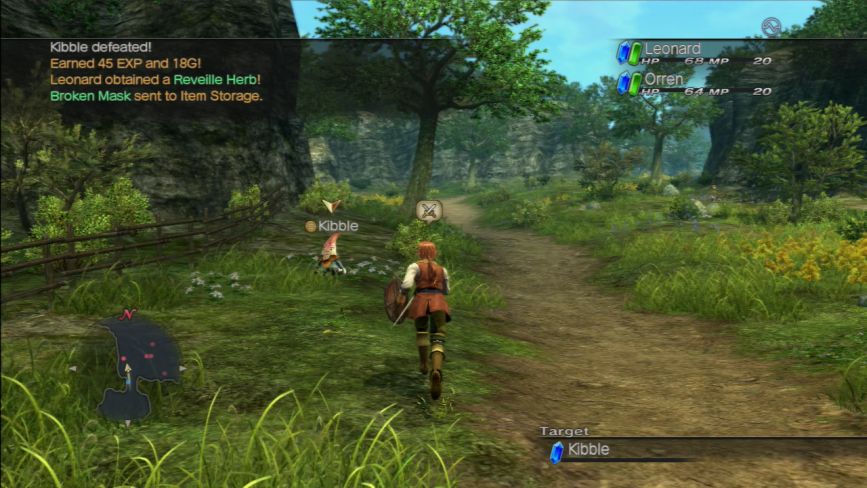
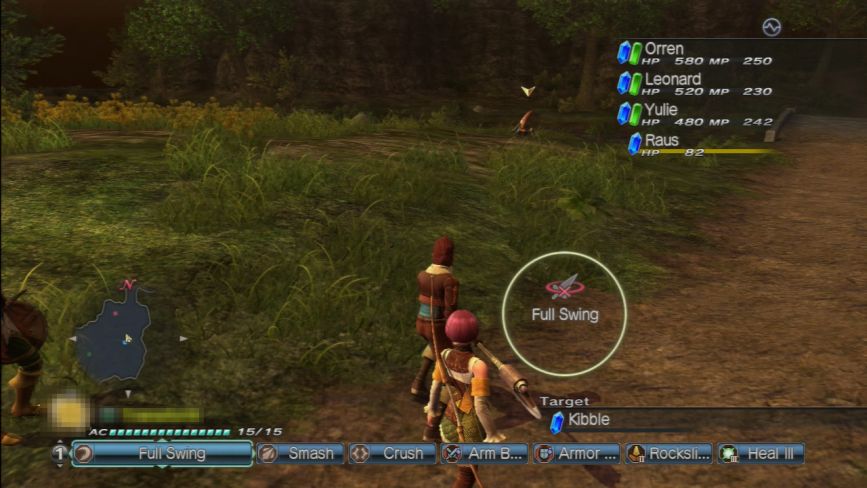
Second verse, same as the first. These little guys are Kibbles. They’re the slightly stronger cousins of the Polkans. They’re occasionally aggressive, particularly if you’re a lower level than they are and they’re a little bit stronger than Polkans too. They carry bone clubs and have these cool elongated tree trunk masks. I think they’re like Polkan priests or something. These guys are susceptible to impact attacks like Leonard’s Lunging Strke.
Again, the kid just up and murders one of them for your benefit.
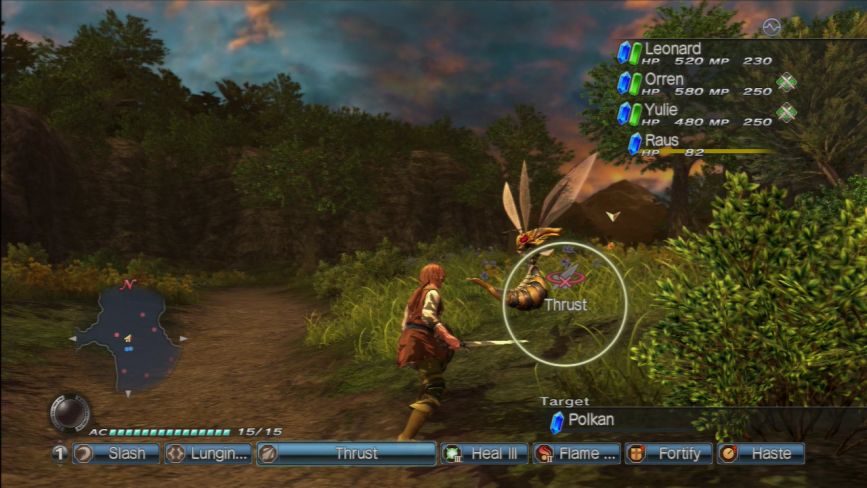
And, lastly, there’s these shitlords. Vespid-type enemies are the absolute worst. They are the single most aggressive and persistent enemies in the game. They will attack you no matter what your level, often rushing at you from the opposite end of the battlefield. While you can successfully run away from about 99% of all other enemies in the game, these pricks are the 1%. They will hound you from one end of the level to the next because they’re fast, aggressive, and have an absolutely huge field of vision, so you will never out run one of them that’s locked on to you.
These guys are just the bland versions. In later areas, and even coming back here at higher levels, we’ll run into ones that do all of that garbage AND inflict status effects like daze, poison, and sleep. The only way to kill these jerks (quickly, anyway), rather appropriately, is by stabbing them with techs like Thrust.

Eat shit and die.
Also, as you can see here, orange damage numbers indicate critical hits. Regular hits show up as white numbers and are often much lower than critical hit damage. You score critical hits by attacking enemies with the attack type they are weak against. There’s only three attack types, so if you don’t get a critical with one type, just try the other two and you’ll eventually tweak onto the right one and then it’s just a matter of remembering it, because all the pallet swap enemies of that type have the same critical hit type susceptibility.
This also leads us into another “what did they change from the first game?” moment. Or rather a “what did they add to the remake?” And the answer of course is the entire Critical Damage mechanic.
That’s right, critical orange damage numbers hits did not exist in White Knight Chronicles International Edition. The vanilla first game did not break attacks down into sub types. Every attack style did more or less the same amount of damage. Many attacks didn't even need MP like they do in the remake. So right there, the remake/sequel has a slightly more complex battle system than the original did.
Also, the game didn't break its magic icons down by element or healing type, what you see up there is pretty much your entire skill icon pallet. So there’s something else the second game has over its predecessor: it’s less visually confusing.

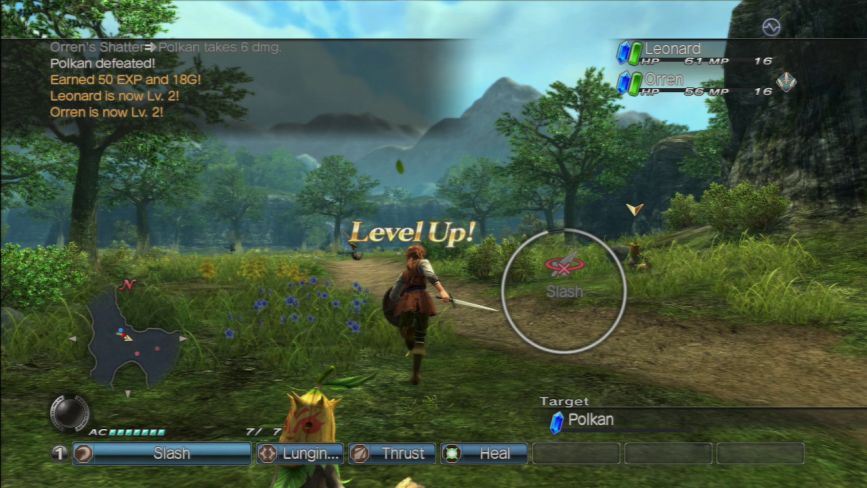
Killing enough enemies will eventually cause you to level up. Levelling up in battle automatically refills the levelling character’s HP and MP gauges. It’s also the only way to learn Skill Points or SP, which allows you to learn new skills under the Learn Skills option in the main menu.
Levelling up starts out easy, but like everything else in the game, it has a difficulty curve in the shape of the Matterhorn. As your levels go up, the amount of EXP enemies give out decreases, quite precipitously, I might add. Whereas the next level requirements inversely increase, thereby guaranteeing hours and hour of grinding in order to properly level your characters to prepare for certain parts of the game.
But I have a way around that…

Also, EXP is only shared between active party members. In order to level up, a character must be in the active party, just to grind out even more of your time.
This actually becomes a hilarious game-breaking flaw in the second game, resulting in a boss battle that I would put down real money to say was the single most ragequit-inducing part of the sequel, and the battle that solidifies Leonard’s image as an impulsive human brainfart who ruins everything he involves himself in.
But that’s more spoilers.
Also, before you enter battle, you can gauge how strong enemies are by checking out the icon beside their name. This yellow “=” icon means that the enemy is of equal strength to you at the moment.
Stronger enemies will be denoted by ever-redder “^” icons. Strong enemies can kill you more easily, but they also net bigger EXP boons and more valuable items.
Weaker enemies will be denoted by ever-greener “V” icons. These enemies are usually weak enough that you can kill them in one or two critical hits. They give less EXP and yield more common items.
Enemies with a teal “/” icon are essentially non-threats. You are so strong compared to them that you could walk right past them naked and they would still only do 1 damage to you. Killing them literally nets you 1 EXP.
Look for the Enemy Strength infographic in the Misc. section for more details.
One last thing to note before we move on. Pressing the L1 button brings up this little diagram in the center of the screen. As you can see, the four icons correspond to the four D-pad buttons.
These are in-battle targeting instructions. Unlike the tactics you can set in the main menu, the AI will actually listen to these for the most part.
The green icon with the crossed swords at the top is “Fight As You See Fit.” This tells the AI to just target the closest target to it and attack that, often times being whatever you’re currently engaged with.
The teal icon with the three swords on the right it “Spread Out.” This tells the AI to… spread out. Hurr. This is good if you’re facing a lot of enemies because it means the AI might actually be moved by a stroke of temporary competence and actually engage these other enemies in order to take the pressure off of you as you focus on a single, often times stronger enemy.
The blue icon on the bottom is “Hang Back.” This tells the AI to move away from all enemies on the field on not to engage under any circumstances. This is usually good if you’ve got a critically wounded 2nd or 3rd party member who you want to send out of the fray to heal, or if you just want to get the AI out of your hair because they’re going to screw up something you’re trying to do, like say get decent images of an enemy for a Let’s Play only for the AI to charge in and kill it.

And lastly, the red icon on the left is “Attack My Target.” This tells the AI to focus exclusively on whatever target you’re currently attack and help you wail on it until it’s dead. This is useful for boss fights and engagements with giant enemies, because it keeps the AI on a nice tight leash while you’re facing really deadly opponents.
Because the less room the AI has to screw up, the better you will be for it.
This feature as also one of the add-ons to the remake/sequel.

Okay, so here now we finally have a full battle party of three characters, each with their chosen weaponry. Leonard has a short sword and shield which is good for short-range in-your-face attacks, while the shield grants a boost to his natural defence.
That’s not a whole lot to say about short swords. They’re the “default” weapon of the game. Pretty much every playable character we get in the game except for one has a short sword as their game 1 “default” weapon. However, if you pick up White Knight Chronicles II and start the game from game 2, your available party will have different default weaponry. For instance, Yulie’s default weapon in WKC II is a the bow and arrow.
Short swords are also one of the weapons that are broken down into multiple sub-weapons, all still classified under short swords though. You can equip a short sword user with a sword, knife, hatchet, or cudgel, with each sub-weapon having its advantages and disadvantages, yet still playing like a normal sword in gameplay, because the game this game is just so
.Short swords are one of the few weapons you can equip a shield with. For example, Leonard comes with a shield as part of his default equipment. There are a few long-range short sword skills, but they’re mostly all short-range stuff. There aren’t that many (if any, actually) cool support skills in the short sword skill line, although you do eventually get access to the “Twin Swords” ability at the end of the skill line which lets you summon an identical version of your equipped sword and do double the damage for a brief period of time.
Short swords can also learn physical attacks with fire and wind elemental attributes to them.

Now since I’ve been using Leonard for the majority of this part, so let’s go over Yulie and Orren’s equipment instead for a second.

First up is Yulie. She is equipped with a bow and arrow. She’s able to strike targets from long distances, but because she’s also limited in terms of attack types to stab and impact-style attacks. She’s only got one slash-style attack, the deceptively named “Angel’s Wing.”
The bow is also a two-handed weapon, which means you can’t equip a shield with it, so no defence boost here. Also, it trades off damage for range. It can hit targets at any distance/height, but at light to moderate damage. However, the bow’s light weight means it also has the fastest cooldown rate of each available weapon type. Look at the image above there, Yulie’s attack hasn’t even landed its hit yet and the action wheel is already over halfway full for her next turn.
Most archer Avatars you’d run into online were actually mages who used their bow as a backup weapon. The bow and arrow is also one of only two weapons that have elemental-based attack skills from all four elements: water, earth, fire, and air. Every other weapon only has skills from two elements.
You can also see the blue, green and yellow icons on her action bar. These are “Healer’s Hymn,” “Spirit’s Hymn,” and “Angel’s Hymn” three high-level bow and arrow-exclusive techs usually unlocked near the end of the bow and arrow’s skill set. They are free healing spells. Healer’s Hymn restores HP without consuming MP, Spirit’s Hymn restores MP and only costs 1 Action Chip, and Angel’s Hymn revives fallen party members only using 1 AC as well.
And these would all be great, if the AI of White Knight Chronicles wasn’t dumber than a sack full of remedial bricks. I keep harping on how Level-5 all but stole Final Fantasy XII’s battle system without also scooping up FFXII’s scalable, intuitive party AI too because it’s so painfully obvious across both games.
Your party members in this game will not use techs beyond basic attack skills. They will only heal if you specifically set their tactical set up to “Heal First.” They will not cast buff spells unless you specifically prompt them too, and even then the spells they cast are often random and take like 40 seconds to complete, and are able to be interrupted by strong enemy attacks. They will not engage battle mode if they’re too far away from you. If they’re not in battle mode, they will not use any healing or support spells, meaning for instance if you decide to try and just run through an area full of enemies without fighting anything and you get stunned or put to sleep or something, they will just stand there and watch you shake like you’re having a seizure, or otherwise watch you get pummelled to death by all the enemies you were deftly trying to run away from. And they don’t utilize equipped skills that capitalize on enemy weaknesses.
The party AI in White Knight Chronicles is so stupid I have seen players on forums having full on fucking breakdowns over how they can’t get past certain boss battles because their party constantly gets them killed through sheer unintuitive stupidity.
Welcome to White Knight Chronicles, where that soft, subtle ‘durr’ sound you hear while playing is not your PS3’s disc drive, it’s the game itself expressing its stupidity.
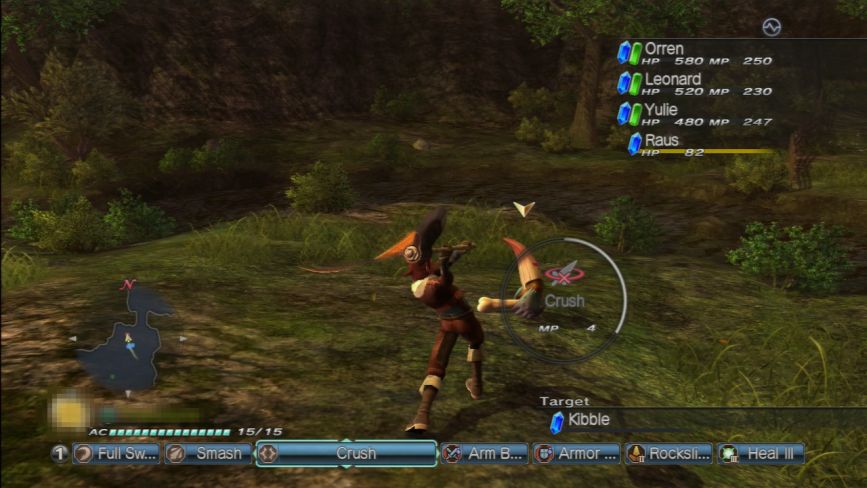
Now on to Orren.
Orren wields a giant fuck off
 axe. Axes/hammers are the ultimate risk/reward weapon in White Knight Chronicles. Being two-handed weapons, they preclude wielding a shield, so you’re sacrificing a defence boost, and you’re taking on a heavy weight, meaning your attack speed is much slower than lighter weight weapons like swords or spears, but they do like twice the damage of short swords and three times the damage of the bow and arrow. …When they hit, of course. Axes/hammers have the lowest accuracy rating of each of the weapon types in the game.
Axes are the other weapon that gets split into sub-weapons. There are three different sub-weapons which all do the same thing because again,
: great axes, warhammers, and mauls.Axe-wielders are the tanks of the game, slow and awkward, but damage nightmares. They’re also the game’s go-to nerf’ers. You can see the two techs in the middle of Orren’s skill bar, “Arm Breaker” and “Armor Breaker,” which lower an enemy’s physical attack and physical defense stats temporarily.
They were also the rarest weapon class you would encounter in the online portions of the game.
The axe skill tree also has skills with innate earth and wind element attributes as well.
ORREN…
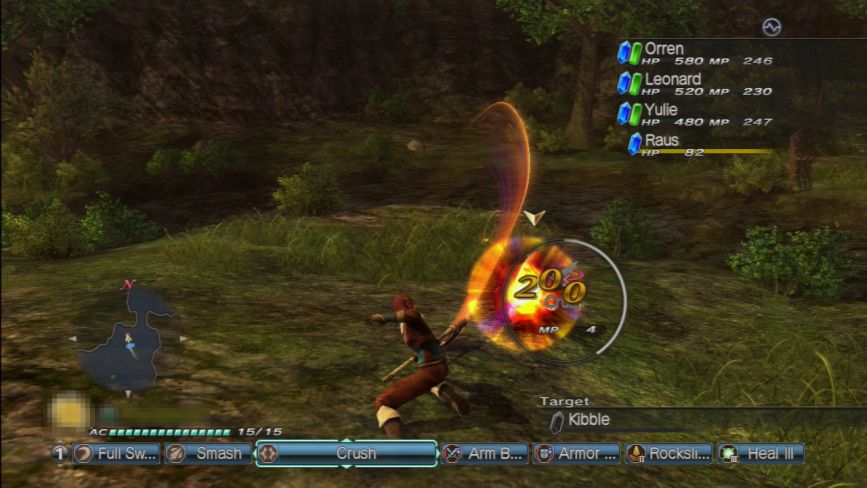
SMASH!

And that’s the end of that.
You also might have noticed the pixelated trigger option over top of Orren’s AC bar. Good for you. I’ve blurred it out for a reason, a spoiler reason. It’s an ability that technically no one in the party should have at this point in the plot, so rather than ruin things, I’m just going to awkwardly blur it out and address it in full when we get to it.
Mostly because I haven’t really decided how I’m going to spin it into the plot yet because it is a quasi-plot-based element of the second game, but since it’s tied to the Avatar it often goes overlooked because, again,
.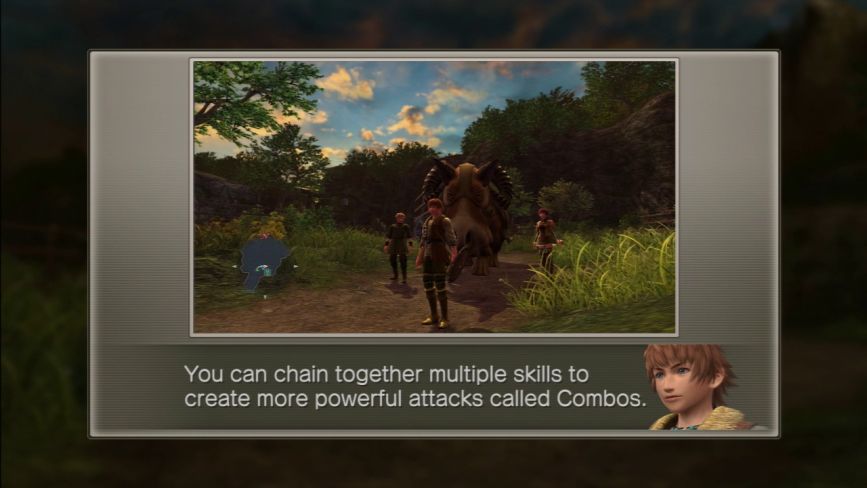
This is also the part of the game where Combos are explained. You can watch the full video to get the whole story, but I’ll sum it up here.
You can create strings of attacks called Combos. Certain skills that you learn are only really useful as parts of combos. These are often skills that either knock enemies down or launch them into the air or whatnot.
Combos can be saved on the Combo tab in the Equip Skills page and can be equipped onto the command bar anywhere you like. Depending on how complex they are, Combos take certain amounts of AC to pull off. Right now you’re limited to like 2 or 3-move combos, but eventually this scales up like 6 or 7-move combos as you clear more of the game and gain more AC and level up weapon-based skills.
There’s no skill to pulling off Combos, just wait until the action wheel is full and hit the X button to continue the combo until it’s over.
Combos can be seen as this game’s version of Limit Breaks, as you can only use them usually after you’ve taken or dealt enough damage to full up your AC bar, and they do stupid-high damage when pulled off successfully.
They’re just ass tedious, like everything else in this game.
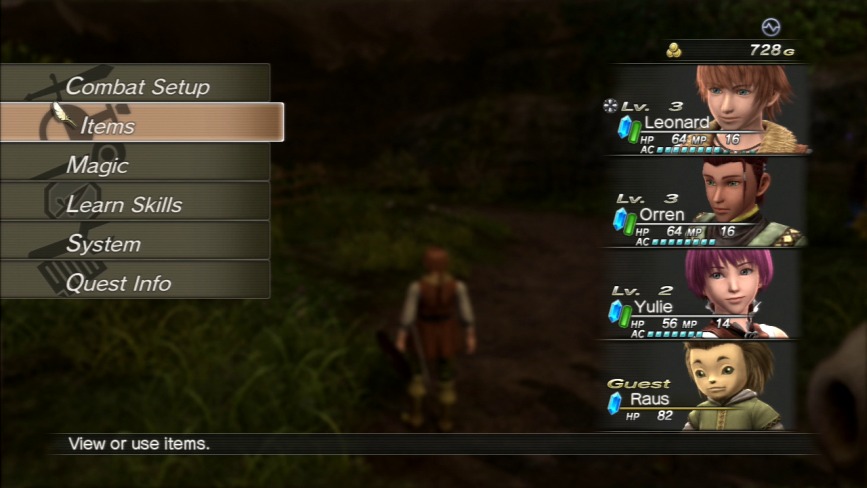
Also, in the original version of the first game, if you opened up the main menu with Triangle, your guest party members got actual character profile pictures. You couldn't select them or alter their equipment, items, or skills, but at least you got a graphical depiction of them actually being in the party.
In the remake and sequel, only their name appears in the main menu. So in this case we've actually LOST something from the original game.
Anyway, back to dumbass… I mean Leonard.
You can also see at the bottom of our party list that Raus is also listed, only he doesn’t have an MP stat and has a yellow stripe running across his HP stat.
Yep, Raus, giant obtuse wine wagon and all, is a guest party member for this portion of the game. Unlike some other guest party members we’ll be getting later in this game and the next, Raus is completely useless… just like he is in general. He’s got no attacks, and he’s torturously slow, is controlled by an independent AI, and, best of all, if he dies… GAME OVER!
The only saving grace of the matter is that he's got a comparatively higher HP threshold than your party does (in the mid-80s, while your party will be in the 60s by this point). The only reason everyone has such wildly inflated HP numbers compared to him in these updates is that I'm breaking the game wide open with a Game Genie to show off its various now-broken features more easily.
So, as you can surmise by all of that then, the second half of the trek through Balastor Plain is an escort mission, the first of many to come, though luckily our future guest party members will be a little less combat-averse and death-prone than Raus is.
Fuck you, White Knight Chronicles.
That said, one of the things they changed (because "improved" would be stretching it) between the first and second games is that in the White Knight Chronicles II engine, Raus will plod the wagon ahead independently of your party, whereas in the original version of game 1, the wagon didn't move unless you moved yourself, though it moved at a considerably quicker pace than it does here.
Keeping pace with Raus’s wagon is an exercise in sheer madness. Instead, all you need to do is run ahead at your normal pace…
And murder every one of these pukestains before the wagon gets anywhere near them. All the other enemies on the field are docile/too far away from the path to even see the wagon anyway.
Raus will start to complain if you ditch him, but it’s more tolerable than taking half an hour to babysit him all the way through to the boss fight.
Oh, did I say ‘boss fight’?
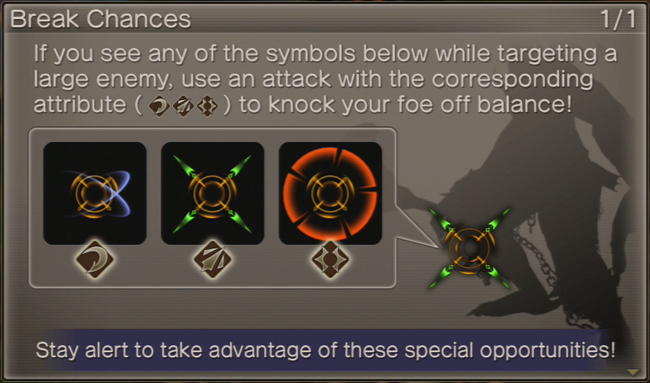
Like I said in the story update, we have to fight a troll before we can get back to Balandor, and as we enter the battle, this screen pops up.
This tutorial explains the special mechanics of giant enemies. From here on out in certain areas, you will encounter giant enemies interspersed with regular enemies. They’re significantly stronger and take more time to defeat than regular enemies, but they’re often beatable no matter your level, and they drop rare items and have high EXP yields too.
Giant enemies are segmented into targetable parts, often some combination of legs, arms, core, head and tail where applicable. As we’re lowly small humans, we barely come up to the troll’s knee, so we can only target its legs. Yulie can hit its upper body parts with her bow and arrow, but otherwise we’re not able to reach them with our attacks… yet. How we’re going to be able to do that is currently a mystery… which you can probably piece together rather easily.
Anyway, when you do damage to a giant enemy’s legs, eventually a special target will appear over one or more of them with one of those three symbols you see above. Like the box says, each target corresponds to a particular attack type. Hitting the enemy again with the attack type suggested by the target (which also happens to be that enemy’s particular critical hit weakness) will cause the enemy to topple, temporarily rendering it immobile and allowing you to hit targets up to at least its core allowing you to deal increased damage to it.
This troll, for example, is vulnerable to stabbing attacks…
And goes down like a bitch because this is New Game+.
(Battles in this game are particularly boring anyway thanks to the stupid AI and terrible user interface set up).
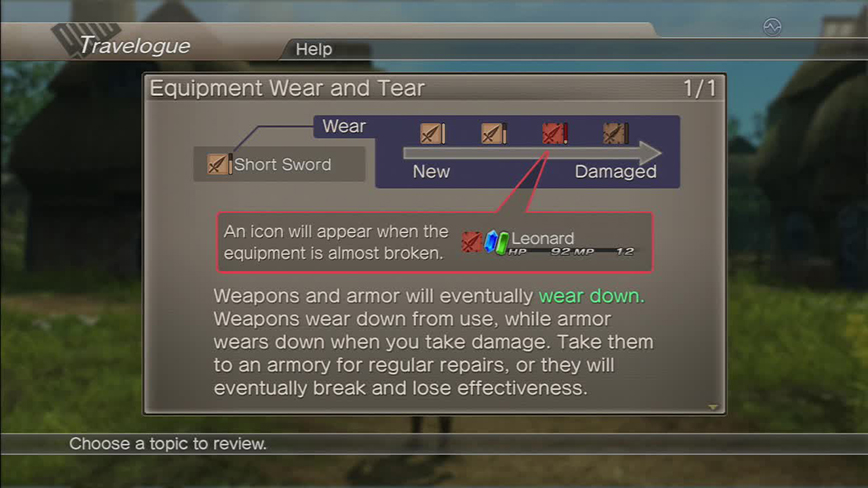
I also promised to talk about equipment wear and tear in this update because this is where it becomes relevant.
Like you can see up there, all equipment now has a health bar that declines with continued usage. Weapons lose their effectiveness with every attack completed, while each piece of armour losses effectiveness with each hit the character takes. Stronger equipment (and upgraded equipment) takes longer to wear down.
If left unchecked, weapons and armor will eventually break, effectively rendering them useless. Broken weapons deal like 1 damage, while broken armour has all the damage resistance of a piece of paper with the word ‘armour’ on it taped to your chest.
Broken or damaged weapons can be repaired either at Logic Stones or armouries for varying sums of money, depending on how powerful the equipment and how much damage it has suffered.
You can also buy weapon repair items which let you repair your items anywhere you want to. These are particularly useful in fields or on quests where repairing weapons at Logic Stones is impossible.
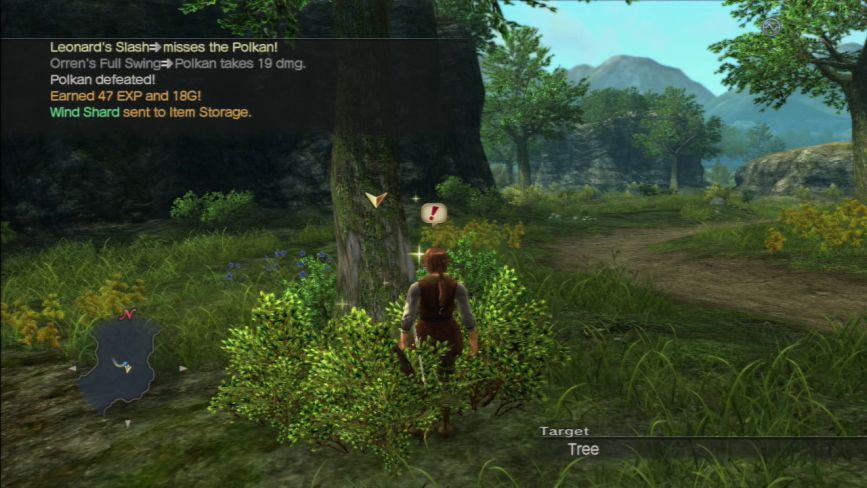
One last thing to highlight is scavenging.
In certain places out in fields or in dungeons, you will come across parts of the scenery or landscape that are glowing with random sparkles, like this tree for example.
You will auto-target it if you approach it and if you press the X button near it…
You’ll bend down and start digging around it like a madman.
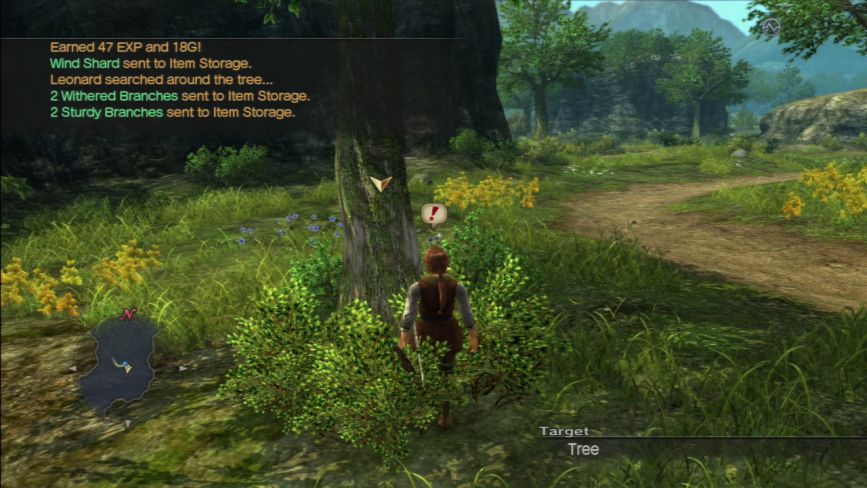
And will often be rewarded with a number of items you can use to upgrade your equipment, assuming you have enough of them. Again, this is just another facet of the game’s grindy/farmy insanity.
You can see here that Leonard acquired 2 Withered Branches and 2 Sturdy Branches from this tree. Whatever.
You can farm items from trees, rocks, fossils, flowers, cracks in walls, busted crates, cracks in walls, the list goes on and on. Anywhere there’s a sparkle, you can gather more meaningless crap in the hopes of maybe, one day, though probably not, binding whatever item you’d set your sights on binding and experience the hollow victory of finally meeting the game’s insane requirements on it and maybe even finally equipping it one day.
I hate this game’s item system.
Also, another sad fact: in the original White Knight Chronicles, you had to farm each item individually from these spawn points. This meant having your character bend down and scratch around the spawn point up to five times in order to get everything out of it.
Level-5 realized this was tedious and repetitive so they tweaked it so that your character bends down and searches for a longer time than in the first game, yet pulls out all the items that spawn point will ever give out in one go.
Funny that that was the pressing issue they thought they absolutely needed to address from game 1 to game 2.
And that’s all for Part 2.

INFOGRAPHICS!