Part 88: Georama & GeoNet
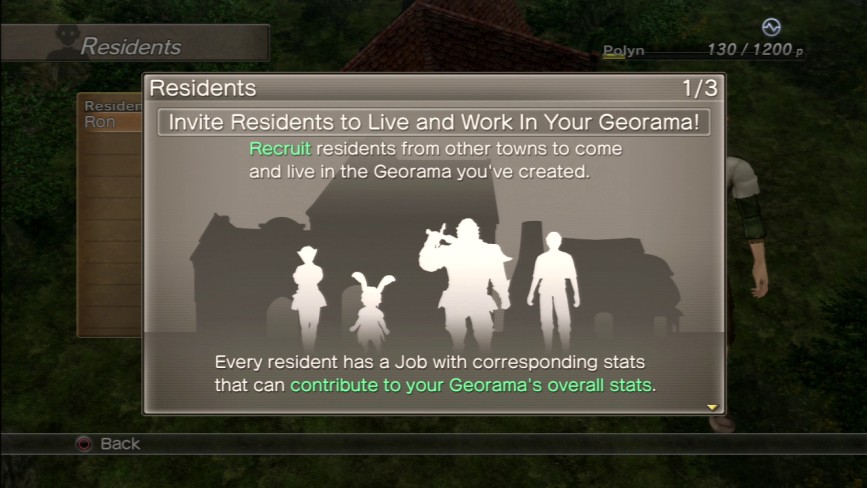
Before we get to our final update of this LP experience, I’m going to pause here and cover something that we haven’t yet touched on outside of a cursory glance. I’m talking about, of course, the Georama.
What is the Georama? Well, the short answer is that it’s a city-building minigame inside White Knight Chronicles.
The long answer is that it’s yet another half-baked, ultimately useless feature Level-5 twisted into the already tangled thread of the game which further muddled its development and probably took that much more away from it being a really good straight single-player JRPG and contributed that much more to being a messy hybrid semi-MMORPG that had its insides liquefy on it upon contact with our oxygen/nitrogen atmosphere like something out of a fucking David Cronenberg movie.
Can you believe these people made the Professor Layton games? I’m asking that because after all the stuff I’ve shown you over the course of this LP, I’m legitimately wondering if I’ve managed to create some kind of cognitive dissonance between Level-5’s decent games and its fuck ups like this one.
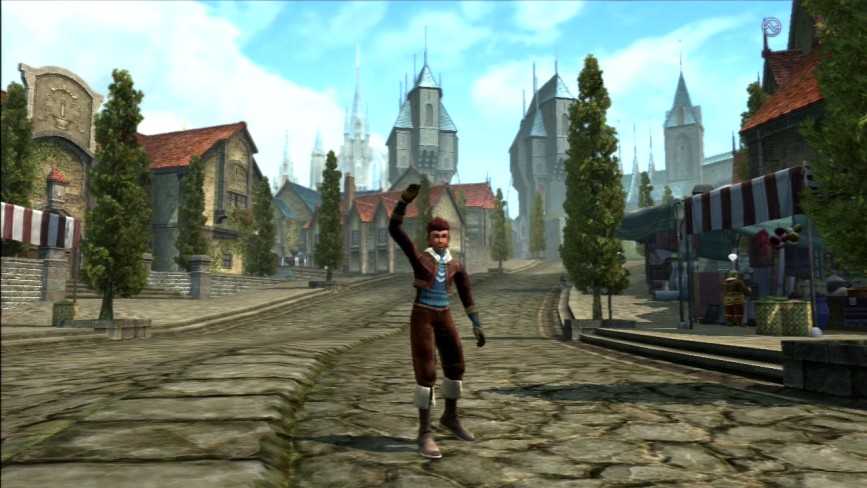
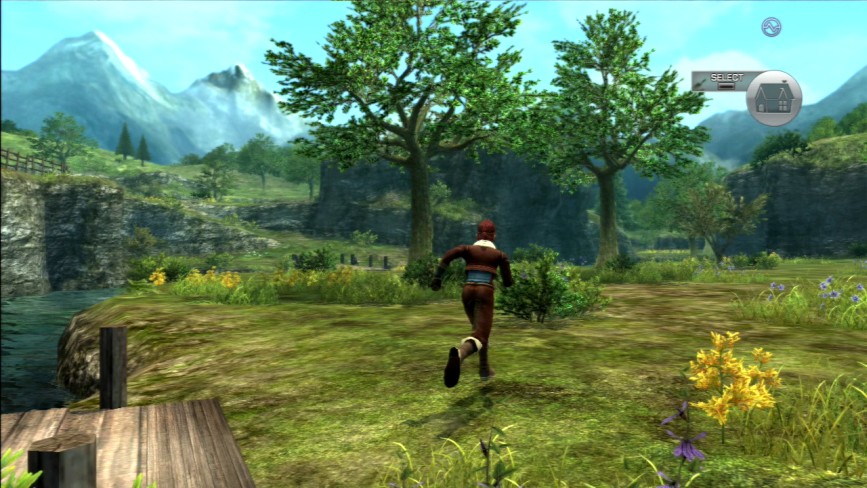
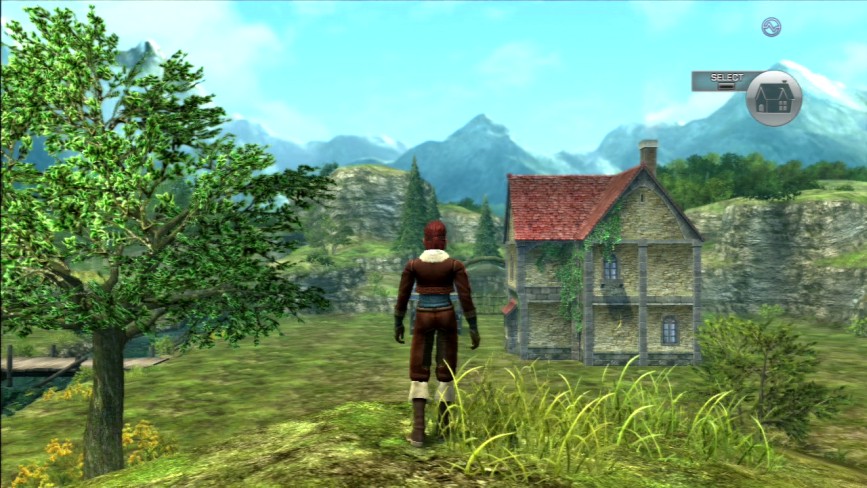
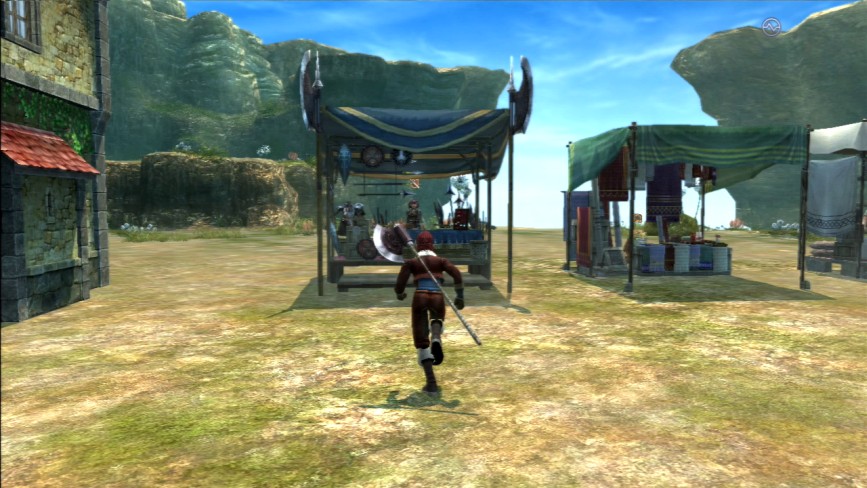
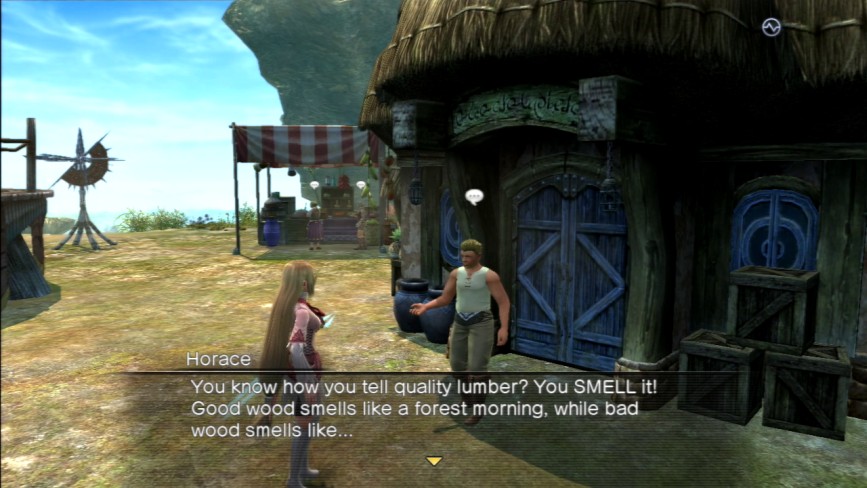
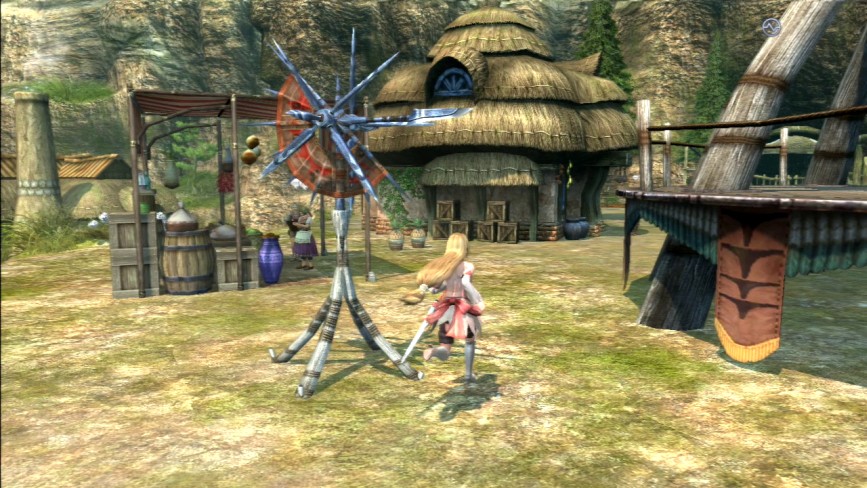
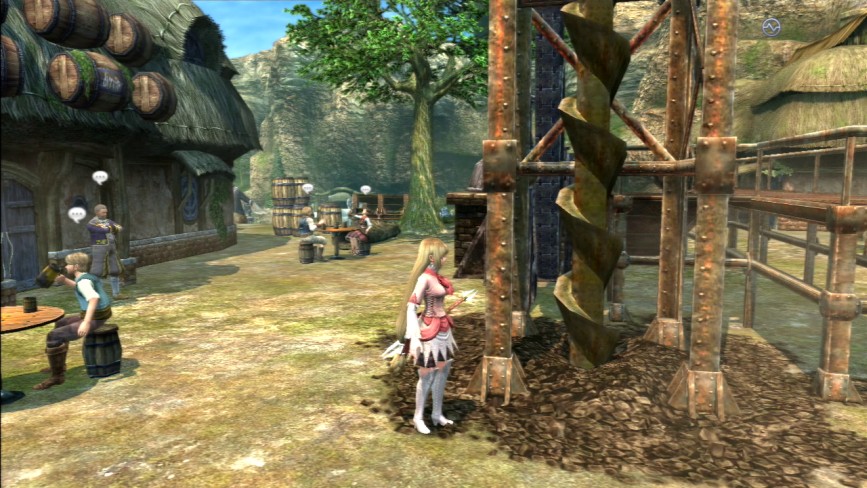
Anyway, for this update, we’re bringing Game 1 Orren out of retirement. It’s been a while since we’ve seen him and stupid tribal haircut. He looks so happy to see us too.
Ah pre-Sand Maze Ruins Game 1. Those were simpler times. We are all so much more innocent then, back when you’d all look at me like I was insane because I was blowing a gasket over Leonard’s stupidity and you didn’t really know why…
Then Lena died. And Cisna got re-kidnapped.
And then you were all MINE
 .
.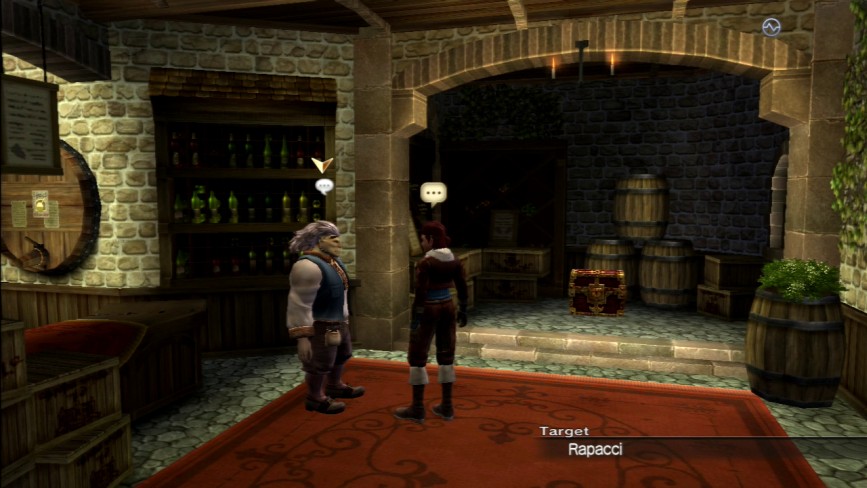
 Rapacci: Why the fuck do I keep hiring you?
 Orren: I do good work and my price is reasonable. Plus you keep murdering your clients. Rapacci: Speaking of, I got new one down in the cellar I need you ‘vanish’ for me.
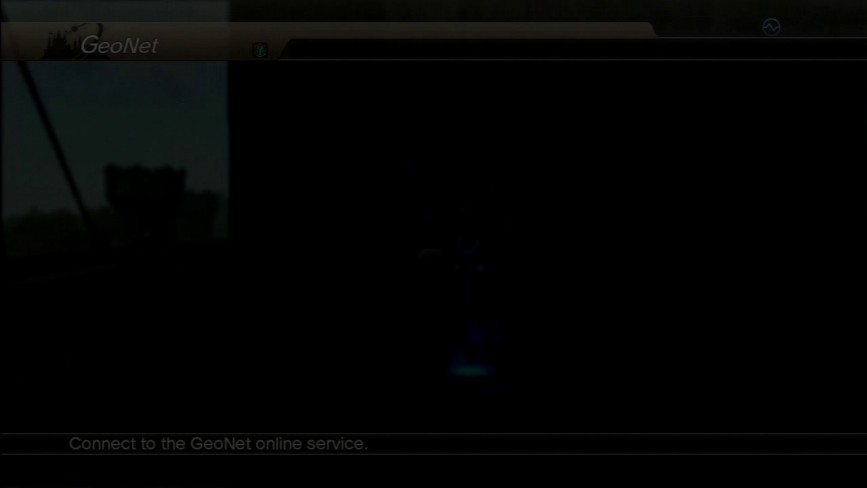
So once you clear the game’s prologue and gain control over the party once again, when you go say goodbye to Rapacci and get the Crystal Camera off of him, one more screen flashes up in the midst of the CC mini-tutorial.
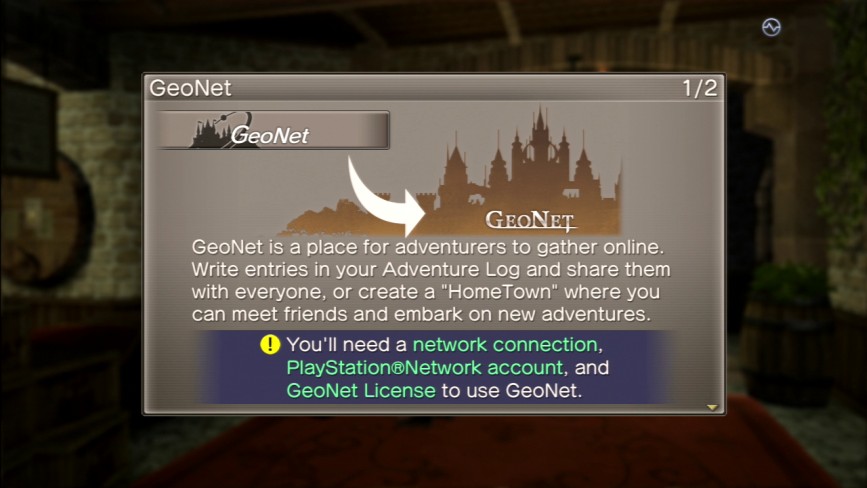
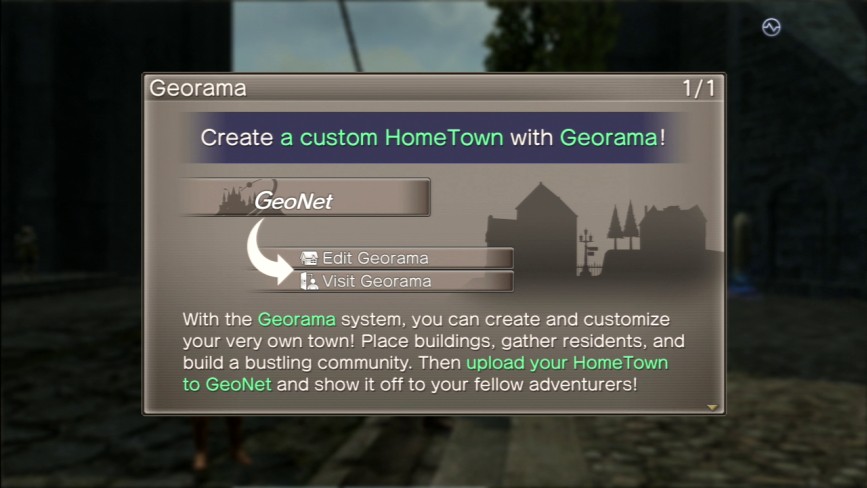
That’s right! It’s the GeoNet screen! Now, generally speaking, this screen is kind of useless now that Sony axed GeoNet, but the Georama is tied to the offline infrastructure of GeoNet, which is still, ironically, online, as it’s tied to the game disc itself.
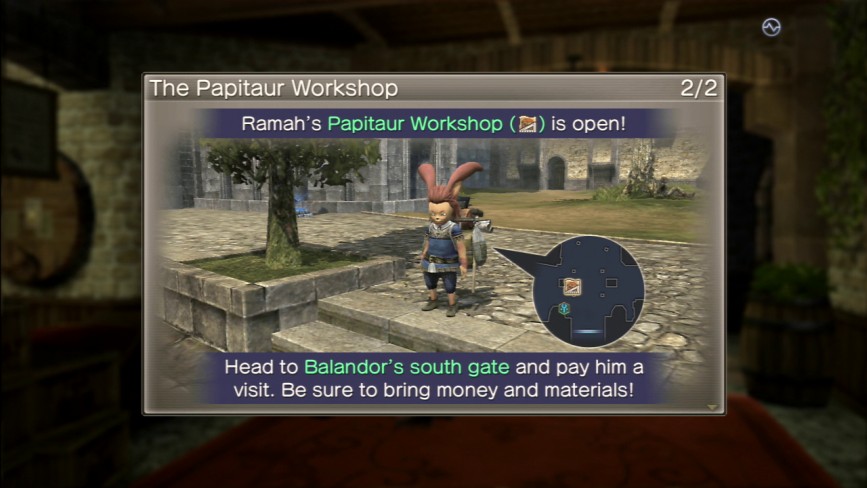
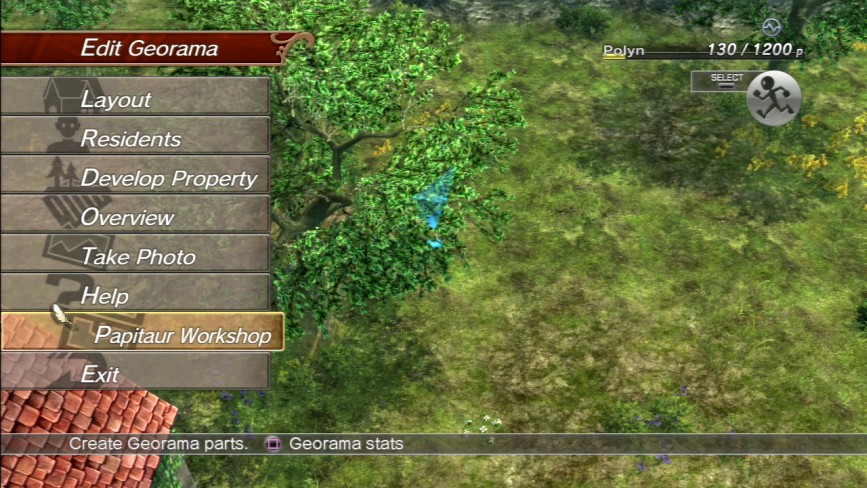
We also get a friendly prompt informing us to the existence of the Papitaur Workshop, one of the key components to building your Georama effectively.
So let’s take a wander on down and see what that’s about.
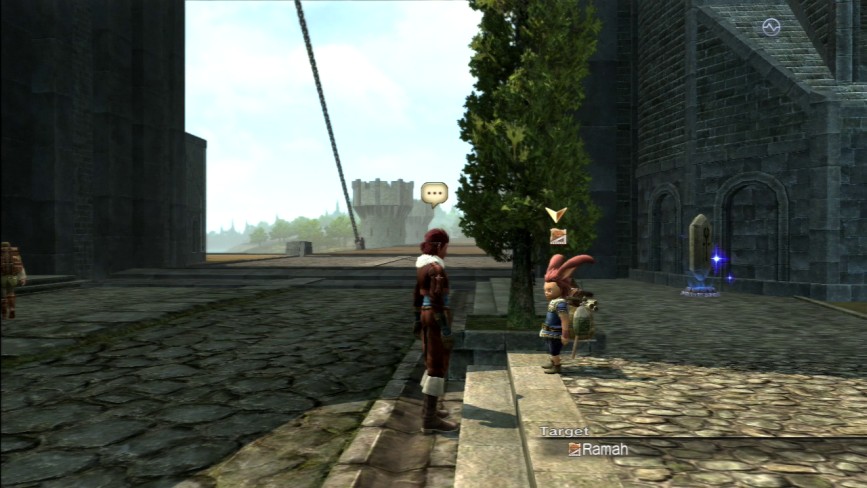
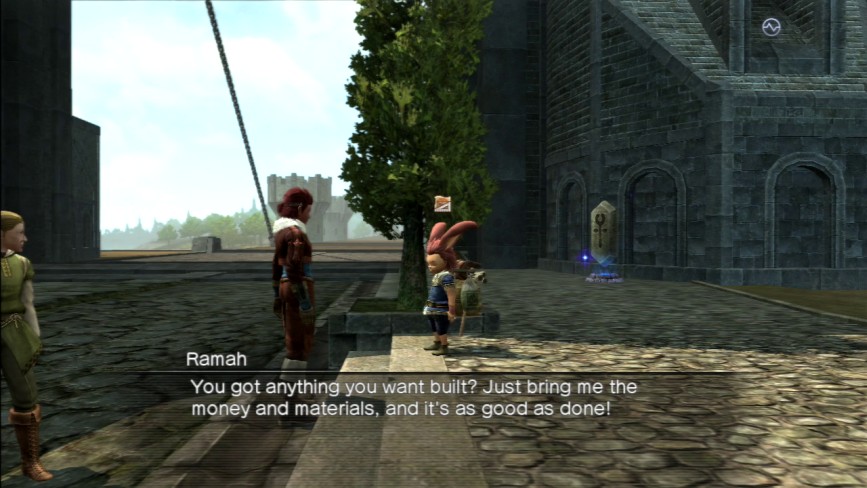
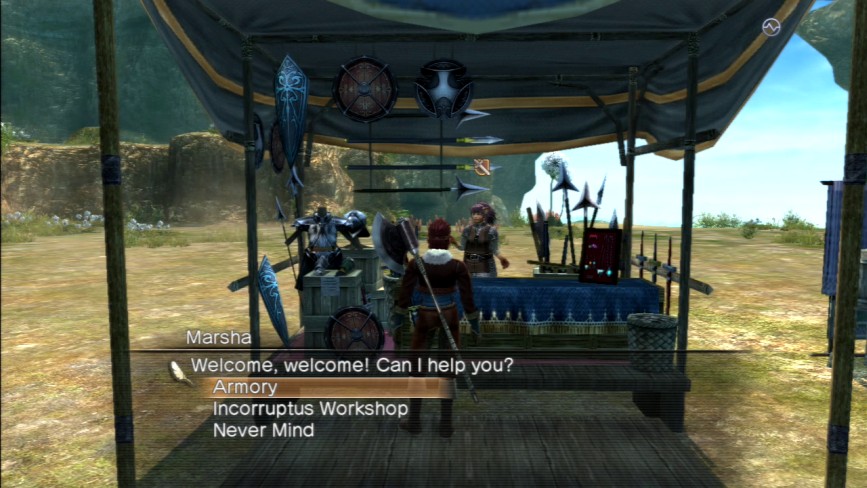
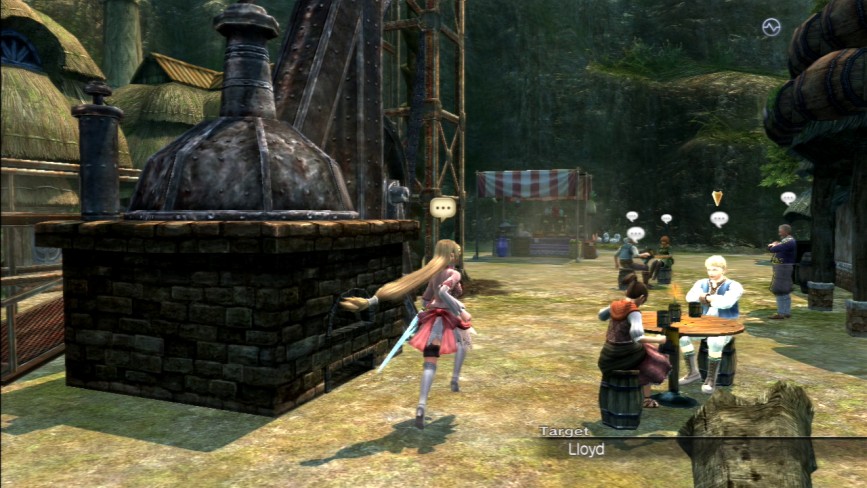
This is Ramah, the Papitaur responsible for maintaining the Papitaur Workshop. Unlike every other shop type in the game, the Papitaur Workshop is only available, physically speaking, here in Balandor. There are no other PW representatives out there in any of the other towns like Greede, Baccea, or Faria.
That said, you don’t need to keep coming back here and bugging Ramah every time you need to make a new piece for your Georama, but we’re getting ahead of ourselves.
Once you’ve spoken to Rapacci and received the Crystal Camera, you can now talk to Ramah about buying a Georama Deed. If you try to talk to him at any point before that, he’ll tell you to piss off.
He’ll offer to sell you a Georama deed for 1,000 Guilders, which at this point in the game is probably a bit steep for players budgeting their funds towards essentials like better armour, weapons, and items. The Georama was never essential to getting through the storyline in the first place, and now that GeoNet is deader than Disco, a Georama deed is a luxury item in the game.
Ramah also jokes that normally deeds are worth 10,000G and that he’s giving us a discount… Probably because Orren would kick him clean into Brimflamme’s mouth on Redhorn Isle if he tried to screw him.
Money poorly spent.
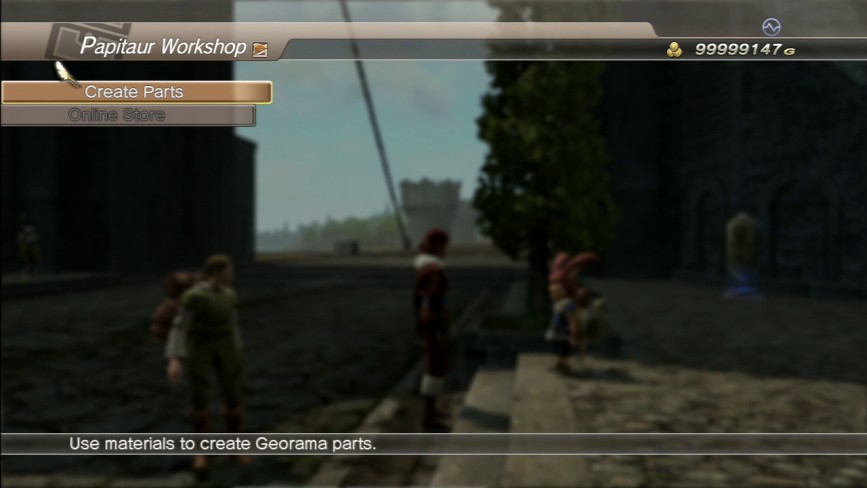
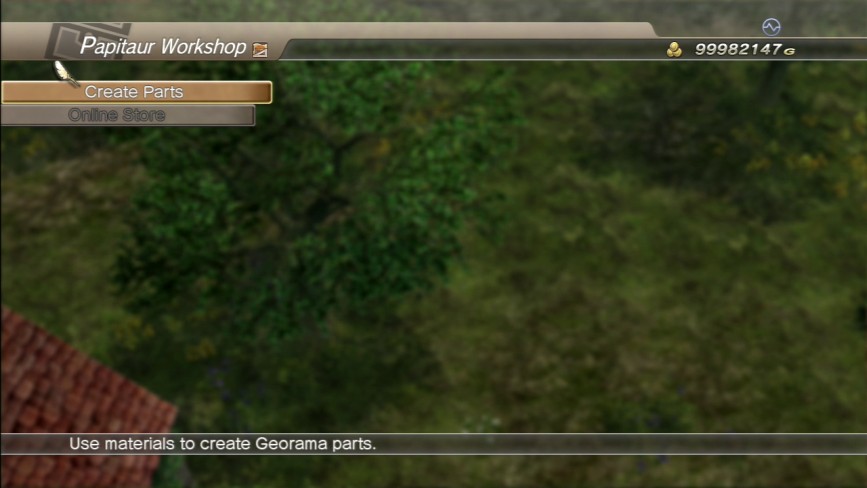
So on that note then, let’s take a peek inside the Papitaur Workshop.
Up front we’ve got two options: Create Parts and Online Store. Online Store is grayed out because GeoNet no longer exists.
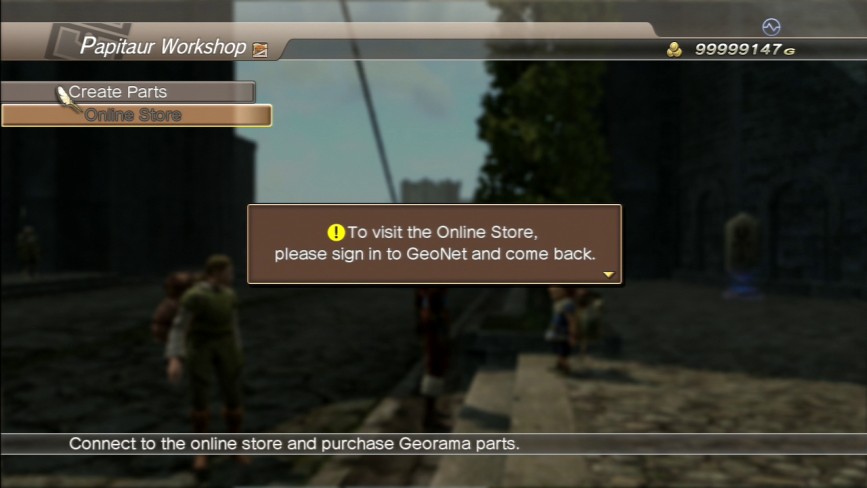
And if you try to access it, this bumper pops up inviting you to attempt the impossible.
I’ll show off what this section involved in-theory in a moment though.
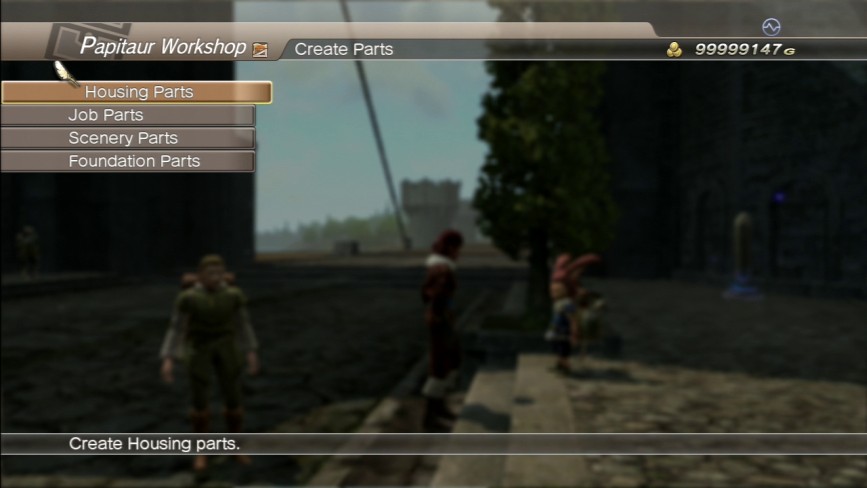
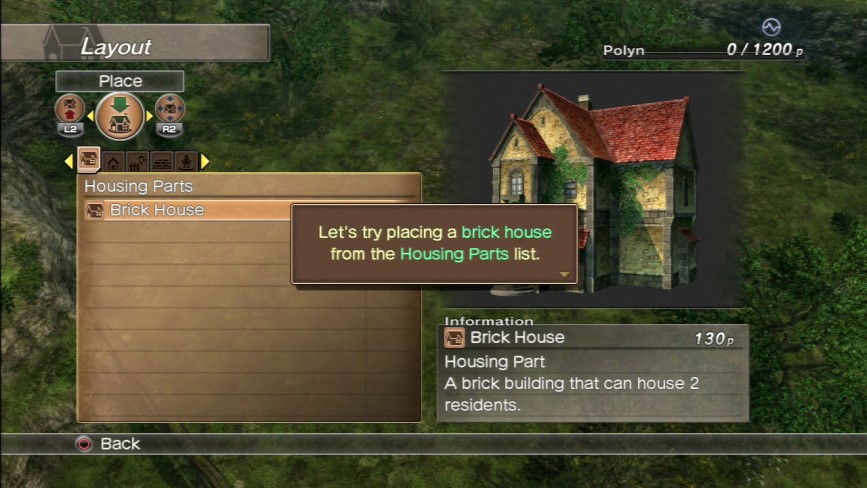
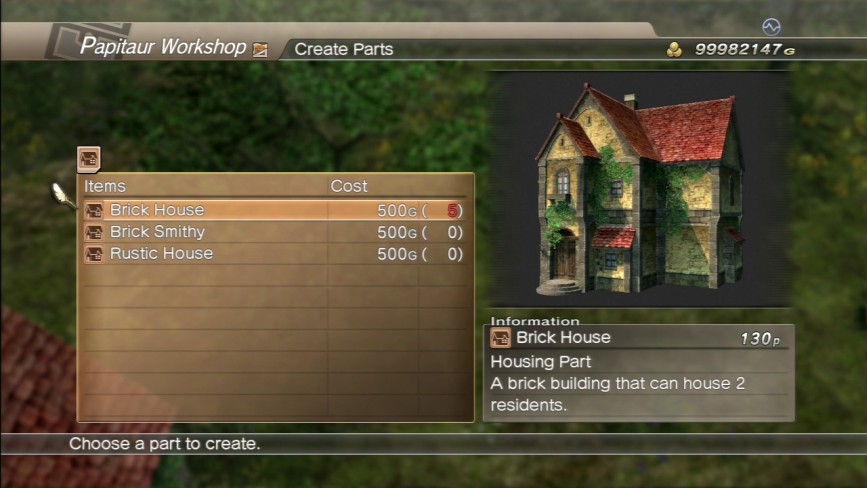
Inside the Create Parts tab, we find four additional tabs: Housing Parts, Job Parts, Scenery Parts, and Foundation Parts.
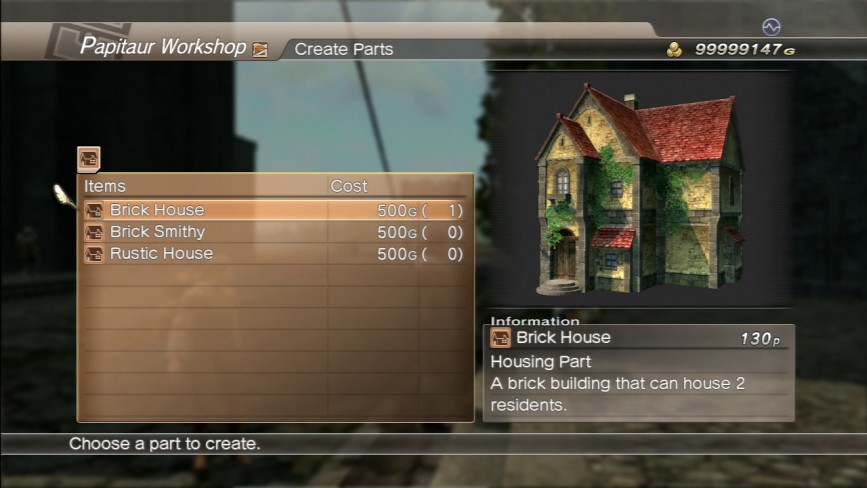
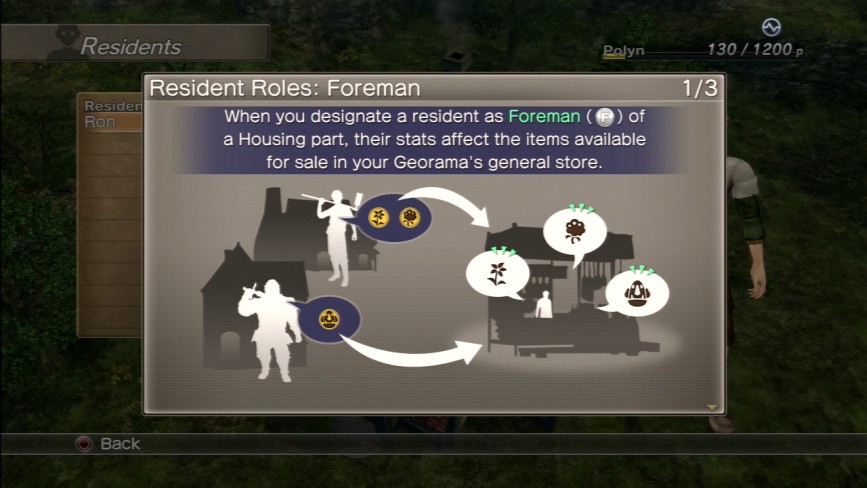
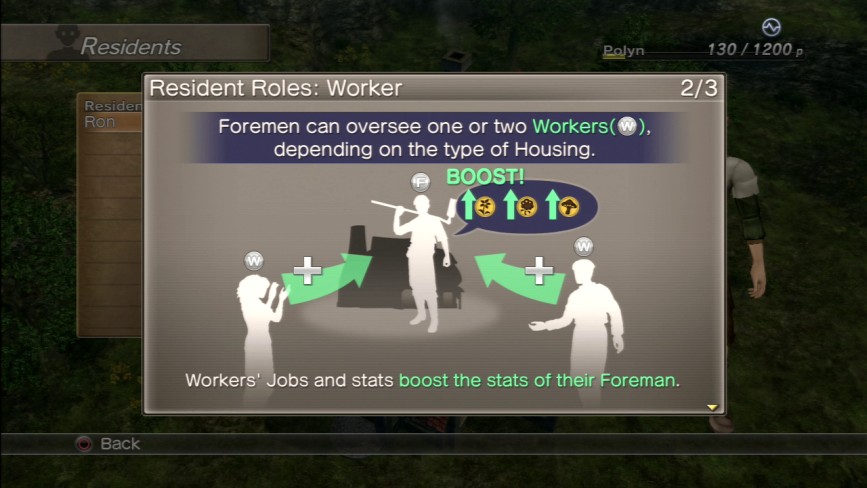
Housing Parts is where you build the buildings that will serve as the residences for your eventual Home Town residents. Depending on the size and type, housing parts can host either two or three residents; one foreman and one or two workers. We’ll get to the details of that part in a moment.
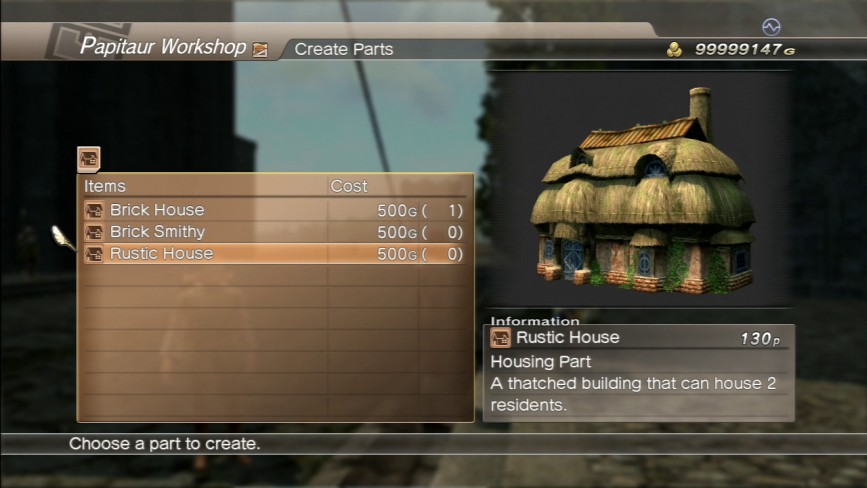
There are two styles of houses available to you at the outset, Brick and Rustic. Brick buildings are Balandor Castletown set, while Rustic buildings are the Parma set. There’s also the Eloquent set, which is the Farian set, but that’s all paid DLC.
You only have a few variants of each set available right at the start, but as you develop your Georama’s level, you’ll unlock more buildings for both sets.
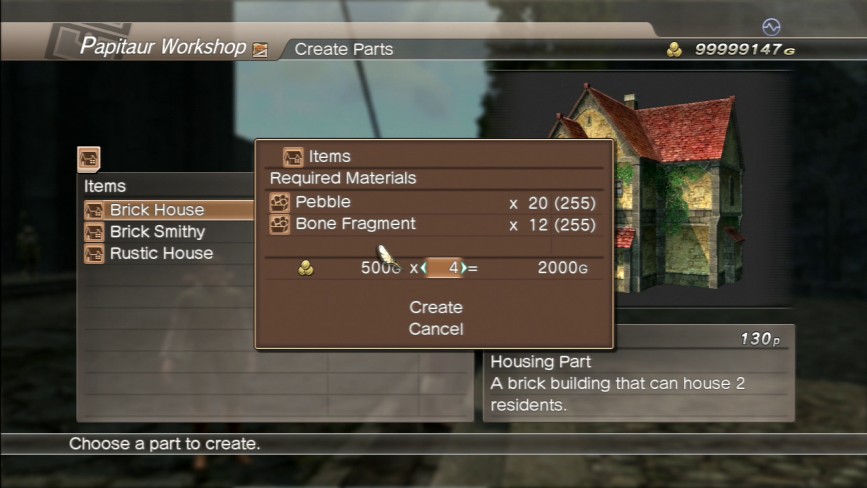
And just like everything in this game, every single Georama piece you want to build has to be bound with scraps of materials you will be farming for ages to get the proper numbers of just to build one fucking barrel.
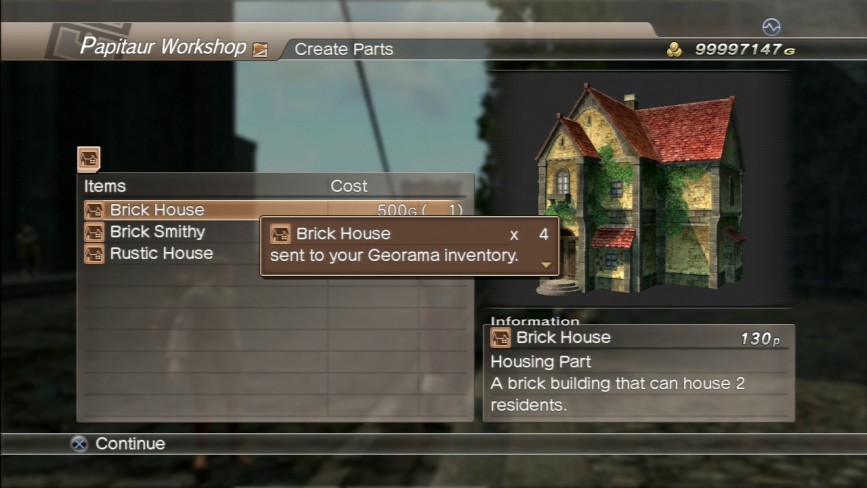
You get one house as a freebie to start off with. That was about the extent of my time with the Georama when playing legitimately with it: plopping the fucking house down in the teeny tiny initial square of land you get and saying “fuck, this is borning,” and never touching it again until I went back to build Orrenstown for this LP.

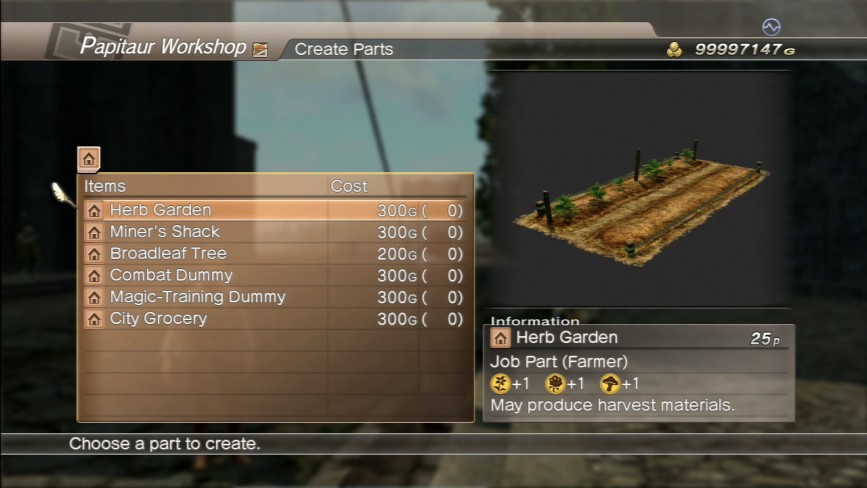
Job parts are pieces designed to augment the various stats of your Georama and its residents. Often times, if you have a resident whose role or skillset matches up with a particular job part, they can sometimes be found at that item, tending to it in a manner befitting their role.
For example, Farmers will tend gardens.
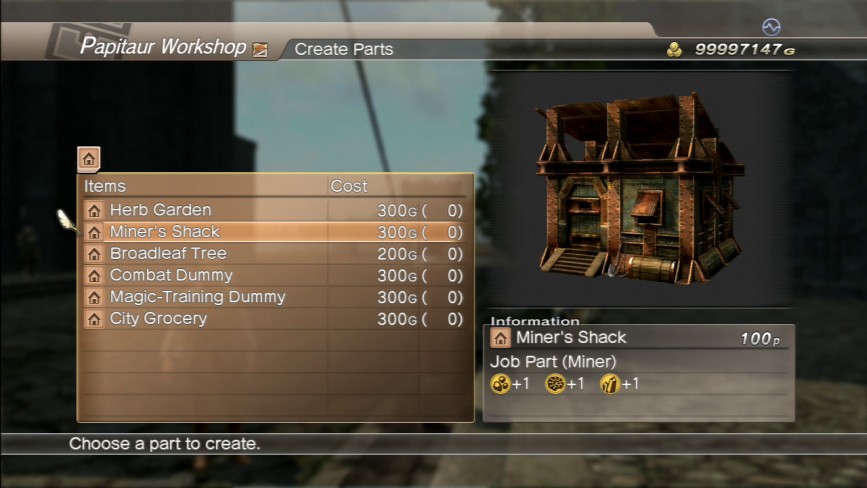
Miners will hang out near mineshafts or dig at mineral deposts.
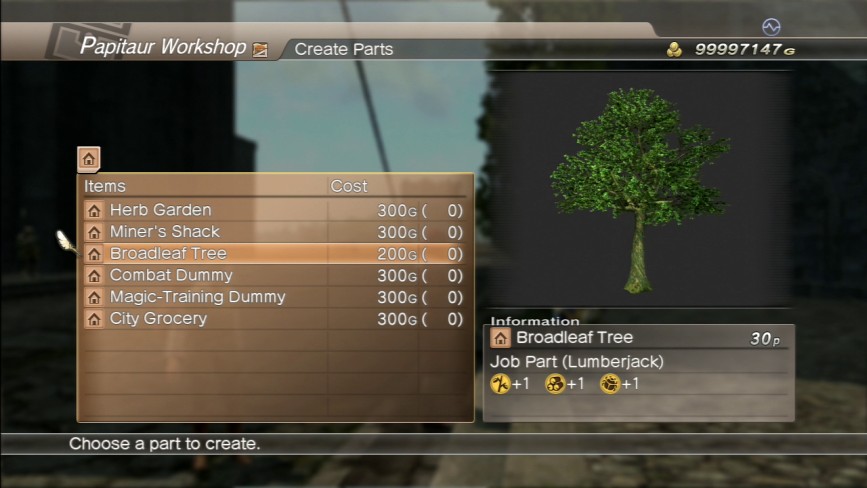
Lumberjacks will chop away at trees.

Warriors will spar with training dummies.
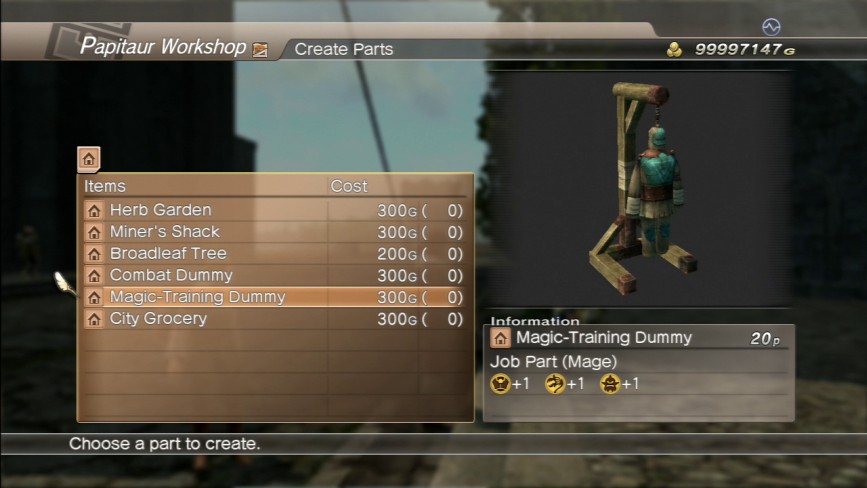
Mages will practice spells on magic dummies.
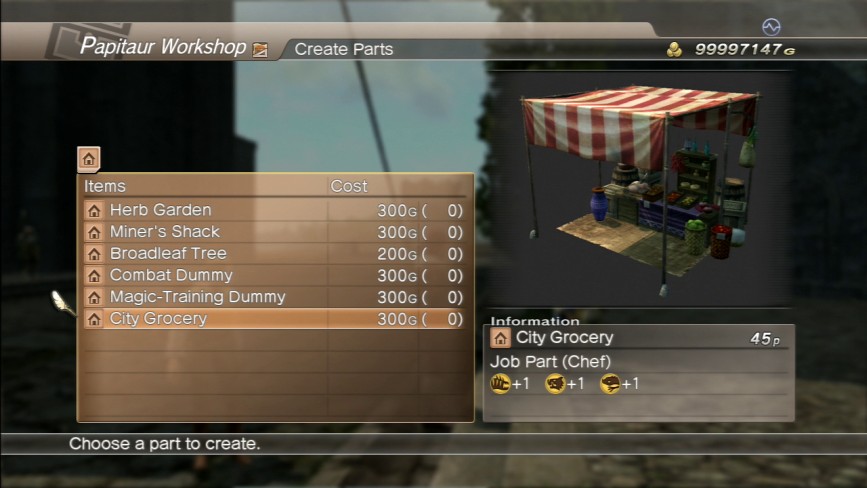
And Chefs will congregate around grocer stalls like this one.
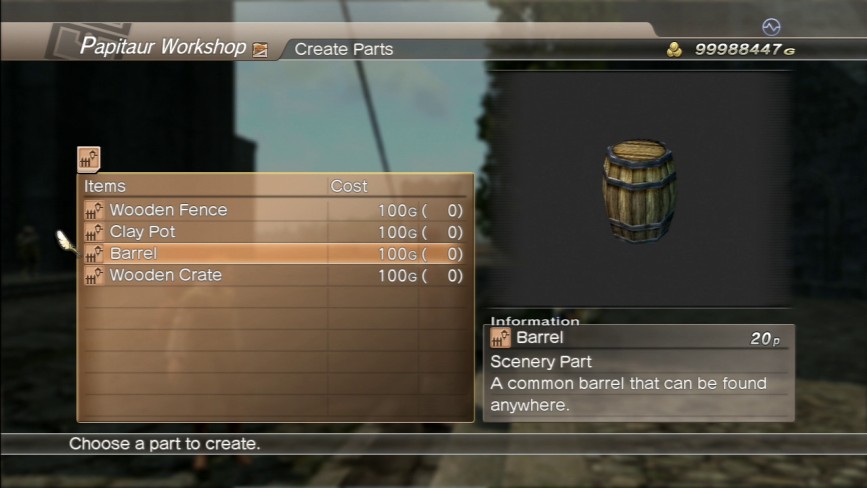
The scenery tab is made up of items that don’t add anything to your Georama functionally, but serve to give it more character. Right now there’s just crates and barrels, but as you go higher up the Georama hierarchy, you eventually unlock tables for people to sit down at, fountains, campfires, and other decorative items like totems and the like.
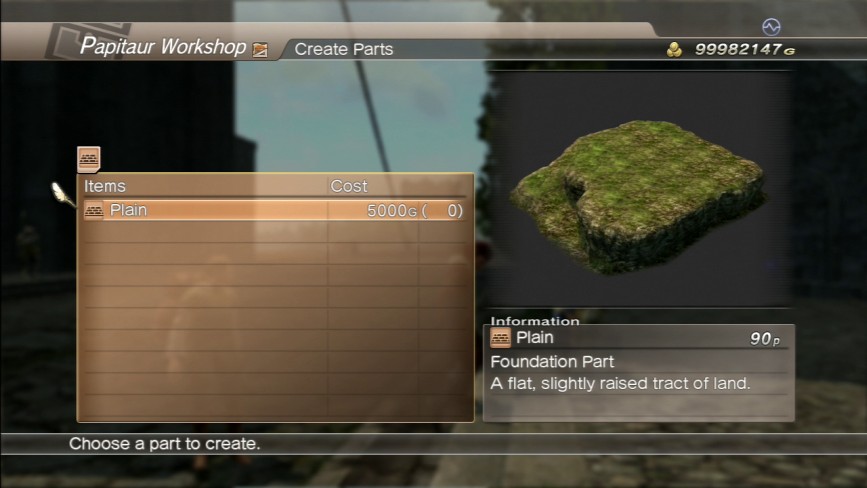
And the final tab is the foundation tab. This one allows you to build additional landscape pieces that you can plop down over an entire area to augment the landscape in very obtuse ways.
Getting these things to plop properly is a fucking nightmare and they’re by and large useless.

And here’s a taste of the missing content from the Papitaur Workshop. The PlayStation Store is chock full of paid DLC items from the Farian building set, and a couple of missing pieces from the Baccea set as well.
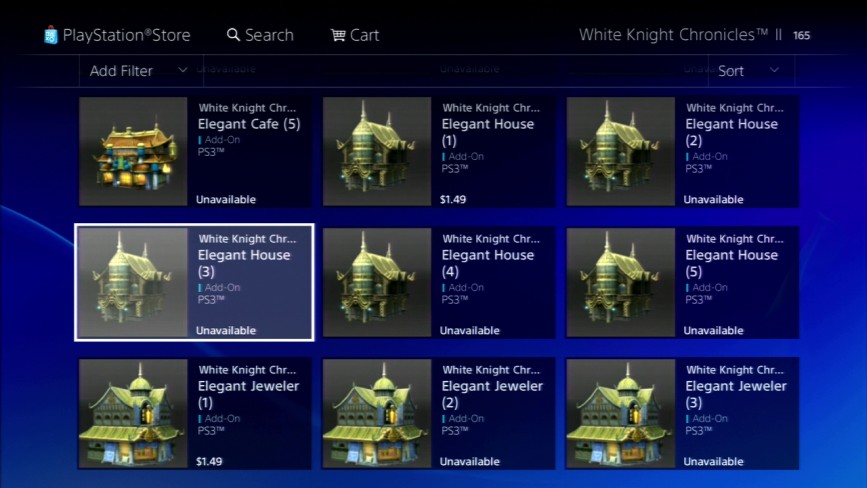
As you can see, each individual building is still available for purchase at a cost of $1.49 per building, and that’s including stuff like trees, baskets, and other scenery items.
I haven’t done the exact math, but there’s got to be well over $20 to $30-worth of per-item DLC content here just in Georama parts alone.
Holy fuck.
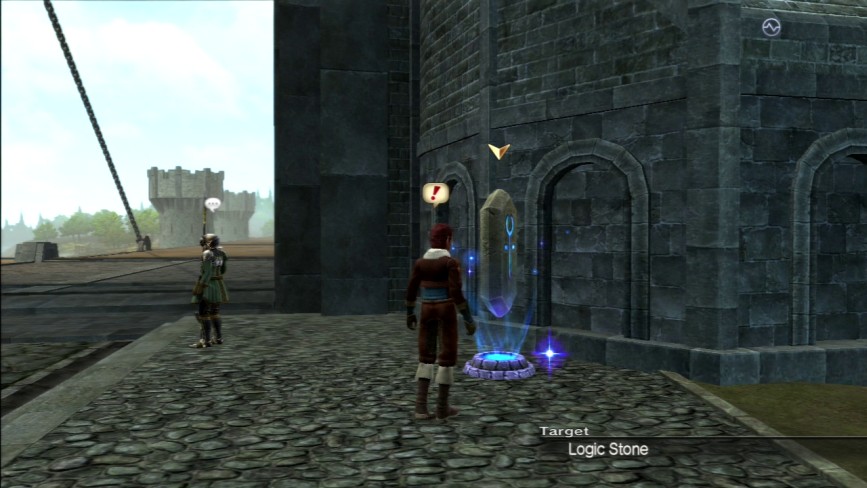
But anyways, let’s get to actually building a Georama. To access the Georama construction area, you need to go to either a Logic Stone or onto the World Map and access the GeoNet tab.
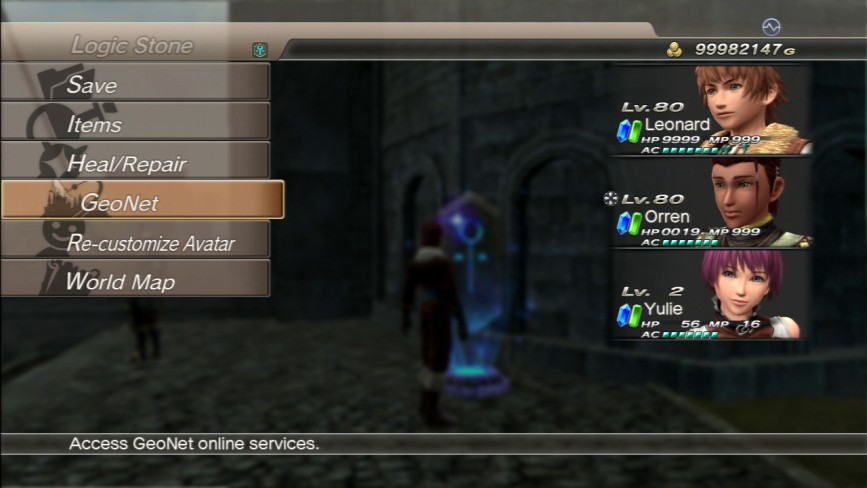
Like so.
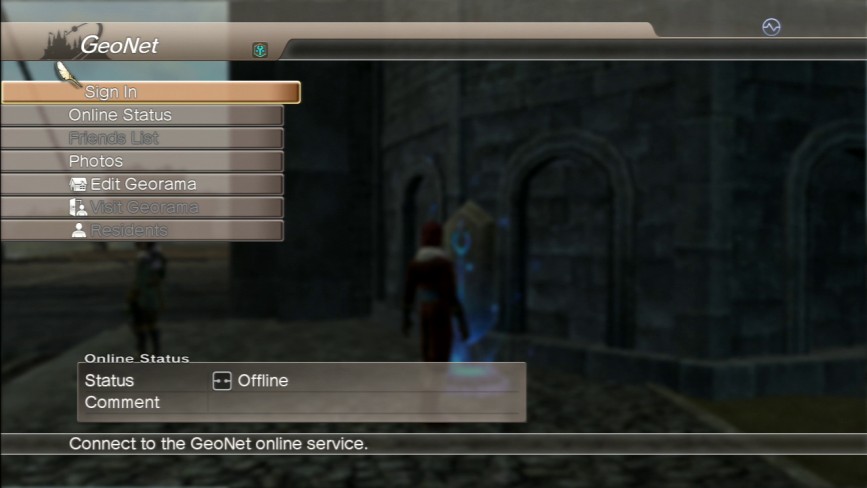
These tabs are all fairly self-explanatory. Sign In would take you out of the single player game and onto GeoNet’s global lobby where you’d then find individual game lobbies to join people on online quests.
Online Status was your online/away/do not disturb/appear offline setting like most online applications have these days.
Friends List is currently grayed out because it’s impossible to have a Friends List in the game anymore, but when GeoNet was online, this was where you’d store profile and quick-contact information for players you felt comfortable enough with to put into what was essentially an address book. Usually this consisted of people you knew in real life who played the game (or at least admitted to it), people you’d go on frequent quests with (because you were guaranteed to run into the same 20 people repeatedly because NO ONE played this game online), and fellow Guild members.
Photos is where all the screenshots taken with the Crystal Camera with your current Avatar were stored. I think I’ve mentioned how terrible the onboard screenshot mechanic is a few times over the course of this LP. The camera itself is pretty good, I’ve done some pretty cool things with it for this LP like the Orrenstown sequence and getting some otherwise hard-to-get talking head shots for various NPCs, but that was just with the camera interface—none of it was actually done by taking any screenshots with it because the screenshots it produces are all shit.
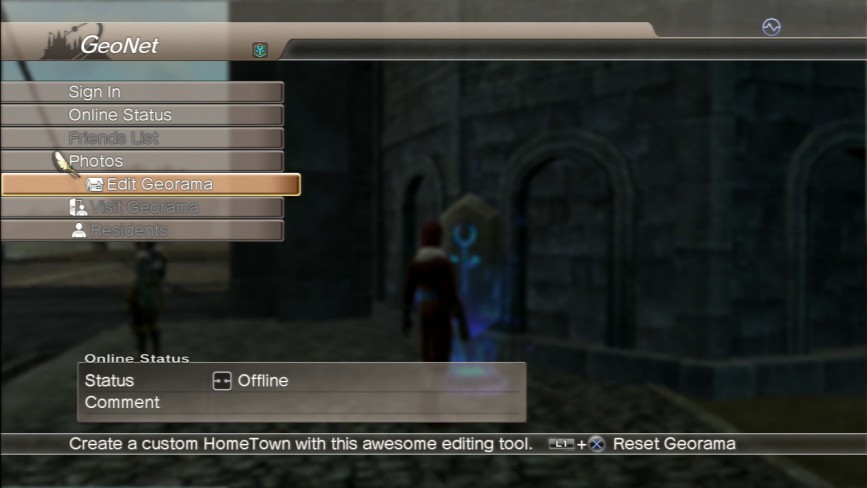
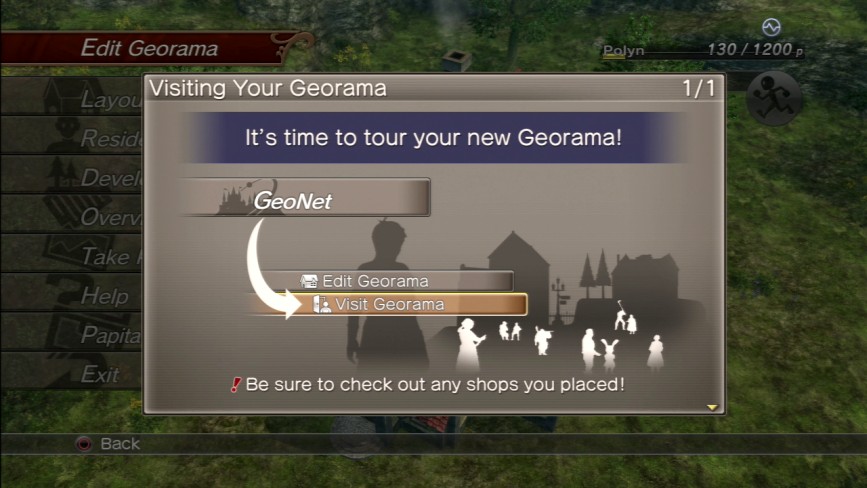
The three options we’re most concerned with for this update, however, are the final three: Edit Georama, Visit Georama, and Residents.
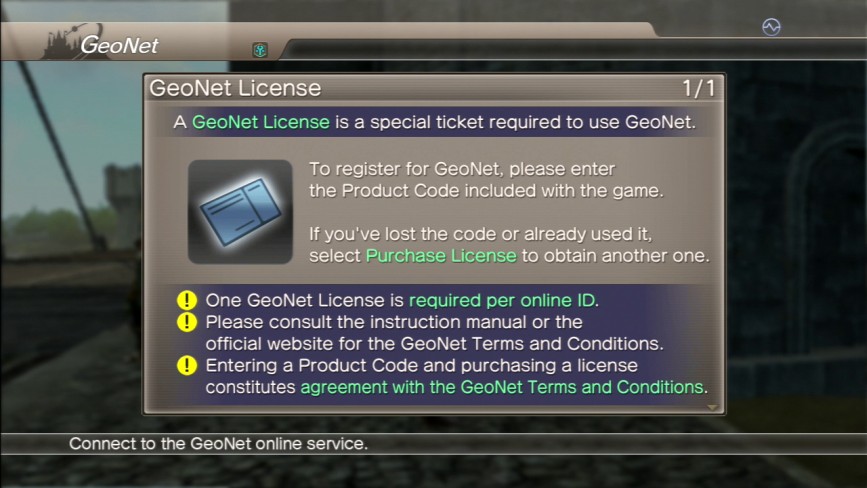
Clicking the Sign In option at the top of the menu will open up this tab which informs you about the GeoNet License. This is the game’s Online Pass. Each new copy of White Knight Chronicles or White Knight Chronicles II came with one free. You couldn’t access GeoNet without one, though you could purchase a replacement License through the PlayStation Store.
Good News: Sony had the presence of mind to stop selling GeoNet Licenses from the PlayStation Store when GeoNet was offlined. So while Sony on the whole may be a swirling tempest of in-fighting, insanity, and incompetence, at the very least someone somewhere up their labyrinthine chain of command had the wherewithal to make sure they weren’t actively ripping people off with this game instead of just passively doing so like normal.
So while we’re here, let’s take a quick look at what all that effort put into White Knight Chronicles’s online mode—the altar upon which Akihiro Hino himself personally sacrificed any hope this game had of being a rather decent thing—ultimately yielded.
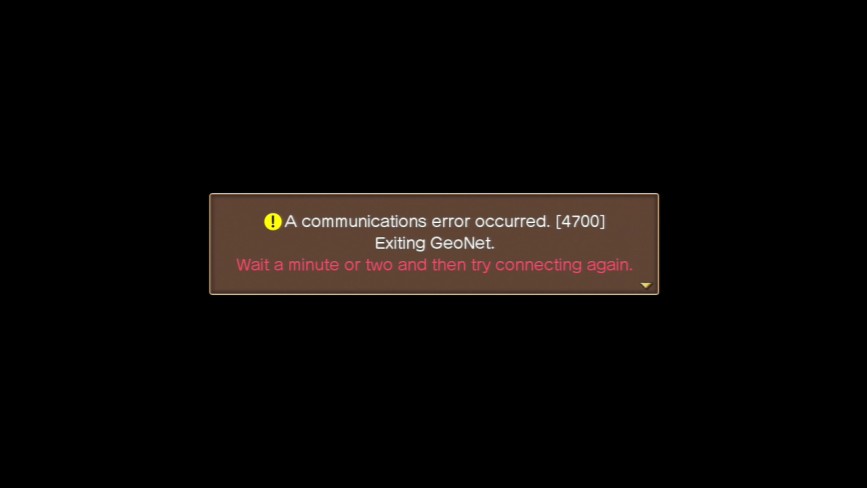
TAHDAH!
 Do you know what that is? That’s all that money spent building GeoNet being tossed out a fucking window into the street.
If you’re looking for the simplest answer to the question “why does this game suck so much?” Well, here it is.
This is what it looks like when you mistakenly believe that cramming a half-assed vanilla JRPG together with a half-assed MMORPG will magically transmute both of them into a whole-ass hybrid video game that wins all of the awards ever and buys your ass a new yacht… Or maybe just another stadium to put your company name on. Instead of merely leaving you with two half-assed incongruous game formats that try to shank one another at every possible opportunity because each despises the other for holding it back.
You think if I submitted this LP in its entirety to MIT I could get an instant Masters of Computer Science?
Just a thought.
Anyway, enough with the prelude, let’s get into the main movement.

BOWEL movement, I mean. Huur.

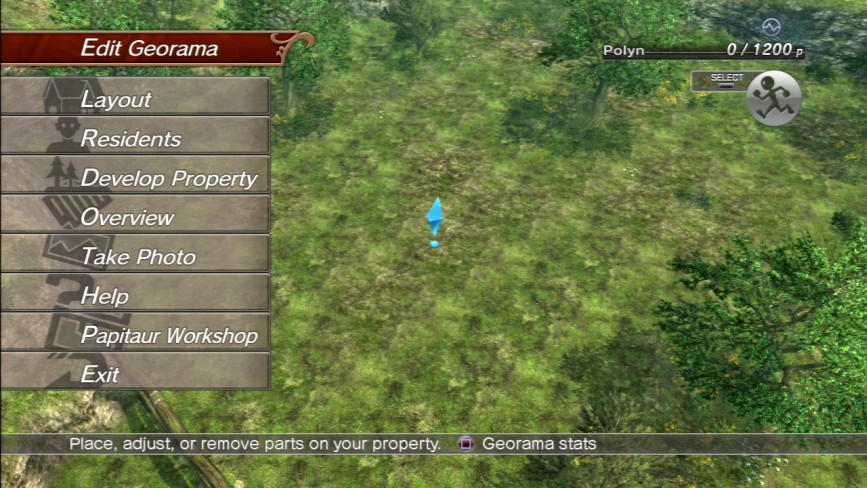
So here’s what you have initially at your disposal to work with in the Georama. A big, bland, green, flat plain.
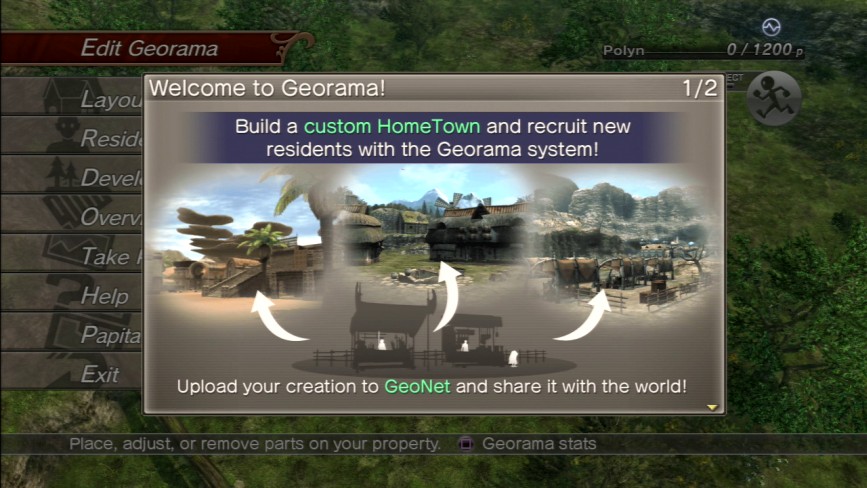
These screens sum up the thesis statement of the Georama.
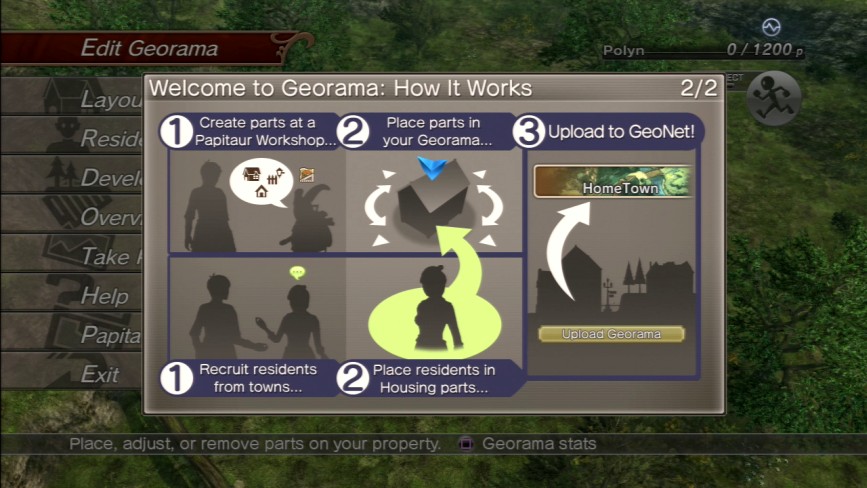
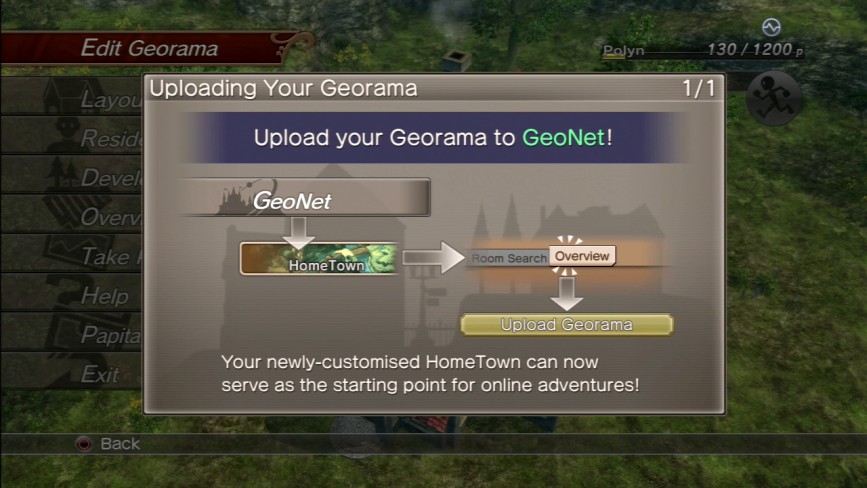
Step 3 of this tab was technically the selling point of the Georama.
Georamas could be uploaded to GeoNet to function both as visitable locales and as lobbies for quests. The interesting idea about Georamas on GeoNet was that Level-5 was trying to create a grassroots online item economy for players.
Depending on which way you developed your Georama and which stats you poured your effort into fostering, it would dictate which items, weapons, and armours could be bought at your Georama’s storefront. And if you had certain harvest points set up too, it also affected what you could farm too.
The idea was, you could wander into someone with a decently developed Georama and buy things that were otherwise unavailable in your own game, or buy materials to make them in your game. It’s no World of WarCraft online economy, that’s for sure, but for good old
 Level-5 , it was something.
Of course, because crafting even a pathetic Georama takes like 80 hours of finagling, it meant that you’d find yourself visiting the same three or four Georamas run by the powerplayers of the game, or people who just up and hacked their way to the top of the heap.
So even when Level-5’s got a decent idea on their hands, they still find a way to utterly ruin it.

Yes, because it means I barely have to type shit for the next 30 screenshots.

So upon your first time entering the Georama to edit it, you’re presented with a crash course on most of the things you need to know in order to make a crack at trying to build a decent Georama.
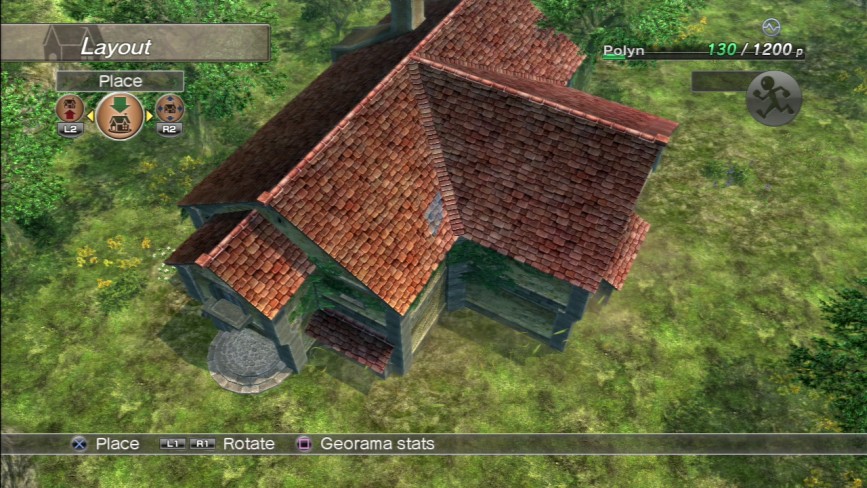
You can see all the tabs down the side there. The first tab is the Layout tab.
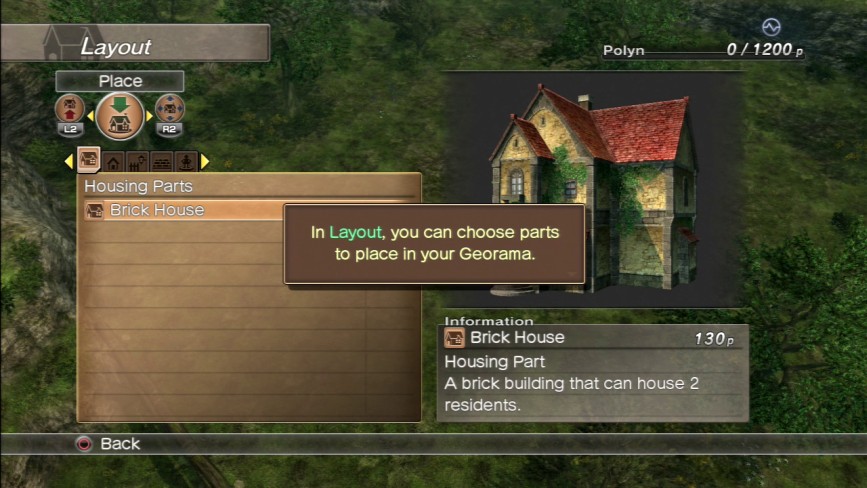
Like the tutorial says, this is where you inventory is stored.
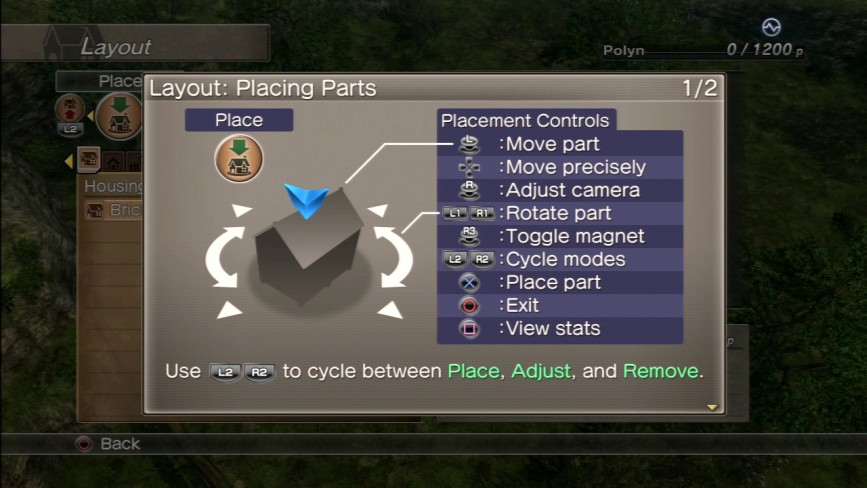
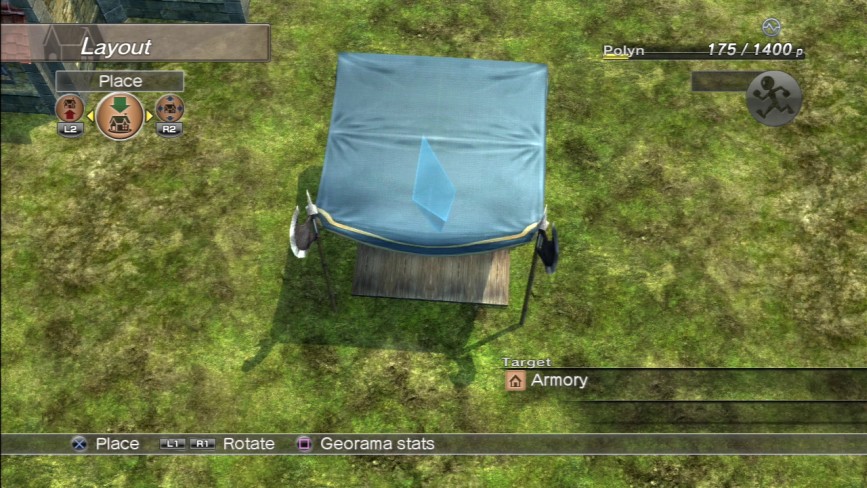
When you select a piece from the inventory, you then get to move it around the map using the thumbsticks on the DualShock3.

Hitting the R2 and L2 buttons cycle you between Place, Adjust, and Remove modes.

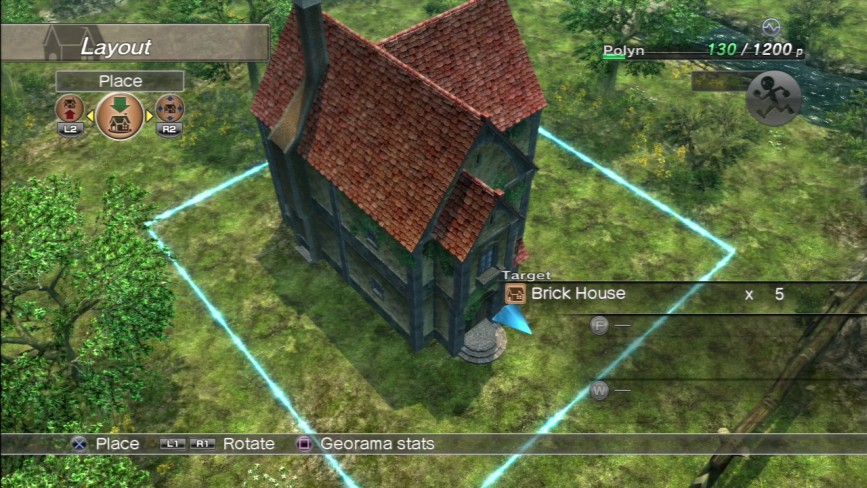
So as you can see, early on there isn’t that much space to work with. A lone house takes up almost half the available space.
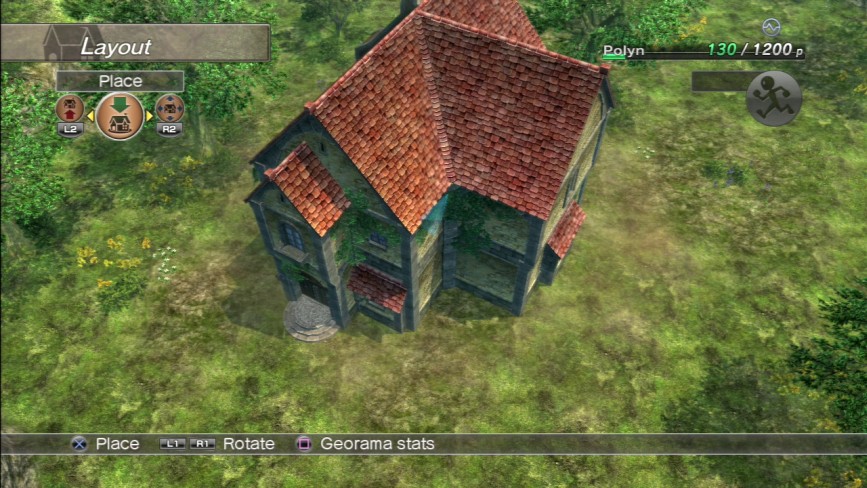
These things are also very finicky about where you plop them down. Georama item collision detecting boxes extend a fair ways out from the item itself, and if it doesn’t like where you’re trying to put it, it will turn red and you will be unable to confirm your placement of it until you move it and it turns normal coloured again.
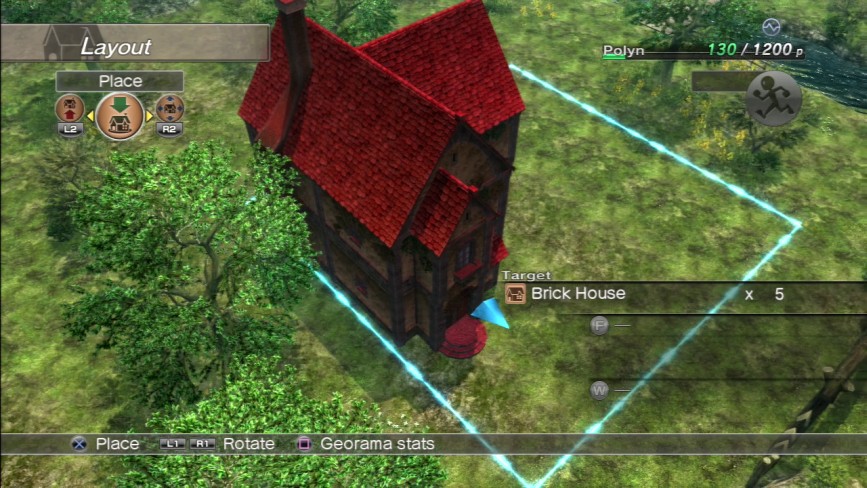
When you do find a spot the game’s okay with, hit the X button and the building or item smooshes into place.
And then pops up firm. It’s a cool little effect, but nothing too
 -worthy.
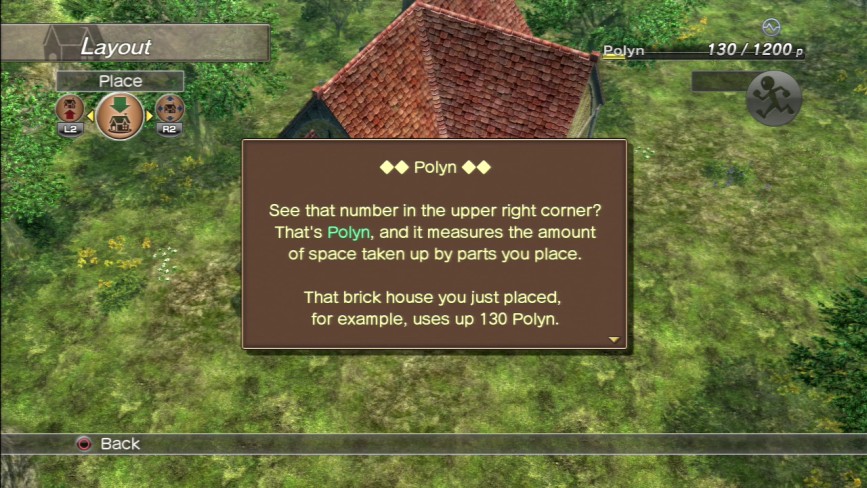
Now the game pauses to inform you about Polyn. Polyn is basically the amount of stuff point you have to work with in a given Georama.
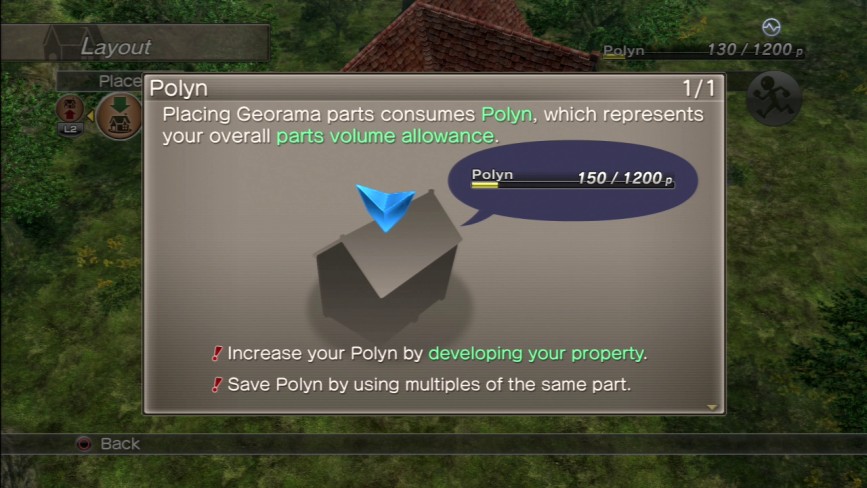
Like the box says, you can build a whole bloody metropolis-worth of parts, but you can only plop down a certain number of items before you exceed your Polyn total, and everything has a Polyn value in the Georama.
Larger parts on average have a higher Polyn count, like houses and non-resident buildings, while scenery items like trees, bushes, and barrels have a relatively low Polyn count.
Developing the Georama to the next level will increase your Polyn allowance and thereby increase the amount of crap you can shove into this place that technically doesn’t exist in-game.
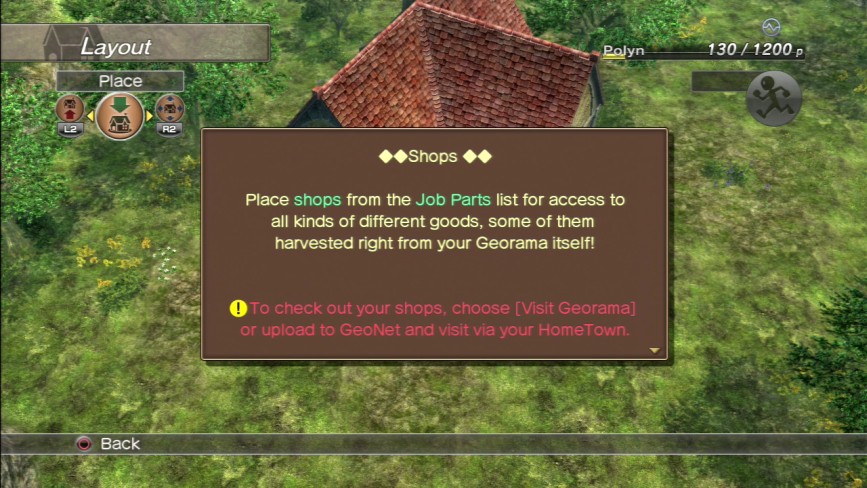
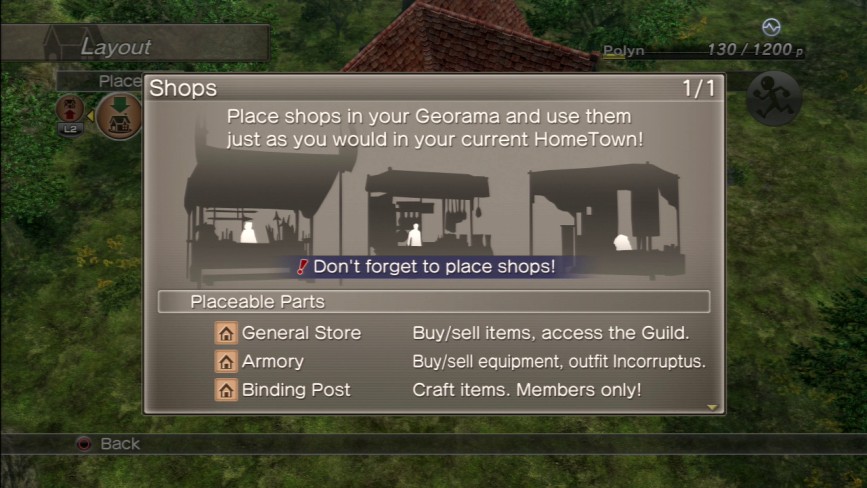
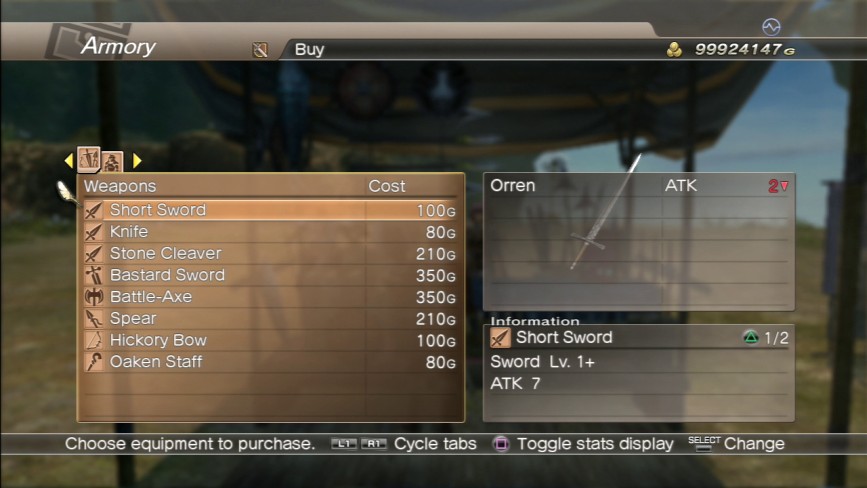
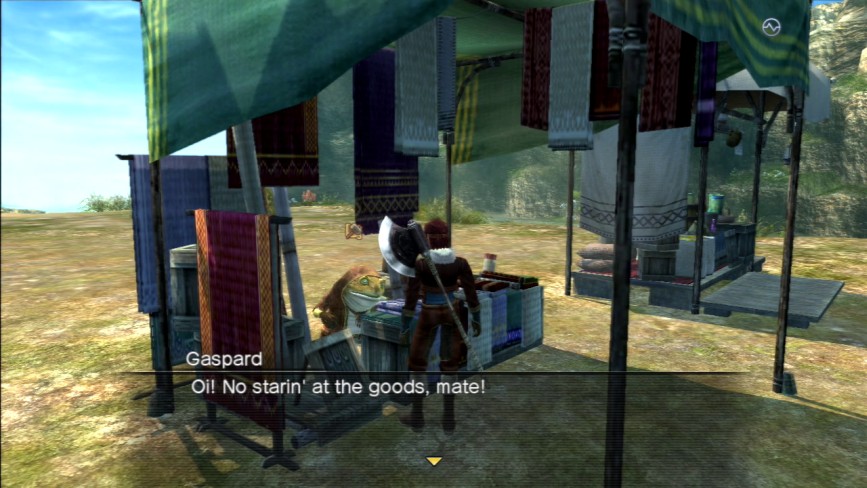
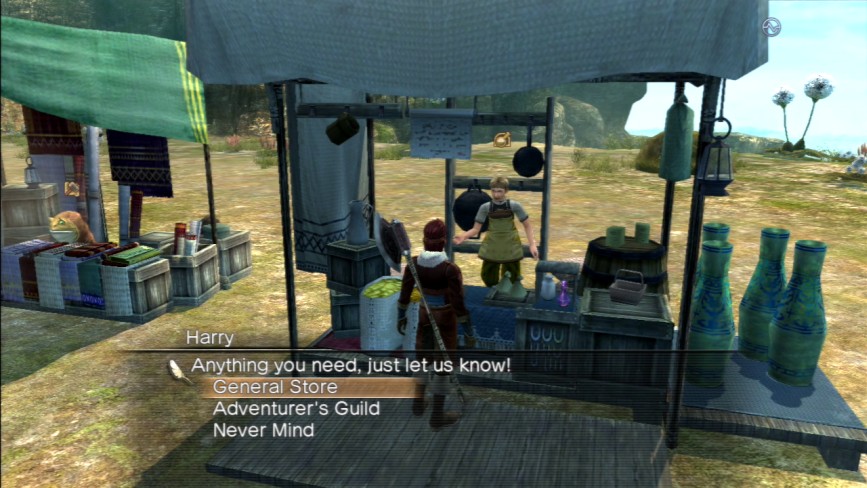
You also get three free shop stalls, a General Store, an Armory, and a Binding Post. The Armory also rolls the Incorruptus Mechanic into it, while the General Store also doubles as the Georama’s Adventurer’s Guild.
These three shops are manned by the shopkeepers from Balandor: Marsha at the Armory, Harry at the General Store, and Gaspard at the Binding Post.
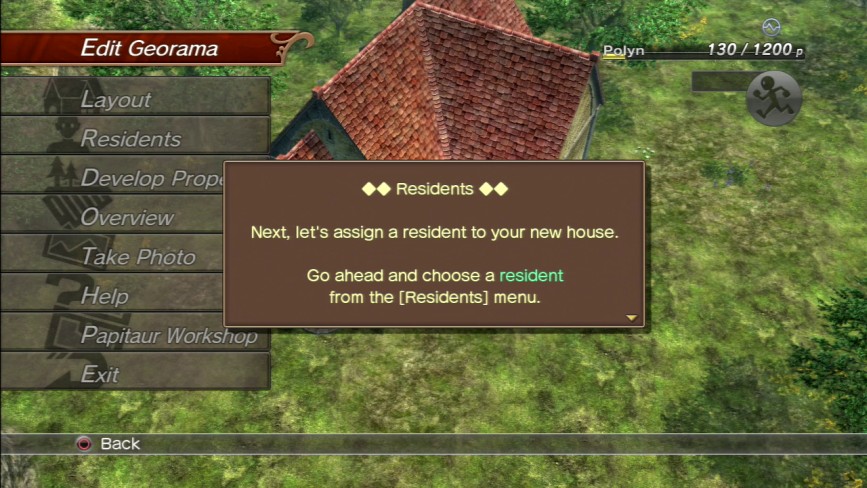
This next part deals with managing the people whom you con into living in your shitass town.
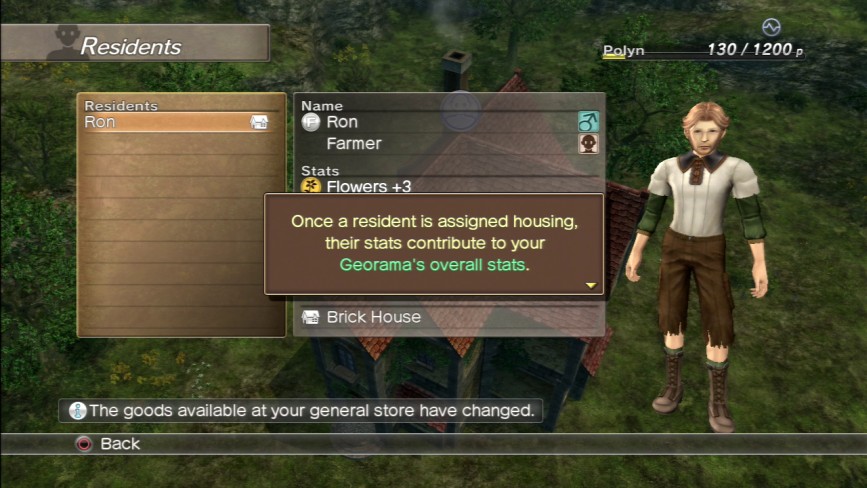
Because who you pick to live in your Georama determines how it grows or crumbles, you need to actively seek out people to live here and fulfill certain roles in it.
For the purpose of the tutorial, the game gives you one free resident, though even if you save the layout of the tutorial Georama, he will disappear the moment you return to the single-player game.
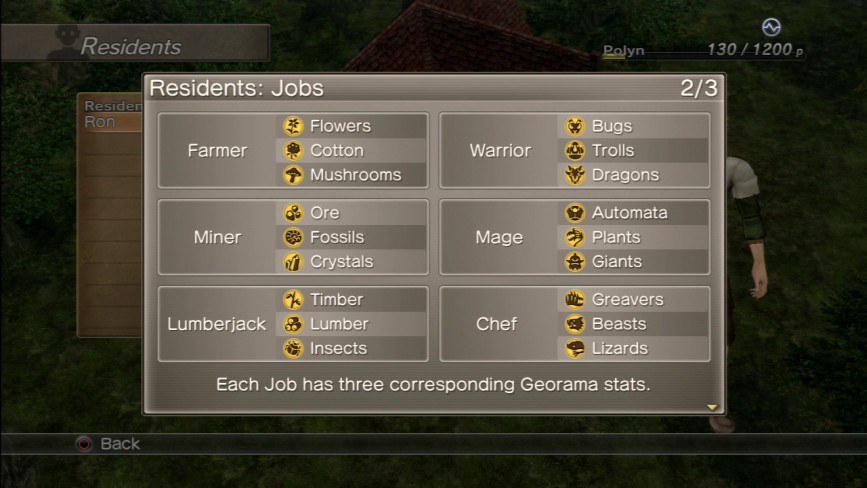
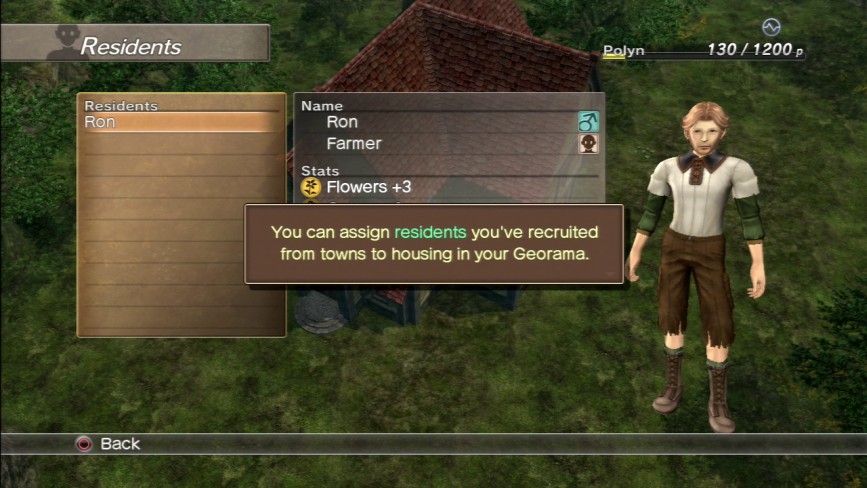
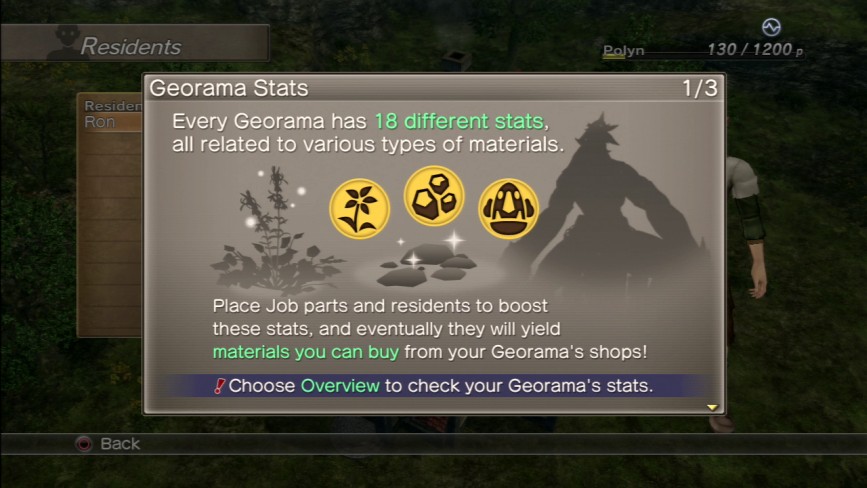
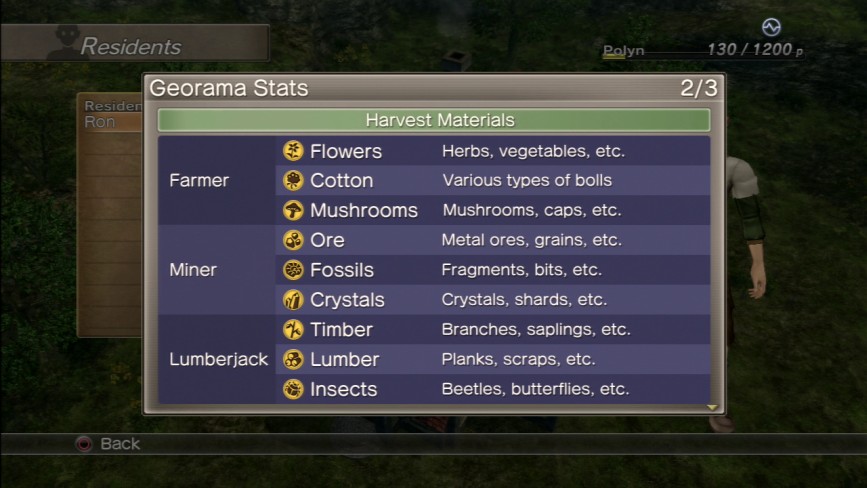
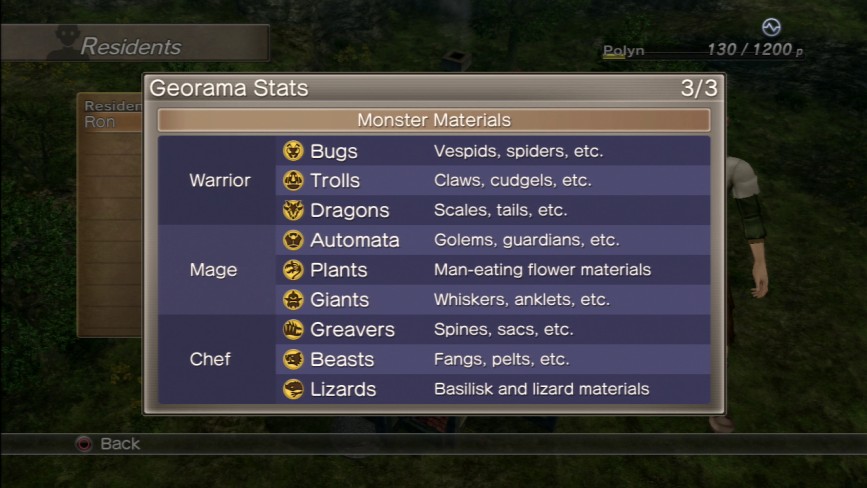
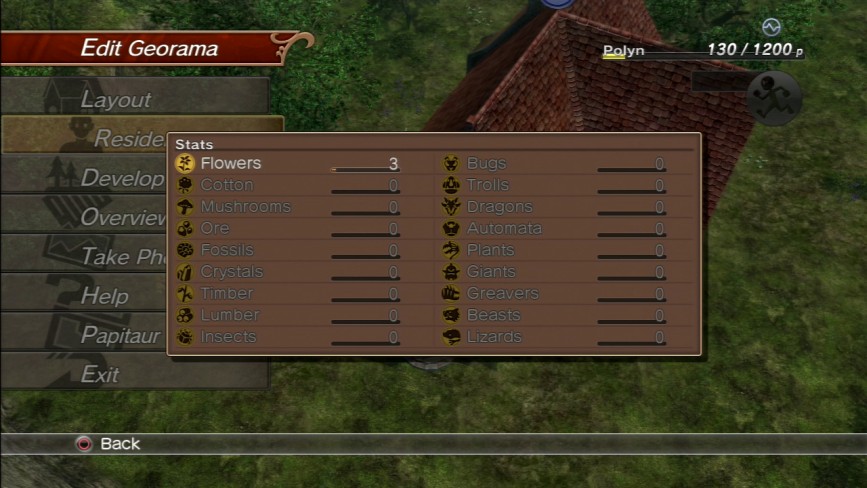
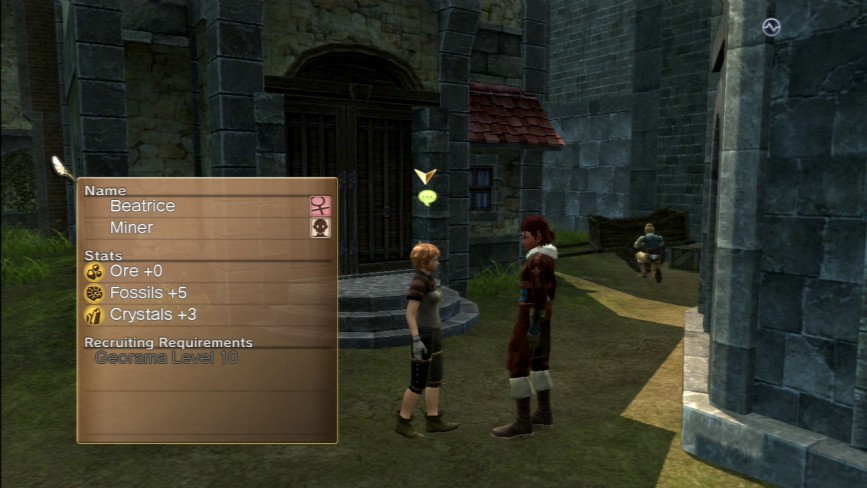
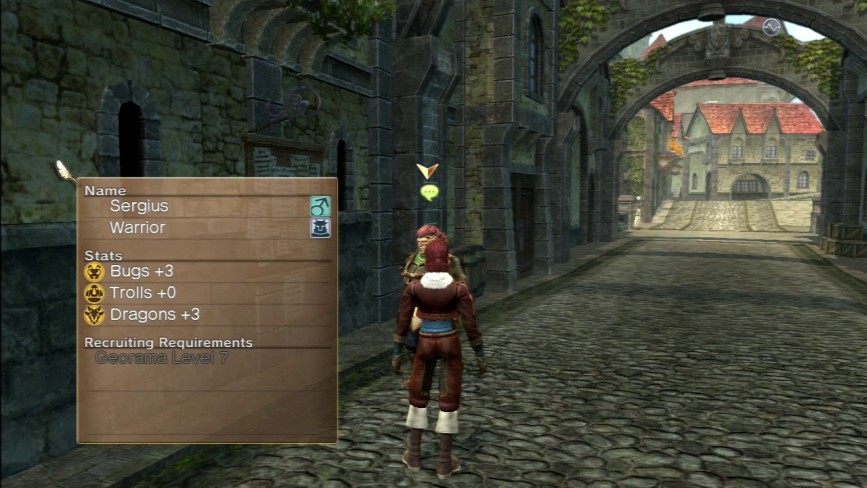
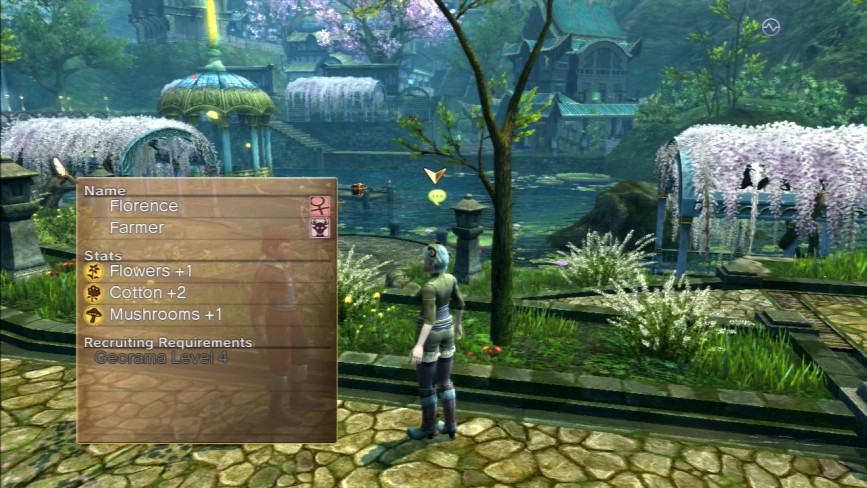
And here are those resident roles I mentioned earlier and which stats they raise. Certain residents bring higher stats to the table than others, so kind of always have to be on the lookout for who can bring the most to your Georama depending on what elements you want to foster.
Each one of these highlighted attributes has a stat inside the Georama from 1 to 50. Both residents, and buildings/scenery pieces can raise these stats. The higher stats you have, the rarer the material parts you can then buy from the Georama general store. The general idea is that eventually you could buy most of the rare 1% drop materials you need to bind all the really cool items from the Binding Posts, HOWEVER, the amount of time and effort you need to pour into the Georama to get these items to appear is about even to the time you'd spend trying to farm said items the "hard way" because even the Georama is tied down to the all-encumbering Guild Rank.
Onmi also reminds me that even if you do get anything of this sort to appear in your Georama shop, that shit is ridiculously expensive. In that certain items literally cost millions of Guilders.
Basically:
 is preferable than trying to suffer through this bullshit.
Ideally, however, if you manage get a stat all the way up to 50, a unique armour or weapon will appear in your Georama’s armoury and can be purchased from there, even if you let that stat dwindle.
Orren’s boots, for example, come from the Georama. If you populate your Georama with Warriors and augment their stats with items that raise the Troll stat up to 50, you can then buy those sweetass boots he’s been running around wearing for the entire LP.
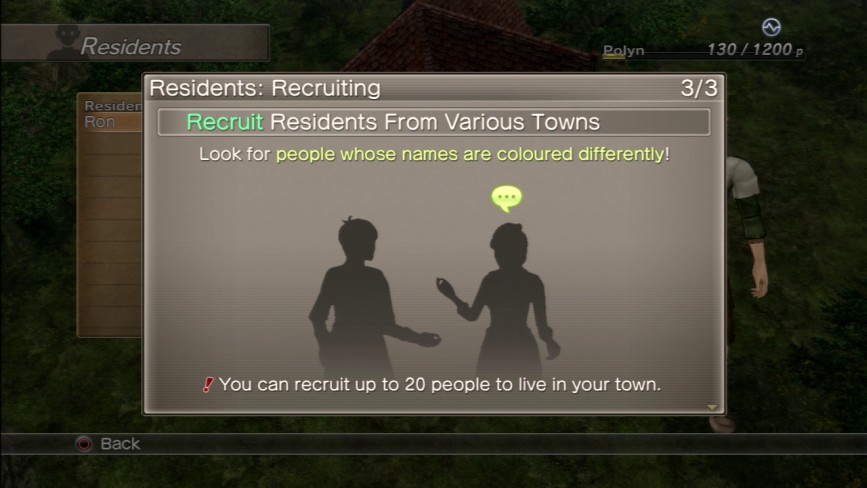
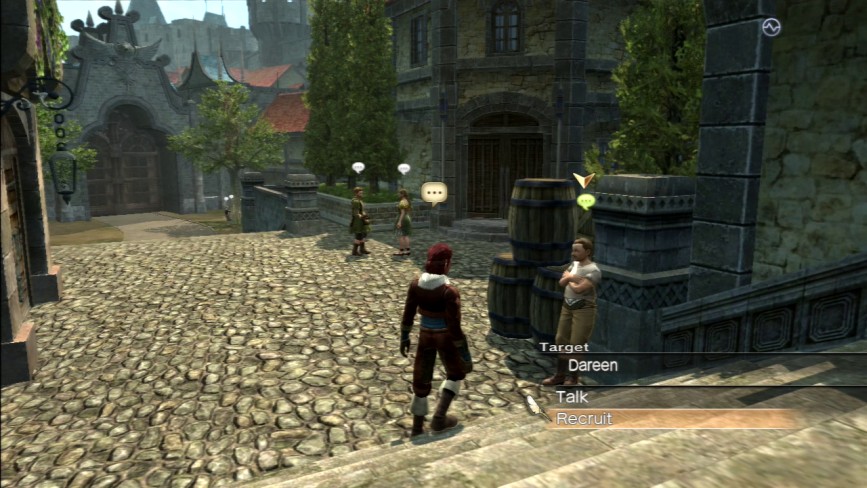
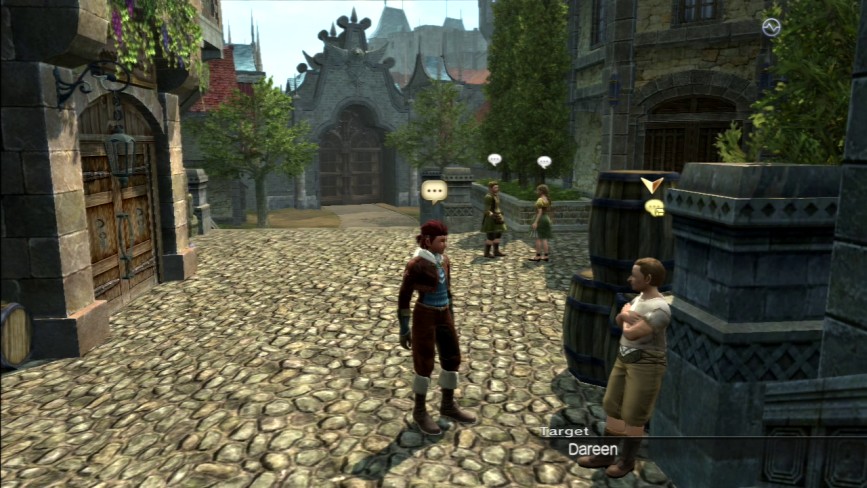
Unfortunately, you can’t just run around and hoover up every NPC in the game. Only certain NPCs are recruitable, and they’re denoted by lime green coloured speech bubbles and names. The further into the game you go, the more recruitable NPCs will open up to you.
Here’s a list of all the Georama-ready NPCs in the game, where to find them, what stats they have, and what conditions need to be met to recruit them.

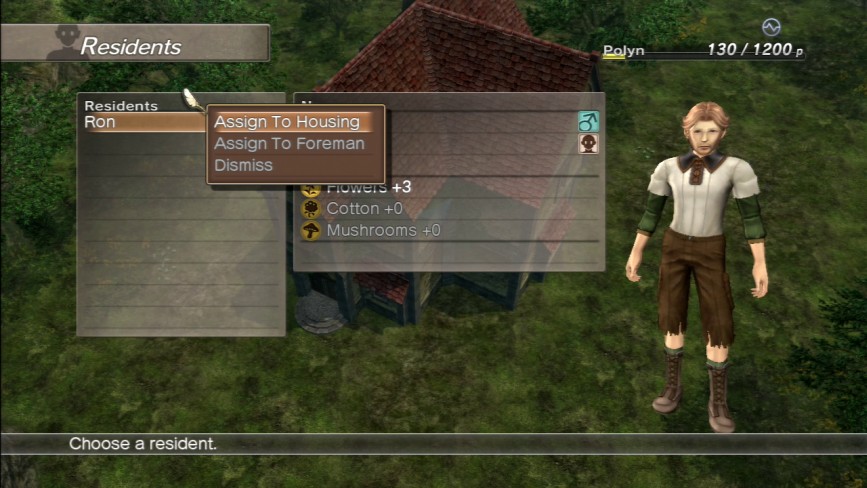
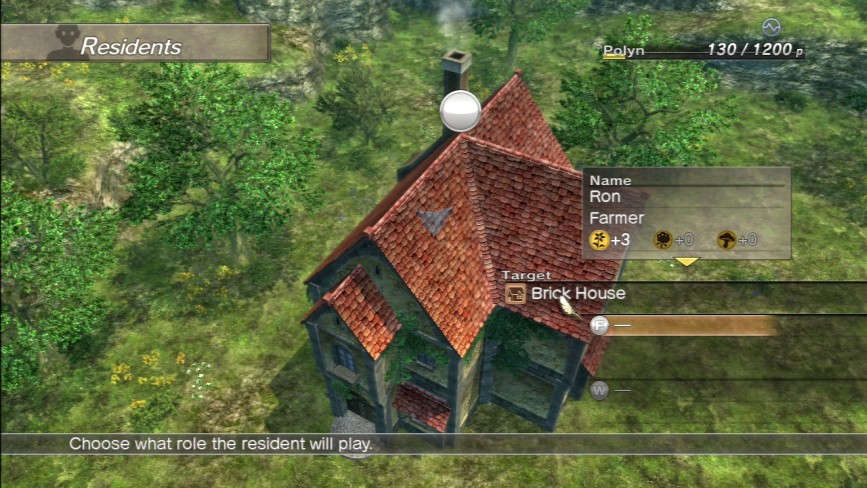
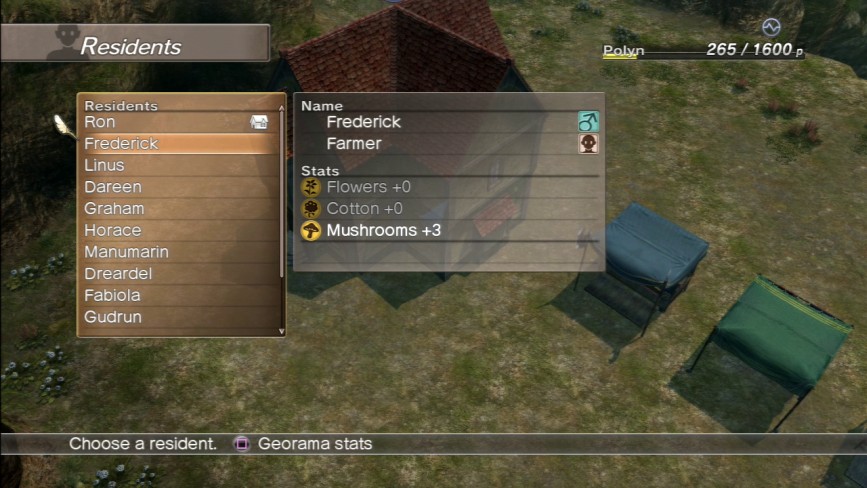
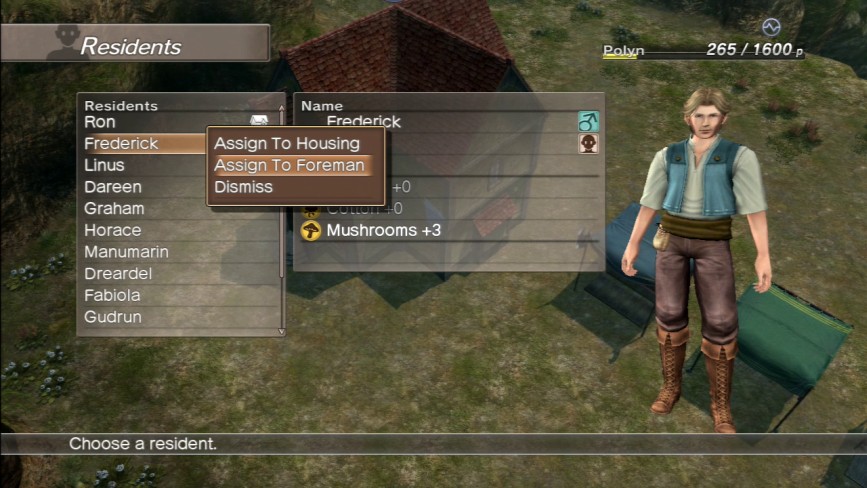
So you’ve got three options when you select a resident from the big list here. Assign to Housing, Assign to Foreman, and Dismiss.
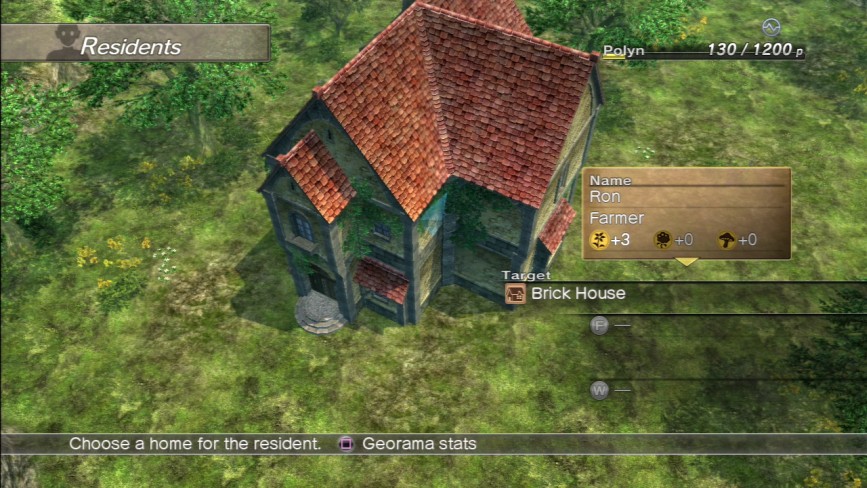
Assign to Housing allows you to place the resident into an empty house, wherein they become the Foreman of that house. You can see in the lower right corner there two open slots, one with an F for Foreman, and the other with a W for Worker.
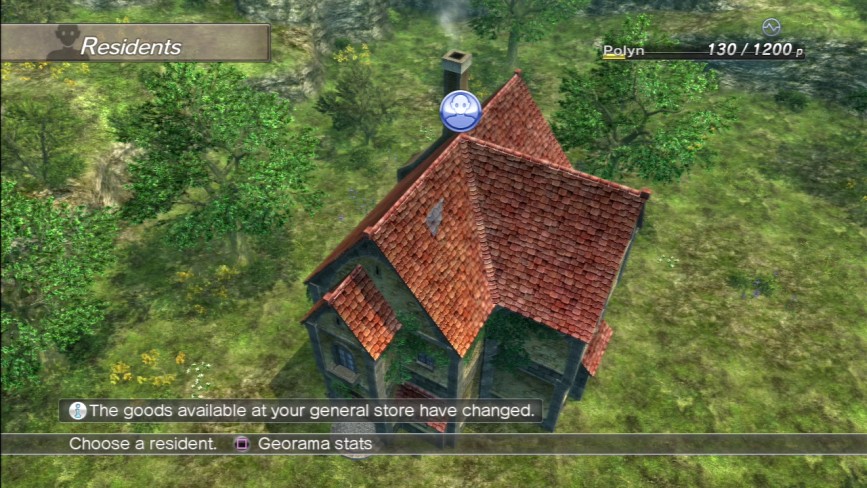
When we put our new Foreman in charge of the house here, suddenly the icon over it turns from unoccupied to occupied, and we get a message saying that because our Georama stats have changed, the items for sale at the shops in the Georama have also changed.
This is where strategic recruitment of residents comes into play.
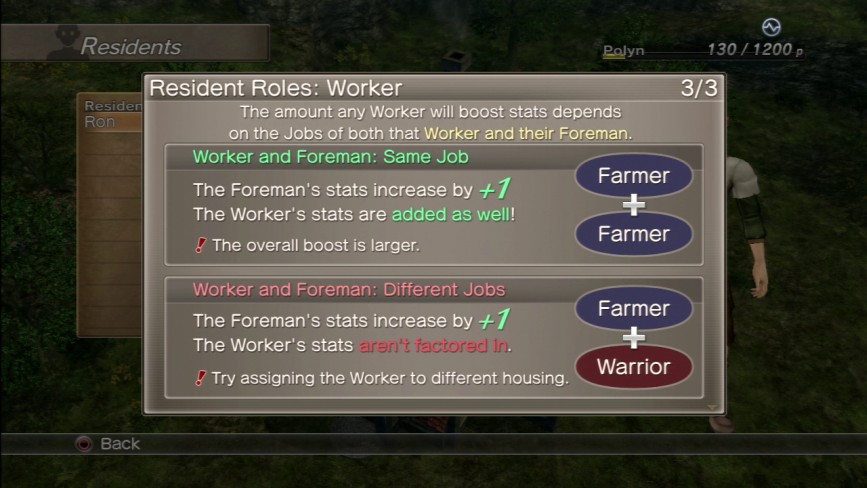
Ideally you’d place workers together with foreman of the same job type. Doing so gives you a stat boost, while placing mismatched workers and foreman together does not.

And that’s it for the tutorial.
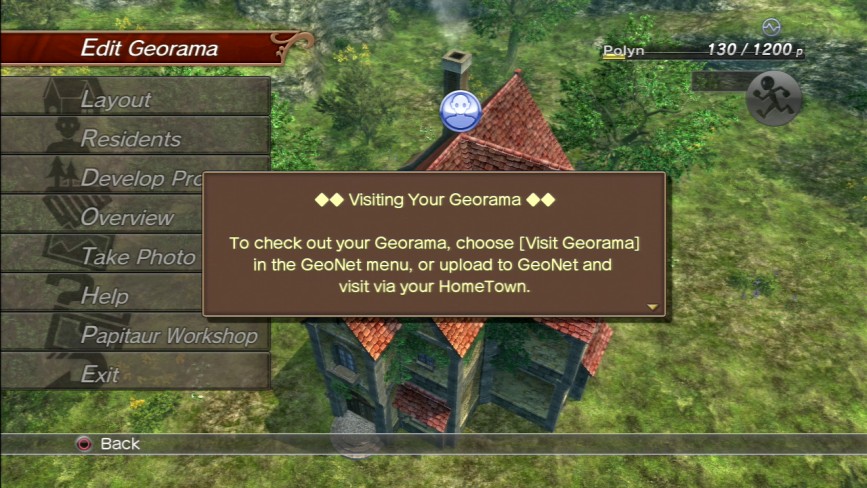
Now that you’ve built a Georama (technically), you can now enter it with your Avatar and check it out for yourself.
This screen is now 100% useless because GeoNet is offline.

So here’s what your overall Georama stat screen looks like when you press the Square button.
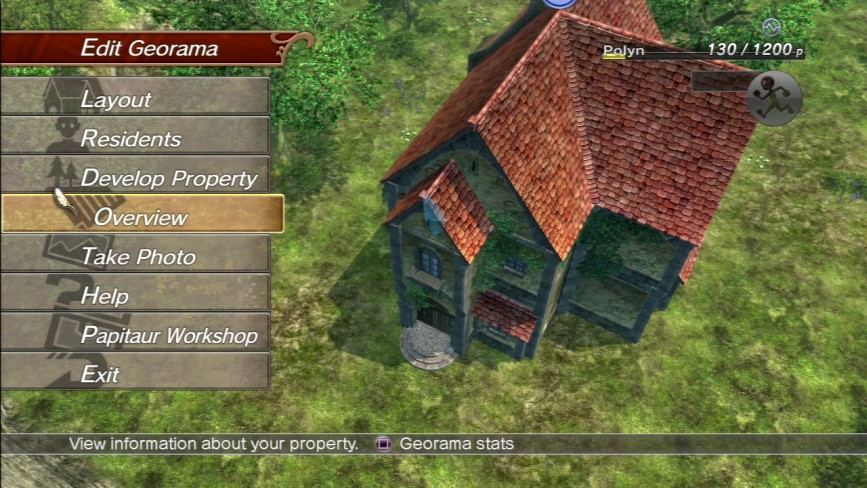
So now I’ll cover the bits and pieces that the tutorial itself doesn’t, starting with the Overview tab.
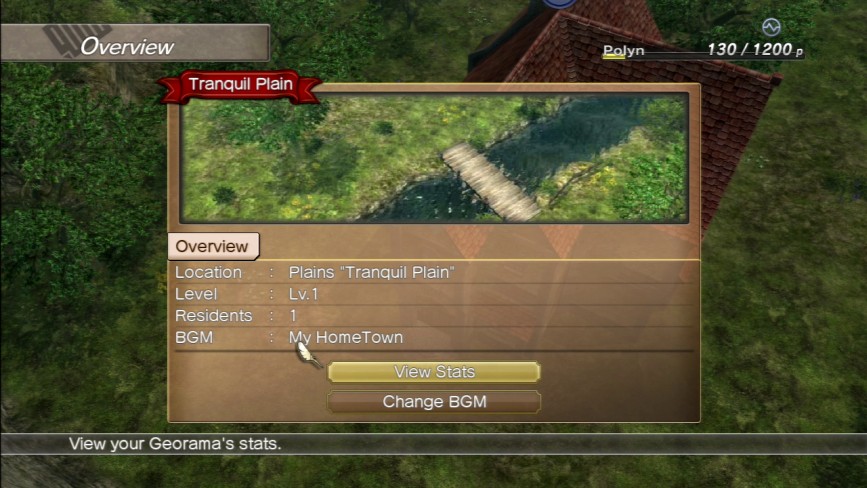
This tab gives you a quick summary of the facts about your Georama; what climate you’ve picked to build it in, what sub-map, if applicable, what its current level is, how many residents are living in it, what its various stats are at the moment, and even what background music is playing in it when you visit it.
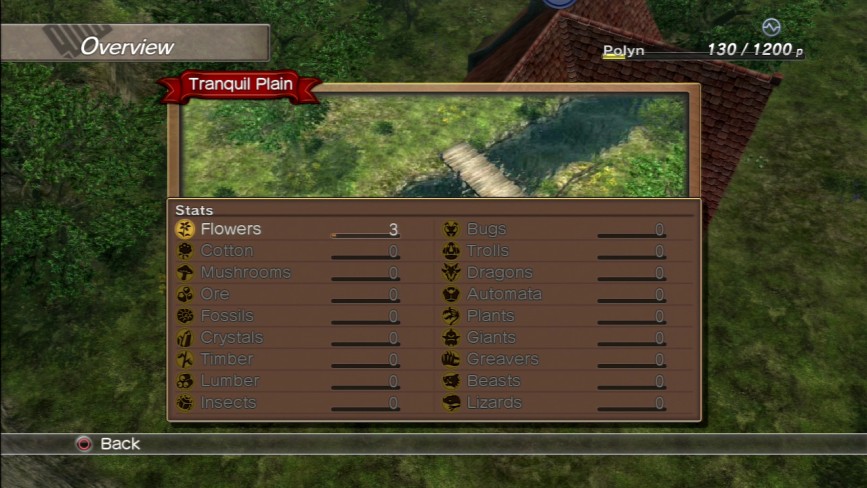
Here’s the stats screen again.

And here’s a sample of BGM tracks to sort through. There aren’t that many when you start out, though more tracks unlock as you both level up your Georama and venture further into the game to the point where virtually the entire Game 1 soundtrack becomes available to you, plus the Archduchy of Faria track from the Game 2 soundtrack.
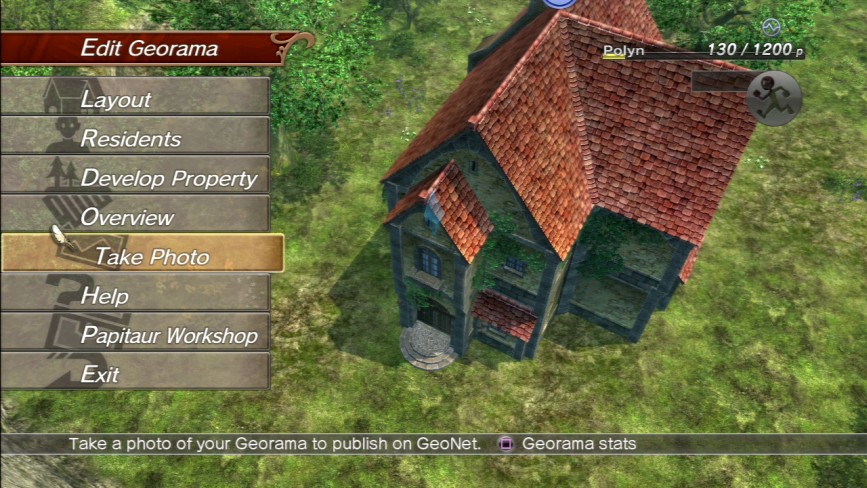
The Take Photo tab is also kind of useless.
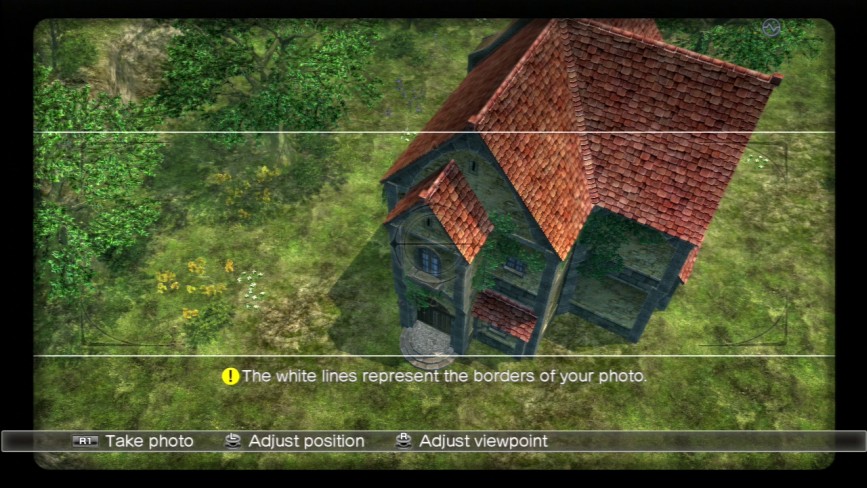
Opening it up brings up and even more gimped version of the Crystal Camera interface. The sole purpose of this mechanic is to capture an image to be used as the headliner on your online GeoNet profile to try and convince people to come to your Georama by showing off all the cool stuff in it.
Unfortunately, the camera is incredibly obtuse and hard to angle properly, so you can’t get any decent shots of things with it, AND because GeoNet is offline now, it serves no practical purpose.
Help opens up the tutorial tabs again, while the Papitaur Workshop tab allows you to access Ramah’s binding workshop on the fly.
As you can see, the same interface pops up and everything.
This allows you to build new items for your Georama right there in the construction mechanic without having to return to Balandor and do it in person. It’s actually a little surprising, honestly. Normally this game is so obtuse you’ld almost expect it to demand you return to do things face-to-face rather than remotely.
And best of all, when you upgrade your Georama, the Papitaur Workshop inside the Georama updates as well with new parts. Again, this is normally stuff you shouldn’t have to point out, but because it’s Level-5 I have to pay extra special attention to all the “things they got right” in the game, because they’re few and far between.
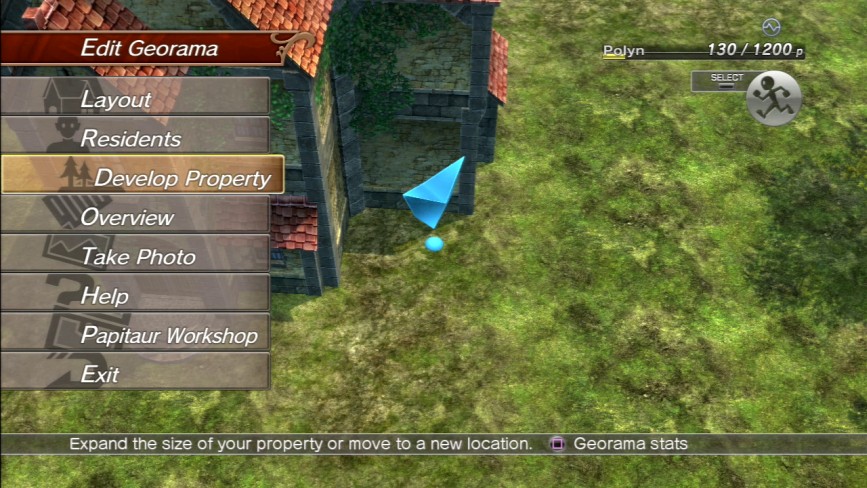
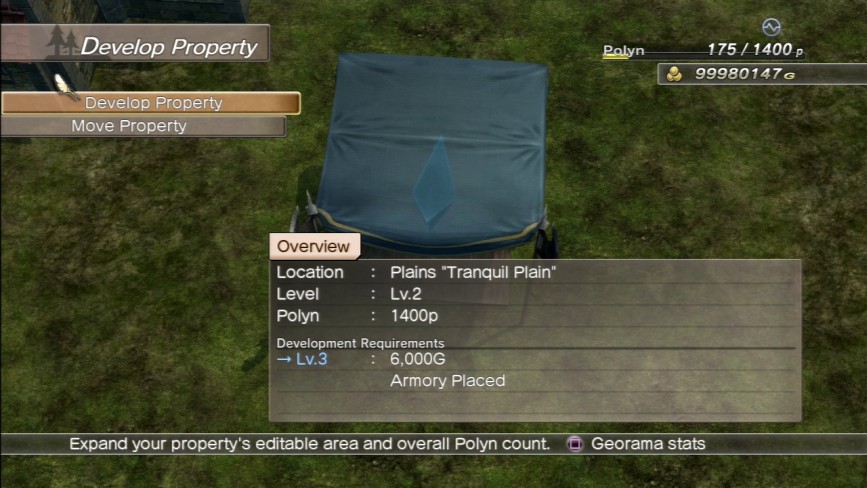
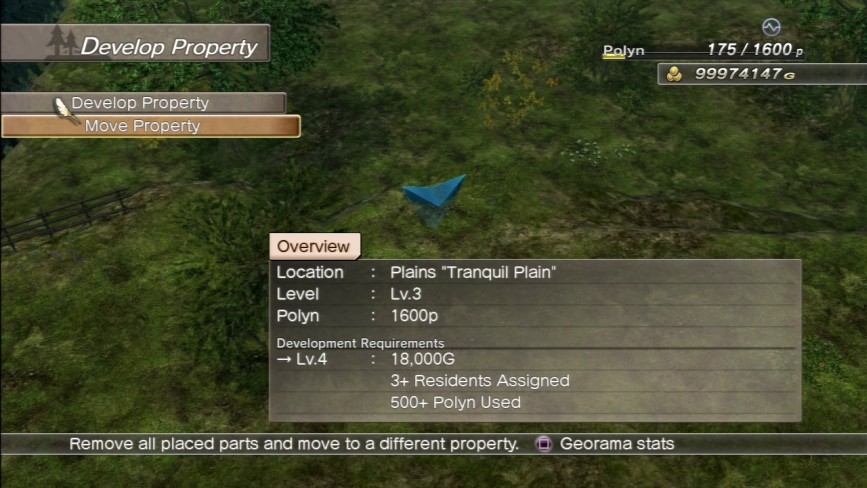
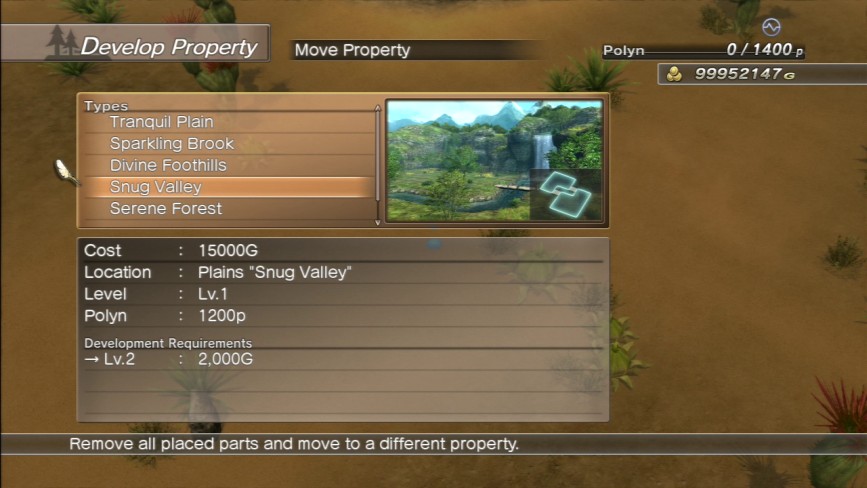
And lastly, there’s the Develop Property tab.
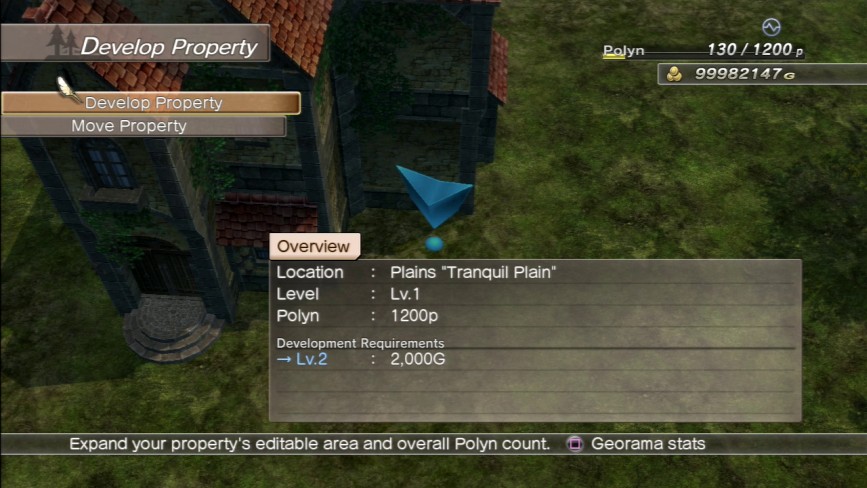
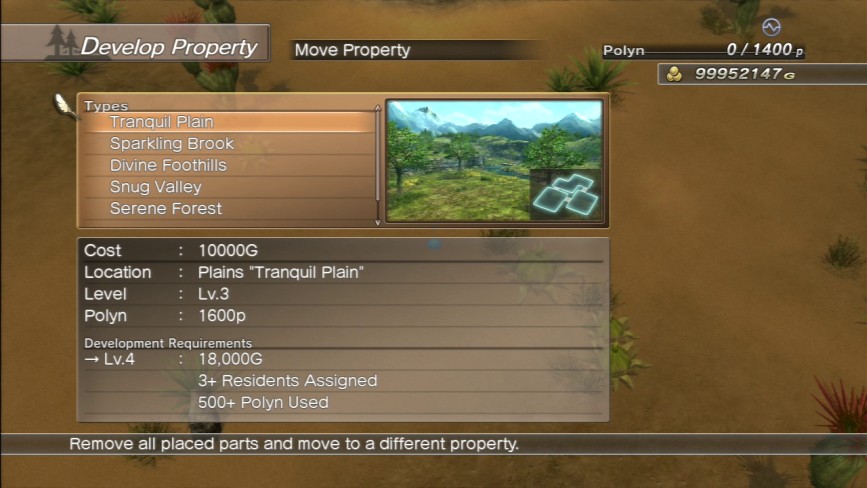
Clicking this tab gives you two options: Develop Property and Move Property.
This tab shows you what you need in order to develop your Georama to the next level. You can check your requirements any time down at the bottom, and if the arrow pointing to the next level is blue then you’ve met the requirements and can upgrade at your leisure. If it’s white, you still have to do a few things before you can move on.

As always, doing anything in this game cost money, and upgrading your Georama will also require an incremental increase in capital to accomplish as you head higher up the ladder.

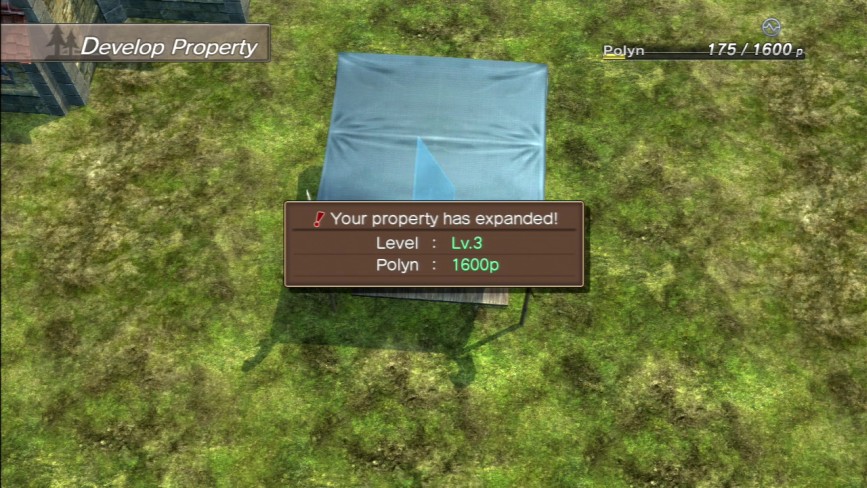
You then hear the sound of hammers and saws working away implying that things are improving. They aren’t.

Leveling up your Georama increases a number of things; available Polyn, buildable area, available Georama parts, and items that can be bought at your Georama shops.
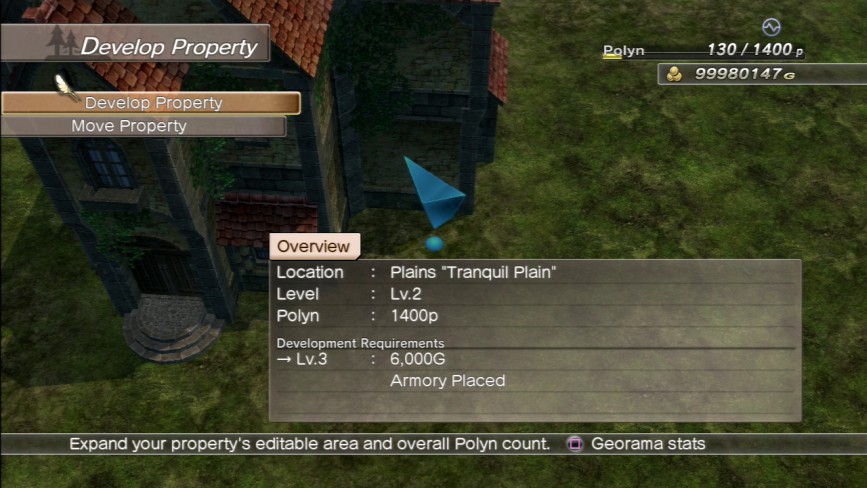
So to get to Georama Level 3 we need an Armory stall and 6,000G. Well, we’ve got the cash, all’s we need is the storefront.
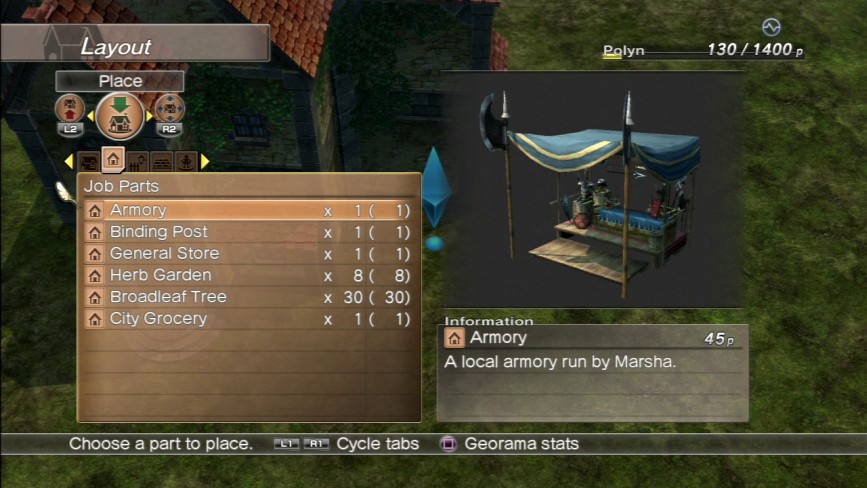
So we just select it out of the Job Parts tab…
And plop it down wherever we can find space for it.
And now we’re all set to move on to Level 3.
There are 10 Georama levels in total. From this point on, increasing levels is usually predicated on factors like number of residents assigned to housing and amount of Polyn spent. Though janusmaxwell reminds me that the upper Georama levels also tie in your Guild Rank as yet another requirement, because everything in this game is locked down by your Guild Rank.
Fucking everything.
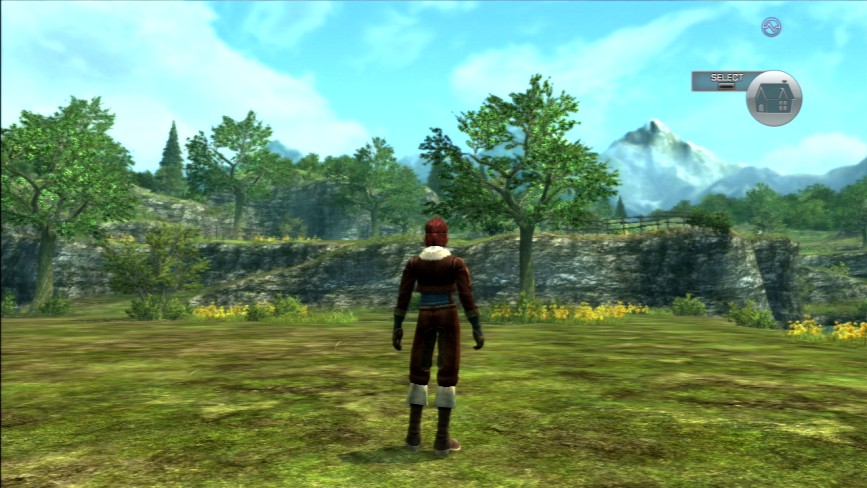
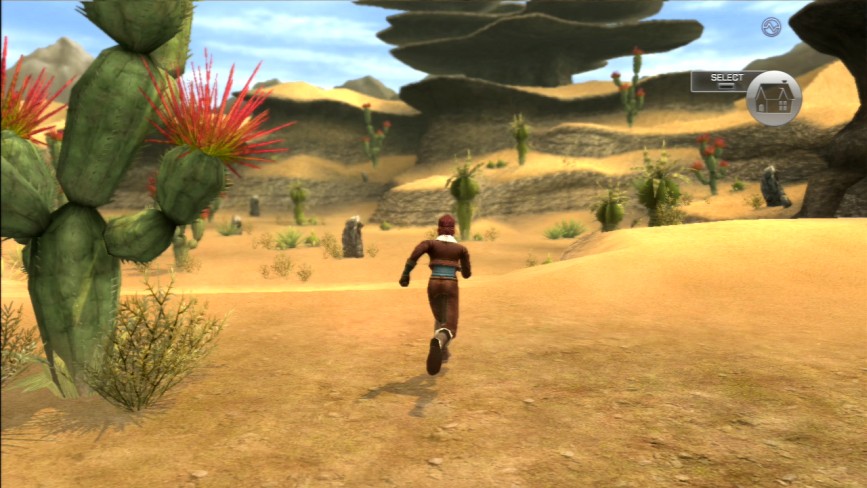
Pressing the Select button on the controller will throw your Avatar down wherever your cursor is (provided it’s not hovering over an unroutable area) and allow you to walk around to get an on-the-ground perspective of how things are shaping up in the Georama.
This is different from the “Visit Georama” option we’ll be exploring in a minute, as none of the NPCs that would otherwise be there are present. So that means you can’t buy anything or interact with anyone until you exit the builder and actually enter the Georama for reals.
Regardless, it can help you plan things out a little.
You can also explore the full map of your Georama this way, not just the little stretches of buildable land you’ve carved out.
One more thing to point out: these flowers and shrubs are all cleared out when you upgrade the Georama to expand its buildable area.
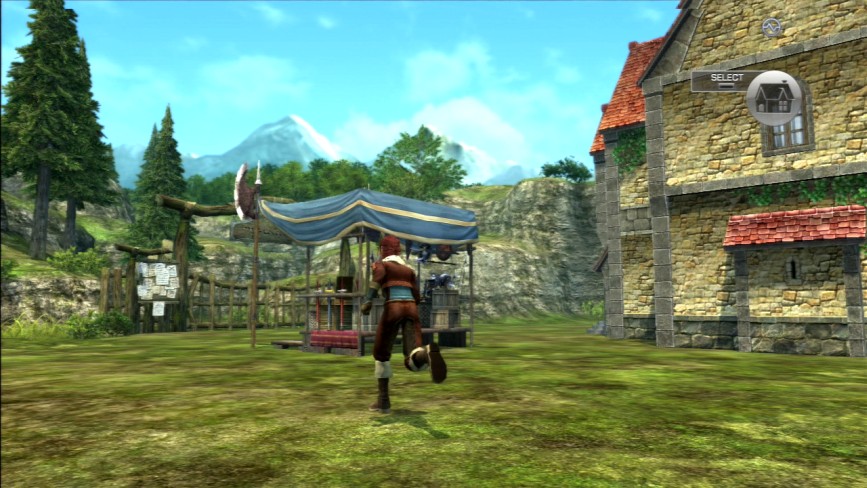
Here’ the gate to the town. Each town has a front gate like this one. It’s where you exit the town from if you’re in Visit mode.
See what I mean about no NPCs? Normally Marsha would be standing there in the kiosk.
You also can’t go inside any of the building in the Georama at any point, unfortunately. The closest you can get to entering a building is the Papitaur lookout hut.
Orrenstown it isn’t, that’s for sure.
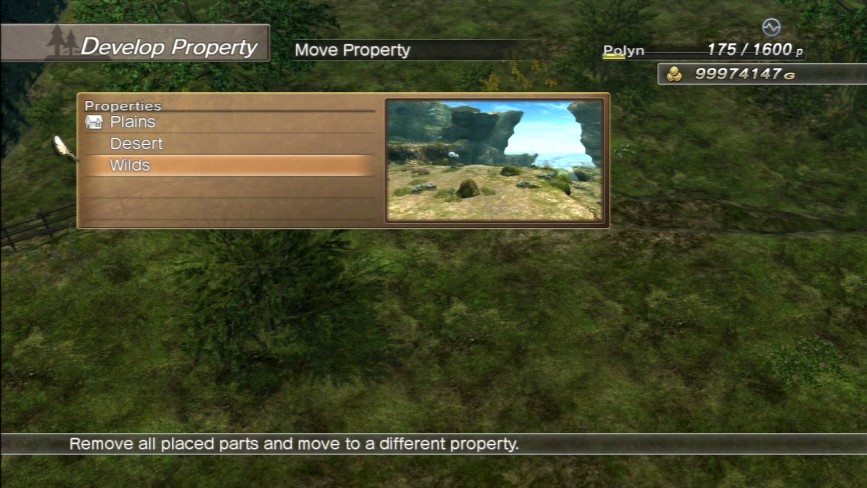
Well, let’s take a look at the Move Property option then.
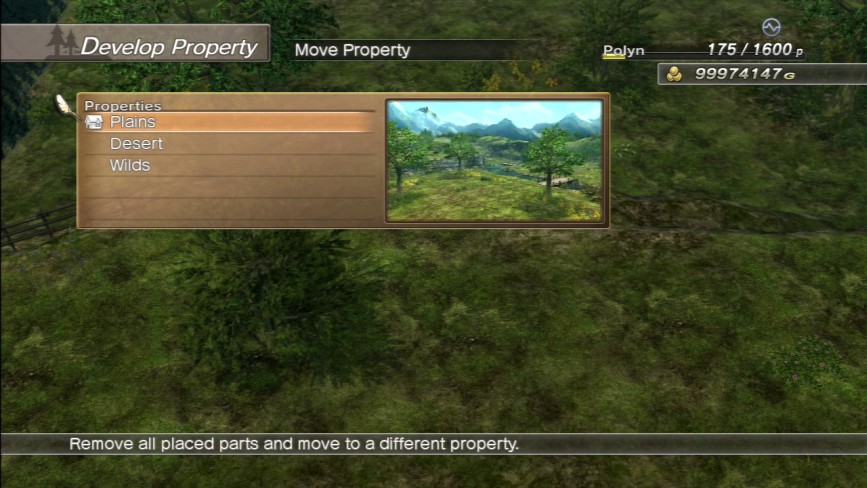
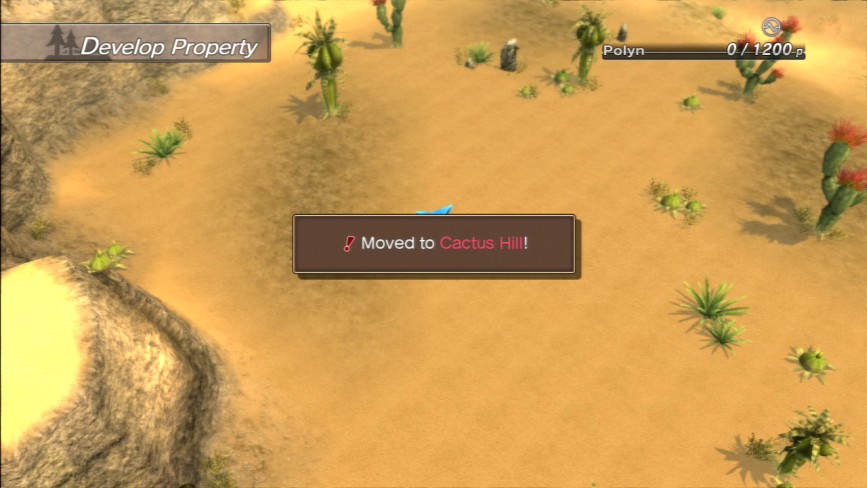
You’ve got three property options to choose from when picking a location for your Georama, Plains (the default location), Desert, and Wilds. Plains is based off the location set for Balastor Plain, Desert is based off the Lagnish Desert, while Wilds is based off of Frass Chasm.
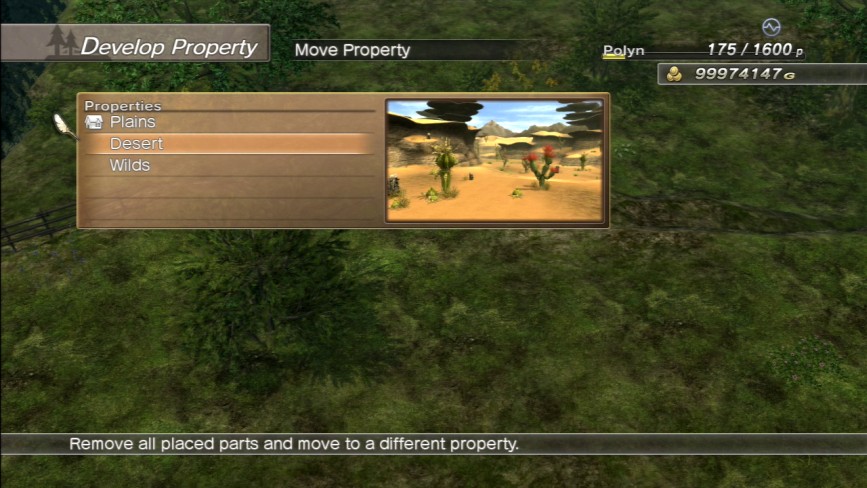
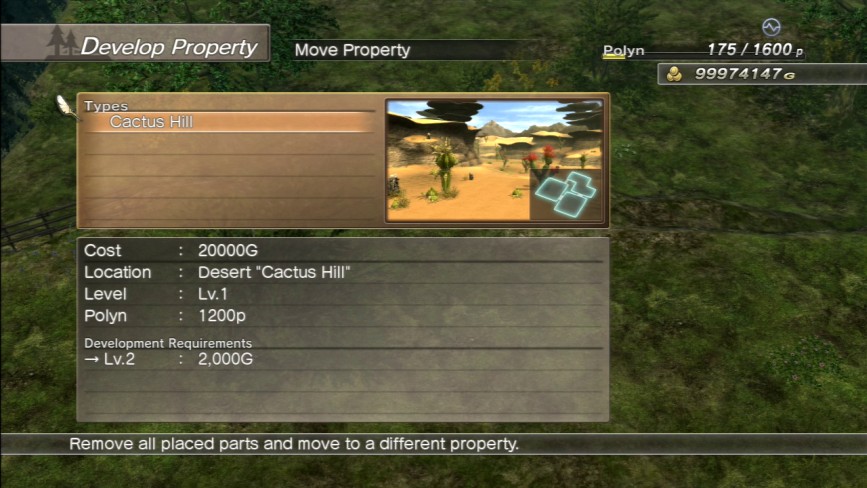
Let’s check out Cactus Hill in the Desert.
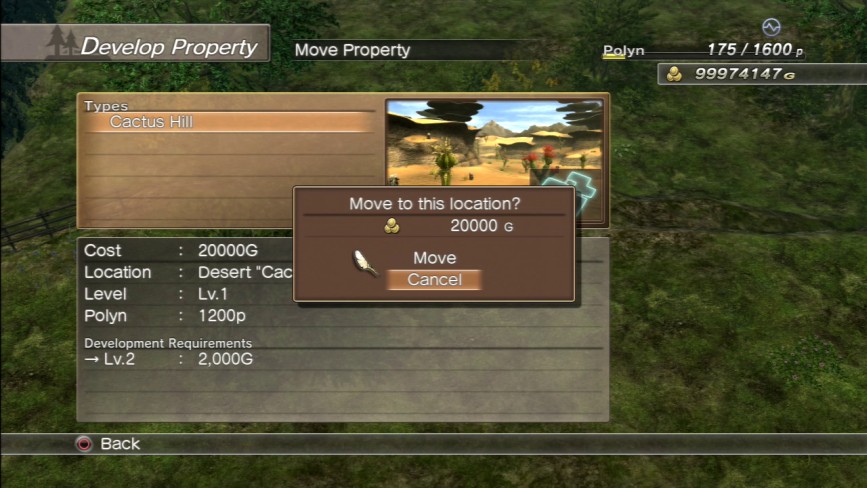
As you can see, moving to a new location costs 20,000G AND strips away all your placed parts, so you kind of have to be really committed to moving if you put a lot of effort into your Georama already.
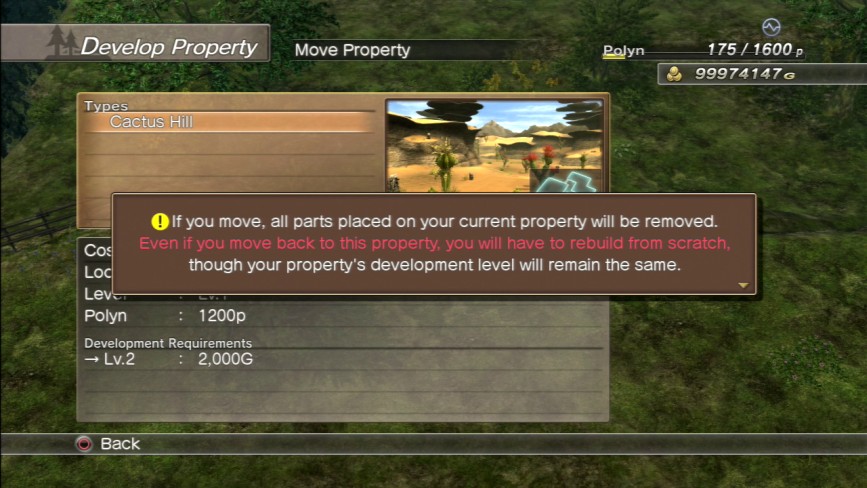

So when you move to a new area, you start that area off at Level 1. However, the levels you amass in areas are persistent. So if you think you made a mistake and want to move back to the Plains, the level you made it up to on the map you left from will be the same when you return to it.
Beyond that, there’s not much to say about the desert.
While the Desert and Wilds each only have one sub-map you can claim, the Plains map has a whole fuckton for your to take your pick from.
Why they didn’t give you the same variety in the other two locations, I have no idea, though I have a strong feeling it’s tied to
.
So here’s what it looks like when you remove an object from the map, by the way.

When you flip over to the Remove tab and select an object with the X button…
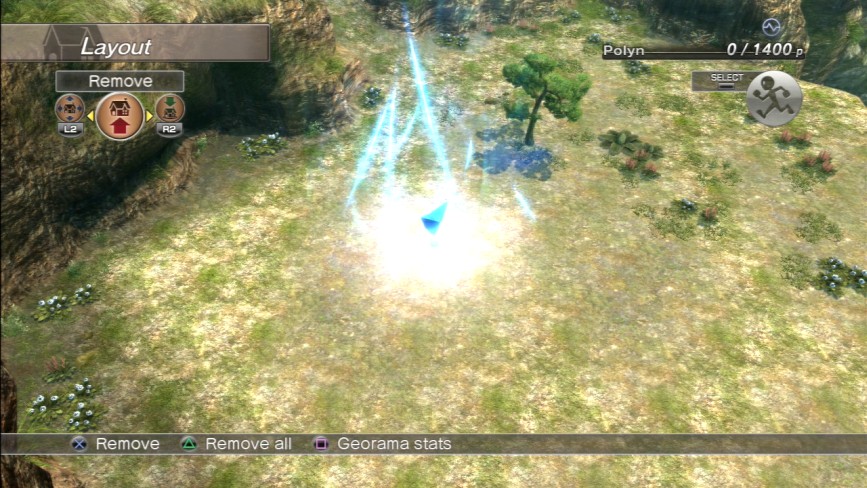
It turns into a pillar of blue light and VOIPs away. Pressing the Triangle button on the remove tab will remove all placed objects from the map in a glorious map-clearing magical apocalypse.
So now we’re actually here in the Georama in Visit mode.
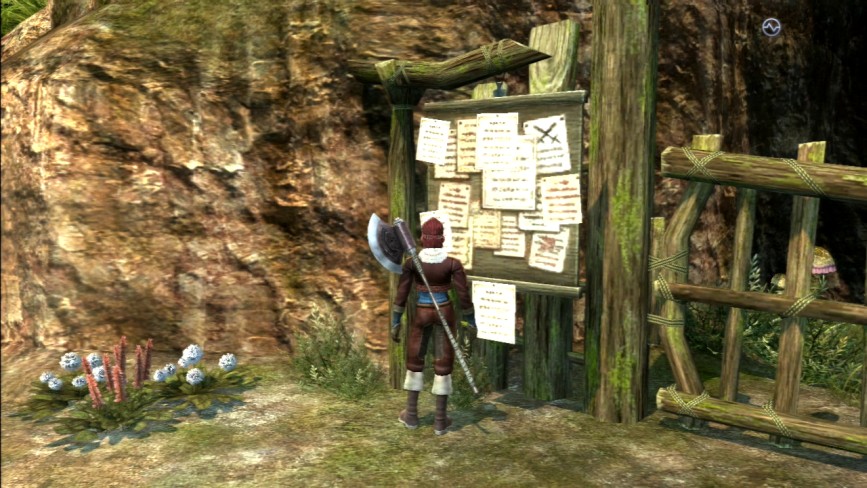
There’s one thing here that I should probably show off even though it doesn’t work anymore. When GeoNet was online and poeples’ Georamas functioned as quest lobbies, these job boards functioned as a quick-join roster for any active or pending quests in that lobby.
You could set up a quest by wandering up to the board and using it to select whatever quest you wanted to undertake from the world map, and then have people join you in the in-quest lobby prior to your initiating the quest. You could also join a pending quest after someone had created it by accessing the job board and selecting the Join Quest option.
Quests that were under way already could not be joined after the fact, so you’d have to stick around the lobby to join the in-quest party on their next round. Because that was a thing that happened online—people rerunning the same quest like 20 times in a row to grind GR points.
Fuck you, Level-5.
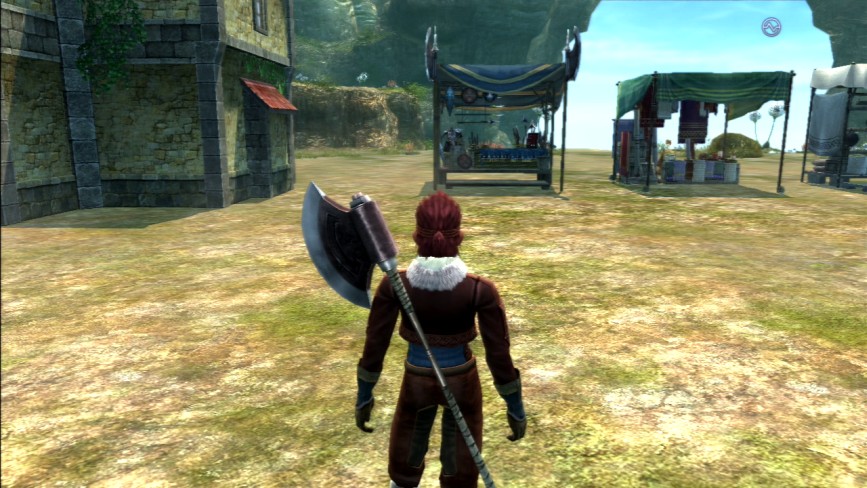
So when you talk to one of the shopkeepers, you need to specify which shop type you want to use first.
Doing so will open that shop’s regular menu.
Unfortunately, the Binding Post is still tied to your story progress, so even if you plop a Binding Post down in the Georama, you still can’t access it until you go through Albana and clear MOTHERFUCKINGFROGSEX

End this torment, please.

Meanwhile, back in Single Player…
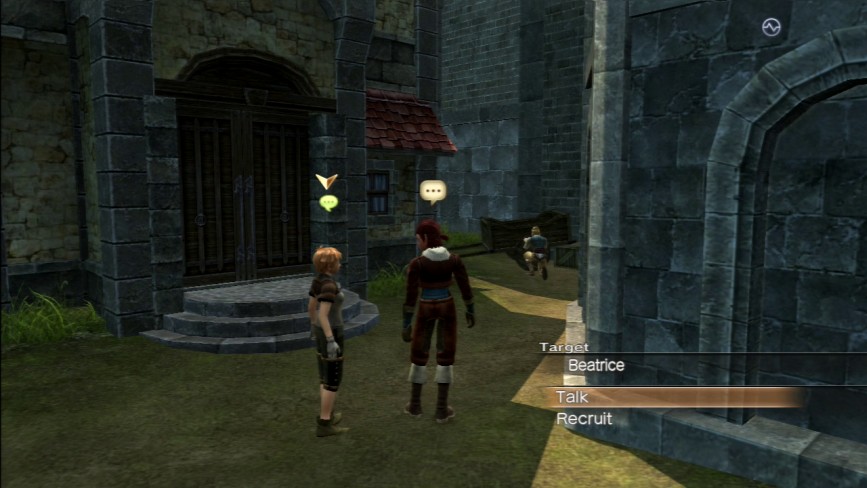
So here’s some examples of what going around and recruiting residents entails.
First you find some gullible schmuck with a green bubble over their head. Talking to them brings up an option tree: talk to them normally, or try and recruit them. Select “Recruit” and…
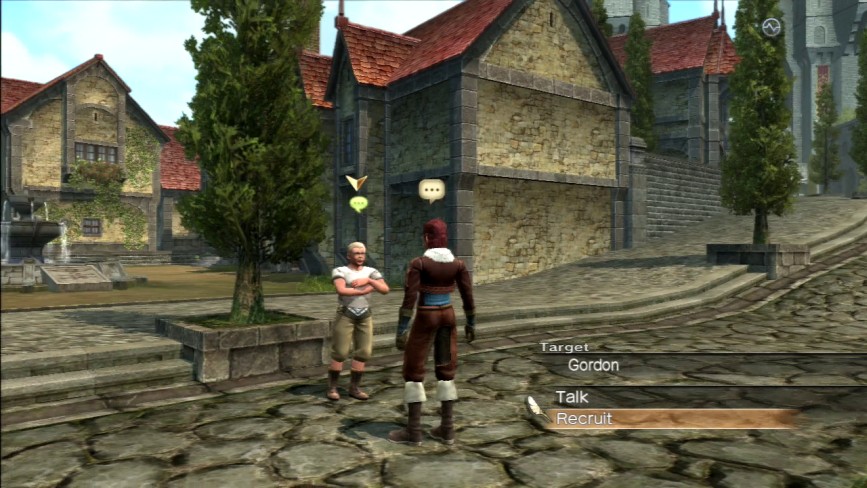
Oh you demanding bitch. Yep, certain residents will be out of reach until you met certain requirements that satisfy their high standards.
Fucking snobs.
 Orren: Hey, do you want to uproot your life and family here in the security of Balandor and come live with me in the middle of Frass Chasm as I try to eke a meagre existence out of rocks and bug shit?
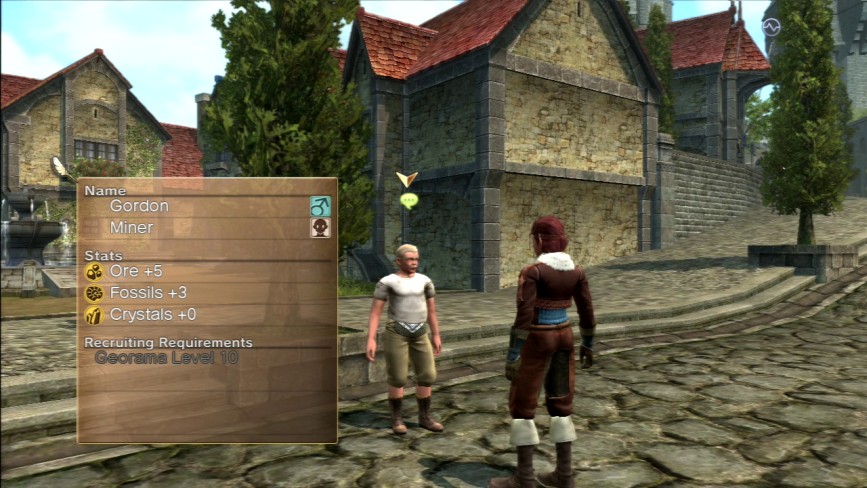 Orren: What do you mean “fuck off?” What haven’t I sold you on?
…Yeah, for this being the starting point of the game, there’s a fuckton of people living in Balandor who are out of reach until you max out your Georama’s level.
 Orren: …The crown owes me a winewagon full of cash if I save Princess Whatsherass.
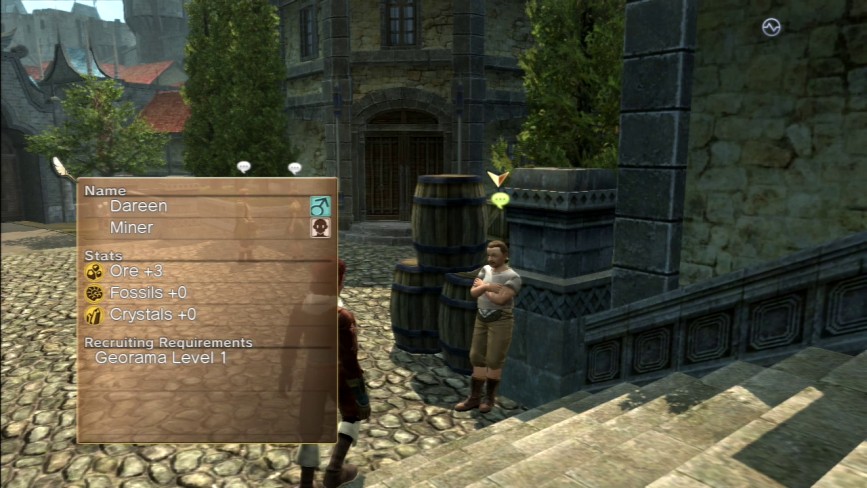 Orren: You’re hired!
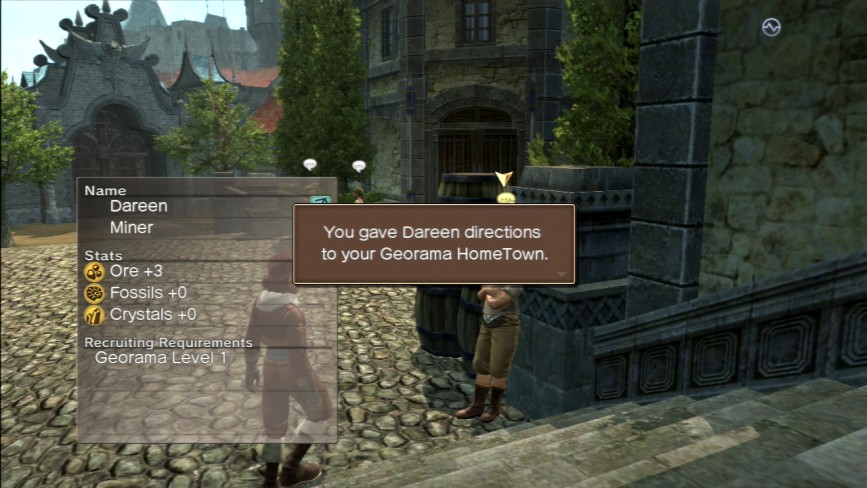
Pressing the X button a second time confirms the recruitment, and adds the NPC to your roster of residents automatically. Now when you go back to edit the Georama they will be there on the list and ready for you to place either as a foreman or a worker.
The icon over their head also changed colour from green to yellow, and a little house icon also appears next to it, signifying that this is a resident of your Georama. You can dismiss residents from your Georama at any time using either the Dismiss option on the residents roster, or by approaching the NPC in town and selecting the Dismiss option which takes the place of the Recruit option once they are a part of your Georama.
You’re limited to 20 residents total for the Georama, so choose your townsfolk wisely.

Certain NPCs, like our little buddy Palt here, have additional requirements that you need to fulfil in order to recruit them. Usually you need to give them an item, weapon, or armor piece, or fulfill an errand to unlock their recruitment option.
You can also see in the upper right of the panel there that not only is there a gender indicator for the character, you also have a race indicator too. Humans are white, and were seen on the previous NPCs’ screens, while Papitaurs are yellow.
Wargs’ icons are blue.
And Farians’ icons are pink. There are no recruitable Farians in the game until you get to at least Greede, so I had to jump to both Faria and a Game 2 save to get their icon on screen.
For better or worse, there are no reruitable Toad Georama residents.
And here’s what a mostly complete resident roster looks like.
Selecting each resident gives you an up close look at their model too.
And here’s one last glimpse of stat-linking in action before we wander away from the nitty-gritty gameplay element of the update.
For now it is time to transition to “A Closer Look At Orrenstown” with The God-Empress of All Creation, Long May She Reign, Cisna Laurentia Candorebanto Di Balandor, First of Her Name, DFA.
Why with (Avatar) Cisna and not Orren? Well, because Fake Cisna was going to be the focus of the Orrenstown “event” at the start of the second game, I built both the town and the Avatar for that scenario.
I later powerwalked her to the end of the game to get her Arc Knight solely for that “Cisna kills High Priest Ledom herself” gag that actually fooled quite a few people, surprisingly.
Orren’s reaction shots for the Orrenstown scene, by the way, were done in an Orrenstown replica painstakingly reproduced in the Japanese version of the game on the same save file that I’m using to clear the Avatar Story.
So now the only question is, “why does she still have her sword with her?” Why? Because she wants to make absolutely certain that no one gets any ideas about fucking with her.
I mean, what’s the point of being the most powerful woman on an entire continent if you can’t flaunt it by striding around some backwoods town holding a sword made of solidified light while the local populace cowers in fear of your every footstep?

Let’s go meet the locals, shall we?
So this here is the main street of Orrenstown, for lack of a better term. It’s capped off by that Papitaur lookout hut I mentioned earlier. You can actually go up those steps and onto the platform, but that’s about it.
Also note the Thalmus statue out front of it. I’d like to imagine that Thalmusism is the official religion of Orrenstown.
Like I said earlier, NPCs will hang around various buildings and objects related to their jobs. If the game can’t figure out where to put them, it’ll just throw them down in front of their own house.
When you talk to each NPC, they’ll also give you INCREDIBLY UNSUBTLE hints about how to improve the stats of the Georama if the game things certain areas are flagging.
Usually it’s something incredibly obtuse like, “Man, as a Lumberjack I’d like to be able to chop down more trees, but there’s too many monsters around here, if only we had a few more Warriors to scare off those monsters…” blah blah blah.
 Cisna: I have my entire kitchen staff executed every night. Their remains are baked into pies and served to the incoming staff in the morning. It helps foster morale.
 Cisna: Why am I not surprised Orren’s shitass town has a rat problem?
Does not follow, but whatever…
 Cisna: And I’m sacrificing WHAT by blowing this place up, again?
Let’s go take a look at the upper tier of the village.
So on the upper tier we’ve got a tavern, a smithy, and a couple of smaller houses, as well as another ore derrick.
I placed a bunch of tables out in front of the tavern, and as it turns out, it’s a popular place for NPCs to gather and get drunk at.
 Cisna: Anyone else find this strangely sexual? Also, why would you be drilling for ore right in the middle of your own town?
Here’s the far back end of the town. You can’t see him, but behind that shrub one of the town lumberjacks is chopping away at that pine tree.
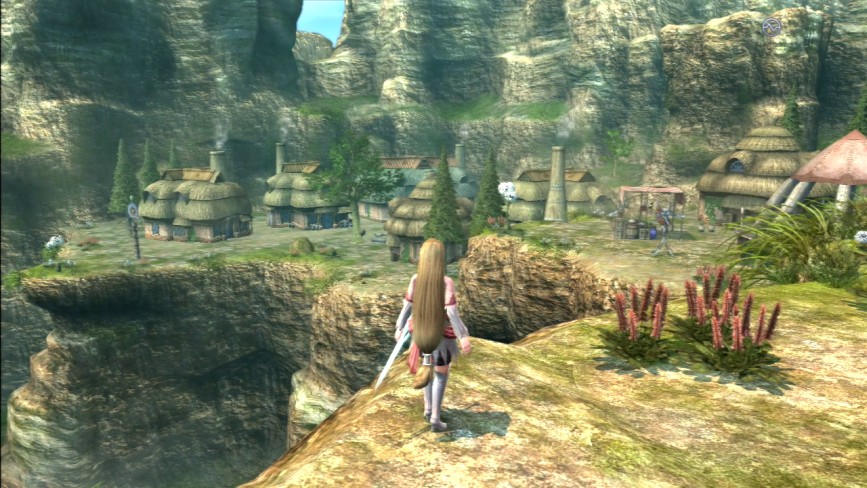
And here’s a view of the full town, particularly the middle and lower tiers, including the cliffside where Orren is telling the frame narrative from on the far left there.
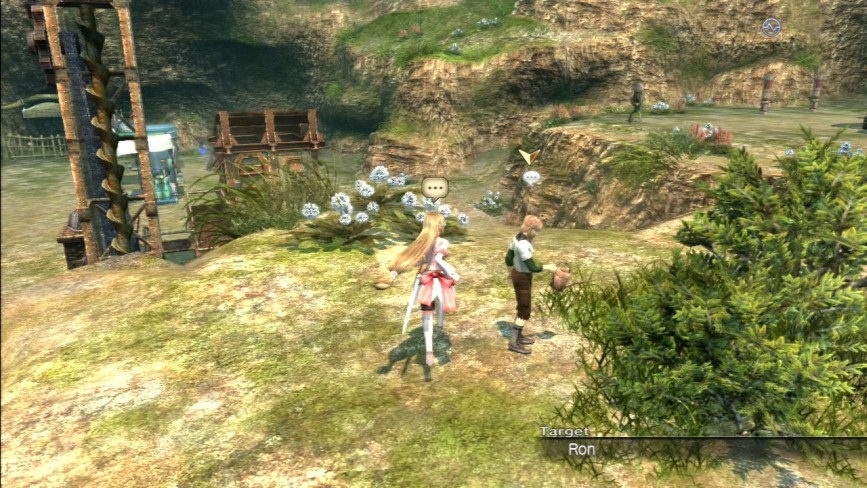
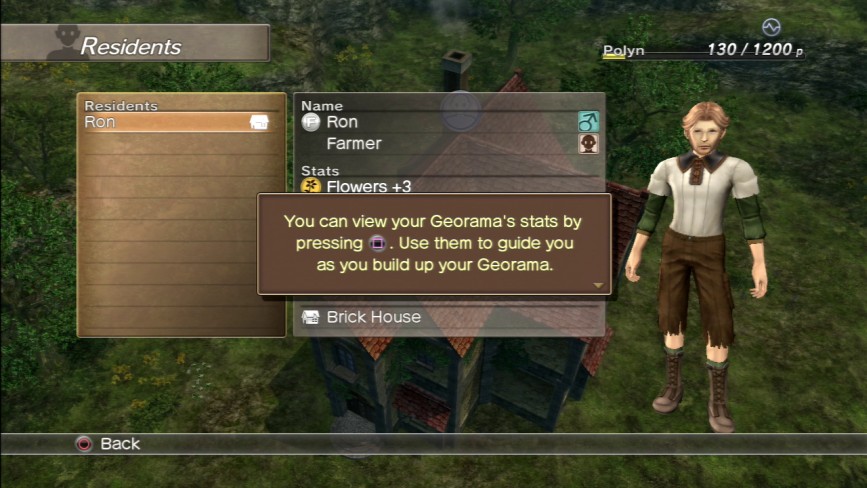
And here’s Ron, our example character from the start of the update, just standing there watering a shrub. Because I guess Farmer and Gardener are interchangeable in this game.
And here’s the town’s vegetable garden.
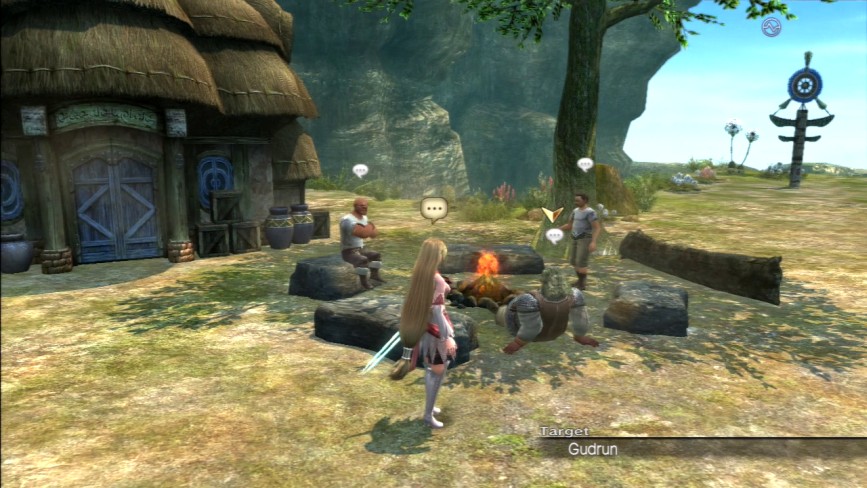
Down on the lower tier is where the majority of the residential houses are located, as well as both a fountain, around which a group of NPCs are located, and a campfire similar to the ones used by the party throughout the first game, where more NPCs are gathered.
 Cisna: Yep, I remember campfires like these. Usually whenever I saw one it meant that dipshit Leonard fucked up trying to rescue me again and I had to hear him not apologize via Bigelow. Which reminds me, I need to track those two birds of Eldore’s down. I’m gonna have them stuffed and mounted on my throne.
And that right there is about it. There’s only one thing left ahead of us now… Saving the world from the literal threat of
God help us all.
"CUTSCENE MUSIC:" "Soul Stalkers" (Disc 1, Track 15)
So then they said, “but you can’t just—”, and then I burned their entire village… right to the ground.
None shall dispute my rule, ever. And once that angry fool and Framboise finish cleaning the other world’s clock in my name, then NO ONE will stand in my way!
MWAHAHAH!
I will rule this planet, godsdammit, or I will burn it to ashes around me.
For soon, shall unveil my most terrifying weapon yet, something so vile that NONE shall escape its wrath intact…
I’m talking of course about…
White Knight Chronicles III
MWAHAHAHAHAHAHAHAHAHAHAAHAHAHAHAHAHAHAHAHAHAHAHA!!!
EN TARO CISNA, MOTHERFUCKERS!