Part 11: Decaying Labyrinth
If you were following the thread, you might have seen a poll that was up for a day or so. (now removed) I asked you guys to choose whether I should start a sidequest soon or continue with the main plot.geri_khan posted:
Pearl lost the book she had on the train, and she needs a new one. What book should she read next?

Votes were definitely in favour of The Secret Garden, which was the sidequest, but when I tried it I realised it was WAYYY too early to be attempting this sidequest. I'd forgotten it's intended for LEVEL TWENTY-FIVE parties and I'm only level eleven/twelve. So I quickly backed down, and removed the poll.
... and yet, I felt bad for pussying out of what the people had voted for, even if I was probably the only person who cared.
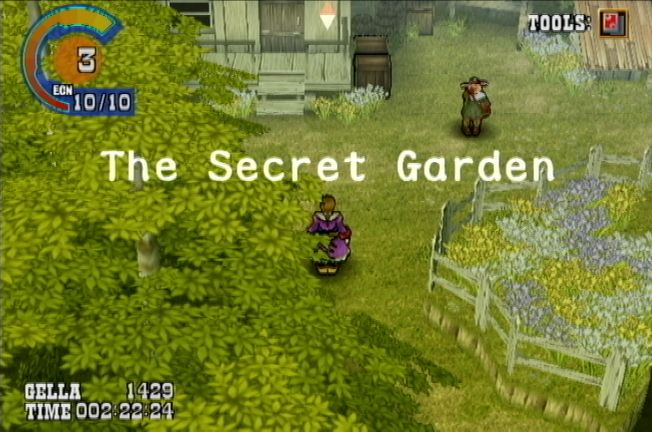
So, before we tackle the dark tower of Ka Dingel, here is my attempt at the sidequest.
Update 11: An attempt to save

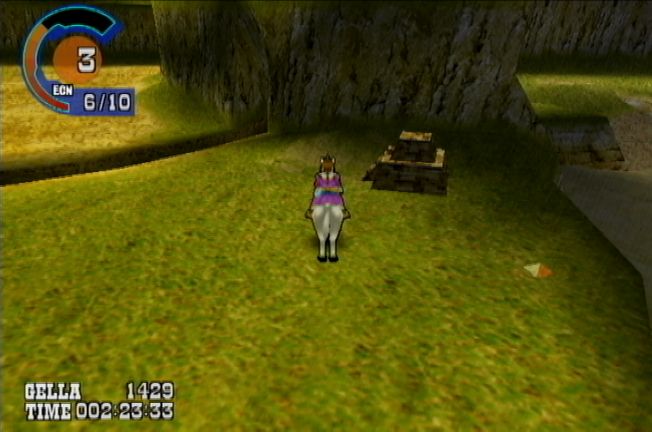
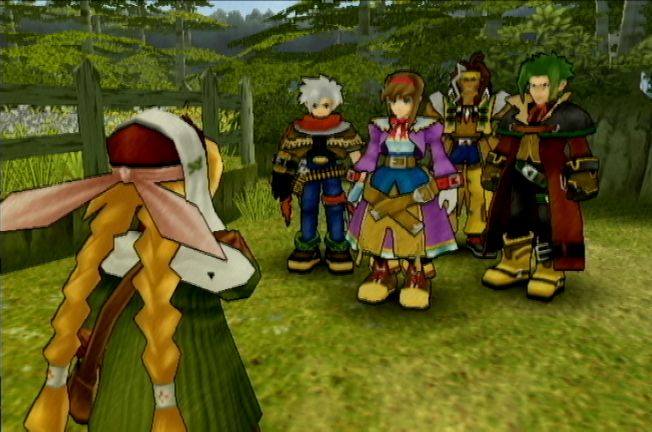
Returning to Midland Station and summoning a horse lets us get access to a previously closed-off area.
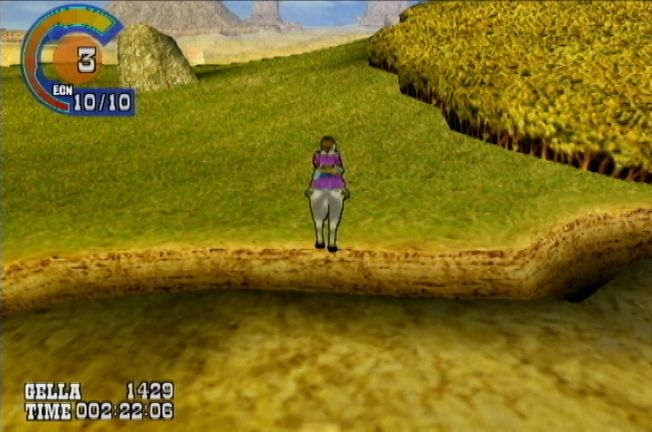
This ravine is normally impassable but horses can jump over it.
After a few tries.
This is actually really annoying, because if you're not perfectly lined up with the ravine it'll just grind to a halt. So then you need to turn around, get a run up again and try again. And maybe again. Eventually however it'll work.

One of the very few forests on Filgaia - this place must have very good soil. It's possible to walk through it, but horses have to take the long way around.
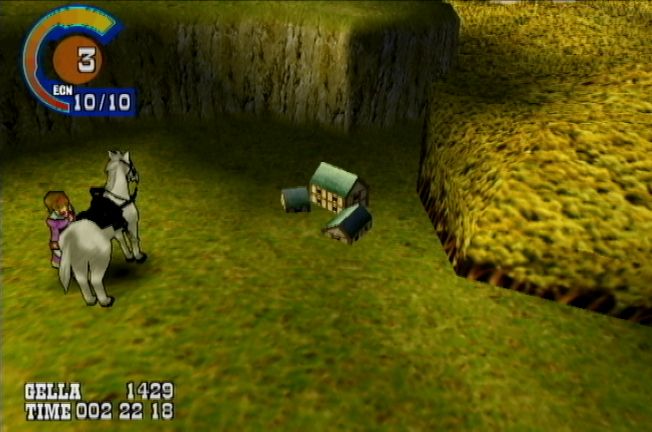
Searching in this open area reveals a small farm. One of the few map locations we can find without anyone telling us about it.
MUSIC - A Person's Warmth
Obviously my imagination regarding possible book titles knows no bounds.
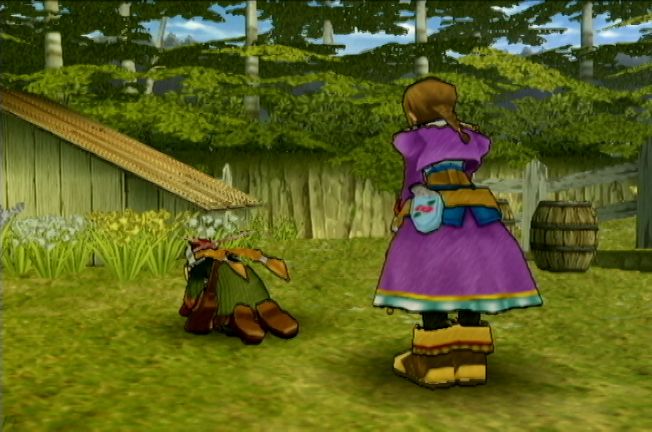
 Howdy! What a pretty field of flowers. Did you grow all this?
The girl stands up, but doesn't reply. She seems to be extremely shy.
Oh... Did I say something rude? Hey, don't worry about it. Communication's the name of the game.
 Silence is golden, Boone. Besides... Not everybody just blurts out whatever pops into their head, like you.
I'll say this, I don't know what went wrong here but this cutscene is a bit incoherent. I don't really get what Boone is trying to say or why it annoys Billy.
Pearl looks at Doc, who shakes his head for some reason.
I'm sorry. We didn't mean to intrude. Show us your flowers sometime, okay?The group leaves, but something sneaks up on Billy and surprises him.
 What the!?
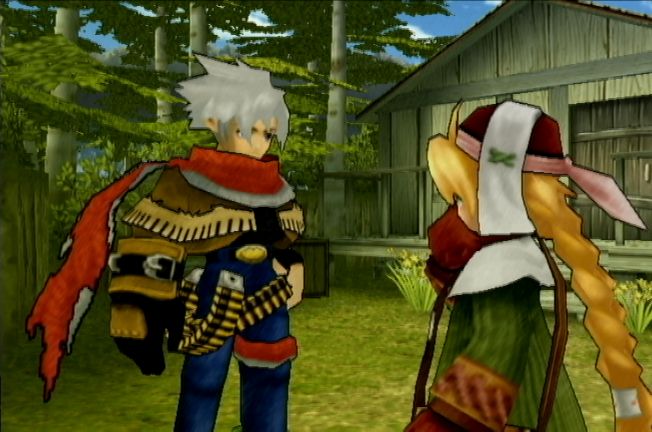
Looks like he has a fan. Poor girl has terrible taste.
Hey! You want something? Speak up, already!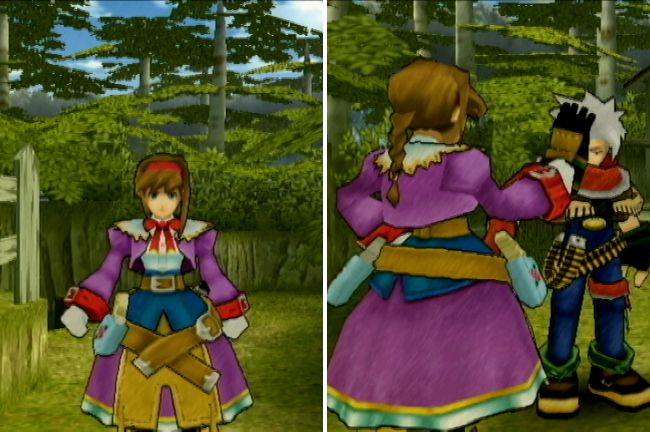
Pearl comes back and slaps him, which is random but it's probably a nice change for her to be the slapper and not the slappee.
 So much for silence being golden! Right, Billy?
I don't get it.
So what's the matter? Um... I... I want to ask you a favor. Is there something we can do?
 Well... My flowers are crying.
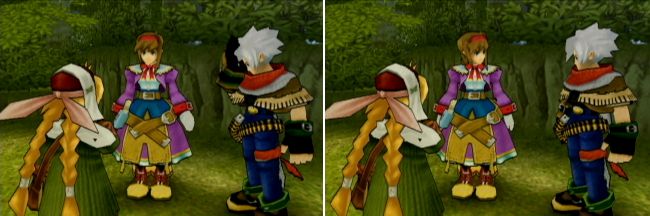
I can see why she would hesitate to tell someone that.
Corrupt soil in the northwest has been tormenting the poor flowers. Soil, corrupted? What the heck is that supposed to mean? You can't tell by looking at it, but the flowers told me so. So, you're requesting that we investigate the cause of this phenomena. Is that correct?
"We should begin with a full psychiatric evaluation."
The girl nods, but remains silent.
Finally! Why didn't you just start at the beginning... with our reward!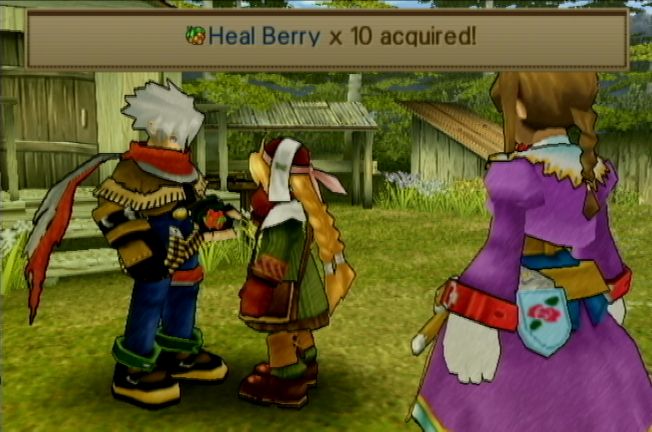
Remember - heal berries, like potion berries, mini carrots and revive fruits, are actually hard to come by. You can't buy them in shops and must depend on them dropping from enemies or being found in treasure chests.
Heal berries? Wait a sec...These things grow here? Well, if you're giving this to me, I'll just go ahead and pocket it.He looks up at Pearl
What? It's a deal! The corrupt soil is to the northwest, right? Let's go have a look-see. Now hold on a minute! How can you jump into a deal without fixin' the reward!? I'm quite impressed. You did quite well.I wonder if Doc's line made any sense in the Japanese version either.
The girl shuffles closer to Billy.
What the!? Now what do you want? Thank you. My name's Florina. My flowers thank you, too. They're so happy you're nice.
 Wh-Whatever! Call me nice again and you'll regret it!
Ooh, big tough man threatening a little girl.
I took a moment to ransack her place - she has a duplicator in some barrels in her house. No signs that anyone else lives within miles of here though.
MUSIC - Losing One's Way in Darkness, Losing Something in Darkness
Leaving the Garden and heading northwest eventually brings us to an ancient ruin near the ravine.
Most of the enemies in the Decaying Labyrinth are level 25, but they're actually quite easy for their level, by design. A level 20 party stands a good chance of finishing this with minimal problems, not just due to additional levels but also important equipment.
Level 11/12? More tricky, but in a straight-up fight the monsters are defeatable with a bit of caution.
In general, ALL the monsters in here are undead, are weak to Light damage, take normal damage from Fire and resist everything else. Unfortunately at this point I don't have a source of Light damage.
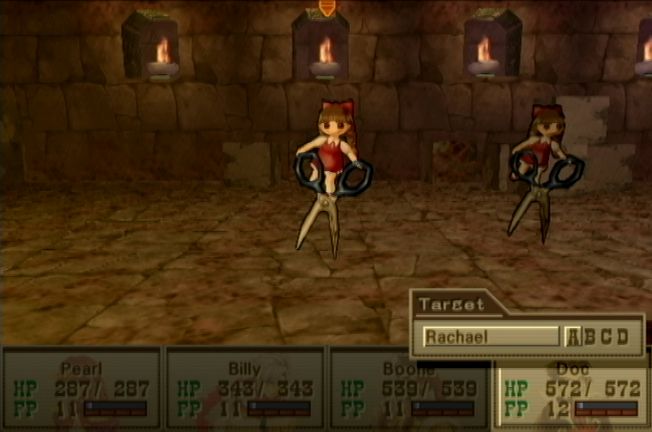
Rachael doesn't look too hard, but she can be pretty potent. Her regular attack is "Paper Cutout" where she snips you with her scissors.
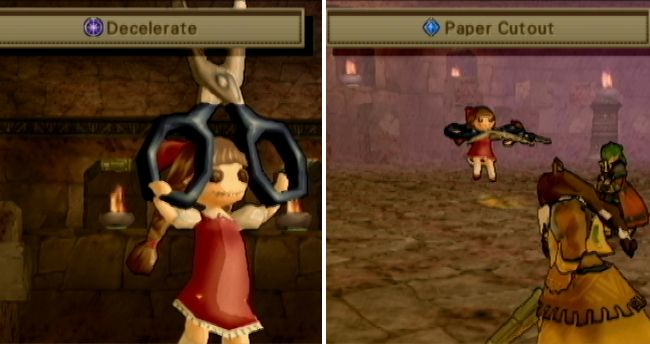
She can also cast Deccelerate. At the proper level you can easily 1-shot her, but for me it takes a turn of focused fire from Billy, Boone and Doc for each one.
The main problem with Rachael is she always appears in groups of three or four and Paper Cutout does a lot of damage. This made battles with her the hardest I faced here. It helps if all she does is spam Decelerate.
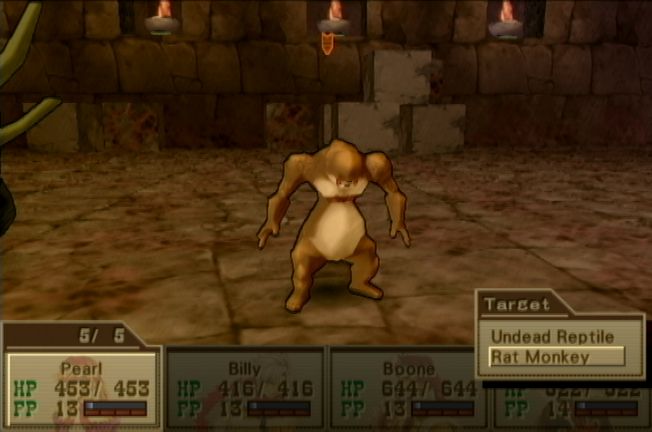
Rat Monkeys appear by themselves or with Undead Reptiles. Even at my level they're a bit of a joke. One round of shots will kill them.
They can Bite for straight damage or use Toxic Breath to inflict poison, but the poison usually isn't an issue. You can kill them before it deals any damage.

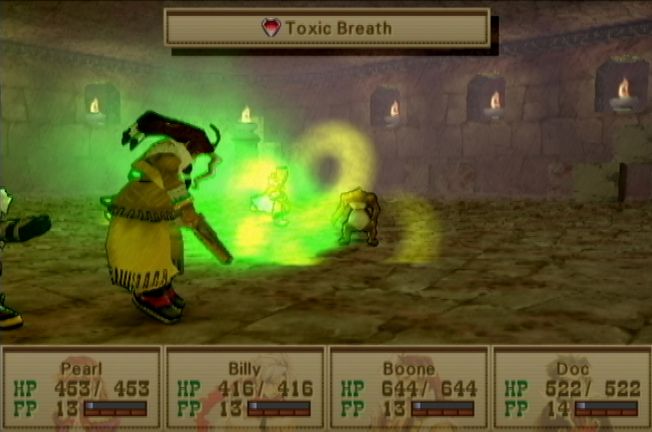
Undead Reptiles can take much more damage, but they're not TOO bad either.

Steam Breath looks dangerous, but it's really not, hitting all characters for less than 20 damage. Most of them take only single digit damage and Doc takes a whopping ZERO.
Getting past the monsters at my level is achievable, if a bit of a grind, but only because they're deliberately easy for their intended level. You'll see why later.
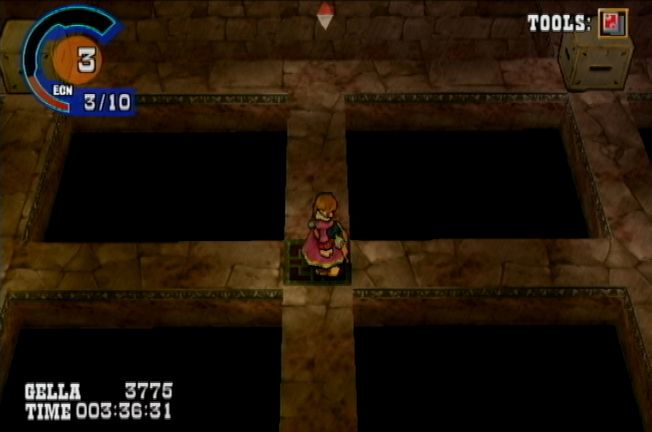
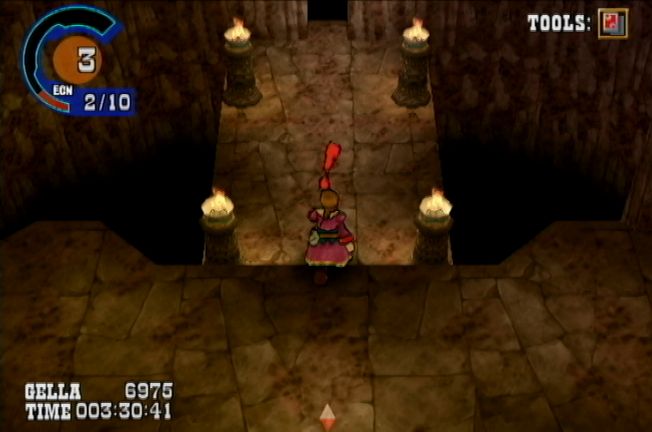
The dungeon itself is designed to be a bit of a pain.
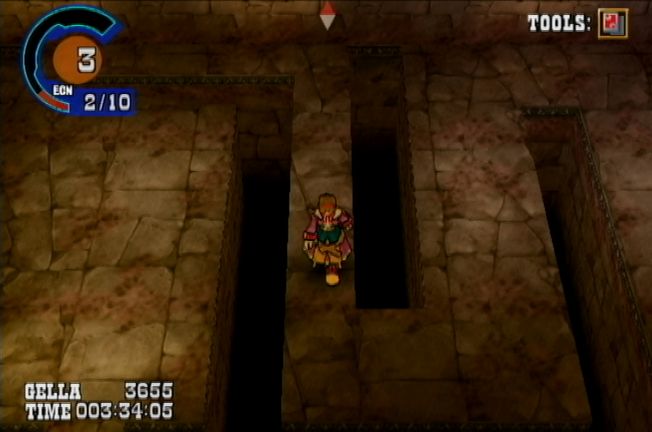
Rooms like these abound, with long winding pathways and pits to navigate. Difficult to rush around.
This layout is also common. Three horizontal paths, three vertical paths, and blocks on the corners you have to move out of the way. The switch in the middle here opens a door in one corner.

You have to push the block from the right direction of course, or you'll just block your own path.
Another way the dungeon likes to waste our time - these long U-shaped rooms. Not so bad in this case, but later on we'll have to guess which path is the right one and which one is the dead end. (hint: it's always the right hand one when going upstairs)
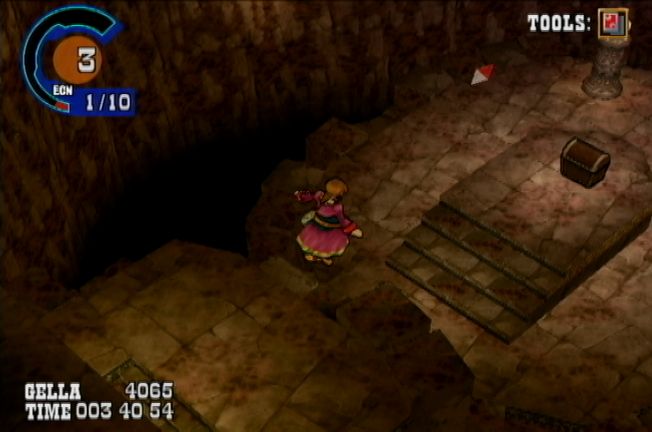
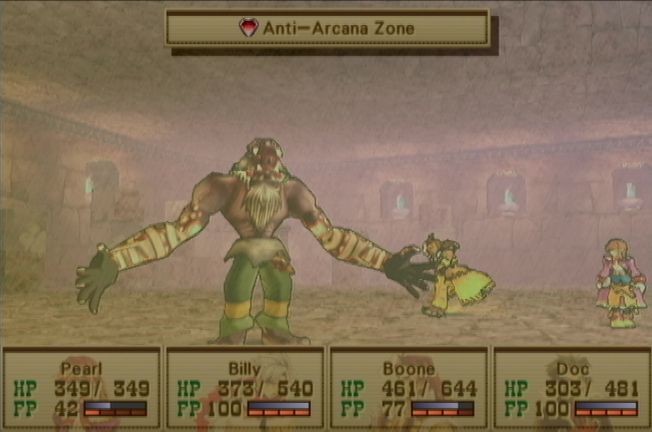
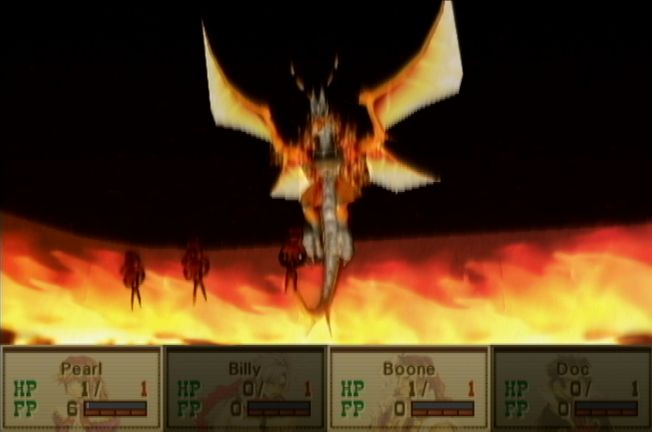
Soon we get to the deepest part of the dungeon, where a chest awaits. Leaping down to it is a one-way trip, but its our only choice - the door has slammed shut behind us. By this point everyone except Pearl has levelled up to 13.
Inside the treasure chest awaits a serious boss.
Part of the seal that decorates the chest is chipped. Could it have faded with time, or is someone responsible...? A strong stench of death creeps out from the small crack! The stench slowly transforms into a human shape and begins to unleash death!
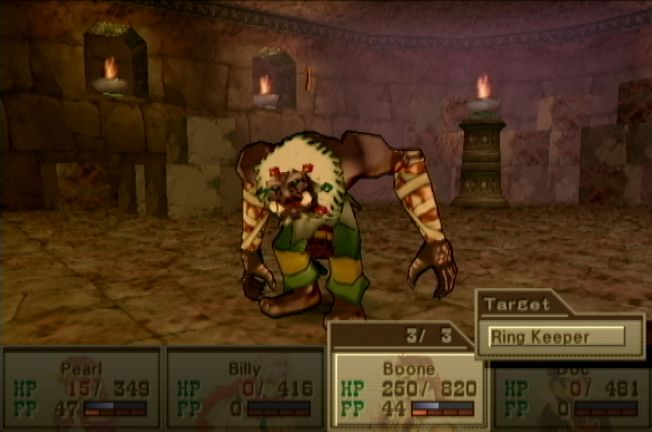
MUSIC - Blood, Tears, and the Dried-Up Wasteland
This is the Ring Keeper, a level 25 boss who uses powerful darkness arcana and melee attacks. He's also fast enough to move before everybody, though Pearl can be faster if she equips the Gale Claw medium.
As you can see by the condition of my party members, he's pretty tough. This was our condition on the second turn of one attempt. He only has two attacks:
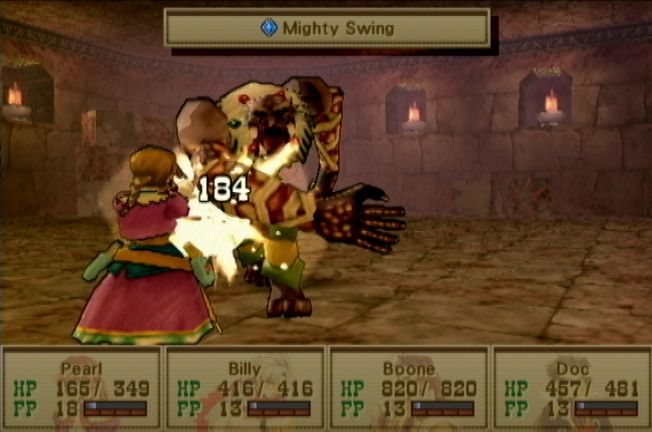
Mighty Swing is his normal attack - even blocked, it's enough to take off half of Pearl's health. He'll also sometimes use this as a counterattack, so I have to be careful who I have attacking.

Phantom Hazard sucks the Drifters into the ground, until what looks like blood spurts up and they are suddenly ejected. This can hit for more than 300 HP. Billy was blocking and took 230.
Without the right tactics he can really trouble a reasonably levelled party. I am not reasonably levelled, so he can easily massacre me. I'll have to go above and beyond.
Since he can't heal himself, fighting defensively can eventually win out. I have a few ways of reducing damage. In order of importance...
100 FP - Cuts all damage by half, but tricky and expensive to set up and locks me out of using Force Abilities like Mystic, Extension, Gatling and Summons. 100FP also doubles damage done.
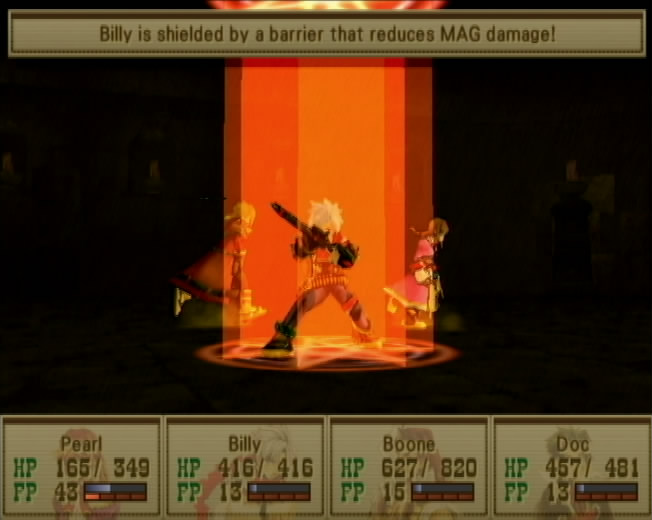
Protect - reduces magical damage. Only lasts 3-5 turns so needs frequent refreshing. Billy and Pearl need this the most, then Doc. Boone can do without it for a while as his magic defence is the best.
Shield - reduces physical damage, just like Protect. Doc needs this the most as he'll be my main attacker and getting counterattacked, but everyone benefits from it.
Turbulence - Even with this our chance to dodge Mighty Swing is low, but every little helps.
I have to take this slowly and very defensively.
Phase 1 - Panic
Pearl and Billy defend, and I hope that the boss uses melee attacks at the start of the battle and not two turns of Phantom Hazard, or I'm fucked.
Boone has Terra Roar and starts casting Protect on people, starting with Billy and Pearl.
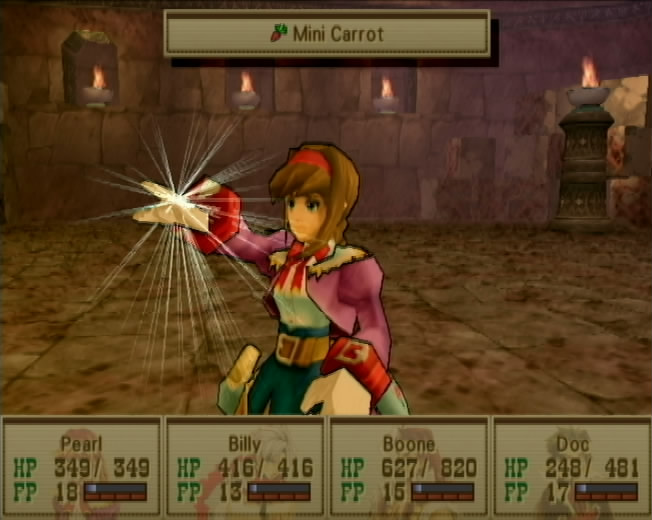
Doc uses a Mini Carrot on Pearl so she has enough FP to use Mystic.
Phase 2 - Preparation
Once she's adequately buffed and safe, Pearl Mystics three Mini Carrots, (25FP each) bringing everyone else's FP up to the 85-100 range. The others use a few mini carrots to bring her FP up to at least 50. I only have 9 mini carrots so I can't spend them too freely.
I give the Terra Roar medium to Billy. He can't do meaningful damage to the boss (I once took a chance on a gatling and each hit did 26 damage) so for the rest of the battle he's in charge of casting Protect and Shield.
Boone keeps Aqua Wisp. He'll heal at every chance he gets. Won't use Extension unless it's vital, he needs FP for defence.
Pearl gets Gale Claw. This will let her act first. Usually she casts Turbulence but if an emergency calls she'll use a Heal Berry or even mystic.
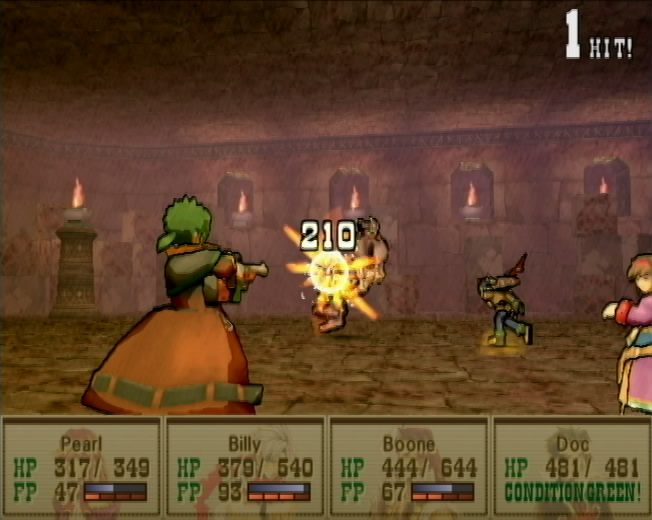
Doc gets Firey Rage to increase his damage and boost his crits. He'll be our sole attacker. At 100FP he can do 250 damage with a regular shot and at least 600 with a crit. I tried to get him to use weaken - while it CAN work, it never did in this battle.
Phase 3 - Persistence
Play it safe. Shoot with Doc, Buff with Jet, Heal with Boone, Pearl is the panic button. If things go tits up have people defend and use Heal Berries until it looks OK. This guy has 4800 HP and no means to heal himself so he'll go down eventually, right?
Phase 4 - Panic Again
The hell?
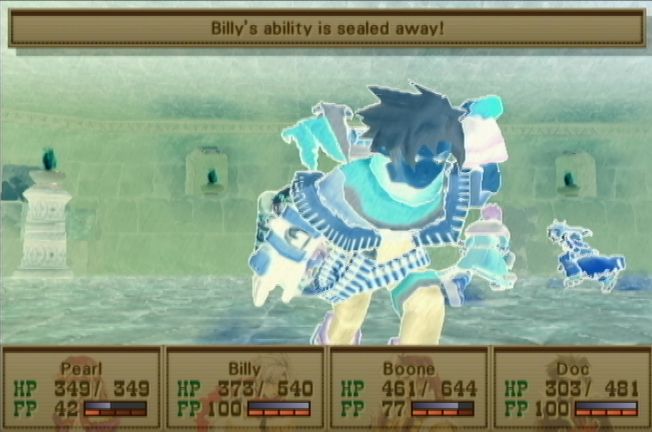
When his HP starts getting low, he'll use this. It completely blocks all Arcana and lasts for several turns, and as soon as it wears off he'll immediately cast it again. Now we've lost Boone's healing, and the buffs will wear off in a few turns, but he can still hammer us with his own arcana.
Nothing for it but to Mystic my last Mini Carrot to get as much defence from FP as possible, use heal berries and tell Doc to SHOOT SHOOT SHOOT.

He obliged.
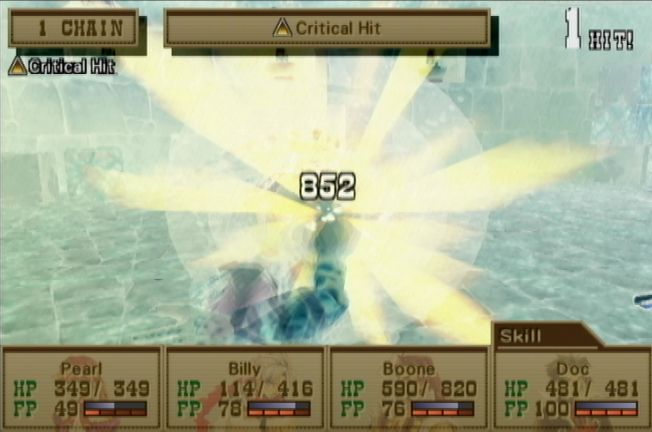
And how.
He actually got three critical hits out of four attacks after the anti-arcana zone business started.
I cannot believe my luck. I really can't.
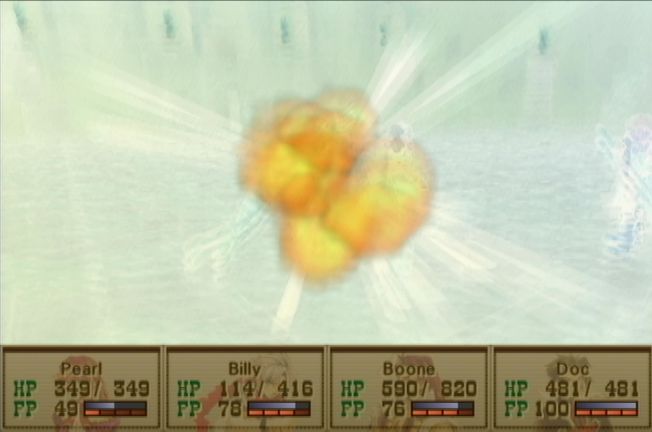
Ohhh yeah.
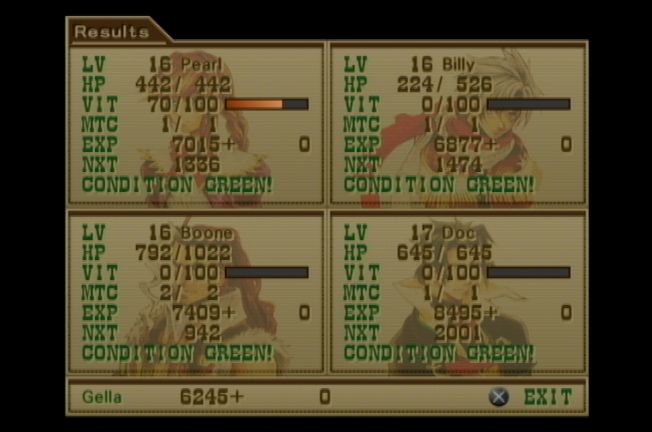
The rewards are 13 times what we got for defeating Janus last time. It's enough XP to take everyone from lvl 13 to lvl 16, and Doc hits lvl 17.
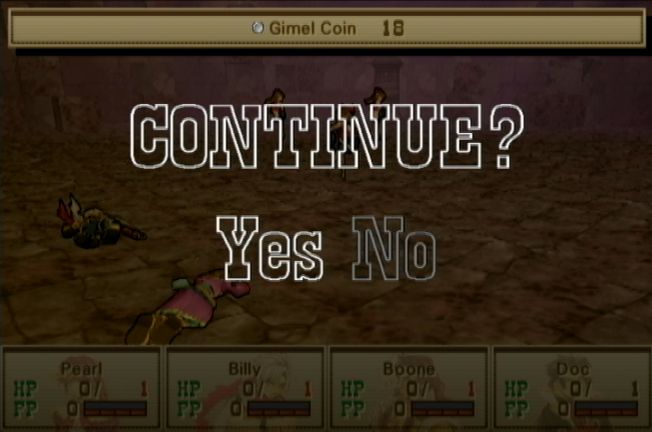
But the price was dear. It took about four attempts to do this, and this attempt took 26 minutes, using up my entire stock of nine Mini Carrots and half my stock of Heal berries.
Well, at least that's it over, right?
Right?

Acquiring the Corpse Ring will curse all party members by reducing their HP to one and their VIT gauge to zero. It will be impossible to remove the curse as long as you are in the ruins. You cannot restore your HP or VIT gauges. Furthermore, you will not be able to save your game onto a Memory Card (PS2) using a Gimel Coin. The only way to remove the curse is by exposing the ring to sunlight. Faced with these conditions, will you be willing to risk death and take the Corpse Ring out of the Decaying Labyrinth to remove the curse?
Oh dear.
When they say HP, they mean MAX HP. All character's HP will be 1/1 - anything can one-shot us. And we can't even savescum... not that I would... of course. (a very good thing, or people could save themselves into an inescapable situation)
Hold on to your cowboy hats, we're going to die. A lot.
Thankfully, we get a chance to save before taking the ring, so we don't need to repeat that boss again, and we do have the option of leaving without taking the ring. We'd still need to fight our way out but it would be with normal HP. The sensible thing to do would be to leave and come back with a few more levels, but this update has nothing to do with "sensible."
Yes
MUSIC - Death Wire
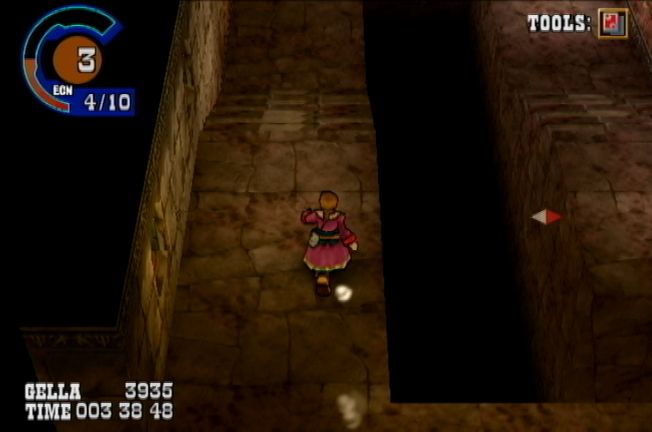
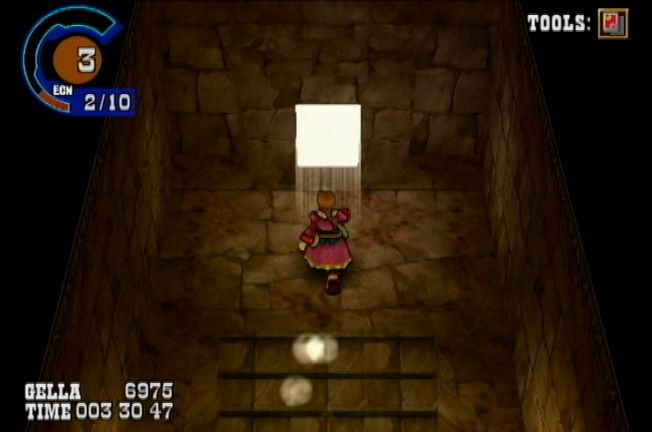
The trip out is longer and trickier than the way in.
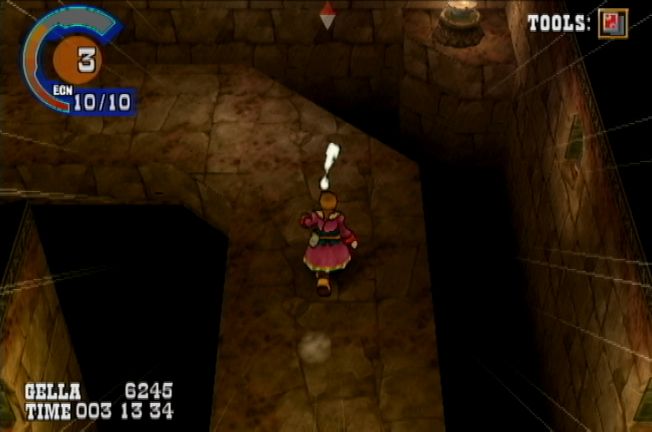
It's best to run as much as possible, but be careful not to fall.

These rooms have got more complicated, with more switches to press and a block in the middle that does a remarkable job of getting in your way.

The third version of them has six switches at the corner of the room, which requires a lot of backtracking to approach boxes from the right angle.
Usefully enemies won't attack you while you're moving a box, so I spent a lot of time tugging boxes around to avoid battles.

These winding paths return as well. I really get the feeling the developers were going all out to frustrate the player. It's annoying, but fair.
But the real challenge is the enemies, of course. I don't have much of a migrant level so skipping all battles is impossible when each one takes four or five points off the meter.
The Rat Monkey can now one-shot you with his bite, but he sometimes uses poison and he's still weak enough to take down in a single turn. When he appears alone, it feels like a gift from the RNG gods.
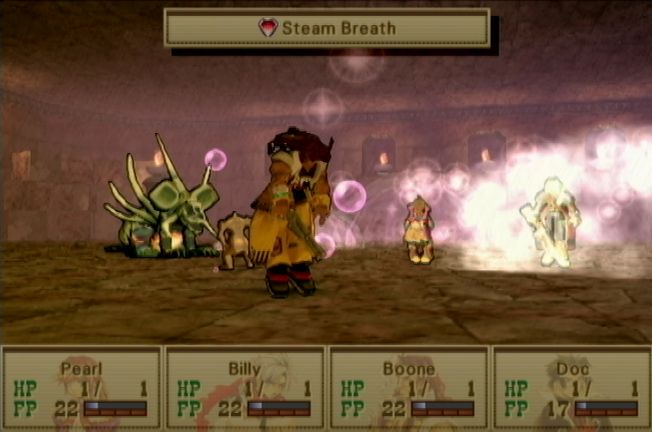
The Undead Reptile's Steam Breath is revealed to be a cruel practical joke by the developers, as its previously laughable damage is now capable of taking out several characters at once. Thankfully Doc seems to be immune to it, always taking 0 damage. Only luck and bad AI keeps the enemy using Steam Breath instead of a regular attack that could kill Doc.
And Rachael? Sweet, cute Rachael?
Rachael who spawns with three of her friends, each of which is capable of killing one of your characters in one hit?
Rachael is a bitch from hell. With her, it's entirely down to the random number generator. She will either use Decelerate, sparing a character for one turn, or she will Paper Cutout and kill them. They can kill me in one attack, while it takes me several attacks to kill one of them. Rachael can overwhelm with sheer numbers.
Choosing to continue here doesn't send me back to the save point, it just restarts the battle.
By the way, did I mention that at this point in the game it is impossible to escape from battles? A strange design choice, and very annoying when you get in this kind of situation. I'm completely stuck here until I beat these things or restart.
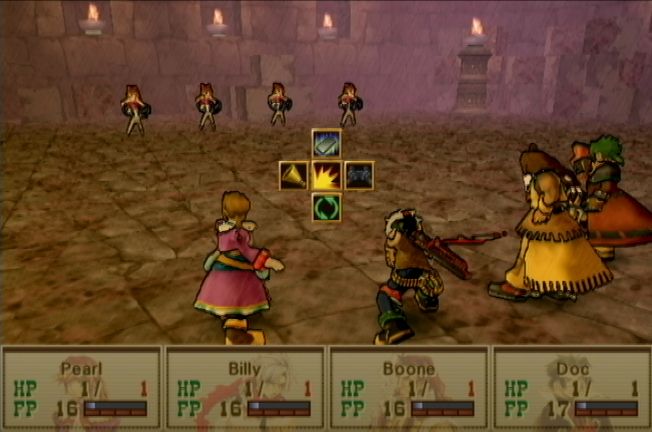
There's really only one way to do it. At this stage a 16FP first-turn summon isn't enough to kill these things, but it softens them up. Pearl and Boone use Fire Gems while Jet and Doc attack, and I cross my fingers.
Jumping off this platform brings me back to the path we entered by. In an incredible fluke the game starts to serve me an unescapable battle just as I jump off the platform, which cancels the battle.
And I run, screaming, for the exit.

The Corpse Ring is purified by the shimmering sunlight and evaporates into thin air. The corruption that was eating away at the ruins and the surrounding area is put to rest.
Phew. Can't believe I did that.
Was it worth it?
Hell no.
Lets be honest, that was a piece of grandstanding by an idiot who was too proud to accept that he'd misremembered the suggested level of that dungeon.
There's no real reason to do this before going to Ka Dingel, long before the levels and tools are available to try it at its intended difficulty.
In the end, success was probably 50% planning and 50% luck.
On top of that, I completely cleaned out my store of Mini Carrots and most of my Heal Berries.
So no, while possible I can't recommend doing this at this level.
If you want to see how this is meant to be attempted, check the gameplay spoilers below.
If you wait until the early twenties, you'll have access to several things I didn't.
Some more mediums, which give you Dark Ward skills that can completely negate Phantom Hazard's damage.
Mediums also give you a source of Light damage arcana and gems, allowing you to deal much more damage to the boss, and also an arcana that lets you boost physical damage to ridiculous amounts.
If you really know what you're doing, finding and Mysticing a Light Ring can convert Doc's ARM damage to light elemental, which is just getting silly.
More starting FP from having a higher level makes it much easier to quickly Mystic or Extend some light damage onto Rachael during the escape.
You also have a higher Migrant level and more points to spend (20) allowing you to skip many more battles.
But all in all I'm glad I got this done. It was definitely a tense and exciting experience, and with the main game so easy at this point it was nice to have a real challenge.
Now if you'll excuse me, I'm going to go exhale.
MUSIC - A Person's Warmth
 Well... We cleansed the cursed ring we found in the ruins in the northwest... But we still don't know whether we stopped the corrupted soil. Hmm... I think it's all right. The flowers say they feel a lot better. Whoa... I'm shocked. You've got a stronger bond with your surroundings than even us Baskars! It's like... We did our job. Now let's get outta here. We can find better work elsewhere. Actually... If you don't mind, I have one more reward for you. The soil is corrupt no more. Now I can share with you the bounty of the harvest: goods for your journey. Are you saying you'll cultivate herbs and medicines for us?
Florina nods.
Many have tried, but so far nobody has been able to raise such plants. That's why you can't just buy them. And here you're offering to do just that, for us? We really appreciate it, but you've given us a reward already, so you don't have to go out on a limb. Okay... Then share some of your flowers with me. That's all I ask for in return. After all, I love taking care of flowers. You heard her. Let's grab as much as we can. I'm sorry he's so rude. He's had it rough, so you'll never hear anything nice out of him. But he's not really a bad guy, okay? Of course. You helped the flowers. You have to be nice people to want to help mother nature.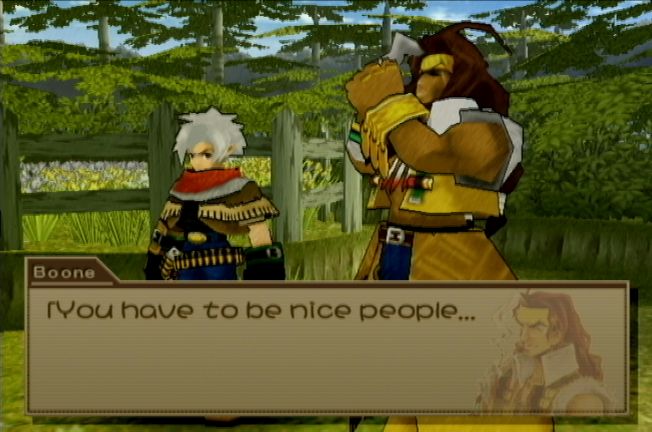
 ... to help mother nature. And your point is!?
Looks like Billy has a new
When gardening, I can cultivate special berries, carrots, and various flowers, too.Remember how I said several times that heal berries, mini carrots and the like are hard to come by and need to be used sparingly? There's a reason why I usually added "in the early game" to that claim. The Secret Garden destroys that game mechanic even if you choose not to completely exploit it.
This is why I wasn't shy about using up my entire stock of Mini Carrots getting though the Labyrinth.
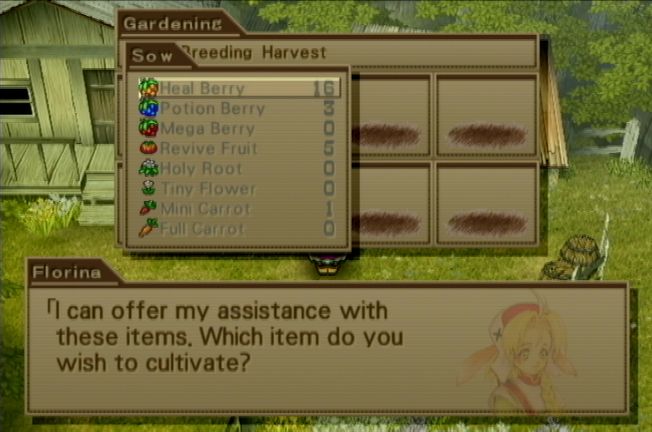
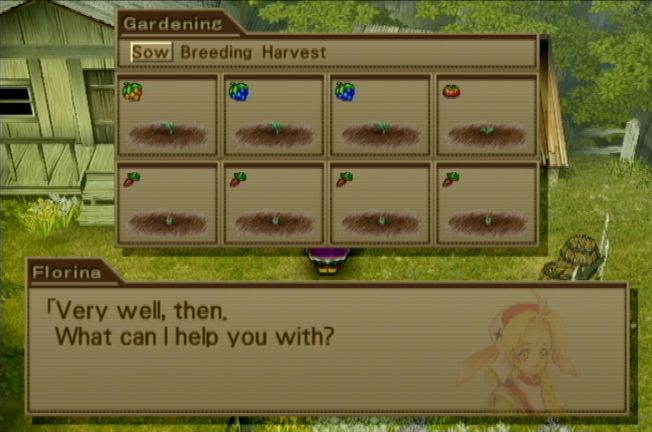
Giving an item to Florina lets her convert it into seeds we can plant. We'll only ever spend one item to give her seeds, but it does gate the likes of Mega Berries and Full Garrots - Florina won't be able to grow them until we find one in the rest of the game to give to her.
I create seedlings of Heal Berries, Potion Berries, Revive Fruits and Mini Carrots, and have her plant them like so.
It'll take time for these to grow - it'll be ready for harvest once a hidden points counter fills up. Staying at inns, (20 points) talking to NPCs, (1 point) getting into battles, (5) travelling between towns (10) and even just leaving the game running for a minute (1) adds points to the counter.
A Heal Berry needs 25 points to grow, while a Mini Carrot needs 50 and some other plants need a full 100. As soon as the counter fills up it immediately starts work on another fruit, so points are never wasted and you don't need to resow.
But there's a catch. Conditions on Filgaia being what they are, there is a chance that a harvest will spoil. This chance varies depending on the item. Heal Berries have a 70% chance of success, Mini Carrots just 20%. That Tiny Flower has a mere 5% chance of success.
The way to fix this is breeding. When you breed, you sacrifice an item in your inventory to raise the chance of success by 1%. Sacrificing 30 heal berries will garantee success for them. You'd need to sacrifice 80 Mini Carrots to get the same result. It's best to figure out how many items you need to be "comfortable" and put the rest into breeding.
There are even rewards for breeding flowers up to 100%... using the Secret Garden to your advantage is definitely worth your time, and the upside of starting it early is I got a head start on breeding.
If you want to grow plants quickly, you can go back to Baskar Colony and repeatedly sleep in the free Inn there, but I'm going to try not to do that because it is boring for me.
This planet isn't a good place for flowers. I heard that long, long ago there were flowers as far as the eye could see...I want to make the world what it was before, and I won't give up, ever.If there's a downside to the Garden, it's Florina herself, who is way more sickly sweet than I can stand. I'd much rather have had an old hermit or maybe Groundskeeper Willie.
Next Time: Back to the main plot, and a reckoning with Janus.
I've stopped checking my e-mails, but that's not stopping the letter sender. I found this in my SA PMs folder...
quote:
ADayADay
Jun 12, 2010
Today is June 12, Crimson Noble Day. One man tried to catch a crimson noble. He set up a simple trap consisting of a basket propped with a stick and beaker with his own blood under it. Nobody believed he could catch a crimson noble with such a stupid trap. But when dawn broke, a crimson noble was trapped under the basket. It's one of those 'you never know until you try it' kind of stories.
Jun 12, 2010 8:32
* Profile
* Message
* Post History
Not only does someone really want me to read this, they spent
 to do so too.