Part 39: The King of Monsters
It's time to tie up the rest of the loose ends before we continue forward to take on Volsung. That means 9 bosses and a dungeon, so strap in.Before we do any of that, though, let's get our proper reward for beating the King of Angolmois!
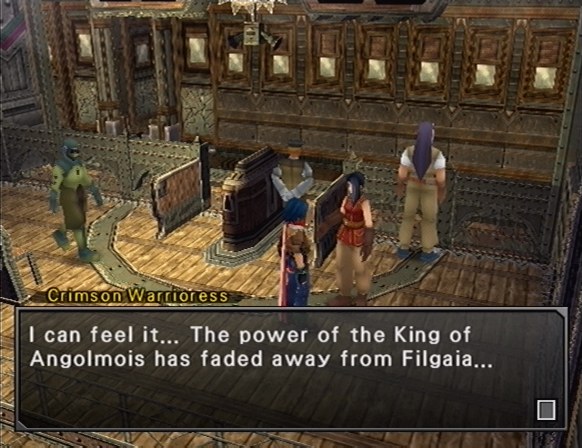
Crimson Warrioress: I thank you for your trouble. Here is what small reward I can offer in exchange. It is a cherished treasure of mine, one I often employed in the purging of evil. I'm sure it will be a great boon to your quest.
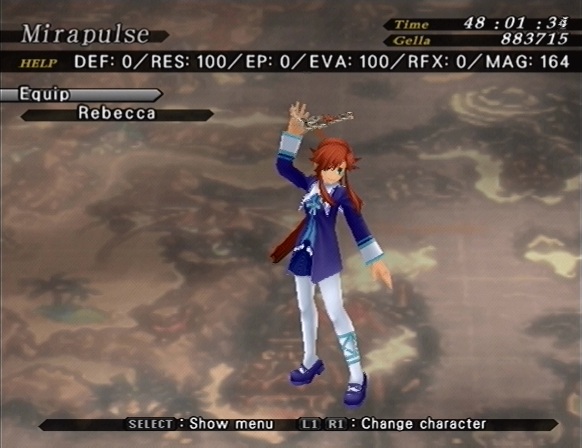
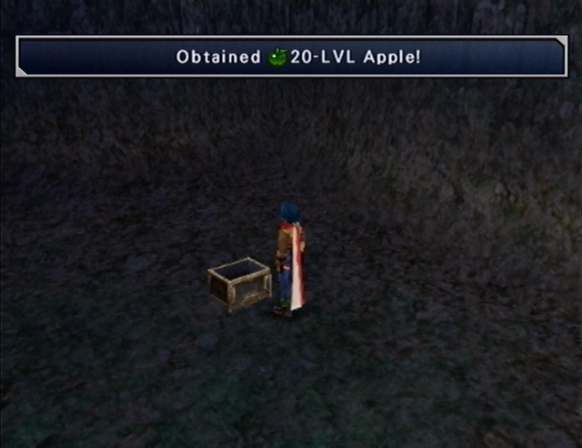
Obtained Final Stage!
The Final Stage is a great ARM Part for Rebecca.
Now let's take care of the remaining Pillar Bosses.
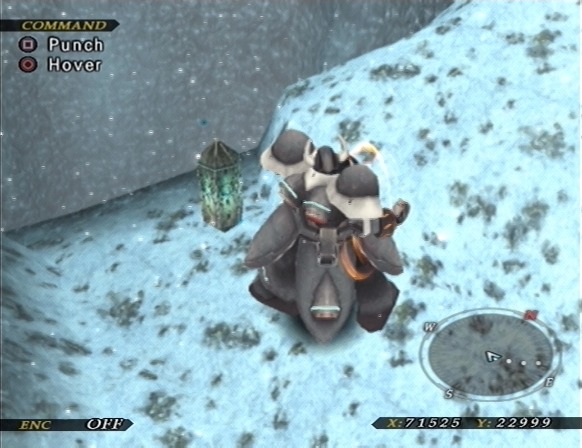
The first Pillar Boss is to the south of Mt. Chug-Chug, we burst it open with Asgard's punch, and we're given the option to jump into battle with our main party, or to mount Asgard and use his iron fist to crush the enemy.
I feel like I'm cheating when I use Asgard (and it's still ridiculously boring), so I'll only be using him for one Pillar Boss, which we'll be saving for last.
Music: Castle of the Heavenly Gods

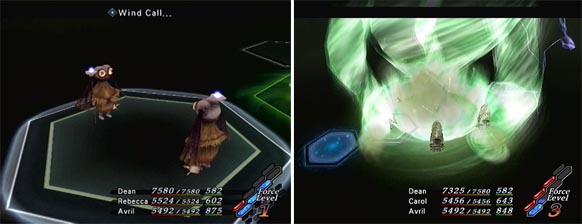
We're up against four Gobs. They can seriously overwhelm you, and they hit hard. The overworld Pillar Bosses are designed to take down Asgard, so they have ridiculous stats.
Lucky for us, the Gobs often spend their turns waiting around, so we don't have to worry too much about them killing our entire party at once. The Gob General does about 4000 damage with his basic attack, the Chief does 7000, the Director does 6000, and the Doctor does 2000. The Doctor can also hit us with Hi-Blast for 10000 damage, and heal for 16000.
Now, you would think that you should target the Doctor first, but this would be a terrible mistake for one simple reason.
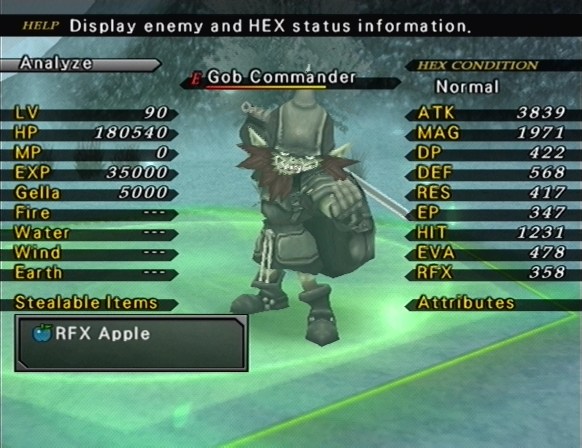
When you attack the Doctor, the Gob Commander jumps into battle, so it's best to defeat all the others first, so that you don't have to deal with five Gobs at once. The Commander attacks for 7000 damage, and can use Heavy Crush for 13000 damage. I haven't provided a video for this battle, because it took over 20 minutes and it's boring as shit.
We get a Golden Angel for our efforts, and continue to the next Pillar Boss.
Boss: Graboid
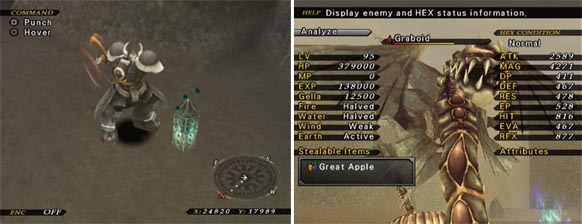
The Graboid is located in the desert to the south of Twelbit. The Graboid is one of the easier overworld bosses, but he still packs quite a punch. He can use Giga Crush for 10000 damage, he can poison a line of HEXes and deal 3500 damage with Harmful Wave, and he can deal 4500 with Snake Crunch.
He also has a two turn attack, Fossa Magna, which hits every HEX with massive earth damage. You should be able to survive it by gathering on the earth ley point, but it's simpler to use Invincible with the Mountain Medium. We make short work of the Graboid by blasting him from the wind ley point.
We get another Golden Angel, and I go to turn in the ones I have, because I want a particular armor for the rest of the bosses.
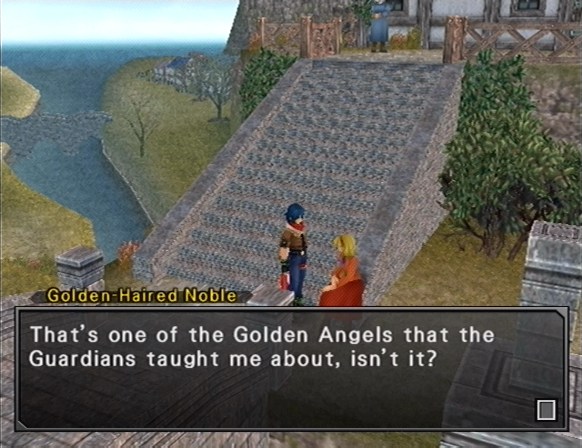
Golden-Haired Noble: Allow me to convey the sincerest gratitude of the Guardians for punishing a beast that sought to harm Filgaia. As their representative, I would be honored to offer you a reward for your efforts...
*Will you exchange your Golden Angel for a Robe of Filgaia, the armor that protects the descendant of a Guardian priestess?
Yes
Obtained Robe of Filgaia!
Golden-Haired Noble: Thank you very much. This robe was given to a distant ancestor of mine by the Ice Queen herself. It will surely be of great use to you.
The Robe of Filgaia gives Avril the apperance of Cecilia during the prologue of Wild Arms 1, and increases her RES by a massive amount.
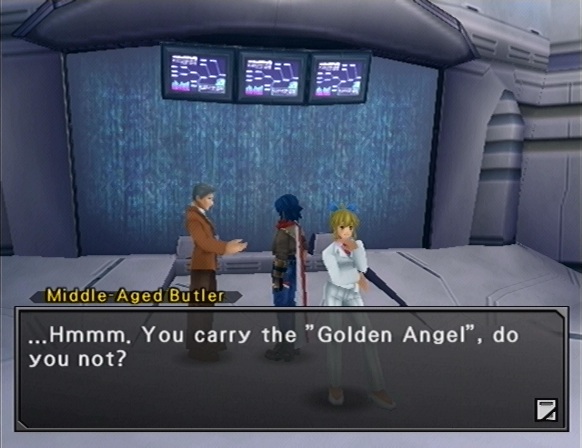
Middle-Aged Butler: I've heard about that item from my master. The proof of a person who will inherit his "old self"...
*Exchange the Golden Angel for the Butler Suit, the proof of a famous butler who has mastered both the art of the sword and odd jobs around the mansion?
Yes
Obtained Butler's Suit!
Middle-Aged Butler: I pray that good fortune and peace will be your constant companions on your journey.
The Butler's Suit looks like Magdalen's clothing in Alter Code F. I always like to put video game characters in suits when possible, so I really like this armor.
Boss: Oil Spirit x5
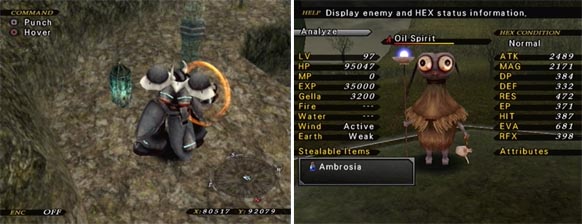
A Pillar in Northeast Filgaia pits us against five Oil Spirits. Their basic attack only deals about 4500 damage, and they'll often waste their turns with Bitter Smile. The real threat in this battle is Mega-Cyclone.
Mega-Cyclone hits every HEX for about 6000 damage. There are five Oil Spirits, so if enough of them decide to do it in one turn, it's a definite game over. Despite this, the Oil Spirits aren't really a big threat. We get another Golden Angel for defeating them, and move on to the next boss.
Boss: Doomsday
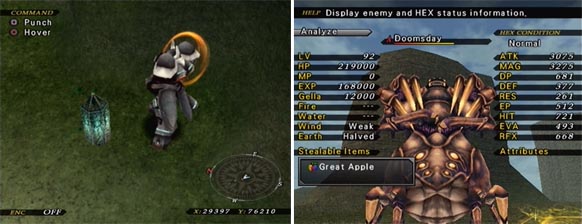
Doomsday is located in Northwest Filgaia, and is probably the easiest overworld Pillar Boss. His preparation attack, The Air of Misery, hits all adjacent HEXes for 6300 damage, and gives all HEXes occupied by one of your characters Misery status. Aside from that, his basic attack hits for 5000 damage, and he can heal himself for 13000 HP. No big deal.
Boss: Bad News
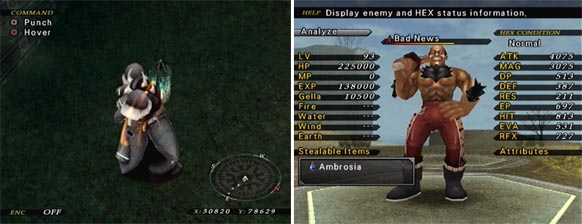
It's Bad News! Bad News is an optional boss in many of the Wild Arms games, but he always looks different. This version of Bad News kind of unsettles me, if only because of the massive buldge in his crotch.
Bad News lives up to his name, because he is bad news. He can attack an adjacent HEX for either 7000 or 10000 damage. But that's not all he can do.
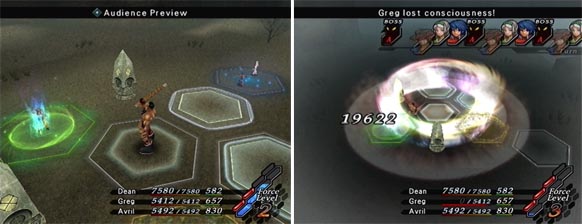
He'll use Audience Preview, and then follow it up with Bad Lariat, which hits all adjacent HEXes for 20000 damage. He can also counter your attacks, which can seriously screw up your strategy and ruin your day. The trick with Bad News is to keep him away from your healer, and to never put more than two characters on one HEX, when you follow this advice, he's not too difficult to beat.
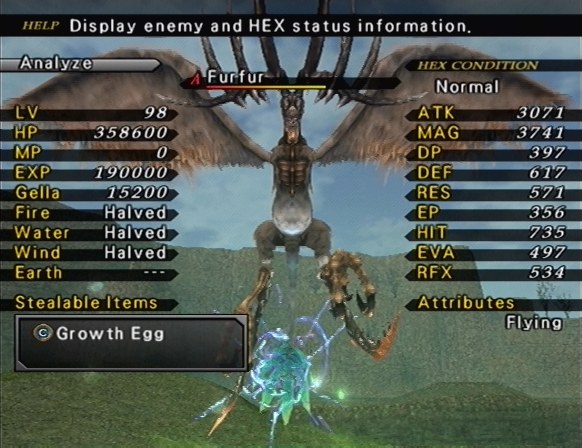
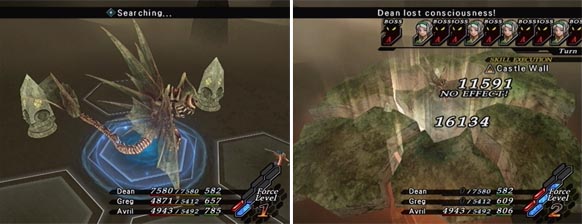
Our final overworld Pillar Boss is probably the hardest boss in the game if you don't use Asgard, so I'm using Asgard. We're up against 2 Furfurs, and they're bastards.
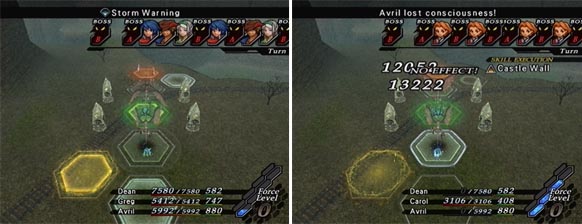
They very frequently use Storm Warning, and follow it up with Lightning Strike, which hits every HEX for 13000 damage. The only way to protect yourself from this is to use Invincible with the Mountain Medium, but this is hard, because the assholes use it all the time, and you just can't build up 75FP between each one. I spent hours of my time trying to beat them without Asgard's help, but I just couldn't do it.
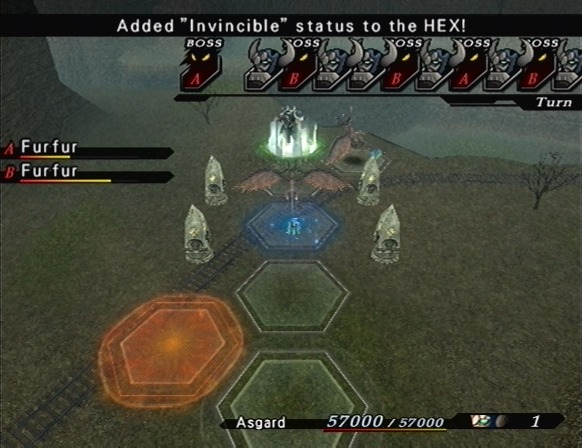
The battle went on for hours (read: 30 minutes), so there's no video, but I've constructed a handy flowchart which perfectly describes Asgard's AI.
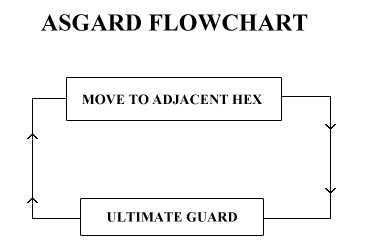
So after Asgard blows all his turns on guarding, you have to hope he at least punched one of them a couple of times, and then finish them off before they get too many chances to use Lightning Strike.
Edit: It turns out I'm the retarded one, not Asgard.
U-DO Burger posted:
You can totally prevent him from using Ultimate Guard. If there are no actions equipped to a turn in his algorithm, he will use Ultimate Guard. If you don't want him to use it, fill up your battle algorithm with Tony.
Anyway, that's all the overworld Pillar Bosses, but there's still one I skipped when clearing out the dungeon bosses, so I'll take care of it now.
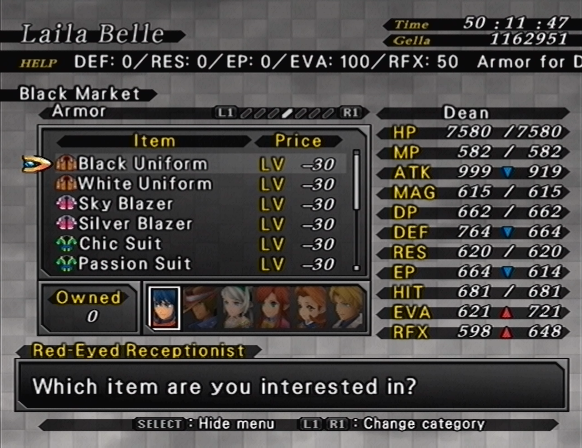
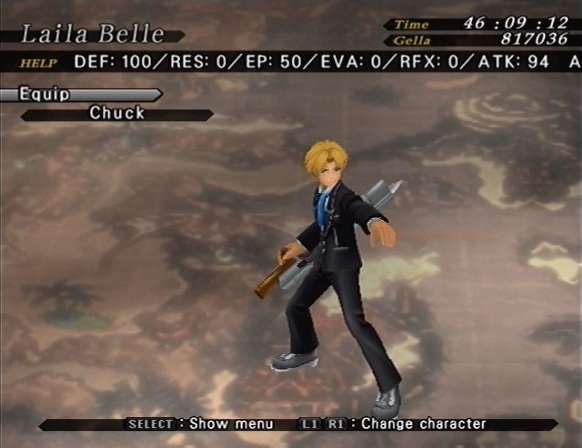
First we have to buy everyone one of their Black Market alternate costumes, which is why I didn't do this before. We buy Dean's Black Uniform, Greg's Black Bancho, Avril's Chic Suit, Rebecca's Sky Blazer, Carol's Junior Green, and Chuck's Class President.
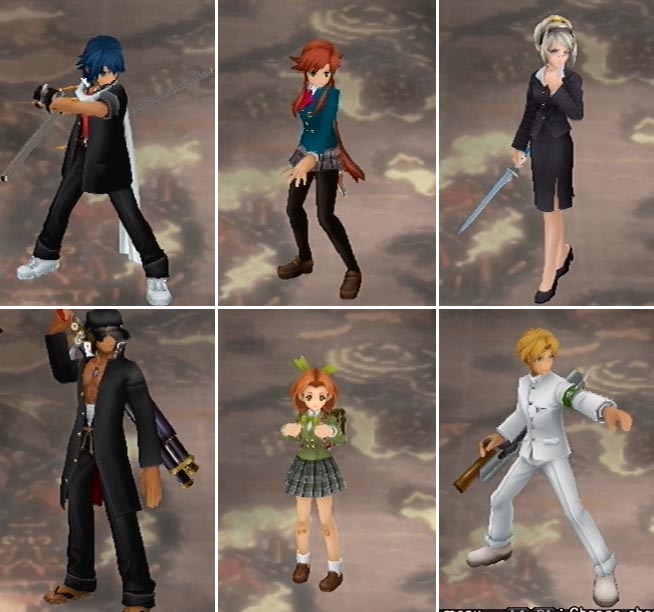
They're all supposed to look like students, but Avril looks more like a secretary, to be honest. Next stop: Mithysmere.
Yes
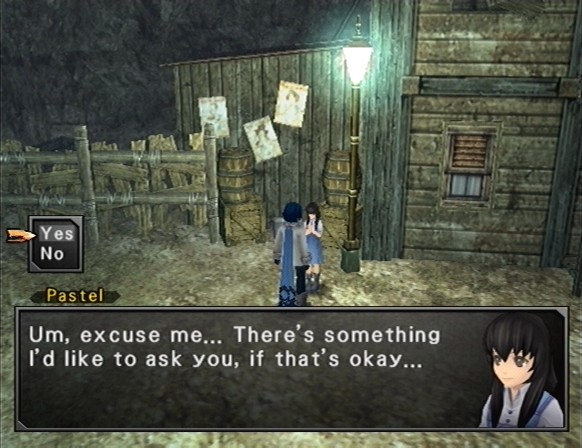
 Thanks! Anyway...there's another really strong monster called Hresvelger. He's decided to settle down in the middle of Mithysmere. He's clever... He hides out when Drifters are around, but he comes out when it's just us kids. Luckily, he hasn't come down this far yet... But I'm scared we'll have to lay low for a while, like we did with Balam... If we can't go outside, we can't dig around for junk parts to sell. So, please, could you defeat the monster Hresvelgr for us?
 No problem! It's not like we're in such a rush we can't sidetrack a little!
So Hresvelgr hides when Drifters are around, but we can fool him into thinking we're children by wearing the school uniforms from the Black Market.

 We're not schoolkids, you fool! We're top-class Drifters! And now you're gonna get what's coming to you for terrorizing those kids!
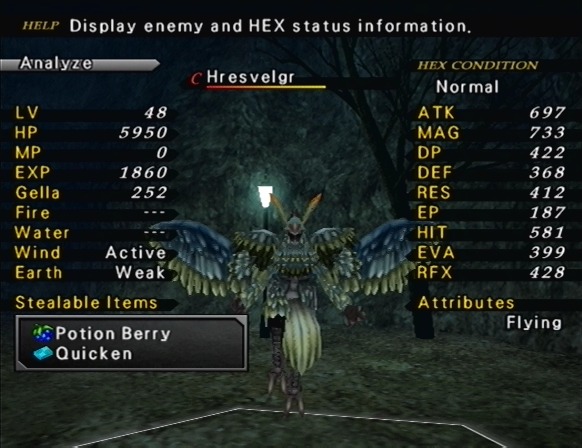
I don't even consider this a boss. Just look at those stats.
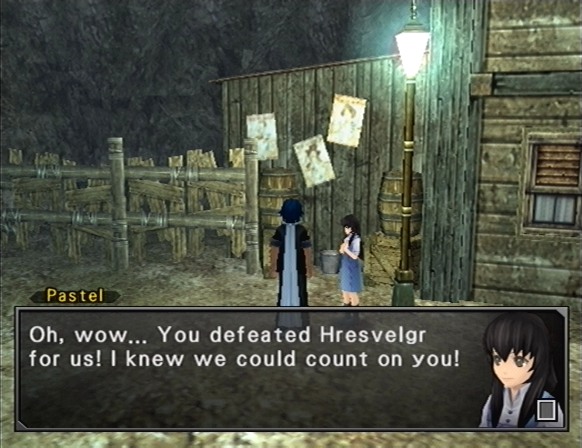 Now all of us here can have some peace for a change. Here, I've got a little gift for you!
Obtained Terrace Tiara!
Thank you for doing all this for us! I know how busy you must be right now. You guys are the best! Good luck!The Terrace Tiara is an awesome badge which reduces MP cost to zero. At level 100 we have more than enough MP though, so it's not actually very useful anymore...
Anyway, we can go clear out the Hillside Ruins now, so let's do that!
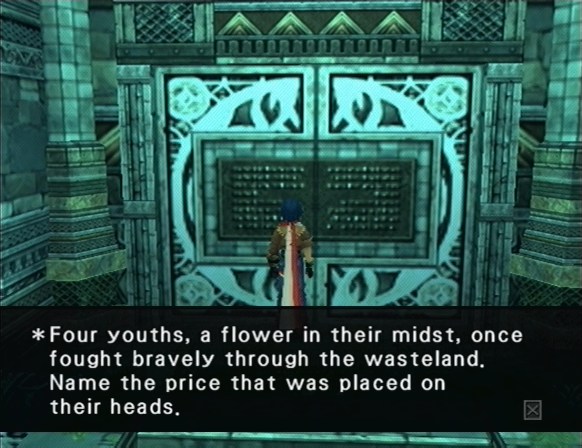
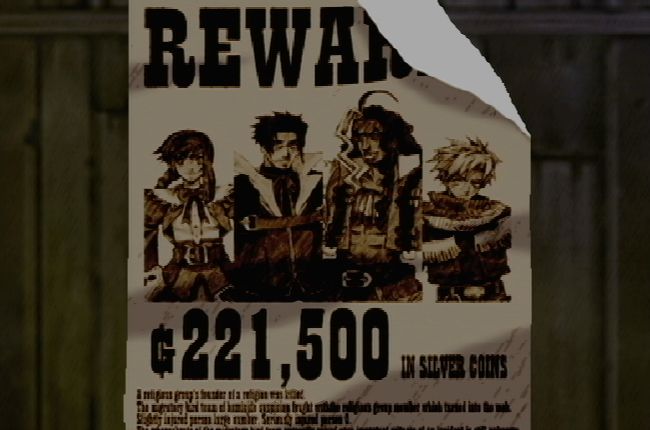
Hey guys, remember this door? If we examine it while holding exactly 221,500 gella, the door opens.
But what's the significance of this number, you ask? Well, those of you who have played Wild Arms 3 or read the recently completed Wild Arms 3 LP may recognize the number from the ending of the game.
Thanks to geri_khan for the screenshot!
Yeah, this is an awful puzzle. Anyone who didn't play Wild Arms 3 will never solve it on their own, and even people who did play Wild Arms 3 probably didn't memorize the number. Thankfully, there's nothing important on the other side of this door, so you don't have to worry about it if you can't open it.
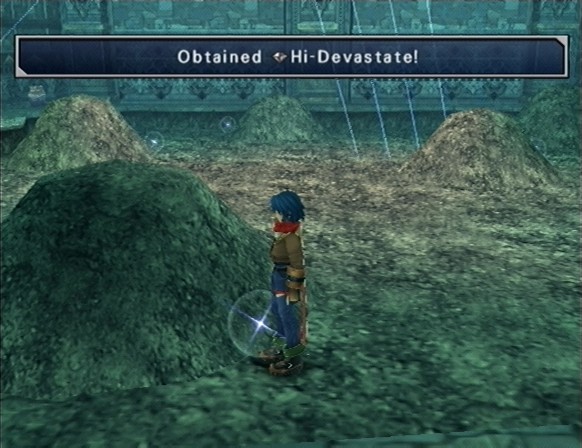
This room contains tons of items buried in the dirt or hidden in pots. In addition to the Hi-Devastate in the screenshot above, we find a Break, Full Revive, Hi-Water, Hi-Vortex, Chick Badge, Water, and a Mega Berry. There's nothing else in this room, so we keep going to the end of the ruin.
 ...What's that supposed to mean?
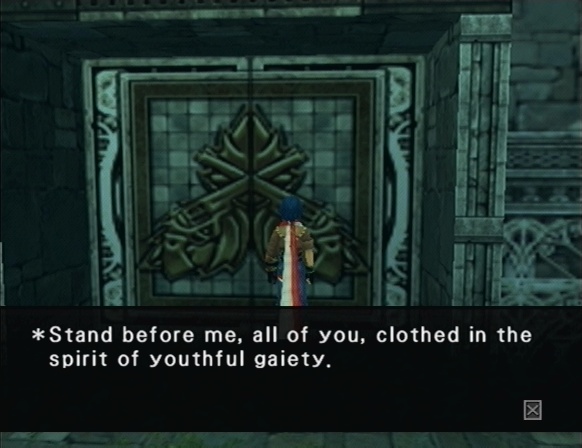
*Those days of youthful laughter pass by so quickly...
In order to open this door, we have to put everyone in school uniforms and examine it.
Boss: Prime Vals
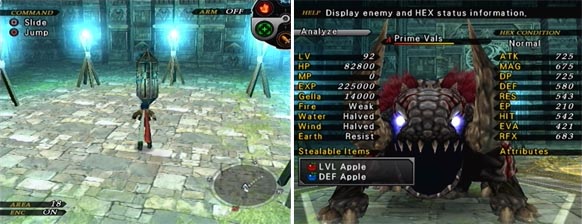
The Prime Vals is our final Pillar Boss! He is not a threat. He dealt about 400 damage to me, and then I killed him.
We have all the Golden Angels now, so let's grab the last of the cameo armors!
*Trade the Golden Angel for Labyrinthos, armor that grants its powerful Baskar blessing upon those with magical talent?
Yes
Obtained Labyrinthos!
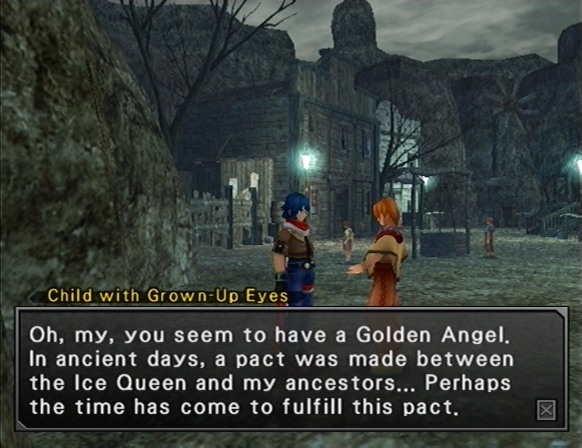
Child with Grown-Up Eyes: I hope you have a chance to cherish it. That would make me very, very happy.
Tim's clothes look silly on Dean.
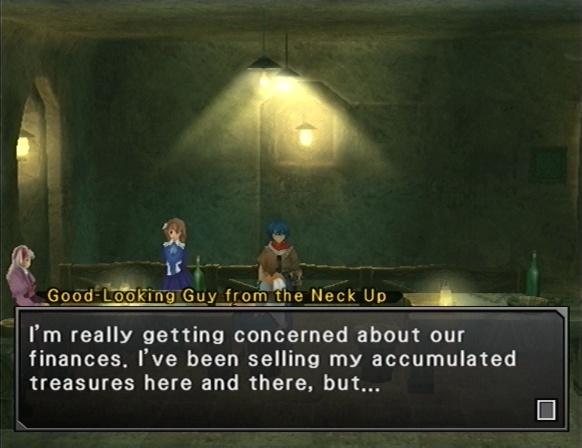
Good-Looking Guy from the Neck Up: The other day I tried to sell my very best garment, and the shopkeeper quoted me an unbelievably insulting price. I told him not to waste my time and left. I guess you can't expect merchants to understand the value of good combat gear. Sorry for the long preface, but...I guess what I'm trying to ask is...would you be interested in making a trade? Maybe I could swap it for that Golden Angel you're holding? I bet I could get a lot of money for that.
*Exchange your Golden Angel for the Dominion Garb, armor that radiates razor-sharp waves of magical energy?
Yes
Obtained Dominion Garb!
Good-Looking Guy from the Neck Up: Nothing would make me happier than knowing that you'll use that armor to help protect others.

The Dominion Garb makes Chuck look like Arnaud. Personally, I think the fancy suit looks much nicer.
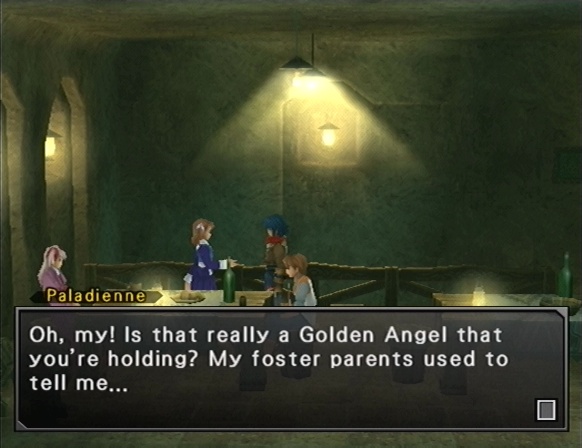
Paladienne: "Great warriors receive Golden Angels as trophies when they slay a monster that's been sealed away. If you meet someone who holds such a trophy, give them these clothes, and pray that they receive the blessings of a goddess."
*Exchange your Golden Angel for Haute Couture, armor that has been blessed by a goddess?
Yes
Obtained Haute Couture!
Paladienne: This garment is the battle costume of the Paladienne, one who can communicate with the guardian beasts that once lived in Filgaia. Please take good care of it.
Yup, now Rebecca is dressed like Yulie.
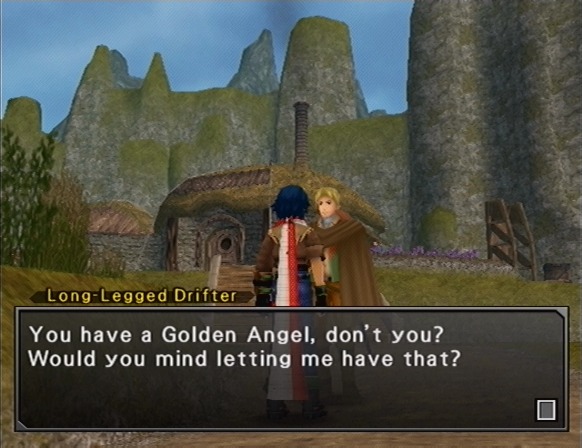
Long-Legged Drifter: My partner has been searching for it for a long time. He says he needs it to be reunited with his lover, Chikuwabu, who was knocked into another dimension. He says it's the proof of how his Filgaia and this Filgaia are connected, and a bunch of other stuff I don't understand. Of course, this is an official Drifter request, so I intend to reward you for it. What do you say?
*Will you exchange the Golden Angel for the Shade Wielder, armor for Drifters who traverse the wilderness?
Yes
Obtained Shade Wielder!
Long-Legged Drifter: Thanks for your help, man! Next time we meet, I'll make sure my partner thanks you personally.
I have no idea who Chikuwabu is. Is this a reference to Twilight Venom or Wild Arms XF or something?

The Shade Wielder looks like Jack's clothes, but it's missing his big coat, so I don't look at it and immediately think of Jack.
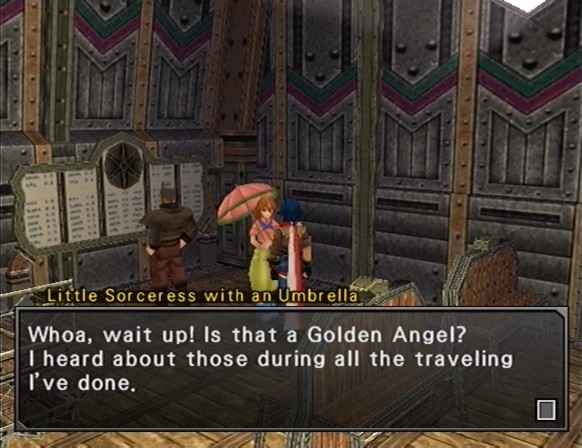
Little Sorceress with an Umbrella: A Golden Angel is proof that you're a super-strong spellcaster who beat a super-strong monster. Just holding it makes you lucky! If I had that, then maybe I wouldn't mess up teleporting anymore! Do you think I could have it?
*Will you exchange your Golden Angel for a Mirage Blazer, the armor of a Crest Sorceress?
Yes
Obtained Mirage Blazer!
Little Sorceress with an Umbrella: Yay, thanks! Now I'm sure that I'll be able to teleport properly.
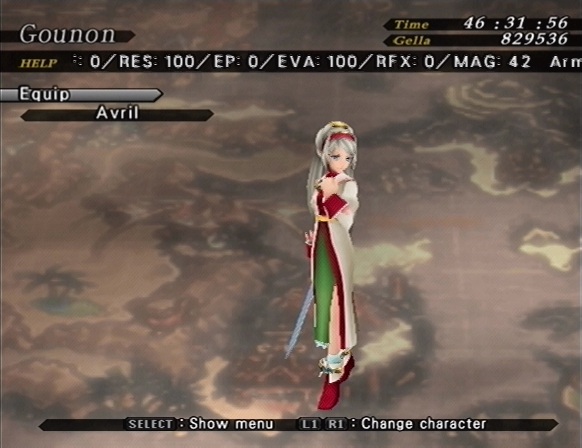
And now that we have Lilka's armor, we have all the cameo armors. The only costumes left to get are the other six Black Market armors, which we'll grab after the final optional dungeon. Speaking of which, why don't we make the final preparations to head through that dungeon?
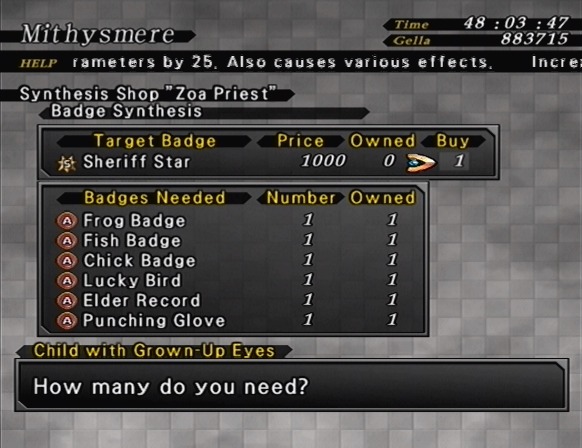
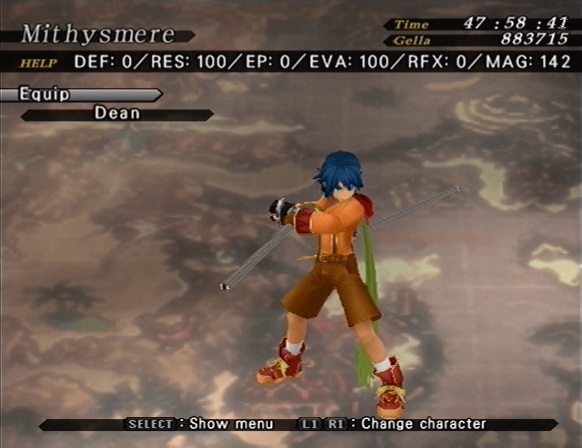
First we want to synthesize all the A Rank badges into a Sheriff Star. The Sheriff Star increases HP and MP by 500, and all other stats by 25. It also has all the effects of every A Rank badge. It's an awesome badge, and with the Black Market, you can make as many as you want for only 350 levels and 1000 gella apiece. (In Wild Arms 4 it would cost 8080 levels, and over 1,000,000 gella.)
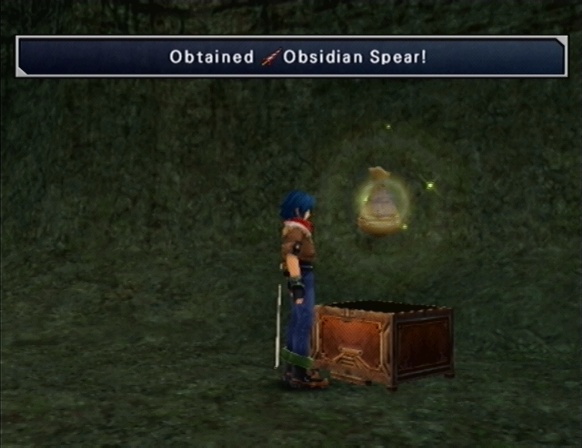
A razor-sharp, jet-black spear that radiates evil. One of the holy artifacts said to have sealed the king of the monsters.
Alright, I think it's time we look into this "king of the monsters" we keep hearing about.
First we have to head to this rock formation and use Lilka's Teleport Orb while standing inside.
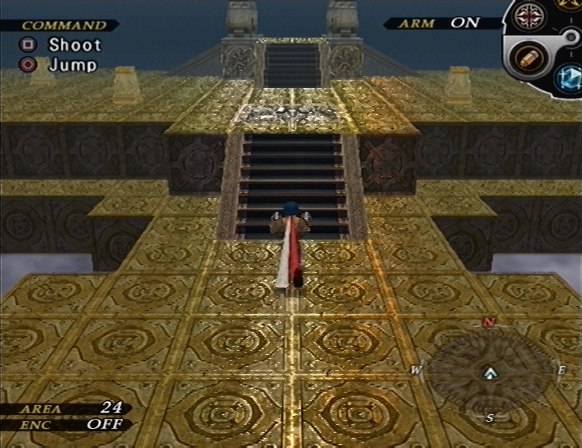
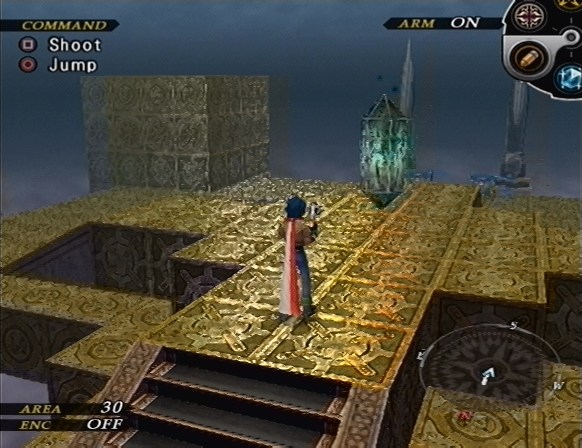
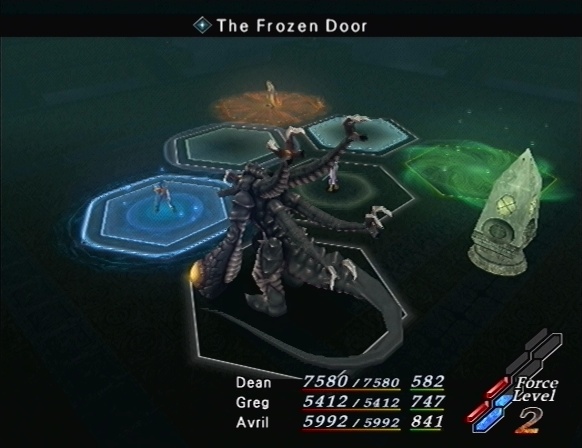
Here it is, the fourth and final optional dungeon.
Music: Entrance of the Beckoning Darkness
I'm still tired of At the Frozen Depths of the Heart, so here's the music from the first
edit: thanks for the correction, geri_khan
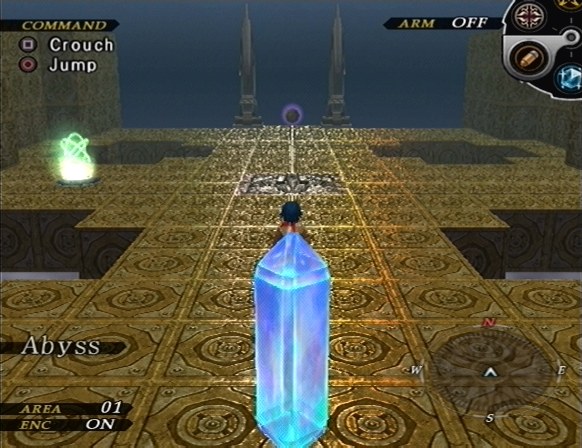
Welcome to the Abyss! Those of you who played Wild Arms 3 and Alter Code F needn't worry though, it only has 30 rooms.
The Abyss is another maze of teleporters. It's a lot simpler to navigate than Tartarus, but it's still hella boring and nothing we haven't seen three times before, so I'm going to take the Tartarus approach of just showing the interesting bits. (There aren't many interesting bits.)
This first room splits off into two directions, and the rooms on either side of it split into two directions as well. The best strategy for the Abyss is to follow one of these paths and grab all the treasure on it, then use the Exodus Orb to warp back to Area 01 and pick a different path.
Going west at the first fork eventually leads us to the 25th Sol Niger. Purifying this before continuing on with the dungeon is a good idea, if you don't want random encounters to get your turned around and lost.
Oh by the way, this place has 11 Duplicator Chests, so bring a ton. I did not have 11 Duplicators when I came here, so I had to backtrack out and buy some from the Black Market.
The Abyss has some interesting stone doors. Shooting one of these doors will remove a quarter of it. We can blast away all four parts, but if we only remove one, we can use the door as a staircase to reach higher levels of the Abyss.
After exploring for awhile, we reach a room with four pedestals. (One of them is hidden by my ARM Cartridges.)
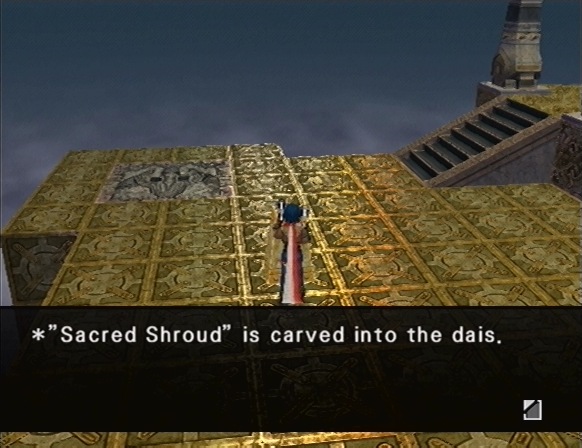
From the left to the right, we place the Sacred Shroud, the Obsidian Spear, the Jasper Pillar, and the Holly Crown.
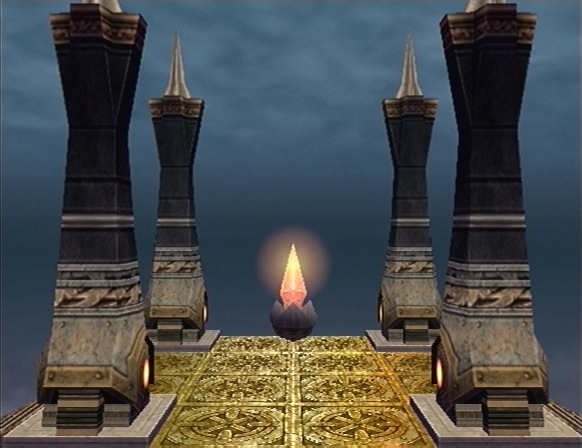
Once we've placed all of these artifacts, a warp appears.
Here it is. The moment you've all been waiting for...
Boss: The King of Monsters
Music: The King That Surpasses 100 Demons
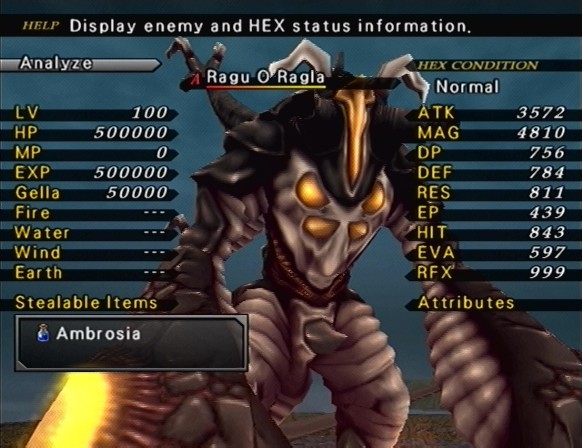
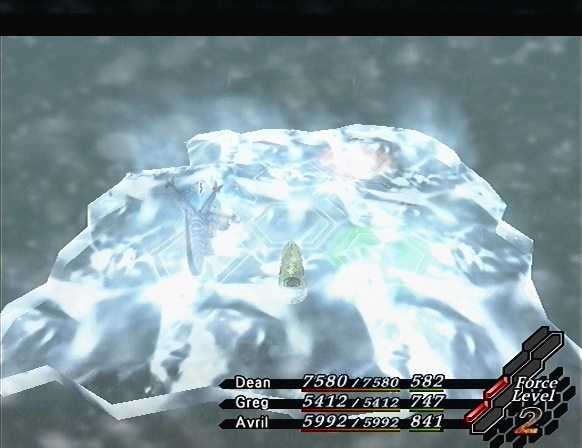
Say hello to Ragu O Ragla, the King of Monsters, and the ultimate challenge!
Ragu is the optional super boss of every single Wild Arms game. Sometimes he's easier than others, and in some games his position as the most difficult boss is debatable, but he's a pain no matter what. A great thing about Ragu in Wild Arms 5 is that you can't brute force him by leveling to 100. If you don't use strategy, you're fucked. And here's why:
Ragu's basic physicals deal either 10000 damage, or 6000, depending on which he uses. But that's not why he's a threat. No, his two-turn attacks are the real issue here.

When he uses The Burning Door, get your ass to the fire ley point immediately. On Ragu's next turn, he'll attack with his signature move, 1 Trillion Degrees.
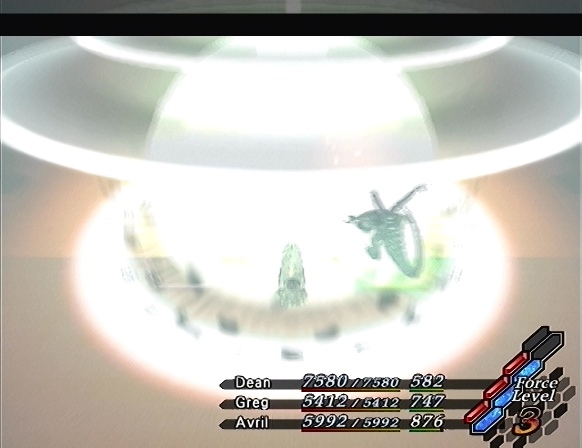
When you aren't protected by the fire ley point or a badge which reduces fire damage, this should deal about 13000 damage to every character, if you're level 100. If you're on the fire ley point and protected by a badge, it should only deal about 4500 damage, but that's still pretty severe.
But that's still not TOO bad, right? Just hang out around the fire ley point and you should be fine!
Nope! 1 Trillion Degrees isn't Ragu's only trick.
Here's Ragu's second trick, -1 Trillion Degrees. It functions the same as 1 Trillion Degrees, but it deals water damage instead. Now, one strategy is to keep Ragu off the fire and water ley points and move your characters between them when necessary, but this is a risky strategy that won't work very often. (I spent about two hours trying this strategy, I would know.)
The real problem with Ragu's attacks are DP. 1 Trillion Degrees and -1 Trillion Degrees will probably delay every one of your party members' turns. If a character wasn't on the appropriate ley point, they will definitely die no matter what, so every one of your characters are on the same HEX, and Ragu then gets to attack you for at least 6000 damage. Ragu can also use Ley Change, so you can't guarantee a water or fire ley point will be available on short notice.
So what do you do about this fiend? Well, there are two very effective strategies, both of which are kind of cheap. I took the less cheap strategy.
First we need to get Rebecca's RFX as high as possible, and then stick Speed Skates on her, so that she can beat Ragu's 999 RFX stat and get the first turn. I put the Full Carrot on her as well, so I started with 100FP. After this, Rebecca is worthless and gets swapped out for Greg.

I put the Moon Medium on Avril, and used Celesdue on the fire ley point, which is occupied by Ragu.
I put the Mountain Medium on Dean, and used Shut-Out to keep Ragu on the fire ley point. Now I know what you're thinking: "You fool! What will you do about 1 Trillion Degrees?!" Well I'll tell you what I'll do about 1 Trillion Degrees: Absolutely nothing, because he won't be using it.
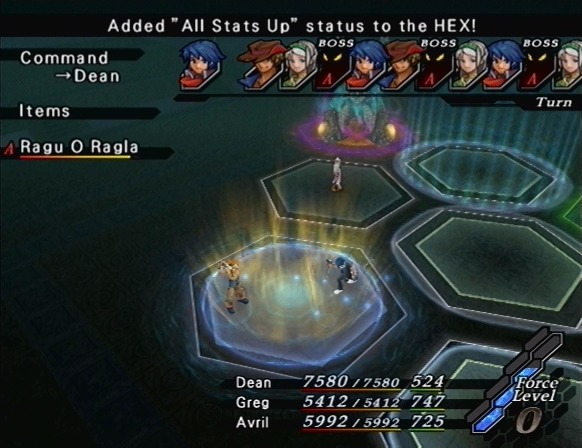
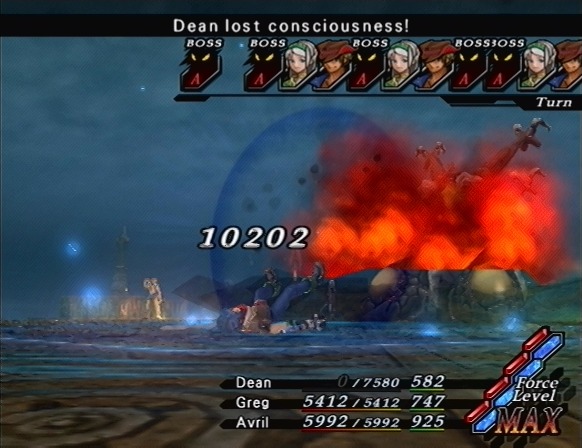
I get Greg on the water ley point, and use a Great Apple to give it All Stats Up status. Greg now deals 10000 damage with every Hi-Blast. Thanks to Dual Cast, that's 20000 damage per-turn. Greg's job in this battle is to use Hi-Blast every turn.
Avril's job is to attack Ragu with physicals. I stuck a Violator on her, so she attacks 2-5 times each turn. The entire purpose of this is for DP, which is why I picked Avril for this job, thanks to her skill Double DP.
Dean is worthless, so I use Turn Shift with him, which allows the ally with the next turn to act in his place.
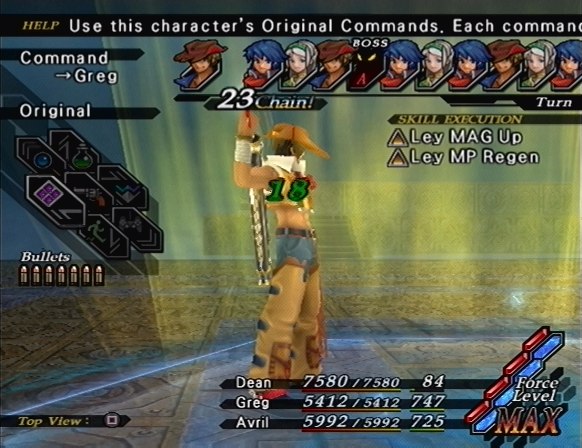
Thanks to the combined DP of Avril's attacks and Greg's Hi-Blasts, Ragu does not get to attack outside of the first few turns of the battle. But at 20000 damage each time Greg acts, this battle will take ages, right? Wrong. Check out that "23 Chain!" in the above screenshot. This means the last 23 actions have been taken by allies. This never really came up in strategies before, but the higher your chain, the more damage your attacks deal.
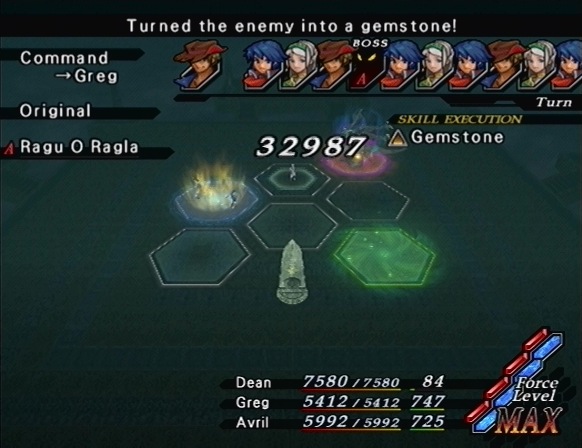
At a chain of 23, Greg's Hi-Blasts deal 32000 damage. Ragu didn't deal a single point of damage to me, and went down in about 10 minutes.
Now you may think that strategy was kind of cheap, but I don't really care. I spent over two hours trying to beat him more legitimately, and I never got his HP below 250000. This isn't as cheap (or as boring) as the other easy Ragu strategy, though.
There's a badge, 100% Orange, which can be synthesized with a Hen Badge, a Mist Cloak, a Pocketbook, and a Sheriff Star. It reduces all damage dealt and received to 100, and prevents the user's HP from being restored. The trick with this badge is to put it on a Sea Medium user, and simply revive your other party members as they die. The characters you revive will only come back with 100 HP, but it doesn't matter, since if you put the Terrace Tiara in your healer you don't have to worry about running out of MP to revive with. If you use a character with 5000 HP as your healer, Ragu has to attack them 50 times to kill them, so you don't have to worry about losing. This strategy is really cheap, and unbearably boring, so I picked the much more interesting strategy to easily defeat Ragu.
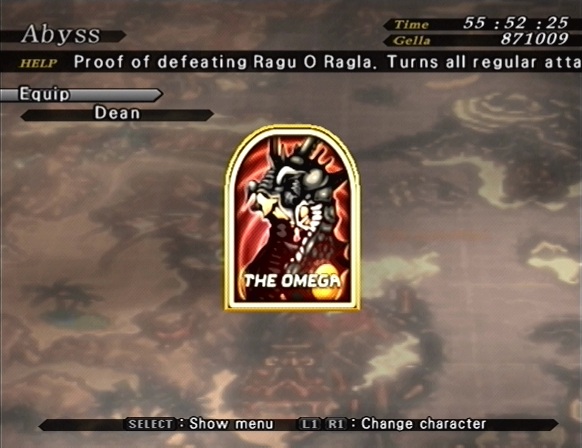
For defeating Ragu O Ragla, we get The Omega, which turns all regular attacks into critical hits. Imagine this on Dean: over 10000 damage from every single one of his attacks. And you could put the Violator on him as well, so he attacks for 10000-25000 damage each turn. We could seriously break this game if we wanted to.
Traditionally, Ragu O Ragla drops the Sheriff Star, but this tradition is no longer followed since badge synthesis was introduced in Wild Arms 4, so he drops The Omega instead.
So we've beaten the King of Monsters, all that's left is Volsung, right? Well, not quite... The Abyss contained 11 chests, several Neutrino Medals, and a Sol Niger, so we have three sidequests to finish.
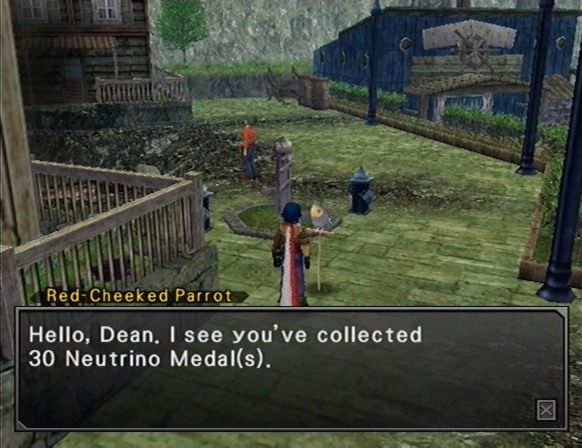
Red-Cheeked Parrot: At last...at last, all 30 Neutrino Medals have come together in one place... Thank you, Dean - here is your reward!
Obtained Final Nova!
Red-Cheeked Parrot: Dean, you have our deepest gratitiude. It seems that our efforts in bringing charm to human towns and presenting you with treasures we did not wish to part with has not been wasted. With the power of our hero, we will at last be able to realize our ultimate desire - the formation of a new avian kingdom. When that happens, Dean, rest assured we will ourselves peck out a statue of bronze to honor your contributions in creating that kingdom. Of course, the statue's head will likely be covered in bird droppings in no time at all, but...well, surely you can understand. Thanks to you, the soul of our revered hero has once more been restored. It won't be long now before he is among us once more, heh heh heh...
The Final Nova is a fantastic ARM Part for Dean.
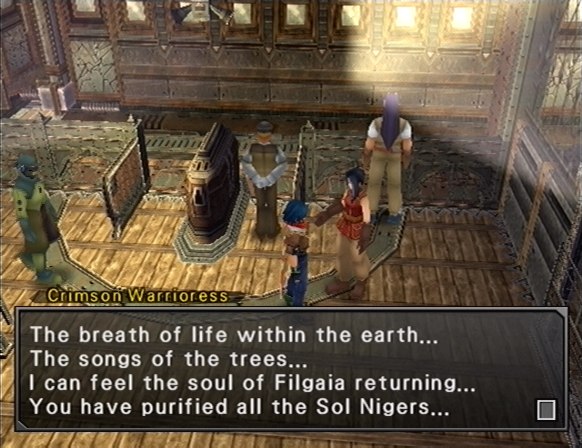
Crimson Warrioress: With this, the evil parasites that have sucked away the power of our planet have been soundly defeated. You have eliminated one of the main causes of Filgaia's decay. Thank you.
Obtained Ambrosia x2!
What! That's all?! I can buy these in the Black Market for 10 levels apiece, which I can earn in seconds by fighting in the Abyss! I don't even use Ambrosia, because they're so rare and what if I need them later?!
Crimson Warrioress: I apologize for always asking so much of you. If only I could move freely...then I wouldn't be such a burden.
Oh, don't worry about it! Like old man Tony always said, it's better to be able to say "thanks" than "sorry"!Crimson Warrioress: You are a very strange boy, Dean...but there is much truth in your mentor's words. ...Thank you.
Alright, whatever. Let's go open the Black Box now.
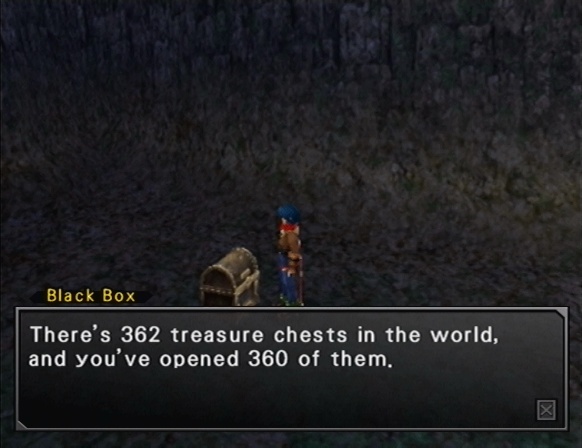
FUCK
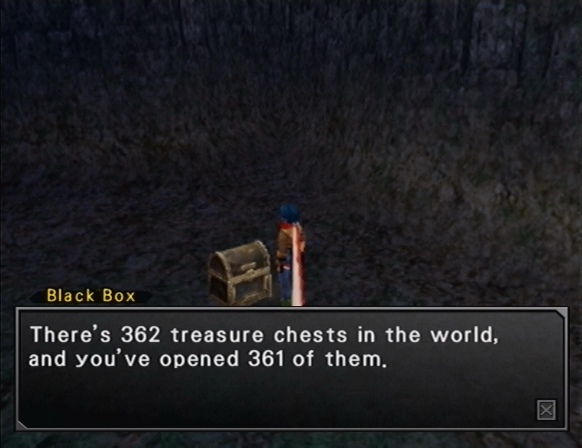
Okay, after searching every single dungeon and scouring the entire overworld, I could not find that one single chest I'm missing. (The Black Box counts as the 362nd chest.)
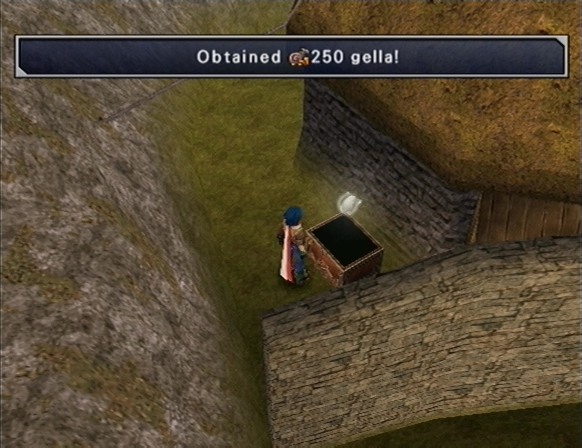
It was in Capo Bronco the entire time. All that searching, for 250 gella. That's all. Just 250 gella. Uuuuugh.
At least we can open the Black Box, now.
Black Box: Wow! You've opened all the treasure chests in the world...except one! And guess what? That last one... ...is ME! Hah hah! Bet you didn't see that one comin'! You know what they say - save the best for last, and all. You wanna get me open, you're gonna have to earn it - in battle!
Boss: Black Box
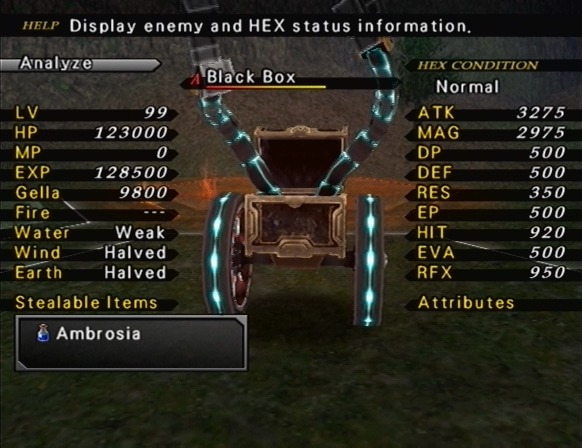
After beating Ragu O Ragla, the Black Box is nothing. He can attack with Agony Effect for 7000 damage, Gimmick Hand for 6000, or Kirlian Buster, which evenly spreads 10000 damage across all occupants of the target HEX. It can also use Melancholy Breath, which hits a line of HEXes for 4700 and causes Misery.
Blasting it from the water ley point makes short work of it.
Eh, not a terrible reward, I suppose. Better than two Ambrosia, at least.
Hey, remember Combination Attacks? Well I had been planning to post a write-up of them all with a compliation video, but I kind of forgot for awhile. Until now!
Video: Combination Attacks
Combination Attacks are a really cool part of the Wild Arms 5 battle system. They have interesting target groups, similar to many enemy attacks. I don't really get much use out of them after the halfway point of the game though, because they just don't seem to do enough damage.. Some of them are pretty interesting though, and a few of the animations are nice.
Dean and Rebecca's Combination Attack is Trigger Rondo, which costs 25FP and attacks all adjacent HEXes with a physical attack.
Dean and Avril's Combination Attack is Javelin Bullet, which costs 25FP and attacks a straight line of HEXes with a physical attack.
Dean and Greg's Combination Attack is Lightning Fang, which costs 25FP and attacks a single enemy HEX with a physical attack. Deals extra damage to golems.
Dean and Carol's Combination Attack is Symphonic Rain, which costs 25FP and attacks all enemy HEXes with a phyiscal attack.
Dean and Chuck's Combination Attack is Omega Revolver, which costs 50FP and attacks a single enemy HEX with a physical attack.
Rebecca and Avril's Combination Attack is Overhead Sorcery, which costs 25FP and attacks all adjacent HEXes with a magical attack.
Rebecca and Greg's Combination Attack is Corona Fall, which costs 50FP and attacks a single enemy HEX with a magical attack.
Rebecca and Carol's Combination Attack is Genocide Circus, which is awesome, costs 50FP, and attacks all enemy HEXes with a physical attack.
Rebecca and Chuck's Combination Attack is Flower Barrage, which costs 50FP, and attacks a single enemy HEX with a physical attack.
Avril and Greg's Combination Attack is Heaven's Gate, which costs 50FP, and attacks all enemy HEXes with a magical attack.
Avril and Carol's Combination Attack is Mysteltainn Zero, which costs 25FP, and attacks a straight line of HEXes with a magical attack.
Avril and Chuck's Combination Attack is Climbing Garden, which costs 25FP, and attacks all enemy HEXes with a magical attack.
Greg and Carol's Combination Attack is Gungnir Effect, which costs 25FP, and attacks a single enemy HEX with a magical attack. Deals extra damage to flying enemies.
Greg and Chuck's Combination Attack is Judgment Heat, which costs 50FP, and attacks a straight line of HEXes with a magical attack.
Carol and Chuck's Combination Attack is Electric Claw, which costs 50FP, and attacks a straight line of HEXes with a physical attack. Deals extra damage to golems.
Honestly, the video was probably enough, but I like to be thorough.
Alright, so that's everything but the last six alternate costumes. But conveniently for us, our whole party is level 100, each costume costs 30 levels, and the end game expects you to be level 70! So by buying all these armors, we can set ourselves to the final boss' level.
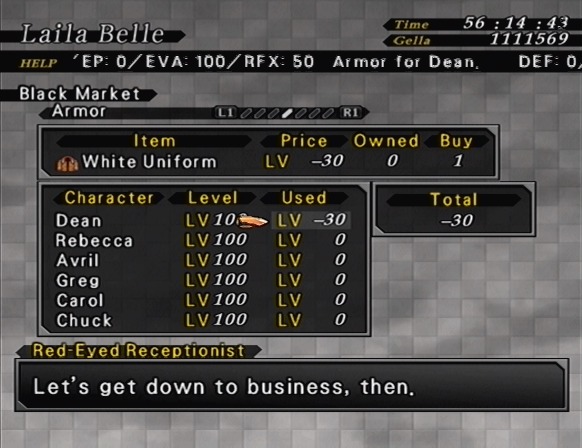
We bought Dean's White Uniform, Rebecca's Silver Blazer, Avril's Passion Suit, Greg's White Bancho, Carol's Junior Silver, and Chuck's Class VP.
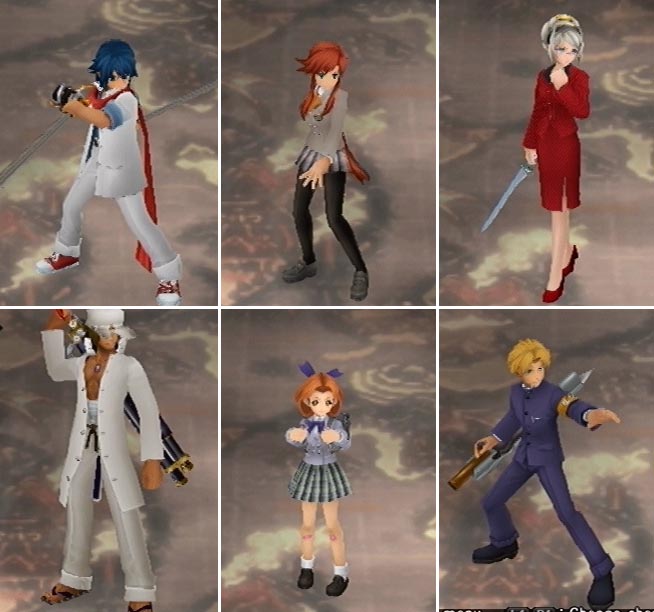
And there we have it. The last of the alternate costumes. For the sake of feeling complete, I've prepared a video which shows off every character's alternate costumes, from all angles.
There are also a few more costume armors that you can get as rare drops from the Abyss, but they're rehashes of previous armors, so I didn't take screenshots. You can see them for a bit in the video though.
Video: Alternate Costumes
You know, with all these options, I just can't decide what to wear! So why don't you guys decide? Vote for your favorite costumes, and I'll use the most popular ones for the end game. You can see all the names in the video, so I won't waste space by listing them all here.
And that's that. Every sidequest is complete, every armor obtained, there's nothing left to do but fight Volsung.
The Art of Wild Arms
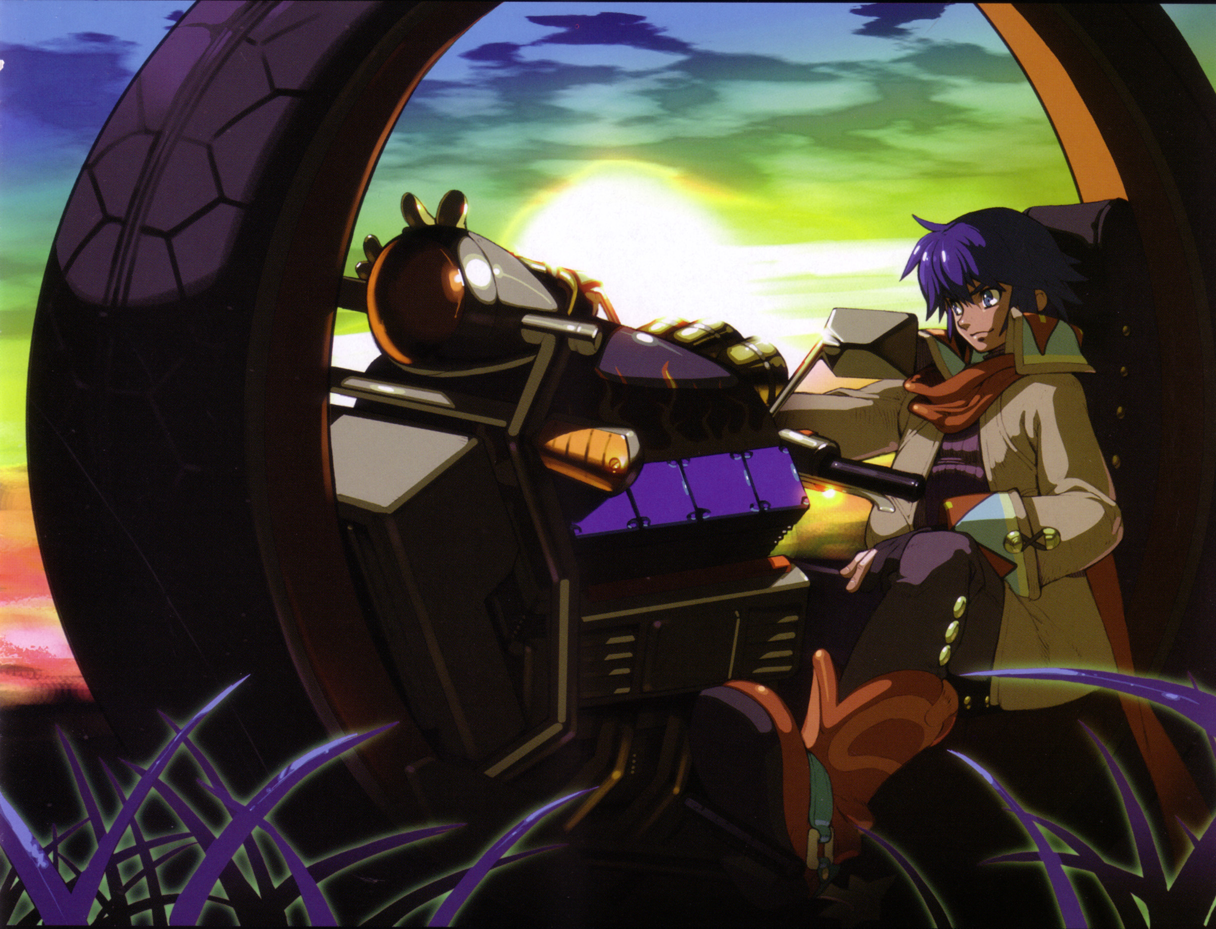
Here's a surprise, this isn't from the art book included with Wild Arms 5! This is from the Wild Arms: The Vth Vanguard Development Material Collection, which was only released in Japan. It's a book full of concept art and such, and it also has a few wallpaper-esque pictures which weren't included in the English art book.