Part 40: Hell is apparently really easy to break out of.
Tackled four different bonus bosses last time, and the reward for each was crap. However, I found 2 PS Necronomicons inside De La Metalica, so it wasn't a complete waste of time.
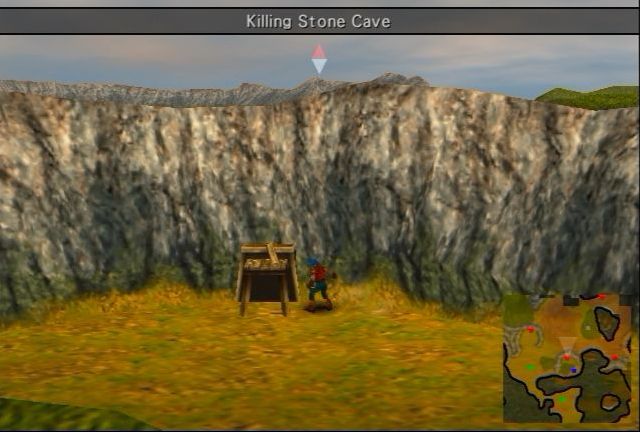

Right, so Rudy wants to go exploring for a pet. I want to go kill bonus bosses. So as a compromise, we're going to go into Killing Stone Cave to kill a bonus boss while Rudy looks for a pet.
The music selection here is a Feeling Wind arrangement of Wings, the ending theme from Wild ARMs 3. I'm more just playing it here because I'm really running out of songs I want to play from these albums.
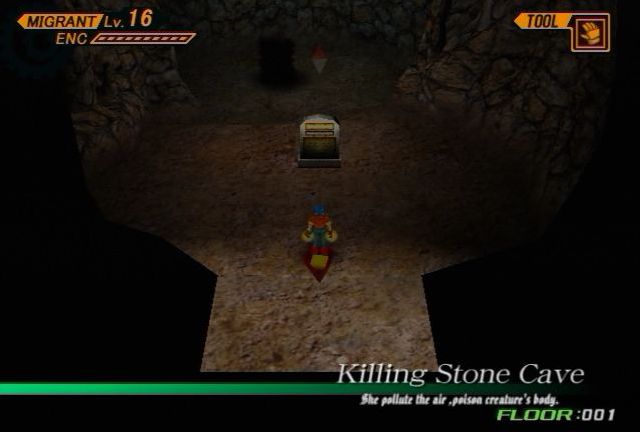
She pollute the air ,poison creature's body.
You can't blame me for the horrid typos in there. Not my fault at all. Anyway, there are two things of note in this room. First, the sign, and second, the mysterious pit with black miasma seeping out of it. Let's read the sign!
Killing Stone Cave's air is unclearn. The poisonous air sucks away your life as time passes.
Seems like a good place to get Rudy a pet. Let's go down the hole!
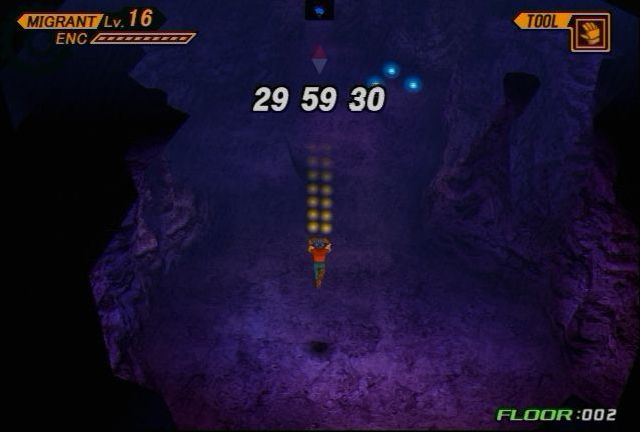
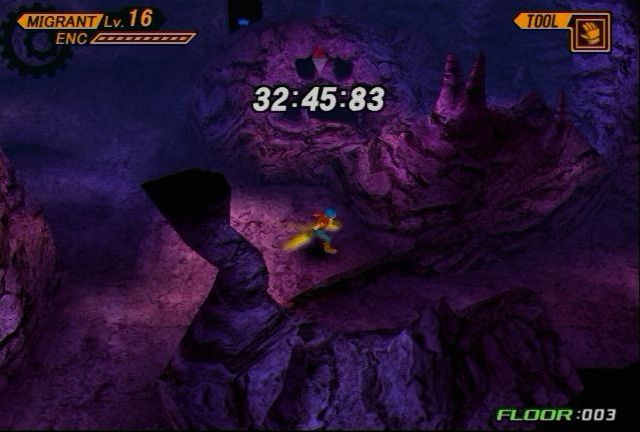
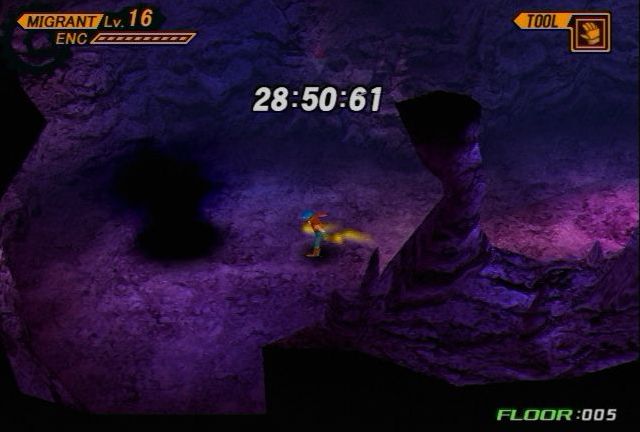
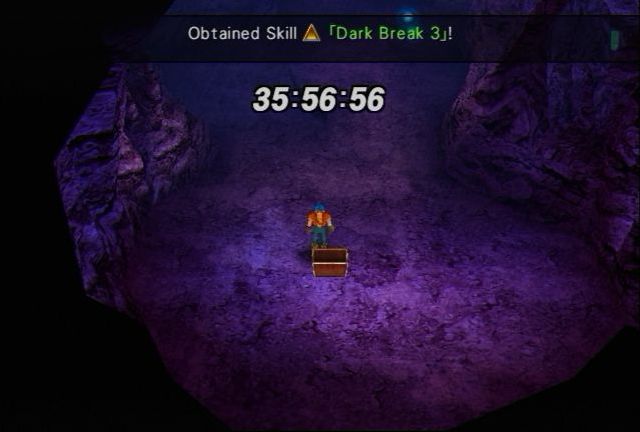
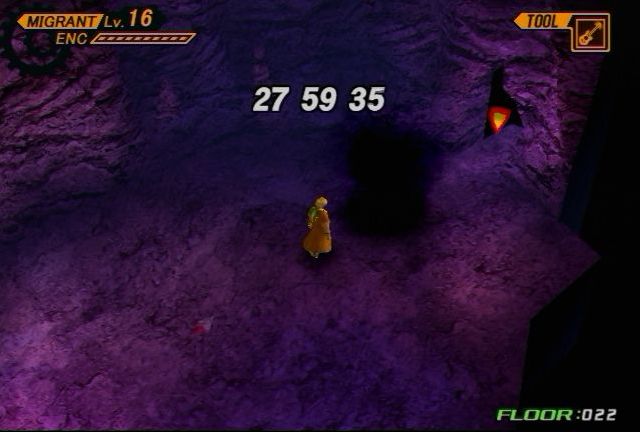
Don't mind the yellow streams, that's just Rudy's gloves. Welcome to Killing Stone Cave! I really hate this dungeon. When you enter, you're placed on a 30 second time limit, which as you may remember does pass during battle. The blue gems to the side will add 1 minute to the timer, so it's easy to keep it going.
To make things worse, Killing Stone Cave is a maze. A biiiig maze. It's got at least fifty rooms in it. Fortunately, the best way to get through is to just enter a room and see if the Floor count goes up by one instead of some random number. This really is the quickest way to get through the maze, but you'll miss out on treasure on the way. Thank goodness for GameFAQs.
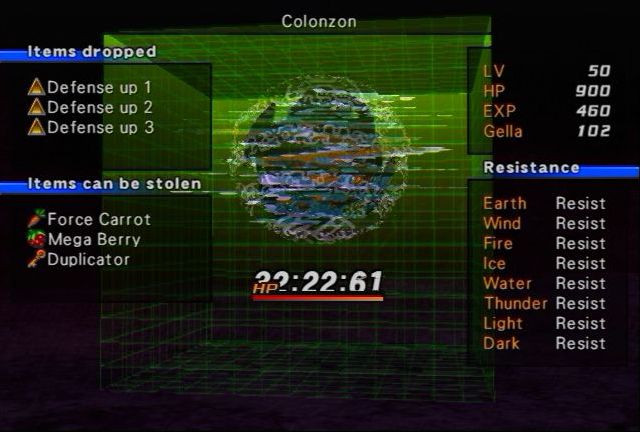
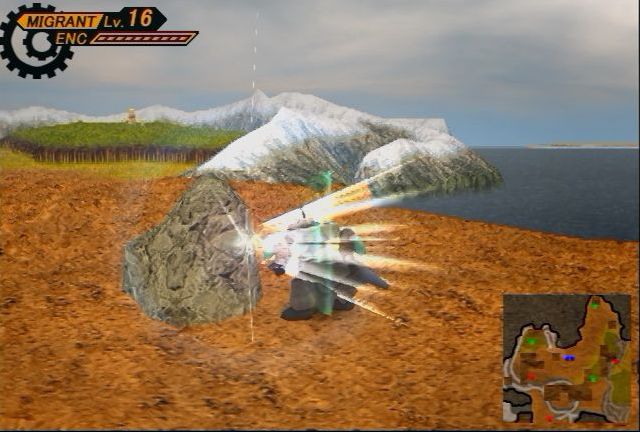
There are only four enemies in this dungeon, and they are all variations of the Colonzon enemy. This is the offensive Colonzon, which starts the battle with DEF and RES up. It's got fairly high reaction and only attacks with physical attacks.
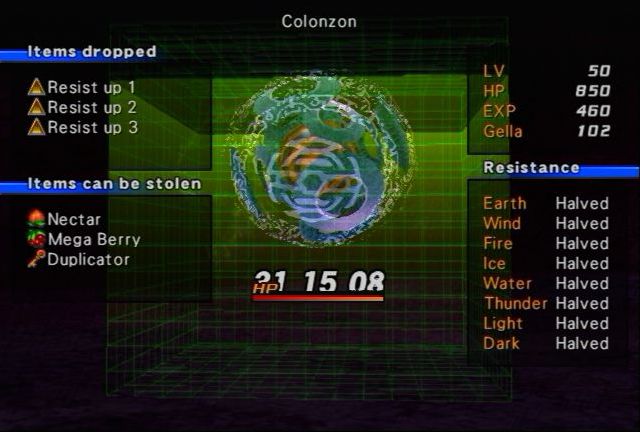
This is the debuffing Colonzon. It has only one way to attack you, a move called Out-of-control sorcery! I have no idea how to trigger it, but it's supposed to deal 1000 damage always. For the most part, it just uses Unlucky, Dispel, Fragile and Feeble Mind. Minor stuff. It starts battle with EVA up, and it drops PS Resist Ups.
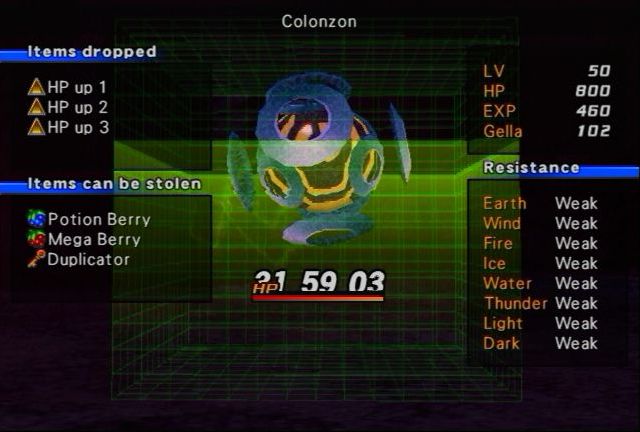
This is the buffing Colonzon. It has Critical Heal and Great Booster, so nab those if you don't have them yet. It drops PS HP Ups, which are always nice, and is weak to all elements, but you want to kill it fast. Unfortunately, it also starts battle with Reflect active. Not like these things have much HP anyway. And at Lv 100, I can just Hope Shard them on round one thanks to PS FP Advance.
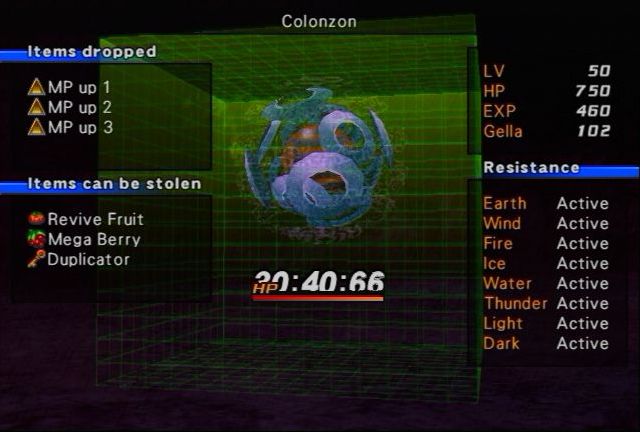
The last one is magical Colonzon. It uses Spectre, Darkness and Devastate. Starts battle with REA Up, and drops PS MP Ups, which are rarer, but not as useful because Rudy and Zed don't use MP, and Cecilia and Emma can restore their own very easily.
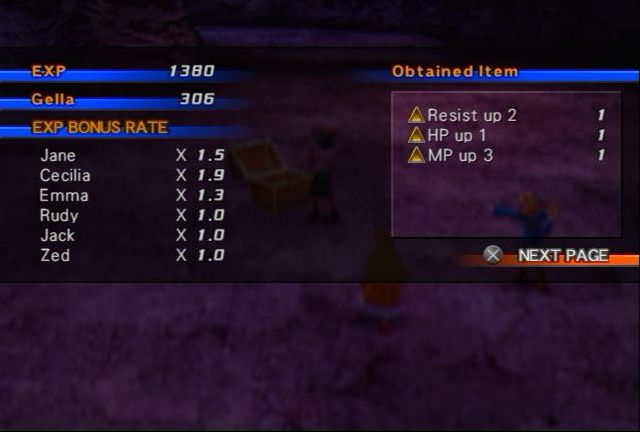
The chance of them dropping the Personal Skills are actually rather high compared to most enemies. It's a 1/8 chance of getting something, and only a 1/8 chance of that something being nothing. Somehow I got very lucky and ended up getting three at once. This was apparently a 1/32768 chance.

To progress through the dungeon, you'll have to go through some holes every now and then. Early on, all the holes will carry you forward, but later on some will send you back. It's just trial and error and hoping you have enough time.
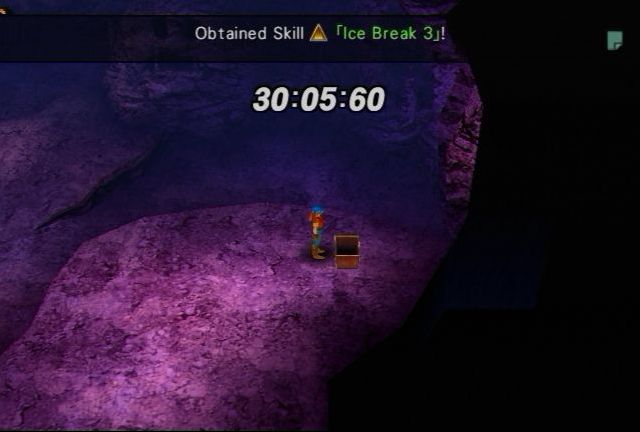
There are several Duplicator chests in this dungeon. I made sure I had enough Duplicators before going in. I do not want to return here. There was also a Crest Graph, PS Boom Break 3, PS Ray Break 3, 20000 Gella, Alter Part x3, LVL Apple x3 (a now useless item), and...wait a second. Fuck! I missed a chest!
Alright. When I was writing this portion of the update, I noticed my error and went right back to recording to remedy this. I do not want to miss a single chest. So technically this screenshot is from the future.
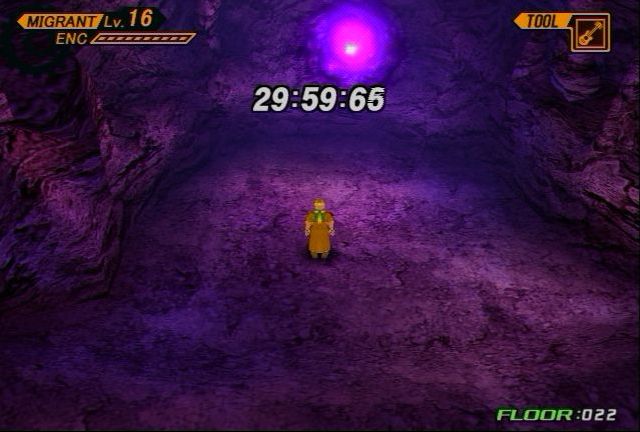
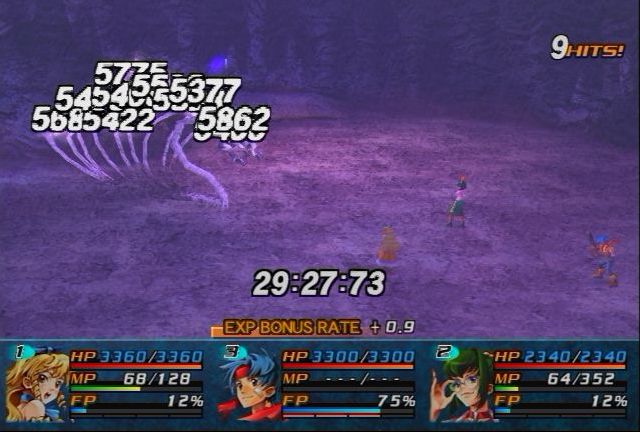
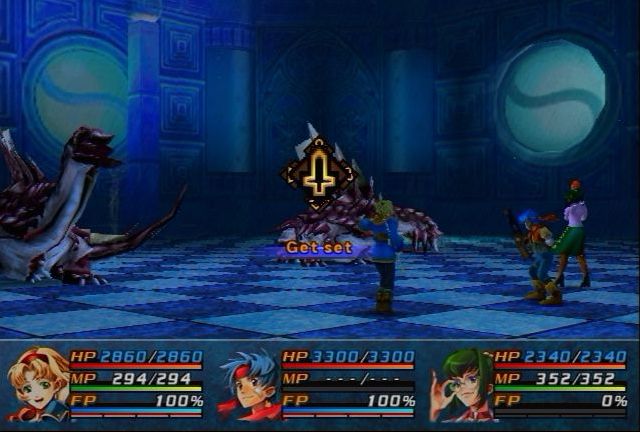
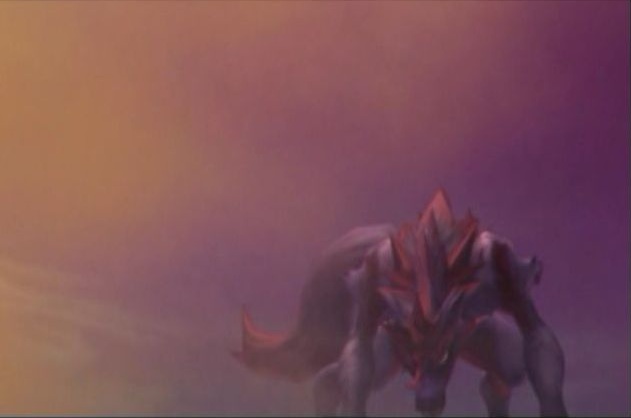
Room 22 is completely empty...until you walk towards the end, and wake up the beast within.
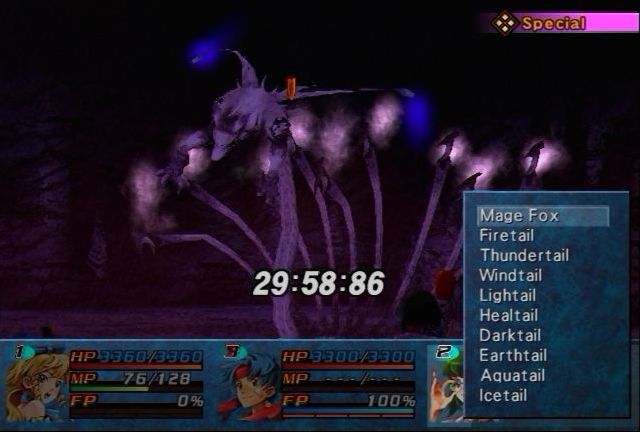
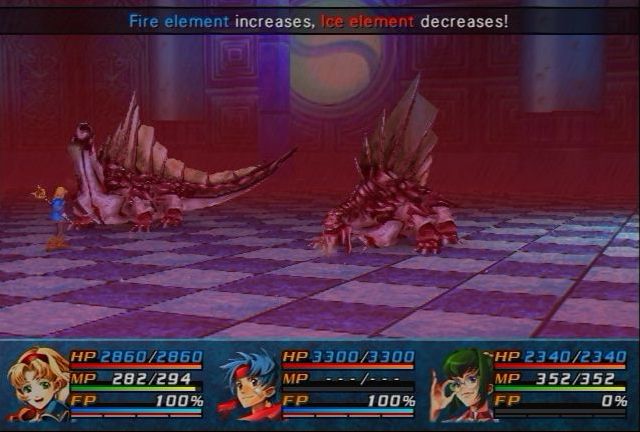
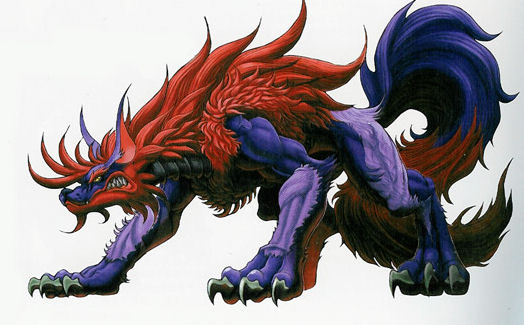
Meet the Mage Fox, and as you can tell...they really changed this battle. Originally, Mage Fox was just a random boss that used magic. Now, Mage Fox is a lot tougher and has a different strategy. First, Mage Fox is Lv 75 with 65k HP and resists all elements. It's got a rather high MAG stat of 666, and will use the Party-wide Downloadable basic elemental skills. It'll randomly use one of the eight possible, based on whether or not the respective tail is alive. The Healtail allows it to use Renovation. And if it tries to use the spell based on a tail that it currently doesn't have (because we killed it, they only have 2650 HP), it'll use Full Revive on the tail. All of these skills are downloadable, so make sure Emma gets them.

Yoink. I also got Luminous Impact (Light), Crack Tremor (Earth) and Flirtation (Ice).
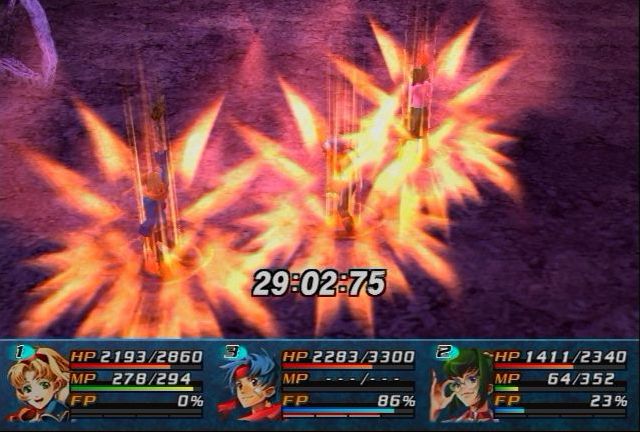
A simple Arc Nova wipes out all nine tails of this nine tailed fox. It brings back the Firetail first.
Blah blah blah Brave Seal blah blah Great Booster blah.
Gatling Raid's damage is significantly lower than I thought, meaning Jack is actually the strongest and most reliable person in the party. Granted this is against a low-defense enemy and Rudy doesn't have RNGs Blessing? Nor did I remember to use Chop-Chop (actually, Rudy killed Mage Fox before I could) and Gatling Raid only does 10 hits, compared to Laser Silhouette's variable number of hits. Against Sadas (Reaction of 550) it did 42 hits. Testing still needs be done because Ragu has a very high REA and even more DEF. But by this point, I'm not sure if I can trust any of the formulas anymore, because apparently Gatling Raid was supposed to do around 31k damage.
 I'm still not sure how I want to do that fight.
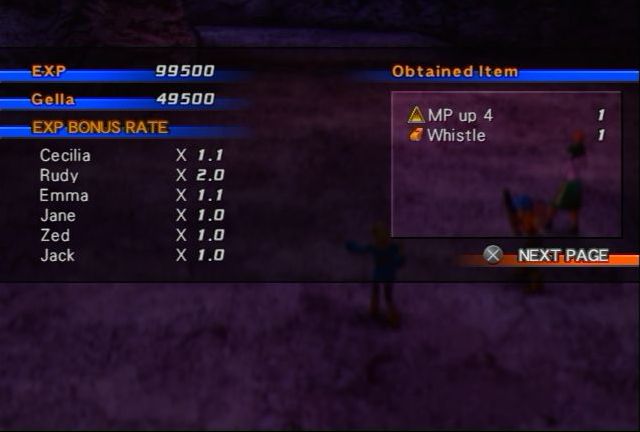
We get the MP UP 4 from the Mage Fox, which is very nice. More important is the Whistle, which has a very unique purpose.
A new portal pops up behind us allowing us to go back to the surface and out of the Miasma.
I pick up
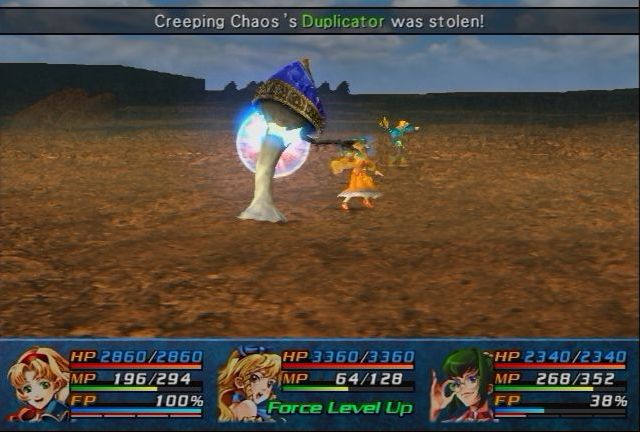
I stop by the Creeping Chaos island to pick up some more Duplicators. Actually, apparently there are two but I don't know where the first one was. The second one is part of the Ka Dingel islands (the only one accessible from sea) and randomly you'll fight Silent Chaos, the much more difficult version of Creeping Chaos, which are gold instead of white.
 And then I accidentally overwrote the recording for them. They are pretty much the same except have much more HP, do much more damage, and instead of Direct Voice, they use Arc-en-Ciel, which is even more powerful. It inflicts Sickness, Poison, Sleep, Confusion, Petrify Countdown (2 turns) and it does all of this to all enemies.
 Oh, and when they use it on you, it also does Amnesia and helpless, and has a 100% chance of success. Hope you used Castle Defense! Needless to say, Emma has it now.

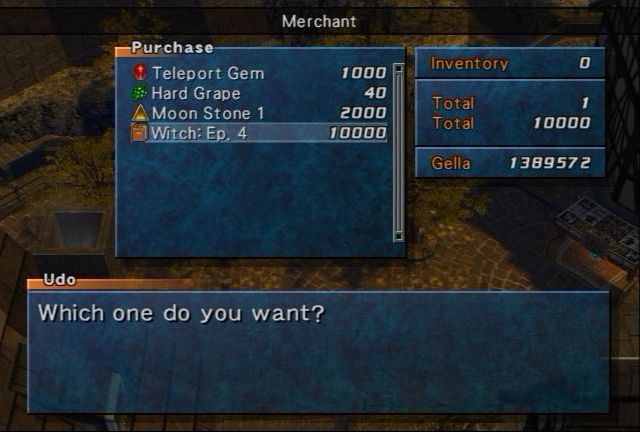
Meanwhile, I finally get around to buying the fourth Witch book from the shop in Rosetta. I'm going to read those next update, so might as well get them now.
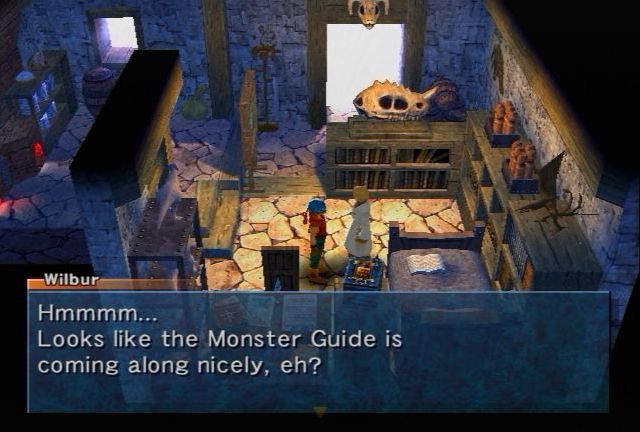
I also return to Wilbur to show him the monsters I've voyeured.
Wilbur: Thank you for gathering so much great monster information. My knowledge of monsters is growing. That is why I prepared a gift for you, to show my gratitude for what you've done, and to entice further work from you. Here, take a look. This came from the stomach of the owner of that skull over there. Isn't that a nice way to show my appreciation?
Obtained Party Item [Ex. File Key]!
 Leaving. Now.
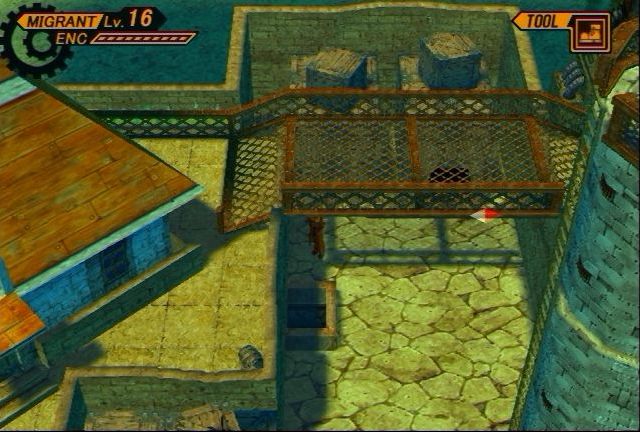
There is also this bridge you can reach using the Jump Boots, and this hole you can drop down.

Inside is a talking chest.
Black Box: Why did you come to a place like this? You are the curious type, aren't you? Well, you want that thing? Don't be so shy. Just say so... Touch, touch ♪
 : Yes || No
Black Box: Well, this world has 383 treasure boxes, with 326 of them already opened. Whoa, you have get around. You guys are naughty, aren't you? Touch, touch ♪
Riiiiight. Anyway, Fuck Up Count: 36 on the "you have get around" part.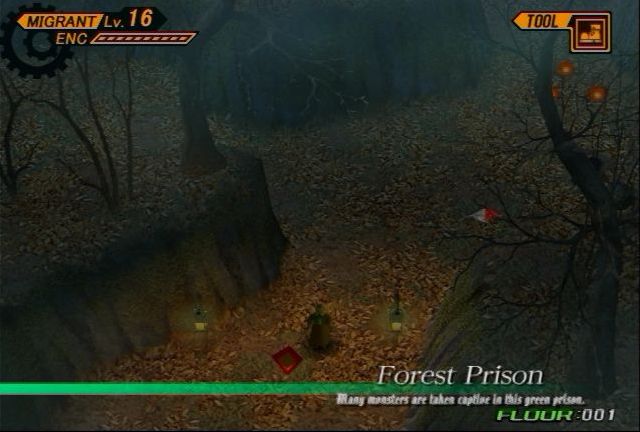

Moving on to our next target, to explore the waterfalls of Elw Borea. To get there, we need to go through the Forest Prison, so I might as well get the Duplicator chests in here now that I have enough Duplicators to get through. Basically, this next portion is me just wandering around the forest, using Detector at every room trying to find the Duplicator chests and using them. Look includes PS Moon Stone 3, PS Silver Harp 3, PS Angel Quill 3, PS Memoirs Pen 3, Ambrosia, PS Clear Chime 3, PS Blue Circlet 3, PS Full Libra 3 and PS Olive Branch 3. All of which are useless except for the Ambrosia and the Full Libra. Full Libra prevents Fallen, which is more difficult to cure than the rest.
Music selection here is the Alone the World version of Wings. This uses the Japanese vocalist Kaori Aso again, not the English vocalist, Samantha Newark. I have to be honest, I prefer Newark's version a lot better simply because of the power she puts into the songs. And I would have loved to see that power in Alter Code: F's songs.
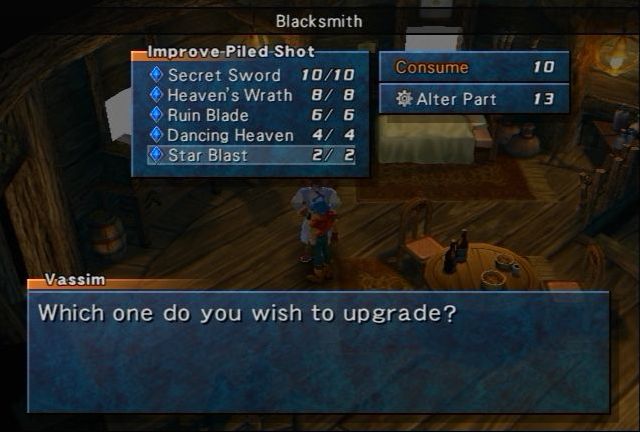
I also stop by Vassim to get Zed some more uses out of his abilities. I had 83 Alter parts, so I doubled the amount for every single Piled Shot. It's good to have options. And this leaves 13 more for Rudy to get at least 6 more uses out of Gatling Raid!

Anyway, to get to the waterfalls, you need to go through this portion of the cave outside Vassim's home. If you walk normally on those rafts, you'll sink and fall.
 More annoying than anything else.
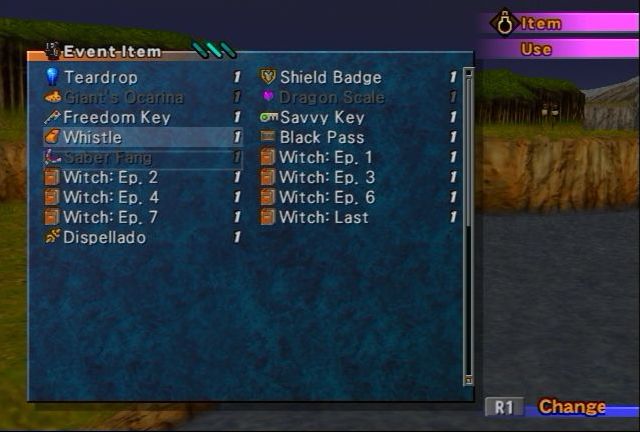
There is a winding path, then you can reach the sea and use the Whistle to summon Sweet Candy II. You can use this anywhere, on Filgaia or Elw Borea. It functions the same way as summoning Asgard, but you can only use it on beaches.

There is an Ambrosia on the sea to pick up, and that's it...
wait a second. Items on the sea are bottles. The Ambrosia is nothing more than a bottle filled with water. Does this mean that Elw Borea's waters are Ambrosia? Dammit! Why can't we be like Link and just reuse all those empty bottles we find everywhere...
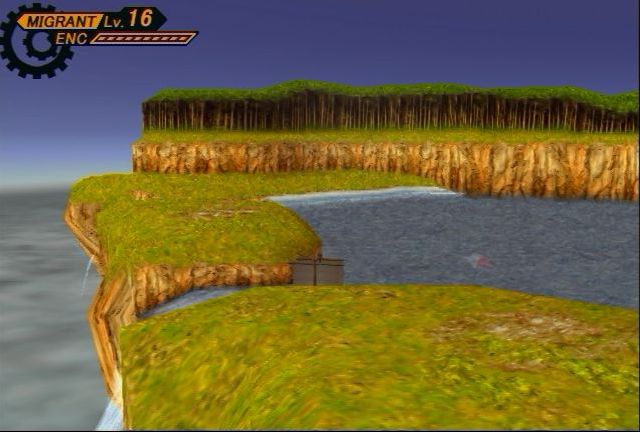
It looks like the waterfalls just go down into the cloudy nothingness. There doesn't seem to be a source of water for this little sea, and they say that Elw Borea hasn't changed in the 1000 years, so I imagine it hasn't rained in 1000 years...
So where is the water coming from anyway?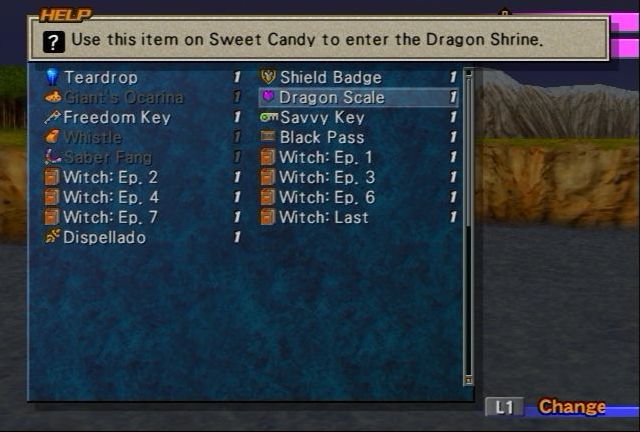
Anyway, the real reason to come to this sea, is to use the Dragon Scale.
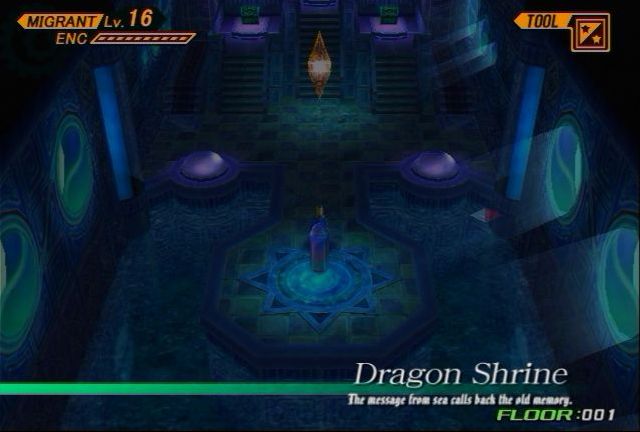
The message from sea calls back the old enemy.
When you use it, you reach a hidden portion of the shrine that contains 3 Duplicator chests and a Sealed Crystal. The two chests we can reach now contain 10000 Gella and 4 Alter Parts. The Sealed Crystal has...
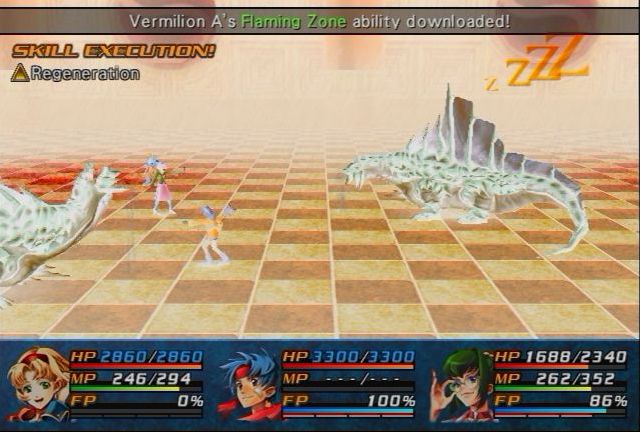
These fuckers. These are Vermillion, an enemy I remember quite well. They don't look that hard at first glance, because they are only Lv 75 and only have 75k HP, but you cannot take them lightly because...
They love to use Flaming Zone, which not only makes their Fire-elemental attack (Baking Breath) more powerful, they already have a decent MAG and this even activates them to make them even more powerful. If you want to take down the Vermillion, you need to put up a zone on the first round before they do. I remember trying to take them down at around Lv 70-ish, and I simply got my ass handed to me. You cannot take them lightly.
This was only after a couple of rounds. They've also got a powerful melee attack that often poisons as well, and the Activation doesn't help us any either. Fortunately, Reset well...resets the battle completely, so any items used will be returned and returned to original stats.
They've also got Slumber Fog, which normally has a 100% chance of sleep, but I prevented it by having Jane make everyone go before the Vermillion, followed by Castle Defense and Anti-Magic Zone. Rudy's going to take point for offense this time, so I don't need magic.
Oops, almost forgot. Really, the best Zone to be using for this fight would be Freezing Zone, but I don't have that. I need to fix that.
Oh, and did I mention that the Vermillion are vulnerable to sleep? Because they are...which is silly, because they use Sleep as well. Silly Vermillion...
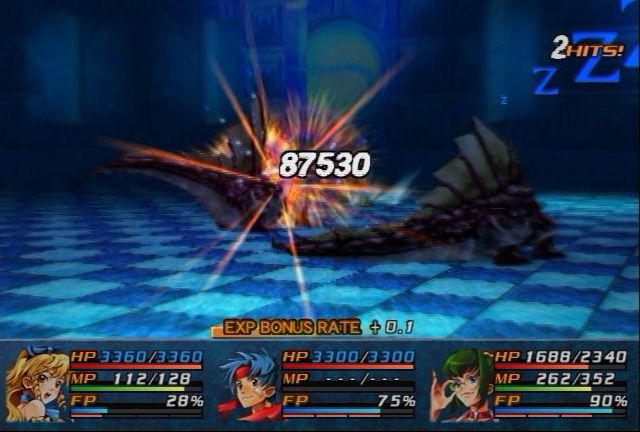
Once Rudy gets completely buffed up, the Vermillion are toast.
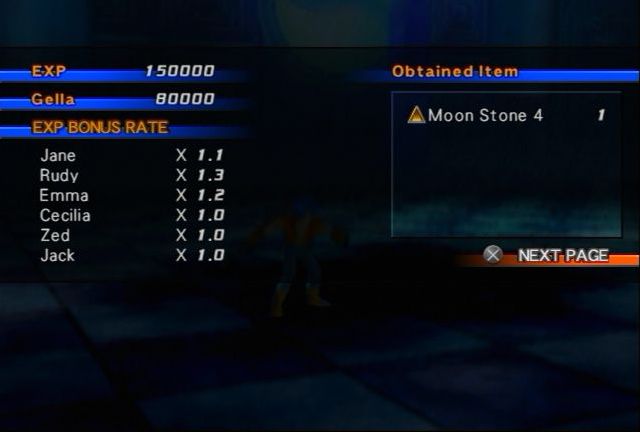
And once again, they drop another useless Lv 4 status-resist PS. To make it worse, the chest this crystal blocked had a PS Silver Harp 4, just as useless.
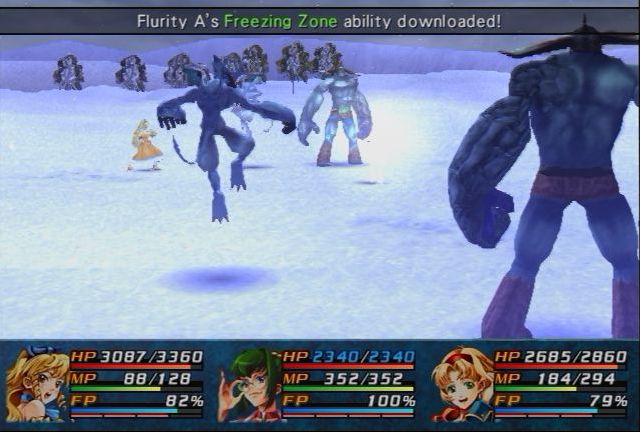
Yoink. Glad to be rid of these guys, although I found it hilarious that even with Freezing Zone in effect, these guys couldn't hurt me with their ice attacks because the girls have such high RES. (Holy Man Sorrow helped.) Also downloaded was Arctic Lance from the Flurities, and Blizzard Breath and Hrimthur's Eternal Ice from the Gigafrost. Arctic Lance has a TC of 2, Blizzard Breath has 2.5, and Hrimthur's Eternal Ice deals Earth and Ice damage to all for 2.25 Tech Constant. Not sure how the dual elements handles weaknesses.

So by this point I decide to finish up the Puzzle Boxes, going around Filgaia using the mini-map to find all of them and any random items scattered around. For the most part, there isn't too much interesting from this as far as interesting encounters or loot goes.
Musical selection is an extension of the Wild ARMs 3 theme going. This is Sky High! Fly High! It played when you flew on Lombardia. That's right, the "flying machine" song got vocals. I don't believe the English version got vocals to this.
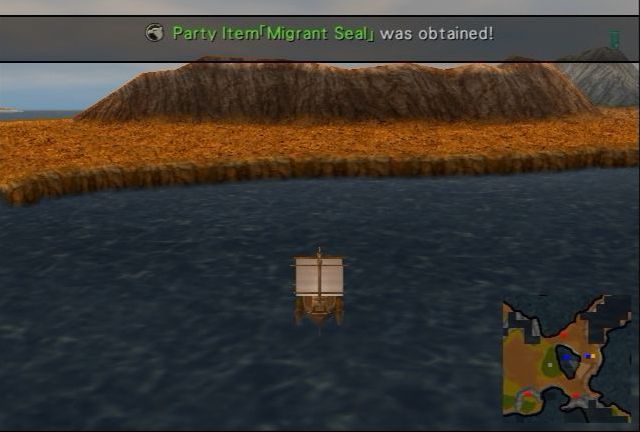
In the lake south of Ruins of Memory is a Migrant Seal to pick up.

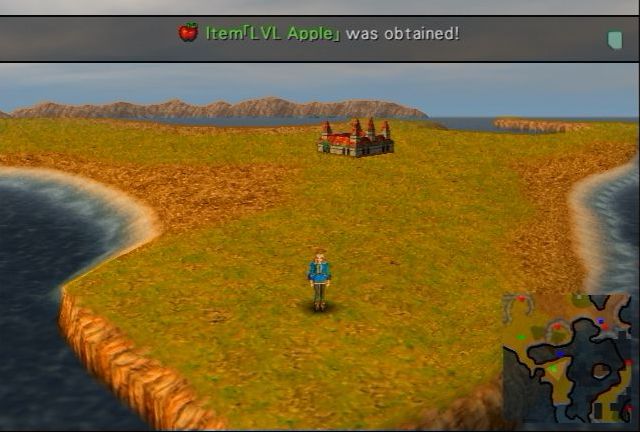
Curan Abbey sits next to some useless apples.
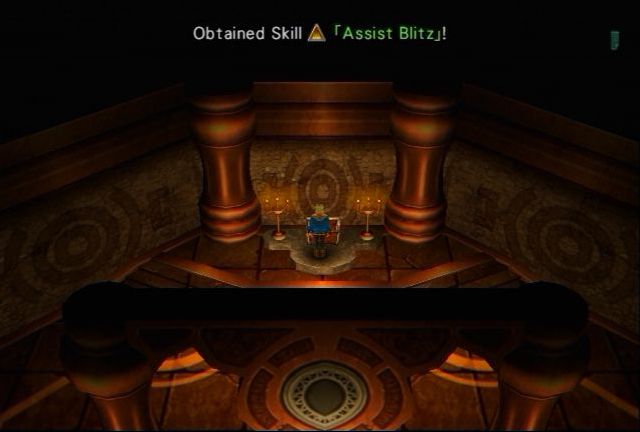
One of the puzzle boxes even gives me another Assist Blitz, and I find yet another flying on the overworld. You can naturally find 6 in the game so everyone can equip one, and I believe this makes all six now. I'm not going out of my way for the Combination Arts, but I'll show them if I can.
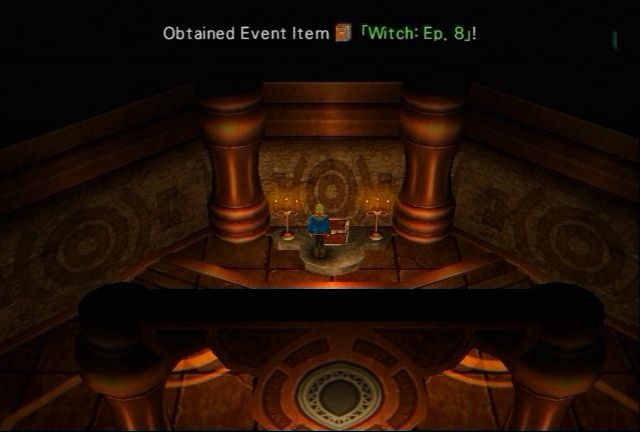
Another one gives me the eighth Witch book. There are ten total and so far I'm missing Ep. 5 and the Side story.
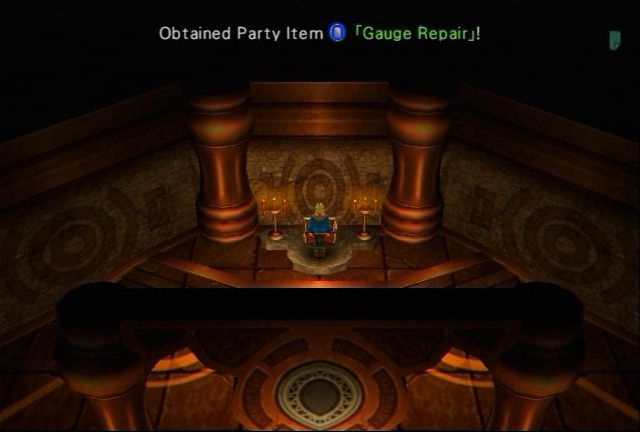
Alright, I guess this one deserves special mention. Normally after a battle my ENC gauge will increase by one (if it isn't at 10 already). This changes it to increase by 2. However, by this point I probably have so many Migrant Seals that I can pretty much march in to the Abyss and only encounter Ambushes.
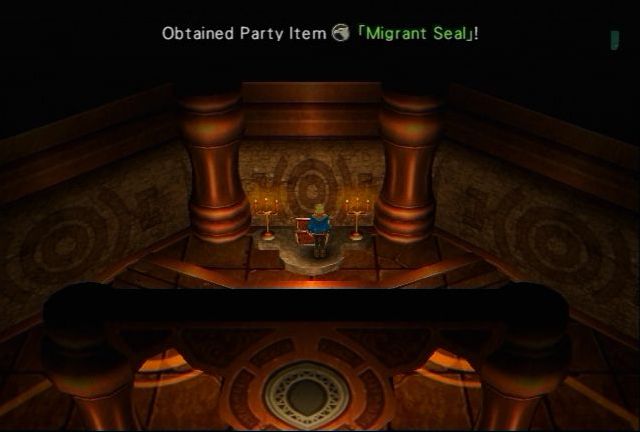
And yet another Migrant seal.
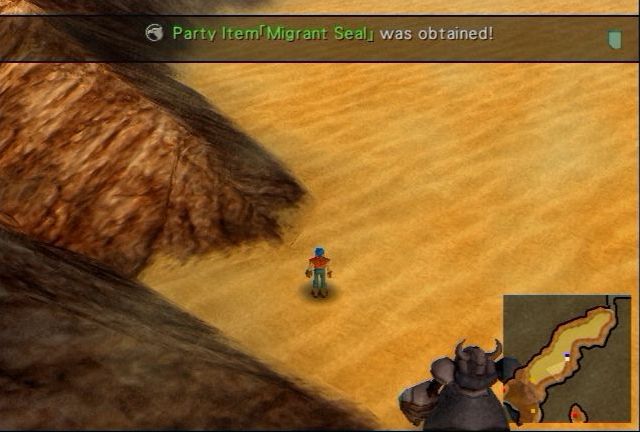
The last Migrant Seal of the update is in this desert which whenever they talk about the stretch of land that got destroyed by the Guardian Blade, I've always assumed this stretch of land because it just seems somewhat out of place and looks really just like a giant scar on the land.
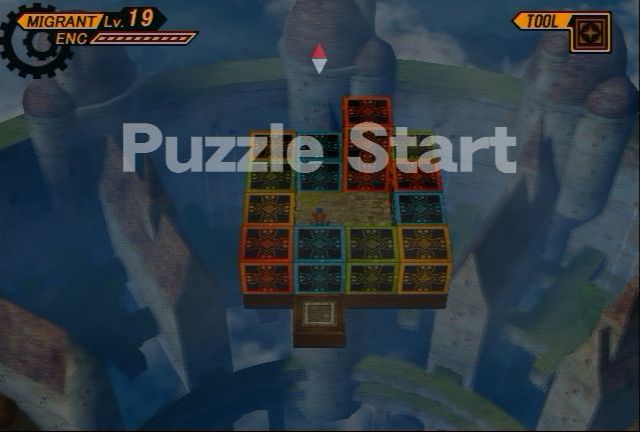 I remember this puzzle. I remember this puzzle with the fury of a thousand suns. This is puzzle 25, and coincidentally the very last puzzle I tackle of the 30 in the game. I remember this puzzle because I got stuck on it for several days, and even had friends watch my solve it to see if they could make any ground on it. As it turns out, they couldn't either. I had to eventually use a guide for this one puzzle, but god dammit I remember spending afternoons just sitting and staring at it. There is such little room to work with, and every single match needs to be a triple, otherwise you'll have extra blocks at the end.
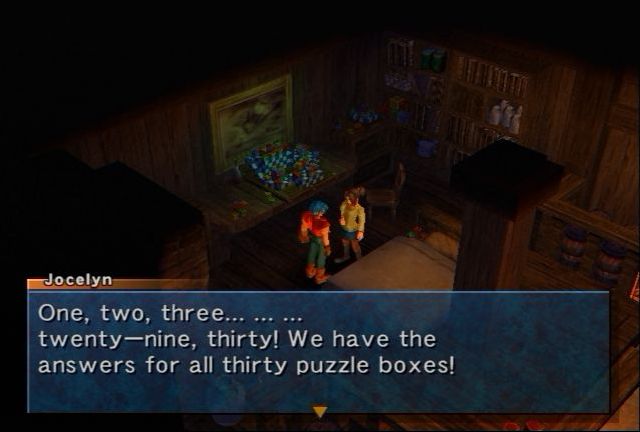
Jocelyn: Ahhh, the golden moment when you solve a puzzle... it's such sweet satisfaction, like candy... Well, I've made up my mind. As soon as I finish packing, I'm going to explore the world. And someday, I will build a gorgeous puzzle that follows the probability ratio. I thank you. And, let me give you this as a token of my appreciation.
Obtained Party Item [Ex. File Key]!
Whatever you crazy puzzle lady. Go build your casino or whatever. Just make sure to build it near a church.
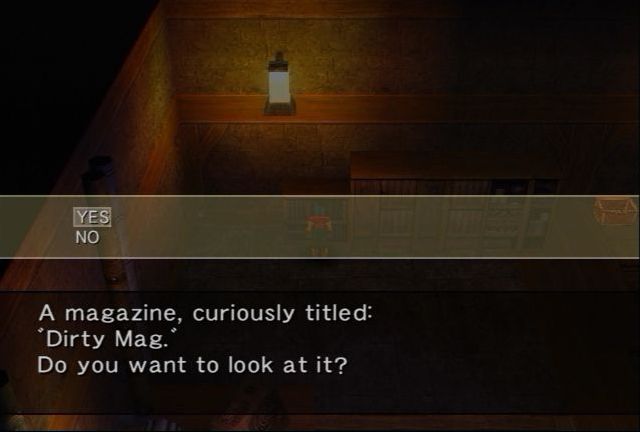
Now, back to Sea of Wind Epitaph to read some interesting articles.
Although it is interesting you pretend otherwise and turn the pages. Then, close the magazine.
Oops, had the girls in front. Let's move a couple guys to the front.
I would like to look at the contents, but what's making me reluctant to do so is this lady beside me.
Well, so we can't have any ladies in the front row. Let's put Rudy, Jack and Zed up there.
You can't control the curiosity. With page after wonderful page, seductive poses dazzle your eyes. It's like the images are popping out of the magazine...
Out of the magazine?! It's neither a dream nor illusion, but it actually jumps off the bookshelf and lunges at you!
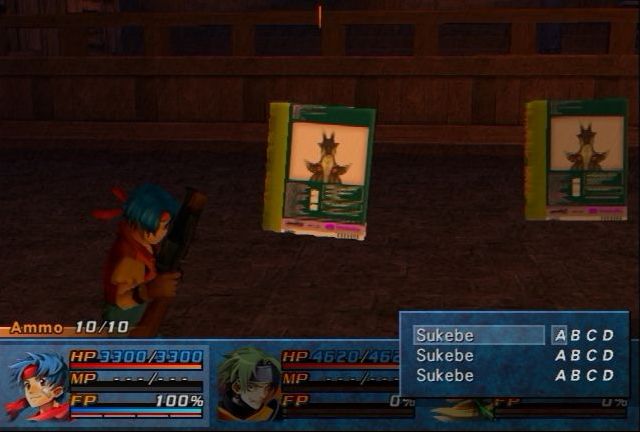
Hooboy, this fight. This is another fight that will kill you if you don't come prepared. This battle is up against 12 Sukebe, which apparently translates to "perverted man" or something to that effect. Usually this boss fight (which is a recurring boss fight) is simple called Adult Mag. Though I'm not sure why they'd call it that considering the image on the book is of a lizard thing...
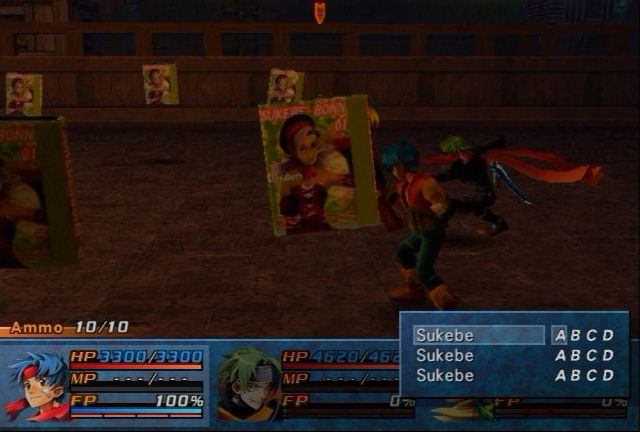
Oh, it's Elizabeth the Dream Demon again. That makes more sense...kind of. Then again, I guess they can't show anything worse if they want to keep a T rating.
Right, so here's what happens if you tried to take them on like weak enemies or using my typical boss fight strategy. The Sukebe have three attacks. Agony Effect for non-elemental damage, Graviton for 50% HP damage, and a do nothing "attack." There are twelve of these guys, so watch out.
Really, the best way to take care of them is to bring in the girls. I find it somewhat ironic that Rudy is the least harmed by the Sukebe, and he seems like the most innocent of the bunch.
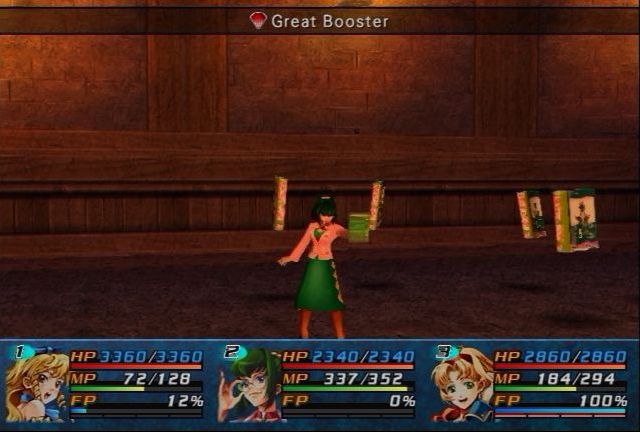
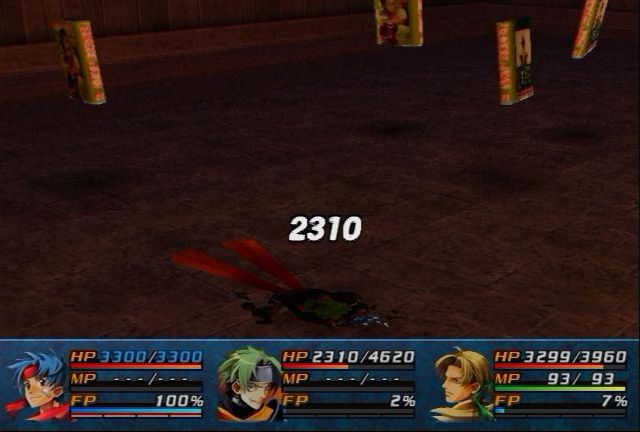
The strategy is pretty simple. Have Jane make everyone go first. Emma uses Great Booster....
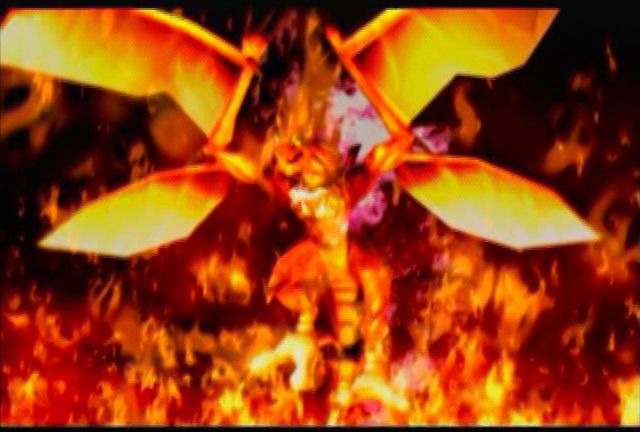
Summon a phoenix to wipe them all away.
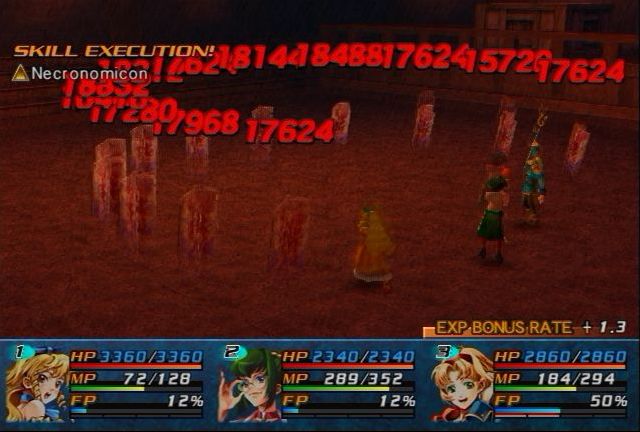
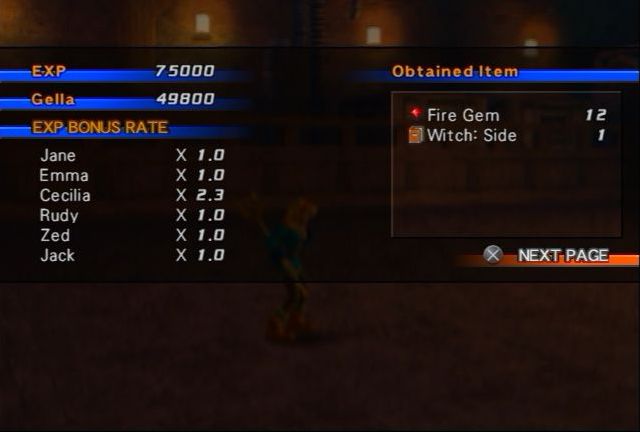
A little overkill, but worth it. These guys were Lv. 75 and had 5000 HP, and of course weak to fire.
The reward is the last Witch book, I just need to get the fifth chapter, which is at the Arena. Might as well finish it up while I'm at it.
Oh, and if you try to read the book again, it just says A dirty mind only invites trouble. It is a sad fact. But in reality, it's tough to stop.
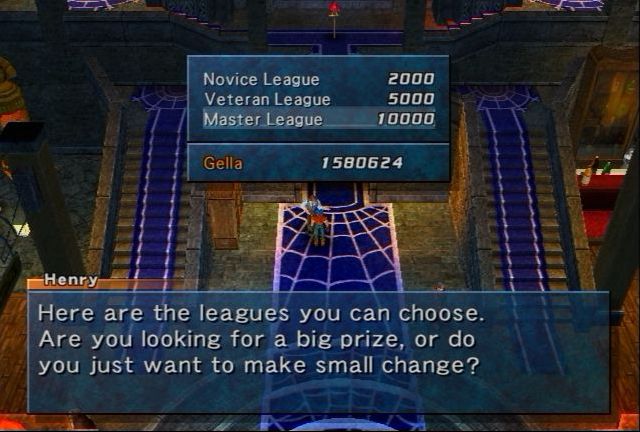

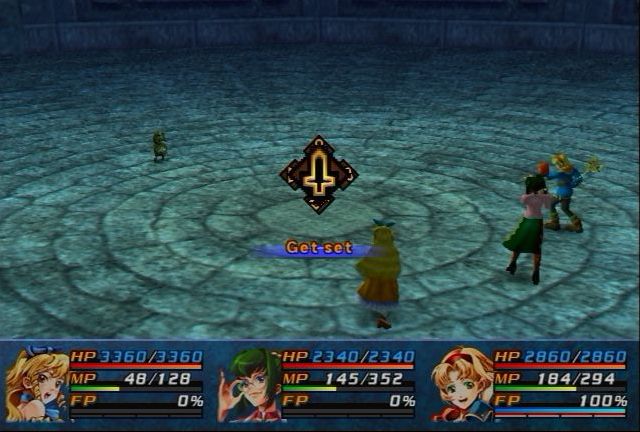
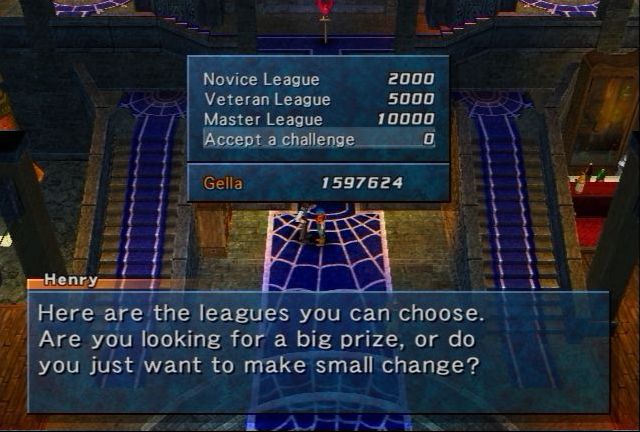
Time to finish up the Master League. It's the exact same as last time, only I wipe out the first three rounds with Ice Crystal, Gale Claw and Hope Shard in that order. Having 100% FP at the beginning is very nice.
Musical selection is Nothing but the Unknown Night Sky, the "stop playing" theme for Wild ARMs 3, which gave you an option to quit after you saved. It would play this. A nice soft little song to end the update with.
The fourth round is Olivier, a Lv 80 monster with 6000 HP...at first. Olivier absorbs all elemental attacks, and if you hit it with one, it will grow in size and gain a lot of HP. It can also cause Poison and Helpless through it's attacks. A Hope Shard wipes it away before it even gets a chance.
You guys are great!! Not many people can come this far!! Ahh!! Take a look at Count Pegucchi!! I see tears rolling down his face!!! They say that Count Pegucchi only cries once every 75 years. Seeing Count Pegucchi in such a great mood, I got so excited that I broke 75 microphones!! This might not be your best match ever, but you are putting on an awesome show!! Now, are you ready for the final round?!!
: Yes || No || So...Pegucchi is Chuck Norris?
The final round is against Bad News, and this guy is tricky. 45K HP, Lv 76, high ATT and a loves to counter attack. No elemental weakness to exploit, although he does have one weakness to exploit that is VERY useful.
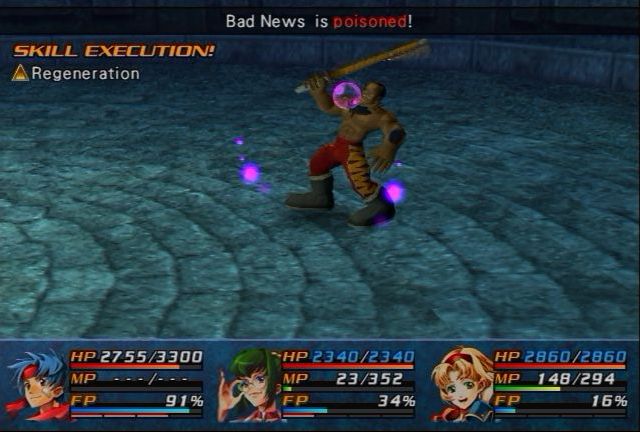
He has 30% vulnerability to Poison. Now, he won't quite die once you take him down to 0 HP because normally Bad News switches out with his brother Bad News (with green pants, 35k HP and more ATT) but if he's poisoned...
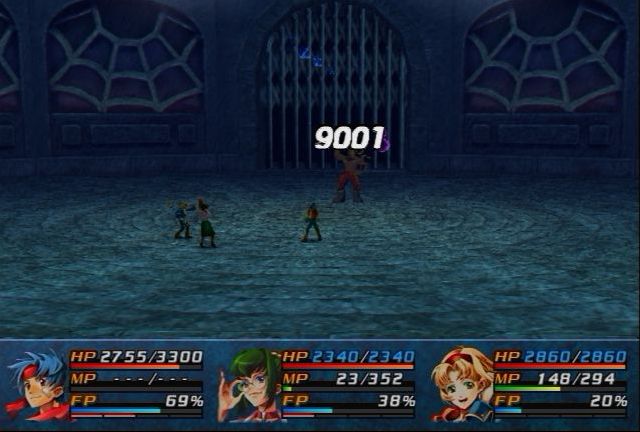
Obvious jokes aside, this has a very important effect: it triggers the end of the battle. Bad News won't switch out to the other Bad News, and you only have to fight one.
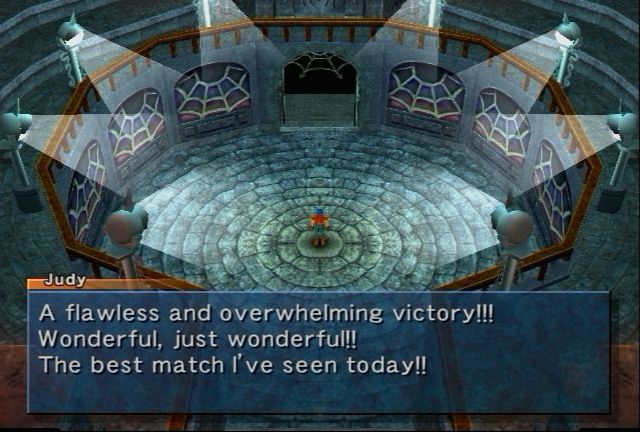
Same old victory speech again. Prizes are Revive Fruit, Antidote x2, Peppy Acorn x3, Lucky Card x3, PS HP up 4, and 30000 measly Gella. One last thing to do.

There is a duplicator door guarding this chest, which I could have grabbed at any time. Anyway, I'm now done with the Arena, there is nothing left to do---
Oh? So much for a soft song to end the update. Let's do this shit.
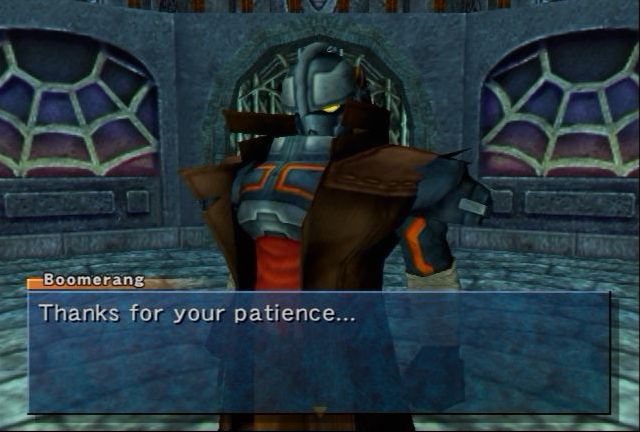

 : I have escaped from hell to finish our battle once and for all.
  : Boomerang! And...
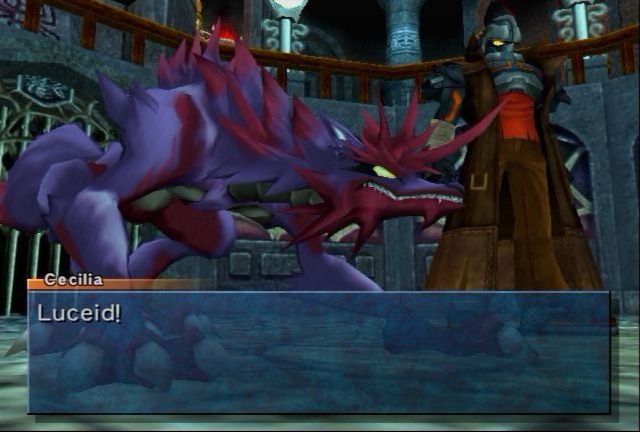
Luceid warps in too.
: This is the perfect setting to finish what we started without any interruptions. The perfect opportunity for each of us to put this bond to the test. 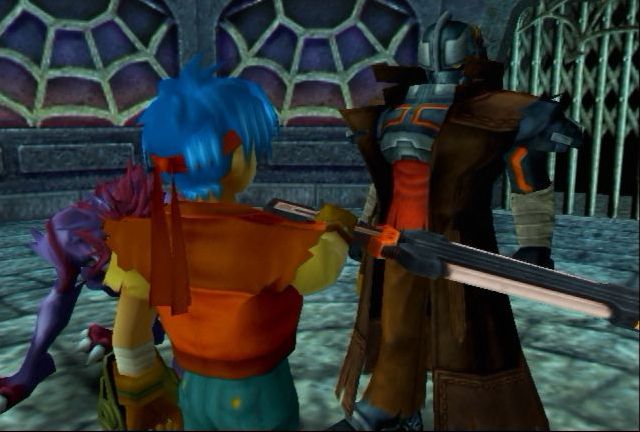
Rudy pulls out Saber Fang, and gives it to Boomerang.
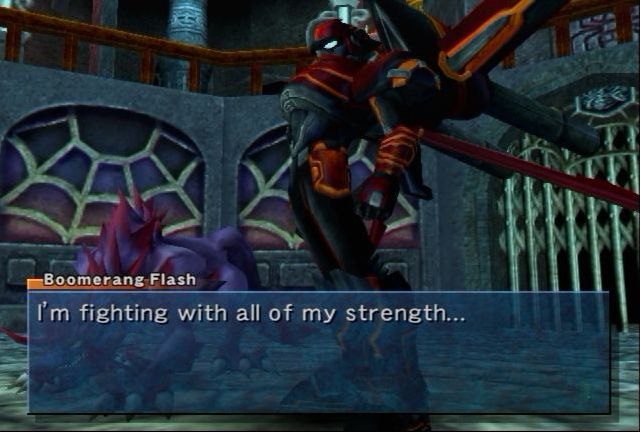
 : What are you doing?!: I have waited for this moment... I will never be satisfied until I defeat you... I can only be satisfied by defeating you with all of my might. You are my greatest foe... And, now I shall finally defeat you!
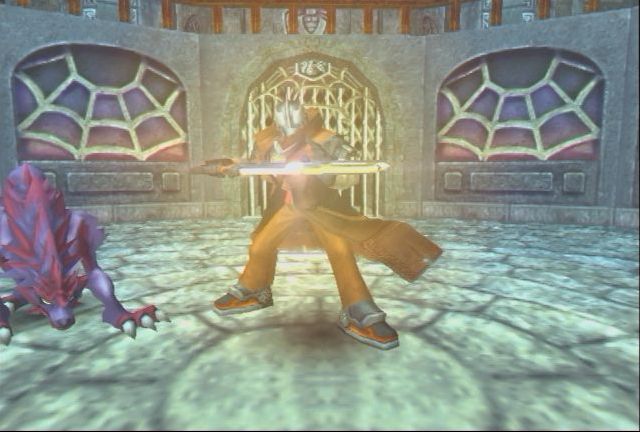
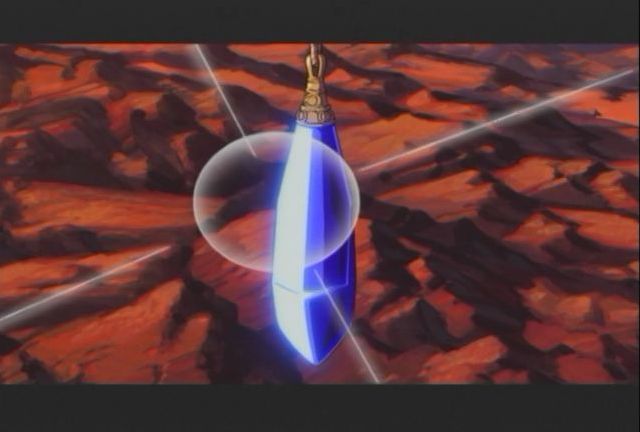
There is a flash of light from Saber Fang and...

Luceid turns into a blue flame which rises up into Boomerang Flash's extended arm.
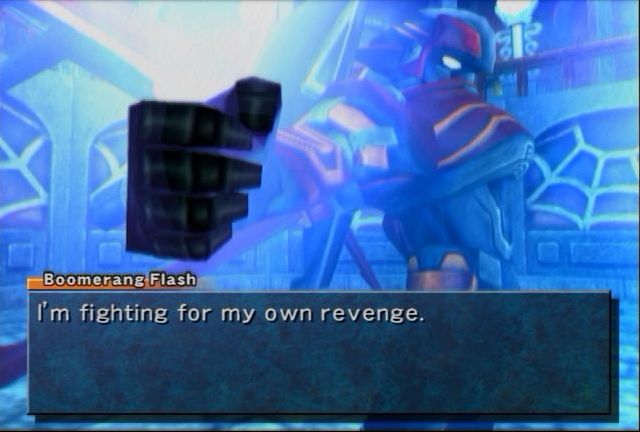
 :Say your last words!
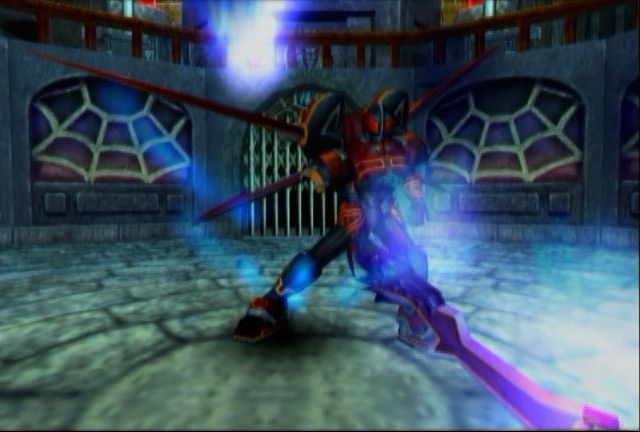
Luceid has transformed into a sword for Boomerang Flash to fight with.
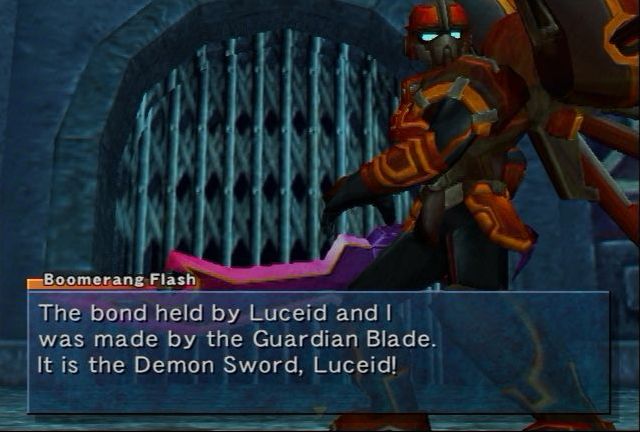 : Once it was lost, but now it is in our possession at last! Feel the power of the Demon Sword!
Boomerang Flash is Level 85 with 130k HP, and very high ATT. He retains his Thunder weakness, and now gains a Light weakness (which Luceid had before).
Boomerang fights like he has before, and there's no Luceid around so the battle feels a little empty. In fact, Boomerang only has four attacks. Dark Luceid replaces Saber Fang as his basic attack, Shadow Stitch seen here cancels a character's turn and deals no damage (but it can be blocked)
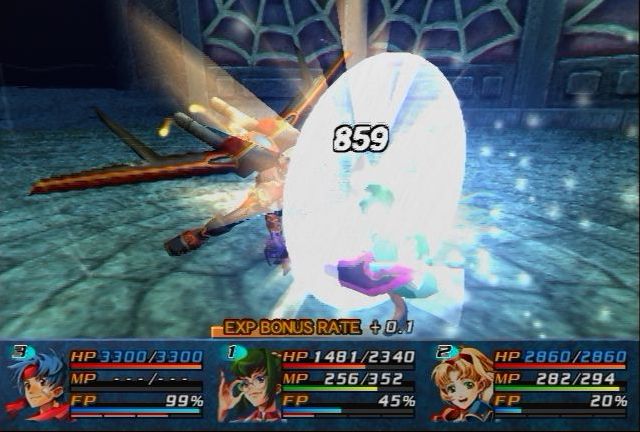
Zero Count Execution here is a more powerful attack, but Emma just used Great Booster on herself (as well as everyone else) to increase her survivability. I want to show off Boomerang Flash's attacks.
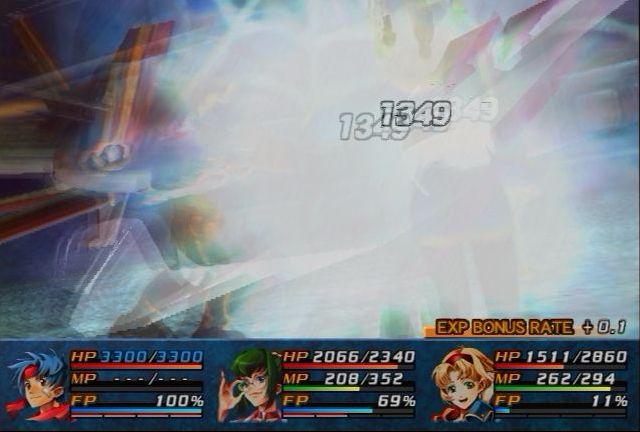
His final move, Shadow Boomerang Maximum is a lot more powerful, and Cecilia was even defending here to reduce the damage further. Like Luceid's Material, it increases in power based on the number of elemental resists the characters have equipped. This also hits everyone, but it goes through the party, hitting them individually.
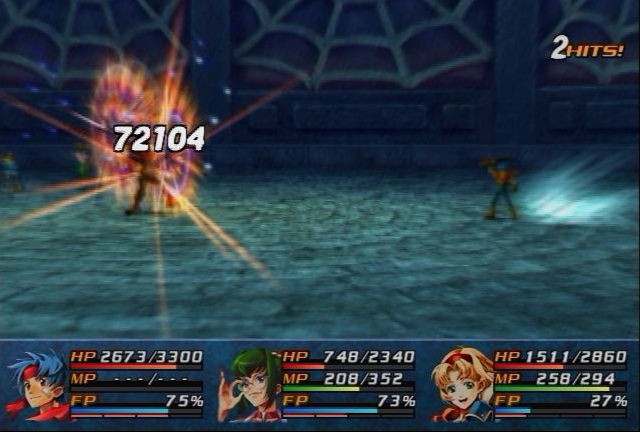
This is almost the full power of Gatling Raid, Rudy was only at Good luck before the battle started, not Best. It only takes three Gatling Raids, almost two.
 : This is, in fact, a miracle, given only to humans so that they can guard and protect Filgaia.
Boomerang doesn't drop anything except a lot of EXP and 60k Gella. When we go from outside of battle, he's still crouching.
: ...I'm afraid this is it for me... But have I lost? No...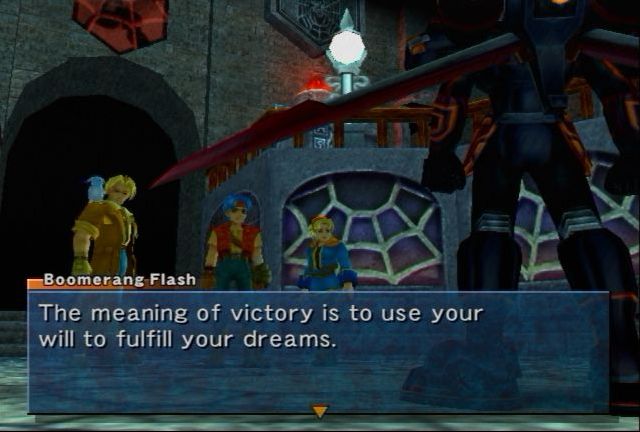 : I lived and fought as a fighter. I did everything I could! You may have defeated me, but I gave it my all. In that way, I am victorious! I lost the battle, but I have no regrets!
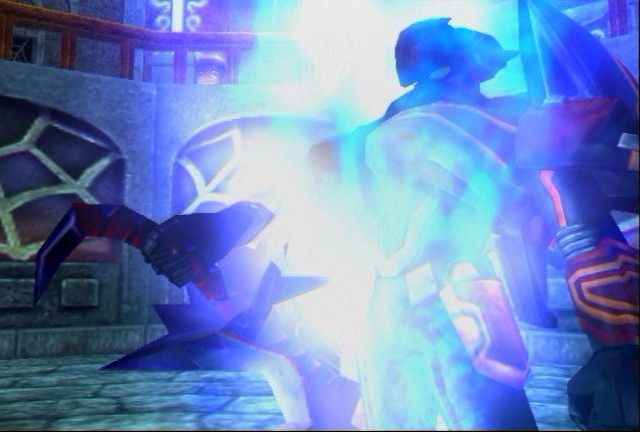
Boomerang erupts in flames, and hands the handle to Luceid forward.
: I am leaving. But I won't take her with me. She is still thirsty for blood. Take her to the battlefield... 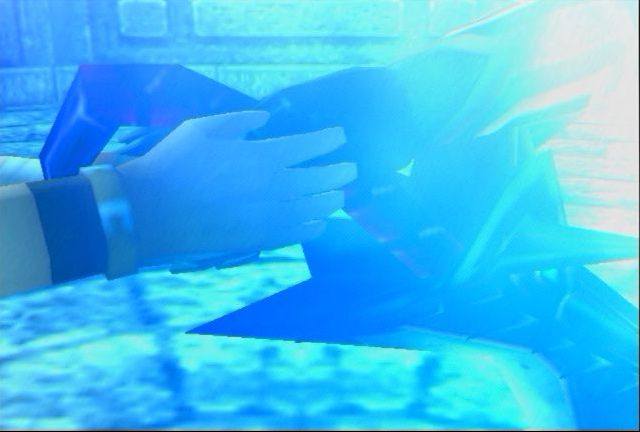
Rudy takes the sword in both hands.
End of update status:
: Level 100--ATK Bonus: 114 (Lv. 8)
--Bullets: 10 (Lv. 7)
: Level 100 : Level 100
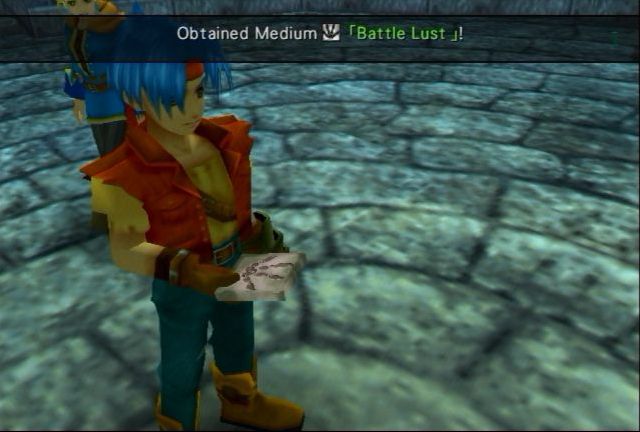
--Obtained Battle Lust
 : Level 100
--Downloaded Storm Blade, Luminous Impact, Crack Tremor, Flirtation, Arc-en-Ciel, Flaming Zone, Freezing Zone, Blizzard Breath, Hrimthur's Eternal Ice and Arctic Lance.
 : Level 100
--Bullets: 20 (Lv. 15)
 : Level 100
Migrant Seals: 18
Ex. File Keys: 14/25
Fuck-Ups: 37 (see below)
Version Differences:
Still more bosses and a reason to return to Elw Borea.
To be honest, Boomerangs return feels less badass because he doesn't charge into the arena telling the other monsters to play with their toys, but I like this version a lot better. It resolves the Luceid storyline and really fleshes out Boomerang for one last hurrah. And he is tough as hell if you are not as over-leveled as I am.
Oh, and you can summon Luceid.
Guardian Roll Call:
One last time. With Luceid, our collection is complete.
Luceid truly is the most unique Guardian of the entire collection of them. She/he has appeared in several games and usually as a fairly significant plot point. Luceid returned in Wild ARMs 2 as the ally of Anatasia the Sword Magess, who later assisted Ashley as well. And Luceid returns again in Wild ARMs 3 as one of the four Guardian Lords, alongside Raftina, Justine and Zephyr once more. Because Luceid betrayed humanity to join the Metal Demons in the war 1000 years ago, she is the only Guardian whom still maintains a physical presence on Filgaia, which also explains her appearance towards the end of Twilight Venom.
It is believed that Luceid still walks the surface of Filgaia, assisting those with great Desire. (XF Spoilers, but really more Speculation) It is hinted that Tony might be Luceid in disguise, because he first follows Labrynthia at the beginning of the game, but gradually moves over to Clarissa because of her desire to not only free Elesia like Labrynthia, but to complete her mother's research to restore Filgaia. That, and a Guardian's and Clysmian's powers oppose each other, and Tony completely negated an attack from the Fear Clysmian.
Luceid's Medium is Battle Lust and her Material is Dark Renegade. Dark Renegade deals more damage based on how resistant the enemy is to the elements. Basically, Dark Renegade is the "Anti-element." The TC of the move is variable, and increases with the enemy's resistance. Every Half resist adds 0.5, full Resist adds 1, Absorb adds 1.5 and Active adds 2. However, Weak reduces it by 0.5. So if the enemy has no elemental resistances, or is weak to too many elements, you may very well deal no damage at all.
However, many bosses tend to resist lots of elements. Motherfried would have TC 7, and Zeik Tuvai would have 6. But, the Elemental Materials have a TC of 4 with Necronomicon, which gets tripled because it's a weakness, effectively making it a TC 12...so unless the enemy is Active or Resistant to all elements, it probably won't work. But when it does...
...also I believe this was originally called Black Renegade when Luceid used it with Boomerang, but now it's Dark Renegade? Fuck Up Count: 37.
Ex File Key:
Alright, we got a couple of keys today. The 12th Ex File Key is the Encyclopedia of Monsters. Basically, it shows the Monster Guide again. With no changes.
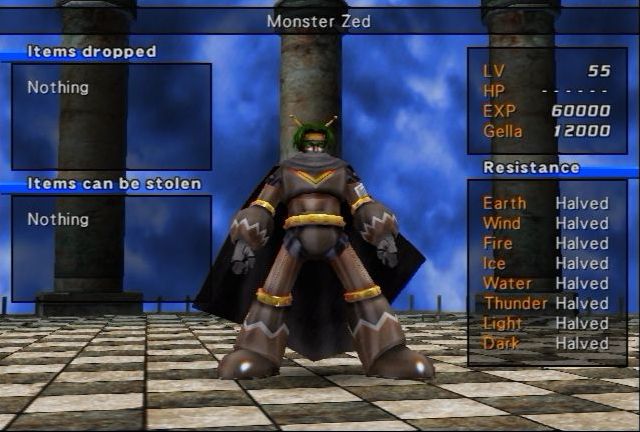
I believe I mentioned that you don't need to use Voyeur on bosses because they'll automatically get included in the book. Case in point, I didn't use it on Monster Zed, but here he is! You only need to Voyeur 50% of the monsters in the game to get the key, so you can then look at it from any time. Still kind of useless thanks to the internet, but nice to have.
The 23rd Ex File Key is OP Movie, which shows you the opening video again. Kind of useless since you can load any post-prologue save file (including the EX save files after you defeat Zeik Tuvai) and it'll show you that again. Still, it's another chance to listen to To the End of the Wilderness, so it's not all bad.
A Saying A Day
 : (October 12th) Today's saying is that an unskilled person chooses a bad tool. Someone who doesn't know what they're doing, buys a pretty tool, not a good one. So we should not judge on looks alone. But then I see wanderers, who have good tools, look strong......... Or, maybe they look strong, so, they have good weapons. This doesn't fit the saying. Well, I wanted to support people who start with the appearance, but it didn't work.: (October 13th) Today's saying is that even a cat steps over some things. If a cat's giving something it hates, it just steps over and passes it by. But, when I try to pass by a cat, the cat tells me not to pass him by. It only thinks about itself, not me. But he is cute, so I'll forgive him. But then, I love cats........: (October 14th) Today's saying is that a stomach gets bigger if you don't say things. If you don't say something out loud, then it will make you sick. And if you are stressed to much, then your stomach will starts swelling. So share your words with the world! If I swallowed my sayings, I'd weigh 200 kilos.: (October 15th) Today's saying is that dead trees can decorate a mountain. Dead trees standing in the winter blue sky are a very poetic image. Dead tree are also good firewood. The idea behind this saying is that everything has its purpose. Also, see the beauty around you......... You should keep this in mind, when you have guests over.
Next Time: