Part 54: Big Damn Ending, Sol System, Sol Sector (Gameplay)
I consider it a win, too, which is presumably why I'm doing the thread.I think much of the problem comes not so much from "that's how everyone ELSE does it" as the fact that Standoff was made by a bunch of people who think that Wing Commander II was the best Wing Commander game (and probably the best starfighter sim) ever made. While this is wrong it is at least a relatively respectable thing to think. Unfortunately, this does not mean you should be trying to make your game as much like WC2 as you possibly can, which is where most of the silly things the Standoff team does come in, except for the occasional excesses of fighters. Strangely, I don't feel like there's too many fighters in this mission (despite the fact that there are 30+ on each side), my complaint is in fact something that every space game I've ever played does - putting a nonthreatening but long bit of padding at the start of a mission to make it longer is FUCKING ANNOYING if it's a mission I will have to replay lots.
Ultimately I'm prepared to forgive Standoff a lot of its amateur-hour shit because the game flies wonderfully - the Vision engine was fantastic anyway and it's even more fun with the Standoff ships - and the missions are appropriately varied and interesting which is more than Prophecy or Secret Ops had going for them. This is probably why I actually like Starlancer. In small doses.
Anyway, video is finally sorted, so:
1st January 2669, Sol System, Sol Sector
Episode 5, Mission 7 - Big Damn Ending
The Confederation fleet launches its strike against the last remaining Kilrathi supercarrier and its escorts.
Mission Briefing:
Briefing Video (Youtube)
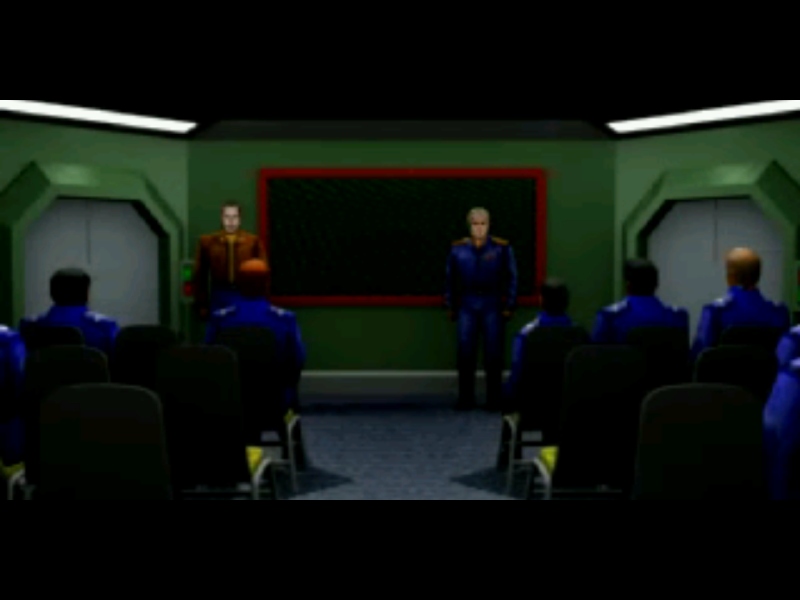
Reismann briefs the entire flight wing personally for this mission, meaning we have a cutscene briefing instead of a standard one. Also, a totally unnecessary last line from Bradshaw (though well within his established character).
 : At ease, everyone. I wanted to brief you all personally for this one. : Whatever the result may be, there's every indication we've entered the endgame of this battle. : This is the most important mission any of you will ever fly, and let's face it, not all of you will come back from it.
  : We'll be back, sir. It's the cats that are gonna suck void.
  : Yeah, we'll show 'em. : I'm glad to hear it, but pay attention. Now, our fleet, and you gentlemen had some part to play in that, has managed to deal a very heavy blow to the Kilrathi.: Most of the enemy capital ships have taken damage or been destroyed. Unfortunately that's also the case for our ships. : Truth is, victory's still up for grabs. You might go out there and finish the cats, but you just might not have a carrier to come home to. : It all depends on you now.
 : Don't worry, sir, we're ready for anything.
  (amused): Huh. Alright, alright, enough interruptions. Let the Commodore finish. : Thank you, Captain. So your job is a simple one. You'll go out there, meet up with the rest of the fleet's strike fighters, and take the fight to the enemy.: We don't know what's going to happen. Intel predicts that if we push hard enough now, Prince Thrakhath may order a retreat. : But it's just as easily possible that he'll turn this into an all-or-nothing affair. I ask only one thing of you: fight to the end.: Keep on fighting until you have nothing left. To the last missile, the last drop of fuel.: Don't get yourself killed, but if the difference between retreat and ejection is one more enemy killed, forget all that bullshit about your ship's price tag.: Stay out there as long as you can, and if you're lucky, someone might pick up your ejection pod.: Best of luck to you all, make us proud.: You heard the man, let's get to it!
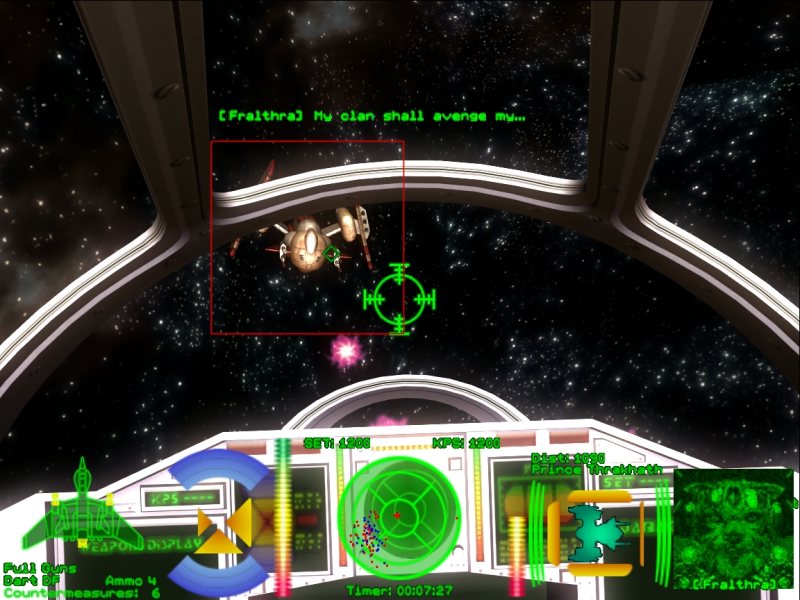
Mission Video (Youtube)
Kills this mission: 27, including Prince Thrakhath and a Snakeir-class carrier.
Tactics Corner
Two fights in this mission, although the first is primarily intended just to cause you to expend afterburner fuel and missiles.
Friendly forces:
15x Rapier medium fighter
12x Sabre heavy fighter
3x Crossbow torpedo bomber (this is all I have, I think the game would launch five if they had survived)
Intercept Nav:
Enemy forces:
8x Drakhri medium fighter
8x Gratha light bomber
4x Grikath torpedo bomber
4x Gothri heavy bomber
4x Drakhri medium fighter (reinforcements, arrive after 1 minute 25 seconds)
4x Krant medium fighter (reinforcements, arrive after 1 minute 25 seconds)
4x Hhriss heavy fighter (reinforcements, arrive after 1 minute 25 seconds)
Deployment:

Wow, actual wing sizes based on the fact that the Kilrathi are a race that counts in base eight, don't see that often. Anyway, this fight is primarily to cause you to waste munitions and fuel before the much bigger fight when we reach the carrier, so try and conserve those (this makes it dull, as I whine about in the video - but hey, if I'm Bradshaw, whining is appropriate, right?). It's probably best to go for one of the two central Gratha groups since they're smaller and in general fewer of your fighters go after them, and the thing you really want to avoid right now is being caught in a big crossfire between 30 friendlies and 24+12 enemies. After that it's just a case of finding and killing the nearest fighter, without leaning on the afterburners or spending too long close on the tail of any enemy fighter, given the Confed numbers here.
Craxtha Nav:
Friendly forces:
Survivors from the previous nav plus
1x Wraith superheavy fighter (Stingray)
5x Epee light fighter (Sierra Wing)
9x Morningstar heavy fighter (Tango and Unicorn Wings)
(I have to note amusement at how U in the Confederation reporting alphabet is apparently "Unicorn". I guess somebody of high rank must have misheard "Uniform" at some point over the next 6 centuries and it stuck.)
Enemy forces:
3x Targu-II class frigate
2x Fralthra class heavy cruiser
1x Snakeir class fleet carrier
1x Hakaga class heavy carrier KIS Craxtha
12x Sartha light fighter
14x Hhriss heavy fighter
3x Drakhai Vatari superheavy fighter
9x Sartha light fighter (reinforcements, arrive once only ~5 Kilrathi fighters survive from previous wave)
10x Krant medium fighter (reinforcements, arrive once only ~5 Kilrathi fighters survive from previous wave)
7x Drakhri medium fighter (reinforcements, arrive once only ~5 Kilrathi fighters survive from previous wave)
6x Jalkehi heavy fighter (reinforcements, arrive once only ~5 Kilrathi fighters survive from previous wave)
3x Gratha light bomber (reinforcements, arrive once only ~5 Kilrathi fighters survive from previous wave)
7x Drakhai Vatari superheavy fighter (reinforcements, arrive once only ~5 Kilrathi fighters survive from previous wave)
1x Bloodfang ace "Prince Thrakhath" (reinforcements, arrive once only ~5 Kilrathi fighters survive from previous wave)
4x Sartha light fighter (reinforcements, arrive after ~5 minutes)
4x Krant medium fighter (reinforcements, arrive after ~5 minutes)
22 or so torpedoes' worth of capships here, as well as 29 + 43 + 8 fighters including a full Vatari squadron and Thrakhath in his Bloodfang. Good job we have up to 45 Confederation fighters to meet them with. The mission objective says "Damage the Craxtha as much as possible", I'm guessing that one's invincible at least as far as finishing it off goes (it certainly survives Fleet Action). In order to complete the mission I think you need to put four torpedoes into the Craxtha, so I'm going with 18 torpedo hits as required (I think we get 19 in the video, maybe 20).
Deployment:
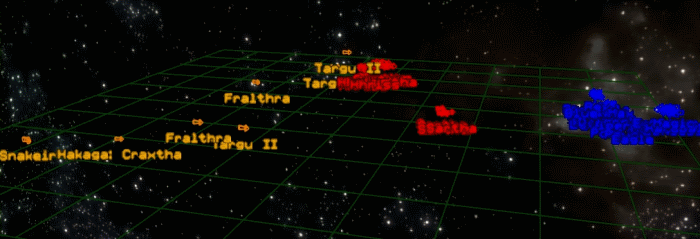
Two strategies come to mind immediately (at least if you've been playing as much Standoff as I have) on seeing this deployment. One is to race for the frigates before the AI starts wasting torpedoes on them; the other is to try and kill as many of the Sartha in the lead group as you can before the others catch up and even the numbers. Experience has shown the first is a non-starter, since you end up with Vatari on your tail and that's not a tremendously survivable way to do a torpedo run. So the ideal approach is to find a Sartha, hit it with an image recognition missile, and repeat until you either run out of Sartha or find a Vatari to kill. These three are fairly high-prority targets because AI wingmen struggle against the Vatari's firepower. You need to save at least one dumbfire for Thrakhath; I tend to keep all of mine back for the second wave of Vatari as it's larger, though one here wouldn't exactly be a waste. Hopefully by this point the Morningstars will have nailed all three frigates - in fact if that doesn't happen in the first couple of minutes of the engagement you can probably forget victory because too many shipkillers will have been wasted. As your kills mount you should begin to start hearing an increasing number of torpedo hits reported - these are on the enemy heavy cruisers. So at this point you're almost certainly thinking things are going pretty well - almost all the enemy fighters are down, the frigates are gone and the cruisers are both taking hits. Then this happens:
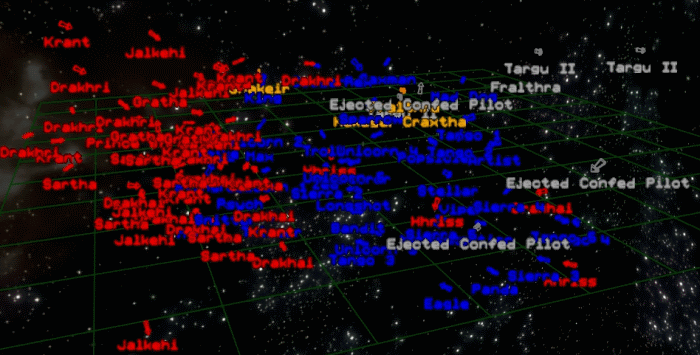
Holy crap. What's basically happened story-wise at this point is that Thrakhath has pulled almost all his surviving fighters back to the Craxtha, which is the only vessel capable of rearming them quickly for a second strike on the remainder of the Confederation fleet. He himself got the hell off the Hakaga in his Bloodfang once he realised what the marines were up to (Thrakhath is in a rather difficult position, politically - he's the only living Kiranka heir to the throne, so if he gets killed there will be a pretty major succession crisis, and you can guess how the Kilrathi resolve those) and is with the incoming fighters. Standoff does a fairly decent job of replicating that, I think.
Anyway, Thrakhath needs killing, or at least forcing to retreat - the latter is much easier but doesn't get the bragging rights; his Bloodfang is seriously dangerous and will wreck a lot of bombers if you leave him alone. Wear the shields down with gunfire and then dumbfire him, making sure you're shooting at the damaged shield facing when you do (if you just dumbfire him, he'll retreat). That thing is seriously fast and he's somewhat prone to running away when damaged so you are unlikely to get two DF shots. Once he's dead, use your remaining missiles on Vatari (DFs) and Sarthas (IRs), and then take down whatever's left in order of how close it is to you. If nothing is particularly nearby, check what might need finishing off and torpedo it.
And then be prepared to replay a lot of times, because you need a bit of luck for the AI to get the 16 hits you need. It's a fun scrap, though, so I wouldn't have minded at all if it didn't mean you had to sit through the first part of the mission again.
Ship of the day:
Bloodfang
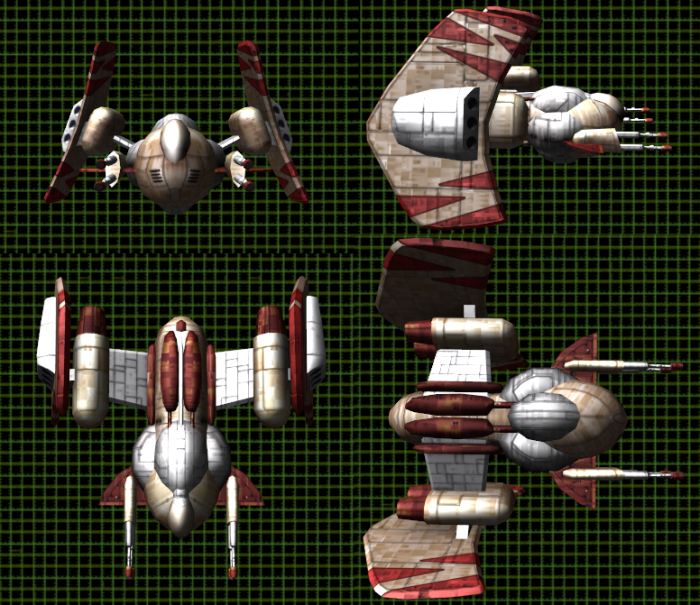
Class: Heavy Fighter (Kilrathi)
Length: 24 m
Mass: unknown (game files: 24 tonnes)
Max Velocity: approx. 450 kps (game: 520 kps)
Afterburner Velocity: approx. 1300 kps (game: 1500 kps)
Maximum Yaw/Pitch/Roll: approx. 80/80/80 degrees/second (game: 90/70/90 degrees/second)
Weapons: 4x Particle Cannon, 4x Image Recognition missile, 4x Friend-or-Foe missile
Shields: approx. Front: 100 Back: 100 (game: Front: 500 Back: 500)
Armour: approx. Front: 90 Back: 90 Left: 90 Right: 90 (game: Front: 360 Left: 240 Right: 240 Back: 360)
Game says: Encountered only once (and destroyed) by Colonel Blair in 2667. The ship in question was Prince Thrakhath's own personal fighter. It is not known whether there are any other Bloodfangs in existence. Warning: based on Prince Thrakhath's personality profile, Intel believes that, should the Prince choose to fly the Bloodfang again, he will ensure the new model is exceedingly more powerful[sic] than the craft he was previously defeated in.
I say: The Bloodfang looks silly, but then the Bloodfang has always looked silly. Thrakhath's fighter is unique amongst your opponents in that it can survive a dumbfire hit, and also in being sufficiently fast to actually escape even a Rapier at full afterburner (though it's less maneuverable) - not that you get to fly a Rapier against it. It's a fairly ridiculous fighter (which isn't to say it won't meet its match at some point in the Terran-Kilrathi War), though like the game says, the Kilrathi only seem to have one of them.
Total kills (Standoff): 27 missions / 367 kills
Total kills (including previous thread): 138 missions / 1293 kills
Next time on Standoff:
We've fought part of the Battle of Earth, but there was another section. Just before Thrakhath shifted his flag from the doomed Hakaga to the Craxtha, he ordered the cruiser squadrons containing his Sr-90 laden nukes forward, to breach the Terran perimeter and race to Earth, hoping to win the war even if he lost the battle. Tolwyn didn't have the manpower to stop them, but fortunately for humanity, there is another story to be told, one that the Firekka would have been a part of if she hadn't been able to save the Leyte Gulf during the Battle of Sirius...
That said, since most of the character bits of the story are the same, I'm not going to put up any repeats, so the story updates will probably be slimmed down a bit. I'll have a story wrapup up either tomorrow or Sunday with the winning ending videos.