Part 3: The Pyramid of Entrapment
Wizardry IV as a glorified romhack? I like that.In the last update, I didn't elaborate on the 1st tier Priest spells that our party can cast now that Werdna has 1st Lvl Priests at his side.
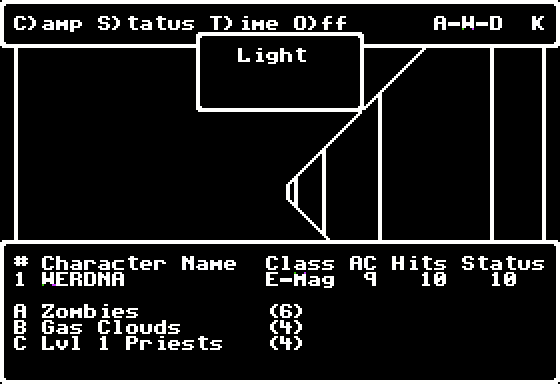
Of those, Kalki, or Blessings, is an in-combat spell that lowers the entire party's AC by 1 for the duration of the fight. Dios, also known as Heal, is the base healing spell that can be cast in both camp and combat modes and restores 1d8 hit points to a single character. Badios, or Harm, on the other hand, is the reverse of Dios dealing 1d8 points of damage to a foe. Next there is Milwa, the Light spell we used to reveal a way out of the starting room. It also increases visibility range (useful when you want to orient yourself by the walls), but only lasts for a short time and can be extinguished by darkness tiles -- of which there aren't any on the starting floor, thankfully. Finally, Porfic, or Shield, lowers the caster's AC by 4 for as long as the encounter lasts.
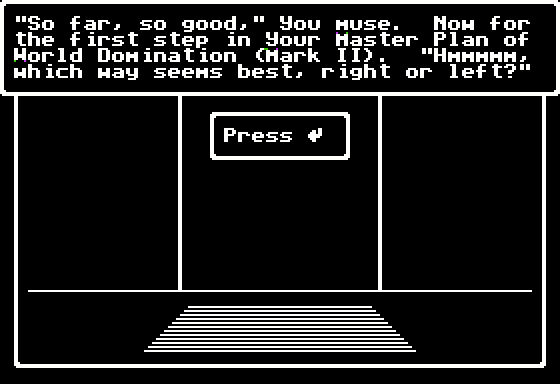
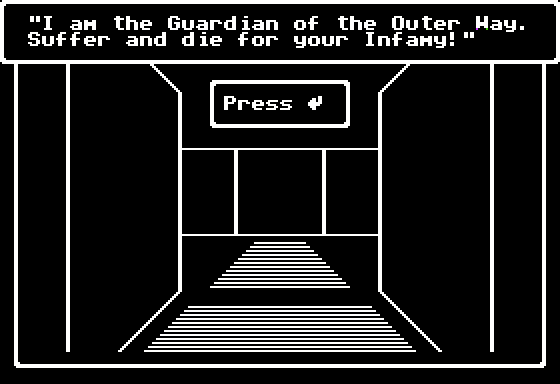
Outside the jail cell, Werdna contemplates his next course of action. Baby steps!
The first choice we're given is to decide where we should go now, left or right. In that, however, the game is just teasing the player, as it is wont to do. Due to the way this floor is laid out, the choice doesn't matter in the least. It isn't by chance that this level is called "The Pyramid of Entrapment".
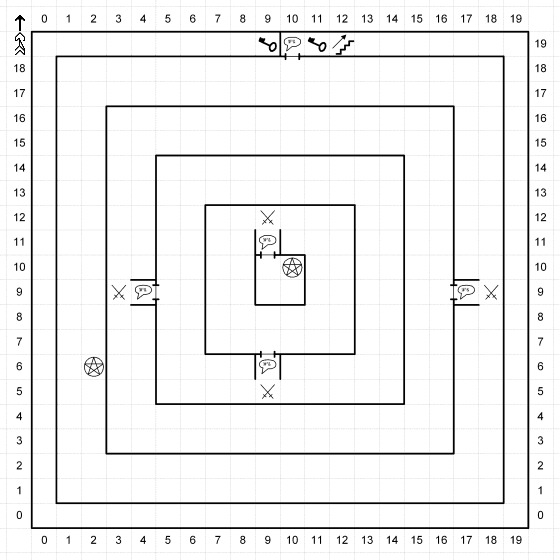
(I will be using the maps from this site. In theory, I could redraw my own hand-made maps in Excel, but that wouldn't make for more accurate or pretty maps anyway. If I spot any inaccuracies in that site's maps, I'll point them out.)
And by that, I mean the floor is made up of concentric squares, each meant to represent a pyramid layer. It's very abstract, sure, since the terrain is flat without any height differences, and the layers make it look like a ziggurat of entrapment rather than a pyramid. Being symmetrical in this way, B10F* is relatively forgiving, to the extent anything in Wizardry IV can be. No matter the direction you take, if you stick to the outer wall you're bound to come across a door leading to the next layer sooner or later. To an extent, as far as some of the outer layers are concerned, the path you take does make some difference, in that one of them may be shorter than the other. And the longer it takes for you to find the exit, the more the level's encounters wear you out.
*i.e., 10th basement floor
All the doors between the layers are secret doors, by the way, just like the one in the first room, so you can only see them with Milwa on.
As you may remember from Chokes McGee's LP or your own playthrough, in Wizardry I dungeon floors significantly differed in importance, to the extent that you didn't even have to visit half of them in order to beat the game, and you wouldn't miss out on any interesting or eventful content either. (I'd say B3F and B7F were perhaps the only ones among the optional floors that had interesting design, at least.) Not so in Wizardry IV. Here, every floor matters and it isn't possible to skip even one of them. Which is also tied in with the game's character progression: another floor means another level for Werdna.
Thankfully, what Wizardry IV lacks in non-linearity, it makes up for in variety. Every dungeon section has a unique twist or gimmick to its design, such as the "pyramid" structure here, and you can say a lot of work went into them. Whether it was a work of love or hate, you decide.
A turn to the right, and a random encounter pops up. In Wizardry IV, encounters happen often, very often. Thankfully, each floor has a fixed list of adventurers that you can encounter on it, and once you've exhausted the list by slaying everyone (without reloading, since that respawns all the guardians), you're free to explore the floor without those pesky adventurers bothering you. On the other hand, the list is usually long, and the longer you explore a floor, the closer Trebor's ghost gets to you, so it's a Scylla and Charybdis thing, really.
Luckily, this time it's just a solo do-gooder Priest, and solo adventurers aren't generally much of a problem at this stage unless the dice gods decide to screw you over completely. It is worth noting that, normally, weak adventurers would populate the dungeon floors that are closer to the surface, while only the stronger ones would be able to get as far down as the 10th floor; that wouldn't, however, make much sense from the standpoint of character progression, so Wizardry IV had to sacrifice that kind of, dare I say, realism.
Apart from unique set encounters that have their own graphics, there are three character portraits for each class in the game, and I'm pretty sure we'll get to see all of them in this playthrough. Note also that the turn doesn't end when one of the opposing sides is slain -- it continues until everyone alive takes their action.
Just like the do-gooder list for a given floor is fixed, so loot drops aren't random either. You can expect the same items to be dropped by the same adventurers. That certainly makes it easier to keep and organize notes when you know that a certain party on a certain floor necessarily carries a certain item that you need.
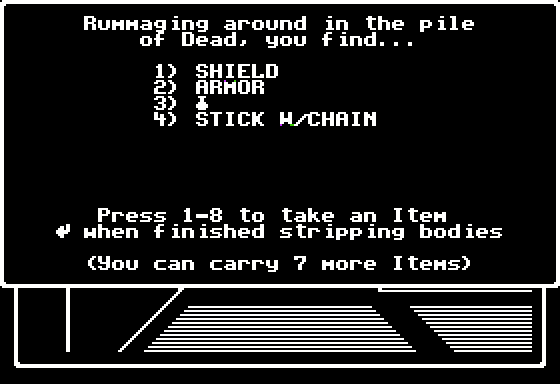
Loot in Wizardry IV greatly varies in usefulness. Being a Mage, Werdna can't even equip most of the items dropped by adventurers. Apart from regular items he can equip (such as staves, robes, etc.), what you're really looking for are unique items, some of which are plot- and puzzle-related while others have useful abilities or bonuses to offer. There are also consumables such as potions and scrolls; in the above screenshot, the potion is a potion of Porfic. Another, even more useful potion we can find on this floor is a potion of Dios.
One convenient thing about Wizardry IV is that Werdna identifies all items automatically, in contrast to Wizardry I where you needed a Bishop or a trip to Boltac's Trading Post for that. It doesn't help, however, that before you pick it up all loot is unidentified when you rummage through it; for example, at one point we'll need to acquire a Blade Cusinart', but it is always listed simply as a "Sword" among the loot, which makes it a pain to pick out.
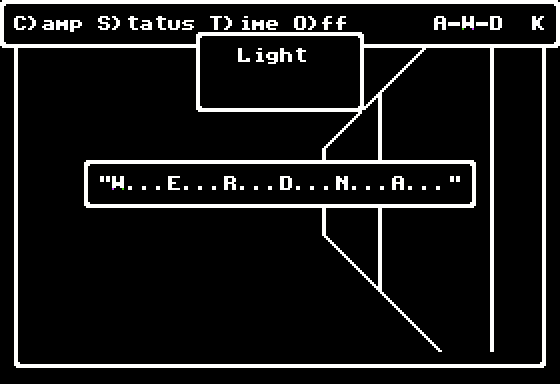
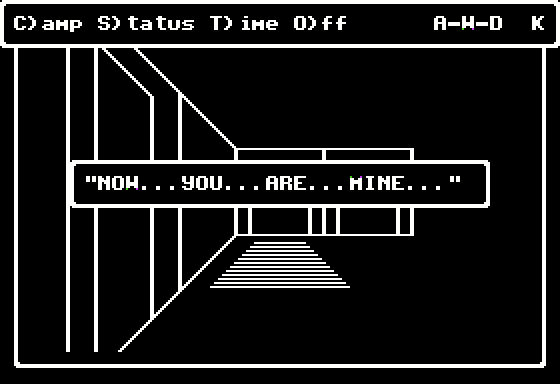
To keep track of Trebor's progress as he tries to catch you, you should pay attention to the ghost's utterings. There are several things he can say depending on how close he is to you, and they come in a fixed sequence:
- W...E...R...D...N...A...
- WHERE...ARE...YOU...???
- I...COME...FOR...YOU...
- MY...REVENGE...IS...AT...HAND...
- I...ALMOST...HAVE...YOU...
And finally,
Which you must avoid at all costs...
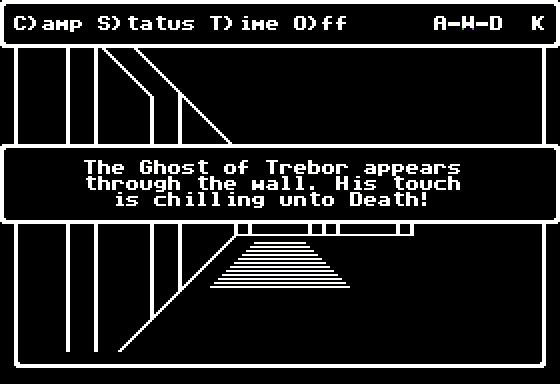
...because it instantly leads to a game over.
Back to our tomb for us.

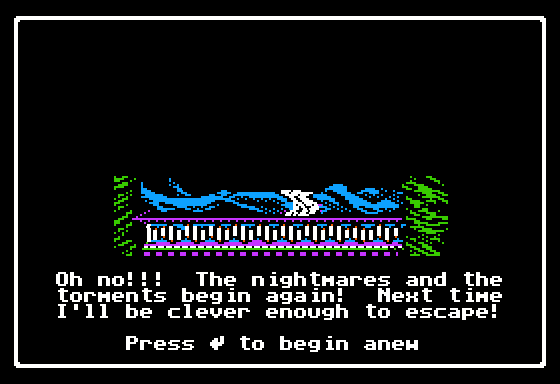
Which is the standard death screen you get no matter the cause of your (always untimely) demise. And no matter what you do or how good (or should I say evil?) you are, this is the single most common thing you're going to see, over and over again, as you play the game.
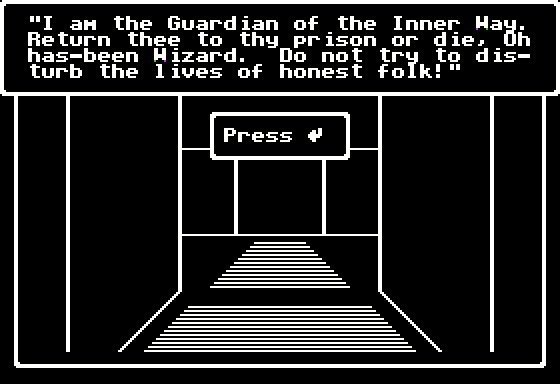
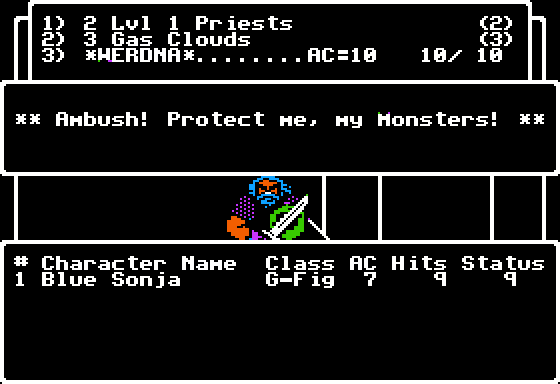
At (9,5) on B10F, our first fixed encounter awaits.
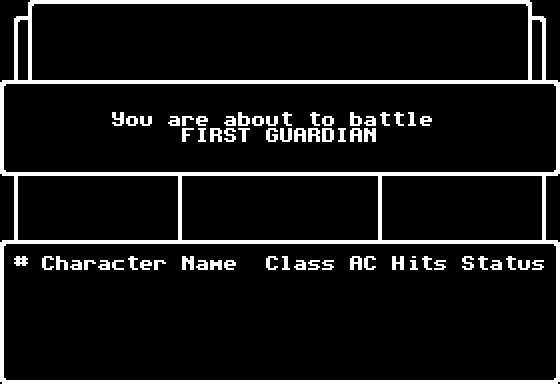
The Guardian of the Inner Way, or simply The Inner Guardian, tries to put an end to Werdna's world domination ambitions.
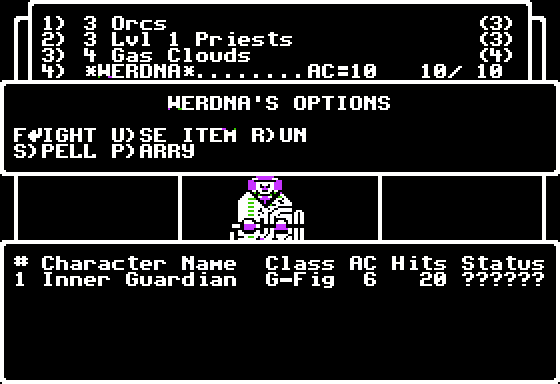
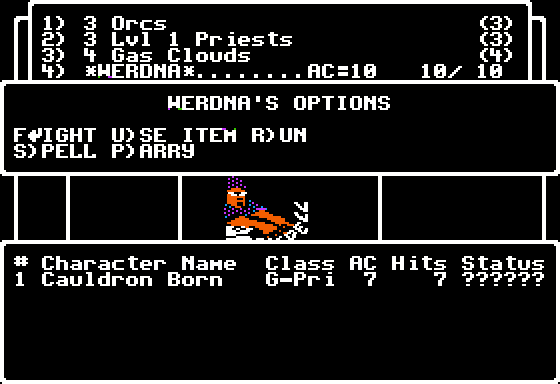
He is alone, but relatively strong. Not too strong, though. From what I've gathered, his regular attack hits for no more than 1d8.
Against our current party, with the help of the Priests' Badios as well as Werdna's and the Gas Clouds' Halito, he doesn't even last a single round.
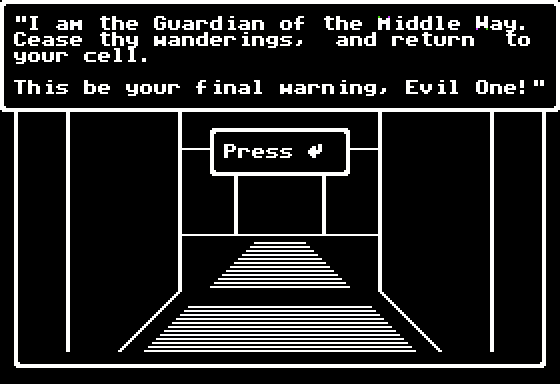
The Guardian of the Middle Way, located at (3,9), comes next. But he won't stop us!

At 30 HP and 5 AC, The Middle Guardian isn't significantly tougher than the Inner one, but still strong enough to last two rounds and even kill an Orc and a Gas Cloud before going down.

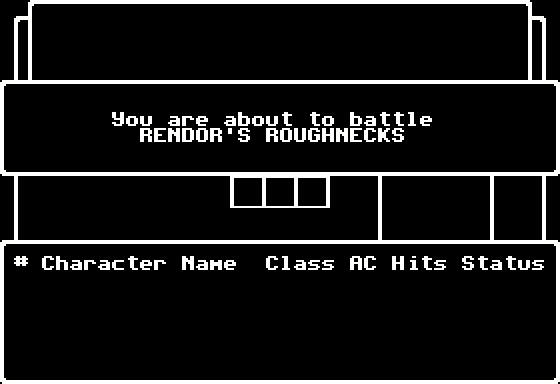
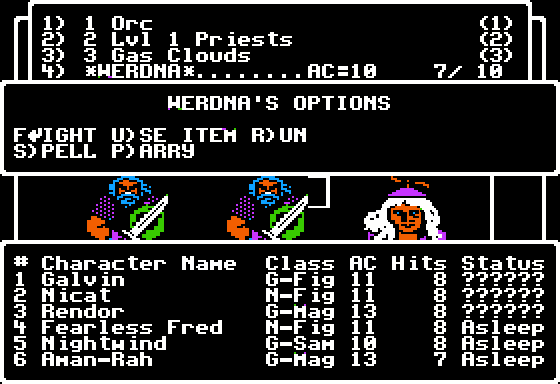
Rendor's Roughnecks is one of the two full-fledged, six-character adventurer parties roaming this floor. Together with static guardians, do-gooder parties are basically a given floor's boss encounters, meant to test you and wear you out as much as possible.
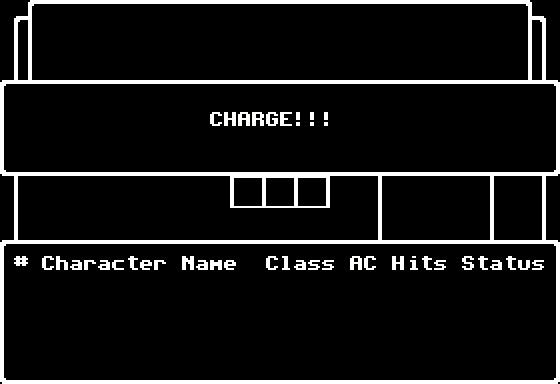
In contrast to solo do-gooders, each enemy party you encounter has a unique motto associated with it. It can be more or less silly or meaningful; in this case, it's a simple "Charge!!!"
As I already mentioned in the OP, many of Wizardry IV's do-gooders were extracted from user disks sent to Sir-Tech for recovery. I've been wondering if users were also allowed to submit a motto for their party, but I haven't been able to find any behind-the-scenes info on the mottos.
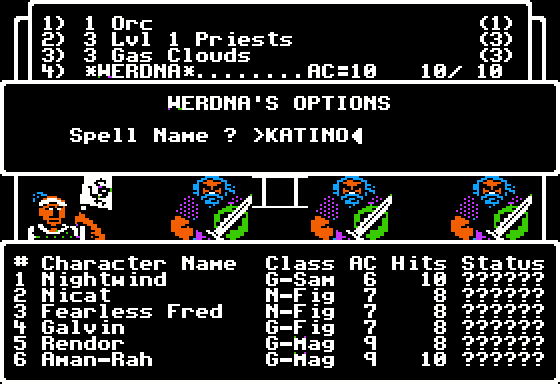
The Roughnecks are two Mages, three Fighters, and a Samurai. Samurai, a prestige class that normally can be of any alignment except evil, are basically Fighter/Mage hybrids who can equip a Muramasa Blade (a powerful Samurai-only sword), wear armor, and start learning Mage spells at level four. (This low-level Samurai is unlikely to have any spells at his disposal, though.) Characters of good and evil alignments can't travel together in Wizardry, but neutral can travel with either.
The screen only shows character portraits for the first four members of the adventurer party. That means the portrait on the left, the one holding a banner, is the Samurai, and the other ones are the Fighters. As some characters get killed, they get moved to the back of the party, and the displayed portraits change.
The Roughnecks' AC is high and HP are low, but there are six of them, and Mages are dangerous because they can easily target Werdna with their spells. It is essential to incapacitate as many of them as possible in the very first round, so we go for a Katino, which targets everyone in the enemy party, in an attempt to put them to sleep. It is definitely one of the most useful, if not the most useful, Mage spell early on.
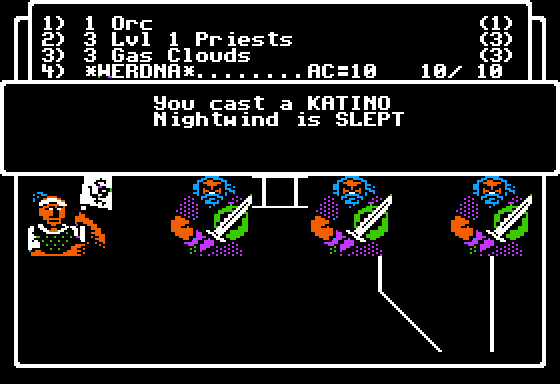
Like almost everything in Wizardry, Katino is dice roll-based. In extreme cases, you can either put everyone or no one in the enemy party to sleep. This case is almost extreme, and luckily in our favor. However, characters tend to awaken when hit, so not everyone we managed to put to sleep will remain asleep when the round is over.
"Slept" characters take more damage and are also transferred to the back of the party. Now we only have to deal with the three who remain on their feet.
We strike them down and move on, encountering even more solo do-gooders who are too insignificant to warrant description.
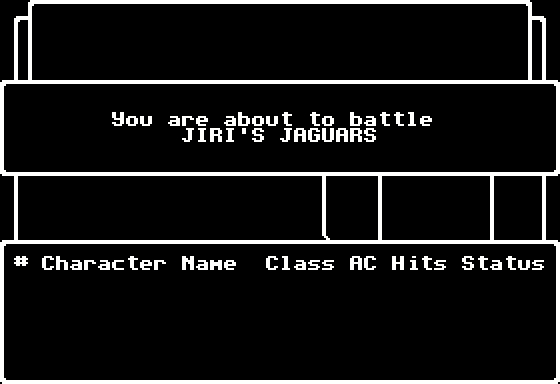
Jiri's Jaguars are the second B10F party.
Their motto is longer, and they're stronger too!
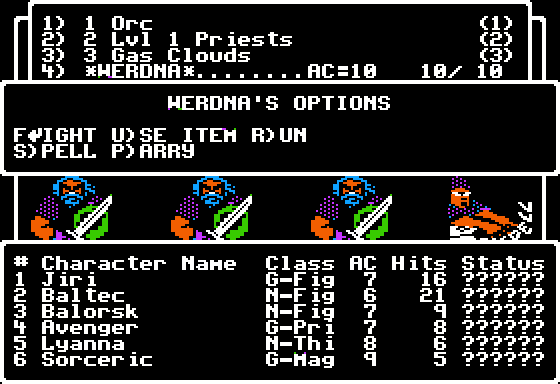
Baltec is a relatively tough Fighter, and they even have a Priest, a Thief, and a Mage. This is pretty much a classic, most orthodox Wizardry party.
This is also where we meet our first death. We've made it quite far without dying, I must say. This is by no means indicative of the original, first playthrough experience.

After reloading, however, it doesn't take us long to encounter the Jaguars again. In our second attempt, we kill two of them and put the rest to sleep, and the combat ends. However, four of them have remained alive, meaning there's a good chance of meeting them again; the dead will remain dead, of course, unless we reload the game again.
In a surprising stroke of luck (I assume luck will be an important motif throughout this LP), we make it to The Outer Guardian at (18,9) almost in one piece.
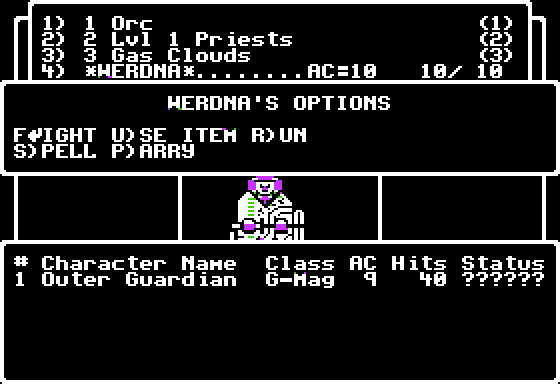
This one is a Mage, not a Fighter, and he has 40 HP. That doesn't bode well since it means he should be relatively high-level. Indeed, The Outer Guardian is capable of casting Molito, or Spark Storm, a 3rd tier Mage spell dealing 3d6 points of damage to a group of monsters. The AI in Wizardry is dice roll-based, so the guardian may as well not cast a Molito. In this case, however, he does.
A single Molito could outright exterminate any of the groups that accompany Werdna, yet thankfully the guardian decides to target the single Orc. Goodbye Orc, but at least the Priests and Gas Clouds are safe and sound.
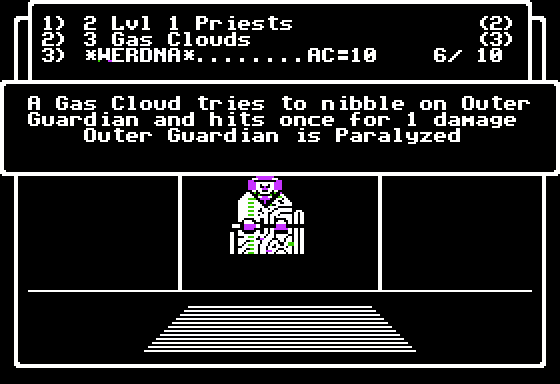
After that, a Gas Cloud saves the day by paralyzing the guardian. Much like sleep, paralysis can end the fight before the enemy is slain.
Among the loot, there is a stick and some kind of clothing. The stick is a regular Staff (1d5 damage per hit), and the clothing is Robes, the only kind of armor a Mage can equip (AC -1). I take the robes, but forget to pick up the staff for some reason. Oh well.
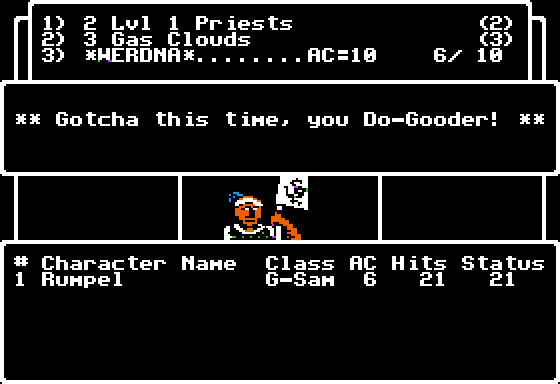
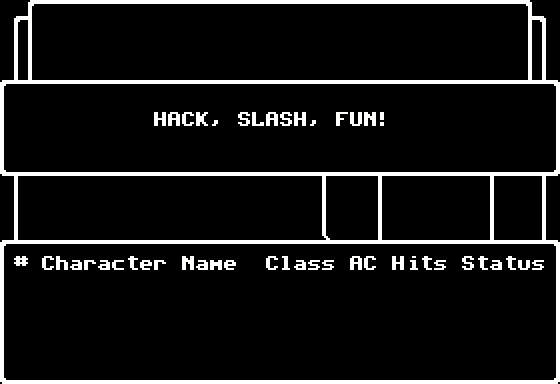
Sometimes, Werdna can surprise the enemy, reacting with the exclamation that provides the title for this thread.
Enemies can't act when surprised and you get an extra round to strike at them. On the other hand, spells aren't permitted in the surprise round, so you have to rely on melee. Scrolls and other items that cast spells when used are, however, allowed, so technically you can cast a spell even in the initiative round, which can at times be very useful.
An ambush is the reverse of the previous scenario: now it is the do-gooders who get to whack at you for an additional round. Thankfully, they can't use spells either, and that can be a matter of life and death if you encounter an all-Mage adventurer party, for example.
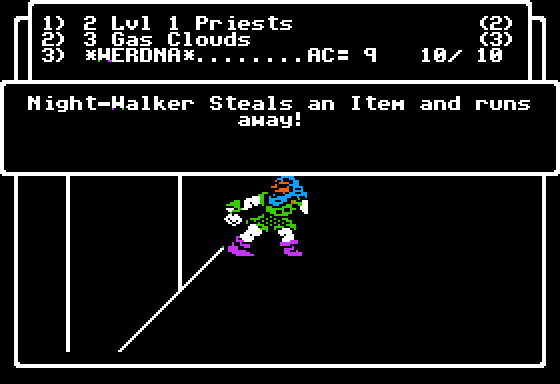
In Wizardry IV, Thieves have a new ability: they can steal items from you. Even plot-critical ones. That certainly makes them one of the most annoying enemies in the game. They can't steal any items you have equipped, though.
As soon as a Thief succeeds at stealing an item, he instantly flees, to the point of abandoning his companions if he's in a party. He does, however, remain on the current floor so you can hunt him down if you want, and the item he stole will be among the loot he drops. Naturally, you should do so before reloading the game, or else everything resets.
After a reset, you can always return to the place you first found the item, though, and it will be there. It may be hard and annoying to backtrack, but it is possible. That means that, even though the game allows you to drop or lose a plot-critical item, it doesn't screw you over completely every time. You are so kind, Wizardry IV!
Struggling through even more random encounters, we reach B10F's second pentagram at (2,6) with just a single Priest and a Gas Cloud. The monster roster is the same here, but we summon Zombies instead of Orcs this time.
The hardest encounter on this floor awaits us.
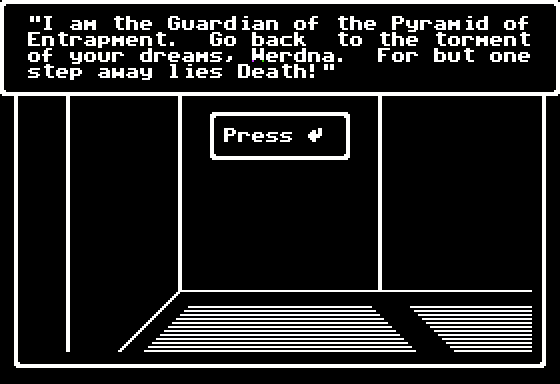
The Guardian of the Pyramid is the final, and the strongest, one. You should definitely save the game before fighting him, even at the cost of all other do-gooders respawning. It would be nothing out of the ordinary to die a dozen times before you finally beat him.
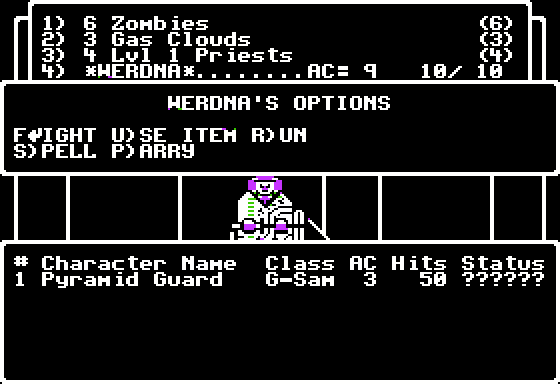
The Pyramid Guardian is a Samurai, a class we've already encountered in this update, but a significantly higher-level one. His regular attack hits up to three times per turn, dealing enough damage to one-strike kill Werdna, and in addition to Halito and Molito he can cast Mahalito, or Big Fire, an offensive spell that deals 4 to 24 points of damage to a monster group. Molito and Mahalito can also kill anyone in our party, including Werdna, on the spot.
To win this fight, we must get really lucky. And after three failed attempts, we do just that.
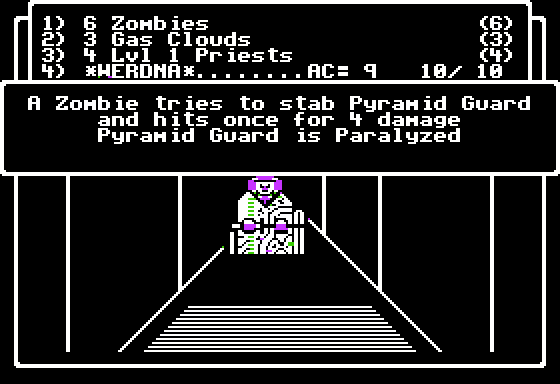
We couldn't wear the guardian down, so we just paralyzed him. Problem solved.
(With Gas Clouds and Zombies both having the ability to inflict paralysis, that was bound to happen at some point.)
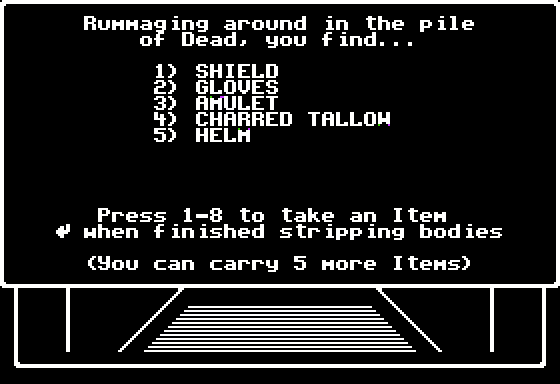
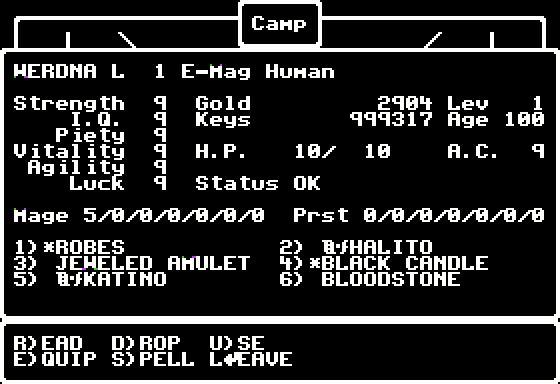
The Pyramid Guardian also drops two essential things. The "charred tallow" is a Black Candle, a unique item that casts Lomilwa -- a stronger Light spell -- when used, and the amulet is a Jeweled Amulet that allows you to cast Dumapic, the mapping spell. Both items can break, however, which also happens on the basis of a roll of a die, so we should use them sparingly. In fact, the Black Candle is so essential an item that you should consider reloading if it breaks.
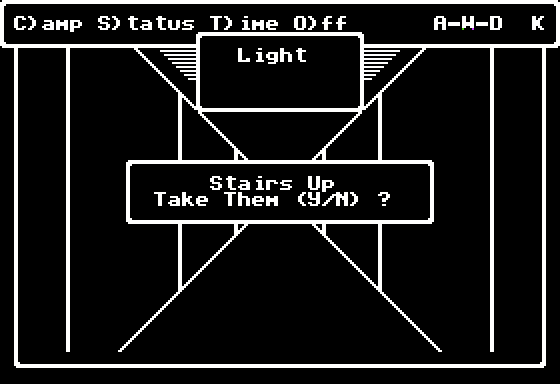
The next tile contains the stairs leading up to B9F, but let's skip them for now and head down the long corridor making up the last pyramid layer and leading all the way around the map, arriving at (9,19).
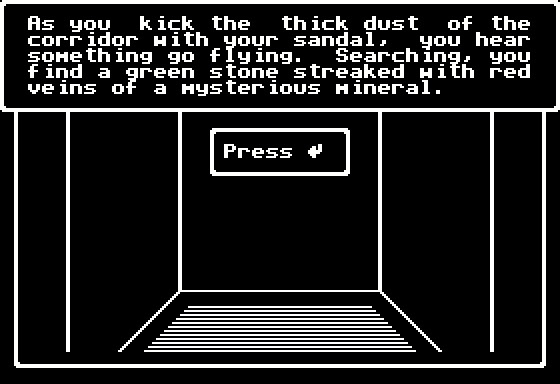
You have obtained A STONE.
The stone is actually a Bloodstone, one of the items required to solve a certain puzzle later on. This done, we can now take the stairs to B9F.
Next up on Wizardry IV, we'll trap an oracle, validate a credit card, and explore the catacombs. Stay tuned!