Part 7: The Realm of the Whirling Dervish
Surprise, we're back, and not just back, but back to the second most assholish floor in the entire game.
B6F is called the "Realm of the Whirling Dervish," but contrary to the regular Sufi whirling it is your and not the Dervish's body that gets spun around here, time and time again. And if you ever wondered who would win in a one-on-one stand-off, a Dervish or a 100-year old evil wizard, it is on this floor that the answer becomes painfully obvious.
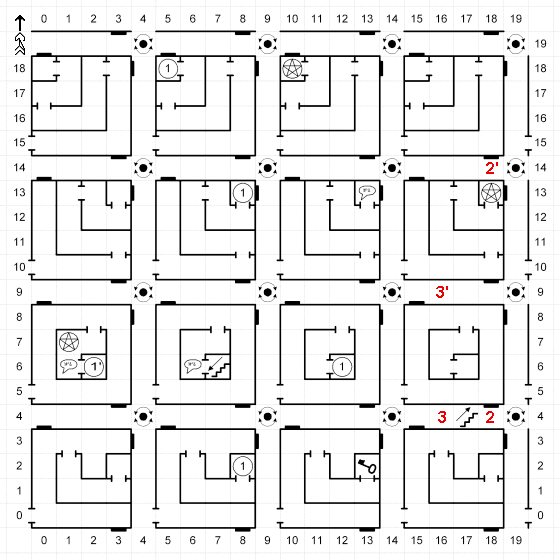
Composed of 16 basic 4x4 clusters (of which there are 4 types, arranged horizontally) surrounded by corridors with a spinner at every intersection, B6F is basically a one-trick floor. But it is a very cruel trick. As you might know, spinners are the worst enemy of a dungeon cartographer, alongside hidden teleporters and shifting walls. The main reason they are so bad is that they always catch you off-guard, and it is only post factum that you can even learn there is, or rather was, one in your way. Many a dungeon crawler would find herself walking down a seemingly linear corridor only to discover she's back to where she started from, or worse, be tricked into thinking she's making progress when in fact moving in circles within the confines of a single room. The way spinners work in Wizardry 4 only makes the matter worse. There is no message or sound signal to tell you you've been spun around, nor any spinning animation or change in the surroundings to indicate you are now facing a different direction. On the contrary, every four-way intersection is designed in such a way as to make you see exactly the same picture no matter the direction you're facing, leaving you without any visual clue:

Contrary to spinners in some other RPGs (Dark Heart of Uukrul's spinners, for example, always turn you to face a predetermined direction), there is no fixed pattern to the spinning either: it's just a throw of a four-sided die that determines the new orientation. It also doesn't help that the hallways loop, which gets in the way of mapping and makes the standard 20x20 grid feel endless and confusing. Finally, to add further insult, accessing the Camp menu when standing on a spinner only serves to trigger it again - or, to be more precise, the spinner re-triggers right after you exit the camping mode - meaning the only spell that could be useful here, Dumapic (the mapping spell that reveals your coordinates and the direction you're facing), becomes no longer relevant after you're done casting it. The only concession the game provides to make your life a bit easier is that the hallways are encounter-free, but although exploring them is thereby made safe, the sheer pain involved in mapping them out eventually makes you wish you were fighting rather than doing the mapping.
There is, of course, also the question of how the player, when mapping, would even learn there are spinners around here in the first place. Normally there is only one way to discover a spinner - by chance, as you notice something is off that you suspect might be the result of a spinner and then attempt to track down its location. In this case, however, there is a somewhat easier way that has to do with Wizardry IV being targeted at experienced Wizardry players: namely, the player is supposed to recognize the similarity of this floor to Wizardry I's B3F, also a spinner floor. Despite some differences, both floors have the same underlying design principle to them, and one certainly seems to hearken back to the other. (But at least the one in Wizardry 4 doesn't have pits in addition to spinners.)
Now, there are only two ways to proceed after you've been spun around. One involves casting Dumapic, but only after you move one step off the spinner so it doesn't trigger again. Your spell points are, however, limited, so you should use Dumapic sparingly and ideally only after discovering the whereabouts of at least one of this floor's pentagrams (which replenish your spell points), and even then you should take care to leave enough uses to be able to find your way back. The other involves doors. As shown on the map, not all doors that you see are real; most are fake, and there is a pattern to this. The first thing you should do is check the door to your right - if it's real, it means you've been spun to face north. If it isn't, check the one a bit farther away to your left. If this one is real, the spinner took you south. If both doors are fake, however, that can equally mean east or west, and unfortunately there's no way of telling these two directions apart without casting Dumapic. (Keep in mind that you can also cast Dumapic by using the Jeweled Amulet, and you can even save scum if need be since the hallways are free from encounters anyway.)
The troubles do not end here, though. Your ultimate goal is to locate the stairs leading up to the next floor, but, in an attempt to make sure you map out most of the floor before you find the way out, the level designer surrounded the stairs at (17,4) by teleporters that prevent you from reaching the exit without following a rather simple (once you've learned it) but completely unobvious procedure that will teleport you right on top of the stairs, to be covered in this update. The two teleporters, marked 2 and 3 on the map, not only make it impossible to access the stairs the normal way, but also contribute to making the exploration even more confusing than it already is, transporting you to 2' and 3' respectively without any kind of warning.
To sum it up, Dervishes don't take shit from evil wizards, they just spin them around and leave them clueless. So what is a poor evil wizard to do?
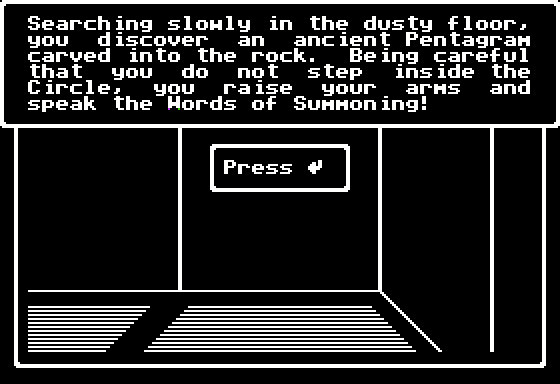
Well, first off, Werdna must find his way to the next pentagram. Some of B6F's do-gooders are considerably stronger than those on the previous floors, and we should be well-prepared before we face them. Starting off at (7,6), the nearest pentagram is at (1,7), with the only entrance to the square block that contains it being at (0,5), so that there are at least two spinners we must get past in order to reach it. This isn't exactly easy, but eventually, after some liberal use of Dumapic, we make it there in one piece.
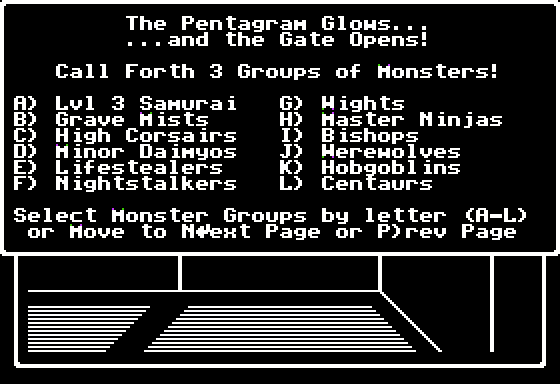
Getting to a new pentagram means new summoning opportunities for Werdna, so let's see what we have here.
A Samurai only starts to gain Mage spells at level 4, therefore Lvl 3 Samurai, or Kimonoed Men as they were called in Wizardry I when unidentified, are but pure Fighters, with AC of 5 and no special abilities to speak of. The only attractive thing about them is their ability to attack up to 3 times per turn (for 1d4+1, 1d6+1, 1d4+1), but the resulting damage is still a bit too low compared to, say, that of Master Ninjas, much stronger Fighters who not only strike 3 times for 1d10+3, have a high initiative, AC of 3 and up to 40 HP, but also, as Ninjas are wont to, decapitate the enemy on a critical hit. Interestingly, despite being magic-less Fighters, in the original Apple II version of Wizardry I Master Ninjas have the same character portrait as higher-level Mages.
There are also other Fighters among this pentagram's monsters, such as Minor Daimyos, Hobgoblins and High Corsairs. Minor Daimyos, who look just like Samurai, have even lower AC than Master Ninjas, even if merely 1 point lower, but can only strike once per round for 1d12 points of damage. Like Lvl 3 Samurai and Master Ninjas, they come from Wizardry I, whereas Hobgoblins and High Corsairs originate in Wizardry III. (As you may have noticed, Wizardry I and III provide the bulk of monsters in the fourth game, with monsters exclusive to Wizardry II being largely ignored for some reason.) High Corsairs are lvl 2 Fighters with AC of 3 and maximum HP of 35 who only attack once per turn for average damage, making them inferior to both the Ninjas and the Daimyos. Hobgoblins, equal to High Corsairs in AC and HP but dealing a measly 2d3 points of damage per hit, aren't too amazing either. If you have to summon Fighters at this pentagram, Master Ninjas are your best bet - unsurprising given that, in general, Ninjas are perhaps the most powerful front line class in Wizardry.
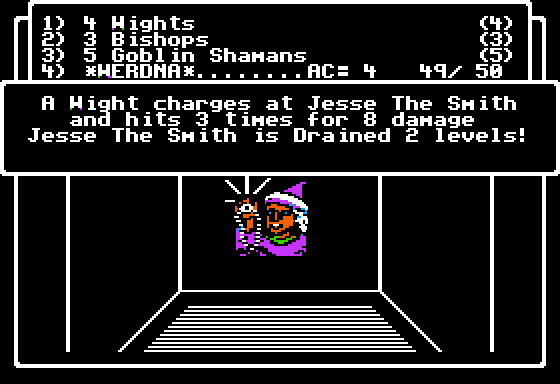
The two mythical creatures available here, Centaurs (from Wizardry III) and Werewolves (from Wizardry I, again the standard combination), have too high AC and too low damage output to be worth summoning or speaking about in detail. Grave Mists, Lifestealers, and Nightstalkers are pretty strong undead monsters who first appeared in Wizardry I. The unseen entities known as Grave Mists are the least useful of the three, being the only ones among them who do not have the level drain ability. They can, however, paralyze on hit and strike up to three times in a row for some noticeable damage. Nightstalkers (upgraded skeleton lookalikes) level-drain for 1 level, while Lifestealers (same character portraits as Wights), the most powerful of the three and the ones with the lowest AC, drain a whopping two levels on a critical, killing low-level enemies outright. They are also capable of poisoning their enemies and turning them into stone, as well as casting Priest and Mage spells of up to the 3rd tier. That would make them the best summon at this pentagram if not for the Wights (from Wizardry III), who also drain two levels whenever a critical hit connects. I'd say it's almost a tie here between Wights and Lifestealers: the former have lower AC and the latter higher HP; the former can paralyze and the latter can turn to stone. However, Wights have access to Dalto, a lvl 4 Mage spell, which Lifestealers don't, and paralysis seems to connect more often than flesh-to-stone, so Wights are arguably the better choice of the two, especially if you take Bishops along as well. Bishops are, as you know, the Mage/Priest hybrid, and their healing magic should definitely come in handy.
In addition to Wights and Bishops, we can summon Goblin Shamans from the previous pentagram for more combined Priest+Mage firepower. An alternative party composition would include Lifestealers instead of or even alongside Wights. (Lifestealers have some Priest spells at their disposal, so I believe you can comfortably substitute them for Bishops or Goblin Shamans.)
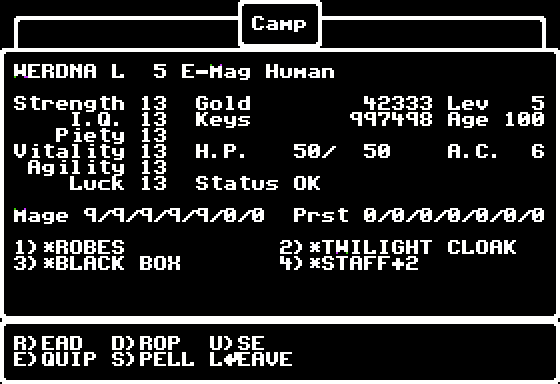
Werdna is now level 5, his attributes all 13s and 5th tier Mage spells available to him. The first of these is Mamorlis, or "Terror", the industrial version of Morlis that causes darkness and fear to affect not just a single group of enemies, but all enemy groups at once. (This makes a lot of difference in Wizardry 1-3, but none in Wizardry 4, as the do-gooders you face always count as a single group.) Next comes Madalto, or "Frost", an upgrade of Dalto dealing 8d6 points of cold damage to a group. And finally there's the fatal Makanito, the "Deadly Air" spell already mentioned in the previous update, that has a chance to instantly suffocate to death any air-breathing enemy. The chance depends on the do-gooder's level and HP, so for now it will only work on relatively weak low-level goons. Still, it's a powerful spell, and extremely useful when you face a party of frail do-gooding spellcasters.
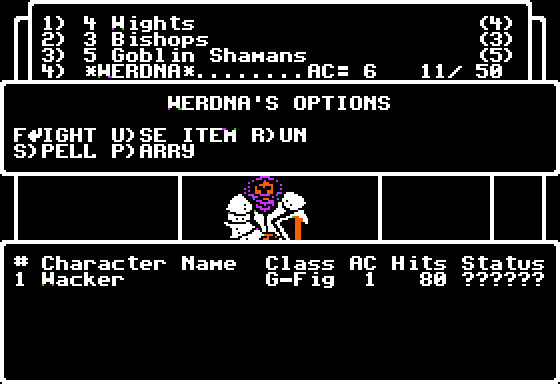
Naturally, it doesn't take long for do-gooders to appear. Luckily, they can only appear within the 4x4 square blocks. Not so luckily, they are now more powerful than they were on the previous floors.
Wacker is relatively weak, though. Just a low-AC Fighter with 80 HP, no tricks up his sleeve.
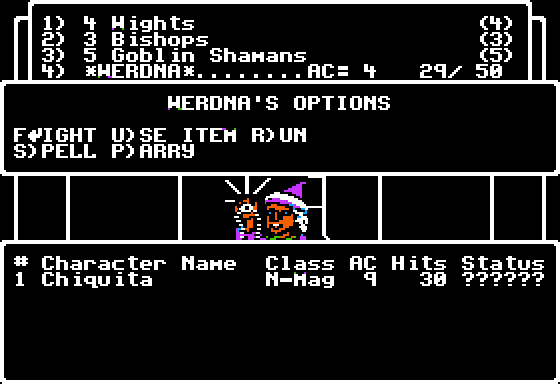
Next, however, we encounter Chiquita, a high-AC neutral Mage. She can't be much of a trouble, now can she?
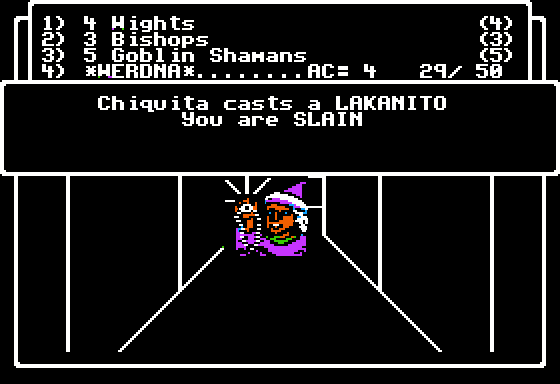
It only takes one turn to find out she can, Lakanito being one of the spells we should beware the most at this point. A more powerful, 6th tier version of Makanito, it has a chance to instantly suffocate even higher-level targets. It works on Werdna pretty much every time it targets him, so the key to getting the upper hand in this fight is to get to act before Chiquita casts the spell. Which is pretty much dependent on luck and nothing else.
An even more dangerous do-gooder on this floor, who I haven't encountered this time, is a Bishop named Tiltowait, capable of casting the spell of the same name. Now, Tiltowait, also known as "Nuke 'em 'till they glow", is famously the most powerful Mage spell in Wizardry, creating a large explosion that deals up to 100 points of damage to all enemies, so it should come as no suprise that a single Tiltowait will more often than not wipe away everyone in Werdna's party, himself included. Therefore Bishop Tiltowait is better avoided - fortunately, he doesn't show up too often.
Other, less notable B6F adventurers include Fearless Farley, Little Conan, Cadidelhop and Ascii the Fighters, Pedro the Ninja (not really related, obviously, but I can't help sharing this), Armondo the Lord, Gor-Y the Samurai, Tharagorn the Mage, and Boz the Thief.
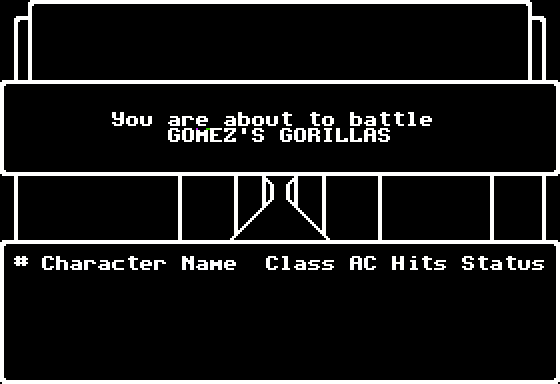
There are also two named do-gooder parties on B6F, and the first of them is Gomez's Gorillas.
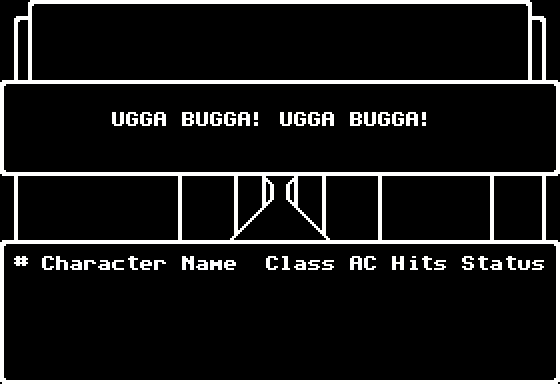
Out to get you with an apt motto.
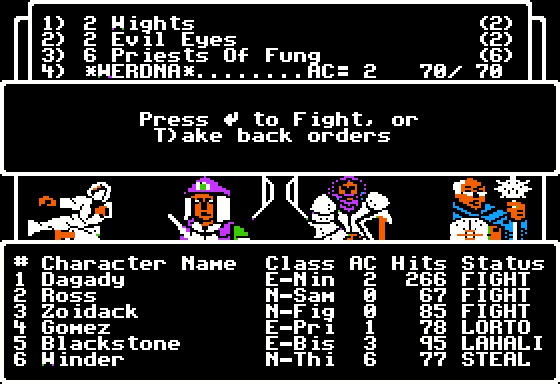
(The screen shows other monsters alongside Werdna than the ones we summoned earlier in this update - disregard this, some of these screenshots are from a bit later on.)
Of these, Dagady the Ninja is the most fearsome opponent, due to the sheer number of hit points he has and his decapitating ability. Still, this isn't the strongest of do-gooder parties, only including two spellcasters, Gomez the Priest and Blackstone the Bishop, who can deal at most 6d6 damage to one of the groups we have in our party (with Lorto and Lahalito respectively). Not too much to be worried about, really. (That is to say you will only die a handful of times before you defeat them.)
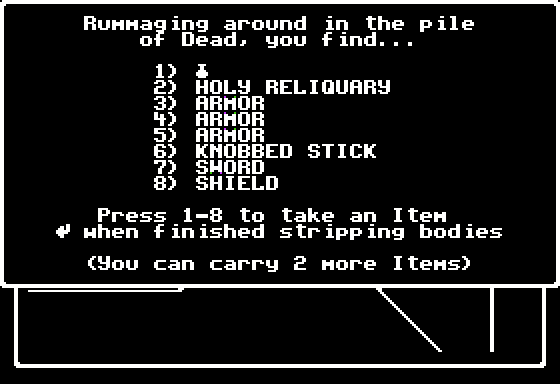
Among the items dropped by the Gorillas when defeated is a unique and fairly useful one, Holy Reliquary.
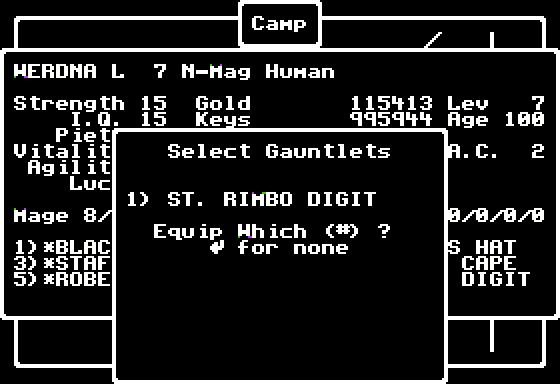
Upon closer inspection, it is revealed to be the St. Rimbo Digit, a special kind of gauntlets that, once equipped, allow Werdna to cast the dreaded Tiltowait for a limited number of times (until the item breaks, that is). Naturally, a well-placed Tiltowait can make even the toughest encounter significantly less of a challenge.
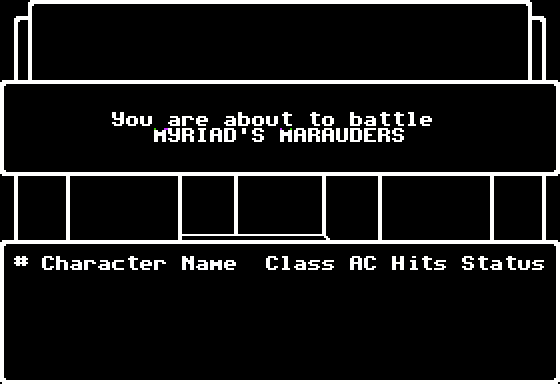
The second adventurer party on B6F is Myriad's Marauders. Do-gooding marauders.
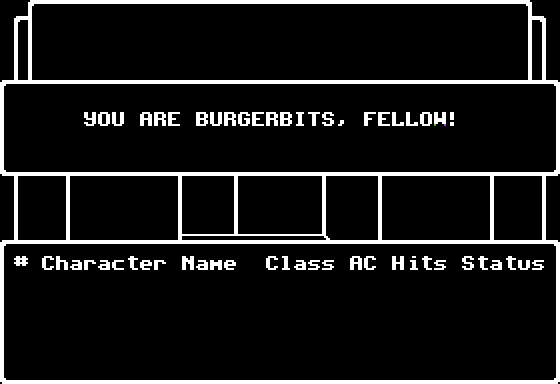
Marauders in the good sense of the word, ready to turn you into burgerbits.
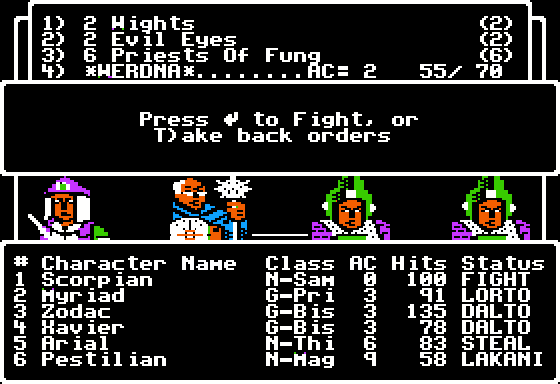
Now this party means business. Obviously, with his 135 HP and his ability to cast Dalto and Lakanito Zodac is one pesky spellcaster and your main problem in this fight, but the other three spellcasters aren't exactly pushover either and their combined spellpower can bring Werdna down in under a single turn. Most of them can of course be finished off quickly with a Tiltowait from the St. Rimbo Digit, but that is provided you have it by this point - and that still leaves Zodac standing anyway.
The Marauders don't drop anything useful when slain, so all things considered this is a pointless fight that you're better off avoiding.
As far as exploration goes, there isn't much to see on B6F. (13,3) has an easy riddle for us to answer. Of course, the riddle is only easy if you bothered to read the backstory given in the manual (or, alternatively, in the third post of this thread). Werdna hungers for power, and the power is contained within the stolen amulet.
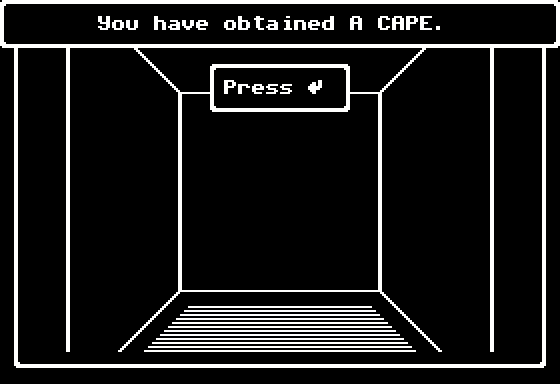
We input "Amulet", and are rewarded with a Cape that shows up as Good Hope Cape (an obvious jab at the Cape of Good Hope) in our inventory. It is a nice reward.
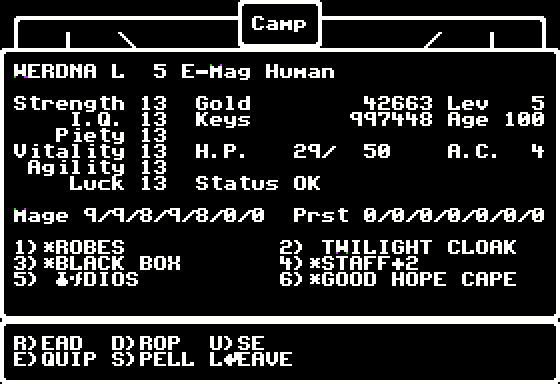
When equipped and invoked, the Good Hope Cape lowers Werdna's AC by 2 and increases his to-hit, giving him one extra attack per turn and boosting the damage output. Not bad at all, even if Werdna still remains a rather subpar melee fighter.
As for the Twilight Cloak, into the Black Box it goes.
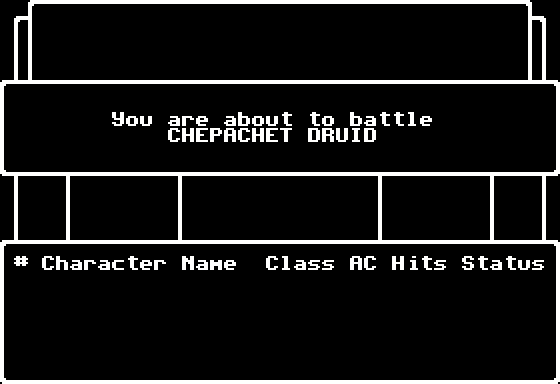
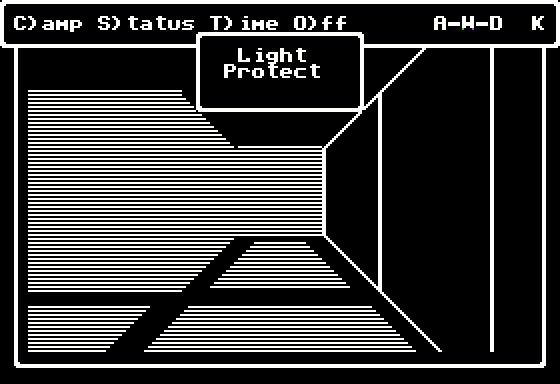
Because of the teleporters flanking them, there is in fact just one way to get to the stairs leading up to B5F, and you can only find it out by experimenting - the game doesn't give you any clues for this. It involves confronting the Chepachet Druid at (13,2), marked by the key sign on the map.
However, it isn't quite as simple as it sounds. Note that the door at (13,1), the one that leads to the druid, is marked a bit differently on the map. It is a secret door, but an unusual one. Namely, there is no way to see it even with a Light spell active. The only way you can guess (yes, guess, not know) there is a door there is by comparing the layout of this 4x4 cluster with that of the neighboring ones after you've mapped them out carefully and figured out their pattern. Otherwise, if you don't pay attention to the layout, it is unlikely you will even bother bumping into what looks like a solid wall even with Lomilwa on.
That can lead to an endless exploration of this floor, and it is in every way as bad as it sounds.
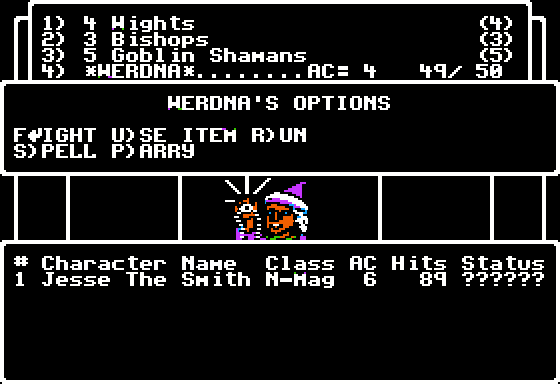
The druid inside is a powerful magician called Jesse The Smith. St. Rimbo Digit should come in handy in this fight - or you could just spam Madalto. Anything goes.
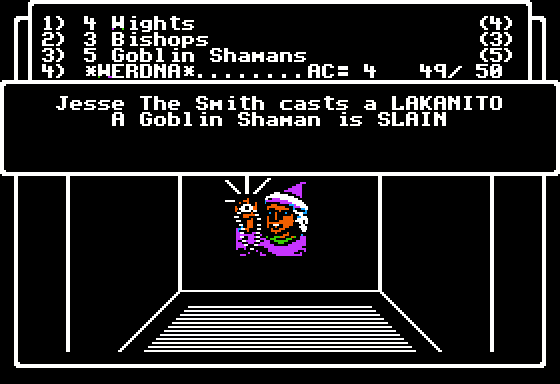
Jesse The Smith's most dangerous spell is Lakanito, and our chief (and only) concern is that it doesn't target Werdna himself.
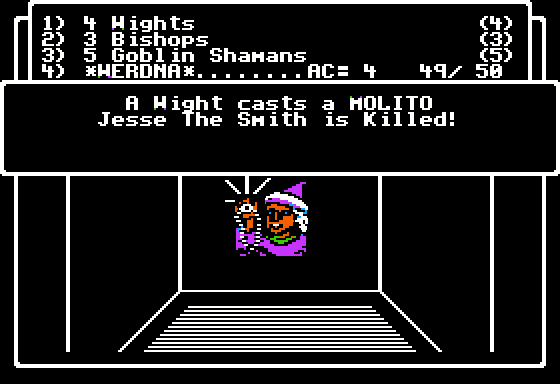
The fight is a joke if you don't get too unlucky, as it only takes a successful level drain and a couple of follow-up attacks to bring him down.
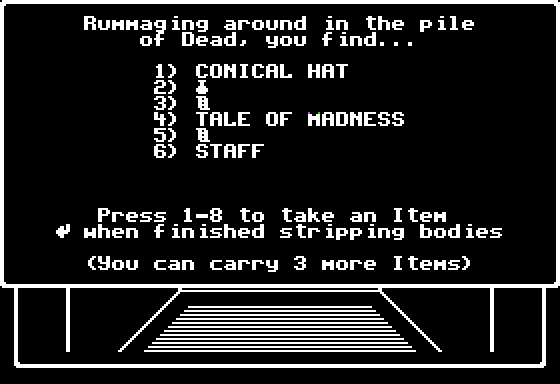
Jesse drops two items of note. One is a Conical Hat that shows up as Initiate Turban in the inventory, and the other is a Tale of Madness, identified as Arabic Diary.
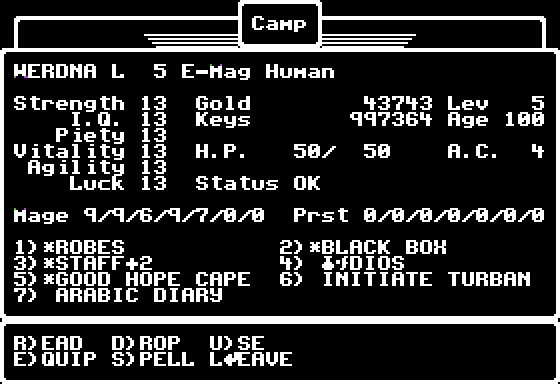
The Arabic Diary is a plot-critical item that will be of use to us later. For now, let's just store it inside the Black Box. The Initiate Turban lowers your AC by 1 and allows you to cast Halito (obsolete at this point). In a way, it is a mysterious item, due to what was most likely an error on the part of the Questbusters magazine, who wrote in their walkthrough of Wizardry 4 that you should "hold onto it [i.e., the Turban] for the end game". This was repeated in some of the later walkthroughs, but as far as I know no one has been able to find any actual use for the Turban at the end game and, having beaten the game myself, I know for certain that you don't need it for any of the endings. Still, maybe I'm forgetting something or the person who wrote that walkthrough knew something I don't.
EDIT: Speaking of the Arabic Diary, ddegenha has the following to say:
ddegenha posted:
Perhaps I'm wrong, but one thing I haven't seen in this thread is an explanation of the Arabic Diary. It's almost certainly a reference to the Necronomicon, or the diary of the Mad Arab Abdul Alhazred. The first extant reference to the book comes from the works of H.P. Lovecraft, who claims the name of both the author and the book came to him in a dream. Nathaniel Hawthorne and Robert Chambers (author of The King in Yellow) might have contributed to the concept, although this is uncertain. Following Lovecraft's invention of the tome, it's found its way into popular culture in a number of different places and ways, with its appearance and use in Wizardry IV being only the latest in a long line. The book itself is usually depicted as full of spells and incantations, information about the Great Old Ones, and poetry.
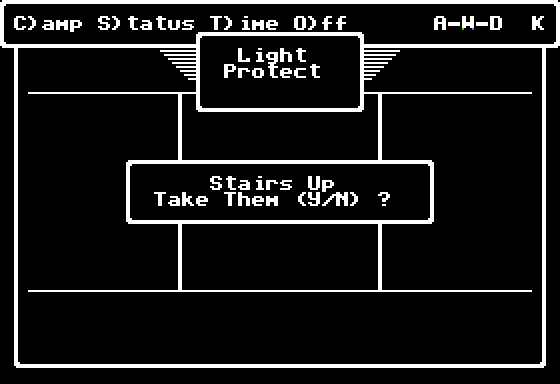
Killing Jesse The Smith instantly teleports us to the stairs up, easy as that. We enter another ticket validation code and find ourselves on B5F, leaving the horrible spinner level behind... for now.
Creatures of Light and Darkness await us, so stick around.